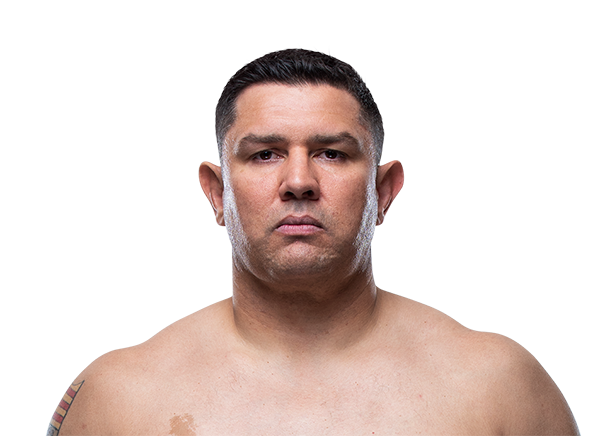
Career Averages - Juan Adams
Career Averages - Chris de la Rocha
Juan Adams - Fight History
Totals
| Fighter | KD | Sig. Str. | Sig. Str. % | Total Str. | TD | TD % | Sub. Att | Rev. | Ctrl |
|---|---|---|---|---|---|---|---|---|---|
| Justin Tafa | 0 | 7 of 11 | 63% | 7 of 11 | 0 of 0 | --- | 0 | 0 | 0:00 |
| Juan Adams | 1 | 10 of 15 | 66% | 10 of 15 | 0 of 0 | --- | 0 | 0 | 0:02 |
Per Round
| Rd | Fighter | KD | Sig. Str. | Sig. Str. % | Total Str. | TD | TD % | Sub. Att | Rev. | Ctrl |
|---|---|---|---|---|---|---|---|---|---|---|
| 1 | Justin Tafa | 0 | 7 of 11 | 63% | 7 of 11 | 0 of 0 | --- | 0 | 0 | 0:00 |
| Juan Adams | 1 | 10 of 15 | 66% | 10 of 15 | 0 of 0 | --- | 0 | 0 | 0:02 |
Significant Strikes
| Fighter | Sig. Str. | Sig. Str. % | Head | Body | Leg | Distance | Clinch | Ground |
|---|---|---|---|---|---|---|---|---|
| Justin Tafa | 7 of 11 | 63% | 3 of 4 | 2 of 4 | 2 of 3 | 7 of 11 | 0 of 0 | 0 of 0 |
| Juan Adams | 10 of 15 | 66% | 5 of 9 | 0 of 1 | 5 of 5 | 8 of 11 | 1 of 1 | 1 of 3 |
Significant Strikes Per Round
| Rd | Fighter | Sig. Str. | Sig. Str. % | Head | Body | Leg | Distance | Clinch | Ground |
|---|---|---|---|---|---|---|---|---|---|
| 1 | Justin Tafa | 7 of 11 | 63% | 3 of 4 | 2 of 4 | 2 of 3 | 7 of 11 | 0 of 0 | 0 of 0 |
| Juan Adams | 10 of 15 | 66% | 5 of 9 | 0 of 1 | 5 of 5 | 8 of 11 | 1 of 1 | 1 of 3 |
Daniel Levi picks Justin Tafa to get a huge upset. He questions Juan Adams' mental state and work ethic, noting that Adams flew home for the holidays while Tafa stayed in Thailand. He believes Tafa can survive the first round and then knock out Adams in the second.
The host leans toward Justin Tafa as a dog, citing his better technical striking and power. He questions Juan Adams' fight IQ and ability to close distance without eating shots. He notes that Tafa's chin may be suspect but believes he can knock out Adams. He suggests a small 0.5 unit play.
The MMA Guru picks Juan Adams, citing his massive reach and size advantage, athleticism, and more experienced record. He notes both are coming off bad losses but Adams has better attributes. He expects Adams to get the job done.
Totals
| Fighter | KD | Sig. Str. | Sig. Str. % | Total Str. | TD | TD % | Sub. Att | Rev. | Ctrl |
|---|---|---|---|---|---|---|---|---|---|
| Greg Hardy | 0 | 36 of 38 | 94% | 36 of 38 | 0 of 0 | --- | 0 | 0 | 0:17 |
| Juan Adams | 0 | 3 of 7 | 42% | 3 of 7 | 0 of 1 | 0% | 0 | 0 | 0:00 |
Per Round
| Rd | Fighter | KD | Sig. Str. | Sig. Str. % | Total Str. | TD | TD % | Sub. Att | Rev. | Ctrl |
|---|---|---|---|---|---|---|---|---|---|---|
| 1 | Greg Hardy | 0 | 36 of 38 | 94% | 36 of 38 | 0 of 0 | --- | 0 | 0 | 0:17 |
| Juan Adams | 0 | 3 of 7 | 42% | 3 of 7 | 0 of 1 | 0% | 0 | 0 | 0:00 |
Significant Strikes
| Fighter | Sig. Str. | Sig. Str. % | Head | Body | Leg | Distance | Clinch | Ground |
|---|---|---|---|---|---|---|---|---|
| Greg Hardy | 36 of 38 | 94% | 35 of 36 | 1 of 2 | 0 of 0 | 5 of 7 | 0 of 0 | 31 of 31 |
| Juan Adams | 3 of 7 | 42% | 3 of 7 | 0 of 0 | 0 of 0 | 3 of 7 | 0 of 0 | 0 of 0 |
Significant Strikes Per Round
| Rd | Fighter | Sig. Str. | Sig. Str. % | Head | Body | Leg | Distance | Clinch | Ground |
|---|---|---|---|---|---|---|---|---|---|
| 1 | Greg Hardy | 36 of 38 | 94% | 35 of 36 | 1 of 2 | 0 of 0 | 5 of 7 | 0 of 0 | 31 of 31 |
| Juan Adams | 3 of 7 | 42% | 3 of 7 | 0 of 0 | 0 of 0 | 3 of 7 | 0 of 0 | 0 of 0 |
Totals
| Fighter | KD | Sig. Str. | Sig. Str. % | Total Str. | TD | TD % | Sub. Att | Rev. | Ctrl |
|---|---|---|---|---|---|---|---|---|---|
| Arjan Bhullar | 0 | 41 of 62 | 66% | 69 of 94 | 2 of 2 | 100% | 0 | 0 | 5:18 |
| Juan Adams | 0 | 81 of 185 | 43% | 107 of 212 | 0 of 0 | --- | 0 | 0 | 1:25 |
Per Round
| Rd | Fighter | KD | Sig. Str. | Sig. Str. % | Total Str. | TD | TD % | Sub. Att | Rev. | Ctrl |
|---|---|---|---|---|---|---|---|---|---|---|
| 1 | Arjan Bhullar | 0 | 20 of 32 | 62% | 20 of 32 | 0 of 0 | --- | 0 | 0 | 0:09 |
| Juan Adams | 0 | 35 of 89 | 39% | 40 of 94 | 0 of 0 | --- | 0 | 0 | 0:19 | |
| 2 | Arjan Bhullar | 0 | 10 of 13 | 76% | 26 of 31 | 1 of 1 | 100% | 0 | 0 | 2:21 |
| Juan Adams | 0 | 23 of 51 | 45% | 35 of 63 | 0 of 0 | --- | 0 | 0 | 0:48 | |
| 3 | Arjan Bhullar | 0 | 11 of 17 | 64% | 23 of 31 | 1 of 1 | 100% | 0 | 0 | 2:48 |
| Juan Adams | 0 | 23 of 45 | 51% | 32 of 55 | 0 of 0 | --- | 0 | 0 | 0:18 |
Significant Strikes
| Fighter | Sig. Str. | Sig. Str. % | Head | Body | Leg | Distance | Clinch | Ground |
|---|---|---|---|---|---|---|---|---|
| Arjan Bhullar | 41 of 62 | 66% | 32 of 53 | 8 of 8 | 1 of 1 | 18 of 37 | 19 of 21 | 4 of 4 |
| Juan Adams | 81 of 185 | 43% | 56 of 158 | 21 of 23 | 4 of 4 | 50 of 148 | 30 of 36 | 1 of 1 |
Significant Strikes Per Round
| Rd | Fighter | Sig. Str. | Sig. Str. % | Head | Body | Leg | Distance | Clinch | Ground |
|---|---|---|---|---|---|---|---|---|---|
| 1 | Arjan Bhullar | 20 of 32 | 62% | 16 of 28 | 4 of 4 | 0 of 0 | 11 of 22 | 9 of 10 | 0 of 0 |
| Juan Adams | 35 of 89 | 39% | 24 of 77 | 7 of 8 | 4 of 4 | 25 of 78 | 10 of 11 | 0 of 0 | |
| 2 | Arjan Bhullar | 10 of 13 | 76% | 7 of 10 | 2 of 2 | 1 of 1 | 4 of 6 | 5 of 6 | 1 of 1 |
| Juan Adams | 23 of 51 | 45% | 13 of 41 | 10 of 10 | 0 of 0 | 13 of 39 | 10 of 12 | 0 of 0 | |
| 3 | Arjan Bhullar | 11 of 17 | 64% | 9 of 15 | 2 of 2 | 0 of 0 | 3 of 9 | 5 of 5 | 3 of 3 |
| Juan Adams | 23 of 45 | 51% | 19 of 40 | 4 of 5 | 0 of 0 | 12 of 31 | 10 of 13 | 1 of 1 |
Totals
| Fighter | KD | Sig. Str. | Sig. Str. % | Total Str. | TD | TD % | Sub. Att | Rev. | Ctrl |
|---|---|---|---|---|---|---|---|---|---|
| Juan Adams | 0 | 41 of 76 | 53% | 46 of 81 | 1 of 2 | 50% | 0 | 0 | 0:59 |
| Chris de la Rocha | 0 | 86 of 144 | 59% | 121 of 180 | 2 of 2 | 100% | 0 | 0 | 4:37 |
Per Round
| Rd | Fighter | KD | Sig. Str. | Sig. Str. % | Total Str. | TD | TD % | Sub. Att | Rev. | Ctrl |
|---|---|---|---|---|---|---|---|---|---|---|
| 1 | Juan Adams | 0 | 16 of 23 | 69% | 18 of 25 | 0 of 0 | --- | 0 | 0 | 0:09 |
| Chris de la Rocha | 0 | 36 of 65 | 55% | 52 of 82 | 1 of 1 | 100% | 0 | 0 | 2:57 | |
| 2 | Juan Adams | 0 | 22 of 48 | 45% | 25 of 51 | 1 of 2 | 50% | 0 | 0 | 0:50 |
| Chris de la Rocha | 0 | 35 of 61 | 57% | 54 of 80 | 1 of 1 | 100% | 0 | 0 | 1:40 | |
| 3 | Juan Adams | 0 | 3 of 5 | 60% | 3 of 5 | 0 of 0 | --- | 0 | 0 | 0:00 |
| Chris de la Rocha | 0 | 15 of 18 | 83% | 15 of 18 | 0 of 0 | --- | 0 | 0 | 0:00 |
Significant Strikes
| Fighter | Sig. Str. | Sig. Str. % | Head | Body | Leg | Distance | Clinch | Ground |
|---|---|---|---|---|---|---|---|---|
| Juan Adams | 41 of 76 | 53% | 30 of 64 | 10 of 11 | 1 of 1 | 36 of 67 | 3 of 7 | 2 of 2 |
| Chris de la Rocha | 86 of 144 | 59% | 74 of 131 | 8 of 8 | 4 of 5 | 38 of 85 | 13 of 15 | 35 of 44 |
Significant Strikes Per Round
| Rd | Fighter | Sig. Str. | Sig. Str. % | Head | Body | Leg | Distance | Clinch | Ground |
|---|---|---|---|---|---|---|---|---|---|
| 1 | Juan Adams | 16 of 23 | 69% | 9 of 16 | 6 of 6 | 1 of 1 | 14 of 21 | 0 of 0 | 2 of 2 |
| Chris de la Rocha | 36 of 65 | 55% | 30 of 58 | 2 of 2 | 4 of 5 | 15 of 38 | 0 of 0 | 21 of 27 | |
| 2 | Juan Adams | 22 of 48 | 45% | 18 of 43 | 4 of 5 | 0 of 0 | 19 of 41 | 3 of 7 | 0 of 0 |
| Chris de la Rocha | 35 of 61 | 57% | 31 of 57 | 4 of 4 | 0 of 0 | 16 of 38 | 5 of 6 | 14 of 17 | |
| 3 | Juan Adams | 3 of 5 | 60% | 3 of 5 | 0 of 0 | 0 of 0 | 3 of 5 | 0 of 0 | 0 of 0 |
| Chris de la Rocha | 15 of 18 | 83% | 13 of 16 | 2 of 2 | 0 of 0 | 7 of 9 | 8 of 9 | 0 of 0 |
Chris de la Rocha - Fight History
Totals
| Fighter | KD | Sig. Str. | Sig. Str. % | Total Str. | TD | TD % | Sub. Att | Rev. | Ctrl |
|---|---|---|---|---|---|---|---|---|---|
| Juan Adams | 0 | 41 of 76 | 53% | 46 of 81 | 1 of 2 | 50% | 0 | 0 | 0:59 |
| Chris de la Rocha | 0 | 86 of 144 | 59% | 121 of 180 | 2 of 2 | 100% | 0 | 0 | 4:37 |
Per Round
| Rd | Fighter | KD | Sig. Str. | Sig. Str. % | Total Str. | TD | TD % | Sub. Att | Rev. | Ctrl |
|---|---|---|---|---|---|---|---|---|---|---|
| 1 | Juan Adams | 0 | 16 of 23 | 69% | 18 of 25 | 0 of 0 | --- | 0 | 0 | 0:09 |
| Chris de la Rocha | 0 | 36 of 65 | 55% | 52 of 82 | 1 of 1 | 100% | 0 | 0 | 2:57 | |
| 2 | Juan Adams | 0 | 22 of 48 | 45% | 25 of 51 | 1 of 2 | 50% | 0 | 0 | 0:50 |
| Chris de la Rocha | 0 | 35 of 61 | 57% | 54 of 80 | 1 of 1 | 100% | 0 | 0 | 1:40 | |
| 3 | Juan Adams | 0 | 3 of 5 | 60% | 3 of 5 | 0 of 0 | --- | 0 | 0 | 0:00 |
| Chris de la Rocha | 0 | 15 of 18 | 83% | 15 of 18 | 0 of 0 | --- | 0 | 0 | 0:00 |
Significant Strikes
| Fighter | Sig. Str. | Sig. Str. % | Head | Body | Leg | Distance | Clinch | Ground |
|---|---|---|---|---|---|---|---|---|
| Juan Adams | 41 of 76 | 53% | 30 of 64 | 10 of 11 | 1 of 1 | 36 of 67 | 3 of 7 | 2 of 2 |
| Chris de la Rocha | 86 of 144 | 59% | 74 of 131 | 8 of 8 | 4 of 5 | 38 of 85 | 13 of 15 | 35 of 44 |
Significant Strikes Per Round
| Rd | Fighter | Sig. Str. | Sig. Str. % | Head | Body | Leg | Distance | Clinch | Ground |
|---|---|---|---|---|---|---|---|---|---|
| 1 | Juan Adams | 16 of 23 | 69% | 9 of 16 | 6 of 6 | 1 of 1 | 14 of 21 | 0 of 0 | 2 of 2 |
| Chris de la Rocha | 36 of 65 | 55% | 30 of 58 | 2 of 2 | 4 of 5 | 15 of 38 | 0 of 0 | 21 of 27 | |
| 2 | Juan Adams | 22 of 48 | 45% | 18 of 43 | 4 of 5 | 0 of 0 | 19 of 41 | 3 of 7 | 0 of 0 |
| Chris de la Rocha | 35 of 61 | 57% | 31 of 57 | 4 of 4 | 0 of 0 | 16 of 38 | 5 of 6 | 14 of 17 | |
| 3 | Juan Adams | 3 of 5 | 60% | 3 of 5 | 0 of 0 | 0 of 0 | 3 of 5 | 0 of 0 | 0 of 0 |
| Chris de la Rocha | 15 of 18 | 83% | 13 of 16 | 2 of 2 | 0 of 0 | 7 of 9 | 8 of 9 | 0 of 0 |
Totals
| Fighter | KD | Sig. Str. | Sig. Str. % | Total Str. | TD | TD % | Sub. Att | Rev. | Ctrl |
|---|---|---|---|---|---|---|---|---|---|
| Chris de la Rocha | 0 | 30 of 57 | 52% | 30 of 58 | 0 of 1 | 0% | 0 | 0 | 0:01 |
| Rashad Coulter | 0 | 40 of 79 | 50% | 79 of 129 | 3 of 4 | 75% | 2 | 0 | 5:21 |
Per Round
| Rd | Fighter | KD | Sig. Str. | Sig. Str. % | Total Str. | TD | TD % | Sub. Att | Rev. | Ctrl |
|---|---|---|---|---|---|---|---|---|---|---|
| 1 | Chris de la Rocha | 0 | 27 of 51 | 52% | 27 of 52 | 0 of 1 | 0% | 0 | 0 | 0:01 |
| Rashad Coulter | 0 | 21 of 52 | 40% | 29 of 62 | 2 of 3 | 66% | 1 | 0 | 2:06 | |
| 2 | Chris de la Rocha | 0 | 3 of 6 | 50% | 3 of 6 | 0 of 0 | --- | 0 | 0 | 0:00 |
| Rashad Coulter | 0 | 19 of 27 | 70% | 50 of 67 | 1 of 1 | 100% | 1 | 0 | 3:15 |
Significant Strikes
| Fighter | Sig. Str. | Sig. Str. % | Head | Body | Leg | Distance | Clinch | Ground |
|---|---|---|---|---|---|---|---|---|
| Chris de la Rocha | 30 of 57 | 52% | 26 of 52 | 4 of 5 | 0 of 0 | 19 of 41 | 11 of 16 | 0 of 0 |
| Rashad Coulter | 40 of 79 | 50% | 36 of 75 | 3 of 3 | 1 of 1 | 14 of 46 | 8 of 11 | 18 of 22 |
Significant Strikes Per Round
| Rd | Fighter | Sig. Str. | Sig. Str. % | Head | Body | Leg | Distance | Clinch | Ground |
|---|---|---|---|---|---|---|---|---|---|
| 1 | Chris de la Rocha | 27 of 51 | 52% | 23 of 46 | 4 of 5 | 0 of 0 | 17 of 36 | 10 of 15 | 0 of 0 |
| Rashad Coulter | 21 of 52 | 40% | 19 of 50 | 1 of 1 | 1 of 1 | 10 of 36 | 8 of 11 | 3 of 5 | |
| 2 | Chris de la Rocha | 3 of 6 | 50% | 3 of 6 | 0 of 0 | 0 of 0 | 2 of 5 | 1 of 1 | 0 of 0 |
| Rashad Coulter | 19 of 27 | 70% | 17 of 25 | 2 of 2 | 0 of 0 | 4 of 10 | 0 of 0 | 15 of 17 |
Totals
| Fighter | KD | Sig. Str. | Sig. Str. % | Total Str. | TD | TD % | Sub. Att | Rev. | Ctrl |
|---|---|---|---|---|---|---|---|---|---|
| Adam Milstead | 0 | 39 of 98 | 39% | 43 of 102 | 0 of 7 | 0% | 0 | 0 | 2:58 |
| Chris de la Rocha | 0 | 58 of 116 | 50% | 61 of 119 | 0 of 0 | --- | 0 | 0 | 0:20 |
Per Round
| Rd | Fighter | KD | Sig. Str. | Sig. Str. % | Total Str. | TD | TD % | Sub. Att | Rev. | Ctrl |
|---|---|---|---|---|---|---|---|---|---|---|
| 1 | Adam Milstead | 0 | 24 of 62 | 38% | 27 of 65 | 0 of 5 | 0% | 0 | 0 | 1:58 |
| Chris de la Rocha | 0 | 32 of 60 | 53% | 35 of 63 | 0 of 0 | --- | 0 | 0 | 0:13 | |
| 2 | Adam Milstead | 0 | 15 of 36 | 41% | 16 of 37 | 0 of 2 | 0% | 0 | 0 | 1:00 |
| Chris de la Rocha | 0 | 26 of 56 | 46% | 26 of 56 | 0 of 0 | --- | 0 | 0 | 0:07 |
Significant Strikes
| Fighter | Sig. Str. | Sig. Str. % | Head | Body | Leg | Distance | Clinch | Ground |
|---|---|---|---|---|---|---|---|---|
| Adam Milstead | 39 of 98 | 39% | 25 of 82 | 9 of 11 | 5 of 5 | 33 of 91 | 6 of 7 | 0 of 0 |
| Chris de la Rocha | 58 of 116 | 50% | 52 of 107 | 5 of 8 | 1 of 1 | 47 of 100 | 9 of 14 | 2 of 2 |
Significant Strikes Per Round
| Rd | Fighter | Sig. Str. | Sig. Str. % | Head | Body | Leg | Distance | Clinch | Ground |
|---|---|---|---|---|---|---|---|---|---|
| 1 | Adam Milstead | 24 of 62 | 38% | 16 of 52 | 6 of 8 | 2 of 2 | 19 of 56 | 5 of 6 | 0 of 0 |
| Chris de la Rocha | 32 of 60 | 53% | 27 of 55 | 4 of 4 | 1 of 1 | 25 of 51 | 5 of 7 | 2 of 2 | |
| 2 | Adam Milstead | 15 of 36 | 41% | 9 of 30 | 3 of 3 | 3 of 3 | 14 of 35 | 1 of 1 | 0 of 0 |
| Chris de la Rocha | 26 of 56 | 46% | 25 of 52 | 1 of 4 | 0 of 0 | 22 of 49 | 4 of 7 | 0 of 0 |
Totals
| Fighter | KD | Sig. Str. | Sig. Str. % | Total Str. | TD | TD % | Sub. Att | Rev. | Ctrl |
|---|---|---|---|---|---|---|---|---|---|
| Daniel Omielańczuk | 1 | 15 of 20 | 75% | 15 of 20 | 0 of 0 | --- | 0 | 0 | 0:00 |
| Chris de la Rocha | 0 | 1 of 12 | 8% | 1 of 12 | 0 of 0 | --- | 0 | 0 | 0:02 |
Per Round
| Rd | Fighter | KD | Sig. Str. | Sig. Str. % | Total Str. | TD | TD % | Sub. Att | Rev. | Ctrl |
|---|---|---|---|---|---|---|---|---|---|---|
| 1 | Daniel Omielańczuk | 1 | 15 of 20 | 75% | 15 of 20 | 0 of 0 | --- | 0 | 0 | 0:00 |
| Chris de la Rocha | 0 | 1 of 12 | 8% | 1 of 12 | 0 of 0 | --- | 0 | 0 | 0:02 |
Significant Strikes
| Fighter | Sig. Str. | Sig. Str. % | Head | Body | Leg | Distance | Clinch | Ground |
|---|---|---|---|---|---|---|---|---|
| Daniel Omielańczuk | 15 of 20 | 75% | 14 of 19 | 0 of 0 | 1 of 1 | 14 of 18 | 0 of 0 | 1 of 2 |
| Chris de la Rocha | 1 of 12 | 8% | 1 of 11 | 0 of 0 | 0 of 1 | 1 of 12 | 0 of 0 | 0 of 0 |
Significant Strikes Per Round
| Rd | Fighter | Sig. Str. | Sig. Str. % | Head | Body | Leg | Distance | Clinch | Ground |
|---|---|---|---|---|---|---|---|---|---|
| 1 | Daniel Omielańczuk | 15 of 20 | 75% | 14 of 19 | 0 of 0 | 1 of 1 | 14 of 18 | 0 of 0 | 1 of 2 |
| Chris de la Rocha | 1 of 12 | 8% | 1 of 11 | 0 of 0 | 0 of 1 | 1 of 12 | 0 of 0 | 0 of 0 |
No comments yet. Be the first to share your thoughts!