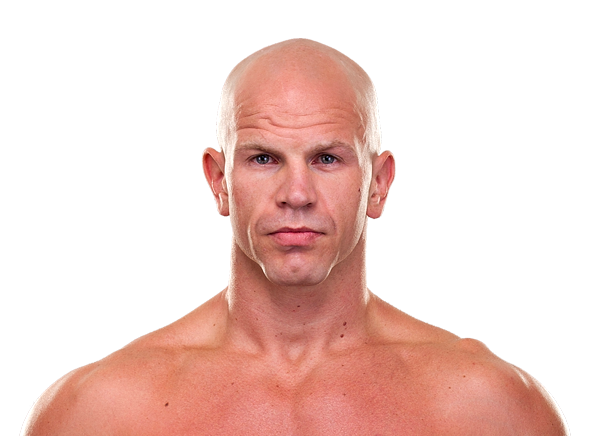
UFC Fight Night: Condit vs. Alves ·
May 30, 2015 ·
Light Heavyweight ·
Completed
Career Averages - Francimar Barroso
2.77
SLpM
52.0%
Str. Acc.
3.07
SApM
59.0%
Str. Def.
2.22
TD Avg
24.0%
TD Acc.
83.0%
TD Def.
0.0
Sub. Avg
Career Averages - Ryan Jimmo
3.12
SLpM
66.0%
Str. Acc.
2.77
SApM
46.0%
Str. Def.
0.45
TD Avg
28.0%
TD Acc.
87.0%
TD Def.
0.0
Sub. Avg
Francimar Barroso - Fight History
LOSS
vs
Gian Villante
Decision (split) (30–27, 28–29, 30–27)
R3
5:00
·
UFC 220: Miocic vs. Ngannou ·
Jan 20, 2018
Totals
| Fighter | KD | Sig. Str. | Sig. Str. % | Total Str. | TD | TD % | Sub. Att | Rev. | Ctrl |
|---|---|---|---|---|---|---|---|---|---|
| Gian Villante | 0 | 74 of 209 | 35% | 74 of 209 | 0 of 0 | --- | 0 | 0 | 0:00 |
| Francimar Barroso | 0 | 74 of 128 | 57% | 74 of 128 | 0 of 0 | --- | 0 | 0 | 0:00 |
Per Round
| Rd | Fighter | KD | Sig. Str. | Sig. Str. % | Total Str. | TD | TD % | Sub. Att | Rev. | Ctrl |
|---|---|---|---|---|---|---|---|---|---|---|
| 1 | Gian Villante | 0 | 15 of 50 | 30% | 15 of 50 | 0 of 0 | --- | 0 | 0 | 0:00 |
| Francimar Barroso | 0 | 21 of 26 | 80% | 21 of 26 | 0 of 0 | --- | 0 | 0 | 0:00 | |
| 2 | Gian Villante | 0 | 35 of 79 | 44% | 35 of 79 | 0 of 0 | --- | 0 | 0 | 0:00 |
| Francimar Barroso | 0 | 26 of 57 | 45% | 26 of 57 | 0 of 0 | --- | 0 | 0 | 0:00 | |
| 3 | Gian Villante | 0 | 24 of 80 | 30% | 24 of 80 | 0 of 0 | --- | 0 | 0 | 0:00 |
| Francimar Barroso | 0 | 27 of 45 | 60% | 27 of 45 | 0 of 0 | --- | 0 | 0 | 0:00 |
Significant Strikes
| Fighter | Sig. Str. | Sig. Str. % | Head | Body | Leg | Distance | Clinch | Ground |
|---|---|---|---|---|---|---|---|---|
| Gian Villante | 74 of 209 | 35% | 57 of 184 | 11 of 17 | 6 of 8 | 74 of 208 | 0 of 1 | 0 of 0 |
| Francimar Barroso | 74 of 128 | 57% | 38 of 86 | 18 of 24 | 18 of 18 | 74 of 127 | 0 of 1 | 0 of 0 |
Significant Strikes Per Round
| Rd | Fighter | Sig. Str. | Sig. Str. % | Head | Body | Leg | Distance | Clinch | Ground |
|---|---|---|---|---|---|---|---|---|---|
| 1 | Gian Villante | 15 of 50 | 30% | 12 of 45 | 1 of 1 | 2 of 4 | 15 of 50 | 0 of 0 | 0 of 0 |
| Francimar Barroso | 21 of 26 | 80% | 9 of 11 | 5 of 8 | 7 of 7 | 21 of 26 | 0 of 0 | 0 of 0 | |
| 2 | Gian Villante | 35 of 79 | 44% | 26 of 69 | 5 of 6 | 4 of 4 | 35 of 78 | 0 of 1 | 0 of 0 |
| Francimar Barroso | 26 of 57 | 45% | 13 of 41 | 7 of 10 | 6 of 6 | 26 of 56 | 0 of 1 | 0 of 0 | |
| 3 | Gian Villante | 24 of 80 | 30% | 19 of 70 | 5 of 10 | 0 of 0 | 24 of 80 | 0 of 0 | 0 of 0 |
| Francimar Barroso | 27 of 45 | 60% | 16 of 34 | 6 of 6 | 5 of 5 | 27 of 45 | 0 of 0 | 0 of 0 |
LOSS
vs
Aleksandar Rakić
Decision (unanimous) (30–27, 30–27, 30–27)
R3
5:00
·
UFC Fight Night: Volkov vs. Struve ·
Sep 02, 2017
Totals
| Fighter | KD | Sig. Str. | Sig. Str. % | Total Str. | TD | TD % | Sub. Att | Rev. | Ctrl |
|---|---|---|---|---|---|---|---|---|---|
| Aleksandar Rakić | 0 | 24 of 55 | 43% | 36 of 69 | 2 of 14 | 14% | 0 | 0 | 1:36 |
| Francimar Barroso | 0 | 46 of 150 | 30% | 75 of 179 | 0 of 0 | --- | 0 | 0 | 0:13 |
Per Round
| Rd | Fighter | KD | Sig. Str. | Sig. Str. % | Total Str. | TD | TD % | Sub. Att | Rev. | Ctrl |
|---|---|---|---|---|---|---|---|---|---|---|
| 1 | Aleksandar Rakić | 0 | 9 of 16 | 56% | 9 of 16 | 0 of 4 | 0% | 0 | 0 | 0:10 |
| Francimar Barroso | 0 | 11 of 34 | 32% | 15 of 38 | 0 of 0 | --- | 0 | 0 | 0:13 | |
| 2 | Aleksandar Rakić | 0 | 10 of 23 | 43% | 22 of 37 | 2 of 6 | 33% | 0 | 0 | 1:26 |
| Francimar Barroso | 0 | 20 of 54 | 37% | 45 of 79 | 0 of 0 | --- | 0 | 0 | 0:00 | |
| 3 | Aleksandar Rakić | 0 | 5 of 16 | 31% | 5 of 16 | 0 of 4 | 0% | 0 | 0 | 0:00 |
| Francimar Barroso | 0 | 15 of 62 | 24% | 15 of 62 | 0 of 0 | --- | 0 | 0 | 0:00 |
Significant Strikes
| Fighter | Sig. Str. | Sig. Str. % | Head | Body | Leg | Distance | Clinch | Ground |
|---|---|---|---|---|---|---|---|---|
| Aleksandar Rakić | 24 of 55 | 43% | 14 of 39 | 0 of 4 | 10 of 12 | 22 of 53 | 0 of 0 | 2 of 2 |
| Francimar Barroso | 46 of 150 | 30% | 22 of 114 | 10 of 16 | 14 of 20 | 44 of 144 | 2 of 6 | 0 of 0 |
Significant Strikes Per Round
| Rd | Fighter | Sig. Str. | Sig. Str. % | Head | Body | Leg | Distance | Clinch | Ground |
|---|---|---|---|---|---|---|---|---|---|
| 1 | Aleksandar Rakić | 9 of 16 | 56% | 5 of 11 | 0 of 0 | 4 of 5 | 9 of 16 | 0 of 0 | 0 of 0 |
| Francimar Barroso | 11 of 34 | 32% | 5 of 22 | 1 of 2 | 5 of 10 | 11 of 34 | 0 of 0 | 0 of 0 | |
| 2 | Aleksandar Rakić | 10 of 23 | 43% | 8 of 19 | 0 of 1 | 2 of 3 | 8 of 21 | 0 of 0 | 2 of 2 |
| Francimar Barroso | 20 of 54 | 37% | 12 of 44 | 3 of 4 | 5 of 6 | 19 of 52 | 1 of 2 | 0 of 0 | |
| 3 | Aleksandar Rakić | 5 of 16 | 31% | 1 of 9 | 0 of 3 | 4 of 4 | 5 of 16 | 0 of 0 | 0 of 0 |
| Francimar Barroso | 15 of 62 | 24% | 5 of 48 | 6 of 10 | 4 of 4 | 14 of 58 | 1 of 4 | 0 of 0 |
Play-by-Play
View on SherdogFrancimar Barroso vs. Aleksandar Rakic
Round 1
Barroso looks for a big right hand in the opening minutes of the fight, backing up as Rakic presses forward; the Brazilian lands a few glancing blows but not the knockout shot he's seeking. The Austrian is finding more success with his long, angled punches, particularly an uppercut which finds Barroso's chin on a few occasions. Rakic keeps his measured approach through the second half of the round, too, and blocks a late takedown attempt from Barroso, turning it around to force the Brazilian to finish the round on the defensive.
Sherdog Scores
Jordan Breen scores the round 10-9 Rakic
Brian Knapp scores the round 10-9 Rakic
Chris Nelson scores the round 10-9 Rakic
Round 2
Rakic tags Barroso with an overhand right at the fence, but "Bodao" keeps his footing. Barroso looks frozen up, waiting to counter but finding few opportunities, and consequently mounting little offense of his own. Rakic is upping his aggression, stepping closer to Barroso, mixing up his punches to the body and head. An uppercut-left hook scores for Rakic toward the middle of the round, and he denies a single-leg attempt from Barroso. With two minutes left, Barroso clinches Rakic against the fence and hits a trip takedown. Barroso isn't able to do much of anything with the position before Rakic works back to his feet. When they stand, Barroso looks exhausted, and Rakic attacks with more punches. Barroso ducks low and picks the ankle of Rakic for a late takedown in the final 10 seconds.
Sherdog Scores
Jordan Breen scores the round 10-9 Rakic
Brian Knapp scores the round 10-9 Rakic
Chris Nelson scores the round 10-9 Rakic
Round 3
Rakic continues to control the tempo and distance of the striking exchanges as the final round begins, constantly pressuring Barroso backward toward the fence with punching combinations and kicks. Rakic goes to the body with a kick, misses as he goes upstairs. Barroso looks wobbly as he circles around the outside, more from exhaustion than any particular strikes. Rakic lands a plunging right hand to the body, now tacks on some hard jabs to the face, another right to the body. Barroso tries to swing back, but Rakic is out of range by the time the Brazilian gets the punch off. With 60 seconds on the clock, Barroso lands a low kick to the cup of Rakic. The Austrian needs only a few seconds to compose himself, and the final minute of the fight ticks down without incident. After the horn, Barroso inexplicably jumps up on the fence to flex for the Dutch fans.
Sherdog Scores
Jordan Breen scores the round 10-9 Rakic (30-27 Rakic)
Brian Knapp scores the round 10-9 Rakic (30-27 Rakic)
Chris Nelson scores the round 10-9 Rakic (30-27 Rakic)
The Official Result
Aleksandar Rakic def. Francimar Barroso via Unanimous Decision (30-27, 30-27, 30-27) R3 5:00
Round 1
Barroso looks for a big right hand in the opening minutes of the fight, backing up as Rakic presses forward; the Brazilian lands a few glancing blows but not the knockout shot he's seeking. The Austrian is finding more success with his long, angled punches, particularly an uppercut which finds Barroso's chin on a few occasions. Rakic keeps his measured approach through the second half of the round, too, and blocks a late takedown attempt from Barroso, turning it around to force the Brazilian to finish the round on the defensive.
Sherdog Scores
Jordan Breen scores the round 10-9 Rakic
Brian Knapp scores the round 10-9 Rakic
Chris Nelson scores the round 10-9 Rakic
Round 2
Rakic tags Barroso with an overhand right at the fence, but "Bodao" keeps his footing. Barroso looks frozen up, waiting to counter but finding few opportunities, and consequently mounting little offense of his own. Rakic is upping his aggression, stepping closer to Barroso, mixing up his punches to the body and head. An uppercut-left hook scores for Rakic toward the middle of the round, and he denies a single-leg attempt from Barroso. With two minutes left, Barroso clinches Rakic against the fence and hits a trip takedown. Barroso isn't able to do much of anything with the position before Rakic works back to his feet. When they stand, Barroso looks exhausted, and Rakic attacks with more punches. Barroso ducks low and picks the ankle of Rakic for a late takedown in the final 10 seconds.
Sherdog Scores
Jordan Breen scores the round 10-9 Rakic
Brian Knapp scores the round 10-9 Rakic
Chris Nelson scores the round 10-9 Rakic
Round 3
Rakic continues to control the tempo and distance of the striking exchanges as the final round begins, constantly pressuring Barroso backward toward the fence with punching combinations and kicks. Rakic goes to the body with a kick, misses as he goes upstairs. Barroso looks wobbly as he circles around the outside, more from exhaustion than any particular strikes. Rakic lands a plunging right hand to the body, now tacks on some hard jabs to the face, another right to the body. Barroso tries to swing back, but Rakic is out of range by the time the Brazilian gets the punch off. With 60 seconds on the clock, Barroso lands a low kick to the cup of Rakic. The Austrian needs only a few seconds to compose himself, and the final minute of the fight ticks down without incident. After the horn, Barroso inexplicably jumps up on the fence to flex for the Dutch fans.
Sherdog Scores
Jordan Breen scores the round 10-9 Rakic (30-27 Rakic)
Brian Knapp scores the round 10-9 Rakic (30-27 Rakic)
Chris Nelson scores the round 10-9 Rakic (30-27 Rakic)
The Official Result
Aleksandar Rakic def. Francimar Barroso via Unanimous Decision (30-27, 30-27, 30-27) R3 5:00
WIN
vs
Darren Stewart
Decision (unanimous) (29–28, 29–28, 29–28)
R3
5:00
·
UFC Fight Night: Manuwa vs. Anderson ·
Mar 18, 2017
Totals
| Fighter | KD | Sig. Str. | Sig. Str. % | Total Str. | TD | TD % | Sub. Att | Rev. | Ctrl |
|---|---|---|---|---|---|---|---|---|---|
| Francimar Barroso | 0 | 31 of 73 | 42% | 55 of 102 | 1 of 5 | 20% | 0 | 0 | 3:59 |
| Darren Stewart | 0 | 28 of 62 | 45% | 46 of 82 | 7 of 12 | 58% | 0 | 0 | 2:40 |
Per Round
| Rd | Fighter | KD | Sig. Str. | Sig. Str. % | Total Str. | TD | TD % | Sub. Att | Rev. | Ctrl |
|---|---|---|---|---|---|---|---|---|---|---|
| 1 | Francimar Barroso | 0 | 14 of 27 | 51% | 23 of 38 | 1 of 3 | 33% | 0 | 0 | 0:18 |
| Darren Stewart | 0 | 12 of 24 | 50% | 20 of 33 | 1 of 4 | 25% | 0 | 0 | 2:01 | |
| 2 | Francimar Barroso | 0 | 6 of 11 | 54% | 13 of 18 | 0 of 1 | 0% | 0 | 0 | 2:51 |
| Darren Stewart | 0 | 8 of 15 | 53% | 17 of 25 | 6 of 6 | 100% | 0 | 0 | 0:00 | |
| 3 | Francimar Barroso | 0 | 11 of 35 | 31% | 19 of 46 | 0 of 1 | 0% | 0 | 0 | 0:50 |
| Darren Stewart | 0 | 8 of 23 | 34% | 9 of 24 | 0 of 2 | 0% | 0 | 0 | 0:39 |
Significant Strikes
| Fighter | Sig. Str. | Sig. Str. % | Head | Body | Leg | Distance | Clinch | Ground |
|---|---|---|---|---|---|---|---|---|
| Francimar Barroso | 31 of 73 | 42% | 13 of 47 | 7 of 9 | 11 of 17 | 16 of 50 | 14 of 20 | 1 of 3 |
| Darren Stewart | 28 of 62 | 45% | 14 of 45 | 8 of 10 | 6 of 7 | 17 of 41 | 10 of 18 | 1 of 3 |
Significant Strikes Per Round
| Rd | Fighter | Sig. Str. | Sig. Str. % | Head | Body | Leg | Distance | Clinch | Ground |
|---|---|---|---|---|---|---|---|---|---|
| 1 | Francimar Barroso | 14 of 27 | 51% | 6 of 16 | 2 of 3 | 6 of 8 | 7 of 14 | 6 of 10 | 1 of 3 |
| Darren Stewart | 12 of 24 | 50% | 4 of 14 | 5 of 6 | 3 of 4 | 7 of 13 | 5 of 9 | 0 of 2 | |
| 2 | Francimar Barroso | 6 of 11 | 54% | 2 of 5 | 2 of 2 | 2 of 4 | 1 of 5 | 5 of 6 | 0 of 0 |
| Darren Stewart | 8 of 15 | 53% | 3 of 10 | 3 of 3 | 2 of 2 | 4 of 9 | 3 of 5 | 1 of 1 | |
| 3 | Francimar Barroso | 11 of 35 | 31% | 5 of 26 | 3 of 4 | 3 of 5 | 8 of 31 | 3 of 4 | 0 of 0 |
| Darren Stewart | 8 of 23 | 34% | 7 of 21 | 0 of 1 | 1 of 1 | 6 of 19 | 2 of 4 | 0 of 0 |
LOSS
vs
Darren Stewart
No Contest (inadvertent headbutt)
R1
1:34
·
UFC Fight Night: Bader vs. Nogueira 2 ·
Nov 19, 2016
Totals
| Fighter | KD | Sig. Str. | Sig. Str. % | Total Str. | TD | TD % | Sub. Att | Rev. | Ctrl |
|---|---|---|---|---|---|---|---|---|---|
| Darren Stewart | 0 | 0 of 1 | 0% | 8 of 10 | 0 of 0 | --- | 0 | 0 | 0:00 |
| Francimar Barroso | 0 | 7 of 10 | 70% | 21 of 25 | 1 of 2 | 50% | 0 | 0 | 1:15 |
Per Round
| Rd | Fighter | KD | Sig. Str. | Sig. Str. % | Total Str. | TD | TD % | Sub. Att | Rev. | Ctrl |
|---|---|---|---|---|---|---|---|---|---|---|
| 1 | Darren Stewart | 0 | 0 of 1 | 0% | 8 of 10 | 0 of 0 | --- | 0 | 0 | 0:00 |
| Francimar Barroso | 0 | 7 of 10 | 70% | 21 of 25 | 1 of 2 | 50% | 0 | 0 | 1:15 |
Significant Strikes
| Fighter | Sig. Str. | Sig. Str. % | Head | Body | Leg | Distance | Clinch | Ground |
|---|---|---|---|---|---|---|---|---|
| Darren Stewart | 0 of 1 | 0% | 0 of 1 | 0 of 0 | 0 of 0 | 0 of 1 | 0 of 0 | 0 of 0 |
| Francimar Barroso | 7 of 10 | 70% | 6 of 9 | 1 of 1 | 0 of 0 | 0 of 2 | 1 of 1 | 6 of 7 |
Significant Strikes Per Round
| Rd | Fighter | Sig. Str. | Sig. Str. % | Head | Body | Leg | Distance | Clinch | Ground |
|---|---|---|---|---|---|---|---|---|---|
| 1 | Darren Stewart | 0 of 1 | 0% | 0 of 1 | 0 of 0 | 0 of 0 | 0 of 1 | 0 of 0 | 0 of 0 |
| Francimar Barroso | 7 of 10 | 70% | 6 of 9 | 1 of 1 | 0 of 0 | 0 of 2 | 1 of 1 | 6 of 7 |
LOSS
vs
Nikita Krylov
Submission (rear-naked choke)
R2
3:11
·
UFC Fight Night: Overeem vs. Arlovski ·
May 08, 2016
Totals
| Fighter | KD | Sig. Str. | Sig. Str. % | Total Str. | TD | TD % | Sub. Att | Rev. | Ctrl |
|---|---|---|---|---|---|---|---|---|---|
| Nikita Krylov | 0 | 58 of 88 | 65% | 115 of 152 | 0 of 2 | 0% | 1 | 1 | 4:02 |
| Francimar Barroso | 0 | 22 of 36 | 61% | 34 of 51 | 2 of 7 | 28% | 0 | 0 | 1:40 |
Per Round
| Rd | Fighter | KD | Sig. Str. | Sig. Str. % | Total Str. | TD | TD % | Sub. Att | Rev. | Ctrl |
|---|---|---|---|---|---|---|---|---|---|---|
| 1 | Nikita Krylov | 0 | 32 of 54 | 59% | 60 of 84 | 0 of 1 | 0% | 0 | 0 | 1:28 |
| Francimar Barroso | 0 | 18 of 31 | 58% | 29 of 44 | 1 of 6 | 16% | 0 | 0 | 1:22 | |
| 2 | Nikita Krylov | 0 | 26 of 34 | 76% | 55 of 68 | 0 of 1 | 0% | 1 | 1 | 2:34 |
| Francimar Barroso | 0 | 4 of 5 | 80% | 5 of 7 | 1 of 1 | 100% | 0 | 0 | 0:18 |
Significant Strikes
| Fighter | Sig. Str. | Sig. Str. % | Head | Body | Leg | Distance | Clinch | Ground |
|---|---|---|---|---|---|---|---|---|
| Nikita Krylov | 58 of 88 | 65% | 33 of 55 | 18 of 24 | 7 of 9 | 12 of 38 | 27 of 30 | 19 of 20 |
| Francimar Barroso | 22 of 36 | 61% | 17 of 31 | 3 of 3 | 2 of 2 | 12 of 24 | 9 of 10 | 1 of 2 |
Significant Strikes Per Round
| Rd | Fighter | Sig. Str. | Sig. Str. % | Head | Body | Leg | Distance | Clinch | Ground |
|---|---|---|---|---|---|---|---|---|---|
| 1 | Nikita Krylov | 32 of 54 | 59% | 13 of 29 | 13 of 17 | 6 of 8 | 10 of 29 | 22 of 25 | 0 of 0 |
| Francimar Barroso | 18 of 31 | 58% | 14 of 27 | 2 of 2 | 2 of 2 | 10 of 22 | 8 of 9 | 0 of 0 | |
| 2 | Nikita Krylov | 26 of 34 | 76% | 20 of 26 | 5 of 7 | 1 of 1 | 2 of 9 | 5 of 5 | 19 of 20 |
| Francimar Barroso | 4 of 5 | 80% | 3 of 4 | 1 of 1 | 0 of 0 | 2 of 2 | 1 of 1 | 1 of 2 |
Play-by-Play
View on SherdogFrancimar Barroso vs. Nikita Krylov
Round 1
Both 205ers come out throwing hands, but it’s Krylov who clips Barroso in the early exchange, backing up the Brazilian to the fence. Barroso tries to clinch but gets spun around, and now it’s Krylov landing short knees to the Brazilian’s legs from the outside position. Krylov switches to a single-leg, can’t get the takedown and goes back to throwing knees. Barroso breaks out of the clinch with an uppercut right around the midway point of the round. A lead uppercut snaps back Krylov’s head, allowing Barroso to change levels and take down “Al Capone” in the center of the cage. Barroso tries to take the back but Krylov powers up to his feet and separates with just over 90 seconds remaining in the round. Barroso gets the better of a few sloppy striking exchanges in the final minute, while Krylov finishes the round throwing a wild combination near the fence.
Sherdog Scores
Jordan Breen scores the round 10-9 Krylov
Brian Knapp scores the round 10-9 Krylov
Chris Nelson scores the round 10-9 Barroso
Round 2
Krylov initiates a clinch but soon is dragged to the ground by Barroso near the fence. Krylov sweeps to top position, stands over Barroso and gets clicked with a hard upkick. Back to the ground comes Krylov, and he’s warned by referee Lukasz Bosacki for headbutting Barroso in the chest. Nonetheless, Krylov retains top position and attempts to ground-and-pound Barroso as they reach the two-minute mark in round two. Barroso throws up an armbar, can’t get it, and now Krylov advances to the Brazilian’s half guard. Krylov stands briefly, comes diving back to the ground and nearly gets caught in a triangle choke. Barroso loses the position and winds up on his knees, allowing Krylov to attach himself to his back. Krylov slaps on a rear-naked choke but doesn’t appear to get underneath the chin before Barroso taps out.
The Official Result
Nikita Krylov def. Francimar Barroso via Submission (Rear-Naked Choke) R2 3:11
Round 1
Both 205ers come out throwing hands, but it’s Krylov who clips Barroso in the early exchange, backing up the Brazilian to the fence. Barroso tries to clinch but gets spun around, and now it’s Krylov landing short knees to the Brazilian’s legs from the outside position. Krylov switches to a single-leg, can’t get the takedown and goes back to throwing knees. Barroso breaks out of the clinch with an uppercut right around the midway point of the round. A lead uppercut snaps back Krylov’s head, allowing Barroso to change levels and take down “Al Capone” in the center of the cage. Barroso tries to take the back but Krylov powers up to his feet and separates with just over 90 seconds remaining in the round. Barroso gets the better of a few sloppy striking exchanges in the final minute, while Krylov finishes the round throwing a wild combination near the fence.
Sherdog Scores
Jordan Breen scores the round 10-9 Krylov
Brian Knapp scores the round 10-9 Krylov
Chris Nelson scores the round 10-9 Barroso
Round 2
Krylov initiates a clinch but soon is dragged to the ground by Barroso near the fence. Krylov sweeps to top position, stands over Barroso and gets clicked with a hard upkick. Back to the ground comes Krylov, and he’s warned by referee Lukasz Bosacki for headbutting Barroso in the chest. Nonetheless, Krylov retains top position and attempts to ground-and-pound Barroso as they reach the two-minute mark in round two. Barroso throws up an armbar, can’t get it, and now Krylov advances to the Brazilian’s half guard. Krylov stands briefly, comes diving back to the ground and nearly gets caught in a triangle choke. Barroso loses the position and winds up on his knees, allowing Krylov to attach himself to his back. Krylov slaps on a rear-naked choke but doesn’t appear to get underneath the chin before Barroso taps out.
The Official Result
Nikita Krylov def. Francimar Barroso via Submission (Rear-Naked Choke) R2 3:11
WIN
vs
Elvis Mutapčić
Decision (unanimous) (30–27, 29–28, 30–27)
R3
5:00
·
UFC Fight Night: Dillashaw vs. Cruz ·
Jan 17, 2016
Totals
| Fighter | KD | Sig. Str. | Sig. Str. % | Total Str. | TD | TD % | Sub. Att | Rev. | Ctrl |
|---|---|---|---|---|---|---|---|---|---|
| Francimar Barroso | 0 | 57 of 95 | 60% | 90 of 132 | 1 of 10 | 10% | 0 | 0 | 3:13 |
| Elvis Mutapčić | 0 | 38 of 120 | 31% | 65 of 148 | 0 of 0 | --- | 0 | 0 | 0:00 |
Per Round
| Rd | Fighter | KD | Sig. Str. | Sig. Str. % | Total Str. | TD | TD % | Sub. Att | Rev. | Ctrl |
|---|---|---|---|---|---|---|---|---|---|---|
| 1 | Francimar Barroso | 0 | 10 of 18 | 55% | 41 of 53 | 1 of 1 | 100% | 0 | 0 | 2:49 |
| Elvis Mutapčić | 0 | 10 of 26 | 38% | 36 of 53 | 0 of 0 | --- | 0 | 0 | 0:00 | |
| 2 | Francimar Barroso | 0 | 23 of 39 | 58% | 23 of 39 | 0 of 5 | 0% | 0 | 0 | 0:00 |
| Elvis Mutapčić | 0 | 10 of 32 | 31% | 10 of 32 | 0 of 0 | --- | 0 | 0 | 0:00 | |
| 3 | Francimar Barroso | 0 | 24 of 38 | 63% | 26 of 40 | 0 of 4 | 0% | 0 | 0 | 0:24 |
| Elvis Mutapčić | 0 | 18 of 62 | 29% | 19 of 63 | 0 of 0 | --- | 0 | 0 | 0:00 |
Significant Strikes
| Fighter | Sig. Str. | Sig. Str. % | Head | Body | Leg | Distance | Clinch | Ground |
|---|---|---|---|---|---|---|---|---|
| Francimar Barroso | 57 of 95 | 60% | 34 of 69 | 7 of 8 | 16 of 18 | 49 of 83 | 5 of 6 | 3 of 6 |
| Elvis Mutapčić | 38 of 120 | 31% | 22 of 100 | 14 of 16 | 2 of 4 | 25 of 99 | 6 of 11 | 7 of 10 |
Significant Strikes Per Round
| Rd | Fighter | Sig. Str. | Sig. Str. % | Head | Body | Leg | Distance | Clinch | Ground |
|---|---|---|---|---|---|---|---|---|---|
| 1 | Francimar Barroso | 10 of 18 | 55% | 5 of 12 | 2 of 3 | 3 of 3 | 7 of 12 | 0 of 0 | 3 of 6 |
| Elvis Mutapčić | 10 of 26 | 38% | 9 of 23 | 1 of 2 | 0 of 1 | 3 of 16 | 0 of 0 | 7 of 10 | |
| 2 | Francimar Barroso | 23 of 39 | 58% | 12 of 27 | 2 of 2 | 9 of 10 | 22 of 37 | 1 of 2 | 0 of 0 |
| Elvis Mutapčić | 10 of 32 | 31% | 3 of 23 | 5 of 6 | 2 of 3 | 10 of 31 | 0 of 1 | 0 of 0 | |
| 3 | Francimar Barroso | 24 of 38 | 63% | 17 of 30 | 3 of 3 | 4 of 5 | 20 of 34 | 4 of 4 | 0 of 0 |
| Elvis Mutapčić | 18 of 62 | 29% | 10 of 54 | 8 of 8 | 0 of 0 | 12 of 52 | 6 of 10 | 0 of 0 |
WIN
vs
Ryan Jimmo
Decision (unanimous) (30–27, 30–27, 29–28)
R3
5:00
·
UFC Fight Night: Condit vs. Alves ·
May 30, 2015
Totals
| Fighter | KD | Sig. Str. | Sig. Str. % | Total Str. | TD | TD % | Sub. Att | Rev. | Ctrl |
|---|---|---|---|---|---|---|---|---|---|
| Francimar Barroso | 0 | 46 of 96 | 47% | 67 of 117 | 0 of 14 | 0% | 0 | 0 | 6:36 |
| Ryan Jimmo | 0 | 35 of 61 | 57% | 46 of 74 | 0 of 0 | --- | 0 | 0 | 0:23 |
Per Round
| Rd | Fighter | KD | Sig. Str. | Sig. Str. % | Total Str. | TD | TD % | Sub. Att | Rev. | Ctrl |
|---|---|---|---|---|---|---|---|---|---|---|
| 1 | Francimar Barroso | 0 | 10 of 21 | 47% | 16 of 27 | 0 of 6 | 0% | 0 | 0 | 2:57 |
| Ryan Jimmo | 0 | 13 of 19 | 68% | 23 of 30 | 0 of 0 | --- | 0 | 0 | 0:00 | |
| 2 | Francimar Barroso | 0 | 22 of 43 | 51% | 26 of 47 | 0 of 4 | 0% | 0 | 0 | 1:42 |
| Ryan Jimmo | 0 | 12 of 26 | 46% | 12 of 26 | 0 of 0 | --- | 0 | 0 | 0:08 | |
| 3 | Francimar Barroso | 0 | 14 of 32 | 43% | 25 of 43 | 0 of 4 | 0% | 0 | 0 | 1:57 |
| Ryan Jimmo | 0 | 10 of 16 | 62% | 11 of 18 | 0 of 0 | --- | 0 | 0 | 0:15 |
Significant Strikes
| Fighter | Sig. Str. | Sig. Str. % | Head | Body | Leg | Distance | Clinch | Ground |
|---|---|---|---|---|---|---|---|---|
| Francimar Barroso | 46 of 96 | 47% | 10 of 53 | 6 of 8 | 30 of 35 | 12 of 55 | 34 of 41 | 0 of 0 |
| Ryan Jimmo | 35 of 61 | 57% | 14 of 37 | 10 of 12 | 11 of 12 | 24 of 48 | 11 of 13 | 0 of 0 |
Significant Strikes Per Round
| Rd | Fighter | Sig. Str. | Sig. Str. % | Head | Body | Leg | Distance | Clinch | Ground |
|---|---|---|---|---|---|---|---|---|---|
| 1 | Francimar Barroso | 10 of 21 | 47% | 2 of 12 | 0 of 1 | 8 of 8 | 2 of 12 | 8 of 9 | 0 of 0 |
| Ryan Jimmo | 13 of 19 | 68% | 4 of 9 | 6 of 7 | 3 of 3 | 6 of 11 | 7 of 8 | 0 of 0 | |
| 2 | Francimar Barroso | 22 of 43 | 51% | 7 of 25 | 3 of 3 | 12 of 15 | 7 of 25 | 15 of 18 | 0 of 0 |
| Ryan Jimmo | 12 of 26 | 46% | 9 of 22 | 2 of 3 | 1 of 1 | 11 of 24 | 1 of 2 | 0 of 0 | |
| 3 | Francimar Barroso | 14 of 32 | 43% | 1 of 16 | 3 of 4 | 10 of 12 | 3 of 18 | 11 of 14 | 0 of 0 |
| Ryan Jimmo | 10 of 16 | 62% | 1 of 6 | 2 of 2 | 7 of 8 | 7 of 13 | 3 of 3 | 0 of 0 |
LOSS
vs
Hans Stringer
Decision (split) (29–28, 28–29, 29–28)
R3
5:00
·
UFC Fight Night: Shogun vs. Henderson 2 ·
Mar 23, 2014
Totals
| Fighter | KD | Sig. Str. | Sig. Str. % | Total Str. | TD | TD % | Sub. Att | Rev. | Ctrl |
|---|---|---|---|---|---|---|---|---|---|
| Hans Stringer | 0 | 36 of 67 | 53% | 76 of 114 | 3 of 8 | 37% | 0 | 0 | 3:01 |
| Francimar Barroso | 0 | 44 of 77 | 57% | 98 of 135 | 1 of 8 | 12% | 0 | 0 | 5:51 |
Per Round
| Rd | Fighter | KD | Sig. Str. | Sig. Str. % | Total Str. | TD | TD % | Sub. Att | Rev. | Ctrl |
|---|---|---|---|---|---|---|---|---|---|---|
| 1 | Hans Stringer | 0 | 9 of 17 | 52% | 19 of 28 | 1 of 2 | 50% | 0 | 0 | 0:40 |
| Francimar Barroso | 0 | 20 of 27 | 74% | 52 of 62 | 1 of 2 | 50% | 0 | 0 | 3:25 | |
| 2 | Hans Stringer | 0 | 18 of 29 | 62% | 30 of 44 | 1 of 2 | 50% | 0 | 0 | 1:42 |
| Francimar Barroso | 0 | 9 of 25 | 36% | 18 of 34 | 0 of 4 | 0% | 0 | 0 | 1:11 | |
| 3 | Hans Stringer | 0 | 9 of 21 | 42% | 27 of 42 | 1 of 4 | 25% | 0 | 0 | 0:39 |
| Francimar Barroso | 0 | 15 of 25 | 60% | 28 of 39 | 0 of 2 | 0% | 0 | 0 | 1:15 |
Significant Strikes
| Fighter | Sig. Str. | Sig. Str. % | Head | Body | Leg | Distance | Clinch | Ground |
|---|---|---|---|---|---|---|---|---|
| Hans Stringer | 36 of 67 | 53% | 11 of 35 | 13 of 18 | 12 of 14 | 21 of 44 | 9 of 13 | 6 of 10 |
| Francimar Barroso | 44 of 77 | 57% | 21 of 51 | 5 of 7 | 18 of 19 | 20 of 48 | 16 of 17 | 8 of 12 |
Significant Strikes Per Round
| Rd | Fighter | Sig. Str. | Sig. Str. % | Head | Body | Leg | Distance | Clinch | Ground |
|---|---|---|---|---|---|---|---|---|---|
| 1 | Hans Stringer | 9 of 17 | 52% | 0 of 7 | 5 of 6 | 4 of 4 | 3 of 9 | 3 of 4 | 3 of 4 |
| Francimar Barroso | 20 of 27 | 74% | 15 of 21 | 3 of 4 | 2 of 2 | 5 of 8 | 7 of 7 | 8 of 12 | |
| 2 | Hans Stringer | 18 of 29 | 62% | 7 of 16 | 6 of 8 | 5 of 5 | 11 of 19 | 5 of 7 | 2 of 3 |
| Francimar Barroso | 9 of 25 | 36% | 2 of 16 | 2 of 3 | 5 of 6 | 4 of 19 | 5 of 6 | 0 of 0 | |
| 3 | Hans Stringer | 9 of 21 | 42% | 4 of 12 | 2 of 4 | 3 of 5 | 7 of 16 | 1 of 2 | 1 of 3 |
| Francimar Barroso | 15 of 25 | 60% | 4 of 14 | 0 of 0 | 11 of 11 | 11 of 21 | 4 of 4 | 0 of 0 |
Ryan Jimmo - Fight History
LOSS
vs
Francimar Barroso
Decision (unanimous) (30–27, 30–27, 29–28)
R3
5:00
·
UFC Fight Night: Condit vs. Alves ·
May 30, 2015
Totals
| Fighter | KD | Sig. Str. | Sig. Str. % | Total Str. | TD | TD % | Sub. Att | Rev. | Ctrl |
|---|---|---|---|---|---|---|---|---|---|
| Francimar Barroso | 0 | 46 of 96 | 47% | 67 of 117 | 0 of 14 | 0% | 0 | 0 | 6:36 |
| Ryan Jimmo | 0 | 35 of 61 | 57% | 46 of 74 | 0 of 0 | --- | 0 | 0 | 0:23 |
Per Round
| Rd | Fighter | KD | Sig. Str. | Sig. Str. % | Total Str. | TD | TD % | Sub. Att | Rev. | Ctrl |
|---|---|---|---|---|---|---|---|---|---|---|
| 1 | Francimar Barroso | 0 | 10 of 21 | 47% | 16 of 27 | 0 of 6 | 0% | 0 | 0 | 2:57 |
| Ryan Jimmo | 0 | 13 of 19 | 68% | 23 of 30 | 0 of 0 | --- | 0 | 0 | 0:00 | |
| 2 | Francimar Barroso | 0 | 22 of 43 | 51% | 26 of 47 | 0 of 4 | 0% | 0 | 0 | 1:42 |
| Ryan Jimmo | 0 | 12 of 26 | 46% | 12 of 26 | 0 of 0 | --- | 0 | 0 | 0:08 | |
| 3 | Francimar Barroso | 0 | 14 of 32 | 43% | 25 of 43 | 0 of 4 | 0% | 0 | 0 | 1:57 |
| Ryan Jimmo | 0 | 10 of 16 | 62% | 11 of 18 | 0 of 0 | --- | 0 | 0 | 0:15 |
Significant Strikes
| Fighter | Sig. Str. | Sig. Str. % | Head | Body | Leg | Distance | Clinch | Ground |
|---|---|---|---|---|---|---|---|---|
| Francimar Barroso | 46 of 96 | 47% | 10 of 53 | 6 of 8 | 30 of 35 | 12 of 55 | 34 of 41 | 0 of 0 |
| Ryan Jimmo | 35 of 61 | 57% | 14 of 37 | 10 of 12 | 11 of 12 | 24 of 48 | 11 of 13 | 0 of 0 |
Significant Strikes Per Round
| Rd | Fighter | Sig. Str. | Sig. Str. % | Head | Body | Leg | Distance | Clinch | Ground |
|---|---|---|---|---|---|---|---|---|---|
| 1 | Francimar Barroso | 10 of 21 | 47% | 2 of 12 | 0 of 1 | 8 of 8 | 2 of 12 | 8 of 9 | 0 of 0 |
| Ryan Jimmo | 13 of 19 | 68% | 4 of 9 | 6 of 7 | 3 of 3 | 6 of 11 | 7 of 8 | 0 of 0 | |
| 2 | Francimar Barroso | 22 of 43 | 51% | 7 of 25 | 3 of 3 | 12 of 15 | 7 of 25 | 15 of 18 | 0 of 0 |
| Ryan Jimmo | 12 of 26 | 46% | 9 of 22 | 2 of 3 | 1 of 1 | 11 of 24 | 1 of 2 | 0 of 0 | |
| 3 | Francimar Barroso | 14 of 32 | 43% | 1 of 16 | 3 of 4 | 10 of 12 | 3 of 18 | 11 of 14 | 0 of 0 |
| Ryan Jimmo | 10 of 16 | 62% | 1 of 6 | 2 of 2 | 7 of 8 | 7 of 13 | 3 of 3 | 0 of 0 |
LOSS
vs
Ovince Saint Preux
Submission (kimura)
R2
2:10
·
UFC 174: Johnson vs. Bagautinov ·
Jun 14, 2014
Totals
| Fighter | KD | Sig. Str. | Sig. Str. % | Total Str. | TD | TD % | Sub. Att | Rev. | Ctrl |
|---|---|---|---|---|---|---|---|---|---|
| Ovince Saint Preux | 0 | 14 of 34 | 41% | 20 of 40 | 2 of 4 | 50% | 1 | 0 | 2:00 |
| Ryan Jimmo | 0 | 15 of 29 | 51% | 19 of 34 | 0 of 1 | 0% | 0 | 0 | 1:00 |
Per Round
| Rd | Fighter | KD | Sig. Str. | Sig. Str. % | Total Str. | TD | TD % | Sub. Att | Rev. | Ctrl |
|---|---|---|---|---|---|---|---|---|---|---|
| 1 | Ovince Saint Preux | 0 | 12 of 28 | 42% | 16 of 32 | 1 of 3 | 33% | 0 | 0 | 0:43 |
| Ryan Jimmo | 0 | 12 of 23 | 52% | 15 of 27 | 0 of 1 | 0% | 0 | 0 | 0:58 | |
| 2 | Ovince Saint Preux | 0 | 2 of 6 | 33% | 4 of 8 | 1 of 1 | 100% | 1 | 0 | 1:17 |
| Ryan Jimmo | 0 | 3 of 6 | 50% | 4 of 7 | 0 of 0 | --- | 0 | 0 | 0:02 |
Significant Strikes
| Fighter | Sig. Str. | Sig. Str. % | Head | Body | Leg | Distance | Clinch | Ground |
|---|---|---|---|---|---|---|---|---|
| Ovince Saint Preux | 14 of 34 | 41% | 7 of 26 | 3 of 3 | 4 of 5 | 11 of 29 | 2 of 4 | 1 of 1 |
| Ryan Jimmo | 15 of 29 | 51% | 4 of 15 | 3 of 5 | 8 of 9 | 13 of 27 | 2 of 2 | 0 of 0 |
Significant Strikes Per Round
| Rd | Fighter | Sig. Str. | Sig. Str. % | Head | Body | Leg | Distance | Clinch | Ground |
|---|---|---|---|---|---|---|---|---|---|
| 1 | Ovince Saint Preux | 12 of 28 | 42% | 6 of 22 | 3 of 3 | 3 of 3 | 10 of 24 | 2 of 4 | 0 of 0 |
| Ryan Jimmo | 12 of 23 | 52% | 3 of 11 | 3 of 5 | 6 of 7 | 10 of 21 | 2 of 2 | 0 of 0 | |
| 2 | Ovince Saint Preux | 2 of 6 | 33% | 1 of 4 | 0 of 0 | 1 of 2 | 1 of 5 | 0 of 0 | 1 of 1 |
| Ryan Jimmo | 3 of 6 | 50% | 1 of 4 | 0 of 0 | 2 of 2 | 3 of 6 | 0 of 0 | 0 of 0 |
WIN
vs
Sean O'Connell
KO (punches)
R1
4:27
·
The Ultimate Fighter Nations Finale: Bisping vs. Kennedy ·
Apr 16, 2014
Totals
| Fighter | KD | Sig. Str. | Sig. Str. % | Total Str. | TD | TD % | Sub. Att | Rev. | Ctrl |
|---|---|---|---|---|---|---|---|---|---|
| Ryan Jimmo | 1 | 20 of 32 | 62% | 29 of 44 | 1 of 1 | 100% | 0 | 0 | 0:37 |
| Sean O'Connell | 0 | 15 of 25 | 60% | 41 of 56 | 0 of 1 | 0% | 0 | 0 | 2:42 |
Per Round
| Rd | Fighter | KD | Sig. Str. | Sig. Str. % | Total Str. | TD | TD % | Sub. Att | Rev. | Ctrl |
|---|---|---|---|---|---|---|---|---|---|---|
| 1 | Ryan Jimmo | 1 | 20 of 32 | 62% | 29 of 44 | 1 of 1 | 100% | 0 | 0 | 0:37 |
| Sean O'Connell | 0 | 15 of 25 | 60% | 41 of 56 | 0 of 1 | 0% | 0 | 0 | 2:42 |
Significant Strikes
| Fighter | Sig. Str. | Sig. Str. % | Head | Body | Leg | Distance | Clinch | Ground |
|---|---|---|---|---|---|---|---|---|
| Ryan Jimmo | 20 of 32 | 62% | 12 of 22 | 8 of 10 | 0 of 0 | 7 of 16 | 10 of 13 | 3 of 3 |
| Sean O'Connell | 15 of 25 | 60% | 6 of 13 | 9 of 11 | 0 of 1 | 5 of 14 | 10 of 11 | 0 of 0 |
Significant Strikes Per Round
| Rd | Fighter | Sig. Str. | Sig. Str. % | Head | Body | Leg | Distance | Clinch | Ground |
|---|---|---|---|---|---|---|---|---|---|
| 1 | Ryan Jimmo | 20 of 32 | 62% | 12 of 22 | 8 of 10 | 0 of 0 | 7 of 16 | 10 of 13 | 3 of 3 |
| Sean O'Connell | 15 of 25 | 60% | 6 of 13 | 9 of 11 | 0 of 1 | 5 of 14 | 10 of 11 | 0 of 0 |
LOSS
vs
Jimi Manuwa
TKO (leg injury)
R2
4:41
·
UFC Fight Night: Machida vs. Munoz ·
Oct 26, 2013
Totals
| Fighter | KD | Sig. Str. | Sig. Str. % | Total Str. | TD | TD % | Sub. Att | Rev. | Ctrl |
|---|---|---|---|---|---|---|---|---|---|
| Jimi Manuwa | 0 | 48 of 72 | 66% | 51 of 76 | 0 of 4 | 0% | 0 | 0 | 1:35 |
| Ryan Jimmo | 0 | 36 of 54 | 66% | 37 of 55 | 0 of 1 | 0% | 0 | 0 | 3:02 |
Per Round
| Rd | Fighter | KD | Sig. Str. | Sig. Str. % | Total Str. | TD | TD % | Sub. Att | Rev. | Ctrl |
|---|---|---|---|---|---|---|---|---|---|---|
| 1 | Jimi Manuwa | 0 | 33 of 46 | 71% | 35 of 48 | 0 of 2 | 0% | 0 | 0 | 1:02 |
| Ryan Jimmo | 0 | 20 of 34 | 58% | 20 of 34 | 0 of 0 | --- | 0 | 0 | 1:14 | |
| 2 | Jimi Manuwa | 0 | 15 of 26 | 57% | 16 of 28 | 0 of 2 | 0% | 0 | 0 | 0:33 |
| Ryan Jimmo | 0 | 16 of 20 | 80% | 17 of 21 | 0 of 1 | 0% | 0 | 0 | 1:48 |
Significant Strikes
| Fighter | Sig. Str. | Sig. Str. % | Head | Body | Leg | Distance | Clinch | Ground |
|---|---|---|---|---|---|---|---|---|
| Jimi Manuwa | 48 of 72 | 66% | 8 of 26 | 9 of 12 | 31 of 34 | 21 of 40 | 27 of 32 | 0 of 0 |
| Ryan Jimmo | 36 of 54 | 66% | 11 of 26 | 9 of 11 | 16 of 17 | 17 of 32 | 19 of 22 | 0 of 0 |
Significant Strikes Per Round
| Rd | Fighter | Sig. Str. | Sig. Str. % | Head | Body | Leg | Distance | Clinch | Ground |
|---|---|---|---|---|---|---|---|---|---|
| 1 | Jimi Manuwa | 33 of 46 | 71% | 4 of 14 | 6 of 7 | 23 of 25 | 11 of 21 | 22 of 25 | 0 of 0 |
| Ryan Jimmo | 20 of 34 | 58% | 6 of 17 | 6 of 8 | 8 of 9 | 10 of 22 | 10 of 12 | 0 of 0 | |
| 2 | Jimi Manuwa | 15 of 26 | 57% | 4 of 12 | 3 of 5 | 8 of 9 | 10 of 19 | 5 of 7 | 0 of 0 |
| Ryan Jimmo | 16 of 20 | 80% | 5 of 9 | 3 of 3 | 8 of 8 | 7 of 10 | 9 of 10 | 0 of 0 |
WIN
vs
Igor Pokrajac
Decision (unanimous) (30–27, 30–27, 30–27)
R3
5:00
·
UFC 161: Evans vs. Henderson ·
Jun 15, 2013
Totals
| Fighter | KD | Sig. Str. | Sig. Str. % | Total Str. | TD | TD % | Sub. Att | Rev. | Ctrl |
|---|---|---|---|---|---|---|---|---|---|
| Ryan Jimmo | 1 | 65 of 83 | 78% | 124 of 150 | 1 of 2 | 50% | 0 | 0 | 10:42 |
| Igor Pokrajac | 0 | 12 of 40 | 30% | 37 of 65 | 0 of 4 | 0% | 1 | 0 | 0:58 |
Per Round
| Rd | Fighter | KD | Sig. Str. | Sig. Str. % | Total Str. | TD | TD % | Sub. Att | Rev. | Ctrl |
|---|---|---|---|---|---|---|---|---|---|---|
| 1 | Ryan Jimmo | 0 | 36 of 47 | 76% | 43 of 54 | 0 of 1 | 0% | 0 | 0 | 1:49 |
| Igor Pokrajac | 0 | 7 of 27 | 25% | 11 of 31 | 0 of 3 | 0% | 0 | 0 | 0:57 | |
| 2 | Ryan Jimmo | 1 | 15 of 20 | 75% | 44 of 52 | 1 of 1 | 100% | 0 | 0 | 4:35 |
| Igor Pokrajac | 0 | 1 of 5 | 20% | 15 of 19 | 0 of 0 | --- | 0 | 0 | 0:00 | |
| 3 | Ryan Jimmo | 0 | 14 of 16 | 87% | 37 of 44 | 0 of 0 | --- | 0 | 0 | 4:18 |
| Igor Pokrajac | 0 | 4 of 8 | 50% | 11 of 15 | 0 of 1 | 0% | 1 | 0 | 0:01 |
Significant Strikes
| Fighter | Sig. Str. | Sig. Str. % | Head | Body | Leg | Distance | Clinch | Ground |
|---|---|---|---|---|---|---|---|---|
| Ryan Jimmo | 65 of 83 | 78% | 26 of 44 | 15 of 15 | 24 of 24 | 22 of 36 | 29 of 29 | 14 of 18 |
| Igor Pokrajac | 12 of 40 | 30% | 8 of 36 | 3 of 3 | 1 of 1 | 7 of 35 | 5 of 5 | 0 of 0 |
Significant Strikes Per Round
| Rd | Fighter | Sig. Str. | Sig. Str. % | Head | Body | Leg | Distance | Clinch | Ground |
|---|---|---|---|---|---|---|---|---|---|
| 1 | Ryan Jimmo | 36 of 47 | 76% | 8 of 19 | 10 of 10 | 18 of 18 | 13 of 24 | 23 of 23 | 0 of 0 |
| Igor Pokrajac | 7 of 27 | 25% | 3 of 23 | 3 of 3 | 1 of 1 | 3 of 23 | 4 of 4 | 0 of 0 | |
| 2 | Ryan Jimmo | 15 of 20 | 75% | 11 of 16 | 1 of 1 | 3 of 3 | 4 of 6 | 1 of 1 | 10 of 13 |
| Igor Pokrajac | 1 of 5 | 20% | 1 of 5 | 0 of 0 | 0 of 0 | 0 of 4 | 1 of 1 | 0 of 0 | |
| 3 | Ryan Jimmo | 14 of 16 | 87% | 7 of 9 | 4 of 4 | 3 of 3 | 5 of 6 | 5 of 5 | 4 of 5 |
| Igor Pokrajac | 4 of 8 | 50% | 4 of 8 | 0 of 0 | 0 of 0 | 4 of 8 | 0 of 0 | 0 of 0 |
LOSS
vs
James Te Huna
Decision (unanimous) (29–27, 29–28, 29–28)
R3
5:00
·
UFC on Fuel TV: Barao vs. McDonald ·
Feb 16, 2013
Totals
| Fighter | KD | Sig. Str. | Sig. Str. % | Total Str. | TD | TD % | Sub. Att | Rev. | Ctrl |
|---|---|---|---|---|---|---|---|---|---|
| James Te Huna | 0 | 49 of 79 | 62% | 121 of 166 | 2 of 5 | 40% | 0 | 0 | 6:38 |
| Ryan Jimmo | 1 | 34 of 52 | 65% | 56 of 77 | 0 of 2 | 0% | 0 | 0 | 6:19 |
Per Round
| Rd | Fighter | KD | Sig. Str. | Sig. Str. % | Total Str. | TD | TD % | Sub. Att | Rev. | Ctrl |
|---|---|---|---|---|---|---|---|---|---|---|
| 1 | James Te Huna | 0 | 7 of 10 | 70% | 35 of 47 | 0 of 0 | --- | 0 | 0 | 0:46 |
| Ryan Jimmo | 1 | 25 of 39 | 64% | 47 of 64 | 0 of 0 | --- | 0 | 0 | 3:58 | |
| 2 | James Te Huna | 0 | 17 of 31 | 54% | 40 of 56 | 1 of 3 | 33% | 0 | 0 | 3:33 |
| Ryan Jimmo | 0 | 6 of 8 | 75% | 6 of 8 | 0 of 1 | 0% | 0 | 0 | 0:41 | |
| 3 | James Te Huna | 0 | 25 of 38 | 65% | 46 of 63 | 1 of 2 | 50% | 0 | 0 | 2:19 |
| Ryan Jimmo | 0 | 3 of 5 | 60% | 3 of 5 | 0 of 1 | 0% | 0 | 0 | 1:40 |
Significant Strikes
| Fighter | Sig. Str. | Sig. Str. % | Head | Body | Leg | Distance | Clinch | Ground |
|---|---|---|---|---|---|---|---|---|
| James Te Huna | 49 of 79 | 62% | 34 of 58 | 7 of 11 | 8 of 10 | 1 of 11 | 14 of 19 | 34 of 49 |
| Ryan Jimmo | 34 of 52 | 65% | 28 of 45 | 1 of 1 | 5 of 6 | 6 of 11 | 5 of 5 | 23 of 36 |
Significant Strikes Per Round
| Rd | Fighter | Sig. Str. | Sig. Str. % | Head | Body | Leg | Distance | Clinch | Ground |
|---|---|---|---|---|---|---|---|---|---|
| 1 | James Te Huna | 7 of 10 | 70% | 4 of 7 | 0 of 0 | 3 of 3 | 0 of 1 | 3 of 3 | 4 of 6 |
| Ryan Jimmo | 25 of 39 | 64% | 23 of 37 | 0 of 0 | 2 of 2 | 2 of 3 | 1 of 1 | 22 of 35 | |
| 2 | James Te Huna | 17 of 31 | 54% | 16 of 28 | 0 of 1 | 1 of 2 | 0 of 4 | 1 of 1 | 16 of 26 |
| Ryan Jimmo | 6 of 8 | 75% | 2 of 4 | 1 of 1 | 3 of 3 | 2 of 4 | 3 of 3 | 1 of 1 | |
| 3 | James Te Huna | 25 of 38 | 65% | 14 of 23 | 7 of 10 | 4 of 5 | 1 of 6 | 10 of 15 | 14 of 17 |
| Ryan Jimmo | 3 of 5 | 60% | 3 of 4 | 0 of 0 | 0 of 1 | 2 of 4 | 1 of 1 | 0 of 0 |
WIN
vs
Anthony Perosh
KO (punch)
R1
0:07
·
UFC 149: Faber vs. Barao ·
Jul 21, 2012
Totals
| Fighter | KD | Sig. Str. | Sig. Str. % | Total Str. | TD | TD % | Sub. Att | Rev. | Ctrl |
|---|---|---|---|---|---|---|---|---|---|
| Ryan Jimmo | 0 | 0 of 1 | 0% | 0 of 1 | 0 of 0 | --- | 0 | 0 | 0:00 |
| Anthony Perosh | 1 | 2 of 2 | 100% | 2 of 2 | 0 of 0 | --- | 0 | 0 | 0:02 |
Per Round
| Rd | Fighter | KD | Sig. Str. | Sig. Str. % | Total Str. | TD | TD % | Sub. Att | Rev. | Ctrl |
|---|---|---|---|---|---|---|---|---|---|---|
| 1 | Ryan Jimmo | 0 | 0 of 1 | 0% | 0 of 1 | 0 of 0 | --- | 0 | 0 | 0:00 |
| Anthony Perosh | 1 | 2 of 2 | 100% | 2 of 2 | 0 of 0 | --- | 0 | 0 | 0:02 |
Significant Strikes
| Fighter | Sig. Str. | Sig. Str. % | Head | Body | Leg | Distance | Clinch | Ground |
|---|---|---|---|---|---|---|---|---|
| Ryan Jimmo | 0 of 1 | 0% | 0 of 1 | 0 of 0 | 0 of 0 | 0 of 1 | 0 of 0 | 0 of 0 |
| Anthony Perosh | 2 of 2 | 100% | 2 of 2 | 0 of 0 | 0 of 0 | 1 of 1 | 0 of 0 | 1 of 1 |
Significant Strikes Per Round
| Rd | Fighter | Sig. Str. | Sig. Str. % | Head | Body | Leg | Distance | Clinch | Ground |
|---|---|---|---|---|---|---|---|---|---|
| 1 | Ryan Jimmo | 0 of 1 | 0% | 0 of 1 | 0 of 0 | 0 of 0 | 0 of 1 | 0 of 0 | 0 of 0 |
| Anthony Perosh | 2 of 2 | 100% | 2 of 2 | 0 of 0 | 0 of 0 | 1 of 1 | 0 of 0 | 1 of 1 |
WIN
vs
Anthony Perosh
KO (punch)
R1
0:07
·
UFC on FX: Johnson vs. McCall 2 ·
Jun 08, 2012
Totals
| Fighter | KD | Sig. Str. | Sig. Str. % | Total Str. | TD | TD % | Sub. Att | Rev. | Ctrl |
|---|---|---|---|---|---|---|---|---|---|
| Ryan Jimmo | 0 | 0 of 1 | 0% | 0 of 1 | 0 of 0 | --- | 0 | 0 | 0:00 |
| Anthony Perosh | 1 | 2 of 2 | 100% | 2 of 2 | 0 of 0 | --- | 0 | 0 | 0:02 |
Per Round
| Rd | Fighter | KD | Sig. Str. | Sig. Str. % | Total Str. | TD | TD % | Sub. Att | Rev. | Ctrl |
|---|---|---|---|---|---|---|---|---|---|---|
| 1 | Ryan Jimmo | 0 | 0 of 1 | 0% | 0 of 1 | 0 of 0 | --- | 0 | 0 | 0:00 |
| Anthony Perosh | 1 | 2 of 2 | 100% | 2 of 2 | 0 of 0 | --- | 0 | 0 | 0:02 |
Significant Strikes
| Fighter | Sig. Str. | Sig. Str. % | Head | Body | Leg | Distance | Clinch | Ground |
|---|---|---|---|---|---|---|---|---|
| Ryan Jimmo | 0 of 1 | 0% | 0 of 1 | 0 of 0 | 0 of 0 | 0 of 1 | 0 of 0 | 0 of 0 |
| Anthony Perosh | 2 of 2 | 100% | 2 of 2 | 0 of 0 | 0 of 0 | 1 of 1 | 0 of 0 | 1 of 1 |
Significant Strikes Per Round
| Rd | Fighter | Sig. Str. | Sig. Str. % | Head | Body | Leg | Distance | Clinch | Ground |
|---|---|---|---|---|---|---|---|---|---|
| 1 | Ryan Jimmo | 0 of 1 | 0% | 0 of 1 | 0 of 0 | 0 of 0 | 0 of 1 | 0 of 0 | 0 of 0 |
| Anthony Perosh | 2 of 2 | 100% | 2 of 2 | 0 of 0 | 0 of 0 | 1 of 1 | 0 of 0 | 1 of 1 |
No comments yet. Be the first to share your thoughts!