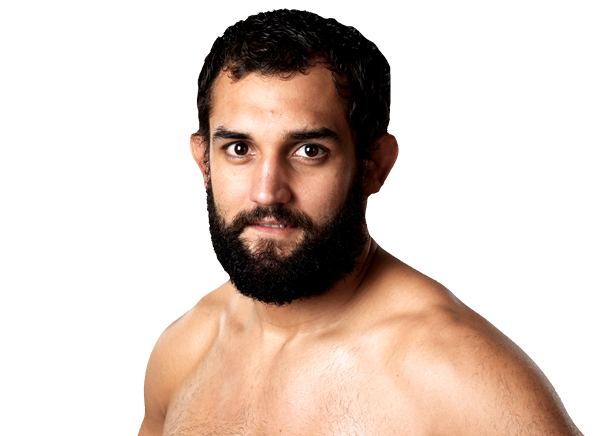
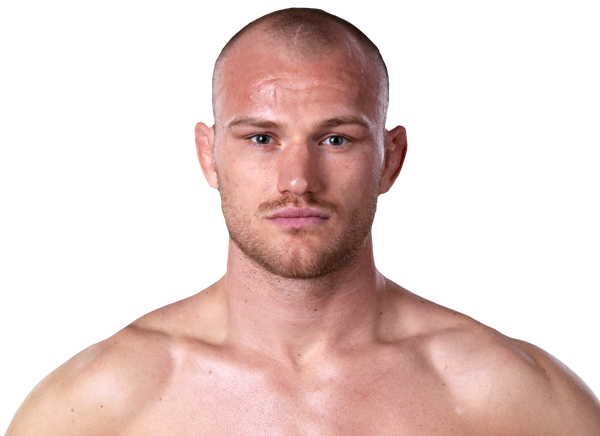
UFC 154: St-Pierre vs. Condit ·
Nov 17, 2012 ·
Welterweight ·
Completed
Career Averages - Johny Hendricks
3.49
SLpM
45.0%
Str. Acc.
3.99
SApM
53.0%
Str. Def.
3.83
TD Avg
46.0%
TD Acc.
63.0%
TD Def.
0.3
Sub. Avg
Career Averages - Martin Kampmann
3.22
SLpM
42.0%
Str. Acc.
3.28
SApM
62.0%
Str. Def.
1.86
TD Avg
41.0%
TD Acc.
78.0%
TD Def.
2.0
Sub. Avg
Johny Hendricks - Fight History
LOSS
vs
Paulo Costa
TKO (punches)
R2
1:23
·
UFC 217: Bisping vs. St-Pierre ·
Nov 04, 2017
Totals
| Fighter | KD | Sig. Str. | Sig. Str. % | Total Str. | TD | TD % | Sub. Att | Rev. | Ctrl |
|---|---|---|---|---|---|---|---|---|---|
| Paulo Costa | 0 | 27 of 54 | 50% | 27 of 54 | 0 of 4 | 0% | 0 | 0 | 0:00 |
| Johny Hendricks | 1 | 49 of 90 | 54% | 49 of 90 | 0 of 0 | --- | 0 | 0 | 0:01 |
Per Round
| Rd | Fighter | KD | Sig. Str. | Sig. Str. % | Total Str. | TD | TD % | Sub. Att | Rev. | Ctrl |
|---|---|---|---|---|---|---|---|---|---|---|
| 1 | Paulo Costa | 0 | 22 of 42 | 52% | 22 of 42 | 0 of 2 | 0% | 0 | 0 | 0:00 |
| Johny Hendricks | 0 | 29 of 60 | 48% | 29 of 60 | 0 of 0 | --- | 0 | 0 | 0:00 | |
| 2 | Paulo Costa | 0 | 5 of 12 | 41% | 5 of 12 | 0 of 2 | 0% | 0 | 0 | 0:00 |
| Johny Hendricks | 1 | 20 of 30 | 66% | 20 of 30 | 0 of 0 | --- | 0 | 0 | 0:01 |
Significant Strikes
| Fighter | Sig. Str. | Sig. Str. % | Head | Body | Leg | Distance | Clinch | Ground |
|---|---|---|---|---|---|---|---|---|
| Paulo Costa | 27 of 54 | 50% | 10 of 32 | 2 of 2 | 15 of 20 | 27 of 52 | 0 of 2 | 0 of 0 |
| Johny Hendricks | 49 of 90 | 54% | 25 of 62 | 23 of 26 | 1 of 2 | 45 of 84 | 3 of 4 | 1 of 2 |
Significant Strikes Per Round
| Rd | Fighter | Sig. Str. | Sig. Str. % | Head | Body | Leg | Distance | Clinch | Ground |
|---|---|---|---|---|---|---|---|---|---|
| 1 | Paulo Costa | 22 of 42 | 52% | 8 of 26 | 2 of 2 | 12 of 14 | 22 of 41 | 0 of 1 | 0 of 0 |
| Johny Hendricks | 29 of 60 | 48% | 10 of 38 | 18 of 20 | 1 of 2 | 28 of 59 | 1 of 1 | 0 of 0 | |
| 2 | Paulo Costa | 5 of 12 | 41% | 2 of 6 | 0 of 0 | 3 of 6 | 5 of 11 | 0 of 1 | 0 of 0 |
| Johny Hendricks | 20 of 30 | 66% | 15 of 24 | 5 of 6 | 0 of 0 | 17 of 25 | 2 of 3 | 1 of 2 |
LOSS
vs
Tim Boetsch
TKO (head kick and punches)
R2
0:46
·
UFC Fight Night: Chiesa vs. Lee ·
Jun 25, 2017
Totals
| Fighter | KD | Sig. Str. | Sig. Str. % | Total Str. | TD | TD % | Sub. Att | Rev. | Ctrl |
|---|---|---|---|---|---|---|---|---|---|
| Tim Boetsch | 0 | 41 of 68 | 60% | 42 of 69 | 0 of 0 | --- | 0 | 0 | 0:01 |
| Johny Hendricks | 0 | 10 of 45 | 22% | 10 of 45 | 0 of 0 | --- | 0 | 0 | 0:00 |
Per Round
| Rd | Fighter | KD | Sig. Str. | Sig. Str. % | Total Str. | TD | TD % | Sub. Att | Rev. | Ctrl |
|---|---|---|---|---|---|---|---|---|---|---|
| 1 | Tim Boetsch | 0 | 29 of 49 | 59% | 29 of 49 | 0 of 0 | --- | 0 | 0 | 0:00 |
| Johny Hendricks | 0 | 9 of 42 | 21% | 9 of 42 | 0 of 0 | --- | 0 | 0 | 0:00 | |
| 2 | Tim Boetsch | 0 | 12 of 19 | 63% | 13 of 20 | 0 of 0 | --- | 0 | 0 | 0:01 |
| Johny Hendricks | 0 | 1 of 3 | 33% | 1 of 3 | 0 of 0 | --- | 0 | 0 | 0:00 |
Significant Strikes
| Fighter | Sig. Str. | Sig. Str. % | Head | Body | Leg | Distance | Clinch | Ground |
|---|---|---|---|---|---|---|---|---|
| Tim Boetsch | 41 of 68 | 60% | 19 of 41 | 16 of 20 | 6 of 7 | 30 of 54 | 10 of 13 | 1 of 1 |
| Johny Hendricks | 10 of 45 | 22% | 2 of 36 | 2 of 2 | 6 of 7 | 10 of 44 | 0 of 1 | 0 of 0 |
Significant Strikes Per Round
| Rd | Fighter | Sig. Str. | Sig. Str. % | Head | Body | Leg | Distance | Clinch | Ground |
|---|---|---|---|---|---|---|---|---|---|
| 1 | Tim Boetsch | 29 of 49 | 59% | 9 of 24 | 14 of 18 | 6 of 7 | 24 of 44 | 5 of 5 | 0 of 0 |
| Johny Hendricks | 9 of 42 | 21% | 2 of 34 | 2 of 2 | 5 of 6 | 9 of 42 | 0 of 0 | 0 of 0 | |
| 2 | Tim Boetsch | 12 of 19 | 63% | 10 of 17 | 2 of 2 | 0 of 0 | 6 of 10 | 5 of 8 | 1 of 1 |
| Johny Hendricks | 1 of 3 | 33% | 0 of 2 | 0 of 0 | 1 of 1 | 1 of 2 | 0 of 1 | 0 of 0 |
WIN
vs
Héctor Lombard
Decision (unanimous) (30–27, 30–27, 29–28)
R3
5:00
·
UFC Fight Night: Lewis vs. Browne ·
Feb 19, 2017
Totals
| Fighter | KD | Sig. Str. | Sig. Str. % | Total Str. | TD | TD % | Sub. Att | Rev. | Ctrl |
|---|---|---|---|---|---|---|---|---|---|
| Johny Hendricks | 0 | 51 of 136 | 37% | 69 of 155 | 0 of 0 | --- | 0 | 0 | 0:00 |
| Héctor Lombard | 0 | 37 of 103 | 35% | 43 of 109 | 2 of 9 | 22% | 0 | 0 | 2:02 |
Per Round
| Rd | Fighter | KD | Sig. Str. | Sig. Str. % | Total Str. | TD | TD % | Sub. Att | Rev. | Ctrl |
|---|---|---|---|---|---|---|---|---|---|---|
| 1 | Johny Hendricks | 0 | 11 of 24 | 45% | 19 of 33 | 0 of 0 | --- | 0 | 0 | 0:00 |
| Héctor Lombard | 0 | 6 of 24 | 25% | 12 of 30 | 1 of 4 | 25% | 0 | 0 | 1:27 | |
| 2 | Johny Hendricks | 0 | 19 of 54 | 35% | 27 of 62 | 0 of 0 | --- | 0 | 0 | 0:00 |
| Héctor Lombard | 0 | 17 of 41 | 41% | 17 of 41 | 0 of 3 | 0% | 0 | 0 | 0:29 | |
| 3 | Johny Hendricks | 0 | 21 of 58 | 36% | 23 of 60 | 0 of 0 | --- | 0 | 0 | 0:00 |
| Héctor Lombard | 0 | 14 of 38 | 36% | 14 of 38 | 1 of 2 | 50% | 0 | 0 | 0:06 |
Significant Strikes
| Fighter | Sig. Str. | Sig. Str. % | Head | Body | Leg | Distance | Clinch | Ground |
|---|---|---|---|---|---|---|---|---|
| Johny Hendricks | 51 of 136 | 37% | 32 of 111 | 7 of 10 | 12 of 15 | 38 of 121 | 13 of 15 | 0 of 0 |
| Héctor Lombard | 37 of 103 | 35% | 22 of 80 | 8 of 15 | 7 of 8 | 33 of 98 | 4 of 5 | 0 of 0 |
Significant Strikes Per Round
| Rd | Fighter | Sig. Str. | Sig. Str. % | Head | Body | Leg | Distance | Clinch | Ground |
|---|---|---|---|---|---|---|---|---|---|
| 1 | Johny Hendricks | 11 of 24 | 45% | 3 of 16 | 2 of 2 | 6 of 6 | 8 of 20 | 3 of 4 | 0 of 0 |
| Héctor Lombard | 6 of 24 | 25% | 5 of 22 | 1 of 2 | 0 of 0 | 6 of 23 | 0 of 1 | 0 of 0 | |
| 2 | Johny Hendricks | 19 of 54 | 35% | 14 of 46 | 2 of 4 | 3 of 4 | 13 of 47 | 6 of 7 | 0 of 0 |
| Héctor Lombard | 17 of 41 | 41% | 10 of 32 | 3 of 5 | 4 of 4 | 14 of 38 | 3 of 3 | 0 of 0 | |
| 3 | Johny Hendricks | 21 of 58 | 36% | 15 of 49 | 3 of 4 | 3 of 5 | 17 of 54 | 4 of 4 | 0 of 0 |
| Héctor Lombard | 14 of 38 | 36% | 7 of 26 | 4 of 8 | 3 of 4 | 13 of 37 | 1 of 1 | 0 of 0 |
LOSS
vs
Neil Magny
Decision (unanimous) (29–28, 29–28, 29–28)
R3
5:00
·
UFC 207: Nunes vs. Rousey ·
Dec 30, 2016
Totals
| Fighter | KD | Sig. Str. | Sig. Str. % | Total Str. | TD | TD % | Sub. Att | Rev. | Ctrl |
|---|---|---|---|---|---|---|---|---|---|
| Neil Magny | 0 | 18 of 36 | 50% | 52 of 76 | 6 of 7 | 85% | 0 | 0 | 9:58 |
| Johny Hendricks | 0 | 50 of 91 | 54% | 96 of 139 | 1 of 1 | 100% | 2 | 0 | 0:01 |
Per Round
| Rd | Fighter | KD | Sig. Str. | Sig. Str. % | Total Str. | TD | TD % | Sub. Att | Rev. | Ctrl |
|---|---|---|---|---|---|---|---|---|---|---|
| 1 | Neil Magny | 0 | 7 of 14 | 50% | 15 of 24 | 1 of 1 | 100% | 0 | 0 | 2:52 |
| Johny Hendricks | 0 | 18 of 33 | 54% | 38 of 54 | 1 of 1 | 100% | 1 | 0 | 0:00 | |
| 2 | Neil Magny | 0 | 5 of 6 | 83% | 26 of 30 | 3 of 3 | 100% | 0 | 0 | 4:24 |
| Johny Hendricks | 0 | 2 of 7 | 28% | 10 of 15 | 0 of 0 | --- | 0 | 0 | 0:01 | |
| 3 | Neil Magny | 0 | 6 of 16 | 37% | 11 of 22 | 2 of 3 | 66% | 0 | 0 | 2:42 |
| Johny Hendricks | 0 | 30 of 51 | 58% | 48 of 70 | 0 of 0 | --- | 1 | 0 | 0:00 |
Significant Strikes
| Fighter | Sig. Str. | Sig. Str. % | Head | Body | Leg | Distance | Clinch | Ground |
|---|---|---|---|---|---|---|---|---|
| Neil Magny | 18 of 36 | 50% | 10 of 28 | 1 of 1 | 7 of 7 | 9 of 20 | 1 of 5 | 8 of 11 |
| Johny Hendricks | 50 of 91 | 54% | 27 of 59 | 16 of 23 | 7 of 9 | 31 of 68 | 1 of 1 | 18 of 22 |
Significant Strikes Per Round
| Rd | Fighter | Sig. Str. | Sig. Str. % | Head | Body | Leg | Distance | Clinch | Ground |
|---|---|---|---|---|---|---|---|---|---|
| 1 | Neil Magny | 7 of 14 | 50% | 4 of 11 | 1 of 1 | 2 of 2 | 5 of 7 | 0 of 2 | 2 of 5 |
| Johny Hendricks | 18 of 33 | 54% | 10 of 21 | 4 of 7 | 4 of 5 | 11 of 25 | 0 of 0 | 7 of 8 | |
| 2 | Neil Magny | 5 of 6 | 83% | 3 of 4 | 0 of 0 | 2 of 2 | 0 of 1 | 0 of 0 | 5 of 5 |
| Johny Hendricks | 2 of 7 | 28% | 0 of 4 | 1 of 2 | 1 of 1 | 2 of 7 | 0 of 0 | 0 of 0 | |
| 3 | Neil Magny | 6 of 16 | 37% | 3 of 13 | 0 of 0 | 3 of 3 | 4 of 12 | 1 of 3 | 1 of 1 |
| Johny Hendricks | 30 of 51 | 58% | 17 of 34 | 11 of 14 | 2 of 3 | 18 of 36 | 1 of 1 | 11 of 14 |
Play-by-Play
View on SherdogJohny Hendricks vs. Neil Magny
Round 1
Magny flicks out jabs and long kicks to keep the southpaw Hendricks out of striking range in the early going. Hendricks charges and backs up Magny to the wall, then whiffs on a big left hand as Magny strides away with a grin. Magny scores with a series of low kicks before circling away off his back foot; Hendricks doesn't give chase and instead waits for his opponent in the center. Another Hendricks left hand backs up Magny to the fence, but Magny bounces off the wall and gives Hendricks a knee. Hendricks changes levels for a quick takedown and sets up in Magny's full guard with half the round remaining. Hendricks tries to posture up for some ground-and-pound, but Magny is making things difficult with a sticky guard. Hendricks tries to stand and adjust; Magny locks down the ex-champ's arms and threatens with a triangle, then nearly sweeps. Hendricks maintains top position but finds himself in triangle trouble again. Magny can't quite cinch the choke, so he holds Hendricks in place to deliver a few elbows to the face in the closing seconds of the round.
Sherdog Scores
Tristen Critchfield scores the round 10-9 Magny
Chris Nelson scores the round 10-9 Magny
Mike Sloan scores the round 10-9 Magny
Round 2
Hendricks scores a quick takedown and tries to transition onto Magny's back, but Magny puts his back to the mat in the center of the cage, and Hendricks settles for half guard. Hendricks passes to side control, and Magny looks to roll inside to escape. Magny can't hit the sweep, so he catches Hendricks in half guard and then rolls to his knees. Hendricks catches him in a headlock, forcing Magny onto his side. Magny slips his head free and uses an underhook to work back to his feet, but Hendricks takes him down again almost immediately. The sequence repeats, with Magny working his way back up, but Hendricks keeping hold of his legs and converting for another takedown. Hendricks isn't doing much of anything on top, but Magny isn't managing much from the bottom, either. Hendricks advances to Magny's half guard, but Magny gets to his knees with 30 seconds remaining. Magny blocks a late single-leg from Hendricks and keeps his footing to the end of the round.
Sherdog Scores
Tristen Critchfield scores the round 10-9 Hendricks
Chris Nelson scores the round 10-9 Hendricks
Mike Sloan scores the round 10-9 Hendricks
Round 3
Magny backs up Hendricks with long, stomping front kicks, dodges a left hand from the wrestler and then adds an outside leg kick. After a minute of trying to get inside, Hendricks finally wraps up Magny and pushes him to the fence; this time, Magny keeps his balance and disengages from Hendricks without being taken down. Hendricks steps forward with a few low kicks, takes one to the body and tries to catch Magny's foot, but Magny pulls it back. Hendricks shoots a double on the fence, but Magny reaches over the top and hooks one of Hendricks' legs. As soon as Magny lets go, Hendricks lifts him into the air, pulls him away from the cage and slams him to the ground. Magny tries to scramble up quickly, but Hendricks bears down and keeps him flat on the mat with one minute left in the fight. Magny throws up a last-ditch triangle with 20 seconds left, but Hendricks gets an elbow inside and creates enough space to ride out the choke.
Sherdog Scores
Tristen Critchfield scores the round 10-9 Magny (29-28 Magny)
Chris Nelson scores the round 10-9 Magny (29-28 Magny)
Mike Sloan scores the round 10-9 Magny (29-28 Magny)
The Official Result
Neil Magny def. Johny Hendricks via Unanimous Decision (29-28, 29-28, 29-28) R3 5:00
Round 1
Magny flicks out jabs and long kicks to keep the southpaw Hendricks out of striking range in the early going. Hendricks charges and backs up Magny to the wall, then whiffs on a big left hand as Magny strides away with a grin. Magny scores with a series of low kicks before circling away off his back foot; Hendricks doesn't give chase and instead waits for his opponent in the center. Another Hendricks left hand backs up Magny to the fence, but Magny bounces off the wall and gives Hendricks a knee. Hendricks changes levels for a quick takedown and sets up in Magny's full guard with half the round remaining. Hendricks tries to posture up for some ground-and-pound, but Magny is making things difficult with a sticky guard. Hendricks tries to stand and adjust; Magny locks down the ex-champ's arms and threatens with a triangle, then nearly sweeps. Hendricks maintains top position but finds himself in triangle trouble again. Magny can't quite cinch the choke, so he holds Hendricks in place to deliver a few elbows to the face in the closing seconds of the round.
Sherdog Scores
Tristen Critchfield scores the round 10-9 Magny
Chris Nelson scores the round 10-9 Magny
Mike Sloan scores the round 10-9 Magny
Round 2
Hendricks scores a quick takedown and tries to transition onto Magny's back, but Magny puts his back to the mat in the center of the cage, and Hendricks settles for half guard. Hendricks passes to side control, and Magny looks to roll inside to escape. Magny can't hit the sweep, so he catches Hendricks in half guard and then rolls to his knees. Hendricks catches him in a headlock, forcing Magny onto his side. Magny slips his head free and uses an underhook to work back to his feet, but Hendricks takes him down again almost immediately. The sequence repeats, with Magny working his way back up, but Hendricks keeping hold of his legs and converting for another takedown. Hendricks isn't doing much of anything on top, but Magny isn't managing much from the bottom, either. Hendricks advances to Magny's half guard, but Magny gets to his knees with 30 seconds remaining. Magny blocks a late single-leg from Hendricks and keeps his footing to the end of the round.
Sherdog Scores
Tristen Critchfield scores the round 10-9 Hendricks
Chris Nelson scores the round 10-9 Hendricks
Mike Sloan scores the round 10-9 Hendricks
Round 3
Magny backs up Hendricks with long, stomping front kicks, dodges a left hand from the wrestler and then adds an outside leg kick. After a minute of trying to get inside, Hendricks finally wraps up Magny and pushes him to the fence; this time, Magny keeps his balance and disengages from Hendricks without being taken down. Hendricks steps forward with a few low kicks, takes one to the body and tries to catch Magny's foot, but Magny pulls it back. Hendricks shoots a double on the fence, but Magny reaches over the top and hooks one of Hendricks' legs. As soon as Magny lets go, Hendricks lifts him into the air, pulls him away from the cage and slams him to the ground. Magny tries to scramble up quickly, but Hendricks bears down and keeps him flat on the mat with one minute left in the fight. Magny throws up a last-ditch triangle with 20 seconds left, but Hendricks gets an elbow inside and creates enough space to ride out the choke.
Sherdog Scores
Tristen Critchfield scores the round 10-9 Magny (29-28 Magny)
Chris Nelson scores the round 10-9 Magny (29-28 Magny)
Mike Sloan scores the round 10-9 Magny (29-28 Magny)
The Official Result
Neil Magny def. Johny Hendricks via Unanimous Decision (29-28, 29-28, 29-28) R3 5:00
LOSS
vs
Kelvin Gastelum
Decision (unanimous) (29–28, 30–27, 30–27)
R3
5:00
·
UFC 200: Tate vs. Nunes ·
Jul 09, 2016
Totals
| Fighter | KD | Sig. Str. | Sig. Str. % | Total Str. | TD | TD % | Sub. Att | Rev. | Ctrl |
|---|---|---|---|---|---|---|---|---|---|
| Kelvin Gastelum | 0 | 70 of 157 | 44% | 90 of 177 | 1 of 5 | 20% | 0 | 0 | 2:09 |
| Johny Hendricks | 0 | 124 of 249 | 49% | 134 of 259 | 0 of 1 | 0% | 0 | 0 | 0:21 |
Per Round
| Rd | Fighter | KD | Sig. Str. | Sig. Str. % | Total Str. | TD | TD % | Sub. Att | Rev. | Ctrl |
|---|---|---|---|---|---|---|---|---|---|---|
| 1 | Kelvin Gastelum | 0 | 14 of 31 | 45% | 22 of 39 | 0 of 0 | --- | 0 | 0 | 0:31 |
| Johny Hendricks | 0 | 51 of 92 | 55% | 55 of 96 | 0 of 0 | --- | 0 | 0 | 0:00 | |
| 2 | Kelvin Gastelum | 0 | 25 of 54 | 46% | 32 of 61 | 1 of 3 | 33% | 0 | 0 | 1:02 |
| Johny Hendricks | 0 | 27 of 63 | 42% | 29 of 65 | 0 of 0 | --- | 0 | 0 | 0:11 | |
| 3 | Kelvin Gastelum | 0 | 31 of 72 | 43% | 36 of 77 | 0 of 2 | 0% | 0 | 0 | 0:36 |
| Johny Hendricks | 0 | 46 of 94 | 48% | 50 of 98 | 0 of 1 | 0% | 0 | 0 | 0:10 |
Significant Strikes
| Fighter | Sig. Str. | Sig. Str. % | Head | Body | Leg | Distance | Clinch | Ground |
|---|---|---|---|---|---|---|---|---|
| Kelvin Gastelum | 70 of 157 | 44% | 51 of 134 | 5 of 7 | 14 of 16 | 58 of 135 | 12 of 22 | 0 of 0 |
| Johny Hendricks | 124 of 249 | 49% | 89 of 211 | 19 of 22 | 16 of 16 | 114 of 235 | 10 of 14 | 0 of 0 |
Significant Strikes Per Round
| Rd | Fighter | Sig. Str. | Sig. Str. % | Head | Body | Leg | Distance | Clinch | Ground |
|---|---|---|---|---|---|---|---|---|---|
| 1 | Kelvin Gastelum | 14 of 31 | 45% | 10 of 27 | 1 of 1 | 3 of 3 | 14 of 31 | 0 of 0 | 0 of 0 |
| Johny Hendricks | 51 of 92 | 55% | 41 of 80 | 3 of 5 | 7 of 7 | 51 of 92 | 0 of 0 | 0 of 0 | |
| 2 | Kelvin Gastelum | 25 of 54 | 46% | 15 of 43 | 1 of 1 | 9 of 10 | 17 of 41 | 8 of 13 | 0 of 0 |
| Johny Hendricks | 27 of 63 | 42% | 18 of 54 | 6 of 6 | 3 of 3 | 23 of 56 | 4 of 7 | 0 of 0 | |
| 3 | Kelvin Gastelum | 31 of 72 | 43% | 26 of 64 | 3 of 5 | 2 of 3 | 27 of 63 | 4 of 9 | 0 of 0 |
| Johny Hendricks | 46 of 94 | 48% | 30 of 77 | 10 of 11 | 6 of 6 | 40 of 87 | 6 of 7 | 0 of 0 |
LOSS
vs
Stephen Thompson
TKO (punches)
R1
3:31
·
UFC Fight Night: Hendricks vs. Thompson ·
Feb 06, 2016
Totals
| Fighter | KD | Sig. Str. | Sig. Str. % | Total Str. | TD | TD % | Sub. Att | Rev. | Ctrl |
|---|---|---|---|---|---|---|---|---|---|
| Stephen Thompson | 0 | 7 of 16 | 43% | 11 of 22 | 0 of 2 | 0% | 0 | 0 | 0:29 |
| Johny Hendricks | 1 | 24 of 46 | 52% | 25 of 47 | 0 of 0 | --- | 0 | 0 | 0:00 |
Per Round
| Rd | Fighter | KD | Sig. Str. | Sig. Str. % | Total Str. | TD | TD % | Sub. Att | Rev. | Ctrl |
|---|---|---|---|---|---|---|---|---|---|---|
| 1 | Stephen Thompson | 0 | 7 of 16 | 43% | 11 of 22 | 0 of 2 | 0% | 0 | 0 | 0:29 |
| Johny Hendricks | 1 | 24 of 46 | 52% | 25 of 47 | 0 of 0 | --- | 0 | 0 | 0:00 |
Significant Strikes
| Fighter | Sig. Str. | Sig. Str. % | Head | Body | Leg | Distance | Clinch | Ground |
|---|---|---|---|---|---|---|---|---|
| Stephen Thompson | 7 of 16 | 43% | 3 of 11 | 0 of 1 | 4 of 4 | 4 of 13 | 3 of 3 | 0 of 0 |
| Johny Hendricks | 24 of 46 | 52% | 17 of 38 | 6 of 7 | 1 of 1 | 19 of 40 | 3 of 4 | 2 of 2 |
Significant Strikes Per Round
| Rd | Fighter | Sig. Str. | Sig. Str. % | Head | Body | Leg | Distance | Clinch | Ground |
|---|---|---|---|---|---|---|---|---|---|
| 1 | Stephen Thompson | 7 of 16 | 43% | 3 of 11 | 0 of 1 | 4 of 4 | 4 of 13 | 3 of 3 | 0 of 0 |
| Johny Hendricks | 24 of 46 | 52% | 17 of 38 | 6 of 7 | 1 of 1 | 19 of 40 | 3 of 4 | 2 of 2 |
WIN
vs
Matt Brown
Decision (unanimous) (30–27, 30–27, 30–27)
R3
5:00
·
UFC 185: Pettis vs. dos Anjos ·
Mar 14, 2015
Totals
| Fighter | KD | Sig. Str. | Sig. Str. % | Total Str. | TD | TD % | Sub. Att | Rev. | Ctrl |
|---|---|---|---|---|---|---|---|---|---|
| Johny Hendricks | 0 | 36 of 67 | 53% | 85 of 124 | 9 of 10 | 90% | 0 | 0 | 11:08 |
| Matt Brown | 0 | 23 of 49 | 46% | 39 of 66 | 0 of 0 | --- | 0 | 0 | 0:21 |
Per Round
| Rd | Fighter | KD | Sig. Str. | Sig. Str. % | Total Str. | TD | TD % | Sub. Att | Rev. | Ctrl |
|---|---|---|---|---|---|---|---|---|---|---|
| 1 | Johny Hendricks | 0 | 10 of 16 | 62% | 28 of 36 | 3 of 4 | 75% | 0 | 0 | 3:46 |
| Matt Brown | 0 | 11 of 21 | 52% | 14 of 24 | 0 of 0 | --- | 0 | 0 | 0:00 | |
| 2 | Johny Hendricks | 0 | 21 of 42 | 50% | 42 of 67 | 4 of 4 | 100% | 0 | 0 | 3:21 |
| Matt Brown | 0 | 7 of 16 | 43% | 9 of 18 | 0 of 0 | --- | 0 | 0 | 0:00 | |
| 3 | Johny Hendricks | 0 | 5 of 9 | 55% | 15 of 21 | 2 of 2 | 100% | 0 | 0 | 4:01 |
| Matt Brown | 0 | 5 of 12 | 41% | 16 of 24 | 0 of 0 | --- | 0 | 0 | 0:21 |
Significant Strikes
| Fighter | Sig. Str. | Sig. Str. % | Head | Body | Leg | Distance | Clinch | Ground |
|---|---|---|---|---|---|---|---|---|
| Johny Hendricks | 36 of 67 | 53% | 27 of 57 | 5 of 5 | 4 of 5 | 20 of 37 | 1 of 4 | 15 of 26 |
| Matt Brown | 23 of 49 | 46% | 16 of 40 | 7 of 9 | 0 of 0 | 12 of 37 | 9 of 10 | 2 of 2 |
Significant Strikes Per Round
| Rd | Fighter | Sig. Str. | Sig. Str. % | Head | Body | Leg | Distance | Clinch | Ground |
|---|---|---|---|---|---|---|---|---|---|
| 1 | Johny Hendricks | 10 of 16 | 62% | 9 of 14 | 1 of 1 | 0 of 1 | 4 of 7 | 0 of 1 | 6 of 8 |
| Matt Brown | 11 of 21 | 52% | 6 of 16 | 5 of 5 | 0 of 0 | 4 of 14 | 7 of 7 | 0 of 0 | |
| 2 | Johny Hendricks | 21 of 42 | 50% | 15 of 36 | 3 of 3 | 3 of 3 | 14 of 25 | 1 of 3 | 6 of 14 |
| Matt Brown | 7 of 16 | 43% | 6 of 14 | 1 of 2 | 0 of 0 | 6 of 15 | 1 of 1 | 0 of 0 | |
| 3 | Johny Hendricks | 5 of 9 | 55% | 3 of 7 | 1 of 1 | 1 of 1 | 2 of 5 | 0 of 0 | 3 of 4 |
| Matt Brown | 5 of 12 | 41% | 4 of 10 | 1 of 2 | 0 of 0 | 2 of 8 | 1 of 2 | 2 of 2 |
LOSS
vs
Robbie Lawler
Decision (split) (48–47, 47–48, 49–46)
R5
5:00
·
UFC 181: Hendricks vs. Lawler II ·
Dec 06, 2014
Totals
| Fighter | KD | Sig. Str. | Sig. Str. % | Total Str. | TD | TD % | Sub. Att | Rev. | Ctrl |
|---|---|---|---|---|---|---|---|---|---|
| Robbie Lawler | 0 | 111 of 228 | 48% | 145 of 264 | 5 of 17 | 29% | 1 | 0 | 10:21 |
| Johny Hendricks | 0 | 116 of 201 | 57% | 167 of 253 | 0 of 0 | --- | 0 | 0 | 1:02 |
Per Round
| Rd | Fighter | KD | Sig. Str. | Sig. Str. % | Total Str. | TD | TD % | Sub. Att | Rev. | Ctrl |
|---|---|---|---|---|---|---|---|---|---|---|
| 1 | Robbie Lawler | 0 | 14 of 29 | 48% | 33 of 50 | 1 of 5 | 20% | 0 | 0 | 3:16 |
| Johny Hendricks | 0 | 34 of 52 | 65% | 43 of 61 | 0 of 0 | --- | 0 | 0 | 0:00 | |
| 2 | Robbie Lawler | 0 | 35 of 63 | 55% | 39 of 67 | 1 of 3 | 33% | 1 | 0 | 1:57 |
| Johny Hendricks | 0 | 13 of 29 | 44% | 18 of 34 | 0 of 0 | --- | 0 | 0 | 0:00 | |
| 3 | Robbie Lawler | 0 | 26 of 57 | 45% | 28 of 59 | 2 of 2 | 100% | 0 | 0 | 1:30 |
| Johny Hendricks | 0 | 8 of 17 | 47% | 13 of 22 | 0 of 0 | --- | 0 | 0 | 0:00 | |
| 4 | Robbie Lawler | 0 | 23 of 49 | 46% | 23 of 49 | 1 of 3 | 33% | 0 | 0 | 1:43 |
| Johny Hendricks | 0 | 19 of 40 | 47% | 30 of 51 | 0 of 0 | --- | 0 | 0 | 0:17 | |
| 5 | Robbie Lawler | 0 | 13 of 30 | 43% | 22 of 39 | 0 of 4 | 0% | 0 | 0 | 1:55 |
| Johny Hendricks | 0 | 42 of 63 | 66% | 63 of 85 | 0 of 0 | --- | 0 | 0 | 0:45 |
Significant Strikes
| Fighter | Sig. Str. | Sig. Str. % | Head | Body | Leg | Distance | Clinch | Ground |
|---|---|---|---|---|---|---|---|---|
| Robbie Lawler | 111 of 228 | 48% | 66 of 176 | 6 of 10 | 39 of 42 | 97 of 206 | 13 of 20 | 1 of 2 |
| Johny Hendricks | 116 of 201 | 57% | 71 of 148 | 45 of 52 | 0 of 1 | 54 of 128 | 36 of 45 | 26 of 28 |
Significant Strikes Per Round
| Rd | Fighter | Sig. Str. | Sig. Str. % | Head | Body | Leg | Distance | Clinch | Ground |
|---|---|---|---|---|---|---|---|---|---|
| 1 | Robbie Lawler | 14 of 29 | 48% | 8 of 22 | 1 of 2 | 5 of 5 | 10 of 21 | 4 of 8 | 0 of 0 |
| Johny Hendricks | 34 of 52 | 65% | 13 of 31 | 21 of 21 | 0 of 0 | 7 of 21 | 27 of 31 | 0 of 0 | |
| 2 | Robbie Lawler | 35 of 63 | 55% | 14 of 40 | 3 of 5 | 18 of 18 | 26 of 50 | 8 of 11 | 1 of 2 |
| Johny Hendricks | 13 of 29 | 44% | 11 of 25 | 2 of 3 | 0 of 1 | 11 of 25 | 0 of 2 | 2 of 2 | |
| 3 | Robbie Lawler | 26 of 57 | 45% | 18 of 47 | 0 of 0 | 8 of 10 | 26 of 57 | 0 of 0 | 0 of 0 |
| Johny Hendricks | 8 of 17 | 47% | 5 of 9 | 3 of 8 | 0 of 0 | 6 of 15 | 2 of 2 | 0 of 0 | |
| 4 | Robbie Lawler | 23 of 49 | 46% | 15 of 40 | 1 of 2 | 7 of 7 | 22 of 48 | 1 of 1 | 0 of 0 |
| Johny Hendricks | 19 of 40 | 47% | 17 of 38 | 2 of 2 | 0 of 0 | 13 of 31 | 1 of 2 | 5 of 7 | |
| 5 | Robbie Lawler | 13 of 30 | 43% | 11 of 27 | 1 of 1 | 1 of 2 | 13 of 30 | 0 of 0 | 0 of 0 |
| Johny Hendricks | 42 of 63 | 66% | 25 of 45 | 17 of 18 | 0 of 0 | 17 of 36 | 6 of 8 | 19 of 19 |
Martin Kampmann - Fight History
LOSS
vs
Carlos Condit
TKO (punches and knees)
R4
0:54
·
UFC Fight Night: Condit vs. Kampmann 2 ·
Aug 28, 2013
Totals
| Fighter | KD | Sig. Str. | Sig. Str. % | Total Str. | TD | TD % | Sub. Att | Rev. | Ctrl |
|---|---|---|---|---|---|---|---|---|---|
| Carlos Condit | 1 | 100 of 235 | 42% | 147 of 282 | 0 of 2 | 0% | 2 | 1 | 1:14 |
| Martin Kampmann | 0 | 35 of 97 | 36% | 43 of 108 | 6 of 15 | 40% | 0 | 0 | 5:23 |
Per Round
| Rd | Fighter | KD | Sig. Str. | Sig. Str. % | Total Str. | TD | TD % | Sub. Att | Rev. | Ctrl |
|---|---|---|---|---|---|---|---|---|---|---|
| 1 | Carlos Condit | 0 | 7 of 15 | 46% | 32 of 40 | 0 of 0 | --- | 0 | 1 | 0:18 |
| Martin Kampmann | 0 | 5 of 10 | 50% | 12 of 20 | 4 of 5 | 80% | 0 | 0 | 3:47 | |
| 2 | Carlos Condit | 0 | 34 of 91 | 37% | 37 of 94 | 0 of 1 | 0% | 0 | 0 | 0:15 |
| Martin Kampmann | 0 | 18 of 44 | 40% | 19 of 45 | 0 of 5 | 0% | 0 | 0 | 0:38 | |
| 3 | Carlos Condit | 0 | 44 of 104 | 42% | 63 of 123 | 0 of 0 | --- | 2 | 0 | 0:41 |
| Martin Kampmann | 0 | 8 of 35 | 22% | 8 of 35 | 1 of 3 | 33% | 0 | 0 | 0:52 | |
| 4 | Carlos Condit | 1 | 15 of 25 | 60% | 15 of 25 | 0 of 1 | 0% | 0 | 0 | 0:00 |
| Martin Kampmann | 0 | 4 of 8 | 50% | 4 of 8 | 1 of 2 | 50% | 0 | 0 | 0:06 |
Significant Strikes
| Fighter | Sig. Str. | Sig. Str. % | Head | Body | Leg | Distance | Clinch | Ground |
|---|---|---|---|---|---|---|---|---|
| Carlos Condit | 100 of 235 | 42% | 68 of 185 | 15 of 25 | 17 of 25 | 81 of 208 | 17 of 24 | 2 of 3 |
| Martin Kampmann | 35 of 97 | 36% | 29 of 91 | 6 of 6 | 0 of 0 | 25 of 77 | 6 of 12 | 4 of 8 |
Significant Strikes Per Round
| Rd | Fighter | Sig. Str. | Sig. Str. % | Head | Body | Leg | Distance | Clinch | Ground |
|---|---|---|---|---|---|---|---|---|---|
| 1 | Carlos Condit | 7 of 15 | 46% | 5 of 13 | 1 of 1 | 1 of 1 | 2 of 7 | 5 of 8 | 0 of 0 |
| Martin Kampmann | 5 of 10 | 50% | 4 of 9 | 1 of 1 | 0 of 0 | 0 of 0 | 2 of 3 | 3 of 7 | |
| 2 | Carlos Condit | 34 of 91 | 37% | 17 of 65 | 6 of 9 | 11 of 17 | 29 of 84 | 5 of 7 | 0 of 0 |
| Martin Kampmann | 18 of 44 | 40% | 16 of 42 | 2 of 2 | 0 of 0 | 16 of 38 | 2 of 6 | 0 of 0 | |
| 3 | Carlos Condit | 44 of 104 | 42% | 34 of 87 | 5 of 10 | 5 of 7 | 37 of 95 | 5 of 6 | 2 of 3 |
| Martin Kampmann | 8 of 35 | 22% | 6 of 33 | 2 of 2 | 0 of 0 | 7 of 33 | 1 of 2 | 0 of 0 | |
| 4 | Carlos Condit | 15 of 25 | 60% | 12 of 20 | 3 of 5 | 0 of 0 | 13 of 22 | 2 of 3 | 0 of 0 |
| Martin Kampmann | 4 of 8 | 50% | 3 of 7 | 1 of 1 | 0 of 0 | 2 of 6 | 1 of 1 | 1 of 1 |
LOSS
vs
Johny Hendricks
KO (punch)
R1
0:46
·
UFC 154: St-Pierre vs. Condit ·
Nov 17, 2012
Totals
| Fighter | KD | Sig. Str. | Sig. Str. % | Total Str. | TD | TD % | Sub. Att | Rev. | Ctrl |
|---|---|---|---|---|---|---|---|---|---|
| Johny Hendricks | 1 | 3 of 7 | 42% | 3 of 7 | 0 of 0 | --- | 0 | 0 | 0:02 |
| Martin Kampmann | 0 | 0 of 4 | 0% | 0 of 4 | 0 of 0 | --- | 0 | 0 | 0:00 |
Per Round
| Rd | Fighter | KD | Sig. Str. | Sig. Str. % | Total Str. | TD | TD % | Sub. Att | Rev. | Ctrl |
|---|---|---|---|---|---|---|---|---|---|---|
| 1 | Johny Hendricks | 1 | 3 of 7 | 42% | 3 of 7 | 0 of 0 | --- | 0 | 0 | 0:02 |
| Martin Kampmann | 0 | 0 of 4 | 0% | 0 of 4 | 0 of 0 | --- | 0 | 0 | 0:00 |
Significant Strikes
| Fighter | Sig. Str. | Sig. Str. % | Head | Body | Leg | Distance | Clinch | Ground |
|---|---|---|---|---|---|---|---|---|
| Johny Hendricks | 3 of 7 | 42% | 3 of 7 | 0 of 0 | 0 of 0 | 2 of 6 | 0 of 0 | 1 of 1 |
| Martin Kampmann | 0 of 4 | 0% | 0 of 3 | 0 of 1 | 0 of 0 | 0 of 4 | 0 of 0 | 0 of 0 |
Significant Strikes Per Round
| Rd | Fighter | Sig. Str. | Sig. Str. % | Head | Body | Leg | Distance | Clinch | Ground |
|---|---|---|---|---|---|---|---|---|---|
| 1 | Johny Hendricks | 3 of 7 | 42% | 3 of 7 | 0 of 0 | 0 of 0 | 2 of 6 | 0 of 0 | 1 of 1 |
| Martin Kampmann | 0 of 4 | 0% | 0 of 3 | 0 of 1 | 0 of 0 | 0 of 4 | 0 of 0 | 0 of 0 |
WIN
vs
Jake Ellenberger
KO (knees)
R2
1:40
·
The Ultimate Fighter: Live Finale ·
Jun 01, 2012
Totals
| Fighter | KD | Sig. Str. | Sig. Str. % | Total Str. | TD | TD % | Sub. Att | Rev. | Ctrl |
|---|---|---|---|---|---|---|---|---|---|
| Martin Kampmann | 1 | 19 of 50 | 38% | 27 of 64 | 0 of 0 | --- | 0 | 0 | 4:07 |
| Jake Ellenberger | 1 | 13 of 31 | 41% | 16 of 34 | 0 of 1 | 0% | 0 | 0 | 0:29 |
Per Round
| Rd | Fighter | KD | Sig. Str. | Sig. Str. % | Total Str. | TD | TD % | Sub. Att | Rev. | Ctrl |
|---|---|---|---|---|---|---|---|---|---|---|
| 1 | Martin Kampmann | 1 | 6 of 19 | 31% | 14 of 33 | 0 of 0 | --- | 0 | 0 | 4:05 |
| Jake Ellenberger | 0 | 3 of 9 | 33% | 6 of 12 | 0 of 1 | 0% | 0 | 0 | 0:22 | |
| 2 | Martin Kampmann | 0 | 13 of 31 | 41% | 13 of 31 | 0 of 0 | --- | 0 | 0 | 0:02 |
| Jake Ellenberger | 1 | 10 of 22 | 45% | 10 of 22 | 0 of 0 | --- | 0 | 0 | 0:07 |
Significant Strikes
| Fighter | Sig. Str. | Sig. Str. % | Head | Body | Leg | Distance | Clinch | Ground |
|---|---|---|---|---|---|---|---|---|
| Martin Kampmann | 19 of 50 | 38% | 15 of 46 | 2 of 2 | 2 of 2 | 13 of 36 | 4 of 4 | 2 of 10 |
| Jake Ellenberger | 13 of 31 | 41% | 10 of 25 | 3 of 6 | 0 of 0 | 6 of 20 | 6 of 9 | 1 of 2 |
Significant Strikes Per Round
| Rd | Fighter | Sig. Str. | Sig. Str. % | Head | Body | Leg | Distance | Clinch | Ground |
|---|---|---|---|---|---|---|---|---|---|
| 1 | Martin Kampmann | 6 of 19 | 31% | 5 of 18 | 0 of 0 | 1 of 1 | 3 of 8 | 1 of 1 | 2 of 10 |
| Jake Ellenberger | 3 of 9 | 33% | 0 of 3 | 3 of 6 | 0 of 0 | 0 of 3 | 3 of 6 | 0 of 0 | |
| 2 | Martin Kampmann | 13 of 31 | 41% | 10 of 28 | 2 of 2 | 1 of 1 | 10 of 28 | 3 of 3 | 0 of 0 |
| Jake Ellenberger | 10 of 22 | 45% | 10 of 22 | 0 of 0 | 0 of 0 | 6 of 17 | 3 of 3 | 1 of 2 |
WIN
vs
Thiago Alves
Submission (guillotine choke)
R3
4:12
·
UFC on FX: Alves vs. Kampmann ·
Mar 03, 2012
Totals
| Fighter | KD | Sig. Str. | Sig. Str. % | Total Str. | TD | TD % | Sub. Att | Rev. | Ctrl |
|---|---|---|---|---|---|---|---|---|---|
| Martin Kampmann | 0 | 62 of 118 | 52% | 90 of 151 | 2 of 3 | 66% | 0 | 0 | 2:31 |
| Thiago Alves | 0 | 47 of 118 | 39% | 57 of 133 | 1 of 7 | 14% | 1 | 1 | 2:30 |
Per Round
| Rd | Fighter | KD | Sig. Str. | Sig. Str. % | Total Str. | TD | TD % | Sub. Att | Rev. | Ctrl |
|---|---|---|---|---|---|---|---|---|---|---|
| 1 | Martin Kampmann | 0 | 11 of 23 | 47% | 34 of 51 | 1 of 1 | 100% | 0 | 0 | 2:23 |
| Thiago Alves | 0 | 12 of 22 | 54% | 20 of 33 | 1 of 4 | 25% | 0 | 0 | 1:03 | |
| 2 | Martin Kampmann | 0 | 32 of 55 | 58% | 32 of 55 | 0 of 0 | --- | 0 | 0 | 0:00 |
| Thiago Alves | 0 | 23 of 57 | 40% | 24 of 59 | 0 of 2 | 0% | 0 | 0 | 0:34 | |
| 3 | Martin Kampmann | 0 | 19 of 40 | 47% | 24 of 45 | 1 of 2 | 50% | 0 | 0 | 0:08 |
| Thiago Alves | 0 | 12 of 39 | 30% | 13 of 41 | 0 of 1 | 0% | 1 | 1 | 0:53 |
Significant Strikes
| Fighter | Sig. Str. | Sig. Str. % | Head | Body | Leg | Distance | Clinch | Ground |
|---|---|---|---|---|---|---|---|---|
| Martin Kampmann | 62 of 118 | 52% | 42 of 91 | 11 of 12 | 9 of 15 | 60 of 113 | 1 of 1 | 1 of 4 |
| Thiago Alves | 47 of 118 | 39% | 34 of 104 | 13 of 14 | 0 of 0 | 39 of 107 | 8 of 11 | 0 of 0 |
Significant Strikes Per Round
| Rd | Fighter | Sig. Str. | Sig. Str. % | Head | Body | Leg | Distance | Clinch | Ground |
|---|---|---|---|---|---|---|---|---|---|
| 1 | Martin Kampmann | 11 of 23 | 47% | 7 of 17 | 2 of 2 | 2 of 4 | 9 of 18 | 1 of 1 | 1 of 4 |
| Thiago Alves | 12 of 22 | 54% | 6 of 16 | 6 of 6 | 0 of 0 | 5 of 13 | 7 of 9 | 0 of 0 | |
| 2 | Martin Kampmann | 32 of 55 | 58% | 20 of 43 | 8 of 8 | 4 of 4 | 32 of 55 | 0 of 0 | 0 of 0 |
| Thiago Alves | 23 of 57 | 40% | 21 of 55 | 2 of 2 | 0 of 0 | 23 of 57 | 0 of 0 | 0 of 0 | |
| 3 | Martin Kampmann | 19 of 40 | 47% | 15 of 31 | 1 of 2 | 3 of 7 | 19 of 40 | 0 of 0 | 0 of 0 |
| Thiago Alves | 12 of 39 | 30% | 7 of 33 | 5 of 6 | 0 of 0 | 11 of 37 | 1 of 2 | 0 of 0 |
WIN
vs
Rick Story
Decision (split) (30–27, 28-29, 29-28)
R3
5:00
·
UFC 139: Shogun vs. Henderson ·
Nov 19, 2011
Totals
| Fighter | KD | Sig. Str. | Sig. Str. % | Total Str. | TD | TD % | Sub. Att | Rev. | Ctrl |
|---|---|---|---|---|---|---|---|---|---|
| Martin Kampmann | 0 | 61 of 170 | 35% | 73 of 183 | 1 of 3 | 33% | 0 | 0 | 0:36 |
| Rick Story | 0 | 38 of 147 | 25% | 55 of 165 | 3 of 9 | 33% | 1 | 0 | 4:55 |
Per Round
| Rd | Fighter | KD | Sig. Str. | Sig. Str. % | Total Str. | TD | TD % | Sub. Att | Rev. | Ctrl |
|---|---|---|---|---|---|---|---|---|---|---|
| 1 | Martin Kampmann | 0 | 34 of 91 | 37% | 37 of 94 | 0 of 1 | 0% | 0 | 0 | 0:08 |
| Rick Story | 0 | 17 of 67 | 25% | 17 of 67 | 0 of 0 | --- | 0 | 0 | 0:00 | |
| 2 | Martin Kampmann | 0 | 13 of 47 | 27% | 14 of 48 | 0 of 0 | --- | 0 | 0 | 0:02 |
| Rick Story | 0 | 11 of 56 | 19% | 24 of 70 | 1 of 2 | 50% | 0 | 0 | 1:56 | |
| 3 | Martin Kampmann | 0 | 14 of 32 | 43% | 22 of 41 | 1 of 2 | 50% | 0 | 0 | 0:26 |
| Rick Story | 0 | 10 of 24 | 41% | 14 of 28 | 2 of 7 | 28% | 1 | 0 | 2:59 |
Significant Strikes
| Fighter | Sig. Str. | Sig. Str. % | Head | Body | Leg | Distance | Clinch | Ground |
|---|---|---|---|---|---|---|---|---|
| Martin Kampmann | 61 of 170 | 35% | 39 of 137 | 22 of 33 | 0 of 0 | 47 of 145 | 14 of 25 | 0 of 0 |
| Rick Story | 38 of 147 | 25% | 34 of 139 | 4 of 7 | 0 of 1 | 29 of 127 | 5 of 16 | 4 of 4 |
Significant Strikes Per Round
| Rd | Fighter | Sig. Str. | Sig. Str. % | Head | Body | Leg | Distance | Clinch | Ground |
|---|---|---|---|---|---|---|---|---|---|
| 1 | Martin Kampmann | 34 of 91 | 37% | 25 of 75 | 9 of 16 | 0 of 0 | 28 of 79 | 6 of 12 | 0 of 0 |
| Rick Story | 17 of 67 | 25% | 17 of 66 | 0 of 0 | 0 of 1 | 15 of 64 | 2 of 3 | 0 of 0 | |
| 2 | Martin Kampmann | 13 of 47 | 27% | 8 of 39 | 5 of 8 | 0 of 0 | 13 of 46 | 0 of 1 | 0 of 0 |
| Rick Story | 11 of 56 | 19% | 8 of 52 | 3 of 4 | 0 of 0 | 7 of 50 | 0 of 2 | 4 of 4 | |
| 3 | Martin Kampmann | 14 of 32 | 43% | 6 of 23 | 8 of 9 | 0 of 0 | 6 of 20 | 8 of 12 | 0 of 0 |
| Rick Story | 10 of 24 | 41% | 9 of 21 | 1 of 3 | 0 of 0 | 7 of 13 | 3 of 11 | 0 of 0 |
LOSS
vs
Diego Sanchez
Decision (unanimous) (29–28, 29–28, 29–28)
R3
5:00
·
UFC Live: Sanchez vs. Kampmann ·
Mar 03, 2011
Totals
| Fighter | KD | Sig. Str. | Sig. Str. % | Total Str. | TD | TD % | Sub. Att | Rev. | Ctrl |
|---|---|---|---|---|---|---|---|---|---|
| Diego Sanchez | 0 | 51 of 202 | 25% | 51 of 202 | 1 of 15 | 6% | 0 | 0 | 1:37 |
| Martin Kampmann | 1 | 77 of 200 | 38% | 79 of 202 | 0 of 0 | --- | 0 | 0 | 0:21 |
Per Round
| Rd | Fighter | KD | Sig. Str. | Sig. Str. % | Total Str. | TD | TD % | Sub. Att | Rev. | Ctrl |
|---|---|---|---|---|---|---|---|---|---|---|
| 1 | Diego Sanchez | 0 | 10 of 37 | 27% | 10 of 37 | 0 of 5 | 0% | 0 | 0 | 0:32 |
| Martin Kampmann | 1 | 32 of 64 | 50% | 33 of 65 | 0 of 0 | --- | 0 | 0 | 0:17 | |
| 2 | Diego Sanchez | 0 | 22 of 77 | 28% | 22 of 77 | 0 of 7 | 0% | 0 | 0 | 0:44 |
| Martin Kampmann | 0 | 26 of 66 | 39% | 27 of 67 | 0 of 0 | --- | 0 | 0 | 0:01 | |
| 3 | Diego Sanchez | 0 | 19 of 88 | 21% | 19 of 88 | 1 of 3 | 33% | 0 | 0 | 0:21 |
| Martin Kampmann | 0 | 19 of 70 | 27% | 19 of 70 | 0 of 0 | --- | 0 | 0 | 0:03 |
Significant Strikes
| Fighter | Sig. Str. | Sig. Str. % | Head | Body | Leg | Distance | Clinch | Ground |
|---|---|---|---|---|---|---|---|---|
| Diego Sanchez | 51 of 202 | 25% | 41 of 186 | 8 of 14 | 2 of 2 | 31 of 153 | 20 of 49 | 0 of 0 |
| Martin Kampmann | 77 of 200 | 38% | 72 of 192 | 4 of 7 | 1 of 1 | 59 of 168 | 18 of 32 | 0 of 0 |
Significant Strikes Per Round
| Rd | Fighter | Sig. Str. | Sig. Str. % | Head | Body | Leg | Distance | Clinch | Ground |
|---|---|---|---|---|---|---|---|---|---|
| 1 | Diego Sanchez | 10 of 37 | 27% | 5 of 31 | 4 of 5 | 1 of 1 | 8 of 34 | 2 of 3 | 0 of 0 |
| Martin Kampmann | 32 of 64 | 50% | 30 of 62 | 2 of 2 | 0 of 0 | 25 of 55 | 7 of 9 | 0 of 0 | |
| 2 | Diego Sanchez | 22 of 77 | 28% | 20 of 73 | 1 of 3 | 1 of 1 | 8 of 44 | 14 of 33 | 0 of 0 |
| Martin Kampmann | 26 of 66 | 39% | 24 of 63 | 2 of 3 | 0 of 0 | 19 of 52 | 7 of 14 | 0 of 0 | |
| 3 | Diego Sanchez | 19 of 88 | 21% | 16 of 82 | 3 of 6 | 0 of 0 | 15 of 75 | 4 of 13 | 0 of 0 |
| Martin Kampmann | 19 of 70 | 27% | 18 of 67 | 0 of 2 | 1 of 1 | 15 of 61 | 4 of 9 | 0 of 0 |
LOSS
vs
Jake Shields
Decision (split) (28–29, 30–27, 29–28)
R3
5:00
·
UFC 121: Lesnar vs. Velasquez ·
Oct 23, 2010
Totals
| Fighter | KD | Sig. Str. | Sig. Str. % | Total Str. | TD | TD % | Sub. Att | Rev. | Ctrl |
|---|---|---|---|---|---|---|---|---|---|
| Jake Shields | 0 | 25 of 46 | 54% | 53 of 80 | 4 of 15 | 26% | 0 | 0 | 7:29 |
| Martin Kampmann | 0 | 35 of 54 | 64% | 57 of 77 | 0 of 0 | --- | 3 | 0 | 3:15 |
Per Round
| Rd | Fighter | KD | Sig. Str. | Sig. Str. % | Total Str. | TD | TD % | Sub. Att | Rev. | Ctrl |
|---|---|---|---|---|---|---|---|---|---|---|
| 1 | Jake Shields | 0 | 14 of 21 | 66% | 20 of 27 | 1 of 5 | 20% | 0 | 0 | 2:36 |
| Martin Kampmann | 0 | 10 of 14 | 71% | 12 of 16 | 0 of 0 | --- | 0 | 0 | 0:30 | |
| 2 | Jake Shields | 0 | 8 of 12 | 66% | 20 of 25 | 2 of 5 | 40% | 0 | 0 | 2:54 |
| Martin Kampmann | 0 | 15 of 25 | 60% | 19 of 29 | 0 of 0 | --- | 1 | 0 | 1:00 | |
| 3 | Jake Shields | 0 | 3 of 13 | 23% | 13 of 28 | 1 of 5 | 20% | 0 | 0 | 1:59 |
| Martin Kampmann | 0 | 10 of 15 | 66% | 26 of 32 | 0 of 0 | --- | 2 | 0 | 1:45 |
Significant Strikes
| Fighter | Sig. Str. | Sig. Str. % | Head | Body | Leg | Distance | Clinch | Ground |
|---|---|---|---|---|---|---|---|---|
| Jake Shields | 25 of 46 | 54% | 9 of 25 | 9 of 11 | 7 of 10 | 21 of 42 | 2 of 2 | 2 of 2 |
| Martin Kampmann | 35 of 54 | 64% | 18 of 33 | 17 of 21 | 0 of 0 | 8 of 22 | 20 of 25 | 7 of 7 |
Significant Strikes Per Round
| Rd | Fighter | Sig. Str. | Sig. Str. % | Head | Body | Leg | Distance | Clinch | Ground |
|---|---|---|---|---|---|---|---|---|---|
| 1 | Jake Shields | 14 of 21 | 66% | 4 of 9 | 4 of 5 | 6 of 7 | 13 of 20 | 0 of 0 | 1 of 1 |
| Martin Kampmann | 10 of 14 | 71% | 3 of 5 | 7 of 9 | 0 of 0 | 3 of 5 | 7 of 9 | 0 of 0 | |
| 2 | Jake Shields | 8 of 12 | 66% | 3 of 7 | 4 of 4 | 1 of 1 | 5 of 9 | 2 of 2 | 1 of 1 |
| Martin Kampmann | 15 of 25 | 60% | 9 of 17 | 6 of 8 | 0 of 0 | 3 of 10 | 9 of 12 | 3 of 3 | |
| 3 | Jake Shields | 3 of 13 | 23% | 2 of 9 | 1 of 2 | 0 of 2 | 3 of 13 | 0 of 0 | 0 of 0 |
| Martin Kampmann | 10 of 15 | 66% | 6 of 11 | 4 of 4 | 0 of 0 | 2 of 7 | 4 of 4 | 4 of 4 |
WIN
vs
Paulo Thiago
Decision (unanimous) (30–27, 30–27, 30–27)
R3
5:00
·
UFC 115: Liddell vs. Franklin ·
Jun 12, 2010
Totals
| Fighter | KD | Sig. Str. | Sig. Str. % | Total Str. | TD | TD % | Sub. Att | Rev. | Ctrl |
|---|---|---|---|---|---|---|---|---|---|
| Martin Kampmann | 0 | 13 of 40 | 32% | 17 of 46 | 1 of 9 | 11% | 1 | 1 | 1:34 |
| Paulo Thiago | 0 | 24 of 59 | 40% | 47 of 83 | 1 of 3 | 33% | 3 | 0 | 7:01 |
Per Round
| Rd | Fighter | KD | Sig. Str. | Sig. Str. % | Total Str. | TD | TD % | Sub. Att | Rev. | Ctrl |
|---|---|---|---|---|---|---|---|---|---|---|
| 1 | Martin Kampmann | 0 | 6 of 18 | 33% | 6 of 18 | 1 of 5 | 20% | 0 | 0 | 0:59 |
| Paulo Thiago | 0 | 10 of 27 | 37% | 13 of 30 | 0 of 0 | --- | 2 | 0 | 0:30 | |
| 2 | Martin Kampmann | 0 | 5 of 15 | 33% | 8 of 20 | 0 of 1 | 0% | 1 | 1 | 0:29 |
| Paulo Thiago | 0 | 6 of 15 | 40% | 9 of 18 | 0 of 1 | 0% | 0 | 0 | 2:32 | |
| 3 | Martin Kampmann | 0 | 2 of 7 | 28% | 3 of 8 | 0 of 3 | 0% | 0 | 0 | 0:06 |
| Paulo Thiago | 0 | 8 of 17 | 47% | 25 of 35 | 1 of 2 | 50% | 1 | 0 | 3:59 |
Significant Strikes
| Fighter | Sig. Str. | Sig. Str. % | Head | Body | Leg | Distance | Clinch | Ground |
|---|---|---|---|---|---|---|---|---|
| Martin Kampmann | 13 of 40 | 32% | 8 of 34 | 2 of 3 | 3 of 3 | 9 of 33 | 2 of 5 | 2 of 2 |
| Paulo Thiago | 24 of 59 | 40% | 19 of 47 | 3 of 5 | 2 of 7 | 14 of 44 | 5 of 6 | 5 of 9 |
Significant Strikes Per Round
| Rd | Fighter | Sig. Str. | Sig. Str. % | Head | Body | Leg | Distance | Clinch | Ground |
|---|---|---|---|---|---|---|---|---|---|
| 1 | Martin Kampmann | 6 of 18 | 33% | 4 of 15 | 0 of 1 | 2 of 2 | 5 of 17 | 0 of 0 | 1 of 1 |
| Paulo Thiago | 10 of 27 | 37% | 9 of 21 | 1 of 2 | 0 of 4 | 10 of 27 | 0 of 0 | 0 of 0 | |
| 2 | Martin Kampmann | 5 of 15 | 33% | 3 of 13 | 1 of 1 | 1 of 1 | 3 of 12 | 1 of 2 | 1 of 1 |
| Paulo Thiago | 6 of 15 | 40% | 3 of 10 | 1 of 2 | 2 of 3 | 3 of 11 | 3 of 3 | 0 of 1 | |
| 3 | Martin Kampmann | 2 of 7 | 28% | 1 of 6 | 1 of 1 | 0 of 0 | 1 of 4 | 1 of 3 | 0 of 0 |
| Paulo Thiago | 8 of 17 | 47% | 7 of 16 | 1 of 1 | 0 of 0 | 1 of 6 | 2 of 3 | 5 of 8 |
No comments yet. Be the first to share your thoughts!