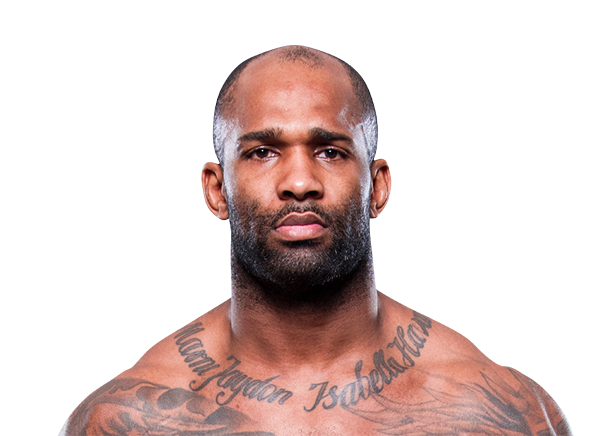
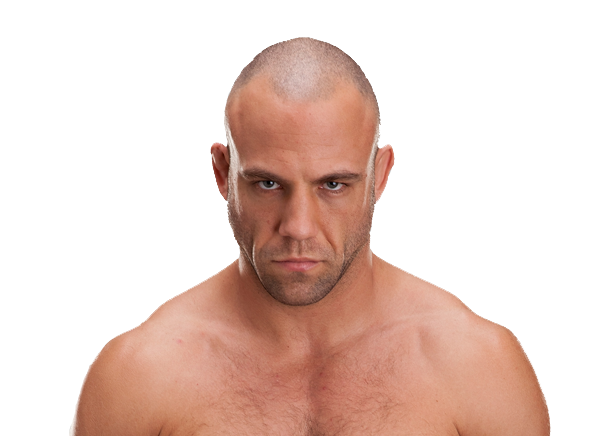
UFC on Fuel TV: Struve vs. Miocic ·
Sep 29, 2012 ·
Light Heavyweight ·
Completed
Career Averages - Jimi Manuwa
3.43
SLpM
54.0%
Str. Acc.
3.97
SApM
49.0%
Str. Def.
0.53
TD Avg
18.0%
TD Acc.
70.0%
TD Def.
0.4
Sub. Avg
Career Averages - Kyle Kingsbury
2.97
SLpM
40.0%
Str. Acc.
3.81
SApM
51.0%
Str. Def.
2.64
TD Avg
41.0%
TD Acc.
52.0%
TD Def.
0.0
Sub. Avg
Jimi Manuwa - Fight History
LOSS
vs
Aleksandar Rakić
KO (head kick)
R1
0:47
·
UFC Fight Night: Gustafsson vs. Smith ·
Jun 01, 2019
Totals
| Fighter | KD | Sig. Str. | Sig. Str. % | Total Str. | TD | TD % | Sub. Att | Rev. | Ctrl |
|---|---|---|---|---|---|---|---|---|---|
| Aleksandar Rakić | 0 | 2 of 3 | 66% | 2 of 3 | 0 of 0 | --- | 0 | 0 | 0:00 |
| Jimi Manuwa | 1 | 2 of 7 | 28% | 2 of 7 | 0 of 0 | --- | 0 | 0 | 0:01 |
Per Round
| Rd | Fighter | KD | Sig. Str. | Sig. Str. % | Total Str. | TD | TD % | Sub. Att | Rev. | Ctrl |
|---|---|---|---|---|---|---|---|---|---|---|
| 1 | Aleksandar Rakić | 0 | 2 of 3 | 66% | 2 of 3 | 0 of 0 | --- | 0 | 0 | 0:00 |
| Jimi Manuwa | 1 | 2 of 7 | 28% | 2 of 7 | 0 of 0 | --- | 0 | 0 | 0:01 |
Significant Strikes
| Fighter | Sig. Str. | Sig. Str. % | Head | Body | Leg | Distance | Clinch | Ground |
|---|---|---|---|---|---|---|---|---|
| Aleksandar Rakić | 2 of 3 | 66% | 1 of 2 | 0 of 0 | 1 of 1 | 2 of 3 | 0 of 0 | 0 of 0 |
| Jimi Manuwa | 2 of 7 | 28% | 1 of 5 | 0 of 0 | 1 of 2 | 2 of 7 | 0 of 0 | 0 of 0 |
Significant Strikes Per Round
| Rd | Fighter | Sig. Str. | Sig. Str. % | Head | Body | Leg | Distance | Clinch | Ground |
|---|---|---|---|---|---|---|---|---|---|
| 1 | Aleksandar Rakić | 2 of 3 | 66% | 1 of 2 | 0 of 0 | 1 of 1 | 2 of 3 | 0 of 0 | 0 of 0 |
| Jimi Manuwa | 2 of 7 | 28% | 1 of 5 | 0 of 0 | 1 of 2 | 2 of 7 | 0 of 0 | 0 of 0 |
Play-by-Play
View on SherdogJimi Manuwa vs. Aleksandar Rakic
Round 1
It’s now time for the co-main event, a light heavyweight bout between Aleksandar Rakic and Jimi Manuwa. Kevin Sataki is the referee. They touch gloves. Rakic with a low kick and Manuwa just misses landing a huge left hook.
Rakic lands a right uppercut and follows it up with a brutal left high kick that absolutely destroys Manuwa, who falls down on the mat completely knocked out cold
. Amazing KO win for Rakic, who looks like a real contender at 205lbs. Amazing win by Rakic tonight in Sweden.
The Official Result
Aleksandar Rakic def. Jimi Manuwa via KO (Head Kick) R1, 0:42
Round 1
It’s now time for the co-main event, a light heavyweight bout between Aleksandar Rakic and Jimi Manuwa. Kevin Sataki is the referee. They touch gloves. Rakic with a low kick and Manuwa just misses landing a huge left hook.
Rakic lands a right uppercut and follows it up with a brutal left high kick that absolutely destroys Manuwa, who falls down on the mat completely knocked out cold
. Amazing KO win for Rakic, who looks like a real contender at 205lbs. Amazing win by Rakic tonight in Sweden.
The Official Result
Aleksandar Rakic def. Jimi Manuwa via KO (Head Kick) R1, 0:42
LOSS
vs
Thiago Santos
KO (punch)
R2
0:41
·
UFC 231: Holloway vs. Ortega ·
Dec 08, 2018
Totals
| Fighter | KD | Sig. Str. | Sig. Str. % | Total Str. | TD | TD % | Sub. Att | Rev. | Ctrl |
|---|---|---|---|---|---|---|---|---|---|
| Thiago Santos | 0 | 27 of 42 | 64% | 30 of 45 | 0 of 2 | 0% | 0 | 0 | 2:25 |
| Jimi Manuwa | 2 | 42 of 74 | 56% | 65 of 97 | 1 of 3 | 33% | 0 | 0 | 1:19 |
Per Round
| Rd | Fighter | KD | Sig. Str. | Sig. Str. % | Total Str. | TD | TD % | Sub. Att | Rev. | Ctrl |
|---|---|---|---|---|---|---|---|---|---|---|
| 1 | Thiago Santos | 0 | 26 of 36 | 72% | 29 of 39 | 0 of 1 | 0% | 0 | 0 | 2:23 |
| Jimi Manuwa | 1 | 33 of 55 | 60% | 55 of 77 | 1 of 3 | 33% | 0 | 0 | 1:16 | |
| 2 | Thiago Santos | 0 | 1 of 6 | 16% | 1 of 6 | 0 of 1 | 0% | 0 | 0 | 0:02 |
| Jimi Manuwa | 1 | 9 of 19 | 47% | 10 of 20 | 0 of 0 | --- | 0 | 0 | 0:03 |
Significant Strikes
| Fighter | Sig. Str. | Sig. Str. % | Head | Body | Leg | Distance | Clinch | Ground |
|---|---|---|---|---|---|---|---|---|
| Thiago Santos | 27 of 42 | 64% | 15 of 30 | 12 of 12 | 0 of 0 | 8 of 20 | 17 of 19 | 2 of 3 |
| Jimi Manuwa | 42 of 74 | 56% | 27 of 58 | 13 of 14 | 2 of 2 | 20 of 45 | 22 of 28 | 0 of 1 |
Significant Strikes Per Round
| Rd | Fighter | Sig. Str. | Sig. Str. % | Head | Body | Leg | Distance | Clinch | Ground |
|---|---|---|---|---|---|---|---|---|---|
| 1 | Thiago Santos | 26 of 36 | 72% | 15 of 25 | 11 of 11 | 0 of 0 | 7 of 15 | 17 of 18 | 2 of 3 |
| Jimi Manuwa | 33 of 55 | 60% | 20 of 41 | 11 of 12 | 2 of 2 | 15 of 32 | 18 of 22 | 0 of 1 | |
| 2 | Thiago Santos | 1 of 6 | 16% | 0 of 5 | 1 of 1 | 0 of 0 | 1 of 5 | 0 of 1 | 0 of 0 |
| Jimi Manuwa | 9 of 19 | 47% | 7 of 17 | 2 of 2 | 0 of 0 | 5 of 13 | 4 of 6 | 0 of 0 |
LOSS
vs
Jan Błachowicz
Decision (unanimous) (29–28, 29–28, 30–27)
R3
5:00
·
UFC Fight Night: Werdum vs. Volkov ·
Mar 17, 2018
Totals
| Fighter | KD | Sig. Str. | Sig. Str. % | Total Str. | TD | TD % | Sub. Att | Rev. | Ctrl |
|---|---|---|---|---|---|---|---|---|---|
| Jan Błachowicz | 0 | 37 of 110 | 33% | 37 of 110 | 0 of 2 | 0% | 0 | 0 | 0:02 |
| Jimi Manuwa | 1 | 97 of 191 | 50% | 124 of 219 | 1 of 6 | 16% | 0 | 0 | 2:52 |
Per Round
| Rd | Fighter | KD | Sig. Str. | Sig. Str. % | Total Str. | TD | TD % | Sub. Att | Rev. | Ctrl |
|---|---|---|---|---|---|---|---|---|---|---|
| 1 | Jan Błachowicz | 0 | 8 of 33 | 24% | 8 of 33 | 0 of 1 | 0% | 0 | 0 | 0:02 |
| Jimi Manuwa | 1 | 27 of 65 | 41% | 38 of 76 | 0 of 1 | 0% | 0 | 0 | 1:04 | |
| 2 | Jan Błachowicz | 0 | 16 of 41 | 39% | 16 of 41 | 0 of 1 | 0% | 0 | 0 | 0:00 |
| Jimi Manuwa | 0 | 28 of 55 | 50% | 33 of 60 | 0 of 4 | 0% | 0 | 0 | 1:21 | |
| 3 | Jan Błachowicz | 0 | 13 of 36 | 36% | 13 of 36 | 0 of 0 | --- | 0 | 0 | 0:00 |
| Jimi Manuwa | 0 | 42 of 71 | 59% | 53 of 83 | 1 of 1 | 100% | 0 | 0 | 0:27 |
Significant Strikes
| Fighter | Sig. Str. | Sig. Str. % | Head | Body | Leg | Distance | Clinch | Ground |
|---|---|---|---|---|---|---|---|---|
| Jan Błachowicz | 37 of 110 | 33% | 16 of 79 | 17 of 23 | 4 of 8 | 32 of 104 | 5 of 6 | 0 of 0 |
| Jimi Manuwa | 97 of 191 | 50% | 81 of 171 | 11 of 15 | 5 of 5 | 88 of 178 | 8 of 12 | 1 of 1 |
Significant Strikes Per Round
| Rd | Fighter | Sig. Str. | Sig. Str. % | Head | Body | Leg | Distance | Clinch | Ground |
|---|---|---|---|---|---|---|---|---|---|
| 1 | Jan Błachowicz | 8 of 33 | 24% | 1 of 24 | 5 of 7 | 2 of 2 | 6 of 30 | 2 of 3 | 0 of 0 |
| Jimi Manuwa | 27 of 65 | 41% | 25 of 61 | 1 of 3 | 1 of 1 | 21 of 55 | 5 of 9 | 1 of 1 | |
| 2 | Jan Błachowicz | 16 of 41 | 39% | 8 of 29 | 7 of 9 | 1 of 3 | 13 of 38 | 3 of 3 | 0 of 0 |
| Jimi Manuwa | 28 of 55 | 50% | 23 of 49 | 3 of 4 | 2 of 2 | 25 of 52 | 3 of 3 | 0 of 0 | |
| 3 | Jan Błachowicz | 13 of 36 | 36% | 7 of 26 | 5 of 7 | 1 of 3 | 13 of 36 | 0 of 0 | 0 of 0 |
| Jimi Manuwa | 42 of 71 | 59% | 33 of 61 | 7 of 8 | 2 of 2 | 42 of 71 | 0 of 0 | 0 of 0 |
LOSS
vs
Volkan Oezdemir
KO (punches)
R1
0:42
·
UFC 214: Cormier vs. Jones 2 ·
Jul 29, 2017
Totals
| Fighter | KD | Sig. Str. | Sig. Str. % | Total Str. | TD | TD % | Sub. Att | Rev. | Ctrl |
|---|---|---|---|---|---|---|---|---|---|
| Volkan Oezdemir | 0 | 2 of 4 | 50% | 2 of 4 | 0 of 0 | --- | 0 | 0 | 0:15 |
| Jimi Manuwa | 0 | 12 of 19 | 63% | 13 of 20 | 0 of 0 | --- | 0 | 0 | 0:02 |
Per Round
| Rd | Fighter | KD | Sig. Str. | Sig. Str. % | Total Str. | TD | TD % | Sub. Att | Rev. | Ctrl |
|---|---|---|---|---|---|---|---|---|---|---|
| 1 | Volkan Oezdemir | 0 | 2 of 4 | 50% | 2 of 4 | 0 of 0 | --- | 0 | 0 | 0:15 |
| Jimi Manuwa | 0 | 12 of 19 | 63% | 13 of 20 | 0 of 0 | --- | 0 | 0 | 0:02 |
Significant Strikes
| Fighter | Sig. Str. | Sig. Str. % | Head | Body | Leg | Distance | Clinch | Ground |
|---|---|---|---|---|---|---|---|---|
| Volkan Oezdemir | 2 of 4 | 50% | 0 of 2 | 1 of 1 | 1 of 1 | 0 of 2 | 2 of 2 | 0 of 0 |
| Jimi Manuwa | 12 of 19 | 63% | 10 of 17 | 1 of 1 | 1 of 1 | 3 of 7 | 8 of 9 | 1 of 3 |
Significant Strikes Per Round
| Rd | Fighter | Sig. Str. | Sig. Str. % | Head | Body | Leg | Distance | Clinch | Ground |
|---|---|---|---|---|---|---|---|---|---|
| 1 | Volkan Oezdemir | 2 of 4 | 50% | 0 of 2 | 1 of 1 | 1 of 1 | 0 of 2 | 2 of 2 | 0 of 0 |
| Jimi Manuwa | 12 of 19 | 63% | 10 of 17 | 1 of 1 | 1 of 1 | 3 of 7 | 8 of 9 | 1 of 3 |
WIN
vs
Corey Anderson
KO (punch)
R1
3:05
·
UFC Fight Night: Manuwa vs. Anderson ·
Mar 18, 2017
Totals
| Fighter | KD | Sig. Str. | Sig. Str. % | Total Str. | TD | TD % | Sub. Att | Rev. | Ctrl |
|---|---|---|---|---|---|---|---|---|---|
| Jimi Manuwa | 1 | 6 of 13 | 46% | 6 of 13 | 0 of 0 | --- | 0 | 0 | 0:01 |
| Corey Anderson | 0 | 6 of 27 | 22% | 6 of 27 | 0 of 3 | 0% | 0 | 0 | 0:00 |
Per Round
| Rd | Fighter | KD | Sig. Str. | Sig. Str. % | Total Str. | TD | TD % | Sub. Att | Rev. | Ctrl |
|---|---|---|---|---|---|---|---|---|---|---|
| 1 | Jimi Manuwa | 1 | 6 of 13 | 46% | 6 of 13 | 0 of 0 | --- | 0 | 0 | 0:01 |
| Corey Anderson | 0 | 6 of 27 | 22% | 6 of 27 | 0 of 3 | 0% | 0 | 0 | 0:00 |
Significant Strikes
| Fighter | Sig. Str. | Sig. Str. % | Head | Body | Leg | Distance | Clinch | Ground |
|---|---|---|---|---|---|---|---|---|
| Jimi Manuwa | 6 of 13 | 46% | 5 of 11 | 0 of 1 | 1 of 1 | 6 of 13 | 0 of 0 | 0 of 0 |
| Corey Anderson | 6 of 27 | 22% | 4 of 24 | 0 of 1 | 2 of 2 | 5 of 26 | 1 of 1 | 0 of 0 |
Significant Strikes Per Round
| Rd | Fighter | Sig. Str. | Sig. Str. % | Head | Body | Leg | Distance | Clinch | Ground |
|---|---|---|---|---|---|---|---|---|---|
| 1 | Jimi Manuwa | 6 of 13 | 46% | 5 of 11 | 0 of 1 | 1 of 1 | 6 of 13 | 0 of 0 | 0 of 0 |
| Corey Anderson | 6 of 27 | 22% | 4 of 24 | 0 of 1 | 2 of 2 | 5 of 26 | 1 of 1 | 0 of 0 |
WIN
vs
Ovince Saint Preux
KO (punch)
R2
2:38
·
UFC 204: Bisping vs. Henderson 2 ·
Oct 08, 2016
Totals
| Fighter | KD | Sig. Str. | Sig. Str. % | Total Str. | TD | TD % | Sub. Att | Rev. | Ctrl |
|---|---|---|---|---|---|---|---|---|---|
| Jimi Manuwa | 0 | 13 of 38 | 34% | 17 of 44 | 2 of 3 | 66% | 0 | 0 | 3:27 |
| Ovince Saint Preux | 1 | 32 of 47 | 68% | 33 of 48 | 0 of 3 | 0% | 1 | 0 | 0:31 |
Per Round
| Rd | Fighter | KD | Sig. Str. | Sig. Str. % | Total Str. | TD | TD % | Sub. Att | Rev. | Ctrl |
|---|---|---|---|---|---|---|---|---|---|---|
| 1 | Jimi Manuwa | 0 | 7 of 17 | 41% | 11 of 23 | 2 of 2 | 100% | 0 | 0 | 3:14 |
| Ovince Saint Preux | 0 | 15 of 20 | 75% | 16 of 21 | 0 of 3 | 0% | 1 | 0 | 0:30 | |
| 2 | Jimi Manuwa | 0 | 6 of 21 | 28% | 6 of 21 | 0 of 1 | 0% | 0 | 0 | 0:13 |
| Ovince Saint Preux | 1 | 17 of 27 | 62% | 17 of 27 | 0 of 0 | --- | 0 | 0 | 0:01 |
Significant Strikes
| Fighter | Sig. Str. | Sig. Str. % | Head | Body | Leg | Distance | Clinch | Ground |
|---|---|---|---|---|---|---|---|---|
| Jimi Manuwa | 13 of 38 | 34% | 7 of 29 | 4 of 7 | 2 of 2 | 10 of 34 | 2 of 3 | 1 of 1 |
| Ovince Saint Preux | 32 of 47 | 68% | 12 of 25 | 9 of 11 | 11 of 11 | 20 of 32 | 12 of 14 | 0 of 1 |
Significant Strikes Per Round
| Rd | Fighter | Sig. Str. | Sig. Str. % | Head | Body | Leg | Distance | Clinch | Ground |
|---|---|---|---|---|---|---|---|---|---|
| 1 | Jimi Manuwa | 7 of 17 | 41% | 4 of 12 | 3 of 5 | 0 of 0 | 4 of 13 | 2 of 3 | 1 of 1 |
| Ovince Saint Preux | 15 of 20 | 75% | 2 of 6 | 5 of 6 | 8 of 8 | 3 of 6 | 12 of 14 | 0 of 0 | |
| 2 | Jimi Manuwa | 6 of 21 | 28% | 3 of 17 | 1 of 2 | 2 of 2 | 6 of 21 | 0 of 0 | 0 of 0 |
| Ovince Saint Preux | 17 of 27 | 62% | 10 of 19 | 4 of 5 | 3 of 3 | 17 of 26 | 0 of 0 | 0 of 1 |
LOSS
vs
Anthony Johnson
KO (punches)
R2
0:28
·
UFC 191: Johnson vs. Dodson 2 ·
Sep 05, 2015
Totals
| Fighter | KD | Sig. Str. | Sig. Str. % | Total Str. | TD | TD % | Sub. Att | Rev. | Ctrl |
|---|---|---|---|---|---|---|---|---|---|
| Anthony Johnson | 1 | 25 of 42 | 59% | 37 of 55 | 2 of 2 | 100% | 0 | 0 | 3:21 |
| Jimi Manuwa | 0 | 8 of 20 | 40% | 8 of 20 | 0 of 0 | --- | 0 | 0 | 0:51 |
Per Round
| Rd | Fighter | KD | Sig. Str. | Sig. Str. % | Total Str. | TD | TD % | Sub. Att | Rev. | Ctrl |
|---|---|---|---|---|---|---|---|---|---|---|
| 1 | Anthony Johnson | 0 | 18 of 28 | 64% | 30 of 41 | 2 of 2 | 100% | 0 | 0 | 3:18 |
| Jimi Manuwa | 0 | 6 of 15 | 40% | 6 of 15 | 0 of 0 | --- | 0 | 0 | 0:51 | |
| 2 | Anthony Johnson | 1 | 7 of 14 | 50% | 7 of 14 | 0 of 0 | --- | 0 | 0 | 0:03 |
| Jimi Manuwa | 0 | 2 of 5 | 40% | 2 of 5 | 0 of 0 | --- | 0 | 0 | 0:00 |
Significant Strikes
| Fighter | Sig. Str. | Sig. Str. % | Head | Body | Leg | Distance | Clinch | Ground |
|---|---|---|---|---|---|---|---|---|
| Anthony Johnson | 25 of 42 | 59% | 16 of 31 | 3 of 4 | 6 of 7 | 13 of 25 | 9 of 12 | 3 of 5 |
| Jimi Manuwa | 8 of 20 | 40% | 1 of 11 | 0 of 1 | 7 of 8 | 5 of 16 | 3 of 4 | 0 of 0 |
Significant Strikes Per Round
| Rd | Fighter | Sig. Str. | Sig. Str. % | Head | Body | Leg | Distance | Clinch | Ground |
|---|---|---|---|---|---|---|---|---|---|
| 1 | Anthony Johnson | 18 of 28 | 64% | 10 of 19 | 2 of 2 | 6 of 7 | 8 of 14 | 9 of 11 | 1 of 3 |
| Jimi Manuwa | 6 of 15 | 40% | 0 of 8 | 0 of 0 | 6 of 7 | 3 of 11 | 3 of 4 | 0 of 0 | |
| 2 | Anthony Johnson | 7 of 14 | 50% | 6 of 12 | 1 of 2 | 0 of 0 | 5 of 11 | 0 of 1 | 2 of 2 |
| Jimi Manuwa | 2 of 5 | 40% | 1 of 3 | 0 of 1 | 1 of 1 | 2 of 5 | 0 of 0 | 0 of 0 |
WIN
vs
Jan Błachowicz
Decision (unanimous) (30–27, 30–27, 29–28)
R3
5:00
·
UFC Fight Night: Gonzaga vs. Cro Cop 2 ·
Apr 11, 2015
Totals
| Fighter | KD | Sig. Str. | Sig. Str. % | Total Str. | TD | TD % | Sub. Att | Rev. | Ctrl |
|---|---|---|---|---|---|---|---|---|---|
| Jimi Manuwa | 0 | 43 of 86 | 50% | 81 of 130 | 0 of 2 | 0% | 0 | 0 | 5:43 |
| Jan Błachowicz | 0 | 44 of 106 | 41% | 58 of 120 | 0 of 3 | 0% | 0 | 0 | 0:29 |
Per Round
| Rd | Fighter | KD | Sig. Str. | Sig. Str. % | Total Str. | TD | TD % | Sub. Att | Rev. | Ctrl |
|---|---|---|---|---|---|---|---|---|---|---|
| 1 | Jimi Manuwa | 0 | 11 of 26 | 42% | 21 of 39 | 0 of 1 | 0% | 0 | 0 | 2:15 |
| Jan Błachowicz | 0 | 17 of 36 | 47% | 21 of 40 | 0 of 0 | --- | 0 | 0 | 0:19 | |
| 2 | Jimi Manuwa | 0 | 11 of 26 | 42% | 26 of 44 | 0 of 0 | --- | 0 | 0 | 1:35 |
| Jan Błachowicz | 0 | 11 of 35 | 31% | 17 of 41 | 0 of 1 | 0% | 0 | 0 | 0:07 | |
| 3 | Jimi Manuwa | 0 | 21 of 34 | 61% | 34 of 47 | 0 of 1 | 0% | 0 | 0 | 1:53 |
| Jan Błachowicz | 0 | 16 of 35 | 45% | 20 of 39 | 0 of 2 | 0% | 0 | 0 | 0:03 |
Significant Strikes
| Fighter | Sig. Str. | Sig. Str. % | Head | Body | Leg | Distance | Clinch | Ground |
|---|---|---|---|---|---|---|---|---|
| Jimi Manuwa | 43 of 86 | 50% | 15 of 46 | 16 of 25 | 12 of 15 | 30 of 69 | 13 of 17 | 0 of 0 |
| Jan Błachowicz | 44 of 106 | 41% | 25 of 77 | 17 of 26 | 2 of 3 | 33 of 90 | 11 of 16 | 0 of 0 |
Significant Strikes Per Round
| Rd | Fighter | Sig. Str. | Sig. Str. % | Head | Body | Leg | Distance | Clinch | Ground |
|---|---|---|---|---|---|---|---|---|---|
| 1 | Jimi Manuwa | 11 of 26 | 42% | 0 of 13 | 6 of 7 | 5 of 6 | 7 of 20 | 4 of 6 | 0 of 0 |
| Jan Błachowicz | 17 of 36 | 47% | 9 of 26 | 8 of 10 | 0 of 0 | 11 of 27 | 6 of 9 | 0 of 0 | |
| 2 | Jimi Manuwa | 11 of 26 | 42% | 2 of 12 | 6 of 10 | 3 of 4 | 7 of 22 | 4 of 4 | 0 of 0 |
| Jan Błachowicz | 11 of 35 | 31% | 5 of 23 | 5 of 10 | 1 of 2 | 9 of 33 | 2 of 2 | 0 of 0 | |
| 3 | Jimi Manuwa | 21 of 34 | 61% | 13 of 21 | 4 of 8 | 4 of 5 | 16 of 27 | 5 of 7 | 0 of 0 |
| Jan Błachowicz | 16 of 35 | 45% | 11 of 28 | 4 of 6 | 1 of 1 | 13 of 30 | 3 of 5 | 0 of 0 |
Play-by-Play
View on SherdogJan Blachowicz vs. Jimi Manuwa
Round 1
Manuwa presses the action in the opening minute, closing the gap on Blachowicz and backing the Polish big man up against the fence with probing punches. Blachowicz is biting on feints from Manuwa, and seems to be letting the "Poster Boy" play his game here in the first few minutes. Manuwa blasts Blachowicz's midsection with a kick; Blachowicz tries to do the same, but Manuwa slides out of range. Halfway through the round, Blachowicz turns the tides with an uppercut-right hand, and a barrage of follow-up punches. Manuwa hits the deck on his knees, Blachowicz tries to take the back but Manuwa powers back to his feet. Manuwa seems to have recovered quickly, but his nose is flowing with bloody after Blachowicz's thunderous combination. Blachowicz blitzes Manuwa and tries to take the back standing, but the Englishman turns his own back to the fence to prevent it. Blachowicz leans on Manuwa for a few seconds, but Manuwa breaks loose in the final 30 seconds. Manuwa tries to corner Blachowicz at the fence and throw punches, but it's Blachowicz landing the better shots with his counters.
Sherdog Scores
Tristen Critchfield scores the round 10-9 Blachowicz
Chris Nelson scores the round 10-9 Blachowicz
Josh Stillman scores the round 10-9 Blachowicz
Round 2
Manuwa waves his hands for Blachowicz to come forward and engage in a striking exchange early in round two. Blachowicz wants to stay on the outside, however, and snap off jabs in the Englishman's face. Blachowicz eats a hard shot, changes levels and scores a takedown, but Manuwa elevates the Pole and springs back to his feet within seconds. Manuwa is closing in on Blachowicz at the fence once again, and Blachowicz is waiting to sting the "Poster Boy" with another heavy counter combination. Blachowicz tags Manuwa with a left hook-uppercut, then changes levels as Manuwa comes forward to respond. Blachowicz traps Manuwa on the fence with an underhook, but Manuwa breaks loose and finds a home for a left hook. Blachowicz clinches up and puts Manuwa back on the fence, now with 90 seconds left in round two. Manuwa breaks loose and snaps back Blachowicz's head with a stiff double-jab. Manuwa sticks another hard jab, then swings a right high kick that doesn't quite catch Blachowicz cleanly.
Sherdog Scores
Tristen Critchfield scores the round 10-9 Manuwa
Chris Nelson scores the round 10-9 Manuwa
Josh Stillman scores the round 10-9 Blachowicz
Round 3
Manuwa marches forward on Blachowicz, who's waiting with his left-hook counter once again. This time, Manuwa lands a left, too, and the 205ers are swinging for the fences momentarily. Manuwa continues to be the man pressing the action, constantly moving forward and walking Blachowicz around the edge of the cage. Blachowicz touches Manuwa with a jab, a straight left, then takes a kick to the body in return. Blachowicz doubles up on his jab, then sidesteps to avoid Manuwa's counter. Blachowicz thumps Manuwa with a jab-cross as the Polish fighter continues to take control of the final frame with just under two minutes left to fight. Manuwa keeps pressing forward, but now he's walking into jabs and uppercuts, blood streaming down his face and chest. Blachowicz backs up the Londoner with a body kick, follows with a left hook. Thirty seconds left now, and Blachowicz may have just sealed the deal with a powerful double-leg takedown in the center of the cage. Manuwa looks exhausted, not even trying to get back to his feet as the final moments of the fight tick away.
Sherdog Scores
Tristen Critchfield scores the round 10-9 Blachowicz (29-28 Blachowicz)
Chris Nelson scores the round 10-9 Blachowicz (29-28 Blachowicz)
Josh Stillman scores the round 10-9 Blachowicz (30-27 Blachowicz)
The Official Result
Jan Blachowicz def. Jimi Manuwa via Unanimous Decision (30-27, 29-28, 29-28) R3 5:00
Round 1
Manuwa presses the action in the opening minute, closing the gap on Blachowicz and backing the Polish big man up against the fence with probing punches. Blachowicz is biting on feints from Manuwa, and seems to be letting the "Poster Boy" play his game here in the first few minutes. Manuwa blasts Blachowicz's midsection with a kick; Blachowicz tries to do the same, but Manuwa slides out of range. Halfway through the round, Blachowicz turns the tides with an uppercut-right hand, and a barrage of follow-up punches. Manuwa hits the deck on his knees, Blachowicz tries to take the back but Manuwa powers back to his feet. Manuwa seems to have recovered quickly, but his nose is flowing with bloody after Blachowicz's thunderous combination. Blachowicz blitzes Manuwa and tries to take the back standing, but the Englishman turns his own back to the fence to prevent it. Blachowicz leans on Manuwa for a few seconds, but Manuwa breaks loose in the final 30 seconds. Manuwa tries to corner Blachowicz at the fence and throw punches, but it's Blachowicz landing the better shots with his counters.
Sherdog Scores
Tristen Critchfield scores the round 10-9 Blachowicz
Chris Nelson scores the round 10-9 Blachowicz
Josh Stillman scores the round 10-9 Blachowicz
Round 2
Manuwa waves his hands for Blachowicz to come forward and engage in a striking exchange early in round two. Blachowicz wants to stay on the outside, however, and snap off jabs in the Englishman's face. Blachowicz eats a hard shot, changes levels and scores a takedown, but Manuwa elevates the Pole and springs back to his feet within seconds. Manuwa is closing in on Blachowicz at the fence once again, and Blachowicz is waiting to sting the "Poster Boy" with another heavy counter combination. Blachowicz tags Manuwa with a left hook-uppercut, then changes levels as Manuwa comes forward to respond. Blachowicz traps Manuwa on the fence with an underhook, but Manuwa breaks loose and finds a home for a left hook. Blachowicz clinches up and puts Manuwa back on the fence, now with 90 seconds left in round two. Manuwa breaks loose and snaps back Blachowicz's head with a stiff double-jab. Manuwa sticks another hard jab, then swings a right high kick that doesn't quite catch Blachowicz cleanly.
Sherdog Scores
Tristen Critchfield scores the round 10-9 Manuwa
Chris Nelson scores the round 10-9 Manuwa
Josh Stillman scores the round 10-9 Blachowicz
Round 3
Manuwa marches forward on Blachowicz, who's waiting with his left-hook counter once again. This time, Manuwa lands a left, too, and the 205ers are swinging for the fences momentarily. Manuwa continues to be the man pressing the action, constantly moving forward and walking Blachowicz around the edge of the cage. Blachowicz touches Manuwa with a jab, a straight left, then takes a kick to the body in return. Blachowicz doubles up on his jab, then sidesteps to avoid Manuwa's counter. Blachowicz thumps Manuwa with a jab-cross as the Polish fighter continues to take control of the final frame with just under two minutes left to fight. Manuwa keeps pressing forward, but now he's walking into jabs and uppercuts, blood streaming down his face and chest. Blachowicz backs up the Londoner with a body kick, follows with a left hook. Thirty seconds left now, and Blachowicz may have just sealed the deal with a powerful double-leg takedown in the center of the cage. Manuwa looks exhausted, not even trying to get back to his feet as the final moments of the fight tick away.
Sherdog Scores
Tristen Critchfield scores the round 10-9 Blachowicz (29-28 Blachowicz)
Chris Nelson scores the round 10-9 Blachowicz (29-28 Blachowicz)
Josh Stillman scores the round 10-9 Blachowicz (30-27 Blachowicz)
The Official Result
Jan Blachowicz def. Jimi Manuwa via Unanimous Decision (30-27, 29-28, 29-28) R3 5:00
Kyle Kingsbury - Fight History
LOSS
vs
Patrick Cummins
Decision (unanimous) (30–27, 30–25, 30–24)
R3
5:00
·
UFC on Fox: Lawler vs. Brown ·
Jul 26, 2014
Totals
| Fighter | KD | Sig. Str. | Sig. Str. % | Total Str. | TD | TD % | Sub. Att | Rev. | Ctrl |
|---|---|---|---|---|---|---|---|---|---|
| Patrick Cummins | 0 | 22 of 85 | 25% | 22 of 85 | 0 of 1 | 0% | 0 | 0 | 0:16 |
| Kyle Kingsbury | 0 | 73 of 129 | 56% | 115 of 176 | 10 of 17 | 58% | 0 | 0 | 9:33 |
Per Round
| Rd | Fighter | KD | Sig. Str. | Sig. Str. % | Total Str. | TD | TD % | Sub. Att | Rev. | Ctrl |
|---|---|---|---|---|---|---|---|---|---|---|
| 1 | Patrick Cummins | 0 | 10 of 25 | 40% | 10 of 25 | 0 of 0 | --- | 0 | 0 | 0:16 |
| Kyle Kingsbury | 0 | 19 of 35 | 54% | 30 of 47 | 4 of 7 | 57% | 0 | 0 | 3:24 | |
| 2 | Patrick Cummins | 0 | 7 of 35 | 20% | 7 of 35 | 0 of 0 | --- | 0 | 0 | 0:00 |
| Kyle Kingsbury | 0 | 32 of 49 | 65% | 52 of 71 | 3 of 5 | 60% | 0 | 0 | 3:08 | |
| 3 | Patrick Cummins | 0 | 5 of 25 | 20% | 5 of 25 | 0 of 1 | 0% | 0 | 0 | 0:00 |
| Kyle Kingsbury | 0 | 22 of 45 | 48% | 33 of 58 | 3 of 5 | 60% | 0 | 0 | 3:01 |
Significant Strikes
| Fighter | Sig. Str. | Sig. Str. % | Head | Body | Leg | Distance | Clinch | Ground |
|---|---|---|---|---|---|---|---|---|
| Patrick Cummins | 22 of 85 | 25% | 7 of 65 | 4 of 4 | 11 of 16 | 16 of 79 | 6 of 6 | 0 of 0 |
| Kyle Kingsbury | 73 of 129 | 56% | 66 of 120 | 5 of 7 | 2 of 2 | 19 of 53 | 10 of 13 | 44 of 63 |
Significant Strikes Per Round
| Rd | Fighter | Sig. Str. | Sig. Str. % | Head | Body | Leg | Distance | Clinch | Ground |
|---|---|---|---|---|---|---|---|---|---|
| 1 | Patrick Cummins | 10 of 25 | 40% | 3 of 15 | 2 of 2 | 5 of 8 | 5 of 20 | 5 of 5 | 0 of 0 |
| Kyle Kingsbury | 19 of 35 | 54% | 17 of 33 | 2 of 2 | 0 of 0 | 4 of 14 | 4 of 4 | 11 of 17 | |
| 2 | Patrick Cummins | 7 of 35 | 20% | 2 of 29 | 1 of 1 | 4 of 5 | 6 of 34 | 1 of 1 | 0 of 0 |
| Kyle Kingsbury | 32 of 49 | 65% | 27 of 44 | 3 of 3 | 2 of 2 | 10 of 20 | 2 of 2 | 20 of 27 | |
| 3 | Patrick Cummins | 5 of 25 | 20% | 2 of 21 | 1 of 1 | 2 of 3 | 5 of 25 | 0 of 0 | 0 of 0 |
| Kyle Kingsbury | 22 of 45 | 48% | 22 of 43 | 0 of 2 | 0 of 0 | 5 of 19 | 4 of 7 | 13 of 19 |
LOSS
vs
Jimi Manuwa
TKO (doctor stoppage)
R2
5:00
·
UFC on Fuel TV: Struve vs. Miocic ·
Sep 29, 2012
Totals
| Fighter | KD | Sig. Str. | Sig. Str. % | Total Str. | TD | TD % | Sub. Att | Rev. | Ctrl |
|---|---|---|---|---|---|---|---|---|---|
| Jimi Manuwa | 0 | 28 of 44 | 63% | 58 of 74 | 2 of 8 | 25% | 0 | 0 | 5:09 |
| Kyle Kingsbury | 1 | 53 of 77 | 68% | 55 of 79 | 0 of 0 | --- | 1 | 0 | 0:50 |
Per Round
| Rd | Fighter | KD | Sig. Str. | Sig. Str. % | Total Str. | TD | TD % | Sub. Att | Rev. | Ctrl |
|---|---|---|---|---|---|---|---|---|---|---|
| 1 | Jimi Manuwa | 0 | 9 of 18 | 50% | 14 of 23 | 0 of 5 | 0% | 0 | 0 | 2:06 |
| Kyle Kingsbury | 1 | 36 of 52 | 69% | 37 of 53 | 0 of 0 | --- | 0 | 0 | 0:17 | |
| 2 | Jimi Manuwa | 0 | 19 of 26 | 73% | 44 of 51 | 2 of 3 | 66% | 0 | 0 | 3:03 |
| Kyle Kingsbury | 0 | 17 of 25 | 68% | 18 of 26 | 0 of 0 | --- | 1 | 0 | 0:33 |
Significant Strikes
| Fighter | Sig. Str. | Sig. Str. % | Head | Body | Leg | Distance | Clinch | Ground |
|---|---|---|---|---|---|---|---|---|
| Jimi Manuwa | 28 of 44 | 63% | 4 of 20 | 9 of 9 | 15 of 15 | 11 of 26 | 17 of 18 | 0 of 0 |
| Kyle Kingsbury | 53 of 77 | 68% | 32 of 56 | 14 of 14 | 7 of 7 | 35 of 57 | 16 of 18 | 2 of 2 |
Significant Strikes Per Round
| Rd | Fighter | Sig. Str. | Sig. Str. % | Head | Body | Leg | Distance | Clinch | Ground |
|---|---|---|---|---|---|---|---|---|---|
| 1 | Jimi Manuwa | 9 of 18 | 50% | 3 of 12 | 2 of 2 | 4 of 4 | 6 of 15 | 3 of 3 | 0 of 0 |
| Kyle Kingsbury | 36 of 52 | 69% | 23 of 39 | 9 of 9 | 4 of 4 | 26 of 41 | 8 of 9 | 2 of 2 | |
| 2 | Jimi Manuwa | 19 of 26 | 73% | 1 of 8 | 7 of 7 | 11 of 11 | 5 of 11 | 14 of 15 | 0 of 0 |
| Kyle Kingsbury | 17 of 25 | 68% | 9 of 17 | 5 of 5 | 3 of 3 | 9 of 16 | 8 of 9 | 0 of 0 |
LOSS
vs
Glover Teixeira
Submission (arm-triangle choke)
R1
1:53
·
UFC 146: dos Santos vs. Mir ·
May 26, 2012
Totals
| Fighter | KD | Sig. Str. | Sig. Str. % | Total Str. | TD | TD % | Sub. Att | Rev. | Ctrl |
|---|---|---|---|---|---|---|---|---|---|
| Glover Teixeira | 0 | 5 of 19 | 26% | 5 of 19 | 0 of 1 | 0% | 0 | 0 | 0:00 |
| Kyle Kingsbury | 0 | 15 of 30 | 50% | 27 of 49 | 0 of 0 | --- | 1 | 0 | 1:07 |
Per Round
| Rd | Fighter | KD | Sig. Str. | Sig. Str. % | Total Str. | TD | TD % | Sub. Att | Rev. | Ctrl |
|---|---|---|---|---|---|---|---|---|---|---|
| 1 | Glover Teixeira | 0 | 5 of 19 | 26% | 5 of 19 | 0 of 1 | 0% | 0 | 0 | 0:00 |
| Kyle Kingsbury | 0 | 15 of 30 | 50% | 27 of 49 | 0 of 0 | --- | 1 | 0 | 1:07 |
Significant Strikes
| Fighter | Sig. Str. | Sig. Str. % | Head | Body | Leg | Distance | Clinch | Ground |
|---|---|---|---|---|---|---|---|---|
| Glover Teixeira | 5 of 19 | 26% | 1 of 13 | 2 of 4 | 2 of 2 | 4 of 16 | 1 of 3 | 0 of 0 |
| Kyle Kingsbury | 15 of 30 | 50% | 14 of 28 | 1 of 2 | 0 of 0 | 11 of 20 | 0 of 1 | 4 of 9 |
Significant Strikes Per Round
| Rd | Fighter | Sig. Str. | Sig. Str. % | Head | Body | Leg | Distance | Clinch | Ground |
|---|---|---|---|---|---|---|---|---|---|
| 1 | Glover Teixeira | 5 of 19 | 26% | 1 of 13 | 2 of 4 | 2 of 2 | 4 of 16 | 1 of 3 | 0 of 0 |
| Kyle Kingsbury | 15 of 30 | 50% | 14 of 28 | 1 of 2 | 0 of 0 | 11 of 20 | 0 of 1 | 4 of 9 |
LOSS
vs
Stephan Bonnar
Decision (unanimous) (30–25, 30–27, 30–27)
R3
5:00
·
UFC 139: Shogun vs. Henderson ·
Nov 19, 2011
Totals
| Fighter | KD | Sig. Str. | Sig. Str. % | Total Str. | TD | TD % | Sub. Att | Rev. | Ctrl |
|---|---|---|---|---|---|---|---|---|---|
| Stephan Bonnar | 0 | 36 of 74 | 48% | 133 of 183 | 4 of 6 | 66% | 1 | 0 | 10:38 |
| Kyle Kingsbury | 0 | 31 of 53 | 58% | 38 of 60 | 0 of 0 | --- | 0 | 0 | 0:58 |
Per Round
| Rd | Fighter | KD | Sig. Str. | Sig. Str. % | Total Str. | TD | TD % | Sub. Att | Rev. | Ctrl |
|---|---|---|---|---|---|---|---|---|---|---|
| 1 | Stephan Bonnar | 0 | 27 of 48 | 56% | 43 of 68 | 1 of 3 | 33% | 0 | 0 | 1:34 |
| Kyle Kingsbury | 0 | 23 of 36 | 63% | 29 of 42 | 0 of 0 | --- | 0 | 0 | 0:58 | |
| 2 | Stephan Bonnar | 0 | 3 of 13 | 23% | 45 of 59 | 1 of 1 | 100% | 1 | 0 | 4:26 |
| Kyle Kingsbury | 0 | 6 of 12 | 50% | 7 of 13 | 0 of 0 | --- | 0 | 0 | 0:00 | |
| 3 | Stephan Bonnar | 0 | 6 of 13 | 46% | 45 of 56 | 2 of 2 | 100% | 0 | 0 | 4:38 |
| Kyle Kingsbury | 0 | 2 of 5 | 40% | 2 of 5 | 0 of 0 | --- | 0 | 0 | 0:00 |
Significant Strikes
| Fighter | Sig. Str. | Sig. Str. % | Head | Body | Leg | Distance | Clinch | Ground |
|---|---|---|---|---|---|---|---|---|
| Stephan Bonnar | 36 of 74 | 48% | 18 of 51 | 11 of 14 | 7 of 9 | 12 of 36 | 15 of 19 | 9 of 19 |
| Kyle Kingsbury | 31 of 53 | 58% | 15 of 33 | 7 of 9 | 9 of 11 | 19 of 37 | 12 of 16 | 0 of 0 |
Significant Strikes Per Round
| Rd | Fighter | Sig. Str. | Sig. Str. % | Head | Body | Leg | Distance | Clinch | Ground |
|---|---|---|---|---|---|---|---|---|---|
| 1 | Stephan Bonnar | 27 of 48 | 56% | 13 of 30 | 7 of 9 | 7 of 9 | 8 of 23 | 15 of 19 | 4 of 6 |
| Kyle Kingsbury | 23 of 36 | 63% | 11 of 21 | 5 of 7 | 7 of 8 | 11 of 20 | 12 of 16 | 0 of 0 | |
| 2 | Stephan Bonnar | 3 of 13 | 23% | 2 of 11 | 1 of 2 | 0 of 0 | 2 of 10 | 0 of 0 | 1 of 3 |
| Kyle Kingsbury | 6 of 12 | 50% | 3 of 8 | 2 of 2 | 1 of 2 | 6 of 12 | 0 of 0 | 0 of 0 | |
| 3 | Stephan Bonnar | 6 of 13 | 46% | 3 of 10 | 3 of 3 | 0 of 0 | 2 of 3 | 0 of 0 | 4 of 10 |
| Kyle Kingsbury | 2 of 5 | 40% | 1 of 4 | 0 of 0 | 1 of 1 | 2 of 5 | 0 of 0 | 0 of 0 |
WIN
vs
Fábio Maldonado
Decision (unanimous) (29–28, 29–28, 29–28)
R3
5:00
·
The Ultimate Fighter: Team Lesnar vs. Team dos Santos Finale ·
Jun 04, 2011
Totals
| Fighter | KD | Sig. Str. | Sig. Str. % | Total Str. | TD | TD % | Sub. Att | Rev. | Ctrl |
|---|---|---|---|---|---|---|---|---|---|
| Kyle Kingsbury | 0 | 78 of 144 | 54% | 122 of 189 | 2 of 2 | 100% | 2 | 1 | 1:35 |
| Fábio Maldonado | 0 | 95 of 191 | 49% | 110 of 209 | 5 of 14 | 35% | 0 | 0 | 2:36 |
Per Round
| Rd | Fighter | KD | Sig. Str. | Sig. Str. % | Total Str. | TD | TD % | Sub. Att | Rev. | Ctrl |
|---|---|---|---|---|---|---|---|---|---|---|
| 1 | Kyle Kingsbury | 0 | 31 of 54 | 57% | 47 of 70 | 0 of 0 | --- | 1 | 0 | 0:04 |
| Fábio Maldonado | 0 | 42 of 88 | 47% | 48 of 94 | 2 of 3 | 66% | 0 | 0 | 0:57 | |
| 2 | Kyle Kingsbury | 0 | 13 of 40 | 32% | 28 of 56 | 0 of 0 | --- | 1 | 1 | 0:36 |
| Fábio Maldonado | 0 | 29 of 53 | 54% | 34 of 60 | 2 of 6 | 33% | 0 | 0 | 1:08 | |
| 3 | Kyle Kingsbury | 0 | 34 of 50 | 68% | 47 of 63 | 2 of 2 | 100% | 0 | 0 | 0:55 |
| Fábio Maldonado | 0 | 24 of 50 | 48% | 28 of 55 | 1 of 5 | 20% | 0 | 0 | 0:31 |
Significant Strikes
| Fighter | Sig. Str. | Sig. Str. % | Head | Body | Leg | Distance | Clinch | Ground |
|---|---|---|---|---|---|---|---|---|
| Kyle Kingsbury | 78 of 144 | 54% | 45 of 93 | 32 of 50 | 1 of 1 | 63 of 119 | 14 of 23 | 1 of 2 |
| Fábio Maldonado | 95 of 191 | 49% | 43 of 120 | 24 of 31 | 28 of 40 | 66 of 149 | 26 of 38 | 3 of 4 |
Significant Strikes Per Round
| Rd | Fighter | Sig. Str. | Sig. Str. % | Head | Body | Leg | Distance | Clinch | Ground |
|---|---|---|---|---|---|---|---|---|---|
| 1 | Kyle Kingsbury | 31 of 54 | 57% | 19 of 35 | 12 of 19 | 0 of 0 | 25 of 45 | 6 of 9 | 0 of 0 |
| Fábio Maldonado | 42 of 88 | 47% | 23 of 61 | 8 of 12 | 11 of 15 | 26 of 65 | 13 of 19 | 3 of 4 | |
| 2 | Kyle Kingsbury | 13 of 40 | 32% | 4 of 24 | 8 of 15 | 1 of 1 | 10 of 31 | 3 of 8 | 0 of 1 |
| Fábio Maldonado | 29 of 53 | 54% | 11 of 30 | 10 of 12 | 8 of 11 | 22 of 43 | 7 of 10 | 0 of 0 | |
| 3 | Kyle Kingsbury | 34 of 50 | 68% | 22 of 34 | 12 of 16 | 0 of 0 | 28 of 43 | 5 of 6 | 1 of 1 |
| Fábio Maldonado | 24 of 50 | 48% | 9 of 29 | 6 of 7 | 9 of 14 | 18 of 41 | 6 of 9 | 0 of 0 |
WIN
vs
Ricardo Romero
TKO (punches)
R1
0:21
·
UFC 126: Silva vs. Belfort ·
Feb 05, 2011
Totals
| Fighter | KD | Sig. Str. | Sig. Str. % | Total Str. | TD | TD % | Sub. Att | Rev. | Ctrl |
|---|---|---|---|---|---|---|---|---|---|
| Kyle Kingsbury | 1 | 9 of 13 | 69% | 12 of 16 | 0 of 0 | --- | 0 | 0 | 0:07 |
| Ricardo Romero | 0 | 1 of 3 | 33% | 1 of 3 | 0 of 0 | --- | 0 | 0 | 0:00 |
Per Round
| Rd | Fighter | KD | Sig. Str. | Sig. Str. % | Total Str. | TD | TD % | Sub. Att | Rev. | Ctrl |
|---|---|---|---|---|---|---|---|---|---|---|
| 1 | Kyle Kingsbury | 1 | 9 of 13 | 69% | 12 of 16 | 0 of 0 | --- | 0 | 0 | 0:07 |
| Ricardo Romero | 0 | 1 of 3 | 33% | 1 of 3 | 0 of 0 | --- | 0 | 0 | 0:00 |
Significant Strikes
| Fighter | Sig. Str. | Sig. Str. % | Head | Body | Leg | Distance | Clinch | Ground |
|---|---|---|---|---|---|---|---|---|
| Kyle Kingsbury | 9 of 13 | 69% | 5 of 9 | 3 of 3 | 1 of 1 | 2 of 3 | 5 of 6 | 2 of 4 |
| Ricardo Romero | 1 of 3 | 33% | 1 of 3 | 0 of 0 | 0 of 0 | 1 of 3 | 0 of 0 | 0 of 0 |
Significant Strikes Per Round
| Rd | Fighter | Sig. Str. | Sig. Str. % | Head | Body | Leg | Distance | Clinch | Ground |
|---|---|---|---|---|---|---|---|---|---|
| 1 | Kyle Kingsbury | 9 of 13 | 69% | 5 of 9 | 3 of 3 | 1 of 1 | 2 of 3 | 5 of 6 | 2 of 4 |
| Ricardo Romero | 1 of 3 | 33% | 1 of 3 | 0 of 0 | 0 of 0 | 1 of 3 | 0 of 0 | 0 of 0 |
WIN
vs
Jared Hamman
Decision (unanimous) (29–28, 29–28, 29–28)
R3
5:00
·
UFC Fight Night: Marquardt vs. Palhares ·
Sep 15, 2010
Totals
| Fighter | KD | Sig. Str. | Sig. Str. % | Total Str. | TD | TD % | Sub. Att | Rev. | Ctrl |
|---|---|---|---|---|---|---|---|---|---|
| Kyle Kingsbury | 0 | 88 of 239 | 36% | 146 of 298 | 0 of 2 | 0% | 0 | 0 | 0:14 |
| Jared Hamman | 0 | 79 of 219 | 36% | 88 of 229 | 9 of 13 | 69% | 0 | 0 | 4:48 |
Per Round
| Rd | Fighter | KD | Sig. Str. | Sig. Str. % | Total Str. | TD | TD % | Sub. Att | Rev. | Ctrl |
|---|---|---|---|---|---|---|---|---|---|---|
| 1 | Kyle Kingsbury | 0 | 13 of 47 | 27% | 41 of 75 | 0 of 0 | --- | 0 | 0 | 0:05 |
| Jared Hamman | 0 | 25 of 51 | 49% | 32 of 59 | 4 of 5 | 80% | 0 | 0 | 2:52 | |
| 2 | Kyle Kingsbury | 0 | 27 of 86 | 31% | 50 of 110 | 0 of 1 | 0% | 0 | 0 | 0:09 |
| Jared Hamman | 0 | 33 of 97 | 34% | 34 of 98 | 3 of 4 | 75% | 0 | 0 | 1:11 | |
| 3 | Kyle Kingsbury | 0 | 48 of 106 | 45% | 55 of 113 | 0 of 1 | 0% | 0 | 0 | 0:00 |
| Jared Hamman | 0 | 21 of 71 | 29% | 22 of 72 | 2 of 4 | 50% | 0 | 0 | 0:45 |
Significant Strikes
| Fighter | Sig. Str. | Sig. Str. % | Head | Body | Leg | Distance | Clinch | Ground |
|---|---|---|---|---|---|---|---|---|
| Kyle Kingsbury | 88 of 239 | 36% | 65 of 203 | 14 of 22 | 9 of 14 | 77 of 211 | 8 of 20 | 3 of 8 |
| Jared Hamman | 79 of 219 | 36% | 48 of 175 | 10 of 16 | 21 of 28 | 72 of 206 | 5 of 9 | 2 of 4 |
Significant Strikes Per Round
| Rd | Fighter | Sig. Str. | Sig. Str. % | Head | Body | Leg | Distance | Clinch | Ground |
|---|---|---|---|---|---|---|---|---|---|
| 1 | Kyle Kingsbury | 13 of 47 | 27% | 7 of 35 | 3 of 7 | 3 of 5 | 11 of 38 | 1 of 6 | 1 of 3 |
| Jared Hamman | 25 of 51 | 49% | 11 of 35 | 6 of 7 | 8 of 9 | 20 of 42 | 4 of 6 | 1 of 3 | |
| 2 | Kyle Kingsbury | 27 of 86 | 31% | 21 of 75 | 5 of 8 | 1 of 3 | 22 of 76 | 3 of 5 | 2 of 5 |
| Jared Hamman | 33 of 97 | 34% | 24 of 80 | 4 of 6 | 5 of 11 | 31 of 93 | 1 of 3 | 1 of 1 | |
| 3 | Kyle Kingsbury | 48 of 106 | 45% | 37 of 93 | 6 of 7 | 5 of 6 | 44 of 97 | 4 of 9 | 0 of 0 |
| Jared Hamman | 21 of 71 | 29% | 13 of 60 | 0 of 3 | 8 of 8 | 21 of 71 | 0 of 0 | 0 of 0 |
WIN
vs
Razak Al-Hassan
Decision (split) (28–29, 29–28, 29–28)
R3
5:00
·
UFC 104: Machida vs. Shogun ·
Oct 24, 2009
Totals
| Fighter | KD | Sig. Str. | Sig. Str. % | Total Str. | TD | TD % | Sub. Att | Rev. | Ctrl |
|---|---|---|---|---|---|---|---|---|---|
| Kyle Kingsbury | 0 | 25 of 98 | 25% | 76 of 149 | 2 of 6 | 33% | 0 | 0 | 5:29 |
| Razak Al-Hassan | 0 | 31 of 79 | 39% | 45 of 93 | 1 of 4 | 25% | 0 | 1 | 3:49 |
Per Round
| Rd | Fighter | KD | Sig. Str. | Sig. Str. % | Total Str. | TD | TD % | Sub. Att | Rev. | Ctrl |
|---|---|---|---|---|---|---|---|---|---|---|
| 1 | Kyle Kingsbury | 0 | 7 of 25 | 28% | 48 of 66 | 1 of 1 | 100% | 0 | 0 | 3:36 |
| Razak Al-Hassan | 0 | 7 of 19 | 36% | 11 of 23 | 1 of 1 | 100% | 0 | 0 | 0:17 | |
| 2 | Kyle Kingsbury | 0 | 9 of 26 | 34% | 16 of 33 | 1 of 3 | 33% | 0 | 0 | 1:14 |
| Razak Al-Hassan | 0 | 9 of 24 | 37% | 16 of 31 | 0 of 3 | 0% | 0 | 1 | 2:25 | |
| 3 | Kyle Kingsbury | 0 | 9 of 47 | 19% | 12 of 50 | 0 of 2 | 0% | 0 | 0 | 0:39 |
| Razak Al-Hassan | 0 | 15 of 36 | 41% | 18 of 39 | 0 of 0 | --- | 0 | 0 | 1:07 |
Significant Strikes
| Fighter | Sig. Str. | Sig. Str. % | Head | Body | Leg | Distance | Clinch | Ground |
|---|---|---|---|---|---|---|---|---|
| Kyle Kingsbury | 25 of 98 | 25% | 8 of 69 | 6 of 10 | 11 of 19 | 17 of 83 | 5 of 9 | 3 of 6 |
| Razak Al-Hassan | 31 of 79 | 39% | 13 of 50 | 7 of 13 | 11 of 16 | 26 of 63 | 5 of 15 | 0 of 1 |
Significant Strikes Per Round
| Rd | Fighter | Sig. Str. | Sig. Str. % | Head | Body | Leg | Distance | Clinch | Ground |
|---|---|---|---|---|---|---|---|---|---|
| 1 | Kyle Kingsbury | 7 of 25 | 28% | 4 of 21 | 0 of 0 | 3 of 4 | 6 of 21 | 0 of 0 | 1 of 4 |
| Razak Al-Hassan | 7 of 19 | 36% | 2 of 12 | 1 of 2 | 4 of 5 | 7 of 19 | 0 of 0 | 0 of 0 | |
| 2 | Kyle Kingsbury | 9 of 26 | 34% | 3 of 16 | 5 of 7 | 1 of 3 | 5 of 20 | 2 of 4 | 2 of 2 |
| Razak Al-Hassan | 9 of 24 | 37% | 3 of 15 | 2 of 5 | 4 of 4 | 5 of 12 | 4 of 11 | 0 of 1 | |
| 3 | Kyle Kingsbury | 9 of 47 | 19% | 1 of 32 | 1 of 3 | 7 of 12 | 6 of 42 | 3 of 5 | 0 of 0 |
| Razak Al-Hassan | 15 of 36 | 41% | 8 of 23 | 4 of 6 | 3 of 7 | 14 of 32 | 1 of 4 | 0 of 0 |
No comments yet. Be the first to share your thoughts!