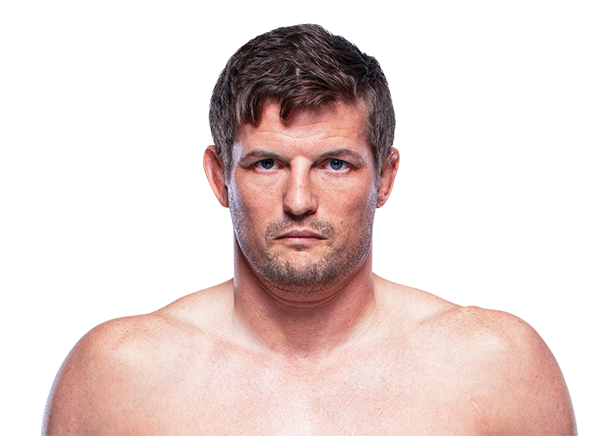
Career Averages - Bobby Moffett
Career Averages - Chas Skelly
Bobby Moffett - Fight History
Totals
| Fighter | KD | Sig. Str. | Sig. Str. % | Total Str. | TD | TD % | Sub. Att | Rev. | Ctrl |
|---|---|---|---|---|---|---|---|---|---|
| Enrique Barzola | 0 | 83 of 239 | 34% | 88 of 244 | 3 of 7 | 42% | 0 | 0 | 0:41 |
| Bobby Moffett | 0 | 90 of 236 | 38% | 98 of 247 | 0 of 1 | 0% | 0 | 0 | 0:24 |
Per Round
| Rd | Fighter | KD | Sig. Str. | Sig. Str. % | Total Str. | TD | TD % | Sub. Att | Rev. | Ctrl |
|---|---|---|---|---|---|---|---|---|---|---|
| 1 | Enrique Barzola | 0 | 28 of 75 | 37% | 28 of 75 | 1 of 1 | 100% | 0 | 0 | 0:04 |
| Bobby Moffett | 0 | 24 of 68 | 35% | 24 of 68 | 0 of 0 | --- | 0 | 0 | 0:00 | |
| 2 | Enrique Barzola | 0 | 28 of 88 | 31% | 28 of 88 | 1 of 4 | 25% | 0 | 0 | 0:18 |
| Bobby Moffett | 0 | 33 of 81 | 40% | 34 of 83 | 0 of 1 | 0% | 0 | 0 | 0:10 | |
| 3 | Enrique Barzola | 0 | 27 of 76 | 35% | 32 of 81 | 1 of 2 | 50% | 0 | 0 | 0:19 |
| Bobby Moffett | 0 | 33 of 87 | 37% | 40 of 96 | 0 of 0 | --- | 0 | 0 | 0:14 |
Significant Strikes
| Fighter | Sig. Str. | Sig. Str. % | Head | Body | Leg | Distance | Clinch | Ground |
|---|---|---|---|---|---|---|---|---|
| Enrique Barzola | 83 of 239 | 34% | 51 of 199 | 24 of 32 | 8 of 8 | 82 of 235 | 1 of 4 | 0 of 0 |
| Bobby Moffett | 90 of 236 | 38% | 56 of 188 | 21 of 32 | 13 of 16 | 88 of 231 | 2 of 5 | 0 of 0 |
Significant Strikes Per Round
| Rd | Fighter | Sig. Str. | Sig. Str. % | Head | Body | Leg | Distance | Clinch | Ground |
|---|---|---|---|---|---|---|---|---|---|
| 1 | Enrique Barzola | 28 of 75 | 37% | 15 of 62 | 9 of 9 | 4 of 4 | 28 of 73 | 0 of 2 | 0 of 0 |
| Bobby Moffett | 24 of 68 | 35% | 11 of 52 | 7 of 9 | 6 of 7 | 24 of 68 | 0 of 0 | 0 of 0 | |
| 2 | Enrique Barzola | 28 of 88 | 31% | 20 of 76 | 5 of 9 | 3 of 3 | 27 of 86 | 1 of 2 | 0 of 0 |
| Bobby Moffett | 33 of 81 | 40% | 21 of 65 | 8 of 12 | 4 of 4 | 31 of 76 | 2 of 5 | 0 of 0 | |
| 3 | Enrique Barzola | 27 of 76 | 35% | 16 of 61 | 10 of 14 | 1 of 1 | 27 of 76 | 0 of 0 | 0 of 0 |
| Bobby Moffett | 33 of 87 | 37% | 24 of 71 | 6 of 11 | 3 of 5 | 33 of 87 | 0 of 0 | 0 of 0 |
Totals
| Fighter | KD | Sig. Str. | Sig. Str. % | Total Str. | TD | TD % | Sub. Att | Rev. | Ctrl |
|---|---|---|---|---|---|---|---|---|---|
| Bryce Mitchell | 0 | 17 of 44 | 38% | 28 of 56 | 0 of 3 | 0% | 2 | 1 | 3:13 |
| Bobby Moffett | 0 | 9 of 42 | 21% | 25 of 63 | 5 of 8 | 62% | 2 | 1 | 6:02 |
Per Round
| Rd | Fighter | KD | Sig. Str. | Sig. Str. % | Total Str. | TD | TD % | Sub. Att | Rev. | Ctrl |
|---|---|---|---|---|---|---|---|---|---|---|
| 1 | Bryce Mitchell | 0 | 7 of 17 | 41% | 8 of 18 | 0 of 2 | 0% | 1 | 0 | 0:58 |
| Bobby Moffett | 0 | 2 of 17 | 11% | 3 of 18 | 1 of 2 | 50% | 0 | 0 | 1:25 | |
| 2 | Bryce Mitchell | 0 | 7 of 16 | 43% | 15 of 25 | 0 of 0 | --- | 0 | 0 | 0:47 |
| Bobby Moffett | 0 | 3 of 14 | 21% | 5 of 17 | 2 of 2 | 100% | 1 | 1 | 2:01 | |
| 3 | Bryce Mitchell | 0 | 3 of 11 | 27% | 5 of 13 | 0 of 1 | 0% | 1 | 1 | 1:28 |
| Bobby Moffett | 0 | 4 of 11 | 36% | 17 of 28 | 2 of 4 | 50% | 1 | 0 | 2:36 |
Significant Strikes
| Fighter | Sig. Str. | Sig. Str. % | Head | Body | Leg | Distance | Clinch | Ground |
|---|---|---|---|---|---|---|---|---|
| Bryce Mitchell | 17 of 44 | 38% | 7 of 29 | 7 of 11 | 3 of 4 | 16 of 41 | 1 of 3 | 0 of 0 |
| Bobby Moffett | 9 of 42 | 21% | 5 of 37 | 1 of 2 | 3 of 3 | 8 of 41 | 1 of 1 | 0 of 0 |
Significant Strikes Per Round
| Rd | Fighter | Sig. Str. | Sig. Str. % | Head | Body | Leg | Distance | Clinch | Ground |
|---|---|---|---|---|---|---|---|---|---|
| 1 | Bryce Mitchell | 7 of 17 | 41% | 3 of 10 | 2 of 4 | 2 of 3 | 6 of 14 | 1 of 3 | 0 of 0 |
| Bobby Moffett | 2 of 17 | 11% | 2 of 17 | 0 of 0 | 0 of 0 | 2 of 17 | 0 of 0 | 0 of 0 | |
| 2 | Bryce Mitchell | 7 of 16 | 43% | 3 of 10 | 3 of 5 | 1 of 1 | 7 of 16 | 0 of 0 | 0 of 0 |
| Bobby Moffett | 3 of 14 | 21% | 0 of 10 | 1 of 2 | 2 of 2 | 2 of 13 | 1 of 1 | 0 of 0 | |
| 3 | Bryce Mitchell | 3 of 11 | 27% | 1 of 9 | 2 of 2 | 0 of 0 | 3 of 11 | 0 of 0 | 0 of 0 |
| Bobby Moffett | 4 of 11 | 36% | 3 of 10 | 0 of 0 | 1 of 1 | 4 of 11 | 0 of 0 | 0 of 0 |
Play-by-Play
View on SherdogRound 1
The final preliminary card bout is a featherweight fight between Bobby Moffett and Bryce Mitchell. The referee is Ricky Parker. No touch of gloves between these two. Mitchell takes the center of the Octagon right away and lands a kick to the body. He nearly lands a head kick that is blocked by Moffett, who fires back with a left hook. Mitchell nearly lands another head kick that is blocked. Mitchell with a straight right that drops Moffett. But Moffett recovers quickly and gets a single leg takedown. Mitchell escapes and is back on the feet but Moffett drags him back down the ground. On the ground Mitchell nearly takes the back of Moffett but Moffett sweeps him and gets on top. Mitchell locks in a triangle from the bottom and is working to submit Moffett. Mitchell transitions into an armbar and Moffett appears to be in serious trouble but is able to scramble and escape. They are both back on the feet now. Moffett with a short right hook that hurts Mitchell. He is backing up Mitchell against the fence but Mitchell changes levels and is looking for a double leg takedown. Moffett stuffs it and they break. Moffett moves forward and Mitchell lands a straight right. Moffett clinches Mitchell against the fence. Mitchell swaps positions along the fence but there’s 10 seconds left and not enough time to do anything. The round is over.
Sherdog Scores
Adam Martin scores the round: 10-9 Mitchell
Tyler Treese scores the round: 10-9 Mitchell
Scottie Smith scores the round: 10-9 Mitchell
Round 2
Round two begins. Mitchell with a hard body kick to the midsection of Moffett. Now Moffett changes levels and lands a double leg takedown. He’s on top of Mitchell on the ground and is landing some hard ground and pound. Moffett has Mitchell pressed into the corner of the Octagon and is looking to take the back of Mitchell. But Mitchell is able to scramble and stand back up. They are back in the center of the Octagon. Mitchell with a spinning back kick. Mitchell with a jab. Moffett is walking forward but Mitchell is doing a good job of landing on him as he backs up. Moffett closes the distance and lands a body lock takedown. He’s on top of Mitchell up against the cage now. Moffett is looking for his signature move, the Brabo choke. He has it locked in tight. Mitchell is trying to escape but Moffett isn’t letting go. Finally Moffett is forced to let go of the choke attempt. In a scramble Mitchell takes the back of Moffett and he puts him in the crucifix position. Mitchell switches to an inverted armbar but Moffett is able to scramble and get out of it. Moffett ends up on top and the round is over.
Sherdog Scores
Adam Martin scores the round: 10-9 Moffett
Tyler Treese scores the round: 10-9 Moffett
Scottie Smith scores the round: 10-9 Moffett
Round 3
Third and final round begins. Moffett starts off with a jab but Mitchell lands a left hook that pushes Moffett backwards. Moffett changes levels and looks for a double leg takedown but Mitchell stuffs it. Moffett changes levels again and this time gets the double leg. Moffett is on top and Mitchell attempts an armbar but Moffett is able to scramble out of it and land in mount. Mitchell gets him into half guard and uses it to stand back up. They are back on the feet now. Mitchell lands a right hook on Moffett, who fails on a body lock takedown attempt. But Moffett continues to power forward and lands a double leg takedown. Moffett is on top of Mitchell working in half guard. Moffett lands some ground and pound and then looks to lock in the Brabo choke once again. Mitchell is able to scramble out of it and reverse position. He takes the back of Moffett and has a rear-naked choke locked in super tight. It looks like Moffett is able to slip out of the choke but Mitchell still has his back. He is looking to adjust his arm and get the choke but Moffett slips out of it. Moffett is able to stand back up to his feet and the round and fight are over.
Sherdog Scores
Adam Martin scores the round: 10-9 Moffett (29-28 Moffett)
Tyler Treese scores the round: 10-9 Mitchell (29-28 Mitchell)
Scottie Smith scores the round: 10-9 Mitchell (29-28 Mitchell)
The Official Result
Bryce Mitchell def. Bobby Moffett via Unanimous Decision (29-28, 29-28, 29-28)
Totals
| Fighter | KD | Sig. Str. | Sig. Str. % | Total Str. | TD | TD % | Sub. Att | Rev. | Ctrl |
|---|---|---|---|---|---|---|---|---|---|
| Bobby Moffett | 0 | 30 of 60 | 50% | 47 of 81 | 1 of 2 | 50% | 0 | 1 | 3:38 |
| Chas Skelly | 0 | 20 of 56 | 35% | 21 of 57 | 1 of 1 | 100% | 1 | 0 | 1:14 |
Per Round
| Rd | Fighter | KD | Sig. Str. | Sig. Str. % | Total Str. | TD | TD % | Sub. Att | Rev. | Ctrl |
|---|---|---|---|---|---|---|---|---|---|---|
| 1 | Bobby Moffett | 0 | 24 of 40 | 60% | 41 of 61 | 1 of 2 | 50% | 0 | 0 | 3:23 |
| Chas Skelly | 0 | 12 of 32 | 37% | 13 of 33 | 0 of 0 | --- | 0 | 0 | 0:00 | |
| 2 | Bobby Moffett | 0 | 6 of 20 | 30% | 6 of 20 | 0 of 0 | --- | 0 | 1 | 0:15 |
| Chas Skelly | 0 | 8 of 24 | 33% | 8 of 24 | 1 of 1 | 100% | 1 | 0 | 1:14 |
Significant Strikes
| Fighter | Sig. Str. | Sig. Str. % | Head | Body | Leg | Distance | Clinch | Ground |
|---|---|---|---|---|---|---|---|---|
| Bobby Moffett | 30 of 60 | 50% | 26 of 55 | 3 of 4 | 1 of 1 | 15 of 44 | 15 of 16 | 0 of 0 |
| Chas Skelly | 20 of 56 | 35% | 13 of 47 | 1 of 2 | 6 of 7 | 18 of 51 | 1 of 4 | 1 of 1 |
Significant Strikes Per Round
| Rd | Fighter | Sig. Str. | Sig. Str. % | Head | Body | Leg | Distance | Clinch | Ground |
|---|---|---|---|---|---|---|---|---|---|
| 1 | Bobby Moffett | 24 of 40 | 60% | 21 of 37 | 2 of 2 | 1 of 1 | 9 of 24 | 15 of 16 | 0 of 0 |
| Chas Skelly | 12 of 32 | 37% | 8 of 27 | 0 of 1 | 4 of 4 | 11 of 28 | 1 of 4 | 0 of 0 | |
| 2 | Bobby Moffett | 6 of 20 | 30% | 5 of 18 | 1 of 2 | 0 of 0 | 6 of 20 | 0 of 0 | 0 of 0 |
| Chas Skelly | 8 of 24 | 33% | 5 of 20 | 1 of 1 | 2 of 3 | 7 of 23 | 0 of 0 | 1 of 1 |
Chas Skelly - Fight History
Totals
| Fighter | KD | Sig. Str. | Sig. Str. % | Total Str. | TD | TD % | Sub. Att | Rev. | Ctrl |
|---|---|---|---|---|---|---|---|---|---|
| Chas Skelly | 1 | 14 of 30 | 46% | 45 of 63 | 1 of 3 | 33% | 0 | 0 | 3:43 |
| Mark Striegl | 0 | 8 of 17 | 47% | 34 of 44 | 0 of 2 | 0% | 0 | 0 | 1:22 |
Per Round
| Rd | Fighter | KD | Sig. Str. | Sig. Str. % | Total Str. | TD | TD % | Sub. Att | Rev. | Ctrl |
|---|---|---|---|---|---|---|---|---|---|---|
| 1 | Chas Skelly | 0 | 3 of 8 | 37% | 34 of 41 | 1 of 2 | 50% | 0 | 0 | 2:51 |
| Mark Striegl | 0 | 4 of 7 | 57% | 29 of 33 | 0 of 2 | 0% | 0 | 0 | 1:15 | |
| 2 | Chas Skelly | 1 | 11 of 22 | 50% | 11 of 22 | 0 of 1 | 0% | 0 | 0 | 0:52 |
| Mark Striegl | 0 | 4 of 10 | 40% | 5 of 11 | 0 of 0 | --- | 0 | 0 | 0:07 |
Significant Strikes
| Fighter | Sig. Str. | Sig. Str. % | Head | Body | Leg | Distance | Clinch | Ground |
|---|---|---|---|---|---|---|---|---|
| Chas Skelly | 14 of 30 | 46% | 12 of 27 | 2 of 3 | 0 of 0 | 7 of 19 | 3 of 3 | 4 of 8 |
| Mark Striegl | 8 of 17 | 47% | 4 of 11 | 1 of 3 | 3 of 3 | 7 of 14 | 0 of 1 | 1 of 2 |
Significant Strikes Per Round
| Rd | Fighter | Sig. Str. | Sig. Str. % | Head | Body | Leg | Distance | Clinch | Ground |
|---|---|---|---|---|---|---|---|---|---|
| 1 | Chas Skelly | 3 of 8 | 37% | 2 of 6 | 1 of 2 | 0 of 0 | 1 of 5 | 1 of 1 | 1 of 2 |
| Mark Striegl | 4 of 7 | 57% | 1 of 4 | 1 of 1 | 2 of 2 | 3 of 4 | 0 of 1 | 1 of 2 | |
| 2 | Chas Skelly | 11 of 22 | 50% | 10 of 21 | 1 of 1 | 0 of 0 | 6 of 14 | 2 of 2 | 3 of 6 |
| Mark Striegl | 4 of 10 | 40% | 3 of 7 | 0 of 2 | 1 of 1 | 4 of 10 | 0 of 0 | 0 of 0 |
Angelo loves Chas Skelly in this matchup, citing his technical striking, willingness to slug, and wide variety of takedowns with submission threats. He notes Striegl is a solid wrestler but never fully commits. He believes Skelly is well-prepared for a grappling match and will get it done.
Big Brady picks Chas Skelly but is very hesitant due to multiple red flags: Skelly is 36, retiring, and hasn't fought in over two years. He notes Skelly could submit Striegl if he's not washed, but the ring rust and retirement fight narrative scare him. He predicts Skelly wins by late round submission.
Cody leans toward Skelly but with very low confidence due to Skelly's three-year layoff and age (36). He notes that Skelly's wins have come against low-level competition and that his wrestling may have declined. Cody is unsure what version of Skelly will show up and suggests waiting for live betting or weigh-ins to get a better read.
Levi picks Skelly to win by submission, citing his elite submission skills and experience. He notes that Striegl's record is padded and that Skelly, despite a dad bod, is too tough and experienced. Levi expects Skelly to take Striegl down and submit him, possibly after some early success from Striegl.
Skelly has a cardio and scrambling advantage over Striegl, who fades in later rounds. The fight will be grapple-heavy with many reversals, and Skelly should dominate positionally. Striegl's cardio is atrocious when pushed, so Skelly by submission in round 3 is the play. The long layoff for both is a concern but Skelly's pace should be too much.
Paul also leans toward Skelly but is very hesitant. He notes that Skelly's three-year layoff and private Instagram are red flags. Paul thinks the fight is likely a grappling match where Skelly has an edge, but he is not confident enough to bet it at -220. He suggests waiting for live betting.
The MMA Guru picks Chas Skelly to win by first-round submission (d'arce or anaconda choke). He questions Mark Striegl's level of competition, noting he fought a 35-23 opponent after going 10-0. He believes Skelly's grappling and nasty d'arce choke will catch Striegl when he shoots a bad takedown, similar to his last fight.
Totals
| Fighter | KD | Sig. Str. | Sig. Str. % | Total Str. | TD | TD % | Sub. Att | Rev. | Ctrl |
|---|---|---|---|---|---|---|---|---|---|
| Chas Skelly | 0 | 21 of 59 | 35% | 80 of 125 | 1 of 3 | 33% | 3 | 1 | 8:35 |
| Jordan Griffin | 0 | 37 of 87 | 42% | 66 of 122 | 1 of 1 | 100% | 2 | 2 | 2:57 |
Per Round
| Rd | Fighter | KD | Sig. Str. | Sig. Str. % | Total Str. | TD | TD % | Sub. Att | Rev. | Ctrl |
|---|---|---|---|---|---|---|---|---|---|---|
| 1 | Chas Skelly | 0 | 7 of 19 | 36% | 24 of 37 | 1 of 1 | 100% | 2 | 0 | 2:49 |
| Jordan Griffin | 0 | 10 of 27 | 37% | 10 of 27 | 0 of 0 | --- | 0 | 1 | 0:55 | |
| 2 | Chas Skelly | 0 | 8 of 24 | 33% | 24 of 41 | 0 of 1 | 0% | 0 | 1 | 2:06 |
| Jordan Griffin | 0 | 19 of 37 | 51% | 28 of 47 | 1 of 1 | 100% | 0 | 0 | 1:43 | |
| 3 | Chas Skelly | 0 | 6 of 16 | 37% | 32 of 47 | 0 of 1 | 0% | 1 | 0 | 3:40 |
| Jordan Griffin | 0 | 8 of 23 | 34% | 28 of 48 | 0 of 0 | --- | 2 | 1 | 0:19 |
Significant Strikes
| Fighter | Sig. Str. | Sig. Str. % | Head | Body | Leg | Distance | Clinch | Ground |
|---|---|---|---|---|---|---|---|---|
| Chas Skelly | 21 of 59 | 35% | 20 of 52 | 1 of 7 | 0 of 0 | 20 of 58 | 0 of 0 | 1 of 1 |
| Jordan Griffin | 37 of 87 | 42% | 36 of 84 | 1 of 3 | 0 of 0 | 32 of 81 | 0 of 0 | 5 of 6 |
Significant Strikes Per Round
| Rd | Fighter | Sig. Str. | Sig. Str. % | Head | Body | Leg | Distance | Clinch | Ground |
|---|---|---|---|---|---|---|---|---|---|
| 1 | Chas Skelly | 7 of 19 | 36% | 7 of 18 | 0 of 1 | 0 of 0 | 7 of 19 | 0 of 0 | 0 of 0 |
| Jordan Griffin | 10 of 27 | 37% | 9 of 25 | 1 of 2 | 0 of 0 | 10 of 27 | 0 of 0 | 0 of 0 | |
| 2 | Chas Skelly | 8 of 24 | 33% | 8 of 21 | 0 of 3 | 0 of 0 | 7 of 23 | 0 of 0 | 1 of 1 |
| Jordan Griffin | 19 of 37 | 51% | 19 of 36 | 0 of 1 | 0 of 0 | 15 of 32 | 0 of 0 | 4 of 5 | |
| 3 | Chas Skelly | 6 of 16 | 37% | 5 of 13 | 1 of 3 | 0 of 0 | 6 of 16 | 0 of 0 | 0 of 0 |
| Jordan Griffin | 8 of 23 | 34% | 8 of 23 | 0 of 0 | 0 of 0 | 7 of 22 | 0 of 0 | 1 of 1 |
Totals
| Fighter | KD | Sig. Str. | Sig. Str. % | Total Str. | TD | TD % | Sub. Att | Rev. | Ctrl |
|---|---|---|---|---|---|---|---|---|---|
| Bobby Moffett | 0 | 30 of 60 | 50% | 47 of 81 | 1 of 2 | 50% | 0 | 1 | 3:38 |
| Chas Skelly | 0 | 20 of 56 | 35% | 21 of 57 | 1 of 1 | 100% | 1 | 0 | 1:14 |
Per Round
| Rd | Fighter | KD | Sig. Str. | Sig. Str. % | Total Str. | TD | TD % | Sub. Att | Rev. | Ctrl |
|---|---|---|---|---|---|---|---|---|---|---|
| 1 | Bobby Moffett | 0 | 24 of 40 | 60% | 41 of 61 | 1 of 2 | 50% | 0 | 0 | 3:23 |
| Chas Skelly | 0 | 12 of 32 | 37% | 13 of 33 | 0 of 0 | --- | 0 | 0 | 0:00 | |
| 2 | Bobby Moffett | 0 | 6 of 20 | 30% | 6 of 20 | 0 of 0 | --- | 0 | 1 | 0:15 |
| Chas Skelly | 0 | 8 of 24 | 33% | 8 of 24 | 1 of 1 | 100% | 1 | 0 | 1:14 |
Significant Strikes
| Fighter | Sig. Str. | Sig. Str. % | Head | Body | Leg | Distance | Clinch | Ground |
|---|---|---|---|---|---|---|---|---|
| Bobby Moffett | 30 of 60 | 50% | 26 of 55 | 3 of 4 | 1 of 1 | 15 of 44 | 15 of 16 | 0 of 0 |
| Chas Skelly | 20 of 56 | 35% | 13 of 47 | 1 of 2 | 6 of 7 | 18 of 51 | 1 of 4 | 1 of 1 |
Significant Strikes Per Round
| Rd | Fighter | Sig. Str. | Sig. Str. % | Head | Body | Leg | Distance | Clinch | Ground |
|---|---|---|---|---|---|---|---|---|---|
| 1 | Bobby Moffett | 24 of 40 | 60% | 21 of 37 | 2 of 2 | 1 of 1 | 9 of 24 | 15 of 16 | 0 of 0 |
| Chas Skelly | 12 of 32 | 37% | 8 of 27 | 0 of 1 | 4 of 4 | 11 of 28 | 1 of 4 | 0 of 0 | |
| 2 | Bobby Moffett | 6 of 20 | 30% | 5 of 18 | 1 of 2 | 0 of 0 | 6 of 20 | 0 of 0 | 0 of 0 |
| Chas Skelly | 8 of 24 | 33% | 5 of 20 | 1 of 1 | 2 of 3 | 7 of 23 | 0 of 0 | 1 of 1 |
Totals
| Fighter | KD | Sig. Str. | Sig. Str. % | Total Str. | TD | TD % | Sub. Att | Rev. | Ctrl |
|---|---|---|---|---|---|---|---|---|---|
| Jason Knight | 0 | 29 of 63 | 46% | 37 of 71 | 1 of 6 | 16% | 0 | 1 | 3:49 |
| Chas Skelly | 1 | 59 of 109 | 54% | 65 of 116 | 2 of 2 | 100% | 3 | 2 | 1:45 |
Per Round
| Rd | Fighter | KD | Sig. Str. | Sig. Str. % | Total Str. | TD | TD % | Sub. Att | Rev. | Ctrl |
|---|---|---|---|---|---|---|---|---|---|---|
| 1 | Jason Knight | 0 | 7 of 24 | 29% | 15 of 32 | 1 of 2 | 50% | 0 | 0 | 2:29 |
| Chas Skelly | 0 | 15 of 27 | 55% | 18 of 31 | 1 of 1 | 100% | 3 | 2 | 0:43 | |
| 2 | Jason Knight | 0 | 19 of 35 | 54% | 19 of 35 | 0 of 4 | 0% | 0 | 1 | 1:20 |
| Chas Skelly | 0 | 28 of 59 | 47% | 31 of 62 | 1 of 1 | 100% | 0 | 0 | 0:51 | |
| 3 | Jason Knight | 0 | 3 of 4 | 75% | 3 of 4 | 0 of 0 | --- | 0 | 0 | 0:00 |
| Chas Skelly | 1 | 16 of 23 | 69% | 16 of 23 | 0 of 0 | --- | 0 | 0 | 0:11 |
Significant Strikes
| Fighter | Sig. Str. | Sig. Str. % | Head | Body | Leg | Distance | Clinch | Ground |
|---|---|---|---|---|---|---|---|---|
| Jason Knight | 29 of 63 | 46% | 23 of 54 | 4 of 7 | 2 of 2 | 28 of 61 | 1 of 1 | 0 of 1 |
| Chas Skelly | 59 of 109 | 54% | 46 of 90 | 7 of 11 | 6 of 8 | 30 of 72 | 6 of 8 | 23 of 29 |
Significant Strikes Per Round
| Rd | Fighter | Sig. Str. | Sig. Str. % | Head | Body | Leg | Distance | Clinch | Ground |
|---|---|---|---|---|---|---|---|---|---|
| 1 | Jason Knight | 7 of 24 | 29% | 6 of 22 | 1 of 2 | 0 of 0 | 7 of 23 | 0 of 0 | 0 of 1 |
| Chas Skelly | 15 of 27 | 55% | 10 of 22 | 0 of 0 | 5 of 5 | 10 of 22 | 3 of 3 | 2 of 2 | |
| 2 | Jason Knight | 19 of 35 | 54% | 14 of 28 | 3 of 5 | 2 of 2 | 18 of 34 | 1 of 1 | 0 of 0 |
| Chas Skelly | 28 of 59 | 47% | 20 of 45 | 7 of 11 | 1 of 3 | 17 of 44 | 3 of 5 | 8 of 10 | |
| 3 | Jason Knight | 3 of 4 | 75% | 3 of 4 | 0 of 0 | 0 of 0 | 3 of 4 | 0 of 0 | 0 of 0 |
| Chas Skelly | 16 of 23 | 69% | 16 of 23 | 0 of 0 | 0 of 0 | 3 of 6 | 0 of 0 | 13 of 17 |
Totals
| Fighter | KD | Sig. Str. | Sig. Str. % | Total Str. | TD | TD % | Sub. Att | Rev. | Ctrl |
|---|---|---|---|---|---|---|---|---|---|
| Chas Skelly | 0 | 21 of 52 | 40% | 29 of 60 | 2 of 3 | 66% | 1 | 0 | 4:39 |
| Chris Gruetzemacher | 0 | 28 of 43 | 65% | 65 of 83 | 0 of 0 | --- | 0 | 0 | 0:00 |
Per Round
| Rd | Fighter | KD | Sig. Str. | Sig. Str. % | Total Str. | TD | TD % | Sub. Att | Rev. | Ctrl |
|---|---|---|---|---|---|---|---|---|---|---|
| 1 | Chas Skelly | 0 | 12 of 31 | 38% | 20 of 39 | 1 of 2 | 50% | 0 | 0 | 3:38 |
| Chris Gruetzemacher | 0 | 12 of 16 | 75% | 41 of 47 | 0 of 0 | --- | 0 | 0 | 0:00 | |
| 2 | Chas Skelly | 0 | 9 of 21 | 42% | 9 of 21 | 1 of 1 | 100% | 1 | 0 | 1:01 |
| Chris Gruetzemacher | 0 | 16 of 27 | 59% | 24 of 36 | 0 of 0 | --- | 0 | 0 | 0:00 |
Significant Strikes
| Fighter | Sig. Str. | Sig. Str. % | Head | Body | Leg | Distance | Clinch | Ground |
|---|---|---|---|---|---|---|---|---|
| Chas Skelly | 21 of 52 | 40% | 20 of 50 | 1 of 2 | 0 of 0 | 15 of 40 | 4 of 8 | 2 of 4 |
| Chris Gruetzemacher | 28 of 43 | 65% | 15 of 29 | 5 of 6 | 8 of 8 | 15 of 29 | 2 of 2 | 11 of 12 |
Significant Strikes Per Round
| Rd | Fighter | Sig. Str. | Sig. Str. % | Head | Body | Leg | Distance | Clinch | Ground |
|---|---|---|---|---|---|---|---|---|---|
| 1 | Chas Skelly | 12 of 31 | 38% | 12 of 31 | 0 of 0 | 0 of 0 | 6 of 19 | 4 of 8 | 2 of 4 |
| Chris Gruetzemacher | 12 of 16 | 75% | 5 of 9 | 2 of 2 | 5 of 5 | 8 of 11 | 2 of 2 | 2 of 3 | |
| 2 | Chas Skelly | 9 of 21 | 42% | 8 of 19 | 1 of 2 | 0 of 0 | 9 of 21 | 0 of 0 | 0 of 0 |
| Chris Gruetzemacher | 16 of 27 | 59% | 10 of 20 | 3 of 4 | 3 of 3 | 7 of 18 | 0 of 0 | 9 of 9 |
Totals
| Fighter | KD | Sig. Str. | Sig. Str. % | Total Str. | TD | TD % | Sub. Att | Rev. | Ctrl |
|---|---|---|---|---|---|---|---|---|---|
| Chas Skelly | 0 | 1 of 1 | 100% | 1 of 1 | 0 of 0 | --- | 1 | 0 | 0:11 |
| Maximo Blanco | 0 | 0 of 1 | 0% | 0 of 1 | 0 of 0 | --- | 0 | 0 | 0:00 |
Per Round
| Rd | Fighter | KD | Sig. Str. | Sig. Str. % | Total Str. | TD | TD % | Sub. Att | Rev. | Ctrl |
|---|---|---|---|---|---|---|---|---|---|---|
| 1 | Chas Skelly | 0 | 1 of 1 | 100% | 1 of 1 | 0 of 0 | --- | 1 | 0 | 0:11 |
| Maximo Blanco | 0 | 0 of 1 | 0% | 0 of 1 | 0 of 0 | --- | 0 | 0 | 0:00 |
Significant Strikes
| Fighter | Sig. Str. | Sig. Str. % | Head | Body | Leg | Distance | Clinch | Ground |
|---|---|---|---|---|---|---|---|---|
| Chas Skelly | 1 of 1 | 100% | 0 of 0 | 1 of 1 | 0 of 0 | 1 of 1 | 0 of 0 | 0 of 0 |
| Maximo Blanco | 0 of 1 | 0% | 0 of 0 | 0 of 1 | 0 of 0 | 0 of 1 | 0 of 0 | 0 of 0 |
Significant Strikes Per Round
| Rd | Fighter | Sig. Str. | Sig. Str. % | Head | Body | Leg | Distance | Clinch | Ground |
|---|---|---|---|---|---|---|---|---|---|
| 1 | Chas Skelly | 1 of 1 | 100% | 0 of 0 | 1 of 1 | 0 of 0 | 1 of 1 | 0 of 0 | 0 of 0 |
| Maximo Blanco | 0 of 1 | 0% | 0 of 0 | 0 of 1 | 0 of 0 | 0 of 1 | 0 of 0 | 0 of 0 |
Totals
| Fighter | KD | Sig. Str. | Sig. Str. % | Total Str. | TD | TD % | Sub. Att | Rev. | Ctrl |
|---|---|---|---|---|---|---|---|---|---|
| Darren Elkins | 0 | 104 of 153 | 67% | 193 of 255 | 7 of 11 | 63% | 0 | 0 | 8:43 |
| Chas Skelly | 0 | 27 of 72 | 37% | 32 of 83 | 0 of 1 | 0% | 2 | 0 | 1:02 |
Per Round
| Rd | Fighter | KD | Sig. Str. | Sig. Str. % | Total Str. | TD | TD % | Sub. Att | Rev. | Ctrl |
|---|---|---|---|---|---|---|---|---|---|---|
| 1 | Darren Elkins | 0 | 36 of 59 | 61% | 73 of 98 | 1 of 2 | 50% | 0 | 0 | 1:55 |
| Chas Skelly | 0 | 22 of 42 | 52% | 22 of 44 | 0 of 0 | --- | 2 | 0 | 0:33 | |
| 2 | Darren Elkins | 0 | 40 of 49 | 81% | 75 of 93 | 2 of 4 | 50% | 0 | 0 | 4:21 |
| Chas Skelly | 0 | 3 of 8 | 37% | 7 of 15 | 0 of 0 | --- | 0 | 0 | 0:00 | |
| 3 | Darren Elkins | 0 | 28 of 45 | 62% | 45 of 64 | 4 of 5 | 80% | 0 | 0 | 2:27 |
| Chas Skelly | 0 | 2 of 22 | 9% | 3 of 24 | 0 of 1 | 0% | 0 | 0 | 0:29 |
Significant Strikes
| Fighter | Sig. Str. | Sig. Str. % | Head | Body | Leg | Distance | Clinch | Ground |
|---|---|---|---|---|---|---|---|---|
| Darren Elkins | 104 of 153 | 67% | 73 of 118 | 26 of 29 | 5 of 6 | 24 of 65 | 32 of 36 | 48 of 52 |
| Chas Skelly | 27 of 72 | 37% | 23 of 65 | 4 of 7 | 0 of 0 | 20 of 62 | 5 of 8 | 2 of 2 |
Significant Strikes Per Round
| Rd | Fighter | Sig. Str. | Sig. Str. % | Head | Body | Leg | Distance | Clinch | Ground |
|---|---|---|---|---|---|---|---|---|---|
| 1 | Darren Elkins | 36 of 59 | 61% | 22 of 43 | 13 of 14 | 1 of 2 | 11 of 32 | 23 of 24 | 2 of 3 |
| Chas Skelly | 22 of 42 | 52% | 18 of 37 | 4 of 5 | 0 of 0 | 16 of 34 | 5 of 7 | 1 of 1 | |
| 2 | Darren Elkins | 40 of 49 | 81% | 27 of 36 | 10 of 10 | 3 of 3 | 3 of 7 | 4 of 6 | 33 of 36 |
| Chas Skelly | 3 of 8 | 37% | 3 of 8 | 0 of 0 | 0 of 0 | 2 of 6 | 0 of 1 | 1 of 1 | |
| 3 | Darren Elkins | 28 of 45 | 62% | 24 of 39 | 3 of 5 | 1 of 1 | 10 of 26 | 5 of 6 | 13 of 13 |
| Chas Skelly | 2 of 22 | 9% | 2 of 20 | 0 of 2 | 0 of 0 | 2 of 22 | 0 of 0 | 0 of 0 |
Totals
| Fighter | KD | Sig. Str. | Sig. Str. % | Total Str. | TD | TD % | Sub. Att | Rev. | Ctrl |
|---|---|---|---|---|---|---|---|---|---|
| Chas Skelly | 1 | 19 of 35 | 54% | 24 of 40 | 0 of 0 | --- | 0 | 0 | 2:07 |
| Edimilson Souza | 0 | 7 of 18 | 38% | 11 of 24 | 2 of 3 | 66% | 2 | 0 | 2:45 |
Per Round
| Rd | Fighter | KD | Sig. Str. | Sig. Str. % | Total Str. | TD | TD % | Sub. Att | Rev. | Ctrl |
|---|---|---|---|---|---|---|---|---|---|---|
| 1 | Chas Skelly | 1 | 6 of 16 | 37% | 6 of 16 | 0 of 0 | --- | 0 | 0 | 1:31 |
| Edimilson Souza | 0 | 7 of 12 | 58% | 11 of 18 | 1 of 1 | 100% | 1 | 0 | 2:10 | |
| 2 | Chas Skelly | 0 | 13 of 19 | 68% | 18 of 24 | 0 of 0 | --- | 0 | 0 | 0:36 |
| Edimilson Souza | 0 | 0 of 6 | 0% | 0 of 6 | 1 of 2 | 50% | 1 | 0 | 0:35 |
Significant Strikes
| Fighter | Sig. Str. | Sig. Str. % | Head | Body | Leg | Distance | Clinch | Ground |
|---|---|---|---|---|---|---|---|---|
| Chas Skelly | 19 of 35 | 54% | 17 of 33 | 2 of 2 | 0 of 0 | 6 of 14 | 0 of 0 | 13 of 21 |
| Edimilson Souza | 7 of 18 | 38% | 7 of 15 | 0 of 3 | 0 of 0 | 0 of 11 | 1 of 1 | 6 of 6 |
Significant Strikes Per Round
| Rd | Fighter | Sig. Str. | Sig. Str. % | Head | Body | Leg | Distance | Clinch | Ground |
|---|---|---|---|---|---|---|---|---|---|
| 1 | Chas Skelly | 6 of 16 | 37% | 5 of 15 | 1 of 1 | 0 of 0 | 2 of 7 | 0 of 0 | 4 of 9 |
| Edimilson Souza | 7 of 12 | 58% | 7 of 11 | 0 of 1 | 0 of 0 | 0 of 5 | 1 of 1 | 6 of 6 | |
| 2 | Chas Skelly | 13 of 19 | 68% | 12 of 18 | 1 of 1 | 0 of 0 | 4 of 7 | 0 of 0 | 9 of 12 |
| Edimilson Souza | 0 of 6 | 0% | 0 of 4 | 0 of 2 | 0 of 0 | 0 of 6 | 0 of 0 | 0 of 0 |
No comments yet. Be the first to share your thoughts!