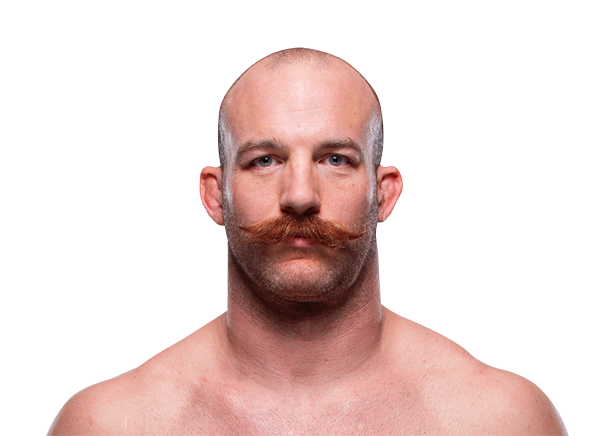
UFC Fight Night: Barboza vs. Lee ·
Apr 21, 2018 ·
Light Heavyweight ·
Completed
Career Averages - Corey Anderson
4.43
SLpM
46.0%
Str. Acc.
2.22
SApM
59.0%
Str. Def.
4.89
TD Avg
50.0%
TD Acc.
83.0%
TD Def.
0.0
Sub. Avg
Career Averages - Patrick Cummins
4.26
SLpM
50.0%
Str. Acc.
3.35
SApM
55.0%
Str. Def.
4.49
TD Avg
41.0%
TD Acc.
28.0%
TD Def.
0.1
Sub. Avg
Corey Anderson - Fight History
LOSS
vs
Jan Błachowicz
KO (punch)
R1
3:08
·
UFC Fight Night: Anderson vs. Blachowicz 2 ·
Feb 15, 2020
Totals
| Fighter | KD | Sig. Str. | Sig. Str. % | Total Str. | TD | TD % | Sub. Att | Rev. | Ctrl |
|---|---|---|---|---|---|---|---|---|---|
| Jan Błachowicz | 0 | 11 of 27 | 40% | 11 of 27 | 0 of 0 | --- | 0 | 0 | 0:03 |
| Corey Anderson | 1 | 13 of 31 | 41% | 13 of 31 | 0 of 0 | --- | 0 | 0 | 0:02 |
Per Round
| Rd | Fighter | KD | Sig. Str. | Sig. Str. % | Total Str. | TD | TD % | Sub. Att | Rev. | Ctrl |
|---|---|---|---|---|---|---|---|---|---|---|
| 1 | Jan Błachowicz | 0 | 11 of 27 | 40% | 11 of 27 | 0 of 0 | --- | 0 | 0 | 0:03 |
| Corey Anderson | 1 | 13 of 31 | 41% | 13 of 31 | 0 of 0 | --- | 0 | 0 | 0:02 |
Significant Strikes
| Fighter | Sig. Str. | Sig. Str. % | Head | Body | Leg | Distance | Clinch | Ground |
|---|---|---|---|---|---|---|---|---|
| Jan Błachowicz | 11 of 27 | 40% | 4 of 19 | 3 of 4 | 4 of 4 | 11 of 27 | 0 of 0 | 0 of 0 |
| Corey Anderson | 13 of 31 | 41% | 11 of 27 | 1 of 3 | 1 of 1 | 12 of 29 | 0 of 1 | 1 of 1 |
Significant Strikes Per Round
| Rd | Fighter | Sig. Str. | Sig. Str. % | Head | Body | Leg | Distance | Clinch | Ground |
|---|---|---|---|---|---|---|---|---|---|
| 1 | Jan Błachowicz | 11 of 27 | 40% | 4 of 19 | 3 of 4 | 4 of 4 | 11 of 27 | 0 of 0 | 0 of 0 |
| Corey Anderson | 13 of 31 | 41% | 11 of 27 | 1 of 3 | 1 of 1 | 12 of 29 | 0 of 1 | 1 of 1 |
DA
Daniel Levi
Expert
Confident
picked Feb 14, 2020 (1 day before fight)
Corey Anderson
Daniel Levi picks Corey Anderson to win by decision, possibly a late finish. He notes Anderson's complete package of boxing, cardio, and wrestling, and that his chin has held up recently. He believes Anderson's pace will be too much for Błachowicz, and that if Błachowicz doesn't get a knockout, Anderson grinds out a win.
decision win, possibly late TKO via ground and pound
"I'm gonna take Corey Anderson by 50 45 49 46 I think he puts a statement"
WIN
vs
Johnny Walker
TKO (punches)
R1
2:07
·
UFC 244: Masvidal vs. Diaz ·
Nov 02, 2019
Totals
| Fighter | KD | Sig. Str. | Sig. Str. % | Total Str. | TD | TD % | Sub. Att | Rev. | Ctrl |
|---|---|---|---|---|---|---|---|---|---|
| Corey Anderson | 1 | 22 of 39 | 56% | 26 of 43 | 1 of 2 | 50% | 0 | 0 | 0:22 |
| Johnny Walker | 0 | 1 of 3 | 33% | 1 of 3 | 0 of 0 | --- | 0 | 0 | 0:19 |
Per Round
| Rd | Fighter | KD | Sig. Str. | Sig. Str. % | Total Str. | TD | TD % | Sub. Att | Rev. | Ctrl |
|---|---|---|---|---|---|---|---|---|---|---|
| 1 | Corey Anderson | 1 | 22 of 39 | 56% | 26 of 43 | 1 of 2 | 50% | 0 | 0 | 0:22 |
| Johnny Walker | 0 | 1 of 3 | 33% | 1 of 3 | 0 of 0 | --- | 0 | 0 | 0:19 |
Significant Strikes
| Fighter | Sig. Str. | Sig. Str. % | Head | Body | Leg | Distance | Clinch | Ground |
|---|---|---|---|---|---|---|---|---|
| Corey Anderson | 22 of 39 | 56% | 21 of 38 | 1 of 1 | 0 of 0 | 5 of 15 | 10 of 13 | 7 of 11 |
| Johnny Walker | 1 of 3 | 33% | 0 of 2 | 0 of 0 | 1 of 1 | 1 of 3 | 0 of 0 | 0 of 0 |
Significant Strikes Per Round
| Rd | Fighter | Sig. Str. | Sig. Str. % | Head | Body | Leg | Distance | Clinch | Ground |
|---|---|---|---|---|---|---|---|---|---|
| 1 | Corey Anderson | 22 of 39 | 56% | 21 of 38 | 1 of 1 | 0 of 0 | 5 of 15 | 10 of 13 | 7 of 11 |
| Johnny Walker | 1 of 3 | 33% | 0 of 2 | 0 of 0 | 1 of 1 | 1 of 3 | 0 of 0 | 0 of 0 |
WIN
vs
Ilir Latifi
Decision (unanimous) (29–28, 29–28, 29–28)
R3
5:00
·
UFC 232: Jones vs. Gustafsson 2 ·
Dec 29, 2018
Totals
| Fighter | KD | Sig. Str. | Sig. Str. % | Total Str. | TD | TD % | Sub. Att | Rev. | Ctrl |
|---|---|---|---|---|---|---|---|---|---|
| Corey Anderson | 0 | 33 of 78 | 42% | 34 of 79 | 0 of 4 | 0% | 0 | 0 | 0:46 |
| Ilir Latifi | 0 | 40 of 121 | 33% | 45 of 127 | 0 of 4 | 0% | 0 | 0 | 0:24 |
Per Round
| Rd | Fighter | KD | Sig. Str. | Sig. Str. % | Total Str. | TD | TD % | Sub. Att | Rev. | Ctrl |
|---|---|---|---|---|---|---|---|---|---|---|
| 1 | Corey Anderson | 0 | 12 of 30 | 40% | 12 of 30 | 0 of 2 | 0% | 0 | 0 | 0:13 |
| Ilir Latifi | 0 | 7 of 29 | 24% | 7 of 29 | 0 of 1 | 0% | 0 | 0 | 0:04 | |
| 2 | Corey Anderson | 0 | 11 of 23 | 47% | 12 of 24 | 0 of 2 | 0% | 0 | 0 | 0:33 |
| Ilir Latifi | 0 | 16 of 43 | 37% | 21 of 48 | 0 of 2 | 0% | 0 | 0 | 0:18 | |
| 3 | Corey Anderson | 0 | 10 of 25 | 40% | 10 of 25 | 0 of 0 | --- | 0 | 0 | 0:00 |
| Ilir Latifi | 0 | 17 of 49 | 34% | 17 of 50 | 0 of 1 | 0% | 0 | 0 | 0:02 |
Significant Strikes
| Fighter | Sig. Str. | Sig. Str. % | Head | Body | Leg | Distance | Clinch | Ground |
|---|---|---|---|---|---|---|---|---|
| Corey Anderson | 33 of 78 | 42% | 23 of 66 | 3 of 5 | 7 of 7 | 23 of 62 | 10 of 16 | 0 of 0 |
| Ilir Latifi | 40 of 121 | 33% | 24 of 93 | 11 of 22 | 5 of 6 | 38 of 114 | 2 of 7 | 0 of 0 |
Significant Strikes Per Round
| Rd | Fighter | Sig. Str. | Sig. Str. % | Head | Body | Leg | Distance | Clinch | Ground |
|---|---|---|---|---|---|---|---|---|---|
| 1 | Corey Anderson | 12 of 30 | 40% | 7 of 24 | 1 of 2 | 4 of 4 | 8 of 21 | 4 of 9 | 0 of 0 |
| Ilir Latifi | 7 of 29 | 24% | 4 of 24 | 1 of 3 | 2 of 2 | 7 of 28 | 0 of 1 | 0 of 0 | |
| 2 | Corey Anderson | 11 of 23 | 47% | 9 of 21 | 1 of 1 | 1 of 1 | 7 of 18 | 4 of 5 | 0 of 0 |
| Ilir Latifi | 16 of 43 | 37% | 6 of 30 | 8 of 11 | 2 of 2 | 15 of 39 | 1 of 4 | 0 of 0 | |
| 3 | Corey Anderson | 10 of 25 | 40% | 7 of 21 | 1 of 2 | 2 of 2 | 8 of 23 | 2 of 2 | 0 of 0 |
| Ilir Latifi | 17 of 49 | 34% | 14 of 39 | 2 of 8 | 1 of 2 | 16 of 47 | 1 of 2 | 0 of 0 |
WIN
vs
Glover Teixeira
Decision (unanimous) (30–27, 30–27, 30–27)
R3
5:00
·
UFC Fight Night: Shogun vs. Smith ·
Jul 22, 2018
Totals
| Fighter | KD | Sig. Str. | Sig. Str. % | Total Str. | TD | TD % | Sub. Att | Rev. | Ctrl |
|---|---|---|---|---|---|---|---|---|---|
| Corey Anderson | 0 | 20 of 46 | 43% | 27 of 54 | 0 of 4 | 0% | 1 | 0 | 0:40 |
| Glover Teixeira | 0 | 48 of 97 | 49% | 88 of 140 | 7 of 19 | 36% | 0 | 0 | 7:26 |
Per Round
| Rd | Fighter | KD | Sig. Str. | Sig. Str. % | Total Str. | TD | TD % | Sub. Att | Rev. | Ctrl |
|---|---|---|---|---|---|---|---|---|---|---|
| 1 | Corey Anderson | 0 | 10 of 18 | 55% | 10 of 18 | 0 of 0 | --- | 1 | 0 | 0:17 |
| Glover Teixeira | 0 | 13 of 38 | 34% | 20 of 46 | 3 of 9 | 33% | 0 | 0 | 1:55 | |
| 2 | Corey Anderson | 0 | 5 of 18 | 27% | 7 of 21 | 0 of 2 | 0% | 0 | 0 | 0:16 |
| Glover Teixeira | 0 | 26 of 40 | 65% | 47 of 63 | 2 of 3 | 66% | 0 | 0 | 2:23 | |
| 3 | Corey Anderson | 0 | 5 of 10 | 50% | 10 of 15 | 0 of 2 | 0% | 0 | 0 | 0:07 |
| Glover Teixeira | 0 | 9 of 19 | 47% | 21 of 31 | 2 of 7 | 28% | 0 | 0 | 3:08 |
Significant Strikes
| Fighter | Sig. Str. | Sig. Str. % | Head | Body | Leg | Distance | Clinch | Ground |
|---|---|---|---|---|---|---|---|---|
| Corey Anderson | 20 of 46 | 43% | 15 of 39 | 5 of 7 | 0 of 0 | 17 of 42 | 1 of 2 | 2 of 2 |
| Glover Teixeira | 48 of 97 | 49% | 39 of 87 | 8 of 9 | 1 of 1 | 31 of 69 | 5 of 16 | 12 of 12 |
Significant Strikes Per Round
| Rd | Fighter | Sig. Str. | Sig. Str. % | Head | Body | Leg | Distance | Clinch | Ground |
|---|---|---|---|---|---|---|---|---|---|
| 1 | Corey Anderson | 10 of 18 | 55% | 7 of 14 | 3 of 4 | 0 of 0 | 10 of 18 | 0 of 0 | 0 of 0 |
| Glover Teixeira | 13 of 38 | 34% | 8 of 32 | 5 of 6 | 0 of 0 | 12 of 28 | 1 of 10 | 0 of 0 | |
| 2 | Corey Anderson | 5 of 18 | 27% | 3 of 15 | 2 of 3 | 0 of 0 | 4 of 16 | 1 of 2 | 0 of 0 |
| Glover Teixeira | 26 of 40 | 65% | 25 of 39 | 1 of 1 | 0 of 0 | 11 of 24 | 3 of 4 | 12 of 12 | |
| 3 | Corey Anderson | 5 of 10 | 50% | 5 of 10 | 0 of 0 | 0 of 0 | 3 of 8 | 0 of 0 | 2 of 2 |
| Glover Teixeira | 9 of 19 | 47% | 6 of 16 | 2 of 2 | 1 of 1 | 8 of 17 | 1 of 2 | 0 of 0 |
WIN
vs
Patrick Cummins
Decision (unanimous) (30–26, 30–26, 30–27)
R3
5:00
·
UFC Fight Night: Barboza vs. Lee ·
Apr 21, 2018
Totals
| Fighter | KD | Sig. Str. | Sig. Str. % | Total Str. | TD | TD % | Sub. Att | Rev. | Ctrl |
|---|---|---|---|---|---|---|---|---|---|
| Corey Anderson | 0 | 64 of 119 | 53% | 99 of 162 | 12 of 13 | 92% | 0 | 0 | 8:02 |
| Patrick Cummins | 0 | 31 of 99 | 31% | 44 of 113 | 0 of 1 | 0% | 0 | 0 | 0:30 |
Per Round
| Rd | Fighter | KD | Sig. Str. | Sig. Str. % | Total Str. | TD | TD % | Sub. Att | Rev. | Ctrl |
|---|---|---|---|---|---|---|---|---|---|---|
| 1 | Corey Anderson | 0 | 43 of 75 | 57% | 50 of 82 | 2 of 2 | 100% | 0 | 0 | 1:33 |
| Patrick Cummins | 0 | 18 of 53 | 33% | 22 of 58 | 0 of 1 | 0% | 0 | 0 | 0:29 | |
| 2 | Corey Anderson | 0 | 16 of 33 | 48% | 24 of 41 | 5 of 5 | 100% | 0 | 0 | 2:17 |
| Patrick Cummins | 0 | 8 of 32 | 25% | 15 of 39 | 0 of 0 | --- | 0 | 0 | 0:00 | |
| 3 | Corey Anderson | 0 | 5 of 11 | 45% | 25 of 39 | 5 of 6 | 83% | 0 | 0 | 4:12 |
| Patrick Cummins | 0 | 5 of 14 | 35% | 7 of 16 | 0 of 0 | --- | 0 | 0 | 0:01 |
Significant Strikes
| Fighter | Sig. Str. | Sig. Str. % | Head | Body | Leg | Distance | Clinch | Ground |
|---|---|---|---|---|---|---|---|---|
| Corey Anderson | 64 of 119 | 53% | 56 of 107 | 6 of 10 | 2 of 2 | 38 of 85 | 16 of 22 | 10 of 12 |
| Patrick Cummins | 31 of 99 | 31% | 24 of 85 | 6 of 12 | 1 of 2 | 18 of 79 | 12 of 19 | 1 of 1 |
Significant Strikes Per Round
| Rd | Fighter | Sig. Str. | Sig. Str. % | Head | Body | Leg | Distance | Clinch | Ground |
|---|---|---|---|---|---|---|---|---|---|
| 1 | Corey Anderson | 43 of 75 | 57% | 38 of 68 | 4 of 6 | 1 of 1 | 23 of 49 | 11 of 15 | 9 of 11 |
| Patrick Cummins | 18 of 53 | 33% | 12 of 46 | 5 of 5 | 1 of 2 | 10 of 41 | 7 of 11 | 1 of 1 | |
| 2 | Corey Anderson | 16 of 33 | 48% | 13 of 29 | 2 of 3 | 1 of 1 | 13 of 28 | 3 of 5 | 0 of 0 |
| Patrick Cummins | 8 of 32 | 25% | 8 of 29 | 0 of 3 | 0 of 0 | 5 of 26 | 3 of 6 | 0 of 0 | |
| 3 | Corey Anderson | 5 of 11 | 45% | 5 of 10 | 0 of 1 | 0 of 0 | 2 of 8 | 2 of 2 | 1 of 1 |
| Patrick Cummins | 5 of 14 | 35% | 4 of 10 | 1 of 4 | 0 of 0 | 3 of 12 | 2 of 2 | 0 of 0 |
LOSS
vs
Ovince Saint Preux
KO (head kick)
R3
1:25
·
UFC 217: Bisping vs. St-Pierre ·
Nov 04, 2017
Totals
| Fighter | KD | Sig. Str. | Sig. Str. % | Total Str. | TD | TD % | Sub. Att | Rev. | Ctrl |
|---|---|---|---|---|---|---|---|---|---|
| Ovince Saint Preux | 1 | 23 of 49 | 46% | 30 of 56 | 0 of 0 | --- | 0 | 0 | 0:02 |
| Corey Anderson | 0 | 30 of 45 | 66% | 60 of 87 | 4 of 10 | 40% | 0 | 0 | 7:08 |
Per Round
| Rd | Fighter | KD | Sig. Str. | Sig. Str. % | Total Str. | TD | TD % | Sub. Att | Rev. | Ctrl |
|---|---|---|---|---|---|---|---|---|---|---|
| 1 | Ovince Saint Preux | 0 | 15 of 27 | 55% | 16 of 28 | 0 of 0 | --- | 0 | 0 | 0:01 |
| Corey Anderson | 0 | 14 of 21 | 66% | 23 of 34 | 2 of 5 | 40% | 0 | 0 | 3:11 | |
| 2 | Ovince Saint Preux | 0 | 5 of 12 | 41% | 11 of 18 | 0 of 0 | --- | 0 | 0 | 0:00 |
| Corey Anderson | 0 | 11 of 17 | 64% | 32 of 46 | 2 of 4 | 50% | 0 | 0 | 3:56 | |
| 3 | Ovince Saint Preux | 1 | 3 of 10 | 30% | 3 of 10 | 0 of 0 | --- | 0 | 0 | 0:01 |
| Corey Anderson | 0 | 5 of 7 | 71% | 5 of 7 | 0 of 1 | 0% | 0 | 0 | 0:01 |
Significant Strikes
| Fighter | Sig. Str. | Sig. Str. % | Head | Body | Leg | Distance | Clinch | Ground |
|---|---|---|---|---|---|---|---|---|
| Ovince Saint Preux | 23 of 49 | 46% | 17 of 41 | 3 of 5 | 3 of 3 | 17 of 42 | 6 of 7 | 0 of 0 |
| Corey Anderson | 30 of 45 | 66% | 19 of 31 | 6 of 8 | 5 of 6 | 14 of 25 | 10 of 14 | 6 of 6 |
Significant Strikes Per Round
| Rd | Fighter | Sig. Str. | Sig. Str. % | Head | Body | Leg | Distance | Clinch | Ground |
|---|---|---|---|---|---|---|---|---|---|
| 1 | Ovince Saint Preux | 15 of 27 | 55% | 9 of 20 | 3 of 4 | 3 of 3 | 11 of 23 | 4 of 4 | 0 of 0 |
| Corey Anderson | 14 of 21 | 66% | 8 of 14 | 4 of 5 | 2 of 2 | 8 of 13 | 5 of 7 | 1 of 1 | |
| 2 | Ovince Saint Preux | 5 of 12 | 41% | 5 of 11 | 0 of 1 | 0 of 0 | 3 of 9 | 2 of 3 | 0 of 0 |
| Corey Anderson | 11 of 17 | 64% | 7 of 11 | 2 of 3 | 2 of 3 | 2 of 6 | 4 of 6 | 5 of 5 | |
| 3 | Ovince Saint Preux | 3 of 10 | 30% | 3 of 10 | 0 of 0 | 0 of 0 | 3 of 10 | 0 of 0 | 0 of 0 |
| Corey Anderson | 5 of 7 | 71% | 4 of 6 | 0 of 0 | 1 of 1 | 4 of 6 | 1 of 1 | 0 of 0 |
LOSS
vs
Jimi Manuwa
KO (punch)
R1
3:05
·
UFC Fight Night: Manuwa vs. Anderson ·
Mar 18, 2017
Totals
| Fighter | KD | Sig. Str. | Sig. Str. % | Total Str. | TD | TD % | Sub. Att | Rev. | Ctrl |
|---|---|---|---|---|---|---|---|---|---|
| Jimi Manuwa | 1 | 6 of 13 | 46% | 6 of 13 | 0 of 0 | --- | 0 | 0 | 0:01 |
| Corey Anderson | 0 | 6 of 27 | 22% | 6 of 27 | 0 of 3 | 0% | 0 | 0 | 0:00 |
Per Round
| Rd | Fighter | KD | Sig. Str. | Sig. Str. % | Total Str. | TD | TD % | Sub. Att | Rev. | Ctrl |
|---|---|---|---|---|---|---|---|---|---|---|
| 1 | Jimi Manuwa | 1 | 6 of 13 | 46% | 6 of 13 | 0 of 0 | --- | 0 | 0 | 0:01 |
| Corey Anderson | 0 | 6 of 27 | 22% | 6 of 27 | 0 of 3 | 0% | 0 | 0 | 0:00 |
Significant Strikes
| Fighter | Sig. Str. | Sig. Str. % | Head | Body | Leg | Distance | Clinch | Ground |
|---|---|---|---|---|---|---|---|---|
| Jimi Manuwa | 6 of 13 | 46% | 5 of 11 | 0 of 1 | 1 of 1 | 6 of 13 | 0 of 0 | 0 of 0 |
| Corey Anderson | 6 of 27 | 22% | 4 of 24 | 0 of 1 | 2 of 2 | 5 of 26 | 1 of 1 | 0 of 0 |
Significant Strikes Per Round
| Rd | Fighter | Sig. Str. | Sig. Str. % | Head | Body | Leg | Distance | Clinch | Ground |
|---|---|---|---|---|---|---|---|---|---|
| 1 | Jimi Manuwa | 6 of 13 | 46% | 5 of 11 | 0 of 1 | 1 of 1 | 6 of 13 | 0 of 0 | 0 of 0 |
| Corey Anderson | 6 of 27 | 22% | 4 of 24 | 0 of 1 | 2 of 2 | 5 of 26 | 1 of 1 | 0 of 0 |
WIN
vs
Sean O'Connell
TKO (punches)
R2
2:36
·
UFC Fight Night: Lewis vs. Abdurakhimov ·
Dec 09, 2016
Totals
| Fighter | KD | Sig. Str. | Sig. Str. % | Total Str. | TD | TD % | Sub. Att | Rev. | Ctrl |
|---|---|---|---|---|---|---|---|---|---|
| Corey Anderson | 0 | 66 of 103 | 64% | 94 of 133 | 5 of 5 | 100% | 0 | 0 | 6:48 |
| Sean O'Connell | 0 | 9 of 22 | 40% | 15 of 29 | 0 of 0 | --- | 0 | 0 | 0:00 |
Per Round
| Rd | Fighter | KD | Sig. Str. | Sig. Str. % | Total Str. | TD | TD % | Sub. Att | Rev. | Ctrl |
|---|---|---|---|---|---|---|---|---|---|---|
| 1 | Corey Anderson | 0 | 37 of 53 | 69% | 57 of 75 | 4 of 4 | 100% | 0 | 0 | 4:23 |
| Sean O'Connell | 0 | 6 of 17 | 35% | 12 of 24 | 0 of 0 | --- | 0 | 0 | 0:00 | |
| 2 | Corey Anderson | 0 | 29 of 50 | 58% | 37 of 58 | 1 of 1 | 100% | 0 | 0 | 2:25 |
| Sean O'Connell | 0 | 3 of 5 | 60% | 3 of 5 | 0 of 0 | --- | 0 | 0 | 0:00 |
Significant Strikes
| Fighter | Sig. Str. | Sig. Str. % | Head | Body | Leg | Distance | Clinch | Ground |
|---|---|---|---|---|---|---|---|---|
| Corey Anderson | 66 of 103 | 64% | 62 of 99 | 2 of 2 | 2 of 2 | 4 of 10 | 1 of 1 | 61 of 92 |
| Sean O'Connell | 9 of 22 | 40% | 5 of 17 | 2 of 2 | 2 of 3 | 3 of 13 | 1 of 1 | 5 of 8 |
Significant Strikes Per Round
| Rd | Fighter | Sig. Str. | Sig. Str. % | Head | Body | Leg | Distance | Clinch | Ground |
|---|---|---|---|---|---|---|---|---|---|
| 1 | Corey Anderson | 37 of 53 | 69% | 33 of 49 | 2 of 2 | 2 of 2 | 3 of 6 | 1 of 1 | 33 of 46 |
| Sean O'Connell | 6 of 17 | 35% | 4 of 14 | 1 of 1 | 1 of 2 | 2 of 10 | 1 of 1 | 3 of 6 | |
| 2 | Corey Anderson | 29 of 50 | 58% | 29 of 50 | 0 of 0 | 0 of 0 | 1 of 4 | 0 of 0 | 28 of 46 |
| Sean O'Connell | 3 of 5 | 60% | 1 of 3 | 1 of 1 | 1 of 1 | 1 of 3 | 0 of 0 | 2 of 2 |
Patrick Cummins - Fight History
LOSS
vs
Ed Herman
TKO (knee and punches)
R1
3:39
·
UFC Fight Night: dos Anjos vs. Lee ·
May 18, 2019
Totals
| Fighter | KD | Sig. Str. | Sig. Str. % | Total Str. | TD | TD % | Sub. Att | Rev. | Ctrl |
|---|---|---|---|---|---|---|---|---|---|
| Ed Herman | 0 | 22 of 33 | 66% | 22 of 33 | 1 of 2 | 50% | 0 | 0 | 0:10 |
| Patrick Cummins | 1 | 11 of 35 | 31% | 14 of 38 | 0 of 0 | --- | 0 | 0 | 0:04 |
Per Round
| Rd | Fighter | KD | Sig. Str. | Sig. Str. % | Total Str. | TD | TD % | Sub. Att | Rev. | Ctrl |
|---|---|---|---|---|---|---|---|---|---|---|
| 1 | Ed Herman | 0 | 22 of 33 | 66% | 22 of 33 | 1 of 2 | 50% | 0 | 0 | 0:10 |
| Patrick Cummins | 1 | 11 of 35 | 31% | 14 of 38 | 0 of 0 | --- | 0 | 0 | 0:04 |
Significant Strikes
| Fighter | Sig. Str. | Sig. Str. % | Head | Body | Leg | Distance | Clinch | Ground |
|---|---|---|---|---|---|---|---|---|
| Ed Herman | 22 of 33 | 66% | 21 of 31 | 0 of 1 | 1 of 1 | 18 of 29 | 4 of 4 | 0 of 0 |
| Patrick Cummins | 11 of 35 | 31% | 11 of 34 | 0 of 0 | 0 of 1 | 8 of 28 | 1 of 4 | 2 of 3 |
Significant Strikes Per Round
| Rd | Fighter | Sig. Str. | Sig. Str. % | Head | Body | Leg | Distance | Clinch | Ground |
|---|---|---|---|---|---|---|---|---|---|
| 1 | Ed Herman | 22 of 33 | 66% | 21 of 31 | 0 of 1 | 1 of 1 | 18 of 29 | 4 of 4 | 0 of 0 |
| Patrick Cummins | 11 of 35 | 31% | 11 of 34 | 0 of 0 | 0 of 1 | 8 of 28 | 1 of 4 | 2 of 3 |
LOSS
vs
Misha Cirkunov
Submission (arm-triangle choke)
R1
2:40
·
UFC Fight Night: Volkan vs. Smith ·
Oct 27, 2018
Totals
| Fighter | KD | Sig. Str. | Sig. Str. % | Total Str. | TD | TD % | Sub. Att | Rev. | Ctrl |
|---|---|---|---|---|---|---|---|---|---|
| Misha Cirkunov | 0 | 11 of 18 | 61% | 65 of 72 | 1 of 1 | 100% | 2 | 0 | 0:40 |
| Patrick Cummins | 0 | 3 of 5 | 60% | 6 of 8 | 0 of 3 | 0% | 0 | 0 | 1:26 |
Per Round
| Rd | Fighter | KD | Sig. Str. | Sig. Str. % | Total Str. | TD | TD % | Sub. Att | Rev. | Ctrl |
|---|---|---|---|---|---|---|---|---|---|---|
| 1 | Misha Cirkunov | 0 | 11 of 18 | 61% | 65 of 72 | 1 of 1 | 100% | 2 | 0 | 0:40 |
| Patrick Cummins | 0 | 3 of 5 | 60% | 6 of 8 | 0 of 3 | 0% | 0 | 0 | 1:26 |
Significant Strikes
| Fighter | Sig. Str. | Sig. Str. % | Head | Body | Leg | Distance | Clinch | Ground |
|---|---|---|---|---|---|---|---|---|
| Misha Cirkunov | 11 of 18 | 61% | 2 of 6 | 9 of 12 | 0 of 0 | 1 of 5 | 9 of 12 | 1 of 1 |
| Patrick Cummins | 3 of 5 | 60% | 0 of 1 | 3 of 4 | 0 of 0 | 0 of 1 | 3 of 4 | 0 of 0 |
Significant Strikes Per Round
| Rd | Fighter | Sig. Str. | Sig. Str. % | Head | Body | Leg | Distance | Clinch | Ground |
|---|---|---|---|---|---|---|---|---|---|
| 1 | Misha Cirkunov | 11 of 18 | 61% | 2 of 6 | 9 of 12 | 0 of 0 | 1 of 5 | 9 of 12 | 1 of 1 |
| Patrick Cummins | 3 of 5 | 60% | 0 of 1 | 3 of 4 | 0 of 0 | 0 of 1 | 3 of 4 | 0 of 0 |
LOSS
vs
Corey Anderson
Decision (unanimous) (30–26, 30–26, 30–27)
R3
5:00
·
UFC Fight Night: Barboza vs. Lee ·
Apr 21, 2018
Totals
| Fighter | KD | Sig. Str. | Sig. Str. % | Total Str. | TD | TD % | Sub. Att | Rev. | Ctrl |
|---|---|---|---|---|---|---|---|---|---|
| Corey Anderson | 0 | 64 of 119 | 53% | 99 of 162 | 12 of 13 | 92% | 0 | 0 | 8:02 |
| Patrick Cummins | 0 | 31 of 99 | 31% | 44 of 113 | 0 of 1 | 0% | 0 | 0 | 0:30 |
Per Round
| Rd | Fighter | KD | Sig. Str. | Sig. Str. % | Total Str. | TD | TD % | Sub. Att | Rev. | Ctrl |
|---|---|---|---|---|---|---|---|---|---|---|
| 1 | Corey Anderson | 0 | 43 of 75 | 57% | 50 of 82 | 2 of 2 | 100% | 0 | 0 | 1:33 |
| Patrick Cummins | 0 | 18 of 53 | 33% | 22 of 58 | 0 of 1 | 0% | 0 | 0 | 0:29 | |
| 2 | Corey Anderson | 0 | 16 of 33 | 48% | 24 of 41 | 5 of 5 | 100% | 0 | 0 | 2:17 |
| Patrick Cummins | 0 | 8 of 32 | 25% | 15 of 39 | 0 of 0 | --- | 0 | 0 | 0:00 | |
| 3 | Corey Anderson | 0 | 5 of 11 | 45% | 25 of 39 | 5 of 6 | 83% | 0 | 0 | 4:12 |
| Patrick Cummins | 0 | 5 of 14 | 35% | 7 of 16 | 0 of 0 | --- | 0 | 0 | 0:01 |
Significant Strikes
| Fighter | Sig. Str. | Sig. Str. % | Head | Body | Leg | Distance | Clinch | Ground |
|---|---|---|---|---|---|---|---|---|
| Corey Anderson | 64 of 119 | 53% | 56 of 107 | 6 of 10 | 2 of 2 | 38 of 85 | 16 of 22 | 10 of 12 |
| Patrick Cummins | 31 of 99 | 31% | 24 of 85 | 6 of 12 | 1 of 2 | 18 of 79 | 12 of 19 | 1 of 1 |
Significant Strikes Per Round
| Rd | Fighter | Sig. Str. | Sig. Str. % | Head | Body | Leg | Distance | Clinch | Ground |
|---|---|---|---|---|---|---|---|---|---|
| 1 | Corey Anderson | 43 of 75 | 57% | 38 of 68 | 4 of 6 | 1 of 1 | 23 of 49 | 11 of 15 | 9 of 11 |
| Patrick Cummins | 18 of 53 | 33% | 12 of 46 | 5 of 5 | 1 of 2 | 10 of 41 | 7 of 11 | 1 of 1 | |
| 2 | Corey Anderson | 16 of 33 | 48% | 13 of 29 | 2 of 3 | 1 of 1 | 13 of 28 | 3 of 5 | 0 of 0 |
| Patrick Cummins | 8 of 32 | 25% | 8 of 29 | 0 of 3 | 0 of 0 | 5 of 26 | 3 of 6 | 0 of 0 | |
| 3 | Corey Anderson | 5 of 11 | 45% | 5 of 10 | 0 of 1 | 0 of 0 | 2 of 8 | 2 of 2 | 1 of 1 |
| Patrick Cummins | 5 of 14 | 35% | 4 of 10 | 1 of 4 | 0 of 0 | 3 of 12 | 2 of 2 | 0 of 0 |
WIN
vs
Gian Villante
Decision (split) (29–28, 28–29, 29–28)
R3
5:00
·
UFC on Fox: Weidman vs. Gastelum ·
Jul 22, 2017
Totals
| Fighter | KD | Sig. Str. | Sig. Str. % | Total Str. | TD | TD % | Sub. Att | Rev. | Ctrl |
|---|---|---|---|---|---|---|---|---|---|
| Patrick Cummins | 0 | 86 of 182 | 47% | 92 of 188 | 1 of 11 | 9% | 0 | 0 | 3:04 |
| Gian Villante | 0 | 72 of 196 | 36% | 85 of 210 | 0 of 0 | --- | 0 | 0 | 0:00 |
Per Round
| Rd | Fighter | KD | Sig. Str. | Sig. Str. % | Total Str. | TD | TD % | Sub. Att | Rev. | Ctrl |
|---|---|---|---|---|---|---|---|---|---|---|
| 1 | Patrick Cummins | 0 | 17 of 39 | 43% | 20 of 42 | 1 of 6 | 16% | 0 | 0 | 1:39 |
| Gian Villante | 0 | 23 of 55 | 41% | 35 of 68 | 0 of 0 | --- | 0 | 0 | 0:00 | |
| 2 | Patrick Cummins | 0 | 37 of 71 | 52% | 38 of 72 | 0 of 4 | 0% | 0 | 0 | 0:19 |
| Gian Villante | 0 | 24 of 72 | 33% | 24 of 72 | 0 of 0 | --- | 0 | 0 | 0:00 | |
| 3 | Patrick Cummins | 0 | 32 of 72 | 44% | 34 of 74 | 0 of 1 | 0% | 0 | 0 | 1:06 |
| Gian Villante | 0 | 25 of 69 | 36% | 26 of 70 | 0 of 0 | --- | 0 | 0 | 0:00 |
Significant Strikes
| Fighter | Sig. Str. | Sig. Str. % | Head | Body | Leg | Distance | Clinch | Ground |
|---|---|---|---|---|---|---|---|---|
| Patrick Cummins | 86 of 182 | 47% | 70 of 163 | 7 of 9 | 9 of 10 | 74 of 164 | 12 of 18 | 0 of 0 |
| Gian Villante | 72 of 196 | 36% | 66 of 189 | 3 of 4 | 3 of 3 | 67 of 189 | 0 of 1 | 5 of 6 |
Significant Strikes Per Round
| Rd | Fighter | Sig. Str. | Sig. Str. % | Head | Body | Leg | Distance | Clinch | Ground |
|---|---|---|---|---|---|---|---|---|---|
| 1 | Patrick Cummins | 17 of 39 | 43% | 15 of 37 | 1 of 1 | 1 of 1 | 15 of 34 | 2 of 5 | 0 of 0 |
| Gian Villante | 23 of 55 | 41% | 21 of 53 | 1 of 1 | 1 of 1 | 18 of 49 | 0 of 1 | 5 of 5 | |
| 2 | Patrick Cummins | 37 of 71 | 52% | 30 of 62 | 5 of 7 | 2 of 2 | 35 of 67 | 2 of 4 | 0 of 0 |
| Gian Villante | 24 of 72 | 33% | 21 of 68 | 1 of 2 | 2 of 2 | 24 of 72 | 0 of 0 | 0 of 0 | |
| 3 | Patrick Cummins | 32 of 72 | 44% | 25 of 64 | 1 of 1 | 6 of 7 | 24 of 63 | 8 of 9 | 0 of 0 |
| Gian Villante | 25 of 69 | 36% | 24 of 68 | 1 of 1 | 0 of 0 | 25 of 68 | 0 of 0 | 0 of 1 |
WIN
vs
Jan Błachowicz
Decision (majority) (29–28, 29–28, 28–28)
R3
5:00
·
UFC 210: Cormier vs. Johnson 2 ·
Apr 08, 2017
Totals
| Fighter | KD | Sig. Str. | Sig. Str. % | Total Str. | TD | TD % | Sub. Att | Rev. | Ctrl |
|---|---|---|---|---|---|---|---|---|---|
| Patrick Cummins | 0 | 73 of 121 | 60% | 109 of 162 | 3 of 10 | 30% | 0 | 0 | 7:39 |
| Jan Błachowicz | 1 | 53 of 99 | 53% | 68 of 115 | 1 of 2 | 50% | 0 | 0 | 1:11 |
Per Round
| Rd | Fighter | KD | Sig. Str. | Sig. Str. % | Total Str. | TD | TD % | Sub. Att | Rev. | Ctrl |
|---|---|---|---|---|---|---|---|---|---|---|
| 1 | Patrick Cummins | 0 | 16 of 36 | 44% | 23 of 45 | 1 of 6 | 16% | 0 | 0 | 1:28 |
| Jan Błachowicz | 1 | 31 of 51 | 60% | 37 of 57 | 0 of 0 | --- | 0 | 0 | 0:40 | |
| 2 | Patrick Cummins | 0 | 21 of 38 | 55% | 27 of 44 | 1 of 2 | 50% | 0 | 0 | 2:28 |
| Jan Błachowicz | 0 | 13 of 30 | 43% | 18 of 36 | 1 of 2 | 50% | 0 | 0 | 0:28 | |
| 3 | Patrick Cummins | 0 | 36 of 47 | 76% | 59 of 73 | 1 of 2 | 50% | 0 | 0 | 3:43 |
| Jan Błachowicz | 0 | 9 of 18 | 50% | 13 of 22 | 0 of 0 | --- | 0 | 0 | 0:03 |
Significant Strikes
| Fighter | Sig. Str. | Sig. Str. % | Head | Body | Leg | Distance | Clinch | Ground |
|---|---|---|---|---|---|---|---|---|
| Patrick Cummins | 73 of 121 | 60% | 62 of 109 | 10 of 11 | 1 of 1 | 23 of 59 | 17 of 21 | 33 of 41 |
| Jan Błachowicz | 53 of 99 | 53% | 43 of 88 | 9 of 10 | 1 of 1 | 37 of 77 | 11 of 15 | 5 of 7 |
Significant Strikes Per Round
| Rd | Fighter | Sig. Str. | Sig. Str. % | Head | Body | Leg | Distance | Clinch | Ground |
|---|---|---|---|---|---|---|---|---|---|
| 1 | Patrick Cummins | 16 of 36 | 44% | 15 of 34 | 1 of 2 | 0 of 0 | 9 of 25 | 4 of 7 | 3 of 4 |
| Jan Błachowicz | 31 of 51 | 60% | 26 of 45 | 5 of 6 | 0 of 0 | 18 of 33 | 10 of 13 | 3 of 5 | |
| 2 | Patrick Cummins | 21 of 38 | 55% | 13 of 30 | 7 of 7 | 1 of 1 | 6 of 19 | 2 of 2 | 13 of 17 |
| Jan Błachowicz | 13 of 30 | 43% | 11 of 28 | 2 of 2 | 0 of 0 | 12 of 28 | 1 of 2 | 0 of 0 | |
| 3 | Patrick Cummins | 36 of 47 | 76% | 34 of 45 | 2 of 2 | 0 of 0 | 8 of 15 | 11 of 12 | 17 of 20 |
| Jan Błachowicz | 9 of 18 | 50% | 6 of 15 | 2 of 2 | 1 of 1 | 7 of 16 | 0 of 0 | 2 of 2 |
Play-by-Play
View on SherdogJan Blachowicz vs. Patrick Cummins
Round 1
Cummins tries to press forward but gets caught by Blachowicz with an uppercut. Cummins hits the deck and tries to climb back to his feet as Blachowicz tees off with punches, looking for the early finish. Cummins stands and gets pushed against the cage, but Blachowicz slips throwing a knee and falls to the ground. Cummins catches the Polish standout in a front headlock, tries to convert it to an anaconda choke but loses Blachowicz's neck as he drops to the ground. Blachowicz separates and lands a heavy body kick, then hits the American with the uppercut again. A looping left hand to the temple from Blachowicz sends Cummins shooting for a takedown. Blachowicz easily shuts down the shot and continues to pick at Cummins with jabs, then lands another uppercut as "Durkin" comes forward. Cummins is on unsteady legs as he's underhooked and pushed against the fence by Blachowicz, who delivers uppercuts to the body in the clinch. Cummins escapes the tie-up and catches Blachowicz stepping forward with a left hand, but Blachowicz walks through it to land another uppercut. Cummins is taking a lot of punishment here, and referee John McCarthy looks close to stopping the bout at one point, but Cummins earns a reprieve with a takedown. Cummins jams Blachowicz's head against the base of the fence to make things uncomfortable, but he loses top position before the end of the round when Blachowicz threatens with an armbar.
Jordan Breen scores the round 10-8 Blachowicz
Brian Knapp scores the round 10-8 Blachowicz
Chris Nelson scores the round 10-8 Blachowicz
Round 2
Blachowicz lands his lead uppercut again in the first 30 seconds of round two, stinging Cummins, who slows the assault with a takedown attempt. Blachowicz stays standing but winds up held against the fence for half a minute or so. When they separate, both 205ers connect with punches before Cummins shoots again and runs Blachowicz to the canvas, unintentionally aided by the referee, who could not get out of Blachowicz's way in time. Cummins stands over Blachowicz, kneels down in guard again and immediately has his right arm attacked by Blachowicz with a kimura. Cummins pulls the arm free and slams Blachowicz with a few heavy punches from the Polish fighter's open guard. Referee McCarthy calls for work, and soon after, Blachowicz kicks Cummins away and escapes to his feet. Now it's Blachowicz shooting for a takedown at the fence, pulling Cummins away from the wall and dumping him to the floor. Cummins is back on his feet within seconds, and suddenly Blachowicz is looking very tired, breathing heavily and letting his hands drop to his waist between punches. Blachowicz leans over with his hands on his knees with 20 seconds on the clock, then shoots for a late takedown and gets sprawled on by Cummins.
Jordan Breen scores the round 10-9 Cummins
Brian Knapp scores the round 10-9 Cummins
Chris Nelson scores the round 10-9 Cummins
Round 3
Cummins moves forward to put Blachowicz's back against the fence but can't hold him there for more than 20 seconds. When they separate, Cummins times Blachowicz's lead uppercut and ducks under to complete an effortless takedown. Blachowicz wraps up Cummins in closed guard, then swings his legs around to try an armbar; Cummins stacks up and frees the limb, then goes back to working for the guard pass. Halfway through the round, Cummins postures up to land an elbow, a few short punches. Cummins denies another armbar, but Blachowicz uses the attempt to roll to his knees and escape to his feet. Blachowicz lands a body kick and charges Cummins, who is ready to tie up Blachowicz in a front headlock. Cummins lands several knees to the leaning Blachowicz's head and receives a warning from the ref to mind the back of the head. Blachowicz drops to guard with just over one minute remaining, and Cummins jams him up against the foot of the fence again. Cummins tries to get busy with ground-and-pound in the final seconds but is tied up by Blachowicz from the bottom.
Jordan Breen scores the round 10-9 Cummins (28-28 Draw)
Brian Knapp scores the round 10-8 Cummins (28-27 Cummins)
Chris Nelson scores the round 10-9 Cummins (28-28 Draw)
The Official Result
Patrick Cummins def. Jan Blachowicz via Majority Decision (29-28, 29-28, 28-28) R3 5:00
Round 1
Cummins tries to press forward but gets caught by Blachowicz with an uppercut. Cummins hits the deck and tries to climb back to his feet as Blachowicz tees off with punches, looking for the early finish. Cummins stands and gets pushed against the cage, but Blachowicz slips throwing a knee and falls to the ground. Cummins catches the Polish standout in a front headlock, tries to convert it to an anaconda choke but loses Blachowicz's neck as he drops to the ground. Blachowicz separates and lands a heavy body kick, then hits the American with the uppercut again. A looping left hand to the temple from Blachowicz sends Cummins shooting for a takedown. Blachowicz easily shuts down the shot and continues to pick at Cummins with jabs, then lands another uppercut as "Durkin" comes forward. Cummins is on unsteady legs as he's underhooked and pushed against the fence by Blachowicz, who delivers uppercuts to the body in the clinch. Cummins escapes the tie-up and catches Blachowicz stepping forward with a left hand, but Blachowicz walks through it to land another uppercut. Cummins is taking a lot of punishment here, and referee John McCarthy looks close to stopping the bout at one point, but Cummins earns a reprieve with a takedown. Cummins jams Blachowicz's head against the base of the fence to make things uncomfortable, but he loses top position before the end of the round when Blachowicz threatens with an armbar.
Jordan Breen scores the round 10-8 Blachowicz
Brian Knapp scores the round 10-8 Blachowicz
Chris Nelson scores the round 10-8 Blachowicz
Round 2
Blachowicz lands his lead uppercut again in the first 30 seconds of round two, stinging Cummins, who slows the assault with a takedown attempt. Blachowicz stays standing but winds up held against the fence for half a minute or so. When they separate, both 205ers connect with punches before Cummins shoots again and runs Blachowicz to the canvas, unintentionally aided by the referee, who could not get out of Blachowicz's way in time. Cummins stands over Blachowicz, kneels down in guard again and immediately has his right arm attacked by Blachowicz with a kimura. Cummins pulls the arm free and slams Blachowicz with a few heavy punches from the Polish fighter's open guard. Referee McCarthy calls for work, and soon after, Blachowicz kicks Cummins away and escapes to his feet. Now it's Blachowicz shooting for a takedown at the fence, pulling Cummins away from the wall and dumping him to the floor. Cummins is back on his feet within seconds, and suddenly Blachowicz is looking very tired, breathing heavily and letting his hands drop to his waist between punches. Blachowicz leans over with his hands on his knees with 20 seconds on the clock, then shoots for a late takedown and gets sprawled on by Cummins.
Jordan Breen scores the round 10-9 Cummins
Brian Knapp scores the round 10-9 Cummins
Chris Nelson scores the round 10-9 Cummins
Round 3
Cummins moves forward to put Blachowicz's back against the fence but can't hold him there for more than 20 seconds. When they separate, Cummins times Blachowicz's lead uppercut and ducks under to complete an effortless takedown. Blachowicz wraps up Cummins in closed guard, then swings his legs around to try an armbar; Cummins stacks up and frees the limb, then goes back to working for the guard pass. Halfway through the round, Cummins postures up to land an elbow, a few short punches. Cummins denies another armbar, but Blachowicz uses the attempt to roll to his knees and escape to his feet. Blachowicz lands a body kick and charges Cummins, who is ready to tie up Blachowicz in a front headlock. Cummins lands several knees to the leaning Blachowicz's head and receives a warning from the ref to mind the back of the head. Blachowicz drops to guard with just over one minute remaining, and Cummins jams him up against the foot of the fence again. Cummins tries to get busy with ground-and-pound in the final seconds but is tied up by Blachowicz from the bottom.
Jordan Breen scores the round 10-9 Cummins (28-28 Draw)
Brian Knapp scores the round 10-8 Cummins (28-27 Cummins)
Chris Nelson scores the round 10-9 Cummins (28-28 Draw)
The Official Result
Patrick Cummins def. Jan Blachowicz via Majority Decision (29-28, 29-28, 28-28) R3 5:00
LOSS
vs
Antônio Rogério Nogueira
TKO (punches)
R1
4:52
·
UFC 198: Werdum vs. Miocic ·
May 14, 2016
Totals
| Fighter | KD | Sig. Str. | Sig. Str. % | Total Str. | TD | TD % | Sub. Att | Rev. | Ctrl |
|---|---|---|---|---|---|---|---|---|---|
| Antônio Rogério Nogueira | 1 | 30 of 58 | 51% | 36 of 65 | 0 of 0 | --- | 0 | 0 | 0:12 |
| Patrick Cummins | 0 | 12 of 36 | 33% | 14 of 38 | 0 of 2 | 0% | 0 | 0 | 0:11 |
Per Round
| Rd | Fighter | KD | Sig. Str. | Sig. Str. % | Total Str. | TD | TD % | Sub. Att | Rev. | Ctrl |
|---|---|---|---|---|---|---|---|---|---|---|
| 1 | Antônio Rogério Nogueira | 1 | 30 of 58 | 51% | 36 of 65 | 0 of 0 | --- | 0 | 0 | 0:12 |
| Patrick Cummins | 0 | 12 of 36 | 33% | 14 of 38 | 0 of 2 | 0% | 0 | 0 | 0:11 |
Significant Strikes
| Fighter | Sig. Str. | Sig. Str. % | Head | Body | Leg | Distance | Clinch | Ground |
|---|---|---|---|---|---|---|---|---|
| Antônio Rogério Nogueira | 30 of 58 | 51% | 30 of 55 | 0 of 3 | 0 of 0 | 23 of 50 | 2 of 3 | 5 of 5 |
| Patrick Cummins | 12 of 36 | 33% | 6 of 25 | 0 of 2 | 6 of 9 | 12 of 33 | 0 of 3 | 0 of 0 |
Significant Strikes Per Round
| Rd | Fighter | Sig. Str. | Sig. Str. % | Head | Body | Leg | Distance | Clinch | Ground |
|---|---|---|---|---|---|---|---|---|---|
| 1 | Antônio Rogério Nogueira | 30 of 58 | 51% | 30 of 55 | 0 of 3 | 0 of 0 | 23 of 50 | 2 of 3 | 5 of 5 |
| Patrick Cummins | 12 of 36 | 33% | 6 of 25 | 0 of 2 | 6 of 9 | 12 of 33 | 0 of 3 | 0 of 0 |
LOSS
vs
Glover Teixeira
TKO (punches)
R2
1:12
·
UFC Fight Night: Belfort vs. Henderson 3 ·
Nov 07, 2015
Totals
| Fighter | KD | Sig. Str. | Sig. Str. % | Total Str. | TD | TD % | Sub. Att | Rev. | Ctrl |
|---|---|---|---|---|---|---|---|---|---|
| Glover Teixeira | 0 | 54 of 102 | 52% | 59 of 107 | 0 of 1 | 0% | 0 | 0 | 0:14 |
| Patrick Cummins | 0 | 33 of 90 | 36% | 38 of 95 | 4 of 6 | 66% | 0 | 0 | 1:25 |
Per Round
| Rd | Fighter | KD | Sig. Str. | Sig. Str. % | Total Str. | TD | TD % | Sub. Att | Rev. | Ctrl |
|---|---|---|---|---|---|---|---|---|---|---|
| 1 | Glover Teixeira | 0 | 32 of 63 | 50% | 34 of 65 | 0 of 1 | 0% | 0 | 0 | 0:02 |
| Patrick Cummins | 0 | 30 of 75 | 40% | 35 of 80 | 4 of 5 | 80% | 0 | 0 | 1:21 | |
| 2 | Glover Teixeira | 0 | 22 of 39 | 56% | 25 of 42 | 0 of 0 | --- | 0 | 0 | 0:12 |
| Patrick Cummins | 0 | 3 of 15 | 20% | 3 of 15 | 0 of 1 | 0% | 0 | 0 | 0:04 |
Significant Strikes
| Fighter | Sig. Str. | Sig. Str. % | Head | Body | Leg | Distance | Clinch | Ground |
|---|---|---|---|---|---|---|---|---|
| Glover Teixeira | 54 of 102 | 52% | 51 of 98 | 3 of 4 | 0 of 0 | 50 of 96 | 4 of 6 | 0 of 0 |
| Patrick Cummins | 33 of 90 | 36% | 23 of 80 | 7 of 7 | 3 of 3 | 22 of 73 | 11 of 17 | 0 of 0 |
Significant Strikes Per Round
| Rd | Fighter | Sig. Str. | Sig. Str. % | Head | Body | Leg | Distance | Clinch | Ground |
|---|---|---|---|---|---|---|---|---|---|
| 1 | Glover Teixeira | 32 of 63 | 50% | 30 of 60 | 2 of 3 | 0 of 0 | 32 of 63 | 0 of 0 | 0 of 0 |
| Patrick Cummins | 30 of 75 | 40% | 20 of 65 | 7 of 7 | 3 of 3 | 19 of 62 | 11 of 13 | 0 of 0 | |
| 2 | Glover Teixeira | 22 of 39 | 56% | 21 of 38 | 1 of 1 | 0 of 0 | 18 of 33 | 4 of 6 | 0 of 0 |
| Patrick Cummins | 3 of 15 | 20% | 3 of 15 | 0 of 0 | 0 of 0 | 3 of 11 | 0 of 4 | 0 of 0 |
WIN
vs
Rafael Cavalcante
TKO (elbows)
R3
0:45
·
UFC 190: Rousey vs. Correia ·
Aug 01, 2015
Totals
| Fighter | KD | Sig. Str. | Sig. Str. % | Total Str. | TD | TD % | Sub. Att | Rev. | Ctrl |
|---|---|---|---|---|---|---|---|---|---|
| Patrick Cummins | 0 | 23 of 45 | 51% | 24 of 47 | 0 of 0 | --- | 0 | 0 | 0:03 |
| Rafael Cavalcante | 0 | 49 of 92 | 53% | 102 of 162 | 8 of 14 | 57% | 0 | 0 | 7:11 |
Per Round
| Rd | Fighter | KD | Sig. Str. | Sig. Str. % | Total Str. | TD | TD % | Sub. Att | Rev. | Ctrl |
|---|---|---|---|---|---|---|---|---|---|---|
| 1 | Patrick Cummins | 0 | 11 of 26 | 42% | 11 of 26 | 0 of 0 | --- | 0 | 0 | 0:00 |
| Rafael Cavalcante | 0 | 20 of 41 | 48% | 39 of 63 | 5 of 9 | 55% | 0 | 0 | 2:54 | |
| 2 | Patrick Cummins | 0 | 11 of 17 | 64% | 12 of 19 | 0 of 0 | --- | 0 | 0 | 0:03 |
| Rafael Cavalcante | 0 | 18 of 38 | 47% | 51 of 85 | 2 of 4 | 50% | 0 | 0 | 3:44 | |
| 3 | Patrick Cummins | 0 | 1 of 2 | 50% | 1 of 2 | 0 of 0 | --- | 0 | 0 | 0:00 |
| Rafael Cavalcante | 0 | 11 of 13 | 84% | 12 of 14 | 1 of 1 | 100% | 0 | 0 | 0:33 |
Significant Strikes
| Fighter | Sig. Str. | Sig. Str. % | Head | Body | Leg | Distance | Clinch | Ground |
|---|---|---|---|---|---|---|---|---|
| Patrick Cummins | 23 of 45 | 51% | 20 of 42 | 1 of 1 | 2 of 2 | 15 of 34 | 1 of 3 | 7 of 8 |
| Rafael Cavalcante | 49 of 92 | 53% | 37 of 77 | 6 of 7 | 6 of 8 | 18 of 49 | 7 of 10 | 24 of 33 |
Significant Strikes Per Round
| Rd | Fighter | Sig. Str. | Sig. Str. % | Head | Body | Leg | Distance | Clinch | Ground |
|---|---|---|---|---|---|---|---|---|---|
| 1 | Patrick Cummins | 11 of 26 | 42% | 9 of 24 | 0 of 0 | 2 of 2 | 10 of 25 | 1 of 1 | 0 of 0 |
| Rafael Cavalcante | 20 of 41 | 48% | 12 of 31 | 2 of 2 | 6 of 8 | 14 of 32 | 4 of 7 | 2 of 2 | |
| 2 | Patrick Cummins | 11 of 17 | 64% | 10 of 16 | 1 of 1 | 0 of 0 | 4 of 7 | 0 of 2 | 7 of 8 |
| Rafael Cavalcante | 18 of 38 | 47% | 14 of 33 | 4 of 5 | 0 of 0 | 3 of 15 | 3 of 3 | 12 of 20 | |
| 3 | Patrick Cummins | 1 of 2 | 50% | 1 of 2 | 0 of 0 | 0 of 0 | 1 of 2 | 0 of 0 | 0 of 0 |
| Rafael Cavalcante | 11 of 13 | 84% | 11 of 13 | 0 of 0 | 0 of 0 | 1 of 2 | 0 of 0 | 10 of 11 |
No comments yet. Be the first to share your thoughts!