UFC on Fuel TV: Barao vs. McDonald ·
Feb 16, 2013 ·
Light Heavyweight ·
Completed
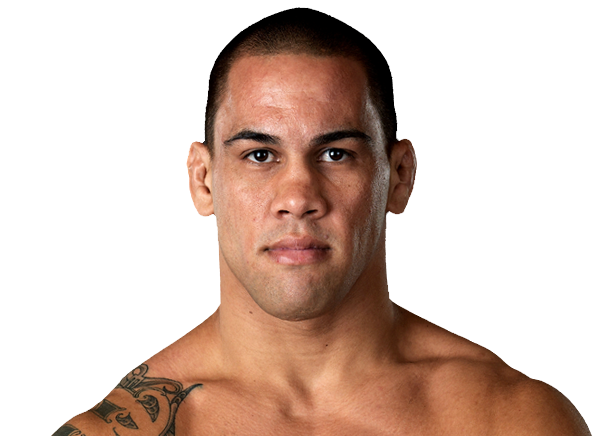
Career Averages - James Te Huna
4.04
SLpM
51.0%
Str. Acc.
2.99
SApM
62.0%
Str. Def.
2.75
TD Avg
37.0%
TD Acc.
58.0%
TD Def.
0.2
Sub. Avg
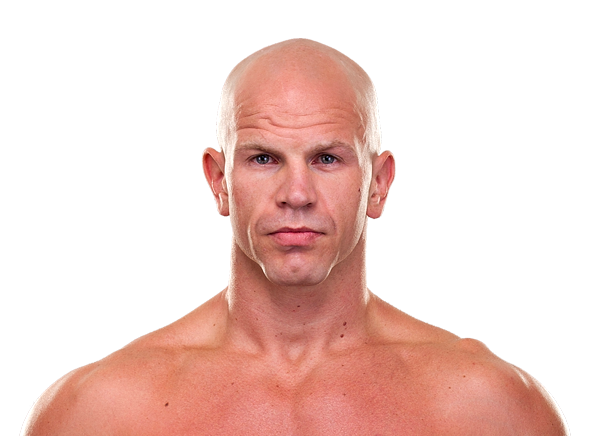
Career Averages - Ryan Jimmo
3.12
SLpM
66.0%
Str. Acc.
2.77
SApM
46.0%
Str. Def.
0.45
TD Avg
28.0%
TD Acc.
87.0%
TD Def.
0.0
Sub. Avg
James Te Huna - Fight History
LOSS
vs
Steve Bossé
KO (punch)
R1
0:52
·
UFC Fight Night: Hunt vs. Mir ·
Mar 20, 2016
Totals
| Fighter | KD | Sig. Str. | Sig. Str. % | Total Str. | TD | TD % | Sub. Att | Rev. | Ctrl |
|---|---|---|---|---|---|---|---|---|---|
| Steve Bossé | 0 | 1 of 7 | 14% | 1 of 7 | 0 of 0 | --- | 0 | 0 | 0:00 |
| James Te Huna | 1 | 5 of 12 | 41% | 5 of 12 | 0 of 0 | --- | 0 | 0 | 0:01 |
Per Round
| Rd | Fighter | KD | Sig. Str. | Sig. Str. % | Total Str. | TD | TD % | Sub. Att | Rev. | Ctrl |
|---|---|---|---|---|---|---|---|---|---|---|
| 1 | Steve Bossé | 0 | 1 of 7 | 14% | 1 of 7 | 0 of 0 | --- | 0 | 0 | 0:00 |
| James Te Huna | 1 | 5 of 12 | 41% | 5 of 12 | 0 of 0 | --- | 0 | 0 | 0:01 |
Significant Strikes
| Fighter | Sig. Str. | Sig. Str. % | Head | Body | Leg | Distance | Clinch | Ground |
|---|---|---|---|---|---|---|---|---|
| Steve Bossé | 1 of 7 | 14% | 0 of 4 | 1 of 3 | 0 of 0 | 1 of 7 | 0 of 0 | 0 of 0 |
| James Te Huna | 5 of 12 | 41% | 3 of 8 | 1 of 3 | 1 of 1 | 5 of 12 | 0 of 0 | 0 of 0 |
Significant Strikes Per Round
| Rd | Fighter | Sig. Str. | Sig. Str. % | Head | Body | Leg | Distance | Clinch | Ground |
|---|---|---|---|---|---|---|---|---|---|
| 1 | Steve Bossé | 1 of 7 | 14% | 0 of 4 | 1 of 3 | 0 of 0 | 1 of 7 | 0 of 0 | 0 of 0 |
| James Te Huna | 5 of 12 | 41% | 3 of 8 | 1 of 3 | 1 of 1 | 5 of 12 | 0 of 0 | 0 of 0 |
LOSS
vs
Nate Marquardt
Submission (armbar)
R1
4:34
·
UFC Fight Night: Te Huna vs. Marquardt ·
Jun 28, 2014
Totals
| Fighter | KD | Sig. Str. | Sig. Str. % | Total Str. | TD | TD % | Sub. Att | Rev. | Ctrl |
|---|---|---|---|---|---|---|---|---|---|
| Nate Marquardt | 0 | 6 of 10 | 60% | 17 of 21 | 0 of 1 | 0% | 0 | 0 | 0:39 |
| James Te Huna | 1 | 17 of 27 | 62% | 29 of 40 | 2 of 2 | 100% | 1 | 0 | 3:14 |
Per Round
| Rd | Fighter | KD | Sig. Str. | Sig. Str. % | Total Str. | TD | TD % | Sub. Att | Rev. | Ctrl |
|---|---|---|---|---|---|---|---|---|---|---|
| 1 | Nate Marquardt | 0 | 6 of 10 | 60% | 17 of 21 | 0 of 1 | 0% | 0 | 0 | 0:39 |
| James Te Huna | 1 | 17 of 27 | 62% | 29 of 40 | 2 of 2 | 100% | 1 | 0 | 3:14 |
Significant Strikes
| Fighter | Sig. Str. | Sig. Str. % | Head | Body | Leg | Distance | Clinch | Ground |
|---|---|---|---|---|---|---|---|---|
| Nate Marquardt | 6 of 10 | 60% | 1 of 4 | 3 of 4 | 2 of 2 | 0 of 2 | 6 of 8 | 0 of 0 |
| James Te Huna | 17 of 27 | 62% | 15 of 23 | 2 of 3 | 0 of 1 | 3 of 9 | 2 of 4 | 12 of 14 |
Significant Strikes Per Round
| Rd | Fighter | Sig. Str. | Sig. Str. % | Head | Body | Leg | Distance | Clinch | Ground |
|---|---|---|---|---|---|---|---|---|---|
| 1 | Nate Marquardt | 6 of 10 | 60% | 1 of 4 | 3 of 4 | 2 of 2 | 0 of 2 | 6 of 8 | 0 of 0 |
| James Te Huna | 17 of 27 | 62% | 15 of 23 | 2 of 3 | 0 of 1 | 3 of 9 | 2 of 4 | 12 of 14 |
LOSS
vs
Maurício Rua
KO (punch)
R1
1:03
·
UFC Fight Night: Hunt vs. Bigfoot ·
Dec 07, 2013
Totals
| Fighter | KD | Sig. Str. | Sig. Str. % | Total Str. | TD | TD % | Sub. Att | Rev. | Ctrl |
|---|---|---|---|---|---|---|---|---|---|
| Maurício Rua | 1 | 9 of 12 | 75% | 9 of 12 | 0 of 0 | --- | 0 | 0 | 0:03 |
| James Te Huna | 0 | 1 of 7 | 14% | 1 of 7 | 0 of 0 | --- | 0 | 0 | 0:00 |
Per Round
| Rd | Fighter | KD | Sig. Str. | Sig. Str. % | Total Str. | TD | TD % | Sub. Att | Rev. | Ctrl |
|---|---|---|---|---|---|---|---|---|---|---|
| 1 | Maurício Rua | 1 | 9 of 12 | 75% | 9 of 12 | 0 of 0 | --- | 0 | 0 | 0:03 |
| James Te Huna | 0 | 1 of 7 | 14% | 1 of 7 | 0 of 0 | --- | 0 | 0 | 0:00 |
Significant Strikes
| Fighter | Sig. Str. | Sig. Str. % | Head | Body | Leg | Distance | Clinch | Ground |
|---|---|---|---|---|---|---|---|---|
| Maurício Rua | 9 of 12 | 75% | 4 of 7 | 2 of 2 | 3 of 3 | 8 of 11 | 0 of 0 | 1 of 1 |
| James Te Huna | 1 of 7 | 14% | 1 of 4 | 0 of 3 | 0 of 0 | 1 of 7 | 0 of 0 | 0 of 0 |
Significant Strikes Per Round
| Rd | Fighter | Sig. Str. | Sig. Str. % | Head | Body | Leg | Distance | Clinch | Ground |
|---|---|---|---|---|---|---|---|---|---|
| 1 | Maurício Rua | 9 of 12 | 75% | 4 of 7 | 2 of 2 | 3 of 3 | 8 of 11 | 0 of 0 | 1 of 1 |
| James Te Huna | 1 of 7 | 14% | 1 of 4 | 0 of 3 | 0 of 0 | 1 of 7 | 0 of 0 | 0 of 0 |
LOSS
vs
Glover Teixeira
Submission (guillotine choke)
R1
2:38
·
UFC 160: Velasquez vs. Bigfoot 2 ·
May 25, 2013
Totals
| Fighter | KD | Sig. Str. | Sig. Str. % | Total Str. | TD | TD % | Sub. Att | Rev. | Ctrl |
|---|---|---|---|---|---|---|---|---|---|
| Glover Teixeira | 0 | 12 of 22 | 54% | 25 of 37 | 1 of 2 | 50% | 1 | 0 | 1:28 |
| James Te Huna | 0 | 8 of 21 | 38% | 11 of 24 | 0 of 0 | --- | 0 | 0 | 0:06 |
Per Round
| Rd | Fighter | KD | Sig. Str. | Sig. Str. % | Total Str. | TD | TD % | Sub. Att | Rev. | Ctrl |
|---|---|---|---|---|---|---|---|---|---|---|
| 1 | Glover Teixeira | 0 | 12 of 22 | 54% | 25 of 37 | 1 of 2 | 50% | 1 | 0 | 1:28 |
| James Te Huna | 0 | 8 of 21 | 38% | 11 of 24 | 0 of 0 | --- | 0 | 0 | 0:06 |
Significant Strikes
| Fighter | Sig. Str. | Sig. Str. % | Head | Body | Leg | Distance | Clinch | Ground |
|---|---|---|---|---|---|---|---|---|
| Glover Teixeira | 12 of 22 | 54% | 11 of 21 | 1 of 1 | 0 of 0 | 7 of 16 | 1 of 1 | 4 of 5 |
| James Te Huna | 8 of 21 | 38% | 4 of 17 | 1 of 1 | 3 of 3 | 7 of 20 | 1 of 1 | 0 of 0 |
Significant Strikes Per Round
| Rd | Fighter | Sig. Str. | Sig. Str. % | Head | Body | Leg | Distance | Clinch | Ground |
|---|---|---|---|---|---|---|---|---|---|
| 1 | Glover Teixeira | 12 of 22 | 54% | 11 of 21 | 1 of 1 | 0 of 0 | 7 of 16 | 1 of 1 | 4 of 5 |
| James Te Huna | 8 of 21 | 38% | 4 of 17 | 1 of 1 | 3 of 3 | 7 of 20 | 1 of 1 | 0 of 0 |
WIN
vs
Ryan Jimmo
Decision (unanimous) (29–27, 29–28, 29–28)
R3
5:00
·
UFC on Fuel TV: Barao vs. McDonald ·
Feb 16, 2013
Totals
| Fighter | KD | Sig. Str. | Sig. Str. % | Total Str. | TD | TD % | Sub. Att | Rev. | Ctrl |
|---|---|---|---|---|---|---|---|---|---|
| James Te Huna | 0 | 49 of 79 | 62% | 121 of 166 | 2 of 5 | 40% | 0 | 0 | 6:38 |
| Ryan Jimmo | 1 | 34 of 52 | 65% | 56 of 77 | 0 of 2 | 0% | 0 | 0 | 6:19 |
Per Round
| Rd | Fighter | KD | Sig. Str. | Sig. Str. % | Total Str. | TD | TD % | Sub. Att | Rev. | Ctrl |
|---|---|---|---|---|---|---|---|---|---|---|
| 1 | James Te Huna | 0 | 7 of 10 | 70% | 35 of 47 | 0 of 0 | --- | 0 | 0 | 0:46 |
| Ryan Jimmo | 1 | 25 of 39 | 64% | 47 of 64 | 0 of 0 | --- | 0 | 0 | 3:58 | |
| 2 | James Te Huna | 0 | 17 of 31 | 54% | 40 of 56 | 1 of 3 | 33% | 0 | 0 | 3:33 |
| Ryan Jimmo | 0 | 6 of 8 | 75% | 6 of 8 | 0 of 1 | 0% | 0 | 0 | 0:41 | |
| 3 | James Te Huna | 0 | 25 of 38 | 65% | 46 of 63 | 1 of 2 | 50% | 0 | 0 | 2:19 |
| Ryan Jimmo | 0 | 3 of 5 | 60% | 3 of 5 | 0 of 1 | 0% | 0 | 0 | 1:40 |
Significant Strikes
| Fighter | Sig. Str. | Sig. Str. % | Head | Body | Leg | Distance | Clinch | Ground |
|---|---|---|---|---|---|---|---|---|
| James Te Huna | 49 of 79 | 62% | 34 of 58 | 7 of 11 | 8 of 10 | 1 of 11 | 14 of 19 | 34 of 49 |
| Ryan Jimmo | 34 of 52 | 65% | 28 of 45 | 1 of 1 | 5 of 6 | 6 of 11 | 5 of 5 | 23 of 36 |
Significant Strikes Per Round
| Rd | Fighter | Sig. Str. | Sig. Str. % | Head | Body | Leg | Distance | Clinch | Ground |
|---|---|---|---|---|---|---|---|---|---|
| 1 | James Te Huna | 7 of 10 | 70% | 4 of 7 | 0 of 0 | 3 of 3 | 0 of 1 | 3 of 3 | 4 of 6 |
| Ryan Jimmo | 25 of 39 | 64% | 23 of 37 | 0 of 0 | 2 of 2 | 2 of 3 | 1 of 1 | 22 of 35 | |
| 2 | James Te Huna | 17 of 31 | 54% | 16 of 28 | 0 of 1 | 1 of 2 | 0 of 4 | 1 of 1 | 16 of 26 |
| Ryan Jimmo | 6 of 8 | 75% | 2 of 4 | 1 of 1 | 3 of 3 | 2 of 4 | 3 of 3 | 1 of 1 | |
| 3 | James Te Huna | 25 of 38 | 65% | 14 of 23 | 7 of 10 | 4 of 5 | 1 of 6 | 10 of 15 | 14 of 17 |
| Ryan Jimmo | 3 of 5 | 60% | 3 of 4 | 0 of 0 | 0 of 1 | 2 of 4 | 1 of 1 | 0 of 0 |
WIN
vs
Joey Beltran
Decision (unanimous) (30–26, 30–27, 30–27)
R3
5:00
·
UFC on Fuel TV: Munoz vs. Weidman ·
Jul 11, 2012
Totals
| Fighter | KD | Sig. Str. | Sig. Str. % | Total Str. | TD | TD % | Sub. Att | Rev. | Ctrl |
|---|---|---|---|---|---|---|---|---|---|
| James Te Huna | 1 | 122 of 249 | 49% | 172 of 301 | 3 of 9 | 33% | 0 | 0 | 2:49 |
| Joey Beltran | 0 | 73 of 278 | 26% | 90 of 296 | 1 of 2 | 50% | 0 | 0 | 1:50 |
Per Round
| Rd | Fighter | KD | Sig. Str. | Sig. Str. % | Total Str. | TD | TD % | Sub. Att | Rev. | Ctrl |
|---|---|---|---|---|---|---|---|---|---|---|
| 1 | James Te Huna | 1 | 65 of 121 | 53% | 80 of 136 | 0 of 1 | 0% | 0 | 0 | 0:40 |
| Joey Beltran | 0 | 19 of 87 | 21% | 25 of 94 | 0 of 0 | --- | 0 | 0 | 0:47 | |
| 2 | James Te Huna | 0 | 26 of 66 | 39% | 42 of 83 | 1 of 3 | 33% | 0 | 0 | 1:01 |
| Joey Beltran | 0 | 25 of 101 | 24% | 31 of 107 | 0 of 0 | --- | 0 | 0 | 0:00 | |
| 3 | James Te Huna | 0 | 31 of 62 | 50% | 50 of 82 | 2 of 5 | 40% | 0 | 0 | 1:08 |
| Joey Beltran | 0 | 29 of 90 | 32% | 34 of 95 | 1 of 2 | 50% | 0 | 0 | 1:03 |
Significant Strikes
| Fighter | Sig. Str. | Sig. Str. % | Head | Body | Leg | Distance | Clinch | Ground |
|---|---|---|---|---|---|---|---|---|
| James Te Huna | 122 of 249 | 49% | 80 of 195 | 23 of 31 | 19 of 23 | 109 of 227 | 3 of 6 | 10 of 16 |
| Joey Beltran | 73 of 278 | 26% | 45 of 243 | 11 of 17 | 17 of 18 | 59 of 264 | 13 of 13 | 1 of 1 |
Significant Strikes Per Round
| Rd | Fighter | Sig. Str. | Sig. Str. % | Head | Body | Leg | Distance | Clinch | Ground |
|---|---|---|---|---|---|---|---|---|---|
| 1 | James Te Huna | 65 of 121 | 53% | 47 of 102 | 8 of 9 | 10 of 10 | 52 of 100 | 3 of 6 | 10 of 15 |
| Joey Beltran | 19 of 87 | 21% | 8 of 76 | 5 of 5 | 6 of 6 | 14 of 82 | 5 of 5 | 0 of 0 | |
| 2 | James Te Huna | 26 of 66 | 39% | 12 of 47 | 9 of 13 | 5 of 6 | 26 of 65 | 0 of 0 | 0 of 1 |
| Joey Beltran | 25 of 101 | 24% | 16 of 87 | 3 of 7 | 6 of 7 | 25 of 101 | 0 of 0 | 0 of 0 | |
| 3 | James Te Huna | 31 of 62 | 50% | 21 of 46 | 6 of 9 | 4 of 7 | 31 of 62 | 0 of 0 | 0 of 0 |
| Joey Beltran | 29 of 90 | 32% | 21 of 80 | 3 of 5 | 5 of 5 | 20 of 81 | 8 of 8 | 1 of 1 |
WIN
vs
Aaron Rosa
TKO (punches)
R1
2:08
·
UFC on FX: Alves vs. Kampmann ·
Mar 03, 2012
Totals
| Fighter | KD | Sig. Str. | Sig. Str. % | Total Str. | TD | TD % | Sub. Att | Rev. | Ctrl |
|---|---|---|---|---|---|---|---|---|---|
| James Te Huna | 0 | 22 of 33 | 66% | 37 of 50 | 0 of 0 | --- | 0 | 0 | 1:07 |
| Aaron Rosa | 0 | 0 of 12 | 0% | 16 of 29 | 0 of 0 | --- | 0 | 0 | 0:00 |
Per Round
| Rd | Fighter | KD | Sig. Str. | Sig. Str. % | Total Str. | TD | TD % | Sub. Att | Rev. | Ctrl |
|---|---|---|---|---|---|---|---|---|---|---|
| 1 | James Te Huna | 0 | 22 of 33 | 66% | 37 of 50 | 0 of 0 | --- | 0 | 0 | 1:07 |
| Aaron Rosa | 0 | 0 of 12 | 0% | 16 of 29 | 0 of 0 | --- | 0 | 0 | 0:00 |
Significant Strikes
| Fighter | Sig. Str. | Sig. Str. % | Head | Body | Leg | Distance | Clinch | Ground |
|---|---|---|---|---|---|---|---|---|
| James Te Huna | 22 of 33 | 66% | 20 of 31 | 0 of 0 | 2 of 2 | 11 of 18 | 4 of 7 | 7 of 8 |
| Aaron Rosa | 0 of 12 | 0% | 0 of 12 | 0 of 0 | 0 of 0 | 0 of 12 | 0 of 0 | 0 of 0 |
Significant Strikes Per Round
| Rd | Fighter | Sig. Str. | Sig. Str. % | Head | Body | Leg | Distance | Clinch | Ground |
|---|---|---|---|---|---|---|---|---|---|
| 1 | James Te Huna | 22 of 33 | 66% | 20 of 31 | 0 of 0 | 2 of 2 | 11 of 18 | 4 of 7 | 7 of 8 |
| Aaron Rosa | 0 of 12 | 0% | 0 of 12 | 0 of 0 | 0 of 0 | 0 of 12 | 0 of 0 | 0 of 0 |
WIN
vs
Ricardo Romero
KO (punches)
R1
0:47
·
UFC 135: Jones vs. Rampage ·
Sep 24, 2011
Totals
| Fighter | KD | Sig. Str. | Sig. Str. % | Total Str. | TD | TD % | Sub. Att | Rev. | Ctrl |
|---|---|---|---|---|---|---|---|---|---|
| James Te Huna | 1 | 5 of 7 | 71% | 6 of 9 | 0 of 0 | --- | 0 | 0 | 0:10 |
| Ricardo Romero | 0 | 0 of 3 | 0% | 0 of 3 | 0 of 3 | 0% | 0 | 0 | 0:00 |
Per Round
| Rd | Fighter | KD | Sig. Str. | Sig. Str. % | Total Str. | TD | TD % | Sub. Att | Rev. | Ctrl |
|---|---|---|---|---|---|---|---|---|---|---|
| 1 | James Te Huna | 1 | 5 of 7 | 71% | 6 of 9 | 0 of 0 | --- | 0 | 0 | 0:10 |
| Ricardo Romero | 0 | 0 of 3 | 0% | 0 of 3 | 0 of 3 | 0% | 0 | 0 | 0:00 |
Significant Strikes
| Fighter | Sig. Str. | Sig. Str. % | Head | Body | Leg | Distance | Clinch | Ground |
|---|---|---|---|---|---|---|---|---|
| James Te Huna | 5 of 7 | 71% | 5 of 7 | 0 of 0 | 0 of 0 | 1 of 1 | 0 of 2 | 4 of 4 |
| Ricardo Romero | 0 of 3 | 0% | 0 of 3 | 0 of 0 | 0 of 0 | 0 of 3 | 0 of 0 | 0 of 0 |
Significant Strikes Per Round
| Rd | Fighter | Sig. Str. | Sig. Str. % | Head | Body | Leg | Distance | Clinch | Ground |
|---|---|---|---|---|---|---|---|---|---|
| 1 | James Te Huna | 5 of 7 | 71% | 5 of 7 | 0 of 0 | 0 of 0 | 1 of 1 | 0 of 2 | 4 of 4 |
| Ricardo Romero | 0 of 3 | 0% | 0 of 3 | 0 of 0 | 0 of 0 | 0 of 3 | 0 of 0 | 0 of 0 |
Ryan Jimmo - Fight History
LOSS
vs
Francimar Barroso
Decision (unanimous) (30–27, 30–27, 29–28)
R3
5:00
·
UFC Fight Night: Condit vs. Alves ·
May 30, 2015
Totals
| Fighter | KD | Sig. Str. | Sig. Str. % | Total Str. | TD | TD % | Sub. Att | Rev. | Ctrl |
|---|---|---|---|---|---|---|---|---|---|
| Francimar Barroso | 0 | 46 of 96 | 47% | 67 of 117 | 0 of 14 | 0% | 0 | 0 | 6:36 |
| Ryan Jimmo | 0 | 35 of 61 | 57% | 46 of 74 | 0 of 0 | --- | 0 | 0 | 0:23 |
Per Round
| Rd | Fighter | KD | Sig. Str. | Sig. Str. % | Total Str. | TD | TD % | Sub. Att | Rev. | Ctrl |
|---|---|---|---|---|---|---|---|---|---|---|
| 1 | Francimar Barroso | 0 | 10 of 21 | 47% | 16 of 27 | 0 of 6 | 0% | 0 | 0 | 2:57 |
| Ryan Jimmo | 0 | 13 of 19 | 68% | 23 of 30 | 0 of 0 | --- | 0 | 0 | 0:00 | |
| 2 | Francimar Barroso | 0 | 22 of 43 | 51% | 26 of 47 | 0 of 4 | 0% | 0 | 0 | 1:42 |
| Ryan Jimmo | 0 | 12 of 26 | 46% | 12 of 26 | 0 of 0 | --- | 0 | 0 | 0:08 | |
| 3 | Francimar Barroso | 0 | 14 of 32 | 43% | 25 of 43 | 0 of 4 | 0% | 0 | 0 | 1:57 |
| Ryan Jimmo | 0 | 10 of 16 | 62% | 11 of 18 | 0 of 0 | --- | 0 | 0 | 0:15 |
Significant Strikes
| Fighter | Sig. Str. | Sig. Str. % | Head | Body | Leg | Distance | Clinch | Ground |
|---|---|---|---|---|---|---|---|---|
| Francimar Barroso | 46 of 96 | 47% | 10 of 53 | 6 of 8 | 30 of 35 | 12 of 55 | 34 of 41 | 0 of 0 |
| Ryan Jimmo | 35 of 61 | 57% | 14 of 37 | 10 of 12 | 11 of 12 | 24 of 48 | 11 of 13 | 0 of 0 |
Significant Strikes Per Round
| Rd | Fighter | Sig. Str. | Sig. Str. % | Head | Body | Leg | Distance | Clinch | Ground |
|---|---|---|---|---|---|---|---|---|---|
| 1 | Francimar Barroso | 10 of 21 | 47% | 2 of 12 | 0 of 1 | 8 of 8 | 2 of 12 | 8 of 9 | 0 of 0 |
| Ryan Jimmo | 13 of 19 | 68% | 4 of 9 | 6 of 7 | 3 of 3 | 6 of 11 | 7 of 8 | 0 of 0 | |
| 2 | Francimar Barroso | 22 of 43 | 51% | 7 of 25 | 3 of 3 | 12 of 15 | 7 of 25 | 15 of 18 | 0 of 0 |
| Ryan Jimmo | 12 of 26 | 46% | 9 of 22 | 2 of 3 | 1 of 1 | 11 of 24 | 1 of 2 | 0 of 0 | |
| 3 | Francimar Barroso | 14 of 32 | 43% | 1 of 16 | 3 of 4 | 10 of 12 | 3 of 18 | 11 of 14 | 0 of 0 |
| Ryan Jimmo | 10 of 16 | 62% | 1 of 6 | 2 of 2 | 7 of 8 | 7 of 13 | 3 of 3 | 0 of 0 |
LOSS
vs
Ovince Saint Preux
Submission (kimura)
R2
2:10
·
UFC 174: Johnson vs. Bagautinov ·
Jun 14, 2014
Totals
| Fighter | KD | Sig. Str. | Sig. Str. % | Total Str. | TD | TD % | Sub. Att | Rev. | Ctrl |
|---|---|---|---|---|---|---|---|---|---|
| Ovince Saint Preux | 0 | 14 of 34 | 41% | 20 of 40 | 2 of 4 | 50% | 1 | 0 | 2:00 |
| Ryan Jimmo | 0 | 15 of 29 | 51% | 19 of 34 | 0 of 1 | 0% | 0 | 0 | 1:00 |
Per Round
| Rd | Fighter | KD | Sig. Str. | Sig. Str. % | Total Str. | TD | TD % | Sub. Att | Rev. | Ctrl |
|---|---|---|---|---|---|---|---|---|---|---|
| 1 | Ovince Saint Preux | 0 | 12 of 28 | 42% | 16 of 32 | 1 of 3 | 33% | 0 | 0 | 0:43 |
| Ryan Jimmo | 0 | 12 of 23 | 52% | 15 of 27 | 0 of 1 | 0% | 0 | 0 | 0:58 | |
| 2 | Ovince Saint Preux | 0 | 2 of 6 | 33% | 4 of 8 | 1 of 1 | 100% | 1 | 0 | 1:17 |
| Ryan Jimmo | 0 | 3 of 6 | 50% | 4 of 7 | 0 of 0 | --- | 0 | 0 | 0:02 |
Significant Strikes
| Fighter | Sig. Str. | Sig. Str. % | Head | Body | Leg | Distance | Clinch | Ground |
|---|---|---|---|---|---|---|---|---|
| Ovince Saint Preux | 14 of 34 | 41% | 7 of 26 | 3 of 3 | 4 of 5 | 11 of 29 | 2 of 4 | 1 of 1 |
| Ryan Jimmo | 15 of 29 | 51% | 4 of 15 | 3 of 5 | 8 of 9 | 13 of 27 | 2 of 2 | 0 of 0 |
Significant Strikes Per Round
| Rd | Fighter | Sig. Str. | Sig. Str. % | Head | Body | Leg | Distance | Clinch | Ground |
|---|---|---|---|---|---|---|---|---|---|
| 1 | Ovince Saint Preux | 12 of 28 | 42% | 6 of 22 | 3 of 3 | 3 of 3 | 10 of 24 | 2 of 4 | 0 of 0 |
| Ryan Jimmo | 12 of 23 | 52% | 3 of 11 | 3 of 5 | 6 of 7 | 10 of 21 | 2 of 2 | 0 of 0 | |
| 2 | Ovince Saint Preux | 2 of 6 | 33% | 1 of 4 | 0 of 0 | 1 of 2 | 1 of 5 | 0 of 0 | 1 of 1 |
| Ryan Jimmo | 3 of 6 | 50% | 1 of 4 | 0 of 0 | 2 of 2 | 3 of 6 | 0 of 0 | 0 of 0 |
WIN
vs
Sean O'Connell
KO (punches)
R1
4:27
·
The Ultimate Fighter Nations Finale: Bisping vs. Kennedy ·
Apr 16, 2014
Totals
| Fighter | KD | Sig. Str. | Sig. Str. % | Total Str. | TD | TD % | Sub. Att | Rev. | Ctrl |
|---|---|---|---|---|---|---|---|---|---|
| Ryan Jimmo | 1 | 20 of 32 | 62% | 29 of 44 | 1 of 1 | 100% | 0 | 0 | 0:37 |
| Sean O'Connell | 0 | 15 of 25 | 60% | 41 of 56 | 0 of 1 | 0% | 0 | 0 | 2:42 |
Per Round
| Rd | Fighter | KD | Sig. Str. | Sig. Str. % | Total Str. | TD | TD % | Sub. Att | Rev. | Ctrl |
|---|---|---|---|---|---|---|---|---|---|---|
| 1 | Ryan Jimmo | 1 | 20 of 32 | 62% | 29 of 44 | 1 of 1 | 100% | 0 | 0 | 0:37 |
| Sean O'Connell | 0 | 15 of 25 | 60% | 41 of 56 | 0 of 1 | 0% | 0 | 0 | 2:42 |
Significant Strikes
| Fighter | Sig. Str. | Sig. Str. % | Head | Body | Leg | Distance | Clinch | Ground |
|---|---|---|---|---|---|---|---|---|
| Ryan Jimmo | 20 of 32 | 62% | 12 of 22 | 8 of 10 | 0 of 0 | 7 of 16 | 10 of 13 | 3 of 3 |
| Sean O'Connell | 15 of 25 | 60% | 6 of 13 | 9 of 11 | 0 of 1 | 5 of 14 | 10 of 11 | 0 of 0 |
Significant Strikes Per Round
| Rd | Fighter | Sig. Str. | Sig. Str. % | Head | Body | Leg | Distance | Clinch | Ground |
|---|---|---|---|---|---|---|---|---|---|
| 1 | Ryan Jimmo | 20 of 32 | 62% | 12 of 22 | 8 of 10 | 0 of 0 | 7 of 16 | 10 of 13 | 3 of 3 |
| Sean O'Connell | 15 of 25 | 60% | 6 of 13 | 9 of 11 | 0 of 1 | 5 of 14 | 10 of 11 | 0 of 0 |
LOSS
vs
Jimi Manuwa
TKO (leg injury)
R2
4:41
·
UFC Fight Night: Machida vs. Munoz ·
Oct 26, 2013
Totals
| Fighter | KD | Sig. Str. | Sig. Str. % | Total Str. | TD | TD % | Sub. Att | Rev. | Ctrl |
|---|---|---|---|---|---|---|---|---|---|
| Jimi Manuwa | 0 | 48 of 72 | 66% | 51 of 76 | 0 of 4 | 0% | 0 | 0 | 1:35 |
| Ryan Jimmo | 0 | 36 of 54 | 66% | 37 of 55 | 0 of 1 | 0% | 0 | 0 | 3:02 |
Per Round
| Rd | Fighter | KD | Sig. Str. | Sig. Str. % | Total Str. | TD | TD % | Sub. Att | Rev. | Ctrl |
|---|---|---|---|---|---|---|---|---|---|---|
| 1 | Jimi Manuwa | 0 | 33 of 46 | 71% | 35 of 48 | 0 of 2 | 0% | 0 | 0 | 1:02 |
| Ryan Jimmo | 0 | 20 of 34 | 58% | 20 of 34 | 0 of 0 | --- | 0 | 0 | 1:14 | |
| 2 | Jimi Manuwa | 0 | 15 of 26 | 57% | 16 of 28 | 0 of 2 | 0% | 0 | 0 | 0:33 |
| Ryan Jimmo | 0 | 16 of 20 | 80% | 17 of 21 | 0 of 1 | 0% | 0 | 0 | 1:48 |
Significant Strikes
| Fighter | Sig. Str. | Sig. Str. % | Head | Body | Leg | Distance | Clinch | Ground |
|---|---|---|---|---|---|---|---|---|
| Jimi Manuwa | 48 of 72 | 66% | 8 of 26 | 9 of 12 | 31 of 34 | 21 of 40 | 27 of 32 | 0 of 0 |
| Ryan Jimmo | 36 of 54 | 66% | 11 of 26 | 9 of 11 | 16 of 17 | 17 of 32 | 19 of 22 | 0 of 0 |
Significant Strikes Per Round
| Rd | Fighter | Sig. Str. | Sig. Str. % | Head | Body | Leg | Distance | Clinch | Ground |
|---|---|---|---|---|---|---|---|---|---|
| 1 | Jimi Manuwa | 33 of 46 | 71% | 4 of 14 | 6 of 7 | 23 of 25 | 11 of 21 | 22 of 25 | 0 of 0 |
| Ryan Jimmo | 20 of 34 | 58% | 6 of 17 | 6 of 8 | 8 of 9 | 10 of 22 | 10 of 12 | 0 of 0 | |
| 2 | Jimi Manuwa | 15 of 26 | 57% | 4 of 12 | 3 of 5 | 8 of 9 | 10 of 19 | 5 of 7 | 0 of 0 |
| Ryan Jimmo | 16 of 20 | 80% | 5 of 9 | 3 of 3 | 8 of 8 | 7 of 10 | 9 of 10 | 0 of 0 |
WIN
vs
Igor Pokrajac
Decision (unanimous) (30–27, 30–27, 30–27)
R3
5:00
·
UFC 161: Evans vs. Henderson ·
Jun 15, 2013
Totals
| Fighter | KD | Sig. Str. | Sig. Str. % | Total Str. | TD | TD % | Sub. Att | Rev. | Ctrl |
|---|---|---|---|---|---|---|---|---|---|
| Ryan Jimmo | 1 | 65 of 83 | 78% | 124 of 150 | 1 of 2 | 50% | 0 | 0 | 10:42 |
| Igor Pokrajac | 0 | 12 of 40 | 30% | 37 of 65 | 0 of 4 | 0% | 1 | 0 | 0:58 |
Per Round
| Rd | Fighter | KD | Sig. Str. | Sig. Str. % | Total Str. | TD | TD % | Sub. Att | Rev. | Ctrl |
|---|---|---|---|---|---|---|---|---|---|---|
| 1 | Ryan Jimmo | 0 | 36 of 47 | 76% | 43 of 54 | 0 of 1 | 0% | 0 | 0 | 1:49 |
| Igor Pokrajac | 0 | 7 of 27 | 25% | 11 of 31 | 0 of 3 | 0% | 0 | 0 | 0:57 | |
| 2 | Ryan Jimmo | 1 | 15 of 20 | 75% | 44 of 52 | 1 of 1 | 100% | 0 | 0 | 4:35 |
| Igor Pokrajac | 0 | 1 of 5 | 20% | 15 of 19 | 0 of 0 | --- | 0 | 0 | 0:00 | |
| 3 | Ryan Jimmo | 0 | 14 of 16 | 87% | 37 of 44 | 0 of 0 | --- | 0 | 0 | 4:18 |
| Igor Pokrajac | 0 | 4 of 8 | 50% | 11 of 15 | 0 of 1 | 0% | 1 | 0 | 0:01 |
Significant Strikes
| Fighter | Sig. Str. | Sig. Str. % | Head | Body | Leg | Distance | Clinch | Ground |
|---|---|---|---|---|---|---|---|---|
| Ryan Jimmo | 65 of 83 | 78% | 26 of 44 | 15 of 15 | 24 of 24 | 22 of 36 | 29 of 29 | 14 of 18 |
| Igor Pokrajac | 12 of 40 | 30% | 8 of 36 | 3 of 3 | 1 of 1 | 7 of 35 | 5 of 5 | 0 of 0 |
Significant Strikes Per Round
| Rd | Fighter | Sig. Str. | Sig. Str. % | Head | Body | Leg | Distance | Clinch | Ground |
|---|---|---|---|---|---|---|---|---|---|
| 1 | Ryan Jimmo | 36 of 47 | 76% | 8 of 19 | 10 of 10 | 18 of 18 | 13 of 24 | 23 of 23 | 0 of 0 |
| Igor Pokrajac | 7 of 27 | 25% | 3 of 23 | 3 of 3 | 1 of 1 | 3 of 23 | 4 of 4 | 0 of 0 | |
| 2 | Ryan Jimmo | 15 of 20 | 75% | 11 of 16 | 1 of 1 | 3 of 3 | 4 of 6 | 1 of 1 | 10 of 13 |
| Igor Pokrajac | 1 of 5 | 20% | 1 of 5 | 0 of 0 | 0 of 0 | 0 of 4 | 1 of 1 | 0 of 0 | |
| 3 | Ryan Jimmo | 14 of 16 | 87% | 7 of 9 | 4 of 4 | 3 of 3 | 5 of 6 | 5 of 5 | 4 of 5 |
| Igor Pokrajac | 4 of 8 | 50% | 4 of 8 | 0 of 0 | 0 of 0 | 4 of 8 | 0 of 0 | 0 of 0 |
LOSS
vs
James Te Huna
Decision (unanimous) (29–27, 29–28, 29–28)
R3
5:00
·
UFC on Fuel TV: Barao vs. McDonald ·
Feb 16, 2013
Totals
| Fighter | KD | Sig. Str. | Sig. Str. % | Total Str. | TD | TD % | Sub. Att | Rev. | Ctrl |
|---|---|---|---|---|---|---|---|---|---|
| James Te Huna | 0 | 49 of 79 | 62% | 121 of 166 | 2 of 5 | 40% | 0 | 0 | 6:38 |
| Ryan Jimmo | 1 | 34 of 52 | 65% | 56 of 77 | 0 of 2 | 0% | 0 | 0 | 6:19 |
Per Round
| Rd | Fighter | KD | Sig. Str. | Sig. Str. % | Total Str. | TD | TD % | Sub. Att | Rev. | Ctrl |
|---|---|---|---|---|---|---|---|---|---|---|
| 1 | James Te Huna | 0 | 7 of 10 | 70% | 35 of 47 | 0 of 0 | --- | 0 | 0 | 0:46 |
| Ryan Jimmo | 1 | 25 of 39 | 64% | 47 of 64 | 0 of 0 | --- | 0 | 0 | 3:58 | |
| 2 | James Te Huna | 0 | 17 of 31 | 54% | 40 of 56 | 1 of 3 | 33% | 0 | 0 | 3:33 |
| Ryan Jimmo | 0 | 6 of 8 | 75% | 6 of 8 | 0 of 1 | 0% | 0 | 0 | 0:41 | |
| 3 | James Te Huna | 0 | 25 of 38 | 65% | 46 of 63 | 1 of 2 | 50% | 0 | 0 | 2:19 |
| Ryan Jimmo | 0 | 3 of 5 | 60% | 3 of 5 | 0 of 1 | 0% | 0 | 0 | 1:40 |
Significant Strikes
| Fighter | Sig. Str. | Sig. Str. % | Head | Body | Leg | Distance | Clinch | Ground |
|---|---|---|---|---|---|---|---|---|
| James Te Huna | 49 of 79 | 62% | 34 of 58 | 7 of 11 | 8 of 10 | 1 of 11 | 14 of 19 | 34 of 49 |
| Ryan Jimmo | 34 of 52 | 65% | 28 of 45 | 1 of 1 | 5 of 6 | 6 of 11 | 5 of 5 | 23 of 36 |
Significant Strikes Per Round
| Rd | Fighter | Sig. Str. | Sig. Str. % | Head | Body | Leg | Distance | Clinch | Ground |
|---|---|---|---|---|---|---|---|---|---|
| 1 | James Te Huna | 7 of 10 | 70% | 4 of 7 | 0 of 0 | 3 of 3 | 0 of 1 | 3 of 3 | 4 of 6 |
| Ryan Jimmo | 25 of 39 | 64% | 23 of 37 | 0 of 0 | 2 of 2 | 2 of 3 | 1 of 1 | 22 of 35 | |
| 2 | James Te Huna | 17 of 31 | 54% | 16 of 28 | 0 of 1 | 1 of 2 | 0 of 4 | 1 of 1 | 16 of 26 |
| Ryan Jimmo | 6 of 8 | 75% | 2 of 4 | 1 of 1 | 3 of 3 | 2 of 4 | 3 of 3 | 1 of 1 | |
| 3 | James Te Huna | 25 of 38 | 65% | 14 of 23 | 7 of 10 | 4 of 5 | 1 of 6 | 10 of 15 | 14 of 17 |
| Ryan Jimmo | 3 of 5 | 60% | 3 of 4 | 0 of 0 | 0 of 1 | 2 of 4 | 1 of 1 | 0 of 0 |
WIN
vs
Anthony Perosh
KO (punch)
R1
0:07
·
UFC 149: Faber vs. Barao ·
Jul 21, 2012
Totals
| Fighter | KD | Sig. Str. | Sig. Str. % | Total Str. | TD | TD % | Sub. Att | Rev. | Ctrl |
|---|---|---|---|---|---|---|---|---|---|
| Ryan Jimmo | 0 | 0 of 1 | 0% | 0 of 1 | 0 of 0 | --- | 0 | 0 | 0:00 |
| Anthony Perosh | 1 | 2 of 2 | 100% | 2 of 2 | 0 of 0 | --- | 0 | 0 | 0:02 |
Per Round
| Rd | Fighter | KD | Sig. Str. | Sig. Str. % | Total Str. | TD | TD % | Sub. Att | Rev. | Ctrl |
|---|---|---|---|---|---|---|---|---|---|---|
| 1 | Ryan Jimmo | 0 | 0 of 1 | 0% | 0 of 1 | 0 of 0 | --- | 0 | 0 | 0:00 |
| Anthony Perosh | 1 | 2 of 2 | 100% | 2 of 2 | 0 of 0 | --- | 0 | 0 | 0:02 |
Significant Strikes
| Fighter | Sig. Str. | Sig. Str. % | Head | Body | Leg | Distance | Clinch | Ground |
|---|---|---|---|---|---|---|---|---|
| Ryan Jimmo | 0 of 1 | 0% | 0 of 1 | 0 of 0 | 0 of 0 | 0 of 1 | 0 of 0 | 0 of 0 |
| Anthony Perosh | 2 of 2 | 100% | 2 of 2 | 0 of 0 | 0 of 0 | 1 of 1 | 0 of 0 | 1 of 1 |
Significant Strikes Per Round
| Rd | Fighter | Sig. Str. | Sig. Str. % | Head | Body | Leg | Distance | Clinch | Ground |
|---|---|---|---|---|---|---|---|---|---|
| 1 | Ryan Jimmo | 0 of 1 | 0% | 0 of 1 | 0 of 0 | 0 of 0 | 0 of 1 | 0 of 0 | 0 of 0 |
| Anthony Perosh | 2 of 2 | 100% | 2 of 2 | 0 of 0 | 0 of 0 | 1 of 1 | 0 of 0 | 1 of 1 |
WIN
vs
Anthony Perosh
KO (punch)
R1
0:07
·
UFC on FX: Johnson vs. McCall 2 ·
Jun 08, 2012
Totals
| Fighter | KD | Sig. Str. | Sig. Str. % | Total Str. | TD | TD % | Sub. Att | Rev. | Ctrl |
|---|---|---|---|---|---|---|---|---|---|
| Ryan Jimmo | 0 | 0 of 1 | 0% | 0 of 1 | 0 of 0 | --- | 0 | 0 | 0:00 |
| Anthony Perosh | 1 | 2 of 2 | 100% | 2 of 2 | 0 of 0 | --- | 0 | 0 | 0:02 |
Per Round
| Rd | Fighter | KD | Sig. Str. | Sig. Str. % | Total Str. | TD | TD % | Sub. Att | Rev. | Ctrl |
|---|---|---|---|---|---|---|---|---|---|---|
| 1 | Ryan Jimmo | 0 | 0 of 1 | 0% | 0 of 1 | 0 of 0 | --- | 0 | 0 | 0:00 |
| Anthony Perosh | 1 | 2 of 2 | 100% | 2 of 2 | 0 of 0 | --- | 0 | 0 | 0:02 |
Significant Strikes
| Fighter | Sig. Str. | Sig. Str. % | Head | Body | Leg | Distance | Clinch | Ground |
|---|---|---|---|---|---|---|---|---|
| Ryan Jimmo | 0 of 1 | 0% | 0 of 1 | 0 of 0 | 0 of 0 | 0 of 1 | 0 of 0 | 0 of 0 |
| Anthony Perosh | 2 of 2 | 100% | 2 of 2 | 0 of 0 | 0 of 0 | 1 of 1 | 0 of 0 | 1 of 1 |
Significant Strikes Per Round
| Rd | Fighter | Sig. Str. | Sig. Str. % | Head | Body | Leg | Distance | Clinch | Ground |
|---|---|---|---|---|---|---|---|---|---|
| 1 | Ryan Jimmo | 0 of 1 | 0% | 0 of 1 | 0 of 0 | 0 of 0 | 0 of 1 | 0 of 0 | 0 of 0 |
| Anthony Perosh | 2 of 2 | 100% | 2 of 2 | 0 of 0 | 0 of 0 | 1 of 1 | 0 of 0 | 1 of 1 |
No comments yet. Be the first to share your thoughts!