
Career Averages - Paul Taylor
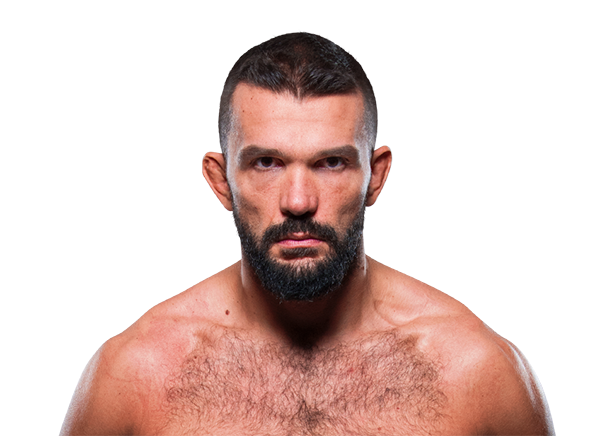
Career Averages - Peter Sobotta
Paul Taylor - Fight History
Totals
| Fighter | KD | Sig. Str. | Sig. Str. % | Total Str. | TD | TD % | Sub. Att | Rev. | Ctrl |
|---|---|---|---|---|---|---|---|---|---|
| Paul Taylor | 1 | 37 of 61 | 60% | 47 of 72 | 0 of 1 | 0% | 0 | 0 | 3:19 |
| Gabe Ruediger | 0 | 17 of 49 | 34% | 60 of 95 | 0 of 6 | 0% | 0 | 0 | 1:08 |
Per Round
| Rd | Fighter | KD | Sig. Str. | Sig. Str. % | Total Str. | TD | TD % | Sub. Att | Rev. | Ctrl |
|---|---|---|---|---|---|---|---|---|---|---|
| 1 | Paul Taylor | 0 | 23 of 37 | 62% | 29 of 44 | 0 of 1 | 0% | 0 | 0 | 2:35 |
| Gabe Ruediger | 0 | 13 of 33 | 39% | 43 of 65 | 0 of 3 | 0% | 0 | 0 | 0:51 | |
| 2 | Paul Taylor | 1 | 14 of 24 | 58% | 18 of 28 | 0 of 0 | --- | 0 | 0 | 0:44 |
| Gabe Ruediger | 0 | 4 of 16 | 25% | 17 of 30 | 0 of 3 | 0% | 0 | 0 | 0:17 |
Significant Strikes
| Fighter | Sig. Str. | Sig. Str. % | Head | Body | Leg | Distance | Clinch | Ground |
|---|---|---|---|---|---|---|---|---|
| Paul Taylor | 37 of 61 | 60% | 31 of 54 | 3 of 3 | 3 of 4 | 25 of 44 | 11 of 15 | 1 of 2 |
| Gabe Ruediger | 17 of 49 | 34% | 10 of 38 | 5 of 7 | 2 of 4 | 11 of 35 | 6 of 14 | 0 of 0 |
Significant Strikes Per Round
| Rd | Fighter | Sig. Str. | Sig. Str. % | Head | Body | Leg | Distance | Clinch | Ground |
|---|---|---|---|---|---|---|---|---|---|
| 1 | Paul Taylor | 23 of 37 | 62% | 19 of 32 | 2 of 2 | 2 of 3 | 18 of 30 | 5 of 7 | 0 of 0 |
| Gabe Ruediger | 13 of 33 | 39% | 6 of 23 | 5 of 6 | 2 of 4 | 7 of 24 | 6 of 9 | 0 of 0 | |
| 2 | Paul Taylor | 14 of 24 | 58% | 12 of 22 | 1 of 1 | 1 of 1 | 7 of 14 | 6 of 8 | 1 of 2 |
| Gabe Ruediger | 4 of 16 | 25% | 4 of 15 | 0 of 1 | 0 of 0 | 4 of 11 | 0 of 5 | 0 of 0 |
Totals
| Fighter | KD | Sig. Str. | Sig. Str. % | Total Str. | TD | TD % | Sub. Att | Rev. | Ctrl |
|---|---|---|---|---|---|---|---|---|---|
| Sam Stout | 0 | 107 of 295 | 36% | 108 of 296 | 1 of 2 | 50% | 0 | 0 | 0:27 |
| Paul Taylor | 0 | 140 of 296 | 47% | 140 of 296 | 0 of 3 | 0% | 0 | 0 | 0:00 |
Per Round
| Rd | Fighter | KD | Sig. Str. | Sig. Str. % | Total Str. | TD | TD % | Sub. Att | Rev. | Ctrl |
|---|---|---|---|---|---|---|---|---|---|---|
| 1 | Sam Stout | 0 | 38 of 99 | 38% | 38 of 99 | 1 of 1 | 100% | 0 | 0 | 0:07 |
| Paul Taylor | 0 | 50 of 84 | 59% | 50 of 84 | 0 of 1 | 0% | 0 | 0 | 0:00 | |
| 2 | Sam Stout | 0 | 30 of 83 | 36% | 31 of 84 | 0 of 0 | --- | 0 | 0 | 0:19 |
| Paul Taylor | 0 | 38 of 89 | 42% | 38 of 89 | 0 of 1 | 0% | 0 | 0 | 0:00 | |
| 3 | Sam Stout | 0 | 39 of 113 | 34% | 39 of 113 | 0 of 1 | 0% | 0 | 0 | 0:01 |
| Paul Taylor | 0 | 52 of 123 | 42% | 52 of 123 | 0 of 1 | 0% | 0 | 0 | 0:00 |
Significant Strikes
| Fighter | Sig. Str. | Sig. Str. % | Head | Body | Leg | Distance | Clinch | Ground |
|---|---|---|---|---|---|---|---|---|
| Sam Stout | 107 of 295 | 36% | 58 of 235 | 16 of 19 | 33 of 41 | 105 of 292 | 2 of 3 | 0 of 0 |
| Paul Taylor | 140 of 296 | 47% | 88 of 228 | 25 of 35 | 27 of 33 | 135 of 289 | 5 of 7 | 0 of 0 |
Significant Strikes Per Round
| Rd | Fighter | Sig. Str. | Sig. Str. % | Head | Body | Leg | Distance | Clinch | Ground |
|---|---|---|---|---|---|---|---|---|---|
| 1 | Sam Stout | 38 of 99 | 38% | 19 of 74 | 5 of 6 | 14 of 19 | 38 of 99 | 0 of 0 | 0 of 0 |
| Paul Taylor | 50 of 84 | 59% | 26 of 59 | 10 of 11 | 14 of 14 | 50 of 84 | 0 of 0 | 0 of 0 | |
| 2 | Sam Stout | 30 of 83 | 36% | 19 of 71 | 5 of 5 | 6 of 7 | 28 of 80 | 2 of 3 | 0 of 0 |
| Paul Taylor | 38 of 89 | 42% | 25 of 73 | 5 of 7 | 8 of 9 | 37 of 87 | 1 of 2 | 0 of 0 | |
| 3 | Sam Stout | 39 of 113 | 34% | 20 of 90 | 6 of 8 | 13 of 15 | 39 of 113 | 0 of 0 | 0 of 0 |
| Paul Taylor | 52 of 123 | 42% | 37 of 96 | 10 of 17 | 5 of 10 | 48 of 118 | 4 of 5 | 0 of 0 |
Totals
| Fighter | KD | Sig. Str. | Sig. Str. % | Total Str. | TD | TD % | Sub. Att | Rev. | Ctrl |
|---|---|---|---|---|---|---|---|---|---|
| John Hathaway | 0 | 80 of 148 | 54% | 239 of 330 | 5 of 6 | 83% | 0 | 0 | 13:23 |
| Paul Taylor | 0 | 5 of 19 | 26% | 11 of 25 | 0 of 0 | --- | 1 | 0 | 0:00 |
Per Round
| Rd | Fighter | KD | Sig. Str. | Sig. Str. % | Total Str. | TD | TD % | Sub. Att | Rev. | Ctrl |
|---|---|---|---|---|---|---|---|---|---|---|
| 1 | John Hathaway | 0 | 12 of 31 | 38% | 64 of 87 | 3 of 4 | 75% | 0 | 0 | 4:10 |
| Paul Taylor | 0 | 2 of 12 | 16% | 2 of 12 | 0 of 0 | --- | 0 | 0 | 0:00 | |
| 2 | John Hathaway | 0 | 49 of 81 | 60% | 102 of 140 | 1 of 1 | 100% | 0 | 0 | 4:39 |
| Paul Taylor | 0 | 2 of 3 | 66% | 3 of 4 | 0 of 0 | --- | 1 | 0 | 0:00 | |
| 3 | John Hathaway | 0 | 19 of 36 | 52% | 73 of 103 | 1 of 1 | 100% | 0 | 0 | 4:34 |
| Paul Taylor | 0 | 1 of 4 | 25% | 6 of 9 | 0 of 0 | --- | 0 | 0 | 0:00 |
Significant Strikes
| Fighter | Sig. Str. | Sig. Str. % | Head | Body | Leg | Distance | Clinch | Ground |
|---|---|---|---|---|---|---|---|---|
| John Hathaway | 80 of 148 | 54% | 59 of 123 | 19 of 23 | 2 of 2 | 4 of 10 | 1 of 2 | 75 of 136 |
| Paul Taylor | 5 of 19 | 26% | 1 of 13 | 1 of 1 | 3 of 5 | 3 of 16 | 2 of 3 | 0 of 0 |
Significant Strikes Per Round
| Rd | Fighter | Sig. Str. | Sig. Str. % | Head | Body | Leg | Distance | Clinch | Ground |
|---|---|---|---|---|---|---|---|---|---|
| 1 | John Hathaway | 12 of 31 | 38% | 8 of 26 | 3 of 4 | 1 of 1 | 2 of 4 | 1 of 2 | 9 of 25 |
| Paul Taylor | 2 of 12 | 16% | 1 of 10 | 0 of 0 | 1 of 2 | 1 of 10 | 1 of 2 | 0 of 0 | |
| 2 | John Hathaway | 49 of 81 | 60% | 37 of 68 | 11 of 12 | 1 of 1 | 2 of 4 | 0 of 0 | 47 of 77 |
| Paul Taylor | 2 of 3 | 66% | 0 of 0 | 1 of 1 | 1 of 2 | 2 of 3 | 0 of 0 | 0 of 0 | |
| 3 | John Hathaway | 19 of 36 | 52% | 14 of 29 | 5 of 7 | 0 of 0 | 0 of 2 | 0 of 0 | 19 of 34 |
| Paul Taylor | 1 of 4 | 25% | 0 of 3 | 0 of 0 | 1 of 1 | 0 of 3 | 1 of 1 | 0 of 0 |
Totals
| Fighter | KD | Sig. Str. | Sig. Str. % | Total Str. | TD | TD % | Sub. Att | Rev. | Ctrl |
|---|---|---|---|---|---|---|---|---|---|
| Paul Taylor | 0 | 46 of 102 | 45% | 80 of 136 | 0 of 0 | --- | 0 | 0 | 4:33 |
| Peter Sobotta | 0 | 18 of 39 | 46% | 19 of 40 | 2 of 7 | 28% | 0 | 0 | 2:08 |
Per Round
| Rd | Fighter | KD | Sig. Str. | Sig. Str. % | Total Str. | TD | TD % | Sub. Att | Rev. | Ctrl |
|---|---|---|---|---|---|---|---|---|---|---|
| 1 | Paul Taylor | 0 | 11 of 26 | 42% | 25 of 40 | 0 of 0 | --- | 0 | 0 | 1:57 |
| Peter Sobotta | 0 | 10 of 12 | 83% | 10 of 12 | 0 of 4 | 0% | 0 | 0 | 0:43 | |
| 2 | Paul Taylor | 0 | 24 of 47 | 51% | 26 of 49 | 0 of 0 | --- | 0 | 0 | 0:20 |
| Peter Sobotta | 0 | 6 of 20 | 30% | 6 of 20 | 1 of 1 | 100% | 0 | 0 | 0:39 | |
| 3 | Paul Taylor | 0 | 11 of 29 | 37% | 29 of 47 | 0 of 0 | --- | 0 | 0 | 2:16 |
| Peter Sobotta | 0 | 2 of 7 | 28% | 3 of 8 | 1 of 2 | 50% | 0 | 0 | 0:46 |
Significant Strikes
| Fighter | Sig. Str. | Sig. Str. % | Head | Body | Leg | Distance | Clinch | Ground |
|---|---|---|---|---|---|---|---|---|
| Paul Taylor | 46 of 102 | 45% | 16 of 55 | 1 of 8 | 29 of 39 | 42 of 92 | 1 of 2 | 3 of 8 |
| Peter Sobotta | 18 of 39 | 46% | 5 of 22 | 4 of 5 | 9 of 12 | 17 of 38 | 1 of 1 | 0 of 0 |
Significant Strikes Per Round
| Rd | Fighter | Sig. Str. | Sig. Str. % | Head | Body | Leg | Distance | Clinch | Ground |
|---|---|---|---|---|---|---|---|---|---|
| 1 | Paul Taylor | 11 of 26 | 42% | 4 of 16 | 0 of 1 | 7 of 9 | 10 of 23 | 0 of 1 | 1 of 2 |
| Peter Sobotta | 10 of 12 | 83% | 2 of 4 | 1 of 1 | 7 of 7 | 10 of 12 | 0 of 0 | 0 of 0 | |
| 2 | Paul Taylor | 24 of 47 | 51% | 7 of 20 | 1 of 5 | 16 of 22 | 24 of 47 | 0 of 0 | 0 of 0 |
| Peter Sobotta | 6 of 20 | 30% | 3 of 14 | 1 of 1 | 2 of 5 | 5 of 19 | 1 of 1 | 0 of 0 | |
| 3 | Paul Taylor | 11 of 29 | 37% | 5 of 19 | 0 of 2 | 6 of 8 | 8 of 22 | 1 of 1 | 2 of 6 |
| Peter Sobotta | 2 of 7 | 28% | 0 of 4 | 2 of 3 | 0 of 0 | 2 of 7 | 0 of 0 | 0 of 0 |
Totals
| Fighter | KD | Sig. Str. | Sig. Str. % | Total Str. | TD | TD % | Sub. Att | Rev. | Ctrl |
|---|---|---|---|---|---|---|---|---|---|
| Chris Lytle | 0 | 102 of 194 | 52% | 212 of 304 | 2 of 3 | 66% | 0 | 0 | 8:01 |
| Paul Taylor | 0 | 85 of 160 | 53% | 133 of 209 | 0 of 2 | 0% | 0 | 0 | 1:03 |
Per Round
| Rd | Fighter | KD | Sig. Str. | Sig. Str. % | Total Str. | TD | TD % | Sub. Att | Rev. | Ctrl |
|---|---|---|---|---|---|---|---|---|---|---|
| 1 | Chris Lytle | 0 | 35 of 54 | 64% | 83 of 102 | 0 of 0 | --- | 0 | 0 | 3:02 |
| Paul Taylor | 0 | 32 of 52 | 61% | 46 of 66 | 0 of 0 | --- | 0 | 0 | 0:18 | |
| 2 | Chris Lytle | 0 | 33 of 55 | 60% | 70 of 92 | 1 of 2 | 50% | 0 | 0 | 2:34 |
| Paul Taylor | 0 | 20 of 43 | 46% | 40 of 64 | 0 of 2 | 0% | 0 | 0 | 0:37 | |
| 3 | Chris Lytle | 0 | 34 of 85 | 40% | 59 of 110 | 1 of 1 | 100% | 0 | 0 | 2:25 |
| Paul Taylor | 0 | 33 of 65 | 50% | 47 of 79 | 0 of 0 | --- | 0 | 0 | 0:08 |
Significant Strikes
| Fighter | Sig. Str. | Sig. Str. % | Head | Body | Leg | Distance | Clinch | Ground |
|---|---|---|---|---|---|---|---|---|
| Chris Lytle | 102 of 194 | 52% | 54 of 131 | 42 of 57 | 6 of 6 | 56 of 128 | 43 of 63 | 3 of 3 |
| Paul Taylor | 85 of 160 | 53% | 42 of 109 | 15 of 23 | 28 of 28 | 48 of 105 | 37 of 55 | 0 of 0 |
Significant Strikes Per Round
| Rd | Fighter | Sig. Str. | Sig. Str. % | Head | Body | Leg | Distance | Clinch | Ground |
|---|---|---|---|---|---|---|---|---|---|
| 1 | Chris Lytle | 35 of 54 | 64% | 13 of 29 | 16 of 19 | 6 of 6 | 15 of 30 | 20 of 24 | 0 of 0 |
| Paul Taylor | 32 of 52 | 61% | 17 of 34 | 6 of 9 | 9 of 9 | 14 of 28 | 18 of 24 | 0 of 0 | |
| 2 | Chris Lytle | 33 of 55 | 60% | 16 of 33 | 17 of 22 | 0 of 0 | 19 of 33 | 11 of 19 | 3 of 3 |
| Paul Taylor | 20 of 43 | 46% | 4 of 25 | 6 of 8 | 10 of 10 | 10 of 27 | 10 of 16 | 0 of 0 | |
| 3 | Chris Lytle | 34 of 85 | 40% | 25 of 69 | 9 of 16 | 0 of 0 | 22 of 65 | 12 of 20 | 0 of 0 |
| Paul Taylor | 33 of 65 | 50% | 21 of 50 | 3 of 6 | 9 of 9 | 24 of 50 | 9 of 15 | 0 of 0 |
Totals
| Fighter | KD | Sig. Str. | Sig. Str. % | Total Str. | TD | TD % | Sub. Att | Rev. | Ctrl |
|---|---|---|---|---|---|---|---|---|---|
| Paul Taylor | 1 | 45 of 86 | 52% | 134 of 180 | 1 of 1 | 100% | 0 | 1 | 3:10 |
| Jess Liaudin | 0 | 35 of 70 | 50% | 57 of 94 | 7 of 13 | 53% | 1 | 0 | 8:56 |
Per Round
| Rd | Fighter | KD | Sig. Str. | Sig. Str. % | Total Str. | TD | TD % | Sub. Att | Rev. | Ctrl |
|---|---|---|---|---|---|---|---|---|---|---|
| 1 | Paul Taylor | 1 | 22 of 34 | 64% | 49 of 64 | 0 of 0 | --- | 0 | 1 | 1:14 |
| Jess Liaudin | 0 | 14 of 29 | 48% | 23 of 40 | 2 of 3 | 66% | 1 | 0 | 3:06 | |
| 2 | Paul Taylor | 0 | 7 of 15 | 46% | 34 of 42 | 1 of 1 | 100% | 0 | 0 | 1:12 |
| Jess Liaudin | 0 | 10 of 17 | 58% | 22 of 29 | 1 of 3 | 33% | 0 | 0 | 2:53 | |
| 3 | Paul Taylor | 0 | 16 of 37 | 43% | 51 of 74 | 0 of 0 | --- | 0 | 0 | 0:44 |
| Jess Liaudin | 0 | 11 of 24 | 45% | 12 of 25 | 4 of 7 | 57% | 0 | 0 | 2:57 |
Significant Strikes
| Fighter | Sig. Str. | Sig. Str. % | Head | Body | Leg | Distance | Clinch | Ground |
|---|---|---|---|---|---|---|---|---|
| Paul Taylor | 45 of 86 | 52% | 24 of 64 | 12 of 12 | 9 of 10 | 13 of 34 | 22 of 28 | 10 of 24 |
| Jess Liaudin | 35 of 70 | 50% | 27 of 61 | 6 of 7 | 2 of 2 | 16 of 43 | 14 of 20 | 5 of 7 |
Significant Strikes Per Round
| Rd | Fighter | Sig. Str. | Sig. Str. % | Head | Body | Leg | Distance | Clinch | Ground |
|---|---|---|---|---|---|---|---|---|---|
| 1 | Paul Taylor | 22 of 34 | 64% | 14 of 26 | 5 of 5 | 3 of 3 | 5 of 12 | 12 of 14 | 5 of 8 |
| Jess Liaudin | 14 of 29 | 48% | 13 of 28 | 1 of 1 | 0 of 0 | 6 of 17 | 7 of 10 | 1 of 2 | |
| 2 | Paul Taylor | 7 of 15 | 46% | 3 of 10 | 2 of 2 | 2 of 3 | 3 of 7 | 2 of 2 | 2 of 6 |
| Jess Liaudin | 10 of 17 | 58% | 7 of 14 | 3 of 3 | 0 of 0 | 4 of 10 | 2 of 2 | 4 of 5 | |
| 3 | Paul Taylor | 16 of 37 | 43% | 7 of 28 | 5 of 5 | 4 of 4 | 5 of 15 | 8 of 12 | 3 of 10 |
| Jess Liaudin | 11 of 24 | 45% | 7 of 19 | 2 of 3 | 2 of 2 | 6 of 16 | 5 of 8 | 0 of 0 |
Totals
| Fighter | KD | Sig. Str. | Sig. Str. % | Total Str. | TD | TD % | Sub. Att | Rev. | Ctrl |
|---|---|---|---|---|---|---|---|---|---|
| Paul Kelly | 0 | 70 of 139 | 50% | 154 of 234 | 3 of 3 | 100% | 0 | 1 | 12:07 |
| Paul Taylor | 0 | 43 of 81 | 53% | 149 of 202 | 1 of 1 | 100% | 3 | 0 | 1:21 |
Per Round
| Rd | Fighter | KD | Sig. Str. | Sig. Str. % | Total Str. | TD | TD % | Sub. Att | Rev. | Ctrl |
|---|---|---|---|---|---|---|---|---|---|---|
| 1 | Paul Kelly | 0 | 31 of 64 | 48% | 45 of 79 | 1 of 1 | 100% | 0 | 0 | 3:56 |
| Paul Taylor | 0 | 24 of 47 | 51% | 53 of 76 | 0 of 0 | --- | 2 | 0 | 0:22 | |
| 2 | Paul Kelly | 0 | 17 of 34 | 50% | 40 of 61 | 0 of 0 | --- | 0 | 1 | 3:56 |
| Paul Taylor | 0 | 7 of 15 | 46% | 45 of 59 | 1 of 1 | 100% | 1 | 0 | 0:46 | |
| 3 | Paul Kelly | 0 | 22 of 41 | 53% | 69 of 94 | 2 of 2 | 100% | 0 | 0 | 4:15 |
| Paul Taylor | 0 | 12 of 19 | 63% | 51 of 67 | 0 of 0 | --- | 0 | 0 | 0:13 |
Significant Strikes
| Fighter | Sig. Str. | Sig. Str. % | Head | Body | Leg | Distance | Clinch | Ground |
|---|---|---|---|---|---|---|---|---|
| Paul Kelly | 70 of 139 | 50% | 57 of 125 | 13 of 14 | 0 of 0 | 13 of 36 | 11 of 15 | 46 of 88 |
| Paul Taylor | 43 of 81 | 53% | 29 of 67 | 7 of 7 | 7 of 7 | 13 of 40 | 17 of 20 | 13 of 21 |
Significant Strikes Per Round
| Rd | Fighter | Sig. Str. | Sig. Str. % | Head | Body | Leg | Distance | Clinch | Ground |
|---|---|---|---|---|---|---|---|---|---|
| 1 | Paul Kelly | 31 of 64 | 48% | 25 of 58 | 6 of 6 | 0 of 0 | 8 of 22 | 8 of 10 | 15 of 32 |
| Paul Taylor | 24 of 47 | 51% | 15 of 38 | 3 of 3 | 6 of 6 | 10 of 28 | 10 of 12 | 4 of 7 | |
| 2 | Paul Kelly | 17 of 34 | 50% | 16 of 32 | 1 of 2 | 0 of 0 | 2 of 5 | 0 of 1 | 15 of 28 |
| Paul Taylor | 7 of 15 | 46% | 6 of 14 | 0 of 0 | 1 of 1 | 1 of 5 | 0 of 0 | 6 of 10 | |
| 3 | Paul Kelly | 22 of 41 | 53% | 16 of 35 | 6 of 6 | 0 of 0 | 3 of 9 | 3 of 4 | 16 of 28 |
| Paul Taylor | 12 of 19 | 63% | 8 of 15 | 4 of 4 | 0 of 0 | 2 of 7 | 7 of 8 | 3 of 4 |
Totals
| Fighter | KD | Sig. Str. | Sig. Str. % | Total Str. | TD | TD % | Sub. Att | Rev. | Ctrl |
|---|---|---|---|---|---|---|---|---|---|
| Marcus Davis | 0 | 24 of 40 | 60% | 32 of 48 | 1 of 3 | 33% | 1 | 0 | 2:30 |
| Paul Taylor | 1 | 16 of 30 | 53% | 26 of 41 | 0 of 0 | --- | 0 | 1 | 1:07 |
Per Round
| Rd | Fighter | KD | Sig. Str. | Sig. Str. % | Total Str. | TD | TD % | Sub. Att | Rev. | Ctrl |
|---|---|---|---|---|---|---|---|---|---|---|
| 1 | Marcus Davis | 0 | 24 of 40 | 60% | 32 of 48 | 1 of 3 | 33% | 1 | 0 | 2:30 |
| Paul Taylor | 1 | 16 of 30 | 53% | 26 of 41 | 0 of 0 | --- | 0 | 1 | 1:07 |
Significant Strikes
| Fighter | Sig. Str. | Sig. Str. % | Head | Body | Leg | Distance | Clinch | Ground |
|---|---|---|---|---|---|---|---|---|
| Marcus Davis | 24 of 40 | 60% | 22 of 37 | 2 of 3 | 0 of 0 | 7 of 15 | 1 of 2 | 16 of 23 |
| Paul Taylor | 16 of 30 | 53% | 12 of 25 | 2 of 2 | 2 of 3 | 6 of 15 | 3 of 4 | 7 of 11 |
Significant Strikes Per Round
| Rd | Fighter | Sig. Str. | Sig. Str. % | Head | Body | Leg | Distance | Clinch | Ground |
|---|---|---|---|---|---|---|---|---|---|
| 1 | Marcus Davis | 24 of 40 | 60% | 22 of 37 | 2 of 3 | 0 of 0 | 7 of 15 | 1 of 2 | 16 of 23 |
| Paul Taylor | 16 of 30 | 53% | 12 of 25 | 2 of 2 | 2 of 3 | 6 of 15 | 3 of 4 | 7 of 11 |
Peter Sobotta - Fight History
Totals
| Fighter | KD | Sig. Str. | Sig. Str. % | Total Str. | TD | TD % | Sub. Att | Rev. | Ctrl |
|---|---|---|---|---|---|---|---|---|---|
| Alex Oliveira | 1 | 45 of 93 | 48% | 48 of 96 | 0 of 0 | --- | 0 | 0 | 0:26 |
| Peter Sobotta | 0 | 29 of 67 | 43% | 30 of 68 | 0 of 3 | 0% | 0 | 0 | 0:47 |
Per Round
| Rd | Fighter | KD | Sig. Str. | Sig. Str. % | Total Str. | TD | TD % | Sub. Att | Rev. | Ctrl |
|---|---|---|---|---|---|---|---|---|---|---|
| 1 | Alex Oliveira | 0 | 9 of 24 | 37% | 9 of 24 | 0 of 0 | --- | 0 | 0 | 0:00 |
| Peter Sobotta | 0 | 7 of 21 | 33% | 7 of 21 | 0 of 0 | --- | 0 | 0 | 0:00 | |
| 2 | Alex Oliveira | 1 | 17 of 33 | 51% | 17 of 33 | 0 of 0 | --- | 0 | 0 | 0:07 |
| Peter Sobotta | 0 | 10 of 17 | 58% | 11 of 18 | 0 of 2 | 0% | 0 | 0 | 0:46 | |
| 3 | Alex Oliveira | 0 | 19 of 36 | 52% | 22 of 39 | 0 of 0 | --- | 0 | 0 | 0:19 |
| Peter Sobotta | 0 | 12 of 29 | 41% | 12 of 29 | 0 of 1 | 0% | 0 | 0 | 0:01 |
Significant Strikes
| Fighter | Sig. Str. | Sig. Str. % | Head | Body | Leg | Distance | Clinch | Ground |
|---|---|---|---|---|---|---|---|---|
| Alex Oliveira | 45 of 93 | 48% | 19 of 51 | 16 of 29 | 10 of 13 | 37 of 85 | 7 of 7 | 1 of 1 |
| Peter Sobotta | 29 of 67 | 43% | 13 of 46 | 7 of 11 | 9 of 10 | 29 of 67 | 0 of 0 | 0 of 0 |
Significant Strikes Per Round
| Rd | Fighter | Sig. Str. | Sig. Str. % | Head | Body | Leg | Distance | Clinch | Ground |
|---|---|---|---|---|---|---|---|---|---|
| 1 | Alex Oliveira | 9 of 24 | 37% | 1 of 11 | 7 of 12 | 1 of 1 | 9 of 24 | 0 of 0 | 0 of 0 |
| Peter Sobotta | 7 of 21 | 33% | 2 of 13 | 2 of 4 | 3 of 4 | 7 of 21 | 0 of 0 | 0 of 0 | |
| 2 | Alex Oliveira | 17 of 33 | 51% | 9 of 17 | 5 of 11 | 3 of 5 | 11 of 27 | 6 of 6 | 0 of 0 |
| Peter Sobotta | 10 of 17 | 58% | 4 of 10 | 1 of 2 | 5 of 5 | 10 of 17 | 0 of 0 | 0 of 0 | |
| 3 | Alex Oliveira | 19 of 36 | 52% | 9 of 23 | 4 of 6 | 6 of 7 | 17 of 34 | 1 of 1 | 1 of 1 |
| Peter Sobotta | 12 of 29 | 41% | 7 of 23 | 4 of 5 | 1 of 1 | 12 of 29 | 0 of 0 | 0 of 0 |
Big Brady picks Sobotta as an underdog because he believes Sobotta has a huge ground advantage with his BJJ. He thinks the fight will hit the ground and Sobotta can win there, either by submission or decision. He is concerned about Oliveira's power but thinks Sobotta's striking has improved and the gap is not large.
Daniel picks Sobotta for the upset, citing his jiu-jitsu and improved boxing. He believes Sobotta can take Oliveira's back and submit him if he avoids early damage. He acknowledges Oliveira's physicality and danger but thinks Sobotta's path to victory via submission is viable. He is worried about Oliveira bullying Sobotta early.
Sobotta is the more technical fighter with superior grappling and submission skills. Oliveira is wild and has a poor gas tank, often fading in the third round. Sobotta can take Oliveira down and submit him late, or outpoint him on the feet. The line should be closer, and Sobotta offers value at plus money.
The MMA Guru picks Alex Oliveira, noting his activity and momentum from a win over Max Griffin. He points out that Sobotta hasn't fought since March 2018 and lost to Leon Edwards. He also mentions Oliveira's reach advantage and jiu-jitsu, and believes Oliveira will get the job done.
Totals
| Fighter | KD | Sig. Str. | Sig. Str. % | Total Str. | TD | TD % | Sub. Att | Rev. | Ctrl |
|---|---|---|---|---|---|---|---|---|---|
| Leon Edwards | 1 | 42 of 86 | 48% | 71 of 117 | 1 of 2 | 50% | 0 | 1 | 8:20 |
| Peter Sobotta | 0 | 16 of 43 | 37% | 57 of 90 | 1 of 4 | 25% | 0 | 0 | 1:04 |
Per Round
| Rd | Fighter | KD | Sig. Str. | Sig. Str. % | Total Str. | TD | TD % | Sub. Att | Rev. | Ctrl |
|---|---|---|---|---|---|---|---|---|---|---|
| 1 | Leon Edwards | 1 | 8 of 19 | 42% | 19 of 31 | 0 of 0 | --- | 0 | 0 | 2:53 |
| Peter Sobotta | 0 | 6 of 14 | 42% | 29 of 42 | 0 of 0 | --- | 0 | 0 | 0:00 | |
| 2 | Leon Edwards | 0 | 4 of 19 | 21% | 12 of 27 | 1 of 1 | 100% | 0 | 1 | 2:54 |
| Peter Sobotta | 0 | 4 of 15 | 26% | 21 of 33 | 0 of 0 | --- | 0 | 0 | 0:13 | |
| 3 | Leon Edwards | 0 | 30 of 48 | 62% | 40 of 59 | 0 of 1 | 0% | 0 | 0 | 2:33 |
| Peter Sobotta | 0 | 6 of 14 | 42% | 7 of 15 | 1 of 4 | 25% | 0 | 0 | 0:51 |
Significant Strikes
| Fighter | Sig. Str. | Sig. Str. % | Head | Body | Leg | Distance | Clinch | Ground |
|---|---|---|---|---|---|---|---|---|
| Leon Edwards | 42 of 86 | 48% | 37 of 78 | 5 of 6 | 0 of 2 | 16 of 50 | 1 of 1 | 25 of 35 |
| Peter Sobotta | 16 of 43 | 37% | 8 of 34 | 3 of 4 | 5 of 5 | 15 of 42 | 1 of 1 | 0 of 0 |
Significant Strikes Per Round
| Rd | Fighter | Sig. Str. | Sig. Str. % | Head | Body | Leg | Distance | Clinch | Ground |
|---|---|---|---|---|---|---|---|---|---|
| 1 | Leon Edwards | 8 of 19 | 42% | 6 of 16 | 2 of 2 | 0 of 1 | 8 of 17 | 0 of 0 | 0 of 2 |
| Peter Sobotta | 6 of 14 | 42% | 5 of 12 | 0 of 1 | 1 of 1 | 6 of 14 | 0 of 0 | 0 of 0 | |
| 2 | Leon Edwards | 4 of 19 | 21% | 2 of 15 | 2 of 3 | 0 of 1 | 4 of 19 | 0 of 0 | 0 of 0 |
| Peter Sobotta | 4 of 15 | 26% | 1 of 12 | 1 of 1 | 2 of 2 | 4 of 15 | 0 of 0 | 0 of 0 | |
| 3 | Leon Edwards | 30 of 48 | 62% | 29 of 47 | 1 of 1 | 0 of 0 | 4 of 14 | 1 of 1 | 25 of 33 |
| Peter Sobotta | 6 of 14 | 42% | 2 of 10 | 2 of 2 | 2 of 2 | 5 of 13 | 1 of 1 | 0 of 0 |
Totals
| Fighter | KD | Sig. Str. | Sig. Str. % | Total Str. | TD | TD % | Sub. Att | Rev. | Ctrl |
|---|---|---|---|---|---|---|---|---|---|
| Peter Sobotta | 3 | 46 of 97 | 47% | 50 of 102 | 0 of 0 | --- | 0 | 0 | 1:03 |
| Ben Saunders | 0 | 19 of 68 | 27% | 23 of 74 | 0 of 0 | --- | 0 | 0 | 0:00 |
Per Round
| Rd | Fighter | KD | Sig. Str. | Sig. Str. % | Total Str. | TD | TD % | Sub. Att | Rev. | Ctrl |
|---|---|---|---|---|---|---|---|---|---|---|
| 1 | Peter Sobotta | 2 | 27 of 61 | 44% | 31 of 66 | 0 of 0 | --- | 0 | 0 | 1:02 |
| Ben Saunders | 0 | 14 of 43 | 32% | 18 of 49 | 0 of 0 | --- | 0 | 0 | 0:00 | |
| 2 | Peter Sobotta | 1 | 19 of 36 | 52% | 19 of 36 | 0 of 0 | --- | 0 | 0 | 0:01 |
| Ben Saunders | 0 | 5 of 25 | 20% | 5 of 25 | 0 of 0 | --- | 0 | 0 | 0:00 |
Significant Strikes
| Fighter | Sig. Str. | Sig. Str. % | Head | Body | Leg | Distance | Clinch | Ground |
|---|---|---|---|---|---|---|---|---|
| Peter Sobotta | 46 of 97 | 47% | 40 of 90 | 1 of 2 | 5 of 5 | 36 of 79 | 1 of 2 | 9 of 16 |
| Ben Saunders | 19 of 68 | 27% | 9 of 44 | 7 of 17 | 3 of 7 | 14 of 62 | 0 of 1 | 5 of 5 |
Significant Strikes Per Round
| Rd | Fighter | Sig. Str. | Sig. Str. % | Head | Body | Leg | Distance | Clinch | Ground |
|---|---|---|---|---|---|---|---|---|---|
| 1 | Peter Sobotta | 27 of 61 | 44% | 23 of 56 | 0 of 1 | 4 of 4 | 17 of 44 | 1 of 2 | 9 of 15 |
| Ben Saunders | 14 of 43 | 32% | 6 of 25 | 5 of 13 | 3 of 5 | 9 of 37 | 0 of 1 | 5 of 5 | |
| 2 | Peter Sobotta | 19 of 36 | 52% | 17 of 34 | 1 of 1 | 1 of 1 | 19 of 35 | 0 of 0 | 0 of 1 |
| Ben Saunders | 5 of 25 | 20% | 3 of 19 | 2 of 4 | 0 of 2 | 5 of 25 | 0 of 0 | 0 of 0 |
Totals
| Fighter | KD | Sig. Str. | Sig. Str. % | Total Str. | TD | TD % | Sub. Att | Rev. | Ctrl |
|---|---|---|---|---|---|---|---|---|---|
| Peter Sobotta | 1 | 38 of 76 | 50% | 83 of 127 | 3 of 5 | 60% | 1 | 0 | 10:22 |
| Nicolas Dalby | 0 | 14 of 52 | 26% | 48 of 87 | 0 of 1 | 0% | 0 | 0 | 0:28 |
Per Round
| Rd | Fighter | KD | Sig. Str. | Sig. Str. % | Total Str. | TD | TD % | Sub. Att | Rev. | Ctrl |
|---|---|---|---|---|---|---|---|---|---|---|
| 1 | Peter Sobotta | 1 | 22 of 38 | 57% | 42 of 62 | 0 of 0 | --- | 1 | 0 | 4:06 |
| Nicolas Dalby | 0 | 1 of 8 | 12% | 8 of 15 | 0 of 1 | 0% | 0 | 0 | 0:00 | |
| 2 | Peter Sobotta | 0 | 5 of 15 | 33% | 29 of 41 | 2 of 2 | 100% | 0 | 0 | 4:23 |
| Nicolas Dalby | 0 | 2 of 9 | 22% | 19 of 27 | 0 of 0 | --- | 0 | 0 | 0:00 | |
| 3 | Peter Sobotta | 0 | 11 of 23 | 47% | 12 of 24 | 1 of 3 | 33% | 0 | 0 | 1:53 |
| Nicolas Dalby | 0 | 11 of 35 | 31% | 21 of 45 | 0 of 0 | --- | 0 | 0 | 0:28 |
Significant Strikes
| Fighter | Sig. Str. | Sig. Str. % | Head | Body | Leg | Distance | Clinch | Ground |
|---|---|---|---|---|---|---|---|---|
| Peter Sobotta | 38 of 76 | 50% | 28 of 65 | 5 of 6 | 5 of 5 | 21 of 44 | 0 of 0 | 17 of 32 |
| Nicolas Dalby | 14 of 52 | 26% | 7 of 40 | 4 of 7 | 3 of 5 | 9 of 45 | 3 of 5 | 2 of 2 |
Significant Strikes Per Round
| Rd | Fighter | Sig. Str. | Sig. Str. % | Head | Body | Leg | Distance | Clinch | Ground |
|---|---|---|---|---|---|---|---|---|---|
| 1 | Peter Sobotta | 22 of 38 | 57% | 14 of 30 | 3 of 3 | 5 of 5 | 8 of 12 | 0 of 0 | 14 of 26 |
| Nicolas Dalby | 1 of 8 | 12% | 0 of 6 | 0 of 0 | 1 of 2 | 1 of 8 | 0 of 0 | 0 of 0 | |
| 2 | Peter Sobotta | 5 of 15 | 33% | 5 of 15 | 0 of 0 | 0 of 0 | 2 of 9 | 0 of 0 | 3 of 6 |
| Nicolas Dalby | 2 of 9 | 22% | 1 of 6 | 0 of 1 | 1 of 2 | 2 of 9 | 0 of 0 | 0 of 0 | |
| 3 | Peter Sobotta | 11 of 23 | 47% | 9 of 20 | 2 of 3 | 0 of 0 | 11 of 23 | 0 of 0 | 0 of 0 |
| Nicolas Dalby | 11 of 35 | 31% | 6 of 28 | 4 of 6 | 1 of 1 | 6 of 28 | 3 of 5 | 2 of 2 |
Play-by-Play
View on SherdogRound 1
Sobotta’s first low kick of the fight draws a warning from referee Leon Roberts, as the shot strays close to Dalby’s groin. Sobotta sticks a jab, lands a body kick and catches Dalby with a front kick to the face. Dalby tries to keep hold of the leg, but Sobotta hops backward until he can pull the limb free. A right hand from Sobotta sends Dalby to the mat, and the German tries to pound out his dazed opponent with a barrage of hammerfists. Dalby survives the follow-up attack and puts Sobotta in his guard. Sobotta looks to posture up and inflict more damage with punches, then passes to side control on Dalby’s right. Dalby wraps up tight from the bottom while Sobotta leans across his opponent’s body, looking perhaps for a kimura or choke setup. Nothing materializes there, so Sobotta goes back to dropping punches on Dalby’s face as they enter the final 90 seconds of the round. Dalby tries to roll free and has his back taken by Sobotta with 45 seconds on the clock. Sobotta throws punches with both hands, trying to soften up Dalby and apply a rear-naked choke. Dalby, leaking blood from a cut on his left cheek, defends well down the stretch and will survive to see round two.
Sherdog Scores
Brian Knapp scores the round 10-8 Sobotta
Chris Nelson scores the round 10-8 Sobotta
Mike Sloan scores the round 10-8 Sobotta
Round 2
Dalby’s left eye is badly swollen as he emerges for the second frame, but it’s Sobotta who needs a timeout after catching a finger in the eye during an early exchange. Referee Roberts calls for the cageside doctor, who quickly clears Sobotta to continue. On the restart, Sobotta catches a kick from Dalby, spins him around and drags him to the canvas. Dalby regains his footing, but only for a split-second before Sobotta trips him back to the mat. Sobotta works from deep half guard on Dalby’s right side, landing short left hands to the face while controlling the position. Sobotta is slowly working his way to full mount, but just before he gets there, Dalby pushes him back to half guard. Sobotta advances to side control with 90 seconds left in the round, gets pushed back to half guard 30 seconds later. Dalby is trying to mount some offense from the bottom, but there doesn’t appear to be much behind his punches. The referee calls for action; Sobotta obliges with three or four hard left hands to Dalby’s face.
Sherdog Scores
Brian Knapp scores the round 10-9 Sobotta
Chris Nelson scores the round 10-9 Sobotta
Mike Sloan scores the round 10-9 Sobotta
Round 3
Dalby takes the outside position in the clinch and separates with a slashing elbow to Sobotta’s head. Sobotta seems unfazed by the strike and resumes jabbing Dalby’s damaged eye once the welterweights break the clinch. Now it’s Sobotta coming back to tie up, if only briefly. Dalby pushes him away and steps forward on the German, who uncorks a hard kick to the body. Dalby charges at Sobotta and has his own momentum used against him, as Sobotta drops levels and scores another takedown. Sobotta crams Dalby against the base of the fence and uses heavy top pressure to hold him down from side control. Dalby rolls to his knees, then puts his back on the mat again when Sobotta threatens to take his back. The 170-pounders scramble back to their feet with 20 seconds remaining. Dalby sprawls on Sobotta’s final takedown attempt, and that’s where it ends.
Sherdog Scores
Brian Knapp scores the round 10-9 Sobotta (30-26 Sobotta)
Chris Nelson scores the round 10-9 Sobotta (30-26 Sobotta)
Mike Sloan scores the round 10-9 Sobotta (30-26 Sobotta)
The Official Result
Peter Sobotta def. Nicolas Dalby via Unanimous Decision (30-26, 30-26, 30-26) R3 5:00
Totals
| Fighter | KD | Sig. Str. | Sig. Str. % | Total Str. | TD | TD % | Sub. Att | Rev. | Ctrl |
|---|---|---|---|---|---|---|---|---|---|
| Kyle Noke | 1 | 23 of 43 | 53% | 24 of 44 | 0 of 0 | --- | 0 | 0 | 0:00 |
| Peter Sobotta | 0 | 2 of 6 | 33% | 2 of 6 | 0 of 0 | --- | 0 | 0 | 0:14 |
Per Round
| Rd | Fighter | KD | Sig. Str. | Sig. Str. % | Total Str. | TD | TD % | Sub. Att | Rev. | Ctrl |
|---|---|---|---|---|---|---|---|---|---|---|
| 1 | Kyle Noke | 1 | 23 of 43 | 53% | 24 of 44 | 0 of 0 | --- | 0 | 0 | 0:00 |
| Peter Sobotta | 0 | 2 of 6 | 33% | 2 of 6 | 0 of 0 | --- | 0 | 0 | 0:14 |
Significant Strikes
| Fighter | Sig. Str. | Sig. Str. % | Head | Body | Leg | Distance | Clinch | Ground |
|---|---|---|---|---|---|---|---|---|
| Kyle Noke | 23 of 43 | 53% | 13 of 30 | 2 of 4 | 8 of 9 | 11 of 21 | 0 of 0 | 12 of 22 |
| Peter Sobotta | 2 of 6 | 33% | 2 of 5 | 0 of 1 | 0 of 0 | 2 of 6 | 0 of 0 | 0 of 0 |
Significant Strikes Per Round
| Rd | Fighter | Sig. Str. | Sig. Str. % | Head | Body | Leg | Distance | Clinch | Ground |
|---|---|---|---|---|---|---|---|---|---|
| 1 | Kyle Noke | 23 of 43 | 53% | 13 of 30 | 2 of 4 | 8 of 9 | 11 of 21 | 0 of 0 | 12 of 22 |
| Peter Sobotta | 2 of 6 | 33% | 2 of 5 | 0 of 1 | 0 of 0 | 2 of 6 | 0 of 0 | 0 of 0 |
Totals
| Fighter | KD | Sig. Str. | Sig. Str. % | Total Str. | TD | TD % | Sub. Att | Rev. | Ctrl |
|---|---|---|---|---|---|---|---|---|---|
| Peter Sobotta | 0 | 6 of 13 | 46% | 7 of 14 | 2 of 2 | 100% | 1 | 0 | 1:20 |
| Steve Kennedy | 0 | 3 of 12 | 25% | 3 of 12 | 0 of 1 | 0% | 0 | 0 | 0:29 |
Per Round
| Rd | Fighter | KD | Sig. Str. | Sig. Str. % | Total Str. | TD | TD % | Sub. Att | Rev. | Ctrl |
|---|---|---|---|---|---|---|---|---|---|---|
| 1 | Peter Sobotta | 0 | 6 of 13 | 46% | 7 of 14 | 2 of 2 | 100% | 1 | 0 | 1:20 |
| Steve Kennedy | 0 | 3 of 12 | 25% | 3 of 12 | 0 of 1 | 0% | 0 | 0 | 0:29 |
Significant Strikes
| Fighter | Sig. Str. | Sig. Str. % | Head | Body | Leg | Distance | Clinch | Ground |
|---|---|---|---|---|---|---|---|---|
| Peter Sobotta | 6 of 13 | 46% | 2 of 9 | 2 of 2 | 2 of 2 | 6 of 13 | 0 of 0 | 0 of 0 |
| Steve Kennedy | 3 of 12 | 25% | 1 of 7 | 0 of 2 | 2 of 3 | 3 of 12 | 0 of 0 | 0 of 0 |
Significant Strikes Per Round
| Rd | Fighter | Sig. Str. | Sig. Str. % | Head | Body | Leg | Distance | Clinch | Ground |
|---|---|---|---|---|---|---|---|---|---|
| 1 | Peter Sobotta | 6 of 13 | 46% | 2 of 9 | 2 of 2 | 2 of 2 | 6 of 13 | 0 of 0 | 0 of 0 |
| Steve Kennedy | 3 of 12 | 25% | 1 of 7 | 0 of 2 | 2 of 3 | 3 of 12 | 0 of 0 | 0 of 0 |
Totals
| Fighter | KD | Sig. Str. | Sig. Str. % | Total Str. | TD | TD % | Sub. Att | Rev. | Ctrl |
|---|---|---|---|---|---|---|---|---|---|
| Peter Sobotta | 0 | 47 of 101 | 46% | 121 of 180 | 3 of 5 | 60% | 0 | 0 | 7:58 |
| Pawel Pawlak | 0 | 21 of 84 | 25% | 65 of 128 | 0 of 0 | --- | 0 | 0 | 0:00 |
Per Round
| Rd | Fighter | KD | Sig. Str. | Sig. Str. % | Total Str. | TD | TD % | Sub. Att | Rev. | Ctrl |
|---|---|---|---|---|---|---|---|---|---|---|
| 1 | Peter Sobotta | 0 | 29 of 68 | 42% | 29 of 68 | 0 of 0 | --- | 0 | 0 | 0:00 |
| Pawel Pawlak | 0 | 13 of 46 | 28% | 13 of 46 | 0 of 0 | --- | 0 | 0 | 0:00 | |
| 2 | Peter Sobotta | 0 | 10 of 12 | 83% | 34 of 39 | 1 of 1 | 100% | 0 | 0 | 4:32 |
| Pawel Pawlak | 0 | 1 of 9 | 11% | 26 of 34 | 0 of 0 | --- | 0 | 0 | 0:00 | |
| 3 | Peter Sobotta | 0 | 8 of 21 | 38% | 58 of 73 | 2 of 4 | 50% | 0 | 0 | 3:26 |
| Pawel Pawlak | 0 | 7 of 29 | 24% | 26 of 48 | 0 of 0 | --- | 0 | 0 | 0:00 |
Significant Strikes
| Fighter | Sig. Str. | Sig. Str. % | Head | Body | Leg | Distance | Clinch | Ground |
|---|---|---|---|---|---|---|---|---|
| Peter Sobotta | 47 of 101 | 46% | 18 of 69 | 15 of 18 | 14 of 14 | 38 of 92 | 1 of 1 | 8 of 8 |
| Pawel Pawlak | 21 of 84 | 25% | 11 of 69 | 2 of 5 | 8 of 10 | 21 of 84 | 0 of 0 | 0 of 0 |
Significant Strikes Per Round
| Rd | Fighter | Sig. Str. | Sig. Str. % | Head | Body | Leg | Distance | Clinch | Ground |
|---|---|---|---|---|---|---|---|---|---|
| 1 | Peter Sobotta | 29 of 68 | 42% | 12 of 50 | 11 of 12 | 6 of 6 | 29 of 68 | 0 of 0 | 0 of 0 |
| Pawel Pawlak | 13 of 46 | 28% | 6 of 37 | 0 of 1 | 7 of 8 | 13 of 46 | 0 of 0 | 0 of 0 | |
| 2 | Peter Sobotta | 10 of 12 | 83% | 3 of 5 | 1 of 1 | 6 of 6 | 2 of 4 | 0 of 0 | 8 of 8 |
| Pawel Pawlak | 1 of 9 | 11% | 1 of 8 | 0 of 1 | 0 of 0 | 1 of 9 | 0 of 0 | 0 of 0 | |
| 3 | Peter Sobotta | 8 of 21 | 38% | 3 of 14 | 3 of 5 | 2 of 2 | 7 of 20 | 1 of 1 | 0 of 0 |
| Pawel Pawlak | 7 of 29 | 24% | 4 of 24 | 2 of 3 | 1 of 2 | 7 of 29 | 0 of 0 | 0 of 0 |
Totals
| Fighter | KD | Sig. Str. | Sig. Str. % | Total Str. | TD | TD % | Sub. Att | Rev. | Ctrl |
|---|---|---|---|---|---|---|---|---|---|
| Amir Sadollah | 0 | 90 of 209 | 43% | 104 of 223 | 0 of 0 | --- | 0 | 0 | 0:47 |
| Peter Sobotta | 0 | 34 of 126 | 26% | 35 of 127 | 0 of 5 | 0% | 0 | 0 | 3:24 |
Per Round
| Rd | Fighter | KD | Sig. Str. | Sig. Str. % | Total Str. | TD | TD % | Sub. Att | Rev. | Ctrl |
|---|---|---|---|---|---|---|---|---|---|---|
| 1 | Amir Sadollah | 0 | 21 of 52 | 40% | 31 of 62 | 0 of 0 | --- | 0 | 0 | 0:21 |
| Peter Sobotta | 0 | 11 of 35 | 31% | 12 of 36 | 0 of 3 | 0% | 0 | 0 | 2:35 | |
| 2 | Amir Sadollah | 0 | 32 of 82 | 39% | 33 of 83 | 0 of 0 | --- | 0 | 0 | 0:26 |
| Peter Sobotta | 0 | 9 of 47 | 19% | 9 of 47 | 0 of 1 | 0% | 0 | 0 | 0:07 | |
| 3 | Amir Sadollah | 0 | 37 of 75 | 49% | 40 of 78 | 0 of 0 | --- | 0 | 0 | 0:00 |
| Peter Sobotta | 0 | 14 of 44 | 31% | 14 of 44 | 0 of 1 | 0% | 0 | 0 | 0:42 |
Significant Strikes
| Fighter | Sig. Str. | Sig. Str. % | Head | Body | Leg | Distance | Clinch | Ground |
|---|---|---|---|---|---|---|---|---|
| Amir Sadollah | 90 of 209 | 43% | 27 of 128 | 14 of 27 | 49 of 54 | 75 of 189 | 13 of 18 | 2 of 2 |
| Peter Sobotta | 34 of 126 | 26% | 25 of 110 | 4 of 10 | 5 of 6 | 31 of 118 | 3 of 8 | 0 of 0 |
Significant Strikes Per Round
| Rd | Fighter | Sig. Str. | Sig. Str. % | Head | Body | Leg | Distance | Clinch | Ground |
|---|---|---|---|---|---|---|---|---|---|
| 1 | Amir Sadollah | 21 of 52 | 40% | 5 of 32 | 4 of 7 | 12 of 13 | 13 of 42 | 8 of 10 | 0 of 0 |
| Peter Sobotta | 11 of 35 | 31% | 10 of 34 | 0 of 0 | 1 of 1 | 8 of 29 | 3 of 6 | 0 of 0 | |
| 2 | Amir Sadollah | 32 of 82 | 39% | 9 of 54 | 4 of 6 | 19 of 22 | 29 of 77 | 1 of 3 | 2 of 2 |
| Peter Sobotta | 9 of 47 | 19% | 5 of 41 | 2 of 3 | 2 of 3 | 9 of 46 | 0 of 1 | 0 of 0 | |
| 3 | Amir Sadollah | 37 of 75 | 49% | 13 of 42 | 6 of 14 | 18 of 19 | 33 of 70 | 4 of 5 | 0 of 0 |
| Peter Sobotta | 14 of 44 | 31% | 10 of 35 | 2 of 7 | 2 of 2 | 14 of 43 | 0 of 1 | 0 of 0 |
No comments yet. Be the first to share your thoughts!