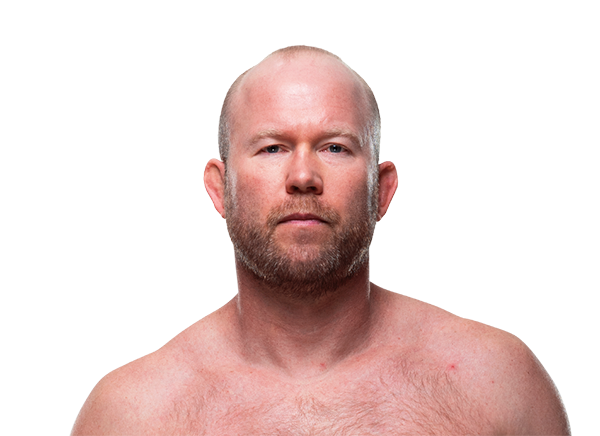
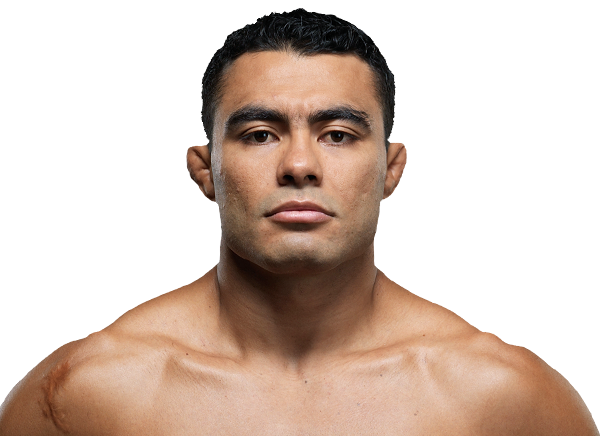
UFC 205: Alvarez vs. McGregor ·
Nov 12, 2016 ·
Middleweight ·
Completed
Career Averages - Tim Boetsch
2.93
SLpM
50.0%
Str. Acc.
2.9
SApM
57.0%
Str. Def.
1.45
TD Avg
34.0%
TD Acc.
59.0%
TD Def.
0.8
Sub. Avg
Career Averages - Rafael Natal
3.1
SLpM
47.0%
Str. Acc.
2.48
SApM
57.0%
Str. Def.
2.55
TD Avg
34.0%
TD Acc.
77.0%
TD Def.
0.5
Sub. Avg
Tim Boetsch - Fight History
LOSS
vs
Omari Akhmedov
Decision (unanimous) (30–27, 30–27, 30–27)
R3
5:00
·
UFC Fight Night: Lewis vs. dos Santos ·
Mar 09, 2019
Totals
| Fighter | KD | Sig. Str. | Sig. Str. % | Total Str. | TD | TD % | Sub. Att | Rev. | Ctrl |
|---|---|---|---|---|---|---|---|---|---|
| Omari Akhmedov | 0 | 41 of 97 | 42% | 64 of 121 | 0 of 2 | 0% | 0 | 0 | 0:02 |
| Tim Boetsch | 0 | 52 of 135 | 38% | 58 of 141 | 0 of 2 | 0% | 0 | 0 | 3:14 |
Per Round
| Rd | Fighter | KD | Sig. Str. | Sig. Str. % | Total Str. | TD | TD % | Sub. Att | Rev. | Ctrl |
|---|---|---|---|---|---|---|---|---|---|---|
| 1 | Omari Akhmedov | 0 | 9 of 18 | 50% | 18 of 27 | 0 of 0 | --- | 0 | 0 | 0:00 |
| Tim Boetsch | 0 | 13 of 36 | 36% | 16 of 39 | 0 of 2 | 0% | 0 | 0 | 1:56 | |
| 2 | Omari Akhmedov | 0 | 8 of 28 | 28% | 19 of 40 | 0 of 1 | 0% | 0 | 0 | 0:00 |
| Tim Boetsch | 0 | 19 of 42 | 45% | 21 of 44 | 0 of 0 | --- | 0 | 0 | 1:11 | |
| 3 | Omari Akhmedov | 0 | 24 of 51 | 47% | 27 of 54 | 0 of 1 | 0% | 0 | 0 | 0:02 |
| Tim Boetsch | 0 | 20 of 57 | 35% | 21 of 58 | 0 of 0 | --- | 0 | 0 | 0:07 |
Significant Strikes
| Fighter | Sig. Str. | Sig. Str. % | Head | Body | Leg | Distance | Clinch | Ground |
|---|---|---|---|---|---|---|---|---|
| Omari Akhmedov | 41 of 97 | 42% | 20 of 66 | 12 of 20 | 9 of 11 | 32 of 85 | 9 of 12 | 0 of 0 |
| Tim Boetsch | 52 of 135 | 38% | 32 of 110 | 13 of 17 | 7 of 8 | 35 of 113 | 17 of 22 | 0 of 0 |
Significant Strikes Per Round
| Rd | Fighter | Sig. Str. | Sig. Str. % | Head | Body | Leg | Distance | Clinch | Ground |
|---|---|---|---|---|---|---|---|---|---|
| 1 | Omari Akhmedov | 9 of 18 | 50% | 2 of 9 | 4 of 5 | 3 of 4 | 4 of 13 | 5 of 5 | 0 of 0 |
| Tim Boetsch | 13 of 36 | 36% | 5 of 26 | 5 of 7 | 3 of 3 | 5 of 27 | 8 of 9 | 0 of 0 | |
| 2 | Omari Akhmedov | 8 of 28 | 28% | 3 of 20 | 2 of 4 | 3 of 4 | 7 of 26 | 1 of 2 | 0 of 0 |
| Tim Boetsch | 19 of 42 | 45% | 8 of 30 | 7 of 8 | 4 of 4 | 13 of 35 | 6 of 7 | 0 of 0 | |
| 3 | Omari Akhmedov | 24 of 51 | 47% | 15 of 37 | 6 of 11 | 3 of 3 | 21 of 46 | 3 of 5 | 0 of 0 |
| Tim Boetsch | 20 of 57 | 35% | 19 of 54 | 1 of 2 | 0 of 1 | 17 of 51 | 3 of 6 | 0 of 0 |
LOSS
vs
Antônio Carlos Júnior
Submission (rear-naked choke)
R1
4:28
·
UFC on Fox: Poirier vs. Gaethje ·
Apr 14, 2018
Totals
| Fighter | KD | Sig. Str. | Sig. Str. % | Total Str. | TD | TD % | Sub. Att | Rev. | Ctrl |
|---|---|---|---|---|---|---|---|---|---|
| Antônio Carlos Júnior | 0 | 7 of 18 | 38% | 13 of 24 | 0 of 0 | --- | 0 | 0 | 0:05 |
| Tim Boetsch | 0 | 31 of 48 | 64% | 35 of 52 | 1 of 2 | 50% | 1 | 0 | 1:32 |
Per Round
| Rd | Fighter | KD | Sig. Str. | Sig. Str. % | Total Str. | TD | TD % | Sub. Att | Rev. | Ctrl |
|---|---|---|---|---|---|---|---|---|---|---|
| 1 | Antônio Carlos Júnior | 0 | 7 of 18 | 38% | 13 of 24 | 0 of 0 | --- | 0 | 0 | 0:05 |
| Tim Boetsch | 0 | 31 of 48 | 64% | 35 of 52 | 1 of 2 | 50% | 1 | 0 | 1:32 |
Significant Strikes
| Fighter | Sig. Str. | Sig. Str. % | Head | Body | Leg | Distance | Clinch | Ground |
|---|---|---|---|---|---|---|---|---|
| Antônio Carlos Júnior | 7 of 18 | 38% | 4 of 14 | 1 of 2 | 2 of 2 | 7 of 18 | 0 of 0 | 0 of 0 |
| Tim Boetsch | 31 of 48 | 64% | 23 of 40 | 4 of 4 | 4 of 4 | 20 of 34 | 2 of 2 | 9 of 12 |
Significant Strikes Per Round
| Rd | Fighter | Sig. Str. | Sig. Str. % | Head | Body | Leg | Distance | Clinch | Ground |
|---|---|---|---|---|---|---|---|---|---|
| 1 | Antônio Carlos Júnior | 7 of 18 | 38% | 4 of 14 | 1 of 2 | 2 of 2 | 7 of 18 | 0 of 0 | 0 of 0 |
| Tim Boetsch | 31 of 48 | 64% | 23 of 40 | 4 of 4 | 4 of 4 | 20 of 34 | 2 of 2 | 9 of 12 |
WIN
vs
Johny Hendricks
TKO (head kick and punches)
R2
0:46
·
UFC Fight Night: Chiesa vs. Lee ·
Jun 25, 2017
Totals
| Fighter | KD | Sig. Str. | Sig. Str. % | Total Str. | TD | TD % | Sub. Att | Rev. | Ctrl |
|---|---|---|---|---|---|---|---|---|---|
| Tim Boetsch | 0 | 41 of 68 | 60% | 42 of 69 | 0 of 0 | --- | 0 | 0 | 0:01 |
| Johny Hendricks | 0 | 10 of 45 | 22% | 10 of 45 | 0 of 0 | --- | 0 | 0 | 0:00 |
Per Round
| Rd | Fighter | KD | Sig. Str. | Sig. Str. % | Total Str. | TD | TD % | Sub. Att | Rev. | Ctrl |
|---|---|---|---|---|---|---|---|---|---|---|
| 1 | Tim Boetsch | 0 | 29 of 49 | 59% | 29 of 49 | 0 of 0 | --- | 0 | 0 | 0:00 |
| Johny Hendricks | 0 | 9 of 42 | 21% | 9 of 42 | 0 of 0 | --- | 0 | 0 | 0:00 | |
| 2 | Tim Boetsch | 0 | 12 of 19 | 63% | 13 of 20 | 0 of 0 | --- | 0 | 0 | 0:01 |
| Johny Hendricks | 0 | 1 of 3 | 33% | 1 of 3 | 0 of 0 | --- | 0 | 0 | 0:00 |
Significant Strikes
| Fighter | Sig. Str. | Sig. Str. % | Head | Body | Leg | Distance | Clinch | Ground |
|---|---|---|---|---|---|---|---|---|
| Tim Boetsch | 41 of 68 | 60% | 19 of 41 | 16 of 20 | 6 of 7 | 30 of 54 | 10 of 13 | 1 of 1 |
| Johny Hendricks | 10 of 45 | 22% | 2 of 36 | 2 of 2 | 6 of 7 | 10 of 44 | 0 of 1 | 0 of 0 |
Significant Strikes Per Round
| Rd | Fighter | Sig. Str. | Sig. Str. % | Head | Body | Leg | Distance | Clinch | Ground |
|---|---|---|---|---|---|---|---|---|---|
| 1 | Tim Boetsch | 29 of 49 | 59% | 9 of 24 | 14 of 18 | 6 of 7 | 24 of 44 | 5 of 5 | 0 of 0 |
| Johny Hendricks | 9 of 42 | 21% | 2 of 34 | 2 of 2 | 5 of 6 | 9 of 42 | 0 of 0 | 0 of 0 | |
| 2 | Tim Boetsch | 12 of 19 | 63% | 10 of 17 | 2 of 2 | 0 of 0 | 6 of 10 | 5 of 8 | 1 of 1 |
| Johny Hendricks | 1 of 3 | 33% | 0 of 2 | 0 of 0 | 1 of 1 | 1 of 2 | 0 of 1 | 0 of 0 |
LOSS
vs
Jacare Souza
Submission (kimura)
R1
3:41
·
UFC 208: Holm vs. de Randamie ·
Feb 11, 2017
Totals
| Fighter | KD | Sig. Str. | Sig. Str. % | Total Str. | TD | TD % | Sub. Att | Rev. | Ctrl |
|---|---|---|---|---|---|---|---|---|---|
| Jacare Souza | 0 | 7 of 18 | 38% | 15 of 30 | 1 of 2 | 50% | 1 | 0 | 1:14 |
| Tim Boetsch | 0 | 6 of 10 | 60% | 8 of 12 | 0 of 0 | --- | 0 | 0 | 0:00 |
Per Round
| Rd | Fighter | KD | Sig. Str. | Sig. Str. % | Total Str. | TD | TD % | Sub. Att | Rev. | Ctrl |
|---|---|---|---|---|---|---|---|---|---|---|
| 1 | Jacare Souza | 0 | 7 of 18 | 38% | 15 of 30 | 1 of 2 | 50% | 1 | 0 | 1:14 |
| Tim Boetsch | 0 | 6 of 10 | 60% | 8 of 12 | 0 of 0 | --- | 0 | 0 | 0:00 |
Significant Strikes
| Fighter | Sig. Str. | Sig. Str. % | Head | Body | Leg | Distance | Clinch | Ground |
|---|---|---|---|---|---|---|---|---|
| Jacare Souza | 7 of 18 | 38% | 5 of 13 | 2 of 5 | 0 of 0 | 5 of 14 | 1 of 3 | 1 of 1 |
| Tim Boetsch | 6 of 10 | 60% | 2 of 6 | 0 of 0 | 4 of 4 | 6 of 10 | 0 of 0 | 0 of 0 |
Significant Strikes Per Round
| Rd | Fighter | Sig. Str. | Sig. Str. % | Head | Body | Leg | Distance | Clinch | Ground |
|---|---|---|---|---|---|---|---|---|---|
| 1 | Jacare Souza | 7 of 18 | 38% | 5 of 13 | 2 of 5 | 0 of 0 | 5 of 14 | 1 of 3 | 1 of 1 |
| Tim Boetsch | 6 of 10 | 60% | 2 of 6 | 0 of 0 | 4 of 4 | 6 of 10 | 0 of 0 | 0 of 0 |
WIN
vs
Rafael Natal
TKO (punches)
R1
3:22
·
UFC 205: Alvarez vs. McGregor ·
Nov 12, 2016
Totals
| Fighter | KD | Sig. Str. | Sig. Str. % | Total Str. | TD | TD % | Sub. Att | Rev. | Ctrl |
|---|---|---|---|---|---|---|---|---|---|
| Tim Boetsch | 0 | 5 of 18 | 27% | 5 of 18 | 0 of 1 | 0% | 0 | 0 | 0:00 |
| Rafael Natal | 1 | 14 of 25 | 56% | 14 of 25 | 0 of 0 | --- | 0 | 0 | 0:04 |
Per Round
| Rd | Fighter | KD | Sig. Str. | Sig. Str. % | Total Str. | TD | TD % | Sub. Att | Rev. | Ctrl |
|---|---|---|---|---|---|---|---|---|---|---|
| 1 | Tim Boetsch | 0 | 5 of 18 | 27% | 5 of 18 | 0 of 1 | 0% | 0 | 0 | 0:00 |
| Rafael Natal | 1 | 14 of 25 | 56% | 14 of 25 | 0 of 0 | --- | 0 | 0 | 0:04 |
Significant Strikes
| Fighter | Sig. Str. | Sig. Str. % | Head | Body | Leg | Distance | Clinch | Ground |
|---|---|---|---|---|---|---|---|---|
| Tim Boetsch | 5 of 18 | 27% | 2 of 13 | 1 of 2 | 2 of 3 | 5 of 18 | 0 of 0 | 0 of 0 |
| Rafael Natal | 14 of 25 | 56% | 9 of 17 | 1 of 4 | 4 of 4 | 11 of 22 | 0 of 0 | 3 of 3 |
Significant Strikes Per Round
| Rd | Fighter | Sig. Str. | Sig. Str. % | Head | Body | Leg | Distance | Clinch | Ground |
|---|---|---|---|---|---|---|---|---|---|
| 1 | Tim Boetsch | 5 of 18 | 27% | 2 of 13 | 1 of 2 | 2 of 3 | 5 of 18 | 0 of 0 | 0 of 0 |
| Rafael Natal | 14 of 25 | 56% | 9 of 17 | 1 of 4 | 4 of 4 | 11 of 22 | 0 of 0 | 3 of 3 |
WIN
vs
Josh Samman
TKO (punches)
R2
3:49
·
UFC Fight Night: McDonald vs. Lineker ·
Jul 13, 2016
Totals
| Fighter | KD | Sig. Str. | Sig. Str. % | Total Str. | TD | TD % | Sub. Att | Rev. | Ctrl |
|---|---|---|---|---|---|---|---|---|---|
| Tim Boetsch | 0 | 38 of 58 | 65% | 98 of 119 | 2 of 2 | 100% | 0 | 0 | 4:22 |
| Josh Samman | 0 | 17 of 39 | 43% | 23 of 47 | 0 of 3 | 0% | 0 | 0 | 2:07 |
Per Round
| Rd | Fighter | KD | Sig. Str. | Sig. Str. % | Total Str. | TD | TD % | Sub. Att | Rev. | Ctrl |
|---|---|---|---|---|---|---|---|---|---|---|
| 1 | Tim Boetsch | 0 | 12 of 22 | 54% | 43 of 53 | 1 of 1 | 100% | 0 | 0 | 1:15 |
| Josh Samman | 0 | 13 of 33 | 39% | 19 of 41 | 0 of 3 | 0% | 0 | 0 | 2:07 | |
| 2 | Tim Boetsch | 0 | 26 of 36 | 72% | 55 of 66 | 1 of 1 | 100% | 0 | 0 | 3:07 |
| Josh Samman | 0 | 4 of 6 | 66% | 4 of 6 | 0 of 0 | --- | 0 | 0 | 0:00 |
Significant Strikes
| Fighter | Sig. Str. | Sig. Str. % | Head | Body | Leg | Distance | Clinch | Ground |
|---|---|---|---|---|---|---|---|---|
| Tim Boetsch | 38 of 58 | 65% | 28 of 46 | 9 of 11 | 1 of 1 | 6 of 16 | 8 of 11 | 24 of 31 |
| Josh Samman | 17 of 39 | 43% | 7 of 23 | 5 of 11 | 5 of 5 | 13 of 26 | 4 of 13 | 0 of 0 |
Significant Strikes Per Round
| Rd | Fighter | Sig. Str. | Sig. Str. % | Head | Body | Leg | Distance | Clinch | Ground |
|---|---|---|---|---|---|---|---|---|---|
| 1 | Tim Boetsch | 12 of 22 | 54% | 5 of 13 | 6 of 8 | 1 of 1 | 4 of 11 | 8 of 11 | 0 of 0 |
| Josh Samman | 13 of 33 | 39% | 5 of 19 | 3 of 9 | 5 of 5 | 9 of 20 | 4 of 13 | 0 of 0 | |
| 2 | Tim Boetsch | 26 of 36 | 72% | 23 of 33 | 3 of 3 | 0 of 0 | 2 of 5 | 0 of 0 | 24 of 31 |
| Josh Samman | 4 of 6 | 66% | 2 of 4 | 2 of 2 | 0 of 0 | 4 of 6 | 0 of 0 | 0 of 0 |
LOSS
vs
Ed Herman
TKO (knee and punches)
R2
1:39
·
UFC Fight Night: Dillashaw vs. Cruz ·
Jan 17, 2016
Totals
| Fighter | KD | Sig. Str. | Sig. Str. % | Total Str. | TD | TD % | Sub. Att | Rev. | Ctrl |
|---|---|---|---|---|---|---|---|---|---|
| Ed Herman | 0 | 27 of 64 | 42% | 32 of 69 | 0 of 0 | --- | 0 | 0 | 0:08 |
| Tim Boetsch | 1 | 47 of 82 | 57% | 56 of 91 | 0 of 0 | --- | 0 | 0 | 0:16 |
Per Round
| Rd | Fighter | KD | Sig. Str. | Sig. Str. % | Total Str. | TD | TD % | Sub. Att | Rev. | Ctrl |
|---|---|---|---|---|---|---|---|---|---|---|
| 1 | Ed Herman | 0 | 20 of 49 | 40% | 23 of 52 | 0 of 0 | --- | 0 | 0 | 0:08 |
| Tim Boetsch | 0 | 29 of 56 | 51% | 34 of 61 | 0 of 0 | --- | 0 | 0 | 0:00 | |
| 2 | Ed Herman | 0 | 7 of 15 | 46% | 9 of 17 | 0 of 0 | --- | 0 | 0 | 0:00 |
| Tim Boetsch | 1 | 18 of 26 | 69% | 22 of 30 | 0 of 0 | --- | 0 | 0 | 0:16 |
Significant Strikes
| Fighter | Sig. Str. | Sig. Str. % | Head | Body | Leg | Distance | Clinch | Ground |
|---|---|---|---|---|---|---|---|---|
| Ed Herman | 27 of 64 | 42% | 16 of 50 | 5 of 7 | 6 of 7 | 23 of 55 | 4 of 9 | 0 of 0 |
| Tim Boetsch | 47 of 82 | 57% | 31 of 63 | 7 of 10 | 9 of 9 | 28 of 58 | 16 of 21 | 3 of 3 |
Significant Strikes Per Round
| Rd | Fighter | Sig. Str. | Sig. Str. % | Head | Body | Leg | Distance | Clinch | Ground |
|---|---|---|---|---|---|---|---|---|---|
| 1 | Ed Herman | 20 of 49 | 40% | 12 of 38 | 3 of 5 | 5 of 6 | 17 of 41 | 3 of 8 | 0 of 0 |
| Tim Boetsch | 29 of 56 | 51% | 16 of 42 | 6 of 7 | 7 of 7 | 19 of 42 | 10 of 14 | 0 of 0 | |
| 2 | Ed Herman | 7 of 15 | 46% | 4 of 12 | 2 of 2 | 1 of 1 | 6 of 14 | 1 of 1 | 0 of 0 |
| Tim Boetsch | 18 of 26 | 69% | 15 of 21 | 1 of 3 | 2 of 2 | 9 of 16 | 6 of 7 | 3 of 3 |
LOSS
vs
Dan Henderson
KO (punches)
R1
0:28
·
UFC Fight Night: Boetsch vs. Henderson ·
Jun 06, 2015
Totals
| Fighter | KD | Sig. Str. | Sig. Str. % | Total Str. | TD | TD % | Sub. Att | Rev. | Ctrl |
|---|---|---|---|---|---|---|---|---|---|
| Dan Henderson | 0 | 3 of 6 | 50% | 3 of 6 | 0 of 0 | --- | 0 | 0 | 0:00 |
| Tim Boetsch | 1 | 12 of 15 | 80% | 12 of 15 | 0 of 0 | --- | 0 | 0 | 0:05 |
Per Round
| Rd | Fighter | KD | Sig. Str. | Sig. Str. % | Total Str. | TD | TD % | Sub. Att | Rev. | Ctrl |
|---|---|---|---|---|---|---|---|---|---|---|
| 1 | Dan Henderson | 0 | 3 of 6 | 50% | 3 of 6 | 0 of 0 | --- | 0 | 0 | 0:00 |
| Tim Boetsch | 1 | 12 of 15 | 80% | 12 of 15 | 0 of 0 | --- | 0 | 0 | 0:05 |
Significant Strikes
| Fighter | Sig. Str. | Sig. Str. % | Head | Body | Leg | Distance | Clinch | Ground |
|---|---|---|---|---|---|---|---|---|
| Dan Henderson | 3 of 6 | 50% | 3 of 5 | 0 of 1 | 0 of 0 | 3 of 6 | 0 of 0 | 0 of 0 |
| Tim Boetsch | 12 of 15 | 80% | 12 of 15 | 0 of 0 | 0 of 0 | 3 of 4 | 1 of 2 | 8 of 9 |
Significant Strikes Per Round
| Rd | Fighter | Sig. Str. | Sig. Str. % | Head | Body | Leg | Distance | Clinch | Ground |
|---|---|---|---|---|---|---|---|---|---|
| 1 | Dan Henderson | 3 of 6 | 50% | 3 of 5 | 0 of 1 | 0 of 0 | 3 of 6 | 0 of 0 | 0 of 0 |
| Tim Boetsch | 12 of 15 | 80% | 12 of 15 | 0 of 0 | 0 of 0 | 3 of 4 | 1 of 2 | 8 of 9 |
Rafael Natal - Fight History
LOSS
vs
Eryk Anders
KO (punches)
R1
2:54
·
UFC on Fox: Weidman vs. Gastelum ·
Jul 22, 2017
Totals
| Fighter | KD | Sig. Str. | Sig. Str. % | Total Str. | TD | TD % | Sub. Att | Rev. | Ctrl |
|---|---|---|---|---|---|---|---|---|---|
| Eryk Anders | 0 | 14 of 23 | 60% | 15 of 24 | 0 of 1 | 0% | 0 | 0 | 0:00 |
| Rafael Natal | 1 | 23 of 29 | 79% | 23 of 29 | 1 of 2 | 50% | 0 | 0 | 0:46 |
Per Round
| Rd | Fighter | KD | Sig. Str. | Sig. Str. % | Total Str. | TD | TD % | Sub. Att | Rev. | Ctrl |
|---|---|---|---|---|---|---|---|---|---|---|
| 1 | Eryk Anders | 0 | 14 of 23 | 60% | 15 of 24 | 0 of 1 | 0% | 0 | 0 | 0:00 |
| Rafael Natal | 1 | 23 of 29 | 79% | 23 of 29 | 1 of 2 | 50% | 0 | 0 | 0:46 |
Significant Strikes
| Fighter | Sig. Str. | Sig. Str. % | Head | Body | Leg | Distance | Clinch | Ground |
|---|---|---|---|---|---|---|---|---|
| Eryk Anders | 14 of 23 | 60% | 8 of 16 | 2 of 3 | 4 of 4 | 13 of 20 | 1 of 3 | 0 of 0 |
| Rafael Natal | 23 of 29 | 79% | 22 of 28 | 1 of 1 | 0 of 0 | 10 of 13 | 2 of 2 | 11 of 14 |
Significant Strikes Per Round
| Rd | Fighter | Sig. Str. | Sig. Str. % | Head | Body | Leg | Distance | Clinch | Ground |
|---|---|---|---|---|---|---|---|---|---|
| 1 | Eryk Anders | 14 of 23 | 60% | 8 of 16 | 2 of 3 | 4 of 4 | 13 of 20 | 1 of 3 | 0 of 0 |
| Rafael Natal | 23 of 29 | 79% | 22 of 28 | 1 of 1 | 0 of 0 | 10 of 13 | 2 of 2 | 11 of 14 |
LOSS
vs
Tim Boetsch
TKO (punches)
R1
3:22
·
UFC 205: Alvarez vs. McGregor ·
Nov 12, 2016
Totals
| Fighter | KD | Sig. Str. | Sig. Str. % | Total Str. | TD | TD % | Sub. Att | Rev. | Ctrl |
|---|---|---|---|---|---|---|---|---|---|
| Tim Boetsch | 0 | 5 of 18 | 27% | 5 of 18 | 0 of 1 | 0% | 0 | 0 | 0:00 |
| Rafael Natal | 1 | 14 of 25 | 56% | 14 of 25 | 0 of 0 | --- | 0 | 0 | 0:04 |
Per Round
| Rd | Fighter | KD | Sig. Str. | Sig. Str. % | Total Str. | TD | TD % | Sub. Att | Rev. | Ctrl |
|---|---|---|---|---|---|---|---|---|---|---|
| 1 | Tim Boetsch | 0 | 5 of 18 | 27% | 5 of 18 | 0 of 1 | 0% | 0 | 0 | 0:00 |
| Rafael Natal | 1 | 14 of 25 | 56% | 14 of 25 | 0 of 0 | --- | 0 | 0 | 0:04 |
Significant Strikes
| Fighter | Sig. Str. | Sig. Str. % | Head | Body | Leg | Distance | Clinch | Ground |
|---|---|---|---|---|---|---|---|---|
| Tim Boetsch | 5 of 18 | 27% | 2 of 13 | 1 of 2 | 2 of 3 | 5 of 18 | 0 of 0 | 0 of 0 |
| Rafael Natal | 14 of 25 | 56% | 9 of 17 | 1 of 4 | 4 of 4 | 11 of 22 | 0 of 0 | 3 of 3 |
Significant Strikes Per Round
| Rd | Fighter | Sig. Str. | Sig. Str. % | Head | Body | Leg | Distance | Clinch | Ground |
|---|---|---|---|---|---|---|---|---|---|
| 1 | Tim Boetsch | 5 of 18 | 27% | 2 of 13 | 1 of 2 | 2 of 3 | 5 of 18 | 0 of 0 | 0 of 0 |
| Rafael Natal | 14 of 25 | 56% | 9 of 17 | 1 of 4 | 4 of 4 | 11 of 22 | 0 of 0 | 3 of 3 |
LOSS
vs
Robert Whittaker
Decision (unanimous) (29–28, 30–27, 30–27)
R3
5:00
·
UFC 197: Jones vs. Saint Preux ·
Apr 23, 2016
Totals
| Fighter | KD | Sig. Str. | Sig. Str. % | Total Str. | TD | TD % | Sub. Att | Rev. | Ctrl |
|---|---|---|---|---|---|---|---|---|---|
| Robert Whittaker | 0 | 89 of 176 | 50% | 92 of 179 | 0 of 0 | --- | 0 | 0 | 0:02 |
| Rafael Natal | 0 | 62 of 137 | 45% | 63 of 138 | 0 of 4 | 0% | 0 | 0 | 0:00 |
Per Round
| Rd | Fighter | KD | Sig. Str. | Sig. Str. % | Total Str. | TD | TD % | Sub. Att | Rev. | Ctrl |
|---|---|---|---|---|---|---|---|---|---|---|
| 1 | Robert Whittaker | 0 | 23 of 51 | 45% | 23 of 51 | 0 of 0 | --- | 0 | 0 | 0:02 |
| Rafael Natal | 0 | 22 of 48 | 45% | 23 of 49 | 0 of 1 | 0% | 0 | 0 | 0:00 | |
| 2 | Robert Whittaker | 0 | 31 of 61 | 50% | 33 of 63 | 0 of 0 | --- | 0 | 0 | 0:00 |
| Rafael Natal | 0 | 21 of 46 | 45% | 21 of 46 | 0 of 2 | 0% | 0 | 0 | 0:00 | |
| 3 | Robert Whittaker | 0 | 35 of 64 | 54% | 36 of 65 | 0 of 0 | --- | 0 | 0 | 0:00 |
| Rafael Natal | 0 | 19 of 43 | 44% | 19 of 43 | 0 of 1 | 0% | 0 | 0 | 0:00 |
Significant Strikes
| Fighter | Sig. Str. | Sig. Str. % | Head | Body | Leg | Distance | Clinch | Ground |
|---|---|---|---|---|---|---|---|---|
| Robert Whittaker | 89 of 176 | 50% | 51 of 129 | 10 of 11 | 28 of 36 | 83 of 166 | 2 of 4 | 4 of 6 |
| Rafael Natal | 62 of 137 | 45% | 36 of 95 | 4 of 15 | 22 of 27 | 61 of 135 | 1 of 2 | 0 of 0 |
Significant Strikes Per Round
| Rd | Fighter | Sig. Str. | Sig. Str. % | Head | Body | Leg | Distance | Clinch | Ground |
|---|---|---|---|---|---|---|---|---|---|
| 1 | Robert Whittaker | 23 of 51 | 45% | 16 of 43 | 2 of 2 | 5 of 6 | 22 of 49 | 0 of 0 | 1 of 2 |
| Rafael Natal | 22 of 48 | 45% | 17 of 37 | 2 of 8 | 3 of 3 | 22 of 48 | 0 of 0 | 0 of 0 | |
| 2 | Robert Whittaker | 31 of 61 | 50% | 17 of 45 | 3 of 4 | 11 of 12 | 30 of 60 | 1 of 1 | 0 of 0 |
| Rafael Natal | 21 of 46 | 45% | 10 of 31 | 2 of 3 | 9 of 12 | 21 of 46 | 0 of 0 | 0 of 0 | |
| 3 | Robert Whittaker | 35 of 64 | 54% | 18 of 41 | 5 of 5 | 12 of 18 | 31 of 57 | 1 of 3 | 3 of 4 |
| Rafael Natal | 19 of 43 | 44% | 9 of 27 | 0 of 4 | 10 of 12 | 18 of 41 | 1 of 2 | 0 of 0 |
Play-by-Play
View on SherdogRobert Whittaker vs. Rafael Natal
Round 1
Whittaker takes the center of the cage and follows Natal around the outside, clipping the veteran with a right hook as both men test the range. Natal scores with a pair of leg kicks, a counter hook and then tries to clinch with Whittaker but comes up empty. Natal eats a left hook but ducks underneath Whittaker’s follow-up head kick and nearly converts it to a takedown midway through the round, but again Whittaker is able to keep his footing. Whittaker sticks a nice jab and sidesteps Natal’s return fire as the middleweights hunt and peck in the last two minutes. Whittaker lands a leg kick, gets hit back with a body shot. A looping left hook behind the ear momentarily takes the legs out from underneath Natal, but he’s right back on his feet within seconds to continue lobbing bombs at Whittaker in the closing seconds.
Sherdog Scores
TJ De Santis scores the round 10-9 Whittaker
Brian Knapp scores the round 10-9 Whittaker
Chris Nelson scores the round 10-9 Whittaker
Round 2
Both men come out swinging, Natal getting backed up to the fence as Whittaker tries to take off his head. Whittaker snuffs out a running double-leg attempt and steps forward to crack Natal with an overhand. Natal responds with three hard chops to Whittaker’s lead leg, then looks to change levels but again is stood up. Whittaker’s left leg is a mess just 90 seconds into the round; the Australian is now checking Natal’s kicks and limping a bit as he comes forward. Whittaker tries to give Natal a leg kick in return, but there’s nothing much behind it. Whittaker is keeping Natal cornered near the fence, not giving the Brazilian much room to operate. Whittaker is dripping blood from his nose, while Natal is sporting a swollen left eye and a small cut on his forehead.
Sherdog Scores
TJ De Santis scores the round 10-9 Whittaker
Brian Knapp scores the round 10-9 Whittaker
Chris Nelson scores the round 10-9 Whittaker
Round 3
The action is paused early in the final round when Natal gets a heel to the cup from an awkward Whittaker side kick. “Sapo” recovers quickly and comes back to fight, and now the middleweights trade kicks in the middle of the cage. Natal continues to do damage with his kicks, but Whittaker is landing clean with punches almost every time he chooses to throw. An overhand left dings Natal’s face, then a jab and a front kick to the midsection. Natal gets stuffed on a double-leg shot and socked with a left hand to the face on the split. Another left hand has Natal stumbling near the fence, but the vet is hanging tough, continuing to throw kicks. Down to the final minute, Natal steps off the fence to engage with Whittaker in the center. The leg kicks are starting to have a visible effect on Whittaker, who has stumbled after the last few chops to his left stem. Right at the 10-second clapper, Whittaker catches Natal leaning left and clubs him with a right high kick for the last meaningful strike of the bout.
Sherdog Scores
TJ De Santis scores the round 10-9 Whittaker (30-27 Whittaker)
Brian Knapp scores the round 10-9 Whittaker (30-27 Whittaker)
Chris Nelson scores the round 10-9 Whittaker (30-27 Whittaker)
The Official Result
Robert Whittaker def. Rafael Natal via Unanimous Decision (30-27, 30-27, 29-28) R3 5:00
Round 1
Whittaker takes the center of the cage and follows Natal around the outside, clipping the veteran with a right hook as both men test the range. Natal scores with a pair of leg kicks, a counter hook and then tries to clinch with Whittaker but comes up empty. Natal eats a left hook but ducks underneath Whittaker’s follow-up head kick and nearly converts it to a takedown midway through the round, but again Whittaker is able to keep his footing. Whittaker sticks a nice jab and sidesteps Natal’s return fire as the middleweights hunt and peck in the last two minutes. Whittaker lands a leg kick, gets hit back with a body shot. A looping left hook behind the ear momentarily takes the legs out from underneath Natal, but he’s right back on his feet within seconds to continue lobbing bombs at Whittaker in the closing seconds.
Sherdog Scores
TJ De Santis scores the round 10-9 Whittaker
Brian Knapp scores the round 10-9 Whittaker
Chris Nelson scores the round 10-9 Whittaker
Round 2
Both men come out swinging, Natal getting backed up to the fence as Whittaker tries to take off his head. Whittaker snuffs out a running double-leg attempt and steps forward to crack Natal with an overhand. Natal responds with three hard chops to Whittaker’s lead leg, then looks to change levels but again is stood up. Whittaker’s left leg is a mess just 90 seconds into the round; the Australian is now checking Natal’s kicks and limping a bit as he comes forward. Whittaker tries to give Natal a leg kick in return, but there’s nothing much behind it. Whittaker is keeping Natal cornered near the fence, not giving the Brazilian much room to operate. Whittaker is dripping blood from his nose, while Natal is sporting a swollen left eye and a small cut on his forehead.
Sherdog Scores
TJ De Santis scores the round 10-9 Whittaker
Brian Knapp scores the round 10-9 Whittaker
Chris Nelson scores the round 10-9 Whittaker
Round 3
The action is paused early in the final round when Natal gets a heel to the cup from an awkward Whittaker side kick. “Sapo” recovers quickly and comes back to fight, and now the middleweights trade kicks in the middle of the cage. Natal continues to do damage with his kicks, but Whittaker is landing clean with punches almost every time he chooses to throw. An overhand left dings Natal’s face, then a jab and a front kick to the midsection. Natal gets stuffed on a double-leg shot and socked with a left hand to the face on the split. Another left hand has Natal stumbling near the fence, but the vet is hanging tough, continuing to throw kicks. Down to the final minute, Natal steps off the fence to engage with Whittaker in the center. The leg kicks are starting to have a visible effect on Whittaker, who has stumbled after the last few chops to his left stem. Right at the 10-second clapper, Whittaker catches Natal leaning left and clubs him with a right high kick for the last meaningful strike of the bout.
Sherdog Scores
TJ De Santis scores the round 10-9 Whittaker (30-27 Whittaker)
Brian Knapp scores the round 10-9 Whittaker (30-27 Whittaker)
Chris Nelson scores the round 10-9 Whittaker (30-27 Whittaker)
The Official Result
Robert Whittaker def. Rafael Natal via Unanimous Decision (30-27, 30-27, 29-28) R3 5:00
WIN
vs
Kevin Casey
TKO (punches)
R3
3:37
·
UFC on Fox: Johnson vs. Bader ·
Jan 30, 2016
Totals
| Fighter | KD | Sig. Str. | Sig. Str. % | Total Str. | TD | TD % | Sub. Att | Rev. | Ctrl |
|---|---|---|---|---|---|---|---|---|---|
| Rafael Natal | 1 | 54 of 87 | 62% | 123 of 168 | 4 of 7 | 57% | 0 | 0 | 5:31 |
| Kevin Casey | 0 | 16 of 49 | 32% | 30 of 64 | 0 of 2 | 0% | 0 | 0 | 2:09 |
Per Round
| Rd | Fighter | KD | Sig. Str. | Sig. Str. % | Total Str. | TD | TD % | Sub. Att | Rev. | Ctrl |
|---|---|---|---|---|---|---|---|---|---|---|
| 1 | Rafael Natal | 1 | 7 of 15 | 46% | 22 of 31 | 1 of 4 | 25% | 0 | 0 | 0:35 |
| Kevin Casey | 0 | 10 of 30 | 33% | 17 of 38 | 0 of 1 | 0% | 0 | 0 | 1:33 | |
| 2 | Rafael Natal | 0 | 24 of 33 | 72% | 59 of 74 | 2 of 2 | 100% | 0 | 0 | 3:12 |
| Kevin Casey | 0 | 2 of 7 | 28% | 9 of 14 | 0 of 1 | 0% | 0 | 0 | 0:36 | |
| 3 | Rafael Natal | 0 | 23 of 39 | 58% | 42 of 63 | 1 of 1 | 100% | 0 | 0 | 1:44 |
| Kevin Casey | 0 | 4 of 12 | 33% | 4 of 12 | 0 of 0 | --- | 0 | 0 | 0:00 |
Significant Strikes
| Fighter | Sig. Str. | Sig. Str. % | Head | Body | Leg | Distance | Clinch | Ground |
|---|---|---|---|---|---|---|---|---|
| Rafael Natal | 54 of 87 | 62% | 43 of 74 | 5 of 7 | 6 of 6 | 16 of 35 | 7 of 9 | 31 of 43 |
| Kevin Casey | 16 of 49 | 32% | 10 of 41 | 5 of 6 | 1 of 2 | 12 of 45 | 4 of 4 | 0 of 0 |
Significant Strikes Per Round
| Rd | Fighter | Sig. Str. | Sig. Str. % | Head | Body | Leg | Distance | Clinch | Ground |
|---|---|---|---|---|---|---|---|---|---|
| 1 | Rafael Natal | 7 of 15 | 46% | 4 of 12 | 2 of 2 | 1 of 1 | 5 of 12 | 2 of 3 | 0 of 0 |
| Kevin Casey | 10 of 30 | 33% | 7 of 25 | 2 of 3 | 1 of 2 | 6 of 26 | 4 of 4 | 0 of 0 | |
| 2 | Rafael Natal | 24 of 33 | 72% | 18 of 25 | 3 of 5 | 3 of 3 | 4 of 9 | 5 of 6 | 15 of 18 |
| Kevin Casey | 2 of 7 | 28% | 1 of 6 | 1 of 1 | 0 of 0 | 2 of 7 | 0 of 0 | 0 of 0 | |
| 3 | Rafael Natal | 23 of 39 | 58% | 21 of 37 | 0 of 0 | 2 of 2 | 7 of 14 | 0 of 0 | 16 of 25 |
| Kevin Casey | 4 of 12 | 33% | 2 of 10 | 2 of 2 | 0 of 0 | 4 of 12 | 0 of 0 | 0 of 0 |
WIN
vs
Uriah Hall
Decision (split) (29–28, 28–29, 29–28)
R3
5:00
·
UFC 187: Johnson vs. Cormier ·
May 23, 2015
Totals
| Fighter | KD | Sig. Str. | Sig. Str. % | Total Str. | TD | TD % | Sub. Att | Rev. | Ctrl |
|---|---|---|---|---|---|---|---|---|---|
| Rafael Natal | 0 | 43 of 74 | 58% | 47 of 78 | 1 of 3 | 33% | 0 | 0 | 0:52 |
| Uriah Hall | 0 | 45 of 103 | 43% | 63 of 125 | 1 of 11 | 9% | 0 | 0 | 2:55 |
Per Round
| Rd | Fighter | KD | Sig. Str. | Sig. Str. % | Total Str. | TD | TD % | Sub. Att | Rev. | Ctrl |
|---|---|---|---|---|---|---|---|---|---|---|
| 1 | Rafael Natal | 0 | 21 of 33 | 63% | 21 of 33 | 0 of 0 | --- | 0 | 0 | 0:00 |
| Uriah Hall | 0 | 21 of 49 | 42% | 21 of 49 | 0 of 4 | 0% | 0 | 0 | 0:19 | |
| 2 | Rafael Natal | 0 | 9 of 14 | 64% | 13 of 18 | 1 of 3 | 33% | 0 | 0 | 0:52 |
| Uriah Hall | 0 | 12 of 23 | 52% | 30 of 45 | 1 of 4 | 25% | 0 | 0 | 1:59 | |
| 3 | Rafael Natal | 0 | 13 of 27 | 48% | 13 of 27 | 0 of 0 | --- | 0 | 0 | 0:00 |
| Uriah Hall | 0 | 12 of 31 | 38% | 12 of 31 | 0 of 3 | 0% | 0 | 0 | 0:37 |
Significant Strikes
| Fighter | Sig. Str. | Sig. Str. % | Head | Body | Leg | Distance | Clinch | Ground |
|---|---|---|---|---|---|---|---|---|
| Rafael Natal | 43 of 74 | 58% | 15 of 40 | 15 of 21 | 13 of 13 | 41 of 70 | 2 of 4 | 0 of 0 |
| Uriah Hall | 45 of 103 | 43% | 15 of 62 | 6 of 14 | 24 of 27 | 31 of 85 | 14 of 17 | 0 of 1 |
Significant Strikes Per Round
| Rd | Fighter | Sig. Str. | Sig. Str. % | Head | Body | Leg | Distance | Clinch | Ground |
|---|---|---|---|---|---|---|---|---|---|
| 1 | Rafael Natal | 21 of 33 | 63% | 7 of 17 | 9 of 11 | 5 of 5 | 21 of 33 | 0 of 0 | 0 of 0 |
| Uriah Hall | 21 of 49 | 42% | 5 of 30 | 4 of 7 | 12 of 12 | 19 of 46 | 2 of 3 | 0 of 0 | |
| 2 | Rafael Natal | 9 of 14 | 64% | 4 of 9 | 3 of 3 | 2 of 2 | 7 of 11 | 2 of 3 | 0 of 0 |
| Uriah Hall | 12 of 23 | 52% | 2 of 11 | 1 of 2 | 9 of 10 | 5 of 13 | 7 of 9 | 0 of 1 | |
| 3 | Rafael Natal | 13 of 27 | 48% | 4 of 14 | 3 of 7 | 6 of 6 | 13 of 26 | 0 of 1 | 0 of 0 |
| Uriah Hall | 12 of 31 | 38% | 8 of 21 | 1 of 5 | 3 of 5 | 7 of 26 | 5 of 5 | 0 of 0 |
WIN
vs
Tom Watson
Decision (unanimous) (30–27, 30–27, 30–26)
R3
5:00
·
UFC 183: Silva vs. Diaz ·
Jan 31, 2015
Totals
| Fighter | KD | Sig. Str. | Sig. Str. % | Total Str. | TD | TD % | Sub. Att | Rev. | Ctrl |
|---|---|---|---|---|---|---|---|---|---|
| Rafael Natal | 0 | 67 of 152 | 44% | 74 of 159 | 8 of 13 | 61% | 0 | 0 | 3:30 |
| Tom Watson | 0 | 29 of 150 | 19% | 33 of 156 | 0 of 0 | --- | 0 | 0 | 0:00 |
Per Round
| Rd | Fighter | KD | Sig. Str. | Sig. Str. % | Total Str. | TD | TD % | Sub. Att | Rev. | Ctrl |
|---|---|---|---|---|---|---|---|---|---|---|
| 1 | Rafael Natal | 0 | 23 of 51 | 45% | 27 of 55 | 3 of 4 | 75% | 0 | 0 | 1:20 |
| Tom Watson | 0 | 9 of 44 | 20% | 11 of 46 | 0 of 0 | --- | 0 | 0 | 0:00 | |
| 2 | Rafael Natal | 0 | 19 of 44 | 43% | 20 of 45 | 2 of 5 | 40% | 0 | 0 | 1:24 |
| Tom Watson | 0 | 9 of 48 | 18% | 10 of 50 | 0 of 0 | --- | 0 | 0 | 0:00 | |
| 3 | Rafael Natal | 0 | 25 of 57 | 43% | 27 of 59 | 3 of 4 | 75% | 0 | 0 | 0:46 |
| Tom Watson | 0 | 11 of 58 | 18% | 12 of 60 | 0 of 0 | --- | 0 | 0 | 0:00 |
Significant Strikes
| Fighter | Sig. Str. | Sig. Str. % | Head | Body | Leg | Distance | Clinch | Ground |
|---|---|---|---|---|---|---|---|---|
| Rafael Natal | 67 of 152 | 44% | 43 of 125 | 6 of 8 | 18 of 19 | 65 of 144 | 1 of 2 | 1 of 6 |
| Tom Watson | 29 of 150 | 19% | 13 of 106 | 1 of 20 | 15 of 24 | 28 of 148 | 1 of 2 | 0 of 0 |
Significant Strikes Per Round
| Rd | Fighter | Sig. Str. | Sig. Str. % | Head | Body | Leg | Distance | Clinch | Ground |
|---|---|---|---|---|---|---|---|---|---|
| 1 | Rafael Natal | 23 of 51 | 45% | 10 of 35 | 2 of 4 | 11 of 12 | 23 of 51 | 0 of 0 | 0 of 0 |
| Tom Watson | 9 of 44 | 20% | 4 of 29 | 0 of 5 | 5 of 10 | 9 of 43 | 0 of 1 | 0 of 0 | |
| 2 | Rafael Natal | 19 of 44 | 43% | 12 of 37 | 2 of 2 | 5 of 5 | 18 of 38 | 1 of 2 | 0 of 4 |
| Tom Watson | 9 of 48 | 18% | 4 of 35 | 0 of 6 | 5 of 7 | 9 of 48 | 0 of 0 | 0 of 0 | |
| 3 | Rafael Natal | 25 of 57 | 43% | 21 of 53 | 2 of 2 | 2 of 2 | 24 of 55 | 0 of 0 | 1 of 2 |
| Tom Watson | 11 of 58 | 18% | 5 of 42 | 1 of 9 | 5 of 7 | 10 of 57 | 1 of 1 | 0 of 0 |
WIN
vs
Chris Camozzi
Decision (split) (28–29, 29–28, 29–28)
R3
5:00
·
UFC Fight Night: Jacare vs. Mousasi ·
Sep 05, 2014
Totals
| Fighter | KD | Sig. Str. | Sig. Str. % | Total Str. | TD | TD % | Sub. Att | Rev. | Ctrl |
|---|---|---|---|---|---|---|---|---|---|
| Rafael Natal | 0 | 36 of 73 | 49% | 46 of 84 | 2 of 12 | 16% | 0 | 0 | 2:44 |
| Chris Camozzi | 0 | 67 of 112 | 59% | 86 of 134 | 0 of 1 | 0% | 0 | 0 | 2:44 |
Per Round
| Rd | Fighter | KD | Sig. Str. | Sig. Str. % | Total Str. | TD | TD % | Sub. Att | Rev. | Ctrl |
|---|---|---|---|---|---|---|---|---|---|---|
| 1 | Rafael Natal | 0 | 16 of 30 | 53% | 18 of 33 | 1 of 3 | 33% | 0 | 0 | 1:16 |
| Chris Camozzi | 0 | 14 of 27 | 51% | 19 of 32 | 0 of 0 | --- | 0 | 0 | 0:11 | |
| 2 | Rafael Natal | 0 | 12 of 24 | 50% | 19 of 31 | 1 of 5 | 20% | 0 | 0 | 0:57 |
| Chris Camozzi | 0 | 12 of 25 | 48% | 20 of 34 | 0 of 1 | 0% | 0 | 0 | 1:05 | |
| 3 | Rafael Natal | 0 | 8 of 19 | 42% | 9 of 20 | 0 of 4 | 0% | 0 | 0 | 0:31 |
| Chris Camozzi | 0 | 41 of 60 | 68% | 47 of 68 | 0 of 0 | --- | 0 | 0 | 1:28 |
Significant Strikes
| Fighter | Sig. Str. | Sig. Str. % | Head | Body | Leg | Distance | Clinch | Ground |
|---|---|---|---|---|---|---|---|---|
| Rafael Natal | 36 of 73 | 49% | 6 of 36 | 16 of 22 | 14 of 15 | 30 of 65 | 6 of 8 | 0 of 0 |
| Chris Camozzi | 67 of 112 | 59% | 39 of 82 | 10 of 10 | 18 of 20 | 57 of 100 | 10 of 12 | 0 of 0 |
Significant Strikes Per Round
| Rd | Fighter | Sig. Str. | Sig. Str. % | Head | Body | Leg | Distance | Clinch | Ground |
|---|---|---|---|---|---|---|---|---|---|
| 1 | Rafael Natal | 16 of 30 | 53% | 3 of 15 | 7 of 9 | 6 of 6 | 13 of 26 | 3 of 4 | 0 of 0 |
| Chris Camozzi | 14 of 27 | 51% | 3 of 16 | 2 of 2 | 9 of 9 | 12 of 24 | 2 of 3 | 0 of 0 | |
| 2 | Rafael Natal | 12 of 24 | 50% | 2 of 11 | 6 of 9 | 4 of 4 | 9 of 21 | 3 of 3 | 0 of 0 |
| Chris Camozzi | 12 of 25 | 48% | 4 of 15 | 4 of 4 | 4 of 6 | 6 of 18 | 6 of 7 | 0 of 0 | |
| 3 | Rafael Natal | 8 of 19 | 42% | 1 of 10 | 3 of 4 | 4 of 5 | 8 of 18 | 0 of 1 | 0 of 0 |
| Chris Camozzi | 41 of 60 | 68% | 32 of 51 | 4 of 4 | 5 of 5 | 39 of 58 | 2 of 2 | 0 of 0 |
LOSS
vs
Ed Herman
Decision (unanimous) (30–27, 29–28, 29–28)
R3
5:00
·
UFC Fight Night: Brown vs. Silva ·
May 10, 2014
Totals
| Fighter | KD | Sig. Str. | Sig. Str. % | Total Str. | TD | TD % | Sub. Att | Rev. | Ctrl |
|---|---|---|---|---|---|---|---|---|---|
| Ed Herman | 0 | 51 of 87 | 58% | 78 of 117 | 1 of 4 | 25% | 0 | 0 | 2:57 |
| Rafael Natal | 0 | 35 of 73 | 47% | 71 of 114 | 1 of 6 | 16% | 0 | 0 | 4:46 |
Per Round
| Rd | Fighter | KD | Sig. Str. | Sig. Str. % | Total Str. | TD | TD % | Sub. Att | Rev. | Ctrl |
|---|---|---|---|---|---|---|---|---|---|---|
| 1 | Ed Herman | 0 | 10 of 20 | 50% | 19 of 31 | 1 of 1 | 100% | 0 | 0 | 1:11 |
| Rafael Natal | 0 | 14 of 26 | 53% | 34 of 49 | 0 of 0 | --- | 0 | 0 | 2:19 | |
| 2 | Ed Herman | 0 | 17 of 30 | 56% | 31 of 45 | 0 of 0 | --- | 0 | 0 | 1:09 |
| Rafael Natal | 0 | 10 of 20 | 50% | 23 of 35 | 1 of 1 | 100% | 0 | 0 | 1:27 | |
| 3 | Ed Herman | 0 | 24 of 37 | 64% | 28 of 41 | 0 of 3 | 0% | 0 | 0 | 0:37 |
| Rafael Natal | 0 | 11 of 27 | 40% | 14 of 30 | 0 of 5 | 0% | 0 | 0 | 1:00 |
Significant Strikes
| Fighter | Sig. Str. | Sig. Str. % | Head | Body | Leg | Distance | Clinch | Ground |
|---|---|---|---|---|---|---|---|---|
| Ed Herman | 51 of 87 | 58% | 22 of 54 | 9 of 9 | 20 of 24 | 24 of 51 | 21 of 29 | 6 of 7 |
| Rafael Natal | 35 of 73 | 47% | 15 of 41 | 8 of 17 | 12 of 15 | 19 of 46 | 8 of 11 | 8 of 16 |
Significant Strikes Per Round
| Rd | Fighter | Sig. Str. | Sig. Str. % | Head | Body | Leg | Distance | Clinch | Ground |
|---|---|---|---|---|---|---|---|---|---|
| 1 | Ed Herman | 10 of 20 | 50% | 8 of 16 | 0 of 0 | 2 of 4 | 3 of 11 | 1 of 2 | 6 of 7 |
| Rafael Natal | 14 of 26 | 53% | 6 of 14 | 2 of 4 | 6 of 8 | 7 of 13 | 1 of 2 | 6 of 11 | |
| 2 | Ed Herman | 17 of 30 | 56% | 3 of 14 | 5 of 5 | 9 of 11 | 8 of 20 | 9 of 10 | 0 of 0 |
| Rafael Natal | 10 of 20 | 50% | 3 of 11 | 4 of 6 | 3 of 3 | 5 of 12 | 3 of 3 | 2 of 5 | |
| 3 | Ed Herman | 24 of 37 | 64% | 11 of 24 | 4 of 4 | 9 of 9 | 13 of 20 | 11 of 17 | 0 of 0 |
| Rafael Natal | 11 of 27 | 40% | 6 of 16 | 2 of 7 | 3 of 4 | 7 of 21 | 4 of 6 | 0 of 0 |
No comments yet. Be the first to share your thoughts!