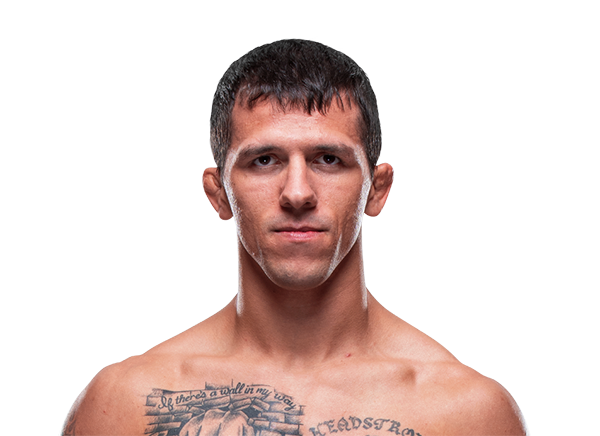
UFC 181: Hendricks vs. Lawler II ·
Dec 06, 2014 ·
Featherweight ·
Completed
Prev Fight
UFC 181: Hendricks vs. Lawler II
Career Averages - Clay Collard
4.22
SLpM
32.0%
Str. Acc.
5.0
SApM
50.0%
Str. Def.
2.81
TD Avg
39.0%
TD Acc.
71.0%
TD Def.
0.5
Sub. Avg
Career Averages - Alex White
3.76
SLpM
42.0%
Str. Acc.
3.07
SApM
60.0%
Str. Def.
0.92
TD Avg
28.0%
TD Acc.
71.0%
TD Def.
0.5
Sub. Avg
Clay Collard - Fight History
LOSS
vs
Tiago dos Santos e Silva
Decision (split) (29–28, 28–29, 29–28)
R3
5:00
·
UFC 191: Johnson vs. Dodson 2 ·
Sep 05, 2015
Totals
| Fighter | KD | Sig. Str. | Sig. Str. % | Total Str. | TD | TD % | Sub. Att | Rev. | Ctrl |
|---|---|---|---|---|---|---|---|---|---|
| Tiago dos Santos e Silva | 1 | 84 of 210 | 40% | 136 of 264 | 1 of 2 | 50% | 0 | 0 | 2:16 |
| Clay Collard | 0 | 52 of 122 | 42% | 73 of 146 | 1 of 4 | 25% | 1 | 2 | 3:38 |
Per Round
| Rd | Fighter | KD | Sig. Str. | Sig. Str. % | Total Str. | TD | TD % | Sub. Att | Rev. | Ctrl |
|---|---|---|---|---|---|---|---|---|---|---|
| 1 | Tiago dos Santos e Silva | 0 | 18 of 52 | 34% | 36 of 70 | 0 of 0 | --- | 0 | 0 | 0:56 |
| Clay Collard | 0 | 11 of 31 | 35% | 17 of 39 | 1 of 2 | 50% | 0 | 1 | 1:17 | |
| 2 | Tiago dos Santos e Silva | 1 | 32 of 76 | 42% | 54 of 99 | 0 of 0 | --- | 0 | 0 | 1:16 |
| Clay Collard | 0 | 11 of 26 | 42% | 18 of 34 | 0 of 0 | --- | 1 | 1 | 1:19 | |
| 3 | Tiago dos Santos e Silva | 0 | 34 of 82 | 41% | 46 of 95 | 1 of 2 | 50% | 0 | 0 | 0:04 |
| Clay Collard | 0 | 30 of 65 | 46% | 38 of 73 | 0 of 2 | 0% | 0 | 0 | 1:02 |
Significant Strikes
| Fighter | Sig. Str. | Sig. Str. % | Head | Body | Leg | Distance | Clinch | Ground |
|---|---|---|---|---|---|---|---|---|
| Tiago dos Santos e Silva | 84 of 210 | 40% | 60 of 178 | 18 of 24 | 6 of 8 | 60 of 174 | 9 of 12 | 15 of 24 |
| Clay Collard | 52 of 122 | 42% | 25 of 85 | 17 of 26 | 10 of 11 | 45 of 109 | 6 of 12 | 1 of 1 |
Significant Strikes Per Round
| Rd | Fighter | Sig. Str. | Sig. Str. % | Head | Body | Leg | Distance | Clinch | Ground |
|---|---|---|---|---|---|---|---|---|---|
| 1 | Tiago dos Santos e Silva | 18 of 52 | 34% | 11 of 43 | 5 of 7 | 2 of 2 | 14 of 45 | 2 of 4 | 2 of 3 |
| Clay Collard | 11 of 31 | 35% | 3 of 20 | 3 of 6 | 5 of 5 | 5 of 23 | 5 of 7 | 1 of 1 | |
| 2 | Tiago dos Santos e Silva | 32 of 76 | 42% | 25 of 63 | 6 of 10 | 1 of 3 | 15 of 50 | 4 of 5 | 13 of 21 |
| Clay Collard | 11 of 26 | 42% | 4 of 14 | 4 of 8 | 3 of 4 | 10 of 22 | 1 of 4 | 0 of 0 | |
| 3 | Tiago dos Santos e Silva | 34 of 82 | 41% | 24 of 72 | 7 of 7 | 3 of 3 | 31 of 79 | 3 of 3 | 0 of 0 |
| Clay Collard | 30 of 65 | 46% | 18 of 51 | 10 of 12 | 2 of 2 | 30 of 64 | 0 of 1 | 0 of 0 |
LOSS
vs
Gabriel Benítez
Decision (unanimous) (30–27, 30–27, 30–27)
R3
5:00
·
UFC 188: Velasquez vs. Werdum ·
Jun 13, 2015
Totals
| Fighter | KD | Sig. Str. | Sig. Str. % | Total Str. | TD | TD % | Sub. Att | Rev. | Ctrl |
|---|---|---|---|---|---|---|---|---|---|
| Gabriel Benítez | 0 | 60 of 106 | 56% | 97 of 144 | 0 of 0 | --- | 1 | 0 | 0:57 |
| Clay Collard | 0 | 34 of 158 | 21% | 54 of 184 | 6 of 11 | 54% | 0 | 0 | 4:46 |
Per Round
| Rd | Fighter | KD | Sig. Str. | Sig. Str. % | Total Str. | TD | TD % | Sub. Att | Rev. | Ctrl |
|---|---|---|---|---|---|---|---|---|---|---|
| 1 | Gabriel Benítez | 0 | 19 of 36 | 52% | 24 of 41 | 0 of 0 | --- | 1 | 0 | 0:11 |
| Clay Collard | 0 | 15 of 50 | 30% | 20 of 56 | 1 of 3 | 33% | 0 | 0 | 2:21 | |
| 2 | Gabriel Benítez | 0 | 26 of 46 | 56% | 36 of 56 | 0 of 0 | --- | 0 | 0 | 0:00 |
| Clay Collard | 0 | 13 of 62 | 20% | 16 of 65 | 3 of 3 | 100% | 0 | 0 | 0:42 | |
| 3 | Gabriel Benítez | 0 | 15 of 24 | 62% | 37 of 47 | 0 of 0 | --- | 0 | 0 | 0:46 |
| Clay Collard | 0 | 6 of 46 | 13% | 18 of 63 | 2 of 5 | 40% | 0 | 0 | 1:43 |
Significant Strikes
| Fighter | Sig. Str. | Sig. Str. % | Head | Body | Leg | Distance | Clinch | Ground |
|---|---|---|---|---|---|---|---|---|
| Gabriel Benítez | 60 of 106 | 56% | 13 of 48 | 30 of 37 | 17 of 21 | 55 of 99 | 1 of 2 | 4 of 5 |
| Clay Collard | 34 of 158 | 21% | 17 of 136 | 5 of 8 | 12 of 14 | 30 of 151 | 3 of 4 | 1 of 3 |
Significant Strikes Per Round
| Rd | Fighter | Sig. Str. | Sig. Str. % | Head | Body | Leg | Distance | Clinch | Ground |
|---|---|---|---|---|---|---|---|---|---|
| 1 | Gabriel Benítez | 19 of 36 | 52% | 5 of 18 | 10 of 13 | 4 of 5 | 17 of 34 | 0 of 0 | 2 of 2 |
| Clay Collard | 15 of 50 | 30% | 5 of 37 | 3 of 4 | 7 of 9 | 12 of 45 | 3 of 3 | 0 of 2 | |
| 2 | Gabriel Benítez | 26 of 46 | 56% | 4 of 18 | 15 of 19 | 7 of 9 | 23 of 42 | 1 of 2 | 2 of 2 |
| Clay Collard | 13 of 62 | 20% | 7 of 55 | 2 of 3 | 4 of 4 | 12 of 61 | 0 of 0 | 1 of 1 | |
| 3 | Gabriel Benítez | 15 of 24 | 62% | 4 of 12 | 5 of 5 | 6 of 7 | 15 of 23 | 0 of 0 | 0 of 1 |
| Clay Collard | 6 of 46 | 13% | 5 of 44 | 0 of 1 | 1 of 1 | 6 of 45 | 0 of 1 | 0 of 0 |
WIN
vs
Alex White
Decision (unanimous) (29–28, 29–28, 29–28)
R3
5:00
·
UFC 181: Hendricks vs. Lawler II ·
Dec 06, 2014
Totals
| Fighter | KD | Sig. Str. | Sig. Str. % | Total Str. | TD | TD % | Sub. Att | Rev. | Ctrl |
|---|---|---|---|---|---|---|---|---|---|
| Clay Collard | 0 | 58 of 164 | 35% | 80 of 189 | 1 of 3 | 33% | 1 | 1 | 1:20 |
| Alex White | 1 | 60 of 193 | 31% | 62 of 195 | 3 of 5 | 60% | 2 | 0 | 2:33 |
Per Round
| Rd | Fighter | KD | Sig. Str. | Sig. Str. % | Total Str. | TD | TD % | Sub. Att | Rev. | Ctrl |
|---|---|---|---|---|---|---|---|---|---|---|
| 1 | Clay Collard | 0 | 27 of 69 | 39% | 29 of 72 | 0 of 0 | --- | 0 | 0 | 0:00 |
| Alex White | 0 | 31 of 90 | 34% | 32 of 91 | 1 of 1 | 100% | 0 | 0 | 0:19 | |
| 2 | Clay Collard | 0 | 14 of 43 | 32% | 15 of 45 | 0 of 2 | 0% | 0 | 1 | 1:12 |
| Alex White | 1 | 20 of 56 | 35% | 21 of 57 | 0 of 1 | 0% | 2 | 0 | 0:44 | |
| 3 | Clay Collard | 0 | 17 of 52 | 32% | 36 of 72 | 1 of 1 | 100% | 1 | 0 | 0:08 |
| Alex White | 0 | 9 of 47 | 19% | 9 of 47 | 2 of 3 | 66% | 0 | 0 | 1:30 |
Significant Strikes
| Fighter | Sig. Str. | Sig. Str. % | Head | Body | Leg | Distance | Clinch | Ground |
|---|---|---|---|---|---|---|---|---|
| Clay Collard | 58 of 164 | 35% | 33 of 123 | 21 of 37 | 4 of 4 | 36 of 123 | 21 of 40 | 1 of 1 |
| Alex White | 60 of 193 | 31% | 32 of 135 | 12 of 32 | 16 of 26 | 42 of 163 | 13 of 19 | 5 of 11 |
Significant Strikes Per Round
| Rd | Fighter | Sig. Str. | Sig. Str. % | Head | Body | Leg | Distance | Clinch | Ground |
|---|---|---|---|---|---|---|---|---|---|
| 1 | Clay Collard | 27 of 69 | 39% | 14 of 49 | 11 of 18 | 2 of 2 | 17 of 53 | 10 of 16 | 0 of 0 |
| Alex White | 31 of 90 | 34% | 14 of 57 | 8 of 19 | 9 of 14 | 22 of 76 | 8 of 10 | 1 of 4 | |
| 2 | Clay Collard | 14 of 43 | 32% | 10 of 34 | 4 of 9 | 0 of 0 | 10 of 33 | 4 of 10 | 0 of 0 |
| Alex White | 20 of 56 | 35% | 14 of 43 | 2 of 5 | 4 of 8 | 14 of 46 | 2 of 4 | 4 of 6 | |
| 3 | Clay Collard | 17 of 52 | 32% | 9 of 40 | 6 of 10 | 2 of 2 | 9 of 37 | 7 of 14 | 1 of 1 |
| Alex White | 9 of 47 | 19% | 4 of 35 | 2 of 8 | 3 of 4 | 6 of 41 | 3 of 5 | 0 of 1 |
LOSS
vs
Max Holloway
TKO (punches)
R3
3:47
·
UFC Fight Night: Henderson vs. dos Anjos ·
Aug 23, 2014
Totals
| Fighter | KD | Sig. Str. | Sig. Str. % | Total Str. | TD | TD % | Sub. Att | Rev. | Ctrl |
|---|---|---|---|---|---|---|---|---|---|
| Max Holloway | 0 | 124 of 204 | 60% | 137 of 219 | 0 of 0 | --- | 0 | 0 | 2:35 |
| Clay Collard | 0 | 70 of 209 | 33% | 73 of 213 | 1 of 10 | 10% | 0 | 1 | 1:48 |
Per Round
| Rd | Fighter | KD | Sig. Str. | Sig. Str. % | Total Str. | TD | TD % | Sub. Att | Rev. | Ctrl |
|---|---|---|---|---|---|---|---|---|---|---|
| 1 | Max Holloway | 0 | 49 of 92 | 53% | 49 of 92 | 0 of 0 | --- | 0 | 0 | 0:05 |
| Clay Collard | 0 | 44 of 116 | 37% | 44 of 116 | 1 of 2 | 50% | 0 | 0 | 0:05 | |
| 2 | Max Holloway | 0 | 28 of 53 | 52% | 34 of 59 | 0 of 0 | --- | 0 | 0 | 0:16 |
| Clay Collard | 0 | 17 of 60 | 28% | 17 of 60 | 0 of 5 | 0% | 0 | 1 | 1:02 | |
| 3 | Max Holloway | 0 | 47 of 59 | 79% | 54 of 68 | 0 of 0 | --- | 0 | 0 | 2:14 |
| Clay Collard | 0 | 9 of 33 | 27% | 12 of 37 | 0 of 3 | 0% | 0 | 0 | 0:41 |
Significant Strikes
| Fighter | Sig. Str. | Sig. Str. % | Head | Body | Leg | Distance | Clinch | Ground |
|---|---|---|---|---|---|---|---|---|
| Max Holloway | 124 of 204 | 60% | 95 of 170 | 26 of 29 | 3 of 5 | 70 of 143 | 14 of 17 | 40 of 44 |
| Clay Collard | 70 of 209 | 33% | 38 of 155 | 16 of 31 | 16 of 23 | 52 of 181 | 14 of 21 | 4 of 7 |
Significant Strikes Per Round
| Rd | Fighter | Sig. Str. | Sig. Str. % | Head | Body | Leg | Distance | Clinch | Ground |
|---|---|---|---|---|---|---|---|---|---|
| 1 | Max Holloway | 49 of 92 | 53% | 32 of 73 | 15 of 16 | 2 of 3 | 41 of 82 | 8 of 10 | 0 of 0 |
| Clay Collard | 44 of 116 | 37% | 27 of 89 | 10 of 17 | 7 of 10 | 33 of 102 | 9 of 11 | 2 of 3 | |
| 2 | Max Holloway | 28 of 53 | 52% | 19 of 42 | 8 of 10 | 1 of 1 | 23 of 47 | 4 of 5 | 1 of 1 |
| Clay Collard | 17 of 60 | 28% | 8 of 44 | 5 of 9 | 4 of 7 | 11 of 49 | 5 of 10 | 1 of 1 | |
| 3 | Max Holloway | 47 of 59 | 79% | 44 of 55 | 3 of 3 | 0 of 1 | 6 of 14 | 2 of 2 | 39 of 43 |
| Clay Collard | 9 of 33 | 27% | 3 of 22 | 1 of 5 | 5 of 6 | 8 of 30 | 0 of 0 | 1 of 3 |
Play-by-Play
View on SherdogClay Collard vs. Max Holloway
Round 1
Both men rattle off kicks in the early going of round one, Holloway landing the better shots, especially with a left high kick upstairs. Holloway begins striking down the center with hard, straight punches, answered in kind by Collard, who catches a kick and smashes the Hawaiian with a big left hand. Collard tries to throw a knee in the Thai clinch, gets tripped to the ground and allowed back up by Holloway. A switch kick from Collard catches Holloway leaning over with a shin to the nose. Holloway puts a spinning kick in Collard’s breadbasket, gets shoved against the fence for a moment and circles out. Holloway knocks Collard backward with a right hook on the chin, then closes the gap on Collard near the fence and hits the newcomer with a spinning kick. Collard steps out to the center of the cage and gets blasted with some big right hooks. Holloway finishes the round with another spinning kick to the body and a right high kick to Collard’s face.
Sherdog Scores
Tristen Critchfield scores the round 10-9 Holloway
TJ De Santis scores the round 10-9 Holloway
Chris Nelson scores the round 10-9 Holloway
Round 2
Holloway stays on the outside of Collard’s long punches and kicks in the opening minute of round two, then closes the distance and drills Collard with a knee to the belly. Another right hand from Hollway snaps back Collard’s head, but Collard catches a kick a few seconds later to rush Holloway to the ground. Holloway pops right back up, drills Collard with a right cross and tacks on a jump knee. Collard tries to fire back but Holloway gets on his horse and evades the counterattack. Midway through the round, Collard shoots for a double-leg on the fence, but Holloway peels him off and circles out. Collard grabs a single-leg and Holloway scrambles to jump on his back, but gives up the position in order to stand and continue trading strikes. Collard ducks under a wide left hook and gets trapped against the fence, where Holloway thumps his opponent’s body with a hard right kick. Collard finally gets Holloway to the ground in the final minute but then has to avoid an armbar and a triangle choke from the Hawaiian.
Sherdog Scores
Tristen Critchfield scores the round 10-9 Holloway
TJ De Santis scores the round 10-9 Holloway
Chris Nelson scores the round 10-9 Holloway
Round 3
Collard shoots a long shot, takes a right hand on his knees and then gets up to chase Holloway around the cage. A couple slapping leg kicks score for Collard before he changes levels to try a single-leg, then switches to a double. Holloway gives Collard some elbows to the side of the head while defending with his back to the fence. Now, Holloway circles out and Collard gives chase, walking into a right hand and the diving for a long shot. Holloway drills Collard with a knee to the body and shoves him to the ground, then comes down to the half guard of “Cassius.” Collard rolls over to his stomach and fends off a rear-naked choke attempt midway through the final round. Holloway sits up in full mount to hit Collard with an elbow, then three or four big punches. Collard looks spent, taking hard shots to his unprotected face. Collard rolls to his belly again, Holloway unloads with a series of 10 big right hands, and referee Dan Miragliotta has seen enough.
The Official Result
Max Holloway def. Clay Collard via TKO (Punches) R3 3:47
Round 1
Both men rattle off kicks in the early going of round one, Holloway landing the better shots, especially with a left high kick upstairs. Holloway begins striking down the center with hard, straight punches, answered in kind by Collard, who catches a kick and smashes the Hawaiian with a big left hand. Collard tries to throw a knee in the Thai clinch, gets tripped to the ground and allowed back up by Holloway. A switch kick from Collard catches Holloway leaning over with a shin to the nose. Holloway puts a spinning kick in Collard’s breadbasket, gets shoved against the fence for a moment and circles out. Holloway knocks Collard backward with a right hook on the chin, then closes the gap on Collard near the fence and hits the newcomer with a spinning kick. Collard steps out to the center of the cage and gets blasted with some big right hooks. Holloway finishes the round with another spinning kick to the body and a right high kick to Collard’s face.
Sherdog Scores
Tristen Critchfield scores the round 10-9 Holloway
TJ De Santis scores the round 10-9 Holloway
Chris Nelson scores the round 10-9 Holloway
Round 2
Holloway stays on the outside of Collard’s long punches and kicks in the opening minute of round two, then closes the distance and drills Collard with a knee to the belly. Another right hand from Hollway snaps back Collard’s head, but Collard catches a kick a few seconds later to rush Holloway to the ground. Holloway pops right back up, drills Collard with a right cross and tacks on a jump knee. Collard tries to fire back but Holloway gets on his horse and evades the counterattack. Midway through the round, Collard shoots for a double-leg on the fence, but Holloway peels him off and circles out. Collard grabs a single-leg and Holloway scrambles to jump on his back, but gives up the position in order to stand and continue trading strikes. Collard ducks under a wide left hook and gets trapped against the fence, where Holloway thumps his opponent’s body with a hard right kick. Collard finally gets Holloway to the ground in the final minute but then has to avoid an armbar and a triangle choke from the Hawaiian.
Sherdog Scores
Tristen Critchfield scores the round 10-9 Holloway
TJ De Santis scores the round 10-9 Holloway
Chris Nelson scores the round 10-9 Holloway
Round 3
Collard shoots a long shot, takes a right hand on his knees and then gets up to chase Holloway around the cage. A couple slapping leg kicks score for Collard before he changes levels to try a single-leg, then switches to a double. Holloway gives Collard some elbows to the side of the head while defending with his back to the fence. Now, Holloway circles out and Collard gives chase, walking into a right hand and the diving for a long shot. Holloway drills Collard with a knee to the body and shoves him to the ground, then comes down to the half guard of “Cassius.” Collard rolls over to his stomach and fends off a rear-naked choke attempt midway through the final round. Holloway sits up in full mount to hit Collard with an elbow, then three or four big punches. Collard looks spent, taking hard shots to his unprotected face. Collard rolls to his belly again, Holloway unloads with a series of 10 big right hands, and referee Dan Miragliotta has seen enough.
The Official Result
Max Holloway def. Clay Collard via TKO (Punches) R3 3:47
Alex White - Fight History
LOSS
vs
Rafael Fiziev
Decision (unanimous) (29–28, 30–27, 30–27)
R3
5:00
·
UFC Fight Night: Maia vs. Askren ·
Oct 26, 2019
Totals
| Fighter | KD | Sig. Str. | Sig. Str. % | Total Str. | TD | TD % | Sub. Att | Rev. | Ctrl |
|---|---|---|---|---|---|---|---|---|---|
| Rafael Fiziev | 0 | 55 of 133 | 41% | 66 of 146 | 0 of 11 | 0% | 0 | 0 | 1:01 |
| Alex White | 0 | 66 of 131 | 50% | 73 of 138 | 1 of 1 | 100% | 0 | 0 | 1:35 |
Per Round
| Rd | Fighter | KD | Sig. Str. | Sig. Str. % | Total Str. | TD | TD % | Sub. Att | Rev. | Ctrl |
|---|---|---|---|---|---|---|---|---|---|---|
| 1 | Rafael Fiziev | 0 | 14 of 38 | 36% | 15 of 39 | 0 of 3 | 0% | 0 | 0 | 0:14 |
| Alex White | 0 | 26 of 48 | 54% | 26 of 48 | 0 of 0 | --- | 0 | 0 | 0:31 | |
| 2 | Rafael Fiziev | 0 | 14 of 37 | 37% | 14 of 38 | 0 of 3 | 0% | 0 | 0 | 0:40 |
| Alex White | 0 | 19 of 43 | 44% | 20 of 44 | 0 of 0 | --- | 0 | 0 | 0:13 | |
| 3 | Rafael Fiziev | 0 | 27 of 58 | 46% | 37 of 69 | 0 of 5 | 0% | 0 | 0 | 0:07 |
| Alex White | 0 | 21 of 40 | 52% | 27 of 46 | 1 of 1 | 100% | 0 | 0 | 0:51 |
Significant Strikes
| Fighter | Sig. Str. | Sig. Str. % | Head | Body | Leg | Distance | Clinch | Ground |
|---|---|---|---|---|---|---|---|---|
| Rafael Fiziev | 55 of 133 | 41% | 37 of 102 | 15 of 27 | 3 of 4 | 36 of 107 | 18 of 25 | 1 of 1 |
| Alex White | 66 of 131 | 50% | 40 of 86 | 12 of 26 | 14 of 19 | 52 of 109 | 14 of 22 | 0 of 0 |
Significant Strikes Per Round
| Rd | Fighter | Sig. Str. | Sig. Str. % | Head | Body | Leg | Distance | Clinch | Ground |
|---|---|---|---|---|---|---|---|---|---|
| 1 | Rafael Fiziev | 14 of 38 | 36% | 11 of 30 | 2 of 6 | 1 of 2 | 11 of 33 | 3 of 5 | 0 of 0 |
| Alex White | 26 of 48 | 54% | 20 of 38 | 0 of 3 | 6 of 7 | 18 of 37 | 8 of 11 | 0 of 0 | |
| 2 | Rafael Fiziev | 14 of 37 | 37% | 8 of 28 | 4 of 7 | 2 of 2 | 10 of 30 | 4 of 7 | 0 of 0 |
| Alex White | 19 of 43 | 44% | 7 of 22 | 10 of 18 | 2 of 3 | 15 of 35 | 4 of 8 | 0 of 0 | |
| 3 | Rafael Fiziev | 27 of 58 | 46% | 18 of 44 | 9 of 14 | 0 of 0 | 15 of 44 | 11 of 13 | 1 of 1 |
| Alex White | 21 of 40 | 52% | 13 of 26 | 2 of 5 | 6 of 9 | 19 of 37 | 2 of 3 | 0 of 0 |
Play-by-Play
View on SherdogRafael Fiziev vs. Alex White
Round 1
We keep things moving at the lightweight division, as once-beaten Fiziev (6-1, 0-1 UFC) tries to rebound from the first loss of his career against White (13-5, 4-5 UFC). Keeping a watchful eye on this bout is referee Kevin Sataki. We touch gloves, and it's straight to business as Fiziev stalks his opponent down while switching stances. Fiziev slaps in a heavy leg kick, but does not follow it with anything as he adjusts his shorts. As White crashes in, Fiziev just misses a huge overhand counter, and White backs off. A left hook from Fiziev nearly bends over White, and a right that follows is barely short of the target. A huge two-punch combination rocks White, and he is hurt but still able to counter with his back against the fence. White ducks down possibly to fake a takedown attempt, but Fiziev spins out and starts to land powerful knees in rapid succession. White eats them all without issue or damage, and even fires a body kick on the break. Faking for another takedown to try to land strikes, White dodges most of the blitz from Fiziev but eats a right for his troubles. White stings Fiziev with a left hand, and then another that makes "Ataman" stumble backwards. As they come together, Fiziev nails his opponent with an elbow, and scores a few more punches over the top that White wears well. White shoots in for a low takedown but in doing so, falls into a guillotine choke, but Fiziev instead chooses to blast White with a knee that slices up White's eyebrow and starts an immediate flow of blood. White charges forward with a slew of punches, but Fiziev is out of the way before anything finds its home. As they clinch, the round ends.
Sherdog Scores
Jay Pettry scores the round: 10-9 Fiziev
Cole Shelton scores the round: 10-9 Fiziev
John Brannigan scores the round: 10-9 Fiziev
Round 2
A touch of gloves kicks off the second round, which begins with a wild exchange of punches on both sides. Fiziev presses forward, and whiffs a spinning wheel kick but cracks White with a left that nearly take the legs out of from the American. To buy himself some time, White drops down for a single leg takedown, but it is nothing doing as Fiziev stands upright and lands a strong knee with his back to the cage. Fiziev throws a body kick at close range that White catches, but he cannot take advantage of it. "Ataman" hammers the body of his adversary with a series of punches, and White grimaces but defends well enough to continue. Taking deep breaths, White is still trying to get his bearings, as he took some damage in that exchange. Fiziev buries a low leg kick, so White throws a right over the top that nearly catches Fiziev flush. White chases Fiziev around the cage with a takedown attempt, but Fiziev stuffs it all the way through. The two trade kicks, and White barely misses a high kick, but the action has slowed considerably. As White comes in, Fiziev lands a few punches to the body, and time expires.
Sherdog Scores
Jay Pettry scores the round: 10-9 Fiziev
Cole Shelton scores the round: 10-9 Fiziev
John Brannigan scores the round: 10-9 Fiziev
Round 3
The last round opens with White trying to press the pace, and as Fiziev throws a low kick, White finally checks it. When they come together, Fiziev opens a cut on White's other eye, and in the ensuing melee, Fiziev takes White down. In his opponent's guard, Fiziev drops down short strikes until White pulls up a high guard, causing Fiziev to back off and get back to his feet. White charges in for a takedown attempt but cannot land it, so he throws a front kick. In true Dan Hardy fashion -- Hardy is on commentary -- the two men trade right hooks that land flush on their chins, but there is not enough on them to make either fall over. A few vicious kicks from Fiziev make White's leg buckle, and White smiles at him as they crash together. White sits down on a multiple-punch combination, but eats a left hand that disrupts it. Fiziev digs a kick to the body, and then a few right hands come that give White pause. "Ataman" stuffs yet another takedown attempt, and then one more for good measure, before making White pay with a right hand. Fiziev shouts and points at the ground, so like Max Holloway and Ricardo Lamas, the two men throw leather until the fight ends. When the horn sounds, Fiziev screams with all he has left, and the two men embrace after a fun battle.
Sherdog Scores
Jay Pettry scores the round: 10-9 Fiziev (30-27 Fiziev)
Cole Shelton scores the round: 10-9 Fiziev (30-27 Fiziev)
John Brannigan scores the round: 10-9 Fiziev (30-27 Fiziev)
The Official Result
Rafael Fiziev def. Alex White via Unanimous Decision (29-28, 30-27, 30-27)
Round 1
We keep things moving at the lightweight division, as once-beaten Fiziev (6-1, 0-1 UFC) tries to rebound from the first loss of his career against White (13-5, 4-5 UFC). Keeping a watchful eye on this bout is referee Kevin Sataki. We touch gloves, and it's straight to business as Fiziev stalks his opponent down while switching stances. Fiziev slaps in a heavy leg kick, but does not follow it with anything as he adjusts his shorts. As White crashes in, Fiziev just misses a huge overhand counter, and White backs off. A left hook from Fiziev nearly bends over White, and a right that follows is barely short of the target. A huge two-punch combination rocks White, and he is hurt but still able to counter with his back against the fence. White ducks down possibly to fake a takedown attempt, but Fiziev spins out and starts to land powerful knees in rapid succession. White eats them all without issue or damage, and even fires a body kick on the break. Faking for another takedown to try to land strikes, White dodges most of the blitz from Fiziev but eats a right for his troubles. White stings Fiziev with a left hand, and then another that makes "Ataman" stumble backwards. As they come together, Fiziev nails his opponent with an elbow, and scores a few more punches over the top that White wears well. White shoots in for a low takedown but in doing so, falls into a guillotine choke, but Fiziev instead chooses to blast White with a knee that slices up White's eyebrow and starts an immediate flow of blood. White charges forward with a slew of punches, but Fiziev is out of the way before anything finds its home. As they clinch, the round ends.
Sherdog Scores
Jay Pettry scores the round: 10-9 Fiziev
Cole Shelton scores the round: 10-9 Fiziev
John Brannigan scores the round: 10-9 Fiziev
Round 2
A touch of gloves kicks off the second round, which begins with a wild exchange of punches on both sides. Fiziev presses forward, and whiffs a spinning wheel kick but cracks White with a left that nearly take the legs out of from the American. To buy himself some time, White drops down for a single leg takedown, but it is nothing doing as Fiziev stands upright and lands a strong knee with his back to the cage. Fiziev throws a body kick at close range that White catches, but he cannot take advantage of it. "Ataman" hammers the body of his adversary with a series of punches, and White grimaces but defends well enough to continue. Taking deep breaths, White is still trying to get his bearings, as he took some damage in that exchange. Fiziev buries a low leg kick, so White throws a right over the top that nearly catches Fiziev flush. White chases Fiziev around the cage with a takedown attempt, but Fiziev stuffs it all the way through. The two trade kicks, and White barely misses a high kick, but the action has slowed considerably. As White comes in, Fiziev lands a few punches to the body, and time expires.
Sherdog Scores
Jay Pettry scores the round: 10-9 Fiziev
Cole Shelton scores the round: 10-9 Fiziev
John Brannigan scores the round: 10-9 Fiziev
Round 3
The last round opens with White trying to press the pace, and as Fiziev throws a low kick, White finally checks it. When they come together, Fiziev opens a cut on White's other eye, and in the ensuing melee, Fiziev takes White down. In his opponent's guard, Fiziev drops down short strikes until White pulls up a high guard, causing Fiziev to back off and get back to his feet. White charges in for a takedown attempt but cannot land it, so he throws a front kick. In true Dan Hardy fashion -- Hardy is on commentary -- the two men trade right hooks that land flush on their chins, but there is not enough on them to make either fall over. A few vicious kicks from Fiziev make White's leg buckle, and White smiles at him as they crash together. White sits down on a multiple-punch combination, but eats a left hand that disrupts it. Fiziev digs a kick to the body, and then a few right hands come that give White pause. "Ataman" stuffs yet another takedown attempt, and then one more for good measure, before making White pay with a right hand. Fiziev shouts and points at the ground, so like Max Holloway and Ricardo Lamas, the two men throw leather until the fight ends. When the horn sounds, Fiziev screams with all he has left, and the two men embrace after a fun battle.
Sherdog Scores
Jay Pettry scores the round: 10-9 Fiziev (30-27 Fiziev)
Cole Shelton scores the round: 10-9 Fiziev (30-27 Fiziev)
John Brannigan scores the round: 10-9 Fiziev (30-27 Fiziev)
The Official Result
Rafael Fiziev def. Alex White via Unanimous Decision (29-28, 30-27, 30-27)
WIN
vs
Dan Moret
Decision (unanimous) (29–28, 29–28, 29–28)
R3
5:00
·
UFC Fight Night: Lewis vs. dos Santos ·
Mar 09, 2019
Totals
| Fighter | KD | Sig. Str. | Sig. Str. % | Total Str. | TD | TD % | Sub. Att | Rev. | Ctrl |
|---|---|---|---|---|---|---|---|---|---|
| Alex White | 0 | 49 of 82 | 59% | 70 of 104 | 2 of 3 | 66% | 3 | 0 | 3:29 |
| Dan Moret | 0 | 42 of 88 | 47% | 50 of 96 | 1 of 9 | 11% | 0 | 0 | 7:35 |
Per Round
| Rd | Fighter | KD | Sig. Str. | Sig. Str. % | Total Str. | TD | TD % | Sub. Att | Rev. | Ctrl |
|---|---|---|---|---|---|---|---|---|---|---|
| 1 | Alex White | 0 | 2 of 6 | 33% | 9 of 14 | 0 of 1 | 0% | 1 | 0 | 0:27 |
| Dan Moret | 0 | 19 of 24 | 79% | 25 of 30 | 1 of 3 | 33% | 0 | 0 | 4:10 | |
| 2 | Alex White | 0 | 26 of 44 | 59% | 26 of 44 | 0 of 0 | --- | 2 | 0 | 1:25 |
| Dan Moret | 0 | 13 of 38 | 34% | 14 of 39 | 0 of 4 | 0% | 0 | 0 | 0:59 | |
| 3 | Alex White | 0 | 21 of 32 | 65% | 35 of 46 | 2 of 2 | 100% | 0 | 0 | 1:37 |
| Dan Moret | 0 | 10 of 26 | 38% | 11 of 27 | 0 of 2 | 0% | 0 | 0 | 2:26 |
Significant Strikes
| Fighter | Sig. Str. | Sig. Str. % | Head | Body | Leg | Distance | Clinch | Ground |
|---|---|---|---|---|---|---|---|---|
| Alex White | 49 of 82 | 59% | 31 of 63 | 17 of 18 | 1 of 1 | 27 of 51 | 22 of 31 | 0 of 0 |
| Dan Moret | 42 of 88 | 47% | 29 of 71 | 6 of 9 | 7 of 8 | 16 of 51 | 20 of 30 | 6 of 7 |
Significant Strikes Per Round
| Rd | Fighter | Sig. Str. | Sig. Str. % | Head | Body | Leg | Distance | Clinch | Ground |
|---|---|---|---|---|---|---|---|---|---|
| 1 | Alex White | 2 of 6 | 33% | 1 of 5 | 1 of 1 | 0 of 0 | 0 of 1 | 2 of 5 | 0 of 0 |
| Dan Moret | 19 of 24 | 79% | 14 of 18 | 1 of 1 | 4 of 5 | 2 of 3 | 11 of 14 | 6 of 7 | |
| 2 | Alex White | 26 of 44 | 59% | 16 of 34 | 9 of 9 | 1 of 1 | 18 of 35 | 8 of 9 | 0 of 0 |
| Dan Moret | 13 of 38 | 34% | 8 of 31 | 2 of 4 | 3 of 3 | 10 of 34 | 3 of 4 | 0 of 0 | |
| 3 | Alex White | 21 of 32 | 65% | 14 of 24 | 7 of 8 | 0 of 0 | 9 of 15 | 12 of 17 | 0 of 0 |
| Dan Moret | 10 of 26 | 38% | 7 of 22 | 3 of 4 | 0 of 0 | 4 of 14 | 6 of 12 | 0 of 0 |
LOSS
vs
Jim Miller
Submission (rear-naked choke)
R1
1:29
·
UFC 228: Woodley vs. Till ·
Sep 08, 2018
Totals
| Fighter | KD | Sig. Str. | Sig. Str. % | Total Str. | TD | TD % | Sub. Att | Rev. | Ctrl |
|---|---|---|---|---|---|---|---|---|---|
| Jim Miller | 0 | 15 of 24 | 62% | 17 of 26 | 1 of 1 | 100% | 1 | 0 | 0:19 |
| Alex White | 0 | 5 of 14 | 35% | 5 of 14 | 0 of 0 | --- | 0 | 0 | 0:00 |
Per Round
| Rd | Fighter | KD | Sig. Str. | Sig. Str. % | Total Str. | TD | TD % | Sub. Att | Rev. | Ctrl |
|---|---|---|---|---|---|---|---|---|---|---|
| 1 | Jim Miller | 0 | 15 of 24 | 62% | 17 of 26 | 1 of 1 | 100% | 1 | 0 | 0:19 |
| Alex White | 0 | 5 of 14 | 35% | 5 of 14 | 0 of 0 | --- | 0 | 0 | 0:00 |
Significant Strikes
| Fighter | Sig. Str. | Sig. Str. % | Head | Body | Leg | Distance | Clinch | Ground |
|---|---|---|---|---|---|---|---|---|
| Jim Miller | 15 of 24 | 62% | 11 of 19 | 2 of 2 | 2 of 3 | 8 of 15 | 0 of 0 | 7 of 9 |
| Alex White | 5 of 14 | 35% | 3 of 11 | 2 of 3 | 0 of 0 | 4 of 12 | 1 of 2 | 0 of 0 |
Significant Strikes Per Round
| Rd | Fighter | Sig. Str. | Sig. Str. % | Head | Body | Leg | Distance | Clinch | Ground |
|---|---|---|---|---|---|---|---|---|---|
| 1 | Jim Miller | 15 of 24 | 62% | 11 of 19 | 2 of 2 | 2 of 3 | 8 of 15 | 0 of 0 | 7 of 9 |
| Alex White | 5 of 14 | 35% | 3 of 11 | 2 of 3 | 0 of 0 | 4 of 12 | 1 of 2 | 0 of 0 |
Play-by-Play
View on SherdogJim Miller vs. Alex White
Round 1
The southpaws square off in the center of the cage, with White landing an early left hand and Miller connecting with a few hard leg kicks. Miller comes over the top with a straight left of his own, then lands another moments later that sends White staggering backward. Miller runs White to the floor, but instead of trying to pound out his dazed opponent,
the New Jersey native wraps up White's neck and forces a near-instant tap with a rear-naked choke.
Jim Miller produces the evening's first finish and snaps a four-fight losing streak with his first submission win since 2014.
The Official Result
Jim Miller def. Alex White via Submission (Rear-Naked Choke) R1 1:29
Round 1
The southpaws square off in the center of the cage, with White landing an early left hand and Miller connecting with a few hard leg kicks. Miller comes over the top with a straight left of his own, then lands another moments later that sends White staggering backward. Miller runs White to the floor, but instead of trying to pound out his dazed opponent,
the New Jersey native wraps up White's neck and forces a near-instant tap with a rear-naked choke.
Jim Miller produces the evening's first finish and snaps a four-fight losing streak with his first submission win since 2014.
The Official Result
Jim Miller def. Alex White via Submission (Rear-Naked Choke) R1 1:29
LOSS
vs
James Krause
Decision (unanimous) (29–28, 29–28, 29–28)
R3
5:00
·
UFC Fight Night: Stephens vs. Choi ·
Jan 14, 2018
Totals
| Fighter | KD | Sig. Str. | Sig. Str. % | Total Str. | TD | TD % | Sub. Att | Rev. | Ctrl |
|---|---|---|---|---|---|---|---|---|---|
| James Krause | 0 | 35 of 67 | 52% | 56 of 93 | 3 of 11 | 27% | 2 | 1 | 10:07 |
| Alex White | 0 | 56 of 127 | 44% | 97 of 175 | 1 of 1 | 100% | 0 | 0 | 0:54 |
Per Round
| Rd | Fighter | KD | Sig. Str. | Sig. Str. % | Total Str. | TD | TD % | Sub. Att | Rev. | Ctrl |
|---|---|---|---|---|---|---|---|---|---|---|
| 1 | James Krause | 0 | 12 of 19 | 63% | 17 of 27 | 1 of 5 | 20% | 0 | 0 | 3:42 |
| Alex White | 0 | 15 of 34 | 44% | 23 of 42 | 0 of 0 | --- | 0 | 0 | 0:00 | |
| 2 | James Krause | 0 | 17 of 32 | 53% | 29 of 44 | 2 of 2 | 100% | 1 | 0 | 3:03 |
| Alex White | 0 | 17 of 50 | 34% | 30 of 64 | 1 of 1 | 100% | 0 | 0 | 0:24 | |
| 3 | James Krause | 0 | 6 of 16 | 37% | 10 of 22 | 0 of 4 | 0% | 1 | 1 | 3:22 |
| Alex White | 0 | 24 of 43 | 55% | 44 of 69 | 0 of 0 | --- | 0 | 0 | 0:30 |
Significant Strikes
| Fighter | Sig. Str. | Sig. Str. % | Head | Body | Leg | Distance | Clinch | Ground |
|---|---|---|---|---|---|---|---|---|
| James Krause | 35 of 67 | 52% | 30 of 60 | 3 of 4 | 2 of 3 | 18 of 43 | 1 of 2 | 16 of 22 |
| Alex White | 56 of 127 | 44% | 42 of 109 | 14 of 17 | 0 of 1 | 29 of 91 | 12 of 15 | 15 of 21 |
Significant Strikes Per Round
| Rd | Fighter | Sig. Str. | Sig. Str. % | Head | Body | Leg | Distance | Clinch | Ground |
|---|---|---|---|---|---|---|---|---|---|
| 1 | James Krause | 12 of 19 | 63% | 11 of 18 | 0 of 0 | 1 of 1 | 3 of 9 | 0 of 0 | 9 of 10 |
| Alex White | 15 of 34 | 44% | 11 of 27 | 4 of 6 | 0 of 1 | 8 of 26 | 1 of 1 | 6 of 7 | |
| 2 | James Krause | 17 of 32 | 53% | 14 of 28 | 3 of 3 | 0 of 1 | 14 of 25 | 0 of 0 | 3 of 7 |
| Alex White | 17 of 50 | 34% | 16 of 48 | 1 of 2 | 0 of 0 | 9 of 39 | 0 of 0 | 8 of 11 | |
| 3 | James Krause | 6 of 16 | 37% | 5 of 14 | 0 of 1 | 1 of 1 | 1 of 9 | 1 of 2 | 4 of 5 |
| Alex White | 24 of 43 | 55% | 15 of 34 | 9 of 9 | 0 of 0 | 12 of 26 | 11 of 14 | 1 of 3 |
WIN
vs
Mitch Clarke
TKO (punches)
R2
4:36
·
UFC 215: Nunes vs. Shevchenko 2 ·
Sep 09, 2017
Totals
| Fighter | KD | Sig. Str. | Sig. Str. % | Total Str. | TD | TD % | Sub. Att | Rev. | Ctrl |
|---|---|---|---|---|---|---|---|---|---|
| Alex White | 0 | 28 of 83 | 33% | 34 of 90 | 0 of 4 | 0% | 0 | 0 | 0:26 |
| Mitch Clarke | 3 | 57 of 115 | 49% | 62 of 122 | 0 of 0 | --- | 0 | 0 | 0:14 |
Per Round
| Rd | Fighter | KD | Sig. Str. | Sig. Str. % | Total Str. | TD | TD % | Sub. Att | Rev. | Ctrl |
|---|---|---|---|---|---|---|---|---|---|---|
| 1 | Alex White | 0 | 21 of 53 | 39% | 23 of 56 | 0 of 2 | 0% | 0 | 0 | 0:00 |
| Mitch Clarke | 0 | 14 of 39 | 35% | 18 of 44 | 0 of 0 | --- | 0 | 0 | 0:00 | |
| 2 | Alex White | 0 | 7 of 30 | 23% | 11 of 34 | 0 of 2 | 0% | 0 | 0 | 0:26 |
| Mitch Clarke | 3 | 43 of 76 | 56% | 44 of 78 | 0 of 0 | --- | 0 | 0 | 0:14 |
Significant Strikes
| Fighter | Sig. Str. | Sig. Str. % | Head | Body | Leg | Distance | Clinch | Ground |
|---|---|---|---|---|---|---|---|---|
| Alex White | 28 of 83 | 33% | 11 of 41 | 8 of 19 | 9 of 23 | 18 of 69 | 10 of 13 | 0 of 1 |
| Mitch Clarke | 57 of 115 | 49% | 46 of 100 | 10 of 13 | 1 of 2 | 28 of 75 | 28 of 37 | 1 of 3 |
Significant Strikes Per Round
| Rd | Fighter | Sig. Str. | Sig. Str. % | Head | Body | Leg | Distance | Clinch | Ground |
|---|---|---|---|---|---|---|---|---|---|
| 1 | Alex White | 21 of 53 | 39% | 6 of 20 | 7 of 14 | 8 of 19 | 14 of 44 | 7 of 9 | 0 of 0 |
| Mitch Clarke | 14 of 39 | 35% | 10 of 33 | 4 of 6 | 0 of 0 | 9 of 31 | 5 of 8 | 0 of 0 | |
| 2 | Alex White | 7 of 30 | 23% | 5 of 21 | 1 of 5 | 1 of 4 | 4 of 25 | 3 of 4 | 0 of 1 |
| Mitch Clarke | 43 of 76 | 56% | 36 of 67 | 6 of 7 | 1 of 2 | 19 of 44 | 23 of 29 | 1 of 3 |
LOSS
vs
Anthony Rocco Martin
Decision (unanimous) (30–27, 30–27, 30–27)
R3
5:00
·
UFC Fight Night: Rodriguez vs. Penn ·
Jan 15, 2017
Totals
| Fighter | KD | Sig. Str. | Sig. Str. % | Total Str. | TD | TD % | Sub. Att | Rev. | Ctrl |
|---|---|---|---|---|---|---|---|---|---|
| Anthony Rocco Martin | 0 | 20 of 40 | 50% | 83 of 119 | 2 of 6 | 33% | 0 | 0 | 12:24 |
| Alex White | 0 | 11 of 30 | 36% | 28 of 51 | 0 of 0 | --- | 0 | 1 | 0:40 |
Per Round
| Rd | Fighter | KD | Sig. Str. | Sig. Str. % | Total Str. | TD | TD % | Sub. Att | Rev. | Ctrl |
|---|---|---|---|---|---|---|---|---|---|---|
| 1 | Anthony Rocco Martin | 0 | 10 of 21 | 47% | 32 of 47 | 1 of 2 | 50% | 0 | 0 | 4:14 |
| Alex White | 0 | 3 of 9 | 33% | 6 of 13 | 0 of 0 | --- | 0 | 0 | 0:00 | |
| 2 | Anthony Rocco Martin | 0 | 5 of 9 | 55% | 25 of 33 | 1 of 2 | 50% | 0 | 0 | 3:36 |
| Alex White | 0 | 5 of 12 | 41% | 8 of 17 | 0 of 0 | --- | 0 | 1 | 0:40 | |
| 3 | Anthony Rocco Martin | 0 | 5 of 10 | 50% | 26 of 39 | 0 of 2 | 0% | 0 | 0 | 4:34 |
| Alex White | 0 | 3 of 9 | 33% | 14 of 21 | 0 of 0 | --- | 0 | 0 | 0:00 |
Significant Strikes
| Fighter | Sig. Str. | Sig. Str. % | Head | Body | Leg | Distance | Clinch | Ground |
|---|---|---|---|---|---|---|---|---|
| Anthony Rocco Martin | 20 of 40 | 50% | 12 of 30 | 7 of 8 | 1 of 2 | 4 of 14 | 6 of 11 | 10 of 15 |
| Alex White | 11 of 30 | 36% | 5 of 20 | 4 of 7 | 2 of 3 | 6 of 20 | 5 of 10 | 0 of 0 |
Significant Strikes Per Round
| Rd | Fighter | Sig. Str. | Sig. Str. % | Head | Body | Leg | Distance | Clinch | Ground |
|---|---|---|---|---|---|---|---|---|---|
| 1 | Anthony Rocco Martin | 10 of 21 | 47% | 7 of 17 | 3 of 4 | 0 of 0 | 2 of 8 | 2 of 4 | 6 of 9 |
| Alex White | 3 of 9 | 33% | 2 of 6 | 1 of 2 | 0 of 1 | 1 of 6 | 2 of 3 | 0 of 0 | |
| 2 | Anthony Rocco Martin | 5 of 9 | 55% | 4 of 7 | 1 of 1 | 0 of 1 | 1 of 3 | 0 of 0 | 4 of 6 |
| Alex White | 5 of 12 | 41% | 2 of 8 | 2 of 3 | 1 of 1 | 4 of 9 | 1 of 3 | 0 of 0 | |
| 3 | Anthony Rocco Martin | 5 of 10 | 50% | 1 of 6 | 3 of 3 | 1 of 1 | 1 of 3 | 4 of 7 | 0 of 0 |
| Alex White | 3 of 9 | 33% | 1 of 6 | 1 of 2 | 1 of 1 | 1 of 5 | 2 of 4 | 0 of 0 |
WIN
vs
Artem Lobov
Decision (unanimous) (30–27, 30–27, 30–27)
R3
5:00
·
UFC Fight Night: Hendricks vs. Thompson ·
Feb 06, 2016
Totals
| Fighter | KD | Sig. Str. | Sig. Str. % | Total Str. | TD | TD % | Sub. Att | Rev. | Ctrl |
|---|---|---|---|---|---|---|---|---|---|
| Alex White | 0 | 23 of 108 | 21% | 32 of 118 | 0 of 0 | --- | 0 | 0 | 3:21 |
| Artem Lobov | 0 | 78 of 172 | 45% | 102 of 197 | 3 of 7 | 42% | 0 | 0 | 1:08 |
Per Round
| Rd | Fighter | KD | Sig. Str. | Sig. Str. % | Total Str. | TD | TD % | Sub. Att | Rev. | Ctrl |
|---|---|---|---|---|---|---|---|---|---|---|
| 1 | Alex White | 0 | 9 of 32 | 28% | 15 of 39 | 0 of 0 | --- | 0 | 0 | 0:42 |
| Artem Lobov | 0 | 25 of 52 | 48% | 36 of 64 | 1 of 2 | 50% | 0 | 0 | 0:58 | |
| 2 | Alex White | 0 | 8 of 44 | 18% | 9 of 45 | 0 of 0 | --- | 0 | 0 | 0:30 |
| Artem Lobov | 0 | 30 of 66 | 45% | 32 of 68 | 1 of 2 | 50% | 0 | 0 | 0:10 | |
| 3 | Alex White | 0 | 6 of 32 | 18% | 8 of 34 | 0 of 0 | --- | 0 | 0 | 2:09 |
| Artem Lobov | 0 | 23 of 54 | 42% | 34 of 65 | 1 of 3 | 33% | 0 | 0 | 0:00 |
Significant Strikes
| Fighter | Sig. Str. | Sig. Str. % | Head | Body | Leg | Distance | Clinch | Ground |
|---|---|---|---|---|---|---|---|---|
| Alex White | 23 of 108 | 21% | 17 of 96 | 5 of 11 | 1 of 1 | 22 of 103 | 1 of 5 | 0 of 0 |
| Artem Lobov | 78 of 172 | 45% | 36 of 115 | 27 of 39 | 15 of 18 | 67 of 156 | 10 of 14 | 1 of 2 |
Significant Strikes Per Round
| Rd | Fighter | Sig. Str. | Sig. Str. % | Head | Body | Leg | Distance | Clinch | Ground |
|---|---|---|---|---|---|---|---|---|---|
| 1 | Alex White | 9 of 32 | 28% | 7 of 29 | 2 of 3 | 0 of 0 | 9 of 31 | 0 of 1 | 0 of 0 |
| Artem Lobov | 25 of 52 | 48% | 10 of 33 | 7 of 10 | 8 of 9 | 20 of 44 | 4 of 6 | 1 of 2 | |
| 2 | Alex White | 8 of 44 | 18% | 4 of 36 | 3 of 7 | 1 of 1 | 7 of 41 | 1 of 3 | 0 of 0 |
| Artem Lobov | 30 of 66 | 45% | 14 of 42 | 10 of 16 | 6 of 8 | 27 of 62 | 3 of 4 | 0 of 0 | |
| 3 | Alex White | 6 of 32 | 18% | 6 of 31 | 0 of 1 | 0 of 0 | 6 of 31 | 0 of 1 | 0 of 0 |
| Artem Lobov | 23 of 54 | 42% | 12 of 40 | 10 of 13 | 1 of 1 | 20 of 50 | 3 of 4 | 0 of 0 |
LOSS
vs
Clay Collard
Decision (unanimous) (29–28, 29–28, 29–28)
R3
5:00
·
UFC 181: Hendricks vs. Lawler II ·
Dec 06, 2014
Totals
| Fighter | KD | Sig. Str. | Sig. Str. % | Total Str. | TD | TD % | Sub. Att | Rev. | Ctrl |
|---|---|---|---|---|---|---|---|---|---|
| Clay Collard | 0 | 58 of 164 | 35% | 80 of 189 | 1 of 3 | 33% | 1 | 1 | 1:20 |
| Alex White | 1 | 60 of 193 | 31% | 62 of 195 | 3 of 5 | 60% | 2 | 0 | 2:33 |
Per Round
| Rd | Fighter | KD | Sig. Str. | Sig. Str. % | Total Str. | TD | TD % | Sub. Att | Rev. | Ctrl |
|---|---|---|---|---|---|---|---|---|---|---|
| 1 | Clay Collard | 0 | 27 of 69 | 39% | 29 of 72 | 0 of 0 | --- | 0 | 0 | 0:00 |
| Alex White | 0 | 31 of 90 | 34% | 32 of 91 | 1 of 1 | 100% | 0 | 0 | 0:19 | |
| 2 | Clay Collard | 0 | 14 of 43 | 32% | 15 of 45 | 0 of 2 | 0% | 0 | 1 | 1:12 |
| Alex White | 1 | 20 of 56 | 35% | 21 of 57 | 0 of 1 | 0% | 2 | 0 | 0:44 | |
| 3 | Clay Collard | 0 | 17 of 52 | 32% | 36 of 72 | 1 of 1 | 100% | 1 | 0 | 0:08 |
| Alex White | 0 | 9 of 47 | 19% | 9 of 47 | 2 of 3 | 66% | 0 | 0 | 1:30 |
Significant Strikes
| Fighter | Sig. Str. | Sig. Str. % | Head | Body | Leg | Distance | Clinch | Ground |
|---|---|---|---|---|---|---|---|---|
| Clay Collard | 58 of 164 | 35% | 33 of 123 | 21 of 37 | 4 of 4 | 36 of 123 | 21 of 40 | 1 of 1 |
| Alex White | 60 of 193 | 31% | 32 of 135 | 12 of 32 | 16 of 26 | 42 of 163 | 13 of 19 | 5 of 11 |
Significant Strikes Per Round
| Rd | Fighter | Sig. Str. | Sig. Str. % | Head | Body | Leg | Distance | Clinch | Ground |
|---|---|---|---|---|---|---|---|---|---|
| 1 | Clay Collard | 27 of 69 | 39% | 14 of 49 | 11 of 18 | 2 of 2 | 17 of 53 | 10 of 16 | 0 of 0 |
| Alex White | 31 of 90 | 34% | 14 of 57 | 8 of 19 | 9 of 14 | 22 of 76 | 8 of 10 | 1 of 4 | |
| 2 | Clay Collard | 14 of 43 | 32% | 10 of 34 | 4 of 9 | 0 of 0 | 10 of 33 | 4 of 10 | 0 of 0 |
| Alex White | 20 of 56 | 35% | 14 of 43 | 2 of 5 | 4 of 8 | 14 of 46 | 2 of 4 | 4 of 6 | |
| 3 | Clay Collard | 17 of 52 | 32% | 9 of 40 | 6 of 10 | 2 of 2 | 9 of 37 | 7 of 14 | 1 of 1 |
| Alex White | 9 of 47 | 19% | 4 of 35 | 2 of 8 | 3 of 4 | 6 of 41 | 3 of 5 | 0 of 1 |
No comments yet. Be the first to share your thoughts!