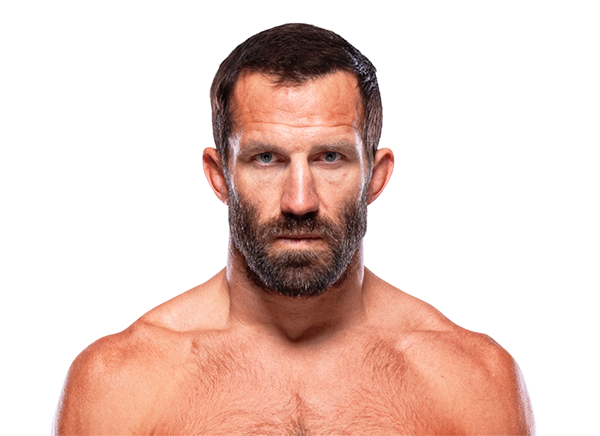
Career Averages - Luke Rockhold
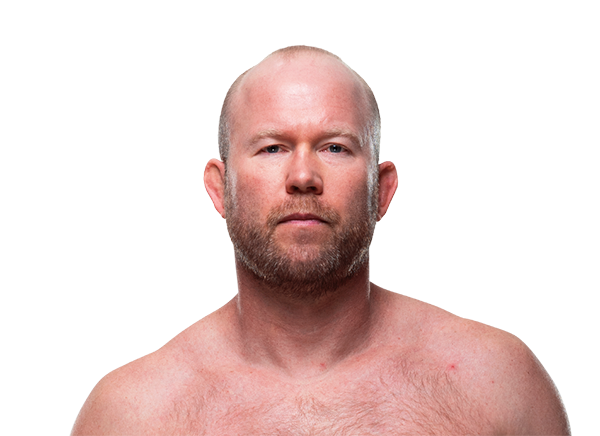
Career Averages - Tim Boetsch
Luke Rockhold - Fight History
Totals
| Fighter | KD | Sig. Str. | Sig. Str. % | Total Str. | TD | TD % | Sub. Att | Rev. | Ctrl |
|---|---|---|---|---|---|---|---|---|---|
| Paulo Costa | 0 | 73 of 103 | 70% | 106 of 137 | 2 of 2 | 100% | 0 | 0 | 5:28 |
| Luke Rockhold | 0 | 51 of 70 | 72% | 57 of 78 | 1 of 4 | 25% | 0 | 1 | 0:47 |
Per Round
| Rd | Fighter | KD | Sig. Str. | Sig. Str. % | Total Str. | TD | TD % | Sub. Att | Rev. | Ctrl |
|---|---|---|---|---|---|---|---|---|---|---|
| 1 | Paulo Costa | 0 | 27 of 34 | 79% | 56 of 64 | 1 of 1 | 100% | 0 | 0 | 2:48 |
| Luke Rockhold | 0 | 19 of 23 | 82% | 19 of 23 | 0 of 2 | 0% | 0 | 0 | 0:03 | |
| 2 | Paulo Costa | 0 | 30 of 42 | 71% | 31 of 43 | 1 of 1 | 100% | 0 | 0 | 0:17 |
| Luke Rockhold | 0 | 23 of 35 | 65% | 23 of 35 | 1 of 1 | 100% | 0 | 0 | 0:12 | |
| 3 | Paulo Costa | 0 | 16 of 27 | 59% | 19 of 30 | 0 of 0 | --- | 0 | 0 | 2:23 |
| Luke Rockhold | 0 | 9 of 12 | 75% | 15 of 20 | 0 of 1 | 0% | 0 | 1 | 0:32 |
Significant Strikes
| Fighter | Sig. Str. | Sig. Str. % | Head | Body | Leg | Distance | Clinch | Ground |
|---|---|---|---|---|---|---|---|---|
| Paulo Costa | 73 of 103 | 70% | 37 of 61 | 33 of 39 | 3 of 3 | 53 of 80 | 3 of 4 | 17 of 19 |
| Luke Rockhold | 51 of 70 | 72% | 23 of 40 | 23 of 25 | 5 of 5 | 48 of 67 | 2 of 2 | 1 of 1 |
Significant Strikes Per Round
| Rd | Fighter | Sig. Str. | Sig. Str. % | Head | Body | Leg | Distance | Clinch | Ground |
|---|---|---|---|---|---|---|---|---|---|
| 1 | Paulo Costa | 27 of 34 | 79% | 13 of 19 | 13 of 14 | 1 of 1 | 11 of 15 | 2 of 3 | 14 of 16 |
| Luke Rockhold | 19 of 23 | 82% | 6 of 8 | 11 of 13 | 2 of 2 | 17 of 21 | 2 of 2 | 0 of 0 | |
| 2 | Paulo Costa | 30 of 42 | 71% | 14 of 22 | 14 of 18 | 2 of 2 | 29 of 41 | 1 of 1 | 0 of 0 |
| Luke Rockhold | 23 of 35 | 65% | 11 of 23 | 9 of 9 | 3 of 3 | 23 of 35 | 0 of 0 | 0 of 0 | |
| 3 | Paulo Costa | 16 of 27 | 59% | 10 of 20 | 6 of 7 | 0 of 0 | 13 of 24 | 0 of 0 | 3 of 3 |
| Luke Rockhold | 9 of 12 | 75% | 6 of 9 | 3 of 3 | 0 of 0 | 8 of 11 | 0 of 0 | 1 of 1 |
Angelo picks Paulo Costa over Luke Rockhold. He describes Costa as a massive middleweight with power, output, and surprising cardio, noting his relentless pace even when exhausted. Angelo acknowledges Rockhold's credentials as a former champion and talented wrestler, but believes the three-year layoff and age (38) are too much to overcome against a top-ranked opponent. He mentions that Costa has good takedown defense (80%) and that he already placed a moneyline bet on Costa at better odds earlier.
Big Brady is confident in Paulo Costa. He notes that Luke Rockhold hasn't fought in three years, hasn't won in nearly five years, and was knocked out in his last fight. Rockhold's chin is gone, and he looked slow and washed against Jan Błachowicz. Costa is younger, more active, hits hard, and has solid cardio. Brady expects Costa to knock Rockhold out in the first or second round. He mentions Costa's takedown defense is good, so Rockhold's wrestling won't work.
Cody picks Costa but expresses concerns about Costa's weight cut and his poor grappling off his back. He notes Rockhold's durability issues but acknowledges Rockhold's BJJ could be a threat if Costa gets taken down. Ultimately, he trusts Costa's power and finishing ability.
Daniel Levi picks Paulo Costa to knock out Luke Rockhold in the first round. He notes that Rockhold's chin has been suspect for a long time, citing knockouts by Vitor Belfort, Michael Bisping, Yoel Romero, and Jan Błachowicz. He believes Rockhold hasn't fought since 2019 and is coming back for a paycheck, which is a bad sign. Levi praises Costa's takedown defense (stuffing Yoel Romero's takedowns) and his power, and thinks Costa is catching Rockhold at the right time. He also mentions that Costa looked back to form in his last fight against Marvin Vettori.
Costa should knock out Rockhold, who has a weak chin and has been inactive for three years. However, the -350 price is too high for a finish-reliant fighter. The host prefers Costa by KO at -120 (now -170) but is passing on the moneyline. He warns that if Costa doesn't finish early, Rockhold could make it a tough fight.
Paul picks Costa to knock out Rockhold inside the first two rounds. He notes Rockhold's chin issues and long layoff, and likes the under 10 minutes on Prize Picks. He mentions Costa's wild card nature but thinks he's in great shape for this fight.
The Guru predicts Paulo Costa wins by first-round KO. He describes Costa rushing across the cage, landing a big kick, and then clipping Rockhold with a shot. He sees Costa slipping Rockhold's jab, landing a right hand and body shot, then a switch kick to the body. He envisions Costa blocking Rockhold's kicks and landing an inside leg kick, then a body kick, and finally a left hook that drops Rockhold about two and a half minutes into the first round.
Totals
| Fighter | KD | Sig. Str. | Sig. Str. % | Total Str. | TD | TD % | Sub. Att | Rev. | Ctrl |
|---|---|---|---|---|---|---|---|---|---|
| Jan Błachowicz | 1 | 30 of 42 | 71% | 38 of 50 | 0 of 0 | --- | 0 | 0 | 0:01 |
| Luke Rockhold | 0 | 14 of 36 | 38% | 17 of 39 | 0 of 5 | 0% | 0 | 0 | 3:26 |
Per Round
| Rd | Fighter | KD | Sig. Str. | Sig. Str. % | Total Str. | TD | TD % | Sub. Att | Rev. | Ctrl |
|---|---|---|---|---|---|---|---|---|---|---|
| 1 | Jan Błachowicz | 0 | 16 of 23 | 69% | 20 of 27 | 0 of 0 | --- | 0 | 0 | 0:00 |
| Luke Rockhold | 0 | 8 of 26 | 30% | 10 of 28 | 0 of 5 | 0% | 0 | 0 | 2:43 | |
| 2 | Jan Błachowicz | 1 | 14 of 19 | 73% | 18 of 23 | 0 of 0 | --- | 0 | 0 | 0:01 |
| Luke Rockhold | 0 | 6 of 10 | 60% | 7 of 11 | 0 of 0 | --- | 0 | 0 | 0:43 |
Significant Strikes
| Fighter | Sig. Str. | Sig. Str. % | Head | Body | Leg | Distance | Clinch | Ground |
|---|---|---|---|---|---|---|---|---|
| Jan Błachowicz | 30 of 42 | 71% | 11 of 21 | 8 of 10 | 11 of 11 | 23 of 35 | 4 of 4 | 3 of 3 |
| Luke Rockhold | 14 of 36 | 38% | 4 of 20 | 8 of 12 | 2 of 4 | 9 of 31 | 5 of 5 | 0 of 0 |
Significant Strikes Per Round
| Rd | Fighter | Sig. Str. | Sig. Str. % | Head | Body | Leg | Distance | Clinch | Ground |
|---|---|---|---|---|---|---|---|---|---|
| 1 | Jan Błachowicz | 16 of 23 | 69% | 5 of 11 | 5 of 6 | 6 of 6 | 14 of 21 | 2 of 2 | 0 of 0 |
| Luke Rockhold | 8 of 26 | 30% | 2 of 15 | 6 of 9 | 0 of 2 | 6 of 24 | 2 of 2 | 0 of 0 | |
| 2 | Jan Błachowicz | 14 of 19 | 73% | 6 of 10 | 3 of 4 | 5 of 5 | 9 of 14 | 2 of 2 | 3 of 3 |
| Luke Rockhold | 6 of 10 | 60% | 2 of 5 | 2 of 3 | 2 of 2 | 3 of 7 | 3 of 3 | 0 of 0 |
Play-by-Play
View on SherdogRound 1
Next up is a light heavyweight bout between Luke Rockhold and Jan Blachowicz. The referee is Herb Dean. No touch of gloves. Rockhold starts off with a high kick. Then he lands a kick to the body and a straight left behind it. Rockhold lands another kick to the body and then shoots for a double leg takedown. Blachowicz stuffs it and Rockhold is now looking for a body lock takedown. Rockhold switches to a single leg but Blachowicz stuffs it. Blachowicz lands a hard elbow in the clinch. Rockhold lands some knees to the body. Another hard elbow by Blachowicz. Left hook by Blachowicz on the break. Rockhold nearly lands a high kick. Rockhold with a low kick that Blachowicz checks. Low kick by Blachowicz. Kick to the body by Rockhold. Straight right, left hook combination by Blachowicz lands. Low kick by Blachowicz. Kick to the body by Blachowicz. Rockhold misses landing a high kick. Blachowicz with a straight right. Rockhold with a spinning back kick to the body. Blachowicz lands a high kick right at the buzzer that hurts Rockhold but the round is over.
Sherdog Scores
Adam Martin scores the round: 10-9 Blachowicz
Cole Shelton scores the round: 10-9 Rockhold
Tyler Treese scores the round: 10-9 Rockhold
Round 2
Round two begins. Rockhold presses forward and gets caught with a counter left hook by Blachowicz. Now Blachowicz lands a low kick. Straight right by Blachowicz. Low kick by Blachowicz and that one hurt. Rockhold pushes forward and clinches Blachowicz against the fence. Blachowicz lands an uppercut from the clinch. Blachowicz with a knee to the body. They break. Blachowicz lands a brutal left hook that drops Rockhold to the canvas. He rushes in and lands some heavy punches on the ground but this fight is over. Huge win for Blachowicz.
The Official Result
Jan Blachowicz def. Luke Rockhold via KO (Punches) R2, 1:39
Totals
| Fighter | KD | Sig. Str. | Sig. Str. % | Total Str. | TD | TD % | Sub. Att | Rev. | Ctrl |
|---|---|---|---|---|---|---|---|---|---|
| Yoel Romero | 1 | 45 of 92 | 48% | 52 of 99 | 0 of 0 | --- | 0 | 0 | 0:08 |
| Luke Rockhold | 0 | 45 of 119 | 37% | 45 of 119 | 0 of 0 | --- | 0 | 0 | 0:00 |
Per Round
| Rd | Fighter | KD | Sig. Str. | Sig. Str. % | Total Str. | TD | TD % | Sub. Att | Rev. | Ctrl |
|---|---|---|---|---|---|---|---|---|---|---|
| 1 | Yoel Romero | 0 | 10 of 27 | 37% | 10 of 27 | 0 of 0 | --- | 0 | 0 | 0:00 |
| Luke Rockhold | 0 | 18 of 41 | 43% | 18 of 41 | 0 of 0 | --- | 0 | 0 | 0:00 | |
| 2 | Yoel Romero | 0 | 24 of 46 | 52% | 31 of 53 | 0 of 0 | --- | 0 | 0 | 0:06 |
| Luke Rockhold | 0 | 17 of 51 | 33% | 17 of 51 | 0 of 0 | --- | 0 | 0 | 0:00 | |
| 3 | Yoel Romero | 1 | 11 of 19 | 57% | 11 of 19 | 0 of 0 | --- | 0 | 0 | 0:02 |
| Luke Rockhold | 0 | 10 of 27 | 37% | 10 of 27 | 0 of 0 | --- | 0 | 0 | 0:00 |
Significant Strikes
| Fighter | Sig. Str. | Sig. Str. % | Head | Body | Leg | Distance | Clinch | Ground |
|---|---|---|---|---|---|---|---|---|
| Yoel Romero | 45 of 92 | 48% | 23 of 60 | 10 of 17 | 12 of 15 | 31 of 73 | 13 of 18 | 1 of 1 |
| Luke Rockhold | 45 of 119 | 37% | 22 of 87 | 10 of 15 | 13 of 17 | 44 of 118 | 1 of 1 | 0 of 0 |
Significant Strikes Per Round
| Rd | Fighter | Sig. Str. | Sig. Str. % | Head | Body | Leg | Distance | Clinch | Ground |
|---|---|---|---|---|---|---|---|---|---|
| 1 | Yoel Romero | 10 of 27 | 37% | 3 of 15 | 1 of 4 | 6 of 8 | 10 of 27 | 0 of 0 | 0 of 0 |
| Luke Rockhold | 18 of 41 | 43% | 3 of 21 | 4 of 7 | 11 of 13 | 18 of 41 | 0 of 0 | 0 of 0 | |
| 2 | Yoel Romero | 24 of 46 | 52% | 13 of 30 | 7 of 11 | 4 of 5 | 11 of 28 | 13 of 18 | 0 of 0 |
| Luke Rockhold | 17 of 51 | 33% | 10 of 40 | 6 of 8 | 1 of 3 | 16 of 50 | 1 of 1 | 0 of 0 | |
| 3 | Yoel Romero | 11 of 19 | 57% | 7 of 15 | 2 of 2 | 2 of 2 | 10 of 18 | 0 of 0 | 1 of 1 |
| Luke Rockhold | 10 of 27 | 37% | 9 of 26 | 0 of 0 | 1 of 1 | 10 of 27 | 0 of 0 | 0 of 0 |
Totals
| Fighter | KD | Sig. Str. | Sig. Str. % | Total Str. | TD | TD % | Sub. Att | Rev. | Ctrl |
|---|---|---|---|---|---|---|---|---|---|
| Luke Rockhold | 0 | 58 of 85 | 68% | 68 of 97 | 2 of 5 | 40% | 0 | 0 | 3:41 |
| David Branch | 0 | 25 of 56 | 44% | 51 of 82 | 1 of 2 | 50% | 0 | 0 | 2:18 |
Per Round
| Rd | Fighter | KD | Sig. Str. | Sig. Str. % | Total Str. | TD | TD % | Sub. Att | Rev. | Ctrl |
|---|---|---|---|---|---|---|---|---|---|---|
| 1 | Luke Rockhold | 0 | 15 of 24 | 62% | 19 of 30 | 1 of 2 | 50% | 0 | 0 | 1:19 |
| David Branch | 0 | 19 of 36 | 52% | 36 of 53 | 1 of 2 | 50% | 0 | 0 | 1:48 | |
| 2 | Luke Rockhold | 0 | 43 of 61 | 70% | 49 of 67 | 1 of 3 | 33% | 0 | 0 | 2:22 |
| David Branch | 0 | 6 of 20 | 30% | 15 of 29 | 0 of 0 | --- | 0 | 0 | 0:30 |
Significant Strikes
| Fighter | Sig. Str. | Sig. Str. % | Head | Body | Leg | Distance | Clinch | Ground |
|---|---|---|---|---|---|---|---|---|
| Luke Rockhold | 58 of 85 | 68% | 40 of 61 | 8 of 13 | 10 of 11 | 21 of 32 | 3 of 7 | 34 of 46 |
| David Branch | 25 of 56 | 44% | 13 of 42 | 10 of 12 | 2 of 2 | 17 of 46 | 8 of 10 | 0 of 0 |
Significant Strikes Per Round
| Rd | Fighter | Sig. Str. | Sig. Str. % | Head | Body | Leg | Distance | Clinch | Ground |
|---|---|---|---|---|---|---|---|---|---|
| 1 | Luke Rockhold | 15 of 24 | 62% | 4 of 8 | 6 of 10 | 5 of 6 | 13 of 19 | 2 of 5 | 0 of 0 |
| David Branch | 19 of 36 | 52% | 13 of 28 | 5 of 7 | 1 of 1 | 13 of 28 | 6 of 8 | 0 of 0 | |
| 2 | Luke Rockhold | 43 of 61 | 70% | 36 of 53 | 2 of 3 | 5 of 5 | 8 of 13 | 1 of 2 | 34 of 46 |
| David Branch | 6 of 20 | 30% | 0 of 14 | 5 of 5 | 1 of 1 | 4 of 18 | 2 of 2 | 0 of 0 |
Totals
| Fighter | KD | Sig. Str. | Sig. Str. % | Total Str. | TD | TD % | Sub. Att | Rev. | Ctrl |
|---|---|---|---|---|---|---|---|---|---|
| Michael Bisping | 0 | 17 of 37 | 45% | 17 of 37 | 0 of 0 | --- | 0 | 0 | 0:00 |
| Luke Rockhold | 2 | 21 of 50 | 42% | 21 of 50 | 0 of 0 | --- | 0 | 0 | 0:03 |
Per Round
| Rd | Fighter | KD | Sig. Str. | Sig. Str. % | Total Str. | TD | TD % | Sub. Att | Rev. | Ctrl |
|---|---|---|---|---|---|---|---|---|---|---|
| 1 | Michael Bisping | 0 | 17 of 37 | 45% | 17 of 37 | 0 of 0 | --- | 0 | 0 | 0:00 |
| Luke Rockhold | 2 | 21 of 50 | 42% | 21 of 50 | 0 of 0 | --- | 0 | 0 | 0:03 |
Significant Strikes
| Fighter | Sig. Str. | Sig. Str. % | Head | Body | Leg | Distance | Clinch | Ground |
|---|---|---|---|---|---|---|---|---|
| Michael Bisping | 17 of 37 | 45% | 6 of 24 | 8 of 9 | 3 of 4 | 16 of 36 | 1 of 1 | 0 of 0 |
| Luke Rockhold | 21 of 50 | 42% | 14 of 43 | 3 of 3 | 4 of 4 | 17 of 46 | 1 of 1 | 3 of 3 |
Significant Strikes Per Round
| Rd | Fighter | Sig. Str. | Sig. Str. % | Head | Body | Leg | Distance | Clinch | Ground |
|---|---|---|---|---|---|---|---|---|---|
| 1 | Michael Bisping | 17 of 37 | 45% | 6 of 24 | 8 of 9 | 3 of 4 | 16 of 36 | 1 of 1 | 0 of 0 |
| Luke Rockhold | 21 of 50 | 42% | 14 of 43 | 3 of 3 | 4 of 4 | 17 of 46 | 1 of 1 | 3 of 3 |
Totals
| Fighter | KD | Sig. Str. | Sig. Str. % | Total Str. | TD | TD % | Sub. Att | Rev. | Ctrl |
|---|---|---|---|---|---|---|---|---|---|
| Luke Rockhold | 0 | 48 of 75 | 64% | 62 of 92 | 3 of 6 | 50% | 0 | 0 | 4:27 |
| Chris Weidman | 0 | 126 of 191 | 65% | 161 of 229 | 2 of 4 | 50% | 1 | 0 | 5:30 |
Per Round
| Rd | Fighter | KD | Sig. Str. | Sig. Str. % | Total Str. | TD | TD % | Sub. Att | Rev. | Ctrl |
|---|---|---|---|---|---|---|---|---|---|---|
| 1 | Luke Rockhold | 0 | 10 of 12 | 83% | 21 of 26 | 2 of 4 | 50% | 0 | 0 | 3:07 |
| Chris Weidman | 0 | 7 of 9 | 77% | 13 of 15 | 0 of 0 | --- | 1 | 0 | 1:05 | |
| 2 | Luke Rockhold | 0 | 14 of 31 | 45% | 14 of 31 | 0 of 1 | 0% | 0 | 0 | 0:14 |
| Chris Weidman | 0 | 31 of 60 | 51% | 32 of 61 | 0 of 0 | --- | 0 | 0 | 0:00 | |
| 3 | Luke Rockhold | 0 | 21 of 29 | 72% | 23 of 31 | 1 of 1 | 100% | 0 | 0 | 1:06 |
| Chris Weidman | 0 | 68 of 99 | 68% | 83 of 114 | 1 of 1 | 100% | 0 | 0 | 1:35 | |
| 4 | Luke Rockhold | 0 | 3 of 3 | 100% | 4 of 4 | 0 of 0 | --- | 0 | 0 | 0:00 |
| Chris Weidman | 0 | 20 of 23 | 86% | 33 of 39 | 1 of 3 | 33% | 0 | 0 | 2:50 |
Significant Strikes
| Fighter | Sig. Str. | Sig. Str. % | Head | Body | Leg | Distance | Clinch | Ground |
|---|---|---|---|---|---|---|---|---|
| Luke Rockhold | 48 of 75 | 64% | 25 of 51 | 18 of 19 | 5 of 5 | 40 of 67 | 7 of 7 | 1 of 1 |
| Chris Weidman | 126 of 191 | 65% | 96 of 157 | 18 of 22 | 12 of 12 | 44 of 83 | 9 of 13 | 73 of 95 |
Significant Strikes Per Round
| Rd | Fighter | Sig. Str. | Sig. Str. % | Head | Body | Leg | Distance | Clinch | Ground |
|---|---|---|---|---|---|---|---|---|---|
| 1 | Luke Rockhold | 10 of 12 | 83% | 8 of 10 | 1 of 1 | 1 of 1 | 3 of 5 | 7 of 7 | 0 of 0 |
| Chris Weidman | 7 of 9 | 77% | 1 of 2 | 4 of 5 | 2 of 2 | 4 of 5 | 3 of 4 | 0 of 0 | |
| 2 | Luke Rockhold | 14 of 31 | 45% | 6 of 23 | 6 of 6 | 2 of 2 | 14 of 31 | 0 of 0 | 0 of 0 |
| Chris Weidman | 31 of 60 | 51% | 14 of 43 | 8 of 8 | 9 of 9 | 26 of 53 | 5 of 7 | 0 of 0 | |
| 3 | Luke Rockhold | 21 of 29 | 72% | 9 of 16 | 10 of 11 | 2 of 2 | 20 of 28 | 0 of 0 | 1 of 1 |
| Chris Weidman | 68 of 99 | 68% | 63 of 91 | 4 of 7 | 1 of 1 | 12 of 22 | 1 of 2 | 55 of 75 | |
| 4 | Luke Rockhold | 3 of 3 | 100% | 2 of 2 | 1 of 1 | 0 of 0 | 3 of 3 | 0 of 0 | 0 of 0 |
| Chris Weidman | 20 of 23 | 86% | 18 of 21 | 2 of 2 | 0 of 0 | 2 of 3 | 0 of 0 | 18 of 20 |
Totals
| Fighter | KD | Sig. Str. | Sig. Str. % | Total Str. | TD | TD % | Sub. Att | Rev. | Ctrl |
|---|---|---|---|---|---|---|---|---|---|
| Luke Rockhold | 0 | 13 of 27 | 48% | 19 of 33 | 0 of 0 | --- | 0 | 0 | 1:25 |
| Lyoto Machida | 0 | 23 of 44 | 52% | 39 of 63 | 1 of 1 | 100% | 2 | 0 | 3:11 |
Per Round
| Rd | Fighter | KD | Sig. Str. | Sig. Str. % | Total Str. | TD | TD % | Sub. Att | Rev. | Ctrl |
|---|---|---|---|---|---|---|---|---|---|---|
| 1 | Luke Rockhold | 0 | 8 of 12 | 66% | 14 of 18 | 0 of 0 | --- | 0 | 0 | 1:25 |
| Lyoto Machida | 0 | 11 of 24 | 45% | 20 of 36 | 1 of 1 | 100% | 1 | 0 | 2:12 | |
| 2 | Luke Rockhold | 0 | 5 of 15 | 33% | 5 of 15 | 0 of 0 | --- | 0 | 0 | 0:00 |
| Lyoto Machida | 0 | 12 of 20 | 60% | 19 of 27 | 0 of 0 | --- | 1 | 0 | 0:59 |
Significant Strikes
| Fighter | Sig. Str. | Sig. Str. % | Head | Body | Leg | Distance | Clinch | Ground |
|---|---|---|---|---|---|---|---|---|
| Luke Rockhold | 13 of 27 | 48% | 7 of 20 | 0 of 1 | 6 of 6 | 12 of 25 | 0 of 0 | 1 of 2 |
| Lyoto Machida | 23 of 44 | 52% | 14 of 34 | 4 of 4 | 5 of 6 | 11 of 23 | 1 of 1 | 11 of 20 |
Significant Strikes Per Round
| Rd | Fighter | Sig. Str. | Sig. Str. % | Head | Body | Leg | Distance | Clinch | Ground |
|---|---|---|---|---|---|---|---|---|---|
| 1 | Luke Rockhold | 8 of 12 | 66% | 6 of 10 | 0 of 0 | 2 of 2 | 7 of 10 | 0 of 0 | 1 of 2 |
| Lyoto Machida | 11 of 24 | 45% | 9 of 21 | 0 of 0 | 2 of 3 | 1 of 5 | 1 of 1 | 9 of 18 | |
| 2 | Luke Rockhold | 5 of 15 | 33% | 1 of 10 | 0 of 1 | 4 of 4 | 5 of 15 | 0 of 0 | 0 of 0 |
| Lyoto Machida | 12 of 20 | 60% | 5 of 13 | 4 of 4 | 3 of 3 | 10 of 18 | 0 of 0 | 2 of 2 |
Totals
| Fighter | KD | Sig. Str. | Sig. Str. % | Total Str. | TD | TD % | Sub. Att | Rev. | Ctrl |
|---|---|---|---|---|---|---|---|---|---|
| Luke Rockhold | 1 | 20 of 41 | 48% | 20 of 41 | 0 of 0 | --- | 1 | 0 | 0:17 |
| Michael Bisping | 0 | 16 of 65 | 24% | 16 of 65 | 0 of 2 | 0% | 0 | 0 | 0:11 |
Per Round
| Rd | Fighter | KD | Sig. Str. | Sig. Str. % | Total Str. | TD | TD % | Sub. Att | Rev. | Ctrl |
|---|---|---|---|---|---|---|---|---|---|---|
| 1 | Luke Rockhold | 0 | 12 of 30 | 40% | 12 of 30 | 0 of 0 | --- | 0 | 0 | 0:14 |
| Michael Bisping | 0 | 14 of 60 | 23% | 14 of 60 | 0 of 2 | 0% | 0 | 0 | 0:01 | |
| 2 | Luke Rockhold | 1 | 8 of 11 | 72% | 8 of 11 | 0 of 0 | --- | 1 | 0 | 0:03 |
| Michael Bisping | 0 | 2 of 5 | 40% | 2 of 5 | 0 of 0 | --- | 0 | 0 | 0:10 |
Significant Strikes
| Fighter | Sig. Str. | Sig. Str. % | Head | Body | Leg | Distance | Clinch | Ground |
|---|---|---|---|---|---|---|---|---|
| Luke Rockhold | 20 of 41 | 48% | 10 of 27 | 7 of 11 | 3 of 3 | 15 of 33 | 1 of 2 | 4 of 6 |
| Michael Bisping | 16 of 65 | 24% | 10 of 53 | 1 of 7 | 5 of 5 | 15 of 64 | 1 of 1 | 0 of 0 |
Significant Strikes Per Round
| Rd | Fighter | Sig. Str. | Sig. Str. % | Head | Body | Leg | Distance | Clinch | Ground |
|---|---|---|---|---|---|---|---|---|---|
| 1 | Luke Rockhold | 12 of 30 | 40% | 4 of 18 | 5 of 9 | 3 of 3 | 11 of 28 | 1 of 2 | 0 of 0 |
| Michael Bisping | 14 of 60 | 23% | 10 of 51 | 0 of 5 | 4 of 4 | 13 of 59 | 1 of 1 | 0 of 0 | |
| 2 | Luke Rockhold | 8 of 11 | 72% | 6 of 9 | 2 of 2 | 0 of 0 | 4 of 5 | 0 of 0 | 4 of 6 |
| Michael Bisping | 2 of 5 | 40% | 0 of 2 | 1 of 2 | 1 of 1 | 2 of 5 | 0 of 0 | 0 of 0 |
Tim Boetsch - Fight History
Totals
| Fighter | KD | Sig. Str. | Sig. Str. % | Total Str. | TD | TD % | Sub. Att | Rev. | Ctrl |
|---|---|---|---|---|---|---|---|---|---|
| Omari Akhmedov | 0 | 41 of 97 | 42% | 64 of 121 | 0 of 2 | 0% | 0 | 0 | 0:02 |
| Tim Boetsch | 0 | 52 of 135 | 38% | 58 of 141 | 0 of 2 | 0% | 0 | 0 | 3:14 |
Per Round
| Rd | Fighter | KD | Sig. Str. | Sig. Str. % | Total Str. | TD | TD % | Sub. Att | Rev. | Ctrl |
|---|---|---|---|---|---|---|---|---|---|---|
| 1 | Omari Akhmedov | 0 | 9 of 18 | 50% | 18 of 27 | 0 of 0 | --- | 0 | 0 | 0:00 |
| Tim Boetsch | 0 | 13 of 36 | 36% | 16 of 39 | 0 of 2 | 0% | 0 | 0 | 1:56 | |
| 2 | Omari Akhmedov | 0 | 8 of 28 | 28% | 19 of 40 | 0 of 1 | 0% | 0 | 0 | 0:00 |
| Tim Boetsch | 0 | 19 of 42 | 45% | 21 of 44 | 0 of 0 | --- | 0 | 0 | 1:11 | |
| 3 | Omari Akhmedov | 0 | 24 of 51 | 47% | 27 of 54 | 0 of 1 | 0% | 0 | 0 | 0:02 |
| Tim Boetsch | 0 | 20 of 57 | 35% | 21 of 58 | 0 of 0 | --- | 0 | 0 | 0:07 |
Significant Strikes
| Fighter | Sig. Str. | Sig. Str. % | Head | Body | Leg | Distance | Clinch | Ground |
|---|---|---|---|---|---|---|---|---|
| Omari Akhmedov | 41 of 97 | 42% | 20 of 66 | 12 of 20 | 9 of 11 | 32 of 85 | 9 of 12 | 0 of 0 |
| Tim Boetsch | 52 of 135 | 38% | 32 of 110 | 13 of 17 | 7 of 8 | 35 of 113 | 17 of 22 | 0 of 0 |
Significant Strikes Per Round
| Rd | Fighter | Sig. Str. | Sig. Str. % | Head | Body | Leg | Distance | Clinch | Ground |
|---|---|---|---|---|---|---|---|---|---|
| 1 | Omari Akhmedov | 9 of 18 | 50% | 2 of 9 | 4 of 5 | 3 of 4 | 4 of 13 | 5 of 5 | 0 of 0 |
| Tim Boetsch | 13 of 36 | 36% | 5 of 26 | 5 of 7 | 3 of 3 | 5 of 27 | 8 of 9 | 0 of 0 | |
| 2 | Omari Akhmedov | 8 of 28 | 28% | 3 of 20 | 2 of 4 | 3 of 4 | 7 of 26 | 1 of 2 | 0 of 0 |
| Tim Boetsch | 19 of 42 | 45% | 8 of 30 | 7 of 8 | 4 of 4 | 13 of 35 | 6 of 7 | 0 of 0 | |
| 3 | Omari Akhmedov | 24 of 51 | 47% | 15 of 37 | 6 of 11 | 3 of 3 | 21 of 46 | 3 of 5 | 0 of 0 |
| Tim Boetsch | 20 of 57 | 35% | 19 of 54 | 1 of 2 | 0 of 1 | 17 of 51 | 3 of 6 | 0 of 0 |
Totals
| Fighter | KD | Sig. Str. | Sig. Str. % | Total Str. | TD | TD % | Sub. Att | Rev. | Ctrl |
|---|---|---|---|---|---|---|---|---|---|
| Antônio Carlos Júnior | 0 | 7 of 18 | 38% | 13 of 24 | 0 of 0 | --- | 0 | 0 | 0:05 |
| Tim Boetsch | 0 | 31 of 48 | 64% | 35 of 52 | 1 of 2 | 50% | 1 | 0 | 1:32 |
Per Round
| Rd | Fighter | KD | Sig. Str. | Sig. Str. % | Total Str. | TD | TD % | Sub. Att | Rev. | Ctrl |
|---|---|---|---|---|---|---|---|---|---|---|
| 1 | Antônio Carlos Júnior | 0 | 7 of 18 | 38% | 13 of 24 | 0 of 0 | --- | 0 | 0 | 0:05 |
| Tim Boetsch | 0 | 31 of 48 | 64% | 35 of 52 | 1 of 2 | 50% | 1 | 0 | 1:32 |
Significant Strikes
| Fighter | Sig. Str. | Sig. Str. % | Head | Body | Leg | Distance | Clinch | Ground |
|---|---|---|---|---|---|---|---|---|
| Antônio Carlos Júnior | 7 of 18 | 38% | 4 of 14 | 1 of 2 | 2 of 2 | 7 of 18 | 0 of 0 | 0 of 0 |
| Tim Boetsch | 31 of 48 | 64% | 23 of 40 | 4 of 4 | 4 of 4 | 20 of 34 | 2 of 2 | 9 of 12 |
Significant Strikes Per Round
| Rd | Fighter | Sig. Str. | Sig. Str. % | Head | Body | Leg | Distance | Clinch | Ground |
|---|---|---|---|---|---|---|---|---|---|
| 1 | Antônio Carlos Júnior | 7 of 18 | 38% | 4 of 14 | 1 of 2 | 2 of 2 | 7 of 18 | 0 of 0 | 0 of 0 |
| Tim Boetsch | 31 of 48 | 64% | 23 of 40 | 4 of 4 | 4 of 4 | 20 of 34 | 2 of 2 | 9 of 12 |
Totals
| Fighter | KD | Sig. Str. | Sig. Str. % | Total Str. | TD | TD % | Sub. Att | Rev. | Ctrl |
|---|---|---|---|---|---|---|---|---|---|
| Tim Boetsch | 0 | 41 of 68 | 60% | 42 of 69 | 0 of 0 | --- | 0 | 0 | 0:01 |
| Johny Hendricks | 0 | 10 of 45 | 22% | 10 of 45 | 0 of 0 | --- | 0 | 0 | 0:00 |
Per Round
| Rd | Fighter | KD | Sig. Str. | Sig. Str. % | Total Str. | TD | TD % | Sub. Att | Rev. | Ctrl |
|---|---|---|---|---|---|---|---|---|---|---|
| 1 | Tim Boetsch | 0 | 29 of 49 | 59% | 29 of 49 | 0 of 0 | --- | 0 | 0 | 0:00 |
| Johny Hendricks | 0 | 9 of 42 | 21% | 9 of 42 | 0 of 0 | --- | 0 | 0 | 0:00 | |
| 2 | Tim Boetsch | 0 | 12 of 19 | 63% | 13 of 20 | 0 of 0 | --- | 0 | 0 | 0:01 |
| Johny Hendricks | 0 | 1 of 3 | 33% | 1 of 3 | 0 of 0 | --- | 0 | 0 | 0:00 |
Significant Strikes
| Fighter | Sig. Str. | Sig. Str. % | Head | Body | Leg | Distance | Clinch | Ground |
|---|---|---|---|---|---|---|---|---|
| Tim Boetsch | 41 of 68 | 60% | 19 of 41 | 16 of 20 | 6 of 7 | 30 of 54 | 10 of 13 | 1 of 1 |
| Johny Hendricks | 10 of 45 | 22% | 2 of 36 | 2 of 2 | 6 of 7 | 10 of 44 | 0 of 1 | 0 of 0 |
Significant Strikes Per Round
| Rd | Fighter | Sig. Str. | Sig. Str. % | Head | Body | Leg | Distance | Clinch | Ground |
|---|---|---|---|---|---|---|---|---|---|
| 1 | Tim Boetsch | 29 of 49 | 59% | 9 of 24 | 14 of 18 | 6 of 7 | 24 of 44 | 5 of 5 | 0 of 0 |
| Johny Hendricks | 9 of 42 | 21% | 2 of 34 | 2 of 2 | 5 of 6 | 9 of 42 | 0 of 0 | 0 of 0 | |
| 2 | Tim Boetsch | 12 of 19 | 63% | 10 of 17 | 2 of 2 | 0 of 0 | 6 of 10 | 5 of 8 | 1 of 1 |
| Johny Hendricks | 1 of 3 | 33% | 0 of 2 | 0 of 0 | 1 of 1 | 1 of 2 | 0 of 1 | 0 of 0 |
Totals
| Fighter | KD | Sig. Str. | Sig. Str. % | Total Str. | TD | TD % | Sub. Att | Rev. | Ctrl |
|---|---|---|---|---|---|---|---|---|---|
| Jacare Souza | 0 | 7 of 18 | 38% | 15 of 30 | 1 of 2 | 50% | 1 | 0 | 1:14 |
| Tim Boetsch | 0 | 6 of 10 | 60% | 8 of 12 | 0 of 0 | --- | 0 | 0 | 0:00 |
Per Round
| Rd | Fighter | KD | Sig. Str. | Sig. Str. % | Total Str. | TD | TD % | Sub. Att | Rev. | Ctrl |
|---|---|---|---|---|---|---|---|---|---|---|
| 1 | Jacare Souza | 0 | 7 of 18 | 38% | 15 of 30 | 1 of 2 | 50% | 1 | 0 | 1:14 |
| Tim Boetsch | 0 | 6 of 10 | 60% | 8 of 12 | 0 of 0 | --- | 0 | 0 | 0:00 |
Significant Strikes
| Fighter | Sig. Str. | Sig. Str. % | Head | Body | Leg | Distance | Clinch | Ground |
|---|---|---|---|---|---|---|---|---|
| Jacare Souza | 7 of 18 | 38% | 5 of 13 | 2 of 5 | 0 of 0 | 5 of 14 | 1 of 3 | 1 of 1 |
| Tim Boetsch | 6 of 10 | 60% | 2 of 6 | 0 of 0 | 4 of 4 | 6 of 10 | 0 of 0 | 0 of 0 |
Significant Strikes Per Round
| Rd | Fighter | Sig. Str. | Sig. Str. % | Head | Body | Leg | Distance | Clinch | Ground |
|---|---|---|---|---|---|---|---|---|---|
| 1 | Jacare Souza | 7 of 18 | 38% | 5 of 13 | 2 of 5 | 0 of 0 | 5 of 14 | 1 of 3 | 1 of 1 |
| Tim Boetsch | 6 of 10 | 60% | 2 of 6 | 0 of 0 | 4 of 4 | 6 of 10 | 0 of 0 | 0 of 0 |
Totals
| Fighter | KD | Sig. Str. | Sig. Str. % | Total Str. | TD | TD % | Sub. Att | Rev. | Ctrl |
|---|---|---|---|---|---|---|---|---|---|
| Tim Boetsch | 0 | 5 of 18 | 27% | 5 of 18 | 0 of 1 | 0% | 0 | 0 | 0:00 |
| Rafael Natal | 1 | 14 of 25 | 56% | 14 of 25 | 0 of 0 | --- | 0 | 0 | 0:04 |
Per Round
| Rd | Fighter | KD | Sig. Str. | Sig. Str. % | Total Str. | TD | TD % | Sub. Att | Rev. | Ctrl |
|---|---|---|---|---|---|---|---|---|---|---|
| 1 | Tim Boetsch | 0 | 5 of 18 | 27% | 5 of 18 | 0 of 1 | 0% | 0 | 0 | 0:00 |
| Rafael Natal | 1 | 14 of 25 | 56% | 14 of 25 | 0 of 0 | --- | 0 | 0 | 0:04 |
Significant Strikes
| Fighter | Sig. Str. | Sig. Str. % | Head | Body | Leg | Distance | Clinch | Ground |
|---|---|---|---|---|---|---|---|---|
| Tim Boetsch | 5 of 18 | 27% | 2 of 13 | 1 of 2 | 2 of 3 | 5 of 18 | 0 of 0 | 0 of 0 |
| Rafael Natal | 14 of 25 | 56% | 9 of 17 | 1 of 4 | 4 of 4 | 11 of 22 | 0 of 0 | 3 of 3 |
Significant Strikes Per Round
| Rd | Fighter | Sig. Str. | Sig. Str. % | Head | Body | Leg | Distance | Clinch | Ground |
|---|---|---|---|---|---|---|---|---|---|
| 1 | Tim Boetsch | 5 of 18 | 27% | 2 of 13 | 1 of 2 | 2 of 3 | 5 of 18 | 0 of 0 | 0 of 0 |
| Rafael Natal | 14 of 25 | 56% | 9 of 17 | 1 of 4 | 4 of 4 | 11 of 22 | 0 of 0 | 3 of 3 |
Totals
| Fighter | KD | Sig. Str. | Sig. Str. % | Total Str. | TD | TD % | Sub. Att | Rev. | Ctrl |
|---|---|---|---|---|---|---|---|---|---|
| Tim Boetsch | 0 | 38 of 58 | 65% | 98 of 119 | 2 of 2 | 100% | 0 | 0 | 4:22 |
| Josh Samman | 0 | 17 of 39 | 43% | 23 of 47 | 0 of 3 | 0% | 0 | 0 | 2:07 |
Per Round
| Rd | Fighter | KD | Sig. Str. | Sig. Str. % | Total Str. | TD | TD % | Sub. Att | Rev. | Ctrl |
|---|---|---|---|---|---|---|---|---|---|---|
| 1 | Tim Boetsch | 0 | 12 of 22 | 54% | 43 of 53 | 1 of 1 | 100% | 0 | 0 | 1:15 |
| Josh Samman | 0 | 13 of 33 | 39% | 19 of 41 | 0 of 3 | 0% | 0 | 0 | 2:07 | |
| 2 | Tim Boetsch | 0 | 26 of 36 | 72% | 55 of 66 | 1 of 1 | 100% | 0 | 0 | 3:07 |
| Josh Samman | 0 | 4 of 6 | 66% | 4 of 6 | 0 of 0 | --- | 0 | 0 | 0:00 |
Significant Strikes
| Fighter | Sig. Str. | Sig. Str. % | Head | Body | Leg | Distance | Clinch | Ground |
|---|---|---|---|---|---|---|---|---|
| Tim Boetsch | 38 of 58 | 65% | 28 of 46 | 9 of 11 | 1 of 1 | 6 of 16 | 8 of 11 | 24 of 31 |
| Josh Samman | 17 of 39 | 43% | 7 of 23 | 5 of 11 | 5 of 5 | 13 of 26 | 4 of 13 | 0 of 0 |
Significant Strikes Per Round
| Rd | Fighter | Sig. Str. | Sig. Str. % | Head | Body | Leg | Distance | Clinch | Ground |
|---|---|---|---|---|---|---|---|---|---|
| 1 | Tim Boetsch | 12 of 22 | 54% | 5 of 13 | 6 of 8 | 1 of 1 | 4 of 11 | 8 of 11 | 0 of 0 |
| Josh Samman | 13 of 33 | 39% | 5 of 19 | 3 of 9 | 5 of 5 | 9 of 20 | 4 of 13 | 0 of 0 | |
| 2 | Tim Boetsch | 26 of 36 | 72% | 23 of 33 | 3 of 3 | 0 of 0 | 2 of 5 | 0 of 0 | 24 of 31 |
| Josh Samman | 4 of 6 | 66% | 2 of 4 | 2 of 2 | 0 of 0 | 4 of 6 | 0 of 0 | 0 of 0 |
Totals
| Fighter | KD | Sig. Str. | Sig. Str. % | Total Str. | TD | TD % | Sub. Att | Rev. | Ctrl |
|---|---|---|---|---|---|---|---|---|---|
| Ed Herman | 0 | 27 of 64 | 42% | 32 of 69 | 0 of 0 | --- | 0 | 0 | 0:08 |
| Tim Boetsch | 1 | 47 of 82 | 57% | 56 of 91 | 0 of 0 | --- | 0 | 0 | 0:16 |
Per Round
| Rd | Fighter | KD | Sig. Str. | Sig. Str. % | Total Str. | TD | TD % | Sub. Att | Rev. | Ctrl |
|---|---|---|---|---|---|---|---|---|---|---|
| 1 | Ed Herman | 0 | 20 of 49 | 40% | 23 of 52 | 0 of 0 | --- | 0 | 0 | 0:08 |
| Tim Boetsch | 0 | 29 of 56 | 51% | 34 of 61 | 0 of 0 | --- | 0 | 0 | 0:00 | |
| 2 | Ed Herman | 0 | 7 of 15 | 46% | 9 of 17 | 0 of 0 | --- | 0 | 0 | 0:00 |
| Tim Boetsch | 1 | 18 of 26 | 69% | 22 of 30 | 0 of 0 | --- | 0 | 0 | 0:16 |
Significant Strikes
| Fighter | Sig. Str. | Sig. Str. % | Head | Body | Leg | Distance | Clinch | Ground |
|---|---|---|---|---|---|---|---|---|
| Ed Herman | 27 of 64 | 42% | 16 of 50 | 5 of 7 | 6 of 7 | 23 of 55 | 4 of 9 | 0 of 0 |
| Tim Boetsch | 47 of 82 | 57% | 31 of 63 | 7 of 10 | 9 of 9 | 28 of 58 | 16 of 21 | 3 of 3 |
Significant Strikes Per Round
| Rd | Fighter | Sig. Str. | Sig. Str. % | Head | Body | Leg | Distance | Clinch | Ground |
|---|---|---|---|---|---|---|---|---|---|
| 1 | Ed Herman | 20 of 49 | 40% | 12 of 38 | 3 of 5 | 5 of 6 | 17 of 41 | 3 of 8 | 0 of 0 |
| Tim Boetsch | 29 of 56 | 51% | 16 of 42 | 6 of 7 | 7 of 7 | 19 of 42 | 10 of 14 | 0 of 0 | |
| 2 | Ed Herman | 7 of 15 | 46% | 4 of 12 | 2 of 2 | 1 of 1 | 6 of 14 | 1 of 1 | 0 of 0 |
| Tim Boetsch | 18 of 26 | 69% | 15 of 21 | 1 of 3 | 2 of 2 | 9 of 16 | 6 of 7 | 3 of 3 |
Totals
| Fighter | KD | Sig. Str. | Sig. Str. % | Total Str. | TD | TD % | Sub. Att | Rev. | Ctrl |
|---|---|---|---|---|---|---|---|---|---|
| Dan Henderson | 0 | 3 of 6 | 50% | 3 of 6 | 0 of 0 | --- | 0 | 0 | 0:00 |
| Tim Boetsch | 1 | 12 of 15 | 80% | 12 of 15 | 0 of 0 | --- | 0 | 0 | 0:05 |
Per Round
| Rd | Fighter | KD | Sig. Str. | Sig. Str. % | Total Str. | TD | TD % | Sub. Att | Rev. | Ctrl |
|---|---|---|---|---|---|---|---|---|---|---|
| 1 | Dan Henderson | 0 | 3 of 6 | 50% | 3 of 6 | 0 of 0 | --- | 0 | 0 | 0:00 |
| Tim Boetsch | 1 | 12 of 15 | 80% | 12 of 15 | 0 of 0 | --- | 0 | 0 | 0:05 |
Significant Strikes
| Fighter | Sig. Str. | Sig. Str. % | Head | Body | Leg | Distance | Clinch | Ground |
|---|---|---|---|---|---|---|---|---|
| Dan Henderson | 3 of 6 | 50% | 3 of 5 | 0 of 1 | 0 of 0 | 3 of 6 | 0 of 0 | 0 of 0 |
| Tim Boetsch | 12 of 15 | 80% | 12 of 15 | 0 of 0 | 0 of 0 | 3 of 4 | 1 of 2 | 8 of 9 |
Significant Strikes Per Round
| Rd | Fighter | Sig. Str. | Sig. Str. % | Head | Body | Leg | Distance | Clinch | Ground |
|---|---|---|---|---|---|---|---|---|---|
| 1 | Dan Henderson | 3 of 6 | 50% | 3 of 5 | 0 of 1 | 0 of 0 | 3 of 6 | 0 of 0 | 0 of 0 |
| Tim Boetsch | 12 of 15 | 80% | 12 of 15 | 0 of 0 | 0 of 0 | 3 of 4 | 1 of 2 | 8 of 9 |
No comments yet. Be the first to share your thoughts!