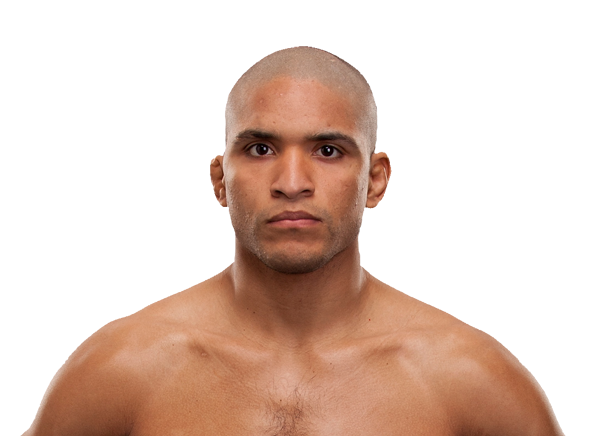
UFC 145: Jones vs. Evans ·
Apr 21, 2012 ·
Featherweight ·
Completed
Prev Fight
UFC 145: Jones vs. Evans
Career Averages - Marcus Brimage
3.97
SLpM
35.0%
Str. Acc.
3.64
SApM
56.0%
Str. Def.
0.56
TD Avg
100.0%
TD Acc.
80.0%
TD Def.
0.0
Sub. Avg
Career Averages - Maximo Blanco
4.11
SLpM
44.0%
Str. Acc.
3.19
SApM
66.0%
Str. Def.
1.85
TD Avg
36.0%
TD Acc.
63.0%
TD Def.
0.3
Sub. Avg
Marcus Brimage - Fight History
LOSS
vs
Jimmie Rivera
TKO (punches)
R1
1:29
·
UFC Fight Night: Bisping vs. Leites ·
Jul 18, 2015
Totals
| Fighter | KD | Sig. Str. | Sig. Str. % | Total Str. | TD | TD % | Sub. Att | Rev. | Ctrl |
|---|---|---|---|---|---|---|---|---|---|
| Jimmie Rivera | 0 | 9 of 17 | 52% | 9 of 17 | 0 of 0 | --- | 0 | 0 | 0:00 |
| Marcus Brimage | 1 | 15 of 27 | 55% | 15 of 27 | 0 of 0 | --- | 0 | 0 | 0:01 |
Per Round
| Rd | Fighter | KD | Sig. Str. | Sig. Str. % | Total Str. | TD | TD % | Sub. Att | Rev. | Ctrl |
|---|---|---|---|---|---|---|---|---|---|---|
| 1 | Jimmie Rivera | 0 | 9 of 17 | 52% | 9 of 17 | 0 of 0 | --- | 0 | 0 | 0:00 |
| Marcus Brimage | 1 | 15 of 27 | 55% | 15 of 27 | 0 of 0 | --- | 0 | 0 | 0:01 |
Significant Strikes
| Fighter | Sig. Str. | Sig. Str. % | Head | Body | Leg | Distance | Clinch | Ground |
|---|---|---|---|---|---|---|---|---|
| Jimmie Rivera | 9 of 17 | 52% | 4 of 12 | 4 of 4 | 1 of 1 | 9 of 17 | 0 of 0 | 0 of 0 |
| Marcus Brimage | 15 of 27 | 55% | 10 of 20 | 3 of 5 | 2 of 2 | 14 of 26 | 0 of 0 | 1 of 1 |
Significant Strikes Per Round
| Rd | Fighter | Sig. Str. | Sig. Str. % | Head | Body | Leg | Distance | Clinch | Ground |
|---|---|---|---|---|---|---|---|---|---|
| 1 | Jimmie Rivera | 9 of 17 | 52% | 4 of 12 | 4 of 4 | 1 of 1 | 9 of 17 | 0 of 0 | 0 of 0 |
| Marcus Brimage | 15 of 27 | 55% | 10 of 20 | 3 of 5 | 2 of 2 | 14 of 26 | 0 of 0 | 1 of 1 |
LOSS
vs
Cody Garbrandt
TKO (punches)
R3
4:50
·
UFC 182: Jones vs. Cormier ·
Jan 03, 2015
Totals
| Fighter | KD | Sig. Str. | Sig. Str. % | Total Str. | TD | TD % | Sub. Att | Rev. | Ctrl |
|---|---|---|---|---|---|---|---|---|---|
| Cody Garbrandt | 0 | 43 of 132 | 32% | 48 of 137 | 0 of 0 | --- | 0 | 0 | 0:17 |
| Marcus Brimage | 2 | 49 of 134 | 36% | 50 of 135 | 1 of 3 | 33% | 0 | 0 | 0:29 |
Per Round
| Rd | Fighter | KD | Sig. Str. | Sig. Str. % | Total Str. | TD | TD % | Sub. Att | Rev. | Ctrl |
|---|---|---|---|---|---|---|---|---|---|---|
| 1 | Cody Garbrandt | 0 | 9 of 32 | 28% | 9 of 32 | 0 of 0 | --- | 0 | 0 | 0:00 |
| Marcus Brimage | 0 | 11 of 35 | 31% | 12 of 36 | 1 of 1 | 100% | 0 | 0 | 0:25 | |
| 2 | Cody Garbrandt | 0 | 18 of 56 | 32% | 18 of 56 | 0 of 0 | --- | 0 | 0 | 0:00 |
| Marcus Brimage | 0 | 14 of 46 | 30% | 14 of 46 | 0 of 1 | 0% | 0 | 0 | 0:00 | |
| 3 | Cody Garbrandt | 0 | 16 of 44 | 36% | 21 of 49 | 0 of 0 | --- | 0 | 0 | 0:17 |
| Marcus Brimage | 2 | 24 of 53 | 45% | 24 of 53 | 0 of 1 | 0% | 0 | 0 | 0:04 |
Significant Strikes
| Fighter | Sig. Str. | Sig. Str. % | Head | Body | Leg | Distance | Clinch | Ground |
|---|---|---|---|---|---|---|---|---|
| Cody Garbrandt | 43 of 132 | 32% | 24 of 100 | 11 of 23 | 8 of 9 | 42 of 129 | 1 of 3 | 0 of 0 |
| Marcus Brimage | 49 of 134 | 36% | 42 of 122 | 5 of 8 | 2 of 4 | 45 of 125 | 0 of 2 | 4 of 7 |
Significant Strikes Per Round
| Rd | Fighter | Sig. Str. | Sig. Str. % | Head | Body | Leg | Distance | Clinch | Ground |
|---|---|---|---|---|---|---|---|---|---|
| 1 | Cody Garbrandt | 9 of 32 | 28% | 3 of 23 | 2 of 4 | 4 of 5 | 9 of 32 | 0 of 0 | 0 of 0 |
| Marcus Brimage | 11 of 35 | 31% | 10 of 32 | 0 of 0 | 1 of 3 | 10 of 33 | 0 of 0 | 1 of 2 | |
| 2 | Cody Garbrandt | 18 of 56 | 32% | 13 of 47 | 4 of 8 | 1 of 1 | 17 of 53 | 1 of 3 | 0 of 0 |
| Marcus Brimage | 14 of 46 | 30% | 11 of 41 | 2 of 4 | 1 of 1 | 14 of 45 | 0 of 1 | 0 of 0 | |
| 3 | Cody Garbrandt | 16 of 44 | 36% | 8 of 30 | 5 of 11 | 3 of 3 | 16 of 44 | 0 of 0 | 0 of 0 |
| Marcus Brimage | 24 of 53 | 45% | 21 of 49 | 3 of 4 | 0 of 0 | 21 of 47 | 0 of 1 | 3 of 5 |
Play-by-Play
View on SherdogMarcus Brimage vs. Cody Garbrandt
Round 1
Garbrandt slaps up high with a pair of head kicks while the southpaw Brimage stays on the outside, pumping his jab and looking for an entrance. An inside low kick catches Garbrandt square on the cup, but the Team Alpha Male fighter is quick to recover and lands a quick hook that puts Brimage off-balance soon after they resume. The bantamweights trade hooks in close quarters, then Garbrandt deflects a high kick from Brimage. Leaping into the air, Garbrandt misses on a flying knee but comes out unscathed as Brimage gets turned around. Brimage tags the incoming Garbrandt with a left hand on the next exchange, but then another low kick hits Garbrandt on the cup. Referee Herb Dean gives Brimage another warning, and the fight soon gets going again. Garbrandt opens up with strikes and seems to hurt Brimage with punches against the fence, but the round ends in the middle of the exchange.
Sherdog Scores
Jordan Breen scores the round 10-9 Garbrandt
Chris Nelson scores the round 10-9 Garbrandt
Jeff Sherwood scores the round 10-9 Garbrandt
Round 2
Brimage ducks under a high kick and blitzes Garbrandt with punches, but not many in the flurry appear to connect and Garbrandt circles out to the center of the cage, seemingly unscathed. Garbrandt steps into range with a hard left hand, then counters Brimage’s next combo with a sweeping right. Brimage times a low kick and catches Garbrandt upstairs with a left hook. Garbrandt lands a left, raises his right hand and lands it again, but Brimage connects with one of his own simultaneously. Midway through the round, Brimage cracks Garbrandt with a high left hook, then tries a Superman punch and catches only air. The pace slows in the latter half of the round, the 135ers circling and feinting. Brimage is finding the mark with his left hand when he throws it, but his combos come up short when he tries to chase down Garbrandt. The Team Alpha Male fighters slips throwing a kick in the last 20 seconds but Brimage can’t capitalize before Garbrandt pops back to his feet.
Sherdog Scores
Jordan Breen scores the round 10-9 Garbrandt
Chris Nelson scores the round 10-9 Garbrandt
Jeff Sherwood scores the round 10-9 Brimage
Round 3
Brimage whips a right hand up top and lands it to counter a Garbrandt low kick as the bantamweights fight near the fence. “The Bama Beast” puts a left hook on Garbrandt’s body, then eats an uppercut as he tries to step into range with his head down. Garbrandt throws a kick and has it caught by Brimage, who dumps Garbrandt to the ground and follows him down. As soon as Garbrandt threatens with a triangle choke, Brimage lifts him to slam and escapes back to his feet as Garbrandt releases. Garbrandt puts a kick on the body of Brimage, who answers with a straight right. A left hook from Garbrandt causes a mouse to pop up on Brimage’s right eye, and Garbrandt adds an uppercut soon after. Garbrandt shuts down a takedown attempt. As Brimage chases after him with strikes, Garbrandt drops him with a three-punch combination. Brimage gets back to his feet in a daze, staggering around the cage while Garbrandt tries to tee him up for the homerun shot. Garbrandt connects with another combo that sends Brimage back to the mat, and now referee Dean steps in to rescue Brimage from further damage.
The Official Result
Cody Garbrandt def. Marcus Brimage via TKO (Punches) R3 4:50
Round 1
Garbrandt slaps up high with a pair of head kicks while the southpaw Brimage stays on the outside, pumping his jab and looking for an entrance. An inside low kick catches Garbrandt square on the cup, but the Team Alpha Male fighter is quick to recover and lands a quick hook that puts Brimage off-balance soon after they resume. The bantamweights trade hooks in close quarters, then Garbrandt deflects a high kick from Brimage. Leaping into the air, Garbrandt misses on a flying knee but comes out unscathed as Brimage gets turned around. Brimage tags the incoming Garbrandt with a left hand on the next exchange, but then another low kick hits Garbrandt on the cup. Referee Herb Dean gives Brimage another warning, and the fight soon gets going again. Garbrandt opens up with strikes and seems to hurt Brimage with punches against the fence, but the round ends in the middle of the exchange.
Sherdog Scores
Jordan Breen scores the round 10-9 Garbrandt
Chris Nelson scores the round 10-9 Garbrandt
Jeff Sherwood scores the round 10-9 Garbrandt
Round 2
Brimage ducks under a high kick and blitzes Garbrandt with punches, but not many in the flurry appear to connect and Garbrandt circles out to the center of the cage, seemingly unscathed. Garbrandt steps into range with a hard left hand, then counters Brimage’s next combo with a sweeping right. Brimage times a low kick and catches Garbrandt upstairs with a left hook. Garbrandt lands a left, raises his right hand and lands it again, but Brimage connects with one of his own simultaneously. Midway through the round, Brimage cracks Garbrandt with a high left hook, then tries a Superman punch and catches only air. The pace slows in the latter half of the round, the 135ers circling and feinting. Brimage is finding the mark with his left hand when he throws it, but his combos come up short when he tries to chase down Garbrandt. The Team Alpha Male fighters slips throwing a kick in the last 20 seconds but Brimage can’t capitalize before Garbrandt pops back to his feet.
Sherdog Scores
Jordan Breen scores the round 10-9 Garbrandt
Chris Nelson scores the round 10-9 Garbrandt
Jeff Sherwood scores the round 10-9 Brimage
Round 3
Brimage whips a right hand up top and lands it to counter a Garbrandt low kick as the bantamweights fight near the fence. “The Bama Beast” puts a left hook on Garbrandt’s body, then eats an uppercut as he tries to step into range with his head down. Garbrandt throws a kick and has it caught by Brimage, who dumps Garbrandt to the ground and follows him down. As soon as Garbrandt threatens with a triangle choke, Brimage lifts him to slam and escapes back to his feet as Garbrandt releases. Garbrandt puts a kick on the body of Brimage, who answers with a straight right. A left hook from Garbrandt causes a mouse to pop up on Brimage’s right eye, and Garbrandt adds an uppercut soon after. Garbrandt shuts down a takedown attempt. As Brimage chases after him with strikes, Garbrandt drops him with a three-punch combination. Brimage gets back to his feet in a daze, staggering around the cage while Garbrandt tries to tee him up for the homerun shot. Garbrandt connects with another combo that sends Brimage back to the mat, and now referee Dean steps in to rescue Brimage from further damage.
The Official Result
Cody Garbrandt def. Marcus Brimage via TKO (Punches) R3 4:50
WIN
vs
Jumabieke Tuerxun
KO (head kick)
R1
2:58
·
UFC Fight Night: Rockhold vs. Bisping ·
Nov 08, 2014
Totals
| Fighter | KD | Sig. Str. | Sig. Str. % | Total Str. | TD | TD % | Sub. Att | Rev. | Ctrl |
|---|---|---|---|---|---|---|---|---|---|
| Marcus Brimage | 0 | 6 of 15 | 40% | 6 of 15 | 0 of 0 | --- | 0 | 0 | 0:00 |
| Jumabieke Tuerxun | 1 | 5 of 16 | 31% | 6 of 17 | 0 of 0 | --- | 0 | 0 | 0:02 |
Per Round
| Rd | Fighter | KD | Sig. Str. | Sig. Str. % | Total Str. | TD | TD % | Sub. Att | Rev. | Ctrl |
|---|---|---|---|---|---|---|---|---|---|---|
| 1 | Marcus Brimage | 0 | 6 of 15 | 40% | 6 of 15 | 0 of 0 | --- | 0 | 0 | 0:00 |
| Jumabieke Tuerxun | 1 | 5 of 16 | 31% | 6 of 17 | 0 of 0 | --- | 0 | 0 | 0:02 |
Significant Strikes
| Fighter | Sig. Str. | Sig. Str. % | Head | Body | Leg | Distance | Clinch | Ground |
|---|---|---|---|---|---|---|---|---|
| Marcus Brimage | 6 of 15 | 40% | 1 of 7 | 2 of 2 | 3 of 6 | 6 of 15 | 0 of 0 | 0 of 0 |
| Jumabieke Tuerxun | 5 of 16 | 31% | 3 of 10 | 0 of 1 | 2 of 5 | 4 of 14 | 0 of 0 | 1 of 2 |
Significant Strikes Per Round
| Rd | Fighter | Sig. Str. | Sig. Str. % | Head | Body | Leg | Distance | Clinch | Ground |
|---|---|---|---|---|---|---|---|---|---|
| 1 | Marcus Brimage | 6 of 15 | 40% | 1 of 7 | 2 of 2 | 3 of 6 | 6 of 15 | 0 of 0 | 0 of 0 |
| Jumabieke Tuerxun | 5 of 16 | 31% | 3 of 10 | 0 of 1 | 2 of 5 | 4 of 14 | 0 of 0 | 1 of 2 |
LOSS
vs
Russell Doane
Decision (split) (29–28, 28–29, 30–27)
R3
5:00
·
UFC 175: Weidman vs. Machida ·
Jul 05, 2014
Totals
| Fighter | KD | Sig. Str. | Sig. Str. % | Total Str. | TD | TD % | Sub. Att | Rev. | Ctrl |
|---|---|---|---|---|---|---|---|---|---|
| Russell Doane | 0 | 27 of 75 | 36% | 33 of 81 | 2 of 2 | 100% | 0 | 0 | 0:31 |
| Marcus Brimage | 0 | 24 of 72 | 33% | 37 of 86 | 3 of 9 | 33% | 0 | 0 | 4:37 |
Per Round
| Rd | Fighter | KD | Sig. Str. | Sig. Str. % | Total Str. | TD | TD % | Sub. Att | Rev. | Ctrl |
|---|---|---|---|---|---|---|---|---|---|---|
| 1 | Russell Doane | 0 | 3 of 22 | 13% | 3 of 22 | 0 of 0 | --- | 0 | 0 | 0:00 |
| Marcus Brimage | 0 | 8 of 19 | 42% | 14 of 25 | 1 of 1 | 100% | 0 | 0 | 3:02 | |
| 2 | Russell Doane | 0 | 13 of 27 | 48% | 18 of 32 | 0 of 0 | --- | 0 | 0 | 0:16 |
| Marcus Brimage | 0 | 7 of 19 | 36% | 14 of 27 | 2 of 6 | 33% | 0 | 0 | 1:35 | |
| 3 | Russell Doane | 0 | 11 of 26 | 42% | 12 of 27 | 2 of 2 | 100% | 0 | 0 | 0:15 |
| Marcus Brimage | 0 | 9 of 34 | 26% | 9 of 34 | 0 of 2 | 0% | 0 | 0 | 0:00 |
Significant Strikes
| Fighter | Sig. Str. | Sig. Str. % | Head | Body | Leg | Distance | Clinch | Ground |
|---|---|---|---|---|---|---|---|---|
| Russell Doane | 27 of 75 | 36% | 9 of 52 | 2 of 3 | 16 of 20 | 24 of 71 | 3 of 4 | 0 of 0 |
| Marcus Brimage | 24 of 72 | 33% | 15 of 62 | 8 of 9 | 1 of 1 | 14 of 62 | 5 of 5 | 5 of 5 |
Significant Strikes Per Round
| Rd | Fighter | Sig. Str. | Sig. Str. % | Head | Body | Leg | Distance | Clinch | Ground |
|---|---|---|---|---|---|---|---|---|---|
| 1 | Russell Doane | 3 of 22 | 13% | 0 of 16 | 0 of 1 | 3 of 5 | 3 of 22 | 0 of 0 | 0 of 0 |
| Marcus Brimage | 8 of 19 | 42% | 6 of 17 | 2 of 2 | 0 of 0 | 4 of 15 | 0 of 0 | 4 of 4 | |
| 2 | Russell Doane | 13 of 27 | 48% | 6 of 19 | 1 of 1 | 6 of 7 | 10 of 23 | 3 of 4 | 0 of 0 |
| Marcus Brimage | 7 of 19 | 36% | 2 of 14 | 4 of 4 | 1 of 1 | 3 of 15 | 3 of 3 | 1 of 1 | |
| 3 | Russell Doane | 11 of 26 | 42% | 3 of 17 | 1 of 1 | 7 of 8 | 11 of 26 | 0 of 0 | 0 of 0 |
| Marcus Brimage | 9 of 34 | 26% | 7 of 31 | 2 of 3 | 0 of 0 | 7 of 32 | 2 of 2 | 0 of 0 |
LOSS
vs
Conor McGregor
TKO (punches)
R1
1:07
·
UFC on Fuel TV: Mousasi vs. Latifi ·
Apr 06, 2013
Totals
| Fighter | KD | Sig. Str. | Sig. Str. % | Total Str. | TD | TD % | Sub. Att | Rev. | Ctrl |
|---|---|---|---|---|---|---|---|---|---|
| Conor McGregor | 0 | 12 of 41 | 29% | 12 of 41 | 0 of 0 | --- | 0 | 0 | 0:00 |
| Marcus Brimage | 1 | 21 of 35 | 60% | 22 of 36 | 0 of 0 | --- | 0 | 0 | 0:05 |
Per Round
| Rd | Fighter | KD | Sig. Str. | Sig. Str. % | Total Str. | TD | TD % | Sub. Att | Rev. | Ctrl |
|---|---|---|---|---|---|---|---|---|---|---|
| 1 | Conor McGregor | 0 | 12 of 41 | 29% | 12 of 41 | 0 of 0 | --- | 0 | 0 | 0:00 |
| Marcus Brimage | 1 | 21 of 35 | 60% | 22 of 36 | 0 of 0 | --- | 0 | 0 | 0:05 |
Significant Strikes
| Fighter | Sig. Str. | Sig. Str. % | Head | Body | Leg | Distance | Clinch | Ground |
|---|---|---|---|---|---|---|---|---|
| Conor McGregor | 12 of 41 | 29% | 7 of 34 | 2 of 2 | 3 of 5 | 12 of 41 | 0 of 0 | 0 of 0 |
| Marcus Brimage | 21 of 35 | 60% | 20 of 34 | 1 of 1 | 0 of 0 | 16 of 29 | 0 of 0 | 5 of 6 |
Significant Strikes Per Round
| Rd | Fighter | Sig. Str. | Sig. Str. % | Head | Body | Leg | Distance | Clinch | Ground |
|---|---|---|---|---|---|---|---|---|---|
| 1 | Conor McGregor | 12 of 41 | 29% | 7 of 34 | 2 of 2 | 3 of 5 | 12 of 41 | 0 of 0 | 0 of 0 |
| Marcus Brimage | 21 of 35 | 60% | 20 of 34 | 1 of 1 | 0 of 0 | 16 of 29 | 0 of 0 | 5 of 6 |
Play-by-Play
View on SherdogMarcus Brimage vs. Conor McGregor
Round 1
There’s no touch of gloves as Brimage comes straight at McGregor, swinging overhand punches at the taller man. McGregor breaks up the momentum with a hard uppercut, then makes Brimage think twice about coming in with a left hook. Another pair of uppercuts have Brimage hitting the deck, where McGregor pounds away with thunderous punches until referee Robert Sundel is forced to intervene. Conor McGregor needs just 67 seconds to win his UFC debut in impressive fashion.
Round 1
There’s no touch of gloves as Brimage comes straight at McGregor, swinging overhand punches at the taller man. McGregor breaks up the momentum with a hard uppercut, then makes Brimage think twice about coming in with a left hook. Another pair of uppercuts have Brimage hitting the deck, where McGregor pounds away with thunderous punches until referee Robert Sundel is forced to intervene. Conor McGregor needs just 67 seconds to win his UFC debut in impressive fashion.
WIN
vs
Jimy Hettes
Decision (unanimous) (29–28, 29–28, 29–28)
R3
5:00
·
UFC 152: Jones vs. Belfort ·
Sep 22, 2012
Totals
| Fighter | KD | Sig. Str. | Sig. Str. % | Total Str. | TD | TD % | Sub. Att | Rev. | Ctrl |
|---|---|---|---|---|---|---|---|---|---|
| Marcus Brimage | 0 | 87 of 175 | 49% | 113 of 204 | 2 of 9 | 22% | 0 | 0 | 2:35 |
| Jimy Hettes | 1 | 111 of 282 | 39% | 120 of 294 | 0 of 0 | --- | 0 | 0 | 0:16 |
Per Round
| Rd | Fighter | KD | Sig. Str. | Sig. Str. % | Total Str. | TD | TD % | Sub. Att | Rev. | Ctrl |
|---|---|---|---|---|---|---|---|---|---|---|
| 1 | Marcus Brimage | 0 | 31 of 69 | 44% | 32 of 70 | 0 of 3 | 0% | 0 | 0 | 0:00 |
| Jimy Hettes | 1 | 50 of 128 | 39% | 57 of 136 | 0 of 0 | --- | 0 | 0 | 0:13 | |
| 2 | Marcus Brimage | 0 | 24 of 40 | 60% | 48 of 66 | 2 of 4 | 50% | 0 | 0 | 2:35 |
| Jimy Hettes | 0 | 16 of 52 | 30% | 18 of 56 | 0 of 0 | --- | 0 | 0 | 0:03 | |
| 3 | Marcus Brimage | 0 | 32 of 66 | 48% | 33 of 68 | 0 of 2 | 0% | 0 | 0 | 0:00 |
| Jimy Hettes | 0 | 45 of 102 | 44% | 45 of 102 | 0 of 0 | --- | 0 | 0 | 0:00 |
Significant Strikes
| Fighter | Sig. Str. | Sig. Str. % | Head | Body | Leg | Distance | Clinch | Ground |
|---|---|---|---|---|---|---|---|---|
| Marcus Brimage | 87 of 175 | 49% | 81 of 169 | 4 of 4 | 2 of 2 | 78 of 164 | 4 of 5 | 5 of 6 |
| Jimy Hettes | 111 of 282 | 39% | 52 of 179 | 49 of 93 | 10 of 10 | 105 of 268 | 5 of 10 | 1 of 4 |
Significant Strikes Per Round
| Rd | Fighter | Sig. Str. | Sig. Str. % | Head | Body | Leg | Distance | Clinch | Ground |
|---|---|---|---|---|---|---|---|---|---|
| 1 | Marcus Brimage | 31 of 69 | 44% | 27 of 65 | 3 of 3 | 1 of 1 | 28 of 65 | 3 of 4 | 0 of 0 |
| Jimy Hettes | 50 of 128 | 39% | 24 of 75 | 24 of 51 | 2 of 2 | 47 of 120 | 2 of 4 | 1 of 4 | |
| 2 | Marcus Brimage | 24 of 40 | 60% | 23 of 39 | 0 of 0 | 1 of 1 | 19 of 34 | 0 of 0 | 5 of 6 |
| Jimy Hettes | 16 of 52 | 30% | 6 of 38 | 10 of 14 | 0 of 0 | 13 of 46 | 3 of 6 | 0 of 0 | |
| 3 | Marcus Brimage | 32 of 66 | 48% | 31 of 65 | 1 of 1 | 0 of 0 | 31 of 65 | 1 of 1 | 0 of 0 |
| Jimy Hettes | 45 of 102 | 44% | 22 of 66 | 15 of 28 | 8 of 8 | 45 of 102 | 0 of 0 | 0 of 0 |
WIN
vs
Maximo Blanco
Decision (split) (28–29, 30–27, 29–28)
R3
5:00
·
UFC 145: Jones vs. Evans ·
Apr 21, 2012
Totals
| Fighter | KD | Sig. Str. | Sig. Str. % | Total Str. | TD | TD % | Sub. Att | Rev. | Ctrl |
|---|---|---|---|---|---|---|---|---|---|
| Marcus Brimage | 0 | 24 of 136 | 17% | 24 of 136 | 0 of 0 | --- | 0 | 0 | 0:01 |
| Maximo Blanco | 0 | 18 of 78 | 23% | 18 of 78 | 0 of 3 | 0% | 0 | 0 | 0:01 |
Per Round
| Rd | Fighter | KD | Sig. Str. | Sig. Str. % | Total Str. | TD | TD % | Sub. Att | Rev. | Ctrl |
|---|---|---|---|---|---|---|---|---|---|---|
| 1 | Marcus Brimage | 0 | 8 of 42 | 19% | 8 of 42 | 0 of 0 | --- | 0 | 0 | 0:00 |
| Maximo Blanco | 0 | 6 of 22 | 27% | 6 of 22 | 0 of 1 | 0% | 0 | 0 | 0:01 | |
| 2 | Marcus Brimage | 0 | 6 of 43 | 13% | 6 of 43 | 0 of 0 | --- | 0 | 0 | 0:01 |
| Maximo Blanco | 0 | 6 of 26 | 23% | 6 of 26 | 0 of 0 | --- | 0 | 0 | 0:00 | |
| 3 | Marcus Brimage | 0 | 10 of 51 | 19% | 10 of 51 | 0 of 0 | --- | 0 | 0 | 0:00 |
| Maximo Blanco | 0 | 6 of 30 | 20% | 6 of 30 | 0 of 2 | 0% | 0 | 0 | 0:00 |
Significant Strikes
| Fighter | Sig. Str. | Sig. Str. % | Head | Body | Leg | Distance | Clinch | Ground |
|---|---|---|---|---|---|---|---|---|
| Marcus Brimage | 24 of 136 | 17% | 15 of 108 | 2 of 11 | 7 of 17 | 24 of 132 | 0 of 3 | 0 of 1 |
| Maximo Blanco | 18 of 78 | 23% | 9 of 59 | 4 of 10 | 5 of 9 | 17 of 74 | 1 of 3 | 0 of 1 |
Significant Strikes Per Round
| Rd | Fighter | Sig. Str. | Sig. Str. % | Head | Body | Leg | Distance | Clinch | Ground |
|---|---|---|---|---|---|---|---|---|---|
| 1 | Marcus Brimage | 8 of 42 | 19% | 6 of 36 | 1 of 2 | 1 of 4 | 8 of 41 | 0 of 1 | 0 of 0 |
| Maximo Blanco | 6 of 22 | 27% | 3 of 16 | 0 of 3 | 3 of 3 | 6 of 20 | 0 of 2 | 0 of 0 | |
| 2 | Marcus Brimage | 6 of 43 | 13% | 4 of 31 | 0 of 5 | 2 of 7 | 6 of 42 | 0 of 0 | 0 of 1 |
| Maximo Blanco | 6 of 26 | 23% | 3 of 19 | 2 of 3 | 1 of 4 | 6 of 26 | 0 of 0 | 0 of 0 | |
| 3 | Marcus Brimage | 10 of 51 | 19% | 5 of 41 | 1 of 4 | 4 of 6 | 10 of 49 | 0 of 2 | 0 of 0 |
| Maximo Blanco | 6 of 30 | 20% | 3 of 24 | 2 of 4 | 1 of 2 | 5 of 28 | 1 of 1 | 0 of 1 |
WIN
vs
Stephen Bass
Decision (unanimous) (30–27, 30–27, 29–28)
R3
5:00
·
The Ultimate Fighter: Team Bisping vs. Team Miller Finale ·
Dec 03, 2011
Totals
| Fighter | KD | Sig. Str. | Sig. Str. % | Total Str. | TD | TD % | Sub. Att | Rev. | Ctrl |
|---|---|---|---|---|---|---|---|---|---|
| Marcus Brimage | 0 | 88 of 197 | 44% | 99 of 211 | 1 of 1 | 100% | 0 | 0 | 0:41 |
| Stephen Bass | 0 | 73 of 140 | 52% | 78 of 145 | 0 of 6 | 0% | 0 | 0 | 0:24 |
Per Round
| Rd | Fighter | KD | Sig. Str. | Sig. Str. % | Total Str. | TD | TD % | Sub. Att | Rev. | Ctrl |
|---|---|---|---|---|---|---|---|---|---|---|
| 1 | Marcus Brimage | 0 | 34 of 62 | 54% | 45 of 76 | 0 of 0 | --- | 0 | 0 | 0:22 |
| Stephen Bass | 0 | 24 of 32 | 75% | 25 of 33 | 0 of 2 | 0% | 0 | 0 | 0:16 | |
| 2 | Marcus Brimage | 0 | 24 of 57 | 42% | 24 of 57 | 0 of 0 | --- | 0 | 0 | 0:04 |
| Stephen Bass | 0 | 16 of 45 | 35% | 17 of 46 | 0 of 3 | 0% | 0 | 0 | 0:06 | |
| 3 | Marcus Brimage | 0 | 30 of 78 | 38% | 30 of 78 | 1 of 1 | 100% | 0 | 0 | 0:15 |
| Stephen Bass | 0 | 33 of 63 | 52% | 36 of 66 | 0 of 1 | 0% | 0 | 0 | 0:02 |
Significant Strikes
| Fighter | Sig. Str. | Sig. Str. % | Head | Body | Leg | Distance | Clinch | Ground |
|---|---|---|---|---|---|---|---|---|
| Marcus Brimage | 88 of 197 | 44% | 61 of 159 | 13 of 21 | 14 of 17 | 79 of 181 | 9 of 16 | 0 of 0 |
| Stephen Bass | 73 of 140 | 52% | 39 of 101 | 24 of 26 | 10 of 13 | 59 of 126 | 13 of 13 | 1 of 1 |
Significant Strikes Per Round
| Rd | Fighter | Sig. Str. | Sig. Str. % | Head | Body | Leg | Distance | Clinch | Ground |
|---|---|---|---|---|---|---|---|---|---|
| 1 | Marcus Brimage | 34 of 62 | 54% | 24 of 51 | 5 of 5 | 5 of 6 | 25 of 49 | 9 of 13 | 0 of 0 |
| Stephen Bass | 24 of 32 | 75% | 8 of 16 | 12 of 12 | 4 of 4 | 14 of 22 | 10 of 10 | 0 of 0 | |
| 2 | Marcus Brimage | 24 of 57 | 42% | 15 of 44 | 2 of 5 | 7 of 8 | 24 of 55 | 0 of 2 | 0 of 0 |
| Stephen Bass | 16 of 45 | 35% | 8 of 34 | 5 of 5 | 3 of 6 | 13 of 42 | 3 of 3 | 0 of 0 | |
| 3 | Marcus Brimage | 30 of 78 | 38% | 22 of 64 | 6 of 11 | 2 of 3 | 30 of 77 | 0 of 1 | 0 of 0 |
| Stephen Bass | 33 of 63 | 52% | 23 of 51 | 7 of 9 | 3 of 3 | 32 of 62 | 0 of 0 | 1 of 1 |
Maximo Blanco - Fight History
LOSS
vs
Chas Skelly
Technical Submission (anaconda choke)
R1
0:19
·
UFC Fight Night: Poirier vs. Johnson ·
Sep 17, 2016
Totals
| Fighter | KD | Sig. Str. | Sig. Str. % | Total Str. | TD | TD % | Sub. Att | Rev. | Ctrl |
|---|---|---|---|---|---|---|---|---|---|
| Chas Skelly | 0 | 1 of 1 | 100% | 1 of 1 | 0 of 0 | --- | 1 | 0 | 0:11 |
| Maximo Blanco | 0 | 0 of 1 | 0% | 0 of 1 | 0 of 0 | --- | 0 | 0 | 0:00 |
Per Round
| Rd | Fighter | KD | Sig. Str. | Sig. Str. % | Total Str. | TD | TD % | Sub. Att | Rev. | Ctrl |
|---|---|---|---|---|---|---|---|---|---|---|
| 1 | Chas Skelly | 0 | 1 of 1 | 100% | 1 of 1 | 0 of 0 | --- | 1 | 0 | 0:11 |
| Maximo Blanco | 0 | 0 of 1 | 0% | 0 of 1 | 0 of 0 | --- | 0 | 0 | 0:00 |
Significant Strikes
| Fighter | Sig. Str. | Sig. Str. % | Head | Body | Leg | Distance | Clinch | Ground |
|---|---|---|---|---|---|---|---|---|
| Chas Skelly | 1 of 1 | 100% | 0 of 0 | 1 of 1 | 0 of 0 | 1 of 1 | 0 of 0 | 0 of 0 |
| Maximo Blanco | 0 of 1 | 0% | 0 of 0 | 0 of 1 | 0 of 0 | 0 of 1 | 0 of 0 | 0 of 0 |
Significant Strikes Per Round
| Rd | Fighter | Sig. Str. | Sig. Str. % | Head | Body | Leg | Distance | Clinch | Ground |
|---|---|---|---|---|---|---|---|---|---|
| 1 | Chas Skelly | 1 of 1 | 100% | 0 of 0 | 1 of 1 | 0 of 0 | 1 of 1 | 0 of 0 | 0 of 0 |
| Maximo Blanco | 0 of 1 | 0% | 0 of 0 | 0 of 1 | 0 of 0 | 0 of 1 | 0 of 0 | 0 of 0 |
LOSS
vs
Luke Sanders
Submission (rear-naked choke)
R1
3:38
·
UFC Fight Night: Dillashaw vs. Cruz ·
Jan 17, 2016
Totals
| Fighter | KD | Sig. Str. | Sig. Str. % | Total Str. | TD | TD % | Sub. Att | Rev. | Ctrl |
|---|---|---|---|---|---|---|---|---|---|
| Luke Sanders | 0 | 16 of 39 | 41% | 17 of 40 | 1 of 1 | 100% | 1 | 0 | 0:29 |
| Maximo Blanco | 1 | 26 of 48 | 54% | 27 of 49 | 0 of 0 | --- | 1 | 0 | 0:12 |
Per Round
| Rd | Fighter | KD | Sig. Str. | Sig. Str. % | Total Str. | TD | TD % | Sub. Att | Rev. | Ctrl |
|---|---|---|---|---|---|---|---|---|---|---|
| 1 | Luke Sanders | 0 | 16 of 39 | 41% | 17 of 40 | 1 of 1 | 100% | 1 | 0 | 0:29 |
| Maximo Blanco | 1 | 26 of 48 | 54% | 27 of 49 | 0 of 0 | --- | 1 | 0 | 0:12 |
Significant Strikes
| Fighter | Sig. Str. | Sig. Str. % | Head | Body | Leg | Distance | Clinch | Ground |
|---|---|---|---|---|---|---|---|---|
| Luke Sanders | 16 of 39 | 41% | 2 of 25 | 7 of 7 | 7 of 7 | 16 of 37 | 0 of 1 | 0 of 1 |
| Maximo Blanco | 26 of 48 | 54% | 21 of 42 | 1 of 1 | 4 of 5 | 24 of 43 | 0 of 3 | 2 of 2 |
Significant Strikes Per Round
| Rd | Fighter | Sig. Str. | Sig. Str. % | Head | Body | Leg | Distance | Clinch | Ground |
|---|---|---|---|---|---|---|---|---|---|
| 1 | Luke Sanders | 16 of 39 | 41% | 2 of 25 | 7 of 7 | 7 of 7 | 16 of 37 | 0 of 1 | 0 of 1 |
| Maximo Blanco | 26 of 48 | 54% | 21 of 42 | 1 of 1 | 4 of 5 | 24 of 43 | 0 of 3 | 2 of 2 |
WIN
vs
Mike De La Torre
TKO (punches)
R1
0:16
·
The Ultimate Fighter: American Top Team vs. Blackzilians Finale ·
Jul 12, 2015
Totals
| Fighter | KD | Sig. Str. | Sig. Str. % | Total Str. | TD | TD % | Sub. Att | Rev. | Ctrl |
|---|---|---|---|---|---|---|---|---|---|
| Maximo Blanco | 1 | 4 of 7 | 57% | 4 of 7 | 0 of 0 | --- | 0 | 0 | 0:01 |
| Mike De La Torre | 0 | 1 of 5 | 20% | 1 of 5 | 0 of 0 | --- | 0 | 0 | 0:00 |
Per Round
| Rd | Fighter | KD | Sig. Str. | Sig. Str. % | Total Str. | TD | TD % | Sub. Att | Rev. | Ctrl |
|---|---|---|---|---|---|---|---|---|---|---|
| 1 | Maximo Blanco | 1 | 4 of 7 | 57% | 4 of 7 | 0 of 0 | --- | 0 | 0 | 0:01 |
| Mike De La Torre | 0 | 1 of 5 | 20% | 1 of 5 | 0 of 0 | --- | 0 | 0 | 0:00 |
Significant Strikes
| Fighter | Sig. Str. | Sig. Str. % | Head | Body | Leg | Distance | Clinch | Ground |
|---|---|---|---|---|---|---|---|---|
| Maximo Blanco | 4 of 7 | 57% | 3 of 6 | 1 of 1 | 0 of 0 | 4 of 7 | 0 of 0 | 0 of 0 |
| Mike De La Torre | 1 of 5 | 20% | 0 of 3 | 1 of 2 | 0 of 0 | 1 of 5 | 0 of 0 | 0 of 0 |
Significant Strikes Per Round
| Rd | Fighter | Sig. Str. | Sig. Str. % | Head | Body | Leg | Distance | Clinch | Ground |
|---|---|---|---|---|---|---|---|---|---|
| 1 | Maximo Blanco | 4 of 7 | 57% | 3 of 6 | 1 of 1 | 0 of 0 | 4 of 7 | 0 of 0 | 0 of 0 |
| Mike De La Torre | 1 of 5 | 20% | 0 of 3 | 1 of 2 | 0 of 0 | 1 of 5 | 0 of 0 | 0 of 0 |
WIN
vs
Dan Hooker
Decision (unanimous) (29–28, 29–28, 29–28)
R3
5:00
·
UFC Fight Night: Hunt vs. Nelson ·
Sep 20, 2014
Totals
| Fighter | KD | Sig. Str. | Sig. Str. % | Total Str. | TD | TD % | Sub. Att | Rev. | Ctrl |
|---|---|---|---|---|---|---|---|---|---|
| Maximo Blanco | 0 | 132 of 240 | 55% | 137 of 246 | 3 of 13 | 23% | 0 | 0 | 2:34 |
| Dan Hooker | 0 | 99 of 236 | 41% | 116 of 253 | 0 of 0 | --- | 0 | 0 | 1:44 |
Per Round
| Rd | Fighter | KD | Sig. Str. | Sig. Str. % | Total Str. | TD | TD % | Sub. Att | Rev. | Ctrl |
|---|---|---|---|---|---|---|---|---|---|---|
| 1 | Maximo Blanco | 0 | 33 of 57 | 57% | 33 of 57 | 2 of 8 | 25% | 0 | 0 | 2:01 |
| Dan Hooker | 0 | 21 of 61 | 34% | 24 of 64 | 0 of 0 | --- | 0 | 0 | 0:31 | |
| 2 | Maximo Blanco | 0 | 71 of 134 | 52% | 72 of 135 | 0 of 2 | 0% | 0 | 0 | 0:00 |
| Dan Hooker | 0 | 41 of 106 | 38% | 42 of 107 | 0 of 0 | --- | 0 | 0 | 0:12 | |
| 3 | Maximo Blanco | 0 | 28 of 49 | 57% | 32 of 54 | 1 of 3 | 33% | 0 | 0 | 0:33 |
| Dan Hooker | 0 | 37 of 69 | 53% | 50 of 82 | 0 of 0 | --- | 0 | 0 | 1:01 |
Significant Strikes
| Fighter | Sig. Str. | Sig. Str. % | Head | Body | Leg | Distance | Clinch | Ground |
|---|---|---|---|---|---|---|---|---|
| Maximo Blanco | 132 of 240 | 55% | 128 of 232 | 4 of 8 | 0 of 0 | 109 of 198 | 22 of 41 | 1 of 1 |
| Dan Hooker | 99 of 236 | 41% | 75 of 201 | 19 of 27 | 5 of 8 | 66 of 174 | 33 of 62 | 0 of 0 |
Significant Strikes Per Round
| Rd | Fighter | Sig. Str. | Sig. Str. % | Head | Body | Leg | Distance | Clinch | Ground |
|---|---|---|---|---|---|---|---|---|---|
| 1 | Maximo Blanco | 33 of 57 | 57% | 32 of 56 | 1 of 1 | 0 of 0 | 27 of 49 | 5 of 7 | 1 of 1 |
| Dan Hooker | 21 of 61 | 34% | 17 of 55 | 4 of 6 | 0 of 0 | 11 of 47 | 10 of 14 | 0 of 0 | |
| 2 | Maximo Blanco | 71 of 134 | 52% | 69 of 129 | 2 of 5 | 0 of 0 | 63 of 116 | 8 of 18 | 0 of 0 |
| Dan Hooker | 41 of 106 | 38% | 32 of 92 | 5 of 7 | 4 of 7 | 33 of 86 | 8 of 20 | 0 of 0 | |
| 3 | Maximo Blanco | 28 of 49 | 57% | 27 of 47 | 1 of 2 | 0 of 0 | 19 of 33 | 9 of 16 | 0 of 0 |
| Dan Hooker | 37 of 69 | 53% | 26 of 54 | 10 of 14 | 1 of 1 | 22 of 41 | 15 of 28 | 0 of 0 |
WIN
vs
Andy Ogle
Decision (unanimous) (29–28, 29–28, 29–28)
R3
5:00
·
UFC Fight Night: Munoz vs. Mousasi ·
May 31, 2014
Totals
| Fighter | KD | Sig. Str. | Sig. Str. % | Total Str. | TD | TD % | Sub. Att | Rev. | Ctrl |
|---|---|---|---|---|---|---|---|---|---|
| Maximo Blanco | 0 | 44 of 116 | 37% | 78 of 150 | 1 of 5 | 20% | 0 | 0 | 5:46 |
| Andy Ogle | 1 | 60 of 117 | 51% | 117 of 184 | 1 of 2 | 50% | 0 | 2 | 2:28 |
Per Round
| Rd | Fighter | KD | Sig. Str. | Sig. Str. % | Total Str. | TD | TD % | Sub. Att | Rev. | Ctrl |
|---|---|---|---|---|---|---|---|---|---|---|
| 1 | Maximo Blanco | 0 | 11 of 35 | 31% | 17 of 41 | 1 of 3 | 33% | 0 | 0 | 2:07 |
| Andy Ogle | 1 | 17 of 32 | 53% | 46 of 68 | 1 of 1 | 100% | 0 | 1 | 1:13 | |
| 2 | Maximo Blanco | 0 | 4 of 5 | 80% | 32 of 33 | 0 of 1 | 0% | 0 | 0 | 3:39 |
| Andy Ogle | 0 | 3 of 4 | 75% | 31 of 34 | 0 of 1 | 0% | 0 | 1 | 1:15 | |
| 3 | Maximo Blanco | 0 | 29 of 76 | 38% | 29 of 76 | 0 of 1 | 0% | 0 | 0 | 0:00 |
| Andy Ogle | 0 | 40 of 81 | 49% | 40 of 82 | 0 of 0 | --- | 0 | 0 | 0:00 |
Significant Strikes
| Fighter | Sig. Str. | Sig. Str. % | Head | Body | Leg | Distance | Clinch | Ground |
|---|---|---|---|---|---|---|---|---|
| Maximo Blanco | 44 of 116 | 37% | 23 of 85 | 15 of 24 | 6 of 7 | 40 of 112 | 1 of 1 | 3 of 3 |
| Andy Ogle | 60 of 117 | 51% | 47 of 102 | 7 of 9 | 6 of 6 | 54 of 111 | 5 of 5 | 1 of 1 |
Significant Strikes Per Round
| Rd | Fighter | Sig. Str. | Sig. Str. % | Head | Body | Leg | Distance | Clinch | Ground |
|---|---|---|---|---|---|---|---|---|---|
| 1 | Maximo Blanco | 11 of 35 | 31% | 8 of 30 | 3 of 5 | 0 of 0 | 11 of 35 | 0 of 0 | 0 of 0 |
| Andy Ogle | 17 of 32 | 53% | 9 of 23 | 6 of 7 | 2 of 2 | 13 of 28 | 4 of 4 | 0 of 0 | |
| 2 | Maximo Blanco | 4 of 5 | 80% | 0 of 1 | 1 of 1 | 3 of 3 | 0 of 1 | 1 of 1 | 3 of 3 |
| Andy Ogle | 3 of 4 | 75% | 3 of 4 | 0 of 0 | 0 of 0 | 1 of 2 | 1 of 1 | 1 of 1 | |
| 3 | Maximo Blanco | 29 of 76 | 38% | 15 of 54 | 11 of 18 | 3 of 4 | 29 of 76 | 0 of 0 | 0 of 0 |
| Andy Ogle | 40 of 81 | 49% | 35 of 75 | 1 of 2 | 4 of 4 | 40 of 81 | 0 of 0 | 0 of 0 |
LOSS
vs
Felipe Arantes
Decision (unanimous) (29–27, 29–27, 29–27)
R3
5:00
·
UFC Fight Night: Machida vs. Mousasi ·
Feb 15, 2014
Totals
| Fighter | KD | Sig. Str. | Sig. Str. % | Total Str. | TD | TD % | Sub. Att | Rev. | Ctrl |
|---|---|---|---|---|---|---|---|---|---|
| Felipe Arantes | 1 | 39 of 97 | 40% | 47 of 105 | 1 of 3 | 33% | 1 | 0 | 2:55 |
| Maximo Blanco | 0 | 44 of 108 | 40% | 73 of 140 | 3 of 6 | 50% | 0 | 0 | 3:33 |
Per Round
| Rd | Fighter | KD | Sig. Str. | Sig. Str. % | Total Str. | TD | TD % | Sub. Att | Rev. | Ctrl |
|---|---|---|---|---|---|---|---|---|---|---|
| 1 | Felipe Arantes | 1 | 25 of 48 | 52% | 26 of 49 | 0 of 0 | --- | 1 | 0 | 0:36 |
| Maximo Blanco | 0 | 20 of 51 | 39% | 20 of 51 | 1 of 3 | 33% | 0 | 0 | 1:10 | |
| 2 | Felipe Arantes | 0 | 8 of 28 | 28% | 8 of 28 | 0 of 1 | 0% | 0 | 0 | 0:16 |
| Maximo Blanco | 0 | 16 of 34 | 47% | 37 of 57 | 1 of 1 | 100% | 0 | 0 | 1:40 | |
| 3 | Felipe Arantes | 0 | 6 of 21 | 28% | 13 of 28 | 1 of 2 | 50% | 0 | 0 | 2:03 |
| Maximo Blanco | 0 | 8 of 23 | 34% | 16 of 32 | 1 of 2 | 50% | 0 | 0 | 0:43 |
Significant Strikes
| Fighter | Sig. Str. | Sig. Str. % | Head | Body | Leg | Distance | Clinch | Ground |
|---|---|---|---|---|---|---|---|---|
| Felipe Arantes | 39 of 97 | 40% | 24 of 72 | 10 of 16 | 5 of 9 | 20 of 63 | 15 of 25 | 4 of 9 |
| Maximo Blanco | 44 of 108 | 40% | 15 of 67 | 18 of 28 | 11 of 13 | 31 of 77 | 12 of 26 | 1 of 5 |
Significant Strikes Per Round
| Rd | Fighter | Sig. Str. | Sig. Str. % | Head | Body | Leg | Distance | Clinch | Ground |
|---|---|---|---|---|---|---|---|---|---|
| 1 | Felipe Arantes | 25 of 48 | 52% | 15 of 34 | 6 of 8 | 4 of 6 | 13 of 28 | 8 of 13 | 4 of 7 |
| Maximo Blanco | 20 of 51 | 39% | 6 of 30 | 10 of 16 | 4 of 5 | 8 of 27 | 12 of 24 | 0 of 0 | |
| 2 | Felipe Arantes | 8 of 28 | 28% | 5 of 20 | 2 of 5 | 1 of 3 | 3 of 18 | 5 of 8 | 0 of 2 |
| Maximo Blanco | 16 of 34 | 47% | 8 of 24 | 4 of 6 | 4 of 4 | 15 of 28 | 0 of 2 | 1 of 4 | |
| 3 | Felipe Arantes | 6 of 21 | 28% | 4 of 18 | 2 of 3 | 0 of 0 | 4 of 17 | 2 of 4 | 0 of 0 |
| Maximo Blanco | 8 of 23 | 34% | 1 of 13 | 4 of 6 | 3 of 4 | 8 of 22 | 0 of 0 | 0 of 1 |
LOSS
vs
Akira Corassani
Disqualification (illegal knee)
R1
0:25
·
The Ultimate Fighter: Team Rousey vs. Team Tate Finale ·
Nov 30, 2013
Totals
| Fighter | KD | Sig. Str. | Sig. Str. % | Total Str. | TD | TD % | Sub. Att | Rev. | Ctrl |
|---|---|---|---|---|---|---|---|---|---|
| Akira Corassani | 0 | 1 of 2 | 50% | 1 of 2 | 0 of 0 | --- | 0 | 0 | 0:00 |
| Maximo Blanco | 0 | 5 of 7 | 71% | 7 of 9 | 1 of 1 | 100% | 0 | 0 | 0:15 |
Per Round
| Rd | Fighter | KD | Sig. Str. | Sig. Str. % | Total Str. | TD | TD % | Sub. Att | Rev. | Ctrl |
|---|---|---|---|---|---|---|---|---|---|---|
| 1 | Akira Corassani | 0 | 1 of 2 | 50% | 1 of 2 | 0 of 0 | --- | 0 | 0 | 0:00 |
| Maximo Blanco | 0 | 5 of 7 | 71% | 7 of 9 | 1 of 1 | 100% | 0 | 0 | 0:15 |
Significant Strikes
| Fighter | Sig. Str. | Sig. Str. % | Head | Body | Leg | Distance | Clinch | Ground |
|---|---|---|---|---|---|---|---|---|
| Akira Corassani | 1 of 2 | 50% | 1 of 2 | 0 of 0 | 0 of 0 | 1 of 2 | 0 of 0 | 0 of 0 |
| Maximo Blanco | 5 of 7 | 71% | 5 of 7 | 0 of 0 | 0 of 0 | 2 of 4 | 2 of 2 | 1 of 1 |
Significant Strikes Per Round
| Rd | Fighter | Sig. Str. | Sig. Str. % | Head | Body | Leg | Distance | Clinch | Ground |
|---|---|---|---|---|---|---|---|---|---|
| 1 | Akira Corassani | 1 of 2 | 50% | 1 of 2 | 0 of 0 | 0 of 0 | 1 of 2 | 0 of 0 | 0 of 0 |
| Maximo Blanco | 5 of 7 | 71% | 5 of 7 | 0 of 0 | 0 of 0 | 2 of 4 | 2 of 2 | 1 of 1 |
WIN
vs
Sam Sicilia
Decision (unanimous) (29–28, 29–28, 29–28)
R3
5:00
·
The Ultimate Fighter: Team Jones vs. Team Sonnen Finale ·
Apr 13, 2013
Totals
| Fighter | KD | Sig. Str. | Sig. Str. % | Total Str. | TD | TD % | Sub. Att | Rev. | Ctrl |
|---|---|---|---|---|---|---|---|---|---|
| Maximo Blanco | 0 | 26 of 99 | 26% | 32 of 107 | 1 of 7 | 14% | 1 | 0 | 2:12 |
| Sam Sicilia | 0 | 52 of 145 | 35% | 86 of 180 | 2 of 4 | 50% | 1 | 0 | 3:47 |
Per Round
| Rd | Fighter | KD | Sig. Str. | Sig. Str. % | Total Str. | TD | TD % | Sub. Att | Rev. | Ctrl |
|---|---|---|---|---|---|---|---|---|---|---|
| 1 | Maximo Blanco | 0 | 6 of 31 | 19% | 6 of 31 | 0 of 0 | --- | 1 | 0 | 0:00 |
| Sam Sicilia | 0 | 12 of 50 | 24% | 12 of 50 | 1 of 1 | 100% | 0 | 0 | 0:44 | |
| 2 | Maximo Blanco | 0 | 13 of 37 | 35% | 18 of 44 | 1 of 4 | 25% | 0 | 0 | 1:33 |
| Sam Sicilia | 0 | 18 of 44 | 40% | 33 of 59 | 1 of 2 | 50% | 0 | 0 | 1:00 | |
| 3 | Maximo Blanco | 0 | 7 of 31 | 22% | 8 of 32 | 0 of 3 | 0% | 0 | 0 | 0:39 |
| Sam Sicilia | 0 | 22 of 51 | 43% | 41 of 71 | 0 of 1 | 0% | 1 | 0 | 2:03 |
Significant Strikes
| Fighter | Sig. Str. | Sig. Str. % | Head | Body | Leg | Distance | Clinch | Ground |
|---|---|---|---|---|---|---|---|---|
| Maximo Blanco | 26 of 99 | 26% | 19 of 90 | 2 of 3 | 5 of 6 | 16 of 81 | 9 of 15 | 1 of 3 |
| Sam Sicilia | 52 of 145 | 35% | 39 of 113 | 3 of 16 | 10 of 16 | 43 of 130 | 9 of 14 | 0 of 1 |
Significant Strikes Per Round
| Rd | Fighter | Sig. Str. | Sig. Str. % | Head | Body | Leg | Distance | Clinch | Ground |
|---|---|---|---|---|---|---|---|---|---|
| 1 | Maximo Blanco | 6 of 31 | 19% | 3 of 27 | 0 of 0 | 3 of 4 | 6 of 30 | 0 of 0 | 0 of 1 |
| Sam Sicilia | 12 of 50 | 24% | 7 of 32 | 1 of 9 | 4 of 9 | 12 of 50 | 0 of 0 | 0 of 0 | |
| 2 | Maximo Blanco | 13 of 37 | 35% | 10 of 33 | 1 of 2 | 2 of 2 | 6 of 25 | 6 of 10 | 1 of 2 |
| Sam Sicilia | 18 of 44 | 40% | 13 of 35 | 2 of 5 | 3 of 4 | 18 of 44 | 0 of 0 | 0 of 0 | |
| 3 | Maximo Blanco | 7 of 31 | 22% | 6 of 30 | 1 of 1 | 0 of 0 | 4 of 26 | 3 of 5 | 0 of 0 |
| Sam Sicilia | 22 of 51 | 43% | 19 of 46 | 0 of 2 | 3 of 3 | 13 of 36 | 9 of 14 | 0 of 1 |
No comments yet. Be the first to share your thoughts!