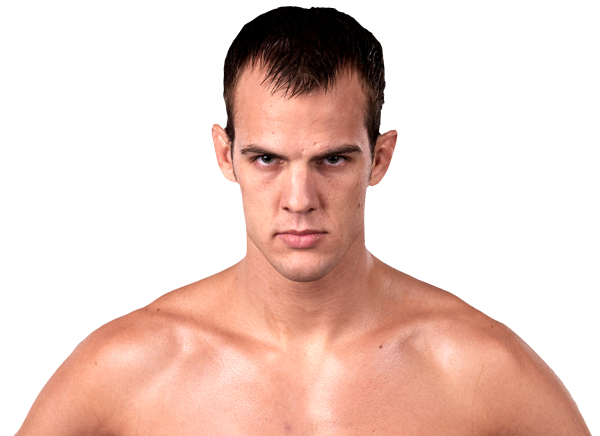
UFC Fight Night: Thomas vs. Florian ·
Sep 19, 2007 ·
Lightweight ·
Completed
Career Averages - Cole Miller
3.0
SLpM
33.0%
Str. Acc.
3.88
SApM
59.0%
Str. Def.
0.6
TD Avg
36.0%
TD Acc.
38.0%
TD Def.
1.8
Sub. Avg
Career Averages - Leonard Garcia
2.77
SLpM
24.0%
Str. Acc.
4.79
SApM
52.0%
Str. Def.
0.3
TD Avg
26.0%
TD Acc.
42.0%
TD Def.
0.5
Sub. Avg
Cole Miller - Fight History
LOSS
vs
Mizuto Hirota
Decision (unanimous) (30–26, 30–27, 30–27)
R3
5:00
·
UFC on Fox: VanZant vs. Waterson ·
Dec 17, 2016
Totals
| Fighter | KD | Sig. Str. | Sig. Str. % | Total Str. | TD | TD % | Sub. Att | Rev. | Ctrl |
|---|---|---|---|---|---|---|---|---|---|
| Mizuto Hirota | 0 | 21 of 60 | 35% | 22 of 61 | 0 of 0 | --- | 0 | 1 | 1:03 |
| Cole Miller | 0 | 57 of 114 | 50% | 165 of 242 | 6 of 7 | 85% | 0 | 0 | 9:49 |
Per Round
| Rd | Fighter | KD | Sig. Str. | Sig. Str. % | Total Str. | TD | TD % | Sub. Att | Rev. | Ctrl |
|---|---|---|---|---|---|---|---|---|---|---|
| 1 | Mizuto Hirota | 0 | 11 of 31 | 35% | 11 of 31 | 0 of 0 | --- | 0 | 0 | 0:00 |
| Cole Miller | 0 | 23 of 48 | 47% | 47 of 74 | 4 of 4 | 100% | 0 | 0 | 2:27 | |
| 2 | Mizuto Hirota | 0 | 3 of 13 | 23% | 3 of 13 | 0 of 0 | --- | 0 | 1 | 1:03 |
| Cole Miller | 0 | 16 of 32 | 50% | 58 of 79 | 1 of 1 | 100% | 0 | 0 | 3:12 | |
| 3 | Mizuto Hirota | 0 | 7 of 16 | 43% | 8 of 17 | 0 of 0 | --- | 0 | 0 | 0:00 |
| Cole Miller | 0 | 18 of 34 | 52% | 60 of 89 | 1 of 2 | 50% | 0 | 0 | 4:10 |
Significant Strikes
| Fighter | Sig. Str. | Sig. Str. % | Head | Body | Leg | Distance | Clinch | Ground |
|---|---|---|---|---|---|---|---|---|
| Mizuto Hirota | 21 of 60 | 35% | 11 of 44 | 5 of 9 | 5 of 7 | 20 of 59 | 0 of 0 | 1 of 1 |
| Cole Miller | 57 of 114 | 50% | 43 of 95 | 7 of 11 | 7 of 8 | 26 of 60 | 1 of 1 | 30 of 53 |
Significant Strikes Per Round
| Rd | Fighter | Sig. Str. | Sig. Str. % | Head | Body | Leg | Distance | Clinch | Ground |
|---|---|---|---|---|---|---|---|---|---|
| 1 | Mizuto Hirota | 11 of 31 | 35% | 4 of 21 | 4 of 6 | 3 of 4 | 10 of 30 | 0 of 0 | 1 of 1 |
| Cole Miller | 23 of 48 | 47% | 15 of 38 | 3 of 5 | 5 of 5 | 16 of 30 | 1 of 1 | 6 of 17 | |
| 2 | Mizuto Hirota | 3 of 13 | 23% | 3 of 11 | 0 of 1 | 0 of 1 | 3 of 13 | 0 of 0 | 0 of 0 |
| Cole Miller | 16 of 32 | 50% | 14 of 28 | 1 of 2 | 1 of 2 | 3 of 12 | 0 of 0 | 13 of 20 | |
| 3 | Mizuto Hirota | 7 of 16 | 43% | 4 of 12 | 1 of 2 | 2 of 2 | 7 of 16 | 0 of 0 | 0 of 0 |
| Cole Miller | 18 of 34 | 52% | 14 of 29 | 3 of 4 | 1 of 1 | 7 of 18 | 0 of 0 | 11 of 16 |
LOSS
vs
Alex Caceres
Decision (unanimous) (29–28, 29–28, 30–27)
R3
5:00
·
UFC 199: Rockhold vs. Bisping 2 ·
Jun 04, 2016
Totals
| Fighter | KD | Sig. Str. | Sig. Str. % | Total Str. | TD | TD % | Sub. Att | Rev. | Ctrl |
|---|---|---|---|---|---|---|---|---|---|
| Alex Caceres | 0 | 33 of 127 | 25% | 39 of 134 | 3 of 3 | 100% | 1 | 0 | 2:33 |
| Cole Miller | 1 | 97 of 156 | 62% | 108 of 167 | 5 of 5 | 100% | 0 | 1 | 3:01 |
Per Round
| Rd | Fighter | KD | Sig. Str. | Sig. Str. % | Total Str. | TD | TD % | Sub. Att | Rev. | Ctrl |
|---|---|---|---|---|---|---|---|---|---|---|
| 1 | Alex Caceres | 0 | 8 of 42 | 19% | 8 of 42 | 2 of 2 | 100% | 0 | 0 | 0:52 |
| Cole Miller | 1 | 27 of 38 | 71% | 33 of 44 | 2 of 2 | 100% | 0 | 1 | 1:13 | |
| 2 | Alex Caceres | 0 | 13 of 50 | 26% | 13 of 50 | 0 of 0 | --- | 0 | 0 | 0:00 |
| Cole Miller | 0 | 46 of 81 | 56% | 47 of 82 | 2 of 2 | 100% | 0 | 0 | 0:26 | |
| 3 | Alex Caceres | 0 | 12 of 35 | 34% | 18 of 42 | 1 of 1 | 100% | 1 | 0 | 1:41 |
| Cole Miller | 0 | 24 of 37 | 64% | 28 of 41 | 1 of 1 | 100% | 0 | 0 | 1:22 |
Significant Strikes
| Fighter | Sig. Str. | Sig. Str. % | Head | Body | Leg | Distance | Clinch | Ground |
|---|---|---|---|---|---|---|---|---|
| Alex Caceres | 33 of 127 | 25% | 24 of 111 | 5 of 11 | 4 of 5 | 30 of 122 | 1 of 2 | 2 of 3 |
| Cole Miller | 97 of 156 | 62% | 65 of 120 | 22 of 26 | 10 of 10 | 77 of 130 | 10 of 14 | 10 of 12 |
Significant Strikes Per Round
| Rd | Fighter | Sig. Str. | Sig. Str. % | Head | Body | Leg | Distance | Clinch | Ground |
|---|---|---|---|---|---|---|---|---|---|
| 1 | Alex Caceres | 8 of 42 | 19% | 3 of 35 | 2 of 3 | 3 of 4 | 7 of 41 | 1 of 1 | 0 of 0 |
| Cole Miller | 27 of 38 | 71% | 16 of 27 | 8 of 8 | 3 of 3 | 18 of 29 | 5 of 5 | 4 of 4 | |
| 2 | Alex Caceres | 13 of 50 | 26% | 10 of 44 | 2 of 5 | 1 of 1 | 13 of 50 | 0 of 0 | 0 of 0 |
| Cole Miller | 46 of 81 | 56% | 28 of 59 | 11 of 15 | 7 of 7 | 41 of 72 | 4 of 8 | 1 of 1 | |
| 3 | Alex Caceres | 12 of 35 | 34% | 11 of 32 | 1 of 3 | 0 of 0 | 10 of 31 | 0 of 1 | 2 of 3 |
| Cole Miller | 24 of 37 | 64% | 21 of 34 | 3 of 3 | 0 of 0 | 18 of 29 | 1 of 1 | 5 of 7 |
LOSS
vs
Jim Alers
No Contest (accidental eye poke)
R2
1:44
·
UFC on Fox: dos Anjos vs. Cowboy 2 ·
Dec 19, 2015
Totals
| Fighter | KD | Sig. Str. | Sig. Str. % | Total Str. | TD | TD % | Sub. Att | Rev. | Ctrl |
|---|---|---|---|---|---|---|---|---|---|
| Cole Miller | 0 | 28 of 77 | 36% | 29 of 78 | 0 of 0 | --- | 0 | 0 | 0:00 |
| Jim Alers | 0 | 25 of 79 | 31% | 25 of 79 | 0 of 0 | --- | 0 | 0 | 0:00 |
Per Round
| Rd | Fighter | KD | Sig. Str. | Sig. Str. % | Total Str. | TD | TD % | Sub. Att | Rev. | Ctrl |
|---|---|---|---|---|---|---|---|---|---|---|
| 1 | Cole Miller | 0 | 22 of 54 | 40% | 23 of 55 | 0 of 0 | --- | 0 | 0 | 0:00 |
| Jim Alers | 0 | 19 of 58 | 32% | 19 of 58 | 0 of 0 | --- | 0 | 0 | 0:00 | |
| 2 | Cole Miller | 0 | 6 of 23 | 26% | 6 of 23 | 0 of 0 | --- | 0 | 0 | 0:00 |
| Jim Alers | 0 | 6 of 21 | 28% | 6 of 21 | 0 of 0 | --- | 0 | 0 | 0:00 |
Significant Strikes
| Fighter | Sig. Str. | Sig. Str. % | Head | Body | Leg | Distance | Clinch | Ground |
|---|---|---|---|---|---|---|---|---|
| Cole Miller | 28 of 77 | 36% | 17 of 64 | 7 of 9 | 4 of 4 | 26 of 75 | 2 of 2 | 0 of 0 |
| Jim Alers | 25 of 79 | 31% | 9 of 55 | 6 of 11 | 10 of 13 | 24 of 77 | 1 of 2 | 0 of 0 |
Significant Strikes Per Round
| Rd | Fighter | Sig. Str. | Sig. Str. % | Head | Body | Leg | Distance | Clinch | Ground |
|---|---|---|---|---|---|---|---|---|---|
| 1 | Cole Miller | 22 of 54 | 40% | 14 of 45 | 5 of 6 | 3 of 3 | 21 of 53 | 1 of 1 | 0 of 0 |
| Jim Alers | 19 of 58 | 32% | 6 of 39 | 5 of 9 | 8 of 10 | 18 of 56 | 1 of 2 | 0 of 0 | |
| 2 | Cole Miller | 6 of 23 | 26% | 3 of 19 | 2 of 3 | 1 of 1 | 5 of 22 | 1 of 1 | 0 of 0 |
| Jim Alers | 6 of 21 | 28% | 3 of 16 | 1 of 2 | 2 of 3 | 6 of 21 | 0 of 0 | 0 of 0 |
LOSS
vs
Max Holloway
Decision (unanimous) (29–28, 29–28, 30–27)
R3
5:00
·
UFC Fight Night: Henderson vs. Thatch ·
Feb 14, 2015
Totals
| Fighter | KD | Sig. Str. | Sig. Str. % | Total Str. | TD | TD % | Sub. Att | Rev. | Ctrl |
|---|---|---|---|---|---|---|---|---|---|
| Max Holloway | 0 | 57 of 176 | 32% | 66 of 186 | 1 of 1 | 100% | 0 | 0 | 2:33 |
| Cole Miller | 0 | 31 of 132 | 23% | 35 of 137 | 0 of 2 | 0% | 0 | 0 | 0:31 |
Per Round
| Rd | Fighter | KD | Sig. Str. | Sig. Str. % | Total Str. | TD | TD % | Sub. Att | Rev. | Ctrl |
|---|---|---|---|---|---|---|---|---|---|---|
| 1 | Max Holloway | 0 | 12 of 48 | 25% | 14 of 51 | 0 of 0 | --- | 0 | 0 | 1:15 |
| Cole Miller | 0 | 10 of 39 | 25% | 11 of 40 | 0 of 0 | --- | 0 | 0 | 0:00 | |
| 2 | Max Holloway | 0 | 12 of 50 | 24% | 14 of 52 | 1 of 1 | 100% | 0 | 0 | 0:37 |
| Cole Miller | 0 | 12 of 45 | 26% | 13 of 47 | 0 of 1 | 0% | 0 | 0 | 0:03 | |
| 3 | Max Holloway | 0 | 33 of 78 | 42% | 38 of 83 | 0 of 0 | --- | 0 | 0 | 0:41 |
| Cole Miller | 0 | 9 of 48 | 18% | 11 of 50 | 0 of 1 | 0% | 0 | 0 | 0:28 |
Significant Strikes
| Fighter | Sig. Str. | Sig. Str. % | Head | Body | Leg | Distance | Clinch | Ground |
|---|---|---|---|---|---|---|---|---|
| Max Holloway | 57 of 176 | 32% | 40 of 145 | 13 of 23 | 4 of 8 | 46 of 159 | 7 of 11 | 4 of 6 |
| Cole Miller | 31 of 132 | 23% | 12 of 93 | 8 of 19 | 11 of 20 | 26 of 123 | 5 of 8 | 0 of 1 |
Significant Strikes Per Round
| Rd | Fighter | Sig. Str. | Sig. Str. % | Head | Body | Leg | Distance | Clinch | Ground |
|---|---|---|---|---|---|---|---|---|---|
| 1 | Max Holloway | 12 of 48 | 25% | 4 of 34 | 5 of 7 | 3 of 7 | 8 of 42 | 3 of 4 | 1 of 2 |
| Cole Miller | 10 of 39 | 25% | 0 of 20 | 5 of 11 | 5 of 8 | 6 of 34 | 4 of 5 | 0 of 0 | |
| 2 | Max Holloway | 12 of 50 | 24% | 10 of 45 | 2 of 5 | 0 of 0 | 9 of 46 | 1 of 1 | 2 of 3 |
| Cole Miller | 12 of 45 | 26% | 4 of 32 | 3 of 4 | 5 of 9 | 12 of 45 | 0 of 0 | 0 of 0 | |
| 3 | Max Holloway | 33 of 78 | 42% | 26 of 66 | 6 of 11 | 1 of 1 | 29 of 71 | 3 of 6 | 1 of 1 |
| Cole Miller | 9 of 48 | 18% | 8 of 41 | 0 of 4 | 1 of 3 | 8 of 44 | 1 of 3 | 0 of 1 |
Play-by-Play
View on SherdogMax Holloway vs. Cole Miller
Round 1
Holloway strikes first with a pair of kicks to the outside of Miller’s lead leg. Miller checks a third and gives the Hawaiian a low kick in return. The featherweights continue trading kicks through the first 80 seconds, Miller mixing in a few to the body. Holloway threatens and probes with punches, looking for an opening against the taller man. The fighters clash kicks, knocking Holloway to the ground, but he pops back up without incident. Holloway slaps Miller’s breadbasket with a loud kick, then tacks on a leg kick, answered in kind by Miller. A straight right lands for Miller before the 145ers clinch up. Holloway takes the driver’s seat in the clinch, shoving Miller to the fence and throwing knees to the body. They fight back to the center, where Miller looks to clinch and eats a hook. He decks Holloway with an elbow as he’s pushed against the cage, and now Miller drops to guard at the base of the fence. Miller sits up and drops back on a heel hook, then gives it up to stand, reach between his legs and rolls through on a kneebar attempt to end the round.
Sherdog Scores
Jordan Breen scores the round 10-9 Holloway
TJ De Santis scores the round 10-9 Holloway
Chris Nelson scores the round 10-9 Holloway
Round 2
Miller pushes Holloway backward with front and low kicks, keeping the smaller man out of striking range. Holloway answers with a spinning-back kick to the midsection, takes another slap to the lead leg and circles out to reset. Holloway is touching Miller’s chin with reaching punches but the strikes don’t appear to have a lot behind them. Miller continues his leg-kicking before shooting for a double-leg two minutes into the round. When it looks like Holloway will defend, Miller pulls guard and Holloway bails. Back up comes Miller halfway through the round and the fight, and Holloway catches him with a spinning-back fist. Holloway rushes into the pocket, swinging hands, but his head slams into the outside of Miller’s left eye. Miller drops to a knee, bleeding from the spot of the accidental clash of heads, and referee Adam Martinez pauses the fight. The bleeding subsides after a minute and Miller indicates that he’s ready to go. Holloway checks an inside leg kick and puts a kick on Miller’s body. A slapping body kick lands on Holloway’s left side courtesy of Miller, who backpedals around the outside while Holloway works from the center. Holloway closes the distance and shoves Miller against the fence with underhooks. Miller shakes him off with 30 seconds on the clock, but Holloway is soon back in his face with a leaping knee and another clinch to close the round. Miller’s eye is bleeding again at the end of the round, and the fighter tells referee Martinez that Holloway headbutted him again at the end of the round.
Sherdog Scores
Jordan Breen scores the round 10-9 Holloway
TJ De Santis scores the round 10-9 Holloway
Chris Nelson scores the round 10-9 Holloway
Round 3
Miller swings punches upstairs but is having less success at the start of round three, as Holloway is changing levels while striking and throwing body shots. A spinning-back fist clips Miller near the fence before Holloway denies a clinch and throws the taller fighter to the ground. Holloway tags Miller with a combination before the featherweights tie up away from the fence and trade knees to the body. An overhand right gets Miller turning to his right side, where Holloway is waiting with a follow-up left hook. Holloway goes body-head with a combo and narrowly misses with another spinning shot. Holloway ducks under a left hand from Miller and cracks him with a straight counter than sends “Magrinho” moving backward to the fence. With 90 seconds left, Holloway backs off and draws Miller forward, cracking the American Top Team fighter with a pair of hooks to the damaged eye. Miller tries a double-leg on the fence, can’t get it and pulls guard instead. Holloway stands and invites Miller to do the same with less than one minute remaining. Holloway is going wild before the bell, launching a variety of flashy spinning kicks at Miller, though none appear to land cleanly.
Sherdog Scores
Jordan Breen scores the round 10-9 Holloway (30-27 Holloway)
TJ De Santis scores the round 10-9 Holloway (30-27 Holloway)
Chris Nelson scores the round 10-9 Holloway (30-27 Holloway)
The Official Result
Max Holloway def. Cole Miller via Unanimous Decision (30-27, 29-28, 29-28) R3 5:00
Round 1
Holloway strikes first with a pair of kicks to the outside of Miller’s lead leg. Miller checks a third and gives the Hawaiian a low kick in return. The featherweights continue trading kicks through the first 80 seconds, Miller mixing in a few to the body. Holloway threatens and probes with punches, looking for an opening against the taller man. The fighters clash kicks, knocking Holloway to the ground, but he pops back up without incident. Holloway slaps Miller’s breadbasket with a loud kick, then tacks on a leg kick, answered in kind by Miller. A straight right lands for Miller before the 145ers clinch up. Holloway takes the driver’s seat in the clinch, shoving Miller to the fence and throwing knees to the body. They fight back to the center, where Miller looks to clinch and eats a hook. He decks Holloway with an elbow as he’s pushed against the cage, and now Miller drops to guard at the base of the fence. Miller sits up and drops back on a heel hook, then gives it up to stand, reach between his legs and rolls through on a kneebar attempt to end the round.
Sherdog Scores
Jordan Breen scores the round 10-9 Holloway
TJ De Santis scores the round 10-9 Holloway
Chris Nelson scores the round 10-9 Holloway
Round 2
Miller pushes Holloway backward with front and low kicks, keeping the smaller man out of striking range. Holloway answers with a spinning-back kick to the midsection, takes another slap to the lead leg and circles out to reset. Holloway is touching Miller’s chin with reaching punches but the strikes don’t appear to have a lot behind them. Miller continues his leg-kicking before shooting for a double-leg two minutes into the round. When it looks like Holloway will defend, Miller pulls guard and Holloway bails. Back up comes Miller halfway through the round and the fight, and Holloway catches him with a spinning-back fist. Holloway rushes into the pocket, swinging hands, but his head slams into the outside of Miller’s left eye. Miller drops to a knee, bleeding from the spot of the accidental clash of heads, and referee Adam Martinez pauses the fight. The bleeding subsides after a minute and Miller indicates that he’s ready to go. Holloway checks an inside leg kick and puts a kick on Miller’s body. A slapping body kick lands on Holloway’s left side courtesy of Miller, who backpedals around the outside while Holloway works from the center. Holloway closes the distance and shoves Miller against the fence with underhooks. Miller shakes him off with 30 seconds on the clock, but Holloway is soon back in his face with a leaping knee and another clinch to close the round. Miller’s eye is bleeding again at the end of the round, and the fighter tells referee Martinez that Holloway headbutted him again at the end of the round.
Sherdog Scores
Jordan Breen scores the round 10-9 Holloway
TJ De Santis scores the round 10-9 Holloway
Chris Nelson scores the round 10-9 Holloway
Round 3
Miller swings punches upstairs but is having less success at the start of round three, as Holloway is changing levels while striking and throwing body shots. A spinning-back fist clips Miller near the fence before Holloway denies a clinch and throws the taller fighter to the ground. Holloway tags Miller with a combination before the featherweights tie up away from the fence and trade knees to the body. An overhand right gets Miller turning to his right side, where Holloway is waiting with a follow-up left hook. Holloway goes body-head with a combo and narrowly misses with another spinning shot. Holloway ducks under a left hand from Miller and cracks him with a straight counter than sends “Magrinho” moving backward to the fence. With 90 seconds left, Holloway backs off and draws Miller forward, cracking the American Top Team fighter with a pair of hooks to the damaged eye. Miller tries a double-leg on the fence, can’t get it and pulls guard instead. Holloway stands and invites Miller to do the same with less than one minute remaining. Holloway is going wild before the bell, launching a variety of flashy spinning kicks at Miller, though none appear to land cleanly.
Sherdog Scores
Jordan Breen scores the round 10-9 Holloway (30-27 Holloway)
TJ De Santis scores the round 10-9 Holloway (30-27 Holloway)
Chris Nelson scores the round 10-9 Holloway (30-27 Holloway)
The Official Result
Max Holloway def. Cole Miller via Unanimous Decision (30-27, 29-28, 29-28) R3 5:00
WIN
vs
Sam Sicilia
Submission (rear-naked choke)
R2
1:54
·
UFC Fight Night: Rockhold vs. Philippou ·
Jan 15, 2014
Totals
| Fighter | KD | Sig. Str. | Sig. Str. % | Total Str. | TD | TD % | Sub. Att | Rev. | Ctrl |
|---|---|---|---|---|---|---|---|---|---|
| Cole Miller | 1 | 38 of 91 | 41% | 38 of 91 | 0 of 0 | --- | 1 | 0 | 0:24 |
| Sam Sicilia | 0 | 14 of 56 | 25% | 14 of 56 | 0 of 2 | 0% | 0 | 0 | 0:00 |
Per Round
| Rd | Fighter | KD | Sig. Str. | Sig. Str. % | Total Str. | TD | TD % | Sub. Att | Rev. | Ctrl |
|---|---|---|---|---|---|---|---|---|---|---|
| 1 | Cole Miller | 0 | 24 of 62 | 38% | 24 of 62 | 0 of 0 | --- | 0 | 0 | 0:00 |
| Sam Sicilia | 0 | 8 of 45 | 17% | 8 of 45 | 0 of 0 | --- | 0 | 0 | 0:00 | |
| 2 | Cole Miller | 1 | 14 of 29 | 48% | 14 of 29 | 0 of 0 | --- | 1 | 0 | 0:24 |
| Sam Sicilia | 0 | 6 of 11 | 54% | 6 of 11 | 0 of 2 | 0% | 0 | 0 | 0:00 |
Significant Strikes
| Fighter | Sig. Str. | Sig. Str. % | Head | Body | Leg | Distance | Clinch | Ground |
|---|---|---|---|---|---|---|---|---|
| Cole Miller | 38 of 91 | 41% | 27 of 74 | 4 of 10 | 7 of 7 | 37 of 88 | 0 of 2 | 1 of 1 |
| Sam Sicilia | 14 of 56 | 25% | 5 of 47 | 5 of 5 | 4 of 4 | 14 of 56 | 0 of 0 | 0 of 0 |
Significant Strikes Per Round
| Rd | Fighter | Sig. Str. | Sig. Str. % | Head | Body | Leg | Distance | Clinch | Ground |
|---|---|---|---|---|---|---|---|---|---|
| 1 | Cole Miller | 24 of 62 | 38% | 16 of 49 | 2 of 7 | 6 of 6 | 24 of 62 | 0 of 0 | 0 of 0 |
| Sam Sicilia | 8 of 45 | 17% | 4 of 41 | 1 of 1 | 3 of 3 | 8 of 45 | 0 of 0 | 0 of 0 | |
| 2 | Cole Miller | 14 of 29 | 48% | 11 of 25 | 2 of 3 | 1 of 1 | 13 of 26 | 0 of 2 | 1 of 1 |
| Sam Sicilia | 6 of 11 | 54% | 1 of 6 | 4 of 4 | 1 of 1 | 6 of 11 | 0 of 0 | 0 of 0 |
WIN
vs
Andy Ogle
Decision (unanimous) (29–28, 29–28, 29–28)
R3
5:00
·
UFC Fight Night: Machida vs. Munoz ·
Oct 26, 2013
Totals
| Fighter | KD | Sig. Str. | Sig. Str. % | Total Str. | TD | TD % | Sub. Att | Rev. | Ctrl |
|---|---|---|---|---|---|---|---|---|---|
| Cole Miller | 0 | 27 of 51 | 52% | 112 of 138 | 2 of 6 | 33% | 0 | 0 | 7:44 |
| Andy Ogle | 0 | 21 of 40 | 52% | 55 of 75 | 0 of 0 | --- | 1 | 2 | 4:27 |
Per Round
| Rd | Fighter | KD | Sig. Str. | Sig. Str. % | Total Str. | TD | TD % | Sub. Att | Rev. | Ctrl |
|---|---|---|---|---|---|---|---|---|---|---|
| 1 | Cole Miller | 0 | 2 of 8 | 25% | 44 of 51 | 1 of 2 | 50% | 0 | 0 | 1:11 |
| Andy Ogle | 0 | 12 of 18 | 66% | 18 of 24 | 0 of 0 | --- | 0 | 1 | 2:57 | |
| 2 | Cole Miller | 0 | 4 of 6 | 66% | 18 of 21 | 0 of 3 | 0% | 0 | 0 | 2:46 |
| Andy Ogle | 0 | 3 of 8 | 37% | 24 of 30 | 0 of 0 | --- | 1 | 1 | 1:30 | |
| 3 | Cole Miller | 0 | 21 of 37 | 56% | 50 of 66 | 1 of 1 | 100% | 0 | 0 | 3:47 |
| Andy Ogle | 0 | 6 of 14 | 42% | 13 of 21 | 0 of 0 | --- | 0 | 0 | 0:00 |
Significant Strikes
| Fighter | Sig. Str. | Sig. Str. % | Head | Body | Leg | Distance | Clinch | Ground |
|---|---|---|---|---|---|---|---|---|
| Cole Miller | 27 of 51 | 52% | 14 of 34 | 8 of 12 | 5 of 5 | 23 of 42 | 0 of 0 | 4 of 9 |
| Andy Ogle | 21 of 40 | 52% | 17 of 34 | 4 of 5 | 0 of 1 | 16 of 35 | 3 of 3 | 2 of 2 |
Significant Strikes Per Round
| Rd | Fighter | Sig. Str. | Sig. Str. % | Head | Body | Leg | Distance | Clinch | Ground |
|---|---|---|---|---|---|---|---|---|---|
| 1 | Cole Miller | 2 of 8 | 25% | 0 of 5 | 2 of 3 | 0 of 0 | 2 of 8 | 0 of 0 | 0 of 0 |
| Andy Ogle | 12 of 18 | 66% | 9 of 15 | 3 of 3 | 0 of 0 | 7 of 13 | 3 of 3 | 2 of 2 | |
| 2 | Cole Miller | 4 of 6 | 66% | 2 of 4 | 0 of 0 | 2 of 2 | 4 of 6 | 0 of 0 | 0 of 0 |
| Andy Ogle | 3 of 8 | 37% | 3 of 8 | 0 of 0 | 0 of 0 | 3 of 8 | 0 of 0 | 0 of 0 | |
| 3 | Cole Miller | 21 of 37 | 56% | 12 of 25 | 6 of 9 | 3 of 3 | 17 of 28 | 0 of 0 | 4 of 9 |
| Andy Ogle | 6 of 14 | 42% | 5 of 11 | 1 of 2 | 0 of 1 | 6 of 14 | 0 of 0 | 0 of 0 |
LOSS
vs
Manvel Gamburyan
Decision (unanimous) (30–27, 29–28, 29–28)
R3
5:00
·
UFC Fight Night: Shogun vs. Sonnen ·
Aug 17, 2013
Totals
| Fighter | KD | Sig. Str. | Sig. Str. % | Total Str. | TD | TD % | Sub. Att | Rev. | Ctrl |
|---|---|---|---|---|---|---|---|---|---|
| Manvel Gamburyan | 0 | 23 of 62 | 37% | 84 of 126 | 5 of 7 | 71% | 0 | 0 | 7:52 |
| Cole Miller | 0 | 32 of 112 | 28% | 94 of 175 | 0 of 0 | --- | 0 | 0 | 0:06 |
Per Round
| Rd | Fighter | KD | Sig. Str. | Sig. Str. % | Total Str. | TD | TD % | Sub. Att | Rev. | Ctrl |
|---|---|---|---|---|---|---|---|---|---|---|
| 1 | Manvel Gamburyan | 0 | 6 of 23 | 26% | 11 of 28 | 1 of 1 | 100% | 0 | 0 | 1:28 |
| Cole Miller | 0 | 11 of 48 | 22% | 16 of 53 | 0 of 0 | --- | 0 | 0 | 0:00 | |
| 2 | Manvel Gamburyan | 0 | 6 of 14 | 42% | 31 of 39 | 3 of 5 | 60% | 0 | 0 | 3:15 |
| Cole Miller | 0 | 14 of 33 | 42% | 23 of 42 | 0 of 0 | --- | 0 | 0 | 0:06 | |
| 3 | Manvel Gamburyan | 0 | 11 of 25 | 44% | 42 of 59 | 1 of 1 | 100% | 0 | 0 | 3:09 |
| Cole Miller | 0 | 7 of 31 | 22% | 55 of 80 | 0 of 0 | --- | 0 | 0 | 0:00 |
Significant Strikes
| Fighter | Sig. Str. | Sig. Str. % | Head | Body | Leg | Distance | Clinch | Ground |
|---|---|---|---|---|---|---|---|---|
| Manvel Gamburyan | 23 of 62 | 37% | 12 of 45 | 3 of 7 | 8 of 10 | 15 of 47 | 2 of 4 | 6 of 11 |
| Cole Miller | 32 of 112 | 28% | 28 of 105 | 4 of 7 | 0 of 0 | 22 of 101 | 8 of 9 | 2 of 2 |
Significant Strikes Per Round
| Rd | Fighter | Sig. Str. | Sig. Str. % | Head | Body | Leg | Distance | Clinch | Ground |
|---|---|---|---|---|---|---|---|---|---|
| 1 | Manvel Gamburyan | 6 of 23 | 26% | 5 of 19 | 0 of 2 | 1 of 2 | 3 of 20 | 1 of 1 | 2 of 2 |
| Cole Miller | 11 of 48 | 22% | 11 of 46 | 0 of 2 | 0 of 0 | 8 of 45 | 1 of 1 | 2 of 2 | |
| 2 | Manvel Gamburyan | 6 of 14 | 42% | 2 of 9 | 0 of 0 | 4 of 5 | 4 of 10 | 1 of 3 | 1 of 1 |
| Cole Miller | 14 of 33 | 42% | 11 of 30 | 3 of 3 | 0 of 0 | 7 of 25 | 7 of 8 | 0 of 0 | |
| 3 | Manvel Gamburyan | 11 of 25 | 44% | 5 of 17 | 3 of 5 | 3 of 3 | 8 of 17 | 0 of 0 | 3 of 8 |
| Cole Miller | 7 of 31 | 22% | 6 of 29 | 1 of 2 | 0 of 0 | 7 of 31 | 0 of 0 | 0 of 0 |
WIN
vs
Bart Palaszewski
Submission (rear-naked choke)
R1
4:23
·
The Ultimate Fighter: Team Jones vs. Team Sonnen Finale ·
Apr 13, 2013
Totals
| Fighter | KD | Sig. Str. | Sig. Str. % | Total Str. | TD | TD % | Sub. Att | Rev. | Ctrl |
|---|---|---|---|---|---|---|---|---|---|
| Cole Miller | 0 | 5 of 43 | 11% | 6 of 44 | 1 of 1 | 100% | 1 | 0 | 0:45 |
| Bart Palaszewski | 0 | 18 of 62 | 29% | 18 of 62 | 0 of 0 | --- | 0 | 0 | 0:00 |
Per Round
| Rd | Fighter | KD | Sig. Str. | Sig. Str. % | Total Str. | TD | TD % | Sub. Att | Rev. | Ctrl |
|---|---|---|---|---|---|---|---|---|---|---|
| 1 | Cole Miller | 0 | 5 of 43 | 11% | 6 of 44 | 1 of 1 | 100% | 1 | 0 | 0:45 |
| Bart Palaszewski | 0 | 18 of 62 | 29% | 18 of 62 | 0 of 0 | --- | 0 | 0 | 0:00 |
Significant Strikes
| Fighter | Sig. Str. | Sig. Str. % | Head | Body | Leg | Distance | Clinch | Ground |
|---|---|---|---|---|---|---|---|---|
| Cole Miller | 5 of 43 | 11% | 1 of 36 | 1 of 4 | 3 of 3 | 5 of 43 | 0 of 0 | 0 of 0 |
| Bart Palaszewski | 18 of 62 | 29% | 7 of 48 | 2 of 4 | 9 of 10 | 17 of 61 | 0 of 0 | 1 of 1 |
Significant Strikes Per Round
| Rd | Fighter | Sig. Str. | Sig. Str. % | Head | Body | Leg | Distance | Clinch | Ground |
|---|---|---|---|---|---|---|---|---|---|
| 1 | Cole Miller | 5 of 43 | 11% | 1 of 36 | 1 of 4 | 3 of 3 | 5 of 43 | 0 of 0 | 0 of 0 |
| Bart Palaszewski | 18 of 62 | 29% | 7 of 48 | 2 of 4 | 9 of 10 | 17 of 61 | 0 of 0 | 1 of 1 |
Leonard Garcia - Fight History
LOSS
vs
Cody McKenzie
Decision (unanimous) (29–28, 30–27, 30–27)
R3
5:00
·
UFC 159: Jones vs. Sonnen ·
Apr 27, 2013
Totals
| Fighter | KD | Sig. Str. | Sig. Str. % | Total Str. | TD | TD % | Sub. Att | Rev. | Ctrl |
|---|---|---|---|---|---|---|---|---|---|
| Cody McKenzie | 0 | 15 of 77 | 19% | 30 of 92 | 0 of 0 | --- | 0 | 0 | 0:20 |
| Leonard Garcia | 0 | 30 of 54 | 55% | 84 of 111 | 5 of 13 | 38% | 4 | 0 | 9:10 |
Per Round
| Rd | Fighter | KD | Sig. Str. | Sig. Str. % | Total Str. | TD | TD % | Sub. Att | Rev. | Ctrl |
|---|---|---|---|---|---|---|---|---|---|---|
| 1 | Cody McKenzie | 0 | 0 of 0 | --- | 7 of 7 | 0 of 0 | --- | 0 | 0 | 0:20 |
| Leonard Garcia | 0 | 6 of 6 | 100% | 36 of 39 | 2 of 2 | 100% | 4 | 0 | 4:28 | |
| 2 | Cody McKenzie | 0 | 3 of 15 | 20% | 11 of 23 | 0 of 0 | --- | 0 | 0 | 0:00 |
| Leonard Garcia | 0 | 5 of 8 | 62% | 25 of 28 | 2 of 6 | 33% | 0 | 0 | 3:54 | |
| 3 | Cody McKenzie | 0 | 12 of 62 | 19% | 12 of 62 | 0 of 0 | --- | 0 | 0 | 0:00 |
| Leonard Garcia | 0 | 19 of 40 | 47% | 23 of 44 | 1 of 5 | 20% | 0 | 0 | 0:48 |
Significant Strikes
| Fighter | Sig. Str. | Sig. Str. % | Head | Body | Leg | Distance | Clinch | Ground |
|---|---|---|---|---|---|---|---|---|
| Cody McKenzie | 15 of 77 | 19% | 10 of 70 | 4 of 4 | 1 of 3 | 11 of 73 | 2 of 2 | 2 of 2 |
| Leonard Garcia | 30 of 54 | 55% | 27 of 48 | 2 of 5 | 1 of 1 | 16 of 38 | 4 of 6 | 10 of 10 |
Significant Strikes Per Round
| Rd | Fighter | Sig. Str. | Sig. Str. % | Head | Body | Leg | Distance | Clinch | Ground |
|---|---|---|---|---|---|---|---|---|---|
| 1 | Cody McKenzie | 0 of 0 | --- | 0 of 0 | 0 of 0 | 0 of 0 | 0 of 0 | 0 of 0 | 0 of 0 |
| Leonard Garcia | 6 of 6 | 100% | 6 of 6 | 0 of 0 | 0 of 0 | 0 of 0 | 0 of 0 | 6 of 6 | |
| 2 | Cody McKenzie | 3 of 15 | 20% | 1 of 12 | 2 of 2 | 0 of 1 | 1 of 13 | 0 of 0 | 2 of 2 |
| Leonard Garcia | 5 of 8 | 62% | 4 of 7 | 1 of 1 | 0 of 0 | 1 of 4 | 1 of 1 | 3 of 3 | |
| 3 | Cody McKenzie | 12 of 62 | 19% | 9 of 58 | 2 of 2 | 1 of 2 | 10 of 60 | 2 of 2 | 0 of 0 |
| Leonard Garcia | 19 of 40 | 47% | 17 of 35 | 1 of 4 | 1 of 1 | 15 of 34 | 3 of 5 | 1 of 1 |
LOSS
vs
Max Holloway
Decision (split) (29–28, 28–29, 29–28)
R3
5:00
·
UFC 155: dos Santos vs. Velasquez 2 ·
Dec 29, 2012
Totals
| Fighter | KD | Sig. Str. | Sig. Str. % | Total Str. | TD | TD % | Sub. Att | Rev. | Ctrl |
|---|---|---|---|---|---|---|---|---|---|
| Max Holloway | 0 | 89 of 359 | 24% | 92 of 367 | 2 of 4 | 50% | 0 | 0 | 1:37 |
| Leonard Garcia | 1 | 120 of 269 | 44% | 122 of 273 | 0 of 0 | --- | 0 | 0 | 0:08 |
Per Round
| Rd | Fighter | KD | Sig. Str. | Sig. Str. % | Total Str. | TD | TD % | Sub. Att | Rev. | Ctrl |
|---|---|---|---|---|---|---|---|---|---|---|
| 1 | Max Holloway | 0 | 25 of 104 | 24% | 25 of 104 | 0 of 0 | --- | 0 | 0 | 0:00 |
| Leonard Garcia | 1 | 32 of 78 | 41% | 32 of 78 | 0 of 0 | --- | 0 | 0 | 0:00 | |
| 2 | Max Holloway | 0 | 25 of 104 | 24% | 26 of 106 | 1 of 2 | 50% | 0 | 0 | 0:40 |
| Leonard Garcia | 0 | 37 of 90 | 41% | 38 of 91 | 0 of 0 | --- | 0 | 0 | 0:00 | |
| 3 | Max Holloway | 0 | 39 of 151 | 25% | 41 of 157 | 1 of 2 | 50% | 0 | 0 | 0:57 |
| Leonard Garcia | 0 | 51 of 101 | 50% | 52 of 104 | 0 of 0 | --- | 0 | 0 | 0:08 |
Significant Strikes
| Fighter | Sig. Str. | Sig. Str. % | Head | Body | Leg | Distance | Clinch | Ground |
|---|---|---|---|---|---|---|---|---|
| Max Holloway | 89 of 359 | 24% | 64 of 320 | 10 of 24 | 15 of 15 | 82 of 346 | 7 of 12 | 0 of 1 |
| Leonard Garcia | 120 of 269 | 44% | 68 of 193 | 38 of 61 | 14 of 15 | 114 of 261 | 6 of 7 | 0 of 1 |
Significant Strikes Per Round
| Rd | Fighter | Sig. Str. | Sig. Str. % | Head | Body | Leg | Distance | Clinch | Ground |
|---|---|---|---|---|---|---|---|---|---|
| 1 | Max Holloway | 25 of 104 | 24% | 13 of 86 | 4 of 10 | 8 of 8 | 23 of 101 | 2 of 3 | 0 of 0 |
| Leonard Garcia | 32 of 78 | 41% | 13 of 50 | 13 of 21 | 6 of 7 | 32 of 78 | 0 of 0 | 0 of 0 | |
| 2 | Max Holloway | 25 of 104 | 24% | 20 of 92 | 2 of 9 | 3 of 3 | 22 of 98 | 3 of 6 | 0 of 0 |
| Leonard Garcia | 37 of 90 | 41% | 24 of 69 | 10 of 18 | 3 of 3 | 34 of 86 | 3 of 4 | 0 of 0 | |
| 3 | Max Holloway | 39 of 151 | 25% | 31 of 142 | 4 of 5 | 4 of 4 | 37 of 147 | 2 of 3 | 0 of 1 |
| Leonard Garcia | 51 of 101 | 50% | 31 of 74 | 15 of 22 | 5 of 5 | 48 of 97 | 3 of 3 | 0 of 1 |
Play-by-Play
View on SherdogLeonard Garcia vs. Max Holloway
Round 1
Kim Winslow is in charge of this featherweight affair. Garcia takes the center of the cage with the longer Holloway on the outside, kicking at the legs of the “Bad Boy.” Garcia gives him a stiff leg kick in return and gets backed up by a teep kick to the body. Garcia rushes forward, winging punches, but Holloway uses good head movement and front kicks to keep the distance. A hard leg kick from Holloway now and Garcia tries to clinch; Holloway shoves him off. Garcia sneaks through a straight left, then another, but they’re glancing blows as Holloway turns away. A big left hand from Garcia stuns Holloway, but the Hawaiian stays vertical. The noses of both men are bloodied now as they enter the last minute. Holloway tags Garcia with a spinning kick to the body, but Garcia comes inside and mugs him with punches in the clinch.
Tristen Critchfield scores the round 10-9 Holloway
Chris Nelson scores the round 10-9 Holloway
Mike Whitman scores the round 10-9 Holloway
Round 2
PICTURE R
D. Mandel/Sherdog.com Holloway edged Garcia on two cards.
/PICTURE R
Holloway snaps off some leg kicks and punches in the early going. Garcia eats a knee on his way in but hits a takedown at the 3:00 mark; Holloway quickly posts up and stands. The featherweights exchange jabs with Holloway picking off the shorter man by virtue of his longer limbs. Garcia keeps throwing to the body and head with mixed results, but he’s got Holloway on the back foot nonetheless, and the Hawaiian’s output has slowed down. They clinch with 30 seconds left and Holloway uses knees to get out. Garcia is just throwing arm punches now but they’ve got Holloway on the retreat, pinned against the fence at the end of the frame.
Tristen Critchfield scores the round 10-9 Garcia
Chris Nelson scores the round 10-9 Garcia
Mike Whitman scores the round 10-9 Garcia
Round 3
Garcia is throwing and yelling but doesn’t appear to be landing much in the opening minute of round three. Holloway is popping the Greg Jackson charge with occasional counters, but he’s forced to stay on his bicycle as Garcia keeps pressing forward. The attack finally slows and Holloway socks Garcia with a straight right, only to be warned by ref Winslow to keep his fingers tucked. Garcia keeps pressing, throwing bombs and eating up Holloway’s counter right hooks. Midway through the frame, Garcia changes levels and hits a double-leg against the fence. Holloway posts up and scrambles to his feet, where he’s again forced to retreat under the relentless arm-punch assault of Garcia. Holloway works the body with some good hooks. Garcia is just relentless and keeps after Holloway, who gets taken down one last time and slammed back to the ground after a last-ditch kick attempt.
Tristen Critchfield scores the round 10-9 Garcia (29-28 Garcia)
Chris Nelson scores the round 10-9 Garcia (29-28 Garcia)
Mike Whitman scores the round 10-9 Garcia (29-28 Garcia)
Official result:
Max Holloway def. Leonard Garcia via Split Decision (29-28, 28-29, 29-28) R3 5:00
Round 1
Kim Winslow is in charge of this featherweight affair. Garcia takes the center of the cage with the longer Holloway on the outside, kicking at the legs of the “Bad Boy.” Garcia gives him a stiff leg kick in return and gets backed up by a teep kick to the body. Garcia rushes forward, winging punches, but Holloway uses good head movement and front kicks to keep the distance. A hard leg kick from Holloway now and Garcia tries to clinch; Holloway shoves him off. Garcia sneaks through a straight left, then another, but they’re glancing blows as Holloway turns away. A big left hand from Garcia stuns Holloway, but the Hawaiian stays vertical. The noses of both men are bloodied now as they enter the last minute. Holloway tags Garcia with a spinning kick to the body, but Garcia comes inside and mugs him with punches in the clinch.
Tristen Critchfield scores the round 10-9 Holloway
Chris Nelson scores the round 10-9 Holloway
Mike Whitman scores the round 10-9 Holloway
Round 2
PICTURE R
D. Mandel/Sherdog.com Holloway edged Garcia on two cards.
/PICTURE R
Holloway snaps off some leg kicks and punches in the early going. Garcia eats a knee on his way in but hits a takedown at the 3:00 mark; Holloway quickly posts up and stands. The featherweights exchange jabs with Holloway picking off the shorter man by virtue of his longer limbs. Garcia keeps throwing to the body and head with mixed results, but he’s got Holloway on the back foot nonetheless, and the Hawaiian’s output has slowed down. They clinch with 30 seconds left and Holloway uses knees to get out. Garcia is just throwing arm punches now but they’ve got Holloway on the retreat, pinned against the fence at the end of the frame.
Tristen Critchfield scores the round 10-9 Garcia
Chris Nelson scores the round 10-9 Garcia
Mike Whitman scores the round 10-9 Garcia
Round 3
Garcia is throwing and yelling but doesn’t appear to be landing much in the opening minute of round three. Holloway is popping the Greg Jackson charge with occasional counters, but he’s forced to stay on his bicycle as Garcia keeps pressing forward. The attack finally slows and Holloway socks Garcia with a straight right, only to be warned by ref Winslow to keep his fingers tucked. Garcia keeps pressing, throwing bombs and eating up Holloway’s counter right hooks. Midway through the frame, Garcia changes levels and hits a double-leg against the fence. Holloway posts up and scrambles to his feet, where he’s again forced to retreat under the relentless arm-punch assault of Garcia. Holloway works the body with some good hooks. Garcia is just relentless and keeps after Holloway, who gets taken down one last time and slammed back to the ground after a last-ditch kick attempt.
Tristen Critchfield scores the round 10-9 Garcia (29-28 Garcia)
Chris Nelson scores the round 10-9 Garcia (29-28 Garcia)
Mike Whitman scores the round 10-9 Garcia (29-28 Garcia)
Official result:
Max Holloway def. Leonard Garcia via Split Decision (29-28, 28-29, 29-28) R3 5:00
LOSS
vs
Matt Grice
Decision (unanimous) (30–27, 30–27, 30–27)
R3
5:00
·
UFC 149: Faber vs. Barao ·
Jul 21, 2012
Totals
| Fighter | KD | Sig. Str. | Sig. Str. % | Total Str. | TD | TD % | Sub. Att | Rev. | Ctrl |
|---|---|---|---|---|---|---|---|---|---|
| Matt Grice | 0 | 2 of 69 | 2% | 30 of 101 | 0 of 0 | --- | 0 | 0 | 0:00 |
| Leonard Garcia | 0 | 61 of 113 | 53% | 136 of 194 | 4 of 7 | 57% | 1 | 0 | 9:37 |
Per Round
| Rd | Fighter | KD | Sig. Str. | Sig. Str. % | Total Str. | TD | TD % | Sub. Att | Rev. | Ctrl |
|---|---|---|---|---|---|---|---|---|---|---|
| 1 | Matt Grice | 0 | 0 of 16 | 0% | 11 of 28 | 0 of 0 | --- | 0 | 0 | 0:00 |
| Leonard Garcia | 0 | 16 of 31 | 51% | 42 of 59 | 1 of 1 | 100% | 1 | 0 | 3:36 | |
| 2 | Matt Grice | 0 | 1 of 8 | 12% | 13 of 23 | 0 of 0 | --- | 0 | 0 | 0:00 |
| Leonard Garcia | 0 | 30 of 52 | 57% | 62 of 86 | 1 of 2 | 50% | 0 | 0 | 4:08 | |
| 3 | Matt Grice | 0 | 1 of 45 | 2% | 6 of 50 | 0 of 0 | --- | 0 | 0 | 0:00 |
| Leonard Garcia | 0 | 15 of 30 | 50% | 32 of 49 | 2 of 4 | 50% | 0 | 0 | 1:53 |
Significant Strikes
| Fighter | Sig. Str. | Sig. Str. % | Head | Body | Leg | Distance | Clinch | Ground |
|---|---|---|---|---|---|---|---|---|
| Matt Grice | 2 of 69 | 2% | 1 of 62 | 1 of 4 | 0 of 3 | 2 of 67 | 0 of 2 | 0 of 0 |
| Leonard Garcia | 61 of 113 | 53% | 59 of 106 | 1 of 3 | 1 of 4 | 8 of 20 | 1 of 4 | 52 of 89 |
Significant Strikes Per Round
| Rd | Fighter | Sig. Str. | Sig. Str. % | Head | Body | Leg | Distance | Clinch | Ground |
|---|---|---|---|---|---|---|---|---|---|
| 1 | Matt Grice | 0 of 16 | 0% | 0 of 14 | 0 of 0 | 0 of 2 | 0 of 16 | 0 of 0 | 0 of 0 |
| Leonard Garcia | 16 of 31 | 51% | 15 of 28 | 0 of 0 | 1 of 3 | 1 of 6 | 0 of 0 | 15 of 25 | |
| 2 | Matt Grice | 1 of 8 | 12% | 1 of 6 | 0 of 2 | 0 of 0 | 1 of 8 | 0 of 0 | 0 of 0 |
| Leonard Garcia | 30 of 52 | 57% | 30 of 51 | 0 of 1 | 0 of 0 | 3 of 5 | 0 of 0 | 27 of 47 | |
| 3 | Matt Grice | 1 of 45 | 2% | 0 of 42 | 1 of 2 | 0 of 1 | 1 of 43 | 0 of 2 | 0 of 0 |
| Leonard Garcia | 15 of 30 | 50% | 14 of 27 | 1 of 2 | 0 of 1 | 4 of 9 | 1 of 4 | 10 of 17 |
LOSS
vs
Matt Grice
Decision (unanimous) (30–27, 30–27, 30–27)
R3
5:00
·
UFC on FX: Johnson vs. McCall 2 ·
Jun 08, 2012
Totals
| Fighter | KD | Sig. Str. | Sig. Str. % | Total Str. | TD | TD % | Sub. Att | Rev. | Ctrl |
|---|---|---|---|---|---|---|---|---|---|
| Matt Grice | 0 | 2 of 69 | 2% | 30 of 101 | 0 of 0 | --- | 0 | 0 | 0:00 |
| Leonard Garcia | 0 | 61 of 113 | 53% | 136 of 194 | 4 of 7 | 57% | 1 | 0 | 9:37 |
Per Round
| Rd | Fighter | KD | Sig. Str. | Sig. Str. % | Total Str. | TD | TD % | Sub. Att | Rev. | Ctrl |
|---|---|---|---|---|---|---|---|---|---|---|
| 1 | Matt Grice | 0 | 0 of 16 | 0% | 11 of 28 | 0 of 0 | --- | 0 | 0 | 0:00 |
| Leonard Garcia | 0 | 16 of 31 | 51% | 42 of 59 | 1 of 1 | 100% | 1 | 0 | 3:36 | |
| 2 | Matt Grice | 0 | 1 of 8 | 12% | 13 of 23 | 0 of 0 | --- | 0 | 0 | 0:00 |
| Leonard Garcia | 0 | 30 of 52 | 57% | 62 of 86 | 1 of 2 | 50% | 0 | 0 | 4:08 | |
| 3 | Matt Grice | 0 | 1 of 45 | 2% | 6 of 50 | 0 of 0 | --- | 0 | 0 | 0:00 |
| Leonard Garcia | 0 | 15 of 30 | 50% | 32 of 49 | 2 of 4 | 50% | 0 | 0 | 1:53 |
Significant Strikes
| Fighter | Sig. Str. | Sig. Str. % | Head | Body | Leg | Distance | Clinch | Ground |
|---|---|---|---|---|---|---|---|---|
| Matt Grice | 2 of 69 | 2% | 1 of 62 | 1 of 4 | 0 of 3 | 2 of 67 | 0 of 2 | 0 of 0 |
| Leonard Garcia | 61 of 113 | 53% | 59 of 106 | 1 of 3 | 1 of 4 | 8 of 20 | 1 of 4 | 52 of 89 |
Significant Strikes Per Round
| Rd | Fighter | Sig. Str. | Sig. Str. % | Head | Body | Leg | Distance | Clinch | Ground |
|---|---|---|---|---|---|---|---|---|---|
| 1 | Matt Grice | 0 of 16 | 0% | 0 of 14 | 0 of 0 | 0 of 2 | 0 of 16 | 0 of 0 | 0 of 0 |
| Leonard Garcia | 16 of 31 | 51% | 15 of 28 | 0 of 0 | 1 of 3 | 1 of 6 | 0 of 0 | 15 of 25 | |
| 2 | Matt Grice | 1 of 8 | 12% | 1 of 6 | 0 of 2 | 0 of 0 | 1 of 8 | 0 of 0 | 0 of 0 |
| Leonard Garcia | 30 of 52 | 57% | 30 of 51 | 0 of 1 | 0 of 0 | 3 of 5 | 0 of 0 | 27 of 47 | |
| 3 | Matt Grice | 1 of 45 | 2% | 0 of 42 | 1 of 2 | 0 of 1 | 1 of 43 | 0 of 2 | 0 of 0 |
| Leonard Garcia | 15 of 30 | 50% | 14 of 27 | 1 of 2 | 0 of 1 | 4 of 9 | 1 of 4 | 10 of 17 |
LOSS
vs
Matt Grice
Decision (unanimous) (30–27, 30–27, 30–27)
R3
5:00
·
UFC on Fuel TV: The Korean Zombie vs. Poirier ·
May 15, 2012
Totals
| Fighter | KD | Sig. Str. | Sig. Str. % | Total Str. | TD | TD % | Sub. Att | Rev. | Ctrl |
|---|---|---|---|---|---|---|---|---|---|
| Matt Grice | 0 | 2 of 69 | 2% | 30 of 101 | 0 of 0 | --- | 0 | 0 | 0:00 |
| Leonard Garcia | 0 | 61 of 113 | 53% | 136 of 194 | 4 of 7 | 57% | 1 | 0 | 9:37 |
Per Round
| Rd | Fighter | KD | Sig. Str. | Sig. Str. % | Total Str. | TD | TD % | Sub. Att | Rev. | Ctrl |
|---|---|---|---|---|---|---|---|---|---|---|
| 1 | Matt Grice | 0 | 0 of 16 | 0% | 11 of 28 | 0 of 0 | --- | 0 | 0 | 0:00 |
| Leonard Garcia | 0 | 16 of 31 | 51% | 42 of 59 | 1 of 1 | 100% | 1 | 0 | 3:36 | |
| 2 | Matt Grice | 0 | 1 of 8 | 12% | 13 of 23 | 0 of 0 | --- | 0 | 0 | 0:00 |
| Leonard Garcia | 0 | 30 of 52 | 57% | 62 of 86 | 1 of 2 | 50% | 0 | 0 | 4:08 | |
| 3 | Matt Grice | 0 | 1 of 45 | 2% | 6 of 50 | 0 of 0 | --- | 0 | 0 | 0:00 |
| Leonard Garcia | 0 | 15 of 30 | 50% | 32 of 49 | 2 of 4 | 50% | 0 | 0 | 1:53 |
Significant Strikes
| Fighter | Sig. Str. | Sig. Str. % | Head | Body | Leg | Distance | Clinch | Ground |
|---|---|---|---|---|---|---|---|---|
| Matt Grice | 2 of 69 | 2% | 1 of 62 | 1 of 4 | 0 of 3 | 2 of 67 | 0 of 2 | 0 of 0 |
| Leonard Garcia | 61 of 113 | 53% | 59 of 106 | 1 of 3 | 1 of 4 | 8 of 20 | 1 of 4 | 52 of 89 |
Significant Strikes Per Round
| Rd | Fighter | Sig. Str. | Sig. Str. % | Head | Body | Leg | Distance | Clinch | Ground |
|---|---|---|---|---|---|---|---|---|---|
| 1 | Matt Grice | 0 of 16 | 0% | 0 of 14 | 0 of 0 | 0 of 2 | 0 of 16 | 0 of 0 | 0 of 0 |
| Leonard Garcia | 16 of 31 | 51% | 15 of 28 | 0 of 0 | 1 of 3 | 1 of 6 | 0 of 0 | 15 of 25 | |
| 2 | Matt Grice | 1 of 8 | 12% | 1 of 6 | 0 of 2 | 0 of 0 | 1 of 8 | 0 of 0 | 0 of 0 |
| Leonard Garcia | 30 of 52 | 57% | 30 of 51 | 0 of 1 | 0 of 0 | 3 of 5 | 0 of 0 | 27 of 47 | |
| 3 | Matt Grice | 1 of 45 | 2% | 0 of 42 | 1 of 2 | 0 of 1 | 1 of 43 | 0 of 2 | 0 of 0 |
| Leonard Garcia | 15 of 30 | 50% | 14 of 27 | 1 of 2 | 0 of 1 | 4 of 9 | 1 of 4 | 10 of 17 |
LOSS
vs
Matt Grice
Decision (unanimous) (30–27, 30–27, 30–27)
R3
5:00
·
UFC on Fuel TV: Sanchez vs. Ellenberger ·
Feb 15, 2012
Totals
| Fighter | KD | Sig. Str. | Sig. Str. % | Total Str. | TD | TD % | Sub. Att | Rev. | Ctrl |
|---|---|---|---|---|---|---|---|---|---|
| Matt Grice | 0 | 2 of 69 | 2% | 30 of 101 | 0 of 0 | --- | 0 | 0 | 0:00 |
| Leonard Garcia | 0 | 61 of 113 | 53% | 136 of 194 | 4 of 7 | 57% | 1 | 0 | 9:37 |
Per Round
| Rd | Fighter | KD | Sig. Str. | Sig. Str. % | Total Str. | TD | TD % | Sub. Att | Rev. | Ctrl |
|---|---|---|---|---|---|---|---|---|---|---|
| 1 | Matt Grice | 0 | 0 of 16 | 0% | 11 of 28 | 0 of 0 | --- | 0 | 0 | 0:00 |
| Leonard Garcia | 0 | 16 of 31 | 51% | 42 of 59 | 1 of 1 | 100% | 1 | 0 | 3:36 | |
| 2 | Matt Grice | 0 | 1 of 8 | 12% | 13 of 23 | 0 of 0 | --- | 0 | 0 | 0:00 |
| Leonard Garcia | 0 | 30 of 52 | 57% | 62 of 86 | 1 of 2 | 50% | 0 | 0 | 4:08 | |
| 3 | Matt Grice | 0 | 1 of 45 | 2% | 6 of 50 | 0 of 0 | --- | 0 | 0 | 0:00 |
| Leonard Garcia | 0 | 15 of 30 | 50% | 32 of 49 | 2 of 4 | 50% | 0 | 0 | 1:53 |
Significant Strikes
| Fighter | Sig. Str. | Sig. Str. % | Head | Body | Leg | Distance | Clinch | Ground |
|---|---|---|---|---|---|---|---|---|
| Matt Grice | 2 of 69 | 2% | 1 of 62 | 1 of 4 | 0 of 3 | 2 of 67 | 0 of 2 | 0 of 0 |
| Leonard Garcia | 61 of 113 | 53% | 59 of 106 | 1 of 3 | 1 of 4 | 8 of 20 | 1 of 4 | 52 of 89 |
Significant Strikes Per Round
| Rd | Fighter | Sig. Str. | Sig. Str. % | Head | Body | Leg | Distance | Clinch | Ground |
|---|---|---|---|---|---|---|---|---|---|
| 1 | Matt Grice | 0 of 16 | 0% | 0 of 14 | 0 of 0 | 0 of 2 | 0 of 16 | 0 of 0 | 0 of 0 |
| Leonard Garcia | 16 of 31 | 51% | 15 of 28 | 0 of 0 | 1 of 3 | 1 of 6 | 0 of 0 | 15 of 25 | |
| 2 | Matt Grice | 1 of 8 | 12% | 1 of 6 | 0 of 2 | 0 of 0 | 1 of 8 | 0 of 0 | 0 of 0 |
| Leonard Garcia | 30 of 52 | 57% | 30 of 51 | 0 of 1 | 0 of 0 | 3 of 5 | 0 of 0 | 27 of 47 | |
| 3 | Matt Grice | 1 of 45 | 2% | 0 of 42 | 1 of 2 | 0 of 1 | 1 of 43 | 0 of 2 | 0 of 0 |
| Leonard Garcia | 15 of 30 | 50% | 14 of 27 | 1 of 2 | 0 of 1 | 4 of 9 | 1 of 4 | 10 of 17 |
LOSS
vs
Matt Grice
Decision (unanimous) (30–27, 30–27, 30–27)
R3
5:00
·
UFC on Fox: Evans vs. Davis ·
Jan 28, 2012
Totals
| Fighter | KD | Sig. Str. | Sig. Str. % | Total Str. | TD | TD % | Sub. Att | Rev. | Ctrl |
|---|---|---|---|---|---|---|---|---|---|
| Matt Grice | 0 | 2 of 69 | 2% | 30 of 101 | 0 of 0 | --- | 0 | 0 | 0:00 |
| Leonard Garcia | 0 | 61 of 113 | 53% | 136 of 194 | 4 of 7 | 57% | 1 | 0 | 9:37 |
Per Round
| Rd | Fighter | KD | Sig. Str. | Sig. Str. % | Total Str. | TD | TD % | Sub. Att | Rev. | Ctrl |
|---|---|---|---|---|---|---|---|---|---|---|
| 1 | Matt Grice | 0 | 0 of 16 | 0% | 11 of 28 | 0 of 0 | --- | 0 | 0 | 0:00 |
| Leonard Garcia | 0 | 16 of 31 | 51% | 42 of 59 | 1 of 1 | 100% | 1 | 0 | 3:36 | |
| 2 | Matt Grice | 0 | 1 of 8 | 12% | 13 of 23 | 0 of 0 | --- | 0 | 0 | 0:00 |
| Leonard Garcia | 0 | 30 of 52 | 57% | 62 of 86 | 1 of 2 | 50% | 0 | 0 | 4:08 | |
| 3 | Matt Grice | 0 | 1 of 45 | 2% | 6 of 50 | 0 of 0 | --- | 0 | 0 | 0:00 |
| Leonard Garcia | 0 | 15 of 30 | 50% | 32 of 49 | 2 of 4 | 50% | 0 | 0 | 1:53 |
Significant Strikes
| Fighter | Sig. Str. | Sig. Str. % | Head | Body | Leg | Distance | Clinch | Ground |
|---|---|---|---|---|---|---|---|---|
| Matt Grice | 2 of 69 | 2% | 1 of 62 | 1 of 4 | 0 of 3 | 2 of 67 | 0 of 2 | 0 of 0 |
| Leonard Garcia | 61 of 113 | 53% | 59 of 106 | 1 of 3 | 1 of 4 | 8 of 20 | 1 of 4 | 52 of 89 |
Significant Strikes Per Round
| Rd | Fighter | Sig. Str. | Sig. Str. % | Head | Body | Leg | Distance | Clinch | Ground |
|---|---|---|---|---|---|---|---|---|---|
| 1 | Matt Grice | 0 of 16 | 0% | 0 of 14 | 0 of 0 | 0 of 2 | 0 of 16 | 0 of 0 | 0 of 0 |
| Leonard Garcia | 16 of 31 | 51% | 15 of 28 | 0 of 0 | 1 of 3 | 1 of 6 | 0 of 0 | 15 of 25 | |
| 2 | Matt Grice | 1 of 8 | 12% | 1 of 6 | 0 of 2 | 0 of 0 | 1 of 8 | 0 of 0 | 0 of 0 |
| Leonard Garcia | 30 of 52 | 57% | 30 of 51 | 0 of 1 | 0 of 0 | 3 of 5 | 0 of 0 | 27 of 47 | |
| 3 | Matt Grice | 1 of 45 | 2% | 0 of 42 | 1 of 2 | 0 of 1 | 1 of 43 | 0 of 2 | 0 of 0 |
| Leonard Garcia | 15 of 30 | 50% | 14 of 27 | 1 of 2 | 0 of 1 | 4 of 9 | 1 of 4 | 10 of 17 |
LOSS
vs
Nam Phan
Decision (unanimous) (29–28, 29–28, 29–28)
R3
5:00
·
UFC 136: Edgar vs. Maynard III ·
Oct 08, 2011
Totals
| Fighter | KD | Sig. Str. | Sig. Str. % | Total Str. | TD | TD % | Sub. Att | Rev. | Ctrl |
|---|---|---|---|---|---|---|---|---|---|
| Nam Phan | 1 | 100 of 374 | 26% | 107 of 382 | 0 of 2 | 0% | 0 | 0 | 0:25 |
| Leonard Garcia | 0 | 174 of 339 | 51% | 195 of 360 | 1 of 1 | 100% | 0 | 0 | 1:33 |
Per Round
| Rd | Fighter | KD | Sig. Str. | Sig. Str. % | Total Str. | TD | TD % | Sub. Att | Rev. | Ctrl |
|---|---|---|---|---|---|---|---|---|---|---|
| 1 | Nam Phan | 0 | 32 of 104 | 30% | 36 of 109 | 0 of 1 | 0% | 0 | 0 | 0:00 |
| Leonard Garcia | 0 | 42 of 85 | 49% | 50 of 93 | 0 of 0 | --- | 0 | 0 | 0:57 | |
| 2 | Nam Phan | 0 | 36 of 136 | 26% | 36 of 136 | 0 of 0 | --- | 0 | 0 | 0:00 |
| Leonard Garcia | 0 | 78 of 165 | 47% | 78 of 165 | 0 of 0 | --- | 0 | 0 | 0:00 | |
| 3 | Nam Phan | 1 | 32 of 134 | 23% | 35 of 137 | 0 of 1 | 0% | 0 | 0 | 0:25 |
| Leonard Garcia | 0 | 54 of 89 | 60% | 67 of 102 | 1 of 1 | 100% | 0 | 0 | 0:36 |
Significant Strikes
| Fighter | Sig. Str. | Sig. Str. % | Head | Body | Leg | Distance | Clinch | Ground |
|---|---|---|---|---|---|---|---|---|
| Nam Phan | 100 of 374 | 26% | 56 of 321 | 19 of 28 | 25 of 25 | 99 of 371 | 1 of 3 | 0 of 0 |
| Leonard Garcia | 174 of 339 | 51% | 131 of 289 | 43 of 49 | 0 of 1 | 173 of 337 | 0 of 0 | 1 of 2 |
Significant Strikes Per Round
| Rd | Fighter | Sig. Str. | Sig. Str. % | Head | Body | Leg | Distance | Clinch | Ground |
|---|---|---|---|---|---|---|---|---|---|
| 1 | Nam Phan | 32 of 104 | 30% | 17 of 86 | 6 of 9 | 9 of 9 | 32 of 104 | 0 of 0 | 0 of 0 |
| Leonard Garcia | 42 of 85 | 49% | 28 of 66 | 14 of 18 | 0 of 1 | 41 of 83 | 0 of 0 | 1 of 2 | |
| 2 | Nam Phan | 36 of 136 | 26% | 22 of 120 | 8 of 10 | 6 of 6 | 36 of 134 | 0 of 2 | 0 of 0 |
| Leonard Garcia | 78 of 165 | 47% | 58 of 145 | 20 of 20 | 0 of 0 | 78 of 165 | 0 of 0 | 0 of 0 | |
| 3 | Nam Phan | 32 of 134 | 23% | 17 of 115 | 5 of 9 | 10 of 10 | 31 of 133 | 1 of 1 | 0 of 0 |
| Leonard Garcia | 54 of 89 | 60% | 45 of 78 | 9 of 11 | 0 of 0 | 54 of 89 | 0 of 0 | 0 of 0 |
No comments yet. Be the first to share your thoughts!