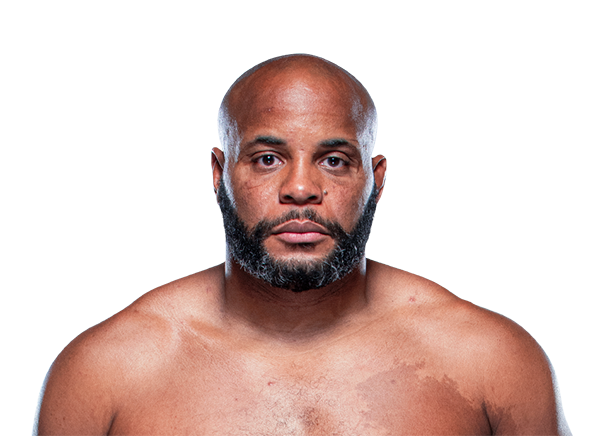
Career Averages - Daniel Cormier
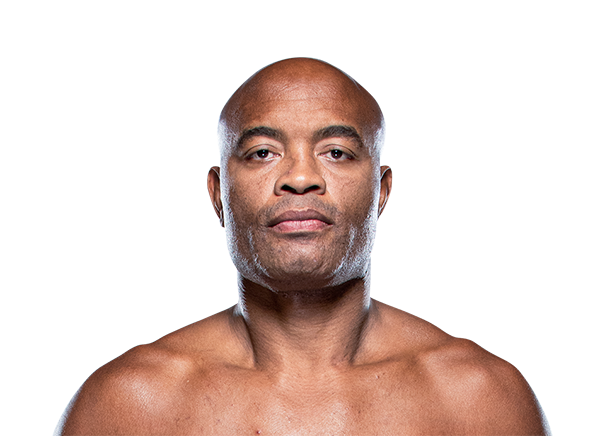
Career Averages - Anderson Silva
Daniel Cormier - Fight History
Totals
| Fighter | KD | Sig. Str. | Sig. Str. % | Total Str. | TD | TD % | Sub. Att | Rev. | Ctrl |
|---|---|---|---|---|---|---|---|---|---|
| Stipe Miocic | 1 | 115 of 187 | 61% | 171 of 244 | 0 of 6 | 0% | 0 | 0 | 5:52 |
| Daniel Cormier | 0 | 105 of 183 | 57% | 145 of 223 | 1 of 2 | 50% | 0 | 0 | 0:53 |
Per Round
| Rd | Fighter | KD | Sig. Str. | Sig. Str. % | Total Str. | TD | TD % | Sub. Att | Rev. | Ctrl |
|---|---|---|---|---|---|---|---|---|---|---|
| 1 | Stipe Miocic | 0 | 20 of 33 | 60% | 22 of 35 | 0 of 0 | --- | 0 | 0 | 0:00 |
| Daniel Cormier | 0 | 14 of 25 | 56% | 14 of 25 | 1 of 1 | 100% | 0 | 0 | 0:38 | |
| 2 | Stipe Miocic | 1 | 24 of 39 | 61% | 38 of 54 | 0 of 2 | 0% | 0 | 0 | 0:09 |
| Daniel Cormier | 0 | 26 of 53 | 49% | 26 of 53 | 0 of 0 | --- | 0 | 0 | 0:00 | |
| 3 | Stipe Miocic | 0 | 28 of 48 | 58% | 46 of 66 | 0 of 0 | --- | 0 | 0 | 1:53 |
| Daniel Cormier | 0 | 16 of 32 | 50% | 34 of 50 | 0 of 0 | --- | 0 | 0 | 0:00 | |
| 4 | Stipe Miocic | 0 | 16 of 32 | 50% | 23 of 39 | 0 of 2 | 0% | 0 | 0 | 1:23 |
| Daniel Cormier | 0 | 30 of 43 | 69% | 41 of 54 | 0 of 1 | 0% | 0 | 0 | 0:00 | |
| 5 | Stipe Miocic | 0 | 27 of 35 | 77% | 42 of 50 | 0 of 2 | 0% | 0 | 0 | 2:27 |
| Daniel Cormier | 0 | 19 of 30 | 63% | 30 of 41 | 0 of 0 | --- | 0 | 0 | 0:15 |
Significant Strikes
| Fighter | Sig. Str. | Sig. Str. % | Head | Body | Leg | Distance | Clinch | Ground |
|---|---|---|---|---|---|---|---|---|
| Stipe Miocic | 115 of 187 | 61% | 67 of 136 | 31 of 34 | 17 of 17 | 101 of 169 | 14 of 18 | 0 of 0 |
| Daniel Cormier | 105 of 183 | 57% | 70 of 132 | 11 of 24 | 24 of 27 | 95 of 171 | 10 of 12 | 0 of 0 |
Significant Strikes Per Round
| Rd | Fighter | Sig. Str. | Sig. Str. % | Head | Body | Leg | Distance | Clinch | Ground |
|---|---|---|---|---|---|---|---|---|---|
| 1 | Stipe Miocic | 20 of 33 | 60% | 7 of 19 | 7 of 8 | 6 of 6 | 20 of 33 | 0 of 0 | 0 of 0 |
| Daniel Cormier | 14 of 25 | 56% | 7 of 14 | 2 of 5 | 5 of 6 | 11 of 22 | 3 of 3 | 0 of 0 | |
| 2 | Stipe Miocic | 24 of 39 | 61% | 13 of 28 | 7 of 7 | 4 of 4 | 24 of 39 | 0 of 0 | 0 of 0 |
| Daniel Cormier | 26 of 53 | 49% | 14 of 36 | 4 of 9 | 8 of 8 | 23 of 50 | 3 of 3 | 0 of 0 | |
| 3 | Stipe Miocic | 28 of 48 | 58% | 18 of 38 | 8 of 8 | 2 of 2 | 22 of 41 | 6 of 7 | 0 of 0 |
| Daniel Cormier | 16 of 32 | 50% | 13 of 27 | 0 of 2 | 3 of 3 | 16 of 31 | 0 of 1 | 0 of 0 | |
| 4 | Stipe Miocic | 16 of 32 | 50% | 12 of 26 | 2 of 4 | 2 of 2 | 16 of 29 | 0 of 3 | 0 of 0 |
| Daniel Cormier | 30 of 43 | 69% | 21 of 31 | 2 of 3 | 7 of 9 | 29 of 41 | 1 of 2 | 0 of 0 | |
| 5 | Stipe Miocic | 27 of 35 | 77% | 17 of 25 | 7 of 7 | 3 of 3 | 19 of 27 | 8 of 8 | 0 of 0 |
| Daniel Cormier | 19 of 30 | 63% | 15 of 24 | 3 of 5 | 1 of 1 | 16 of 27 | 3 of 3 | 0 of 0 |
Big Brady picks Cormier to win by decision, expecting him to implement more wrestling and have better cardio. He thinks Cormier is the better fighter and will fight smarter. He wants to see weigh-ins before betting.
Daniel Levi picks Stipe Miocic to win the trilogy. He argues that Stipe made Cormier work hard in the first fight and that Cormier's pace is unsustainable in championship rounds, especially at age 41 with retirement looming. He notes that Stipe is willing to dig deeper and that body shots have historically troubled Cormier. He also points out that if Cormier wrestles more, it will tire him out faster, leading to a Stipe finish.
Cormier is the better wrestler with superior fight IQ and will use a grapple-heavy approach, taking Miocic down repeatedly and wearing him out. He learned from the second fight where he abandoned his wrestling and gassed out; this time he will chain-wrestle and finish via ground-and-pound in the later rounds. Miocic's gas tank has shown issues when forced to wrestle, as seen in the Ngannou fight, and Cormier's top pressure is crushing.
The MMA Guru picks Stipe Miocic by TKO in the third round. He believes Miocic will start body shots earlier than the second fight and that Cormier won't get away with eye pokes. He dismisses arguments that Cormier will wrestle more, noting Miocic stuffed takedowns in previous fights.
Totals
| Fighter | KD | Sig. Str. | Sig. Str. % | Total Str. | TD | TD % | Sub. Att | Rev. | Ctrl |
|---|---|---|---|---|---|---|---|---|---|
| Stipe Miocic | 0 | 181 of 263 | 68% | 230 of 317 | 1 of 3 | 33% | 0 | 0 | 3:02 |
| Daniel Cormier | 1 | 123 of 229 | 53% | 135 of 244 | 1 of 3 | 33% | 0 | 0 | 1:30 |
Per Round
| Rd | Fighter | KD | Sig. Str. | Sig. Str. % | Total Str. | TD | TD % | Sub. Att | Rev. | Ctrl |
|---|---|---|---|---|---|---|---|---|---|---|
| 1 | Stipe Miocic | 0 | 37 of 46 | 80% | 71 of 83 | 1 of 2 | 50% | 0 | 0 | 2:44 |
| Daniel Cormier | 0 | 7 of 13 | 53% | 9 of 18 | 0 of 0 | --- | 0 | 0 | 0:07 | |
| 2 | Stipe Miocic | 0 | 56 of 82 | 68% | 59 of 85 | 0 of 0 | --- | 0 | 0 | 0:13 |
| Daniel Cormier | 0 | 46 of 82 | 56% | 48 of 84 | 0 of 0 | --- | 0 | 0 | 0:20 | |
| 3 | Stipe Miocic | 0 | 57 of 86 | 66% | 69 of 100 | 0 of 1 | 0% | 0 | 0 | 0:05 |
| Daniel Cormier | 0 | 34 of 67 | 50% | 40 of 73 | 1 of 3 | 33% | 0 | 0 | 1:01 | |
| 4 | Stipe Miocic | 0 | 31 of 49 | 63% | 31 of 49 | 0 of 0 | --- | 0 | 0 | 0:00 |
| Daniel Cormier | 1 | 36 of 67 | 53% | 38 of 69 | 0 of 0 | --- | 0 | 0 | 0:02 |
Significant Strikes
| Fighter | Sig. Str. | Sig. Str. % | Head | Body | Leg | Distance | Clinch | Ground |
|---|---|---|---|---|---|---|---|---|
| Stipe Miocic | 181 of 263 | 68% | 162 of 243 | 9 of 9 | 10 of 11 | 139 of 209 | 21 of 27 | 21 of 27 |
| Daniel Cormier | 123 of 229 | 53% | 86 of 188 | 27 of 30 | 10 of 11 | 102 of 195 | 19 of 28 | 2 of 6 |
Significant Strikes Per Round
| Rd | Fighter | Sig. Str. | Sig. Str. % | Head | Body | Leg | Distance | Clinch | Ground |
|---|---|---|---|---|---|---|---|---|---|
| 1 | Stipe Miocic | 37 of 46 | 80% | 25 of 34 | 7 of 7 | 5 of 5 | 13 of 16 | 3 of 3 | 21 of 27 |
| Daniel Cormier | 7 of 13 | 53% | 3 of 8 | 0 of 0 | 4 of 5 | 6 of 12 | 0 of 0 | 1 of 1 | |
| 2 | Stipe Miocic | 56 of 82 | 68% | 56 of 81 | 0 of 0 | 0 of 1 | 45 of 68 | 11 of 14 | 0 of 0 |
| Daniel Cormier | 46 of 82 | 56% | 37 of 72 | 8 of 9 | 1 of 1 | 42 of 76 | 4 of 6 | 0 of 0 | |
| 3 | Stipe Miocic | 57 of 86 | 66% | 53 of 82 | 1 of 1 | 3 of 3 | 50 of 76 | 7 of 10 | 0 of 0 |
| Daniel Cormier | 34 of 67 | 50% | 28 of 61 | 5 of 5 | 1 of 1 | 24 of 50 | 10 of 17 | 0 of 0 | |
| 4 | Stipe Miocic | 31 of 49 | 63% | 28 of 46 | 1 of 1 | 2 of 2 | 31 of 49 | 0 of 0 | 0 of 0 |
| Daniel Cormier | 36 of 67 | 53% | 18 of 47 | 14 of 16 | 4 of 4 | 30 of 57 | 5 of 5 | 1 of 5 |
Totals
| Fighter | KD | Sig. Str. | Sig. Str. % | Total Str. | TD | TD % | Sub. Att | Rev. | Ctrl |
|---|---|---|---|---|---|---|---|---|---|
| Daniel Cormier | 0 | 19 of 25 | 76% | 42 of 54 | 4 of 4 | 100% | 1 | 0 | 5:10 |
| Derrick Lewis | 0 | 4 of 13 | 30% | 5 of 14 | 0 of 0 | --- | 0 | 0 | 0:00 |
Per Round
| Rd | Fighter | KD | Sig. Str. | Sig. Str. % | Total Str. | TD | TD % | Sub. Att | Rev. | Ctrl |
|---|---|---|---|---|---|---|---|---|---|---|
| 1 | Daniel Cormier | 0 | 14 of 19 | 73% | 35 of 45 | 2 of 2 | 100% | 0 | 0 | 4:10 |
| Derrick Lewis | 0 | 3 of 3 | 100% | 4 of 4 | 0 of 0 | --- | 0 | 0 | 0:00 | |
| 2 | Daniel Cormier | 0 | 5 of 6 | 83% | 7 of 9 | 2 of 2 | 100% | 1 | 0 | 1:00 |
| Derrick Lewis | 0 | 1 of 10 | 10% | 1 of 10 | 0 of 0 | --- | 0 | 0 | 0:00 |
Significant Strikes
| Fighter | Sig. Str. | Sig. Str. % | Head | Body | Leg | Distance | Clinch | Ground |
|---|---|---|---|---|---|---|---|---|
| Daniel Cormier | 19 of 25 | 76% | 16 of 22 | 2 of 2 | 1 of 1 | 4 of 6 | 1 of 1 | 14 of 18 |
| Derrick Lewis | 4 of 13 | 30% | 2 of 9 | 1 of 3 | 1 of 1 | 4 of 13 | 0 of 0 | 0 of 0 |
Significant Strikes Per Round
| Rd | Fighter | Sig. Str. | Sig. Str. % | Head | Body | Leg | Distance | Clinch | Ground |
|---|---|---|---|---|---|---|---|---|---|
| 1 | Daniel Cormier | 14 of 19 | 73% | 13 of 18 | 0 of 0 | 1 of 1 | 1 of 3 | 0 of 0 | 13 of 16 |
| Derrick Lewis | 3 of 3 | 100% | 1 of 1 | 1 of 1 | 1 of 1 | 3 of 3 | 0 of 0 | 0 of 0 | |
| 2 | Daniel Cormier | 5 of 6 | 83% | 3 of 4 | 2 of 2 | 0 of 0 | 3 of 3 | 1 of 1 | 1 of 2 |
| Derrick Lewis | 1 of 10 | 10% | 1 of 8 | 0 of 2 | 0 of 0 | 1 of 10 | 0 of 0 | 0 of 0 |
Play-by-Play
View on SherdogRound 1
Referee Herb Dean is the third man in the cage for tonight’s heavyweight main event, with judges Douglas Crosby, Sal D’Amato and Chris Lee scoring the bout should it complete the scheduled five rounds. Lewis strikes first with a switch kick to the body, then goes to the lead leg of Cormier. The champion answers with a low kick of his own as he closes in on Lewis, changes levels and double-legs him to the floor. Cormier sits up in his challenger’s half guard, but Lewis quickly grabs hold to try and minimize the space Cormier has in which to strike. Cormier is still managing to land some hard, grinding elbows as they hit the halfway point of round one. Lewis rolls to his knees, then stands up as Cormier tries to hold him in the wrestling ride. “DC” spins Lewis to the ground with a single-leg and gets back to elbowing, now landing short right hands from Lewis’ half guard. Lewis rolls to his knees, eats a few left hands and nearly has his back taken. Instead, Cormier shoves the kneeling “Beast” against the fence and holds him there, looking for an opportunity to knee which does not materialize.
Sherdog Scores
Ben Duffy scores the round 10-9 Cormier
Brian Knapp scores the round 10-8 Cormier
Chris Nelson scores the round 10-8 Cormier
Round 2
Cormier lands a body kick and narrowly avoids a combination from Lewis, who’s headhunting early here in round two. Lewis whiffs on a few big right hands, overcommits to a knee and gets taken down again. Lewis posts and stands, Cormier still holding him in a front headlock. Cormier lands a knee, drops levels and ankle-picks the challenger to the floor. Lewis gives up his back, and this time Cormier isn’t squandering the opportunity: within seconds, the champ has an arm wrapped around Lewis’ throat, and the “Black Beast” is forced to tap out. Daniel Cormier successfully defends his UFC heavyweight title for the first time with a second-round rear-naked choke submission of Derrick Lewis.
The Official Result
Daniel Cormier def. Derrick Lewis via Submission (Rear-Naked Choke) R2 2:14
Totals
| Fighter | KD | Sig. Str. | Sig. Str. % | Total Str. | TD | TD % | Sub. Att | Rev. | Ctrl |
|---|---|---|---|---|---|---|---|---|---|
| Daniel Cormier | 0 | 24 of 51 | 47% | 29 of 56 | 1 of 1 | 100% | 0 | 0 | 1:21 |
| Stipe Miocic | 1 | 25 of 37 | 67% | 31 of 43 | 0 of 0 | --- | 0 | 0 | 0:06 |
Per Round
| Rd | Fighter | KD | Sig. Str. | Sig. Str. % | Total Str. | TD | TD % | Sub. Att | Rev. | Ctrl |
|---|---|---|---|---|---|---|---|---|---|---|
| 1 | Daniel Cormier | 0 | 24 of 51 | 47% | 29 of 56 | 1 of 1 | 100% | 0 | 0 | 1:21 |
| Stipe Miocic | 1 | 25 of 37 | 67% | 31 of 43 | 0 of 0 | --- | 0 | 0 | 0:06 |
Significant Strikes
| Fighter | Sig. Str. | Sig. Str. % | Head | Body | Leg | Distance | Clinch | Ground |
|---|---|---|---|---|---|---|---|---|
| Daniel Cormier | 24 of 51 | 47% | 15 of 41 | 6 of 7 | 3 of 3 | 19 of 42 | 5 of 9 | 0 of 0 |
| Stipe Miocic | 25 of 37 | 67% | 20 of 30 | 1 of 1 | 4 of 6 | 19 of 31 | 2 of 2 | 4 of 4 |
Significant Strikes Per Round
| Rd | Fighter | Sig. Str. | Sig. Str. % | Head | Body | Leg | Distance | Clinch | Ground |
|---|---|---|---|---|---|---|---|---|---|
| 1 | Daniel Cormier | 24 of 51 | 47% | 15 of 41 | 6 of 7 | 3 of 3 | 19 of 42 | 5 of 9 | 0 of 0 |
| Stipe Miocic | 25 of 37 | 67% | 20 of 30 | 1 of 1 | 4 of 6 | 19 of 31 | 2 of 2 | 4 of 4 |
Totals
| Fighter | KD | Sig. Str. | Sig. Str. % | Total Str. | TD | TD % | Sub. Att | Rev. | Ctrl |
|---|---|---|---|---|---|---|---|---|---|
| Daniel Cormier | 0 | 32 of 61 | 52% | 84 of 113 | 2 of 3 | 66% | 1 | 0 | 1:43 |
| Volkan Oezdemir | 0 | 38 of 82 | 46% | 42 of 86 | 0 of 0 | --- | 0 | 0 | 0:06 |
Per Round
| Rd | Fighter | KD | Sig. Str. | Sig. Str. % | Total Str. | TD | TD % | Sub. Att | Rev. | Ctrl |
|---|---|---|---|---|---|---|---|---|---|---|
| 1 | Daniel Cormier | 0 | 27 of 54 | 50% | 29 of 56 | 1 of 2 | 50% | 1 | 0 | 0:16 |
| Volkan Oezdemir | 0 | 37 of 79 | 46% | 41 of 83 | 0 of 0 | --- | 0 | 0 | 0:06 | |
| 2 | Daniel Cormier | 0 | 5 of 7 | 71% | 55 of 57 | 1 of 1 | 100% | 0 | 0 | 1:27 |
| Volkan Oezdemir | 0 | 1 of 3 | 33% | 1 of 3 | 0 of 0 | --- | 0 | 0 | 0:00 |
Significant Strikes
| Fighter | Sig. Str. | Sig. Str. % | Head | Body | Leg | Distance | Clinch | Ground |
|---|---|---|---|---|---|---|---|---|
| Daniel Cormier | 32 of 61 | 52% | 30 of 59 | 1 of 1 | 1 of 1 | 24 of 46 | 3 of 8 | 5 of 7 |
| Volkan Oezdemir | 38 of 82 | 46% | 23 of 63 | 11 of 15 | 4 of 4 | 33 of 70 | 5 of 12 | 0 of 0 |
Significant Strikes Per Round
| Rd | Fighter | Sig. Str. | Sig. Str. % | Head | Body | Leg | Distance | Clinch | Ground |
|---|---|---|---|---|---|---|---|---|---|
| 1 | Daniel Cormier | 27 of 54 | 50% | 25 of 52 | 1 of 1 | 1 of 1 | 22 of 43 | 3 of 8 | 2 of 3 |
| Volkan Oezdemir | 37 of 79 | 46% | 22 of 60 | 11 of 15 | 4 of 4 | 32 of 67 | 5 of 12 | 0 of 0 | |
| 2 | Daniel Cormier | 5 of 7 | 71% | 5 of 7 | 0 of 0 | 0 of 0 | 2 of 3 | 0 of 0 | 3 of 4 |
| Volkan Oezdemir | 1 of 3 | 33% | 1 of 3 | 0 of 0 | 0 of 0 | 1 of 3 | 0 of 0 | 0 of 0 |
Totals
| Fighter | KD | Sig. Str. | Sig. Str. % | Total Str. | TD | TD % | Sub. Att | Rev. | Ctrl |
|---|---|---|---|---|---|---|---|---|---|
| Daniel Cormier | 0 | 58 of 140 | 41% | 60 of 142 | 0 of 3 | 0% | 0 | 0 | 0:00 |
| Jon Jones | 1 | 95 of 165 | 57% | 95 of 165 | 0 of 3 | 0% | 0 | 0 | 0:16 |
Per Round
| Rd | Fighter | KD | Sig. Str. | Sig. Str. % | Total Str. | TD | TD % | Sub. Att | Rev. | Ctrl |
|---|---|---|---|---|---|---|---|---|---|---|
| 1 | Daniel Cormier | 0 | 31 of 60 | 51% | 31 of 60 | 0 of 1 | 0% | 0 | 0 | 0:00 |
| Jon Jones | 0 | 34 of 66 | 51% | 34 of 66 | 0 of 1 | 0% | 0 | 0 | 0:02 | |
| 2 | Daniel Cormier | 0 | 22 of 54 | 40% | 24 of 56 | 0 of 2 | 0% | 0 | 0 | 0:00 |
| Jon Jones | 0 | 30 of 47 | 63% | 30 of 47 | 0 of 2 | 0% | 0 | 0 | 0:00 | |
| 3 | Daniel Cormier | 0 | 5 of 26 | 19% | 5 of 26 | 0 of 0 | --- | 0 | 0 | 0:00 |
| Jon Jones | 1 | 31 of 52 | 59% | 31 of 52 | 0 of 0 | --- | 0 | 0 | 0:14 |
Significant Strikes
| Fighter | Sig. Str. | Sig. Str. % | Head | Body | Leg | Distance | Clinch | Ground |
|---|---|---|---|---|---|---|---|---|
| Daniel Cormier | 58 of 140 | 41% | 29 of 99 | 12 of 16 | 17 of 25 | 46 of 123 | 12 of 17 | 0 of 0 |
| Jon Jones | 95 of 165 | 57% | 33 of 74 | 32 of 43 | 30 of 48 | 76 of 142 | 4 of 6 | 15 of 17 |
Significant Strikes Per Round
| Rd | Fighter | Sig. Str. | Sig. Str. % | Head | Body | Leg | Distance | Clinch | Ground |
|---|---|---|---|---|---|---|---|---|---|
| 1 | Daniel Cormier | 31 of 60 | 51% | 13 of 36 | 7 of 9 | 11 of 15 | 26 of 50 | 5 of 10 | 0 of 0 |
| Jon Jones | 34 of 66 | 51% | 8 of 27 | 13 of 19 | 13 of 20 | 31 of 62 | 3 of 4 | 0 of 0 | |
| 2 | Daniel Cormier | 22 of 54 | 40% | 14 of 41 | 3 of 4 | 5 of 9 | 17 of 49 | 5 of 5 | 0 of 0 |
| Jon Jones | 30 of 47 | 63% | 7 of 17 | 11 of 14 | 12 of 16 | 29 of 45 | 1 of 2 | 0 of 0 | |
| 3 | Daniel Cormier | 5 of 26 | 19% | 2 of 22 | 2 of 3 | 1 of 1 | 3 of 24 | 2 of 2 | 0 of 0 |
| Jon Jones | 31 of 52 | 59% | 18 of 30 | 8 of 10 | 5 of 12 | 16 of 35 | 0 of 0 | 15 of 17 |
Totals
| Fighter | KD | Sig. Str. | Sig. Str. % | Total Str. | TD | TD % | Sub. Att | Rev. | Ctrl |
|---|---|---|---|---|---|---|---|---|---|
| Daniel Cormier | 0 | 36 of 41 | 87% | 85 of 97 | 1 of 2 | 50% | 1 | 0 | 4:12 |
| Anthony Johnson | 0 | 22 of 36 | 61% | 22 of 36 | 1 of 3 | 33% | 0 | 0 | 2:38 |
Per Round
| Rd | Fighter | KD | Sig. Str. | Sig. Str. % | Total Str. | TD | TD % | Sub. Att | Rev. | Ctrl |
|---|---|---|---|---|---|---|---|---|---|---|
| 1 | Daniel Cormier | 0 | 12 of 14 | 85% | 32 of 34 | 0 of 0 | --- | 0 | 0 | 1:40 |
| Anthony Johnson | 0 | 16 of 25 | 64% | 16 of 25 | 0 of 2 | 0% | 0 | 0 | 2:15 | |
| 2 | Daniel Cormier | 0 | 24 of 27 | 88% | 53 of 63 | 1 of 2 | 50% | 1 | 0 | 2:32 |
| Anthony Johnson | 0 | 6 of 11 | 54% | 6 of 11 | 1 of 1 | 100% | 0 | 0 | 0:23 |
Significant Strikes
| Fighter | Sig. Str. | Sig. Str. % | Head | Body | Leg | Distance | Clinch | Ground |
|---|---|---|---|---|---|---|---|---|
| Daniel Cormier | 36 of 41 | 87% | 29 of 34 | 4 of 4 | 3 of 3 | 1 of 5 | 21 of 22 | 14 of 14 |
| Anthony Johnson | 22 of 36 | 61% | 6 of 18 | 8 of 10 | 8 of 8 | 12 of 25 | 10 of 11 | 0 of 0 |
Significant Strikes Per Round
| Rd | Fighter | Sig. Str. | Sig. Str. % | Head | Body | Leg | Distance | Clinch | Ground |
|---|---|---|---|---|---|---|---|---|---|
| 1 | Daniel Cormier | 12 of 14 | 85% | 7 of 9 | 4 of 4 | 1 of 1 | 0 of 1 | 12 of 13 | 0 of 0 |
| Anthony Johnson | 16 of 25 | 64% | 5 of 14 | 5 of 5 | 6 of 6 | 9 of 17 | 7 of 8 | 0 of 0 | |
| 2 | Daniel Cormier | 24 of 27 | 88% | 22 of 25 | 0 of 0 | 2 of 2 | 1 of 4 | 9 of 9 | 14 of 14 |
| Anthony Johnson | 6 of 11 | 54% | 1 of 4 | 3 of 5 | 2 of 2 | 3 of 8 | 3 of 3 | 0 of 0 |
Totals
| Fighter | KD | Sig. Str. | Sig. Str. % | Total Str. | TD | TD % | Sub. Att | Rev. | Ctrl |
|---|---|---|---|---|---|---|---|---|---|
| Daniel Cormier | 0 | 33 of 64 | 51% | 153 of 208 | 3 of 3 | 100% | 0 | 0 | 10:34 |
| Anderson Silva | 0 | 17 of 43 | 39% | 30 of 56 | 0 of 0 | --- | 0 | 0 | 0:00 |
Per Round
| Rd | Fighter | KD | Sig. Str. | Sig. Str. % | Total Str. | TD | TD % | Sub. Att | Rev. | Ctrl |
|---|---|---|---|---|---|---|---|---|---|---|
| 1 | Daniel Cormier | 0 | 13 of 25 | 52% | 56 of 74 | 1 of 1 | 100% | 0 | 0 | 4:17 |
| Anderson Silva | 0 | 1 of 1 | 100% | 8 of 8 | 0 of 0 | --- | 0 | 0 | 0:00 | |
| 2 | Daniel Cormier | 0 | 9 of 18 | 50% | 51 of 69 | 1 of 1 | 100% | 0 | 0 | 3:28 |
| Anderson Silva | 0 | 6 of 21 | 28% | 7 of 22 | 0 of 0 | --- | 0 | 0 | 0:00 | |
| 3 | Daniel Cormier | 0 | 11 of 21 | 52% | 46 of 65 | 1 of 1 | 100% | 0 | 0 | 2:49 |
| Anderson Silva | 0 | 10 of 21 | 47% | 15 of 26 | 0 of 0 | --- | 0 | 0 | 0:00 |
Significant Strikes
| Fighter | Sig. Str. | Sig. Str. % | Head | Body | Leg | Distance | Clinch | Ground |
|---|---|---|---|---|---|---|---|---|
| Daniel Cormier | 33 of 64 | 51% | 27 of 56 | 2 of 4 | 4 of 4 | 15 of 38 | 0 of 0 | 18 of 26 |
| Anderson Silva | 17 of 43 | 39% | 9 of 30 | 4 of 7 | 4 of 6 | 16 of 42 | 1 of 1 | 0 of 0 |
Significant Strikes Per Round
| Rd | Fighter | Sig. Str. | Sig. Str. % | Head | Body | Leg | Distance | Clinch | Ground |
|---|---|---|---|---|---|---|---|---|---|
| 1 | Daniel Cormier | 13 of 25 | 52% | 12 of 24 | 1 of 1 | 0 of 0 | 0 of 9 | 0 of 0 | 13 of 16 |
| Anderson Silva | 1 of 1 | 100% | 0 of 0 | 0 of 0 | 1 of 1 | 1 of 1 | 0 of 0 | 0 of 0 | |
| 2 | Daniel Cormier | 9 of 18 | 50% | 9 of 17 | 0 of 1 | 0 of 0 | 6 of 13 | 0 of 0 | 3 of 5 |
| Anderson Silva | 6 of 21 | 28% | 3 of 16 | 2 of 2 | 1 of 3 | 6 of 21 | 0 of 0 | 0 of 0 | |
| 3 | Daniel Cormier | 11 of 21 | 52% | 6 of 15 | 1 of 2 | 4 of 4 | 9 of 16 | 0 of 0 | 2 of 5 |
| Anderson Silva | 10 of 21 | 47% | 6 of 14 | 2 of 5 | 2 of 2 | 9 of 20 | 1 of 1 | 0 of 0 |
Anderson Silva - Fight History
Totals
| Fighter | KD | Sig. Str. | Sig. Str. % | Total Str. | TD | TD % | Sub. Att | Rev. | Ctrl |
|---|---|---|---|---|---|---|---|---|---|
| Uriah Hall | 2 | 60 of 111 | 54% | 61 of 112 | 0 of 0 | --- | 0 | 0 | 0:15 |
| Anderson Silva | 0 | 53 of 110 | 48% | 57 of 114 | 0 of 0 | --- | 0 | 0 | 0:31 |
Per Round
| Rd | Fighter | KD | Sig. Str. | Sig. Str. % | Total Str. | TD | TD % | Sub. Att | Rev. | Ctrl |
|---|---|---|---|---|---|---|---|---|---|---|
| 1 | Uriah Hall | 0 | 12 of 20 | 60% | 12 of 20 | 0 of 0 | --- | 0 | 0 | 0:00 |
| Anderson Silva | 0 | 19 of 35 | 54% | 19 of 35 | 0 of 0 | --- | 0 | 0 | 0:00 | |
| 2 | Uriah Hall | 0 | 13 of 30 | 43% | 13 of 30 | 0 of 0 | --- | 0 | 0 | 0:00 |
| Anderson Silva | 0 | 14 of 24 | 58% | 14 of 24 | 0 of 0 | --- | 0 | 0 | 0:00 | |
| 3 | Uriah Hall | 1 | 22 of 43 | 51% | 23 of 44 | 0 of 0 | --- | 0 | 0 | 0:04 |
| Anderson Silva | 0 | 17 of 38 | 44% | 21 of 42 | 0 of 0 | --- | 0 | 0 | 0:31 | |
| 4 | Uriah Hall | 1 | 13 of 18 | 72% | 13 of 18 | 0 of 0 | --- | 0 | 0 | 0:11 |
| Anderson Silva | 0 | 3 of 13 | 23% | 3 of 13 | 0 of 0 | --- | 0 | 0 | 0:00 |
Significant Strikes
| Fighter | Sig. Str. | Sig. Str. % | Head | Body | Leg | Distance | Clinch | Ground |
|---|---|---|---|---|---|---|---|---|
| Uriah Hall | 60 of 111 | 54% | 41 of 90 | 10 of 12 | 9 of 9 | 45 of 87 | 0 of 0 | 15 of 24 |
| Anderson Silva | 53 of 110 | 48% | 16 of 61 | 18 of 28 | 19 of 21 | 51 of 107 | 2 of 3 | 0 of 0 |
Significant Strikes Per Round
| Rd | Fighter | Sig. Str. | Sig. Str. % | Head | Body | Leg | Distance | Clinch | Ground |
|---|---|---|---|---|---|---|---|---|---|
| 1 | Uriah Hall | 12 of 20 | 60% | 6 of 13 | 2 of 3 | 4 of 4 | 12 of 20 | 0 of 0 | 0 of 0 |
| Anderson Silva | 19 of 35 | 54% | 6 of 21 | 7 of 8 | 6 of 6 | 19 of 35 | 0 of 0 | 0 of 0 | |
| 2 | Uriah Hall | 13 of 30 | 43% | 5 of 21 | 4 of 5 | 4 of 4 | 13 of 30 | 0 of 0 | 0 of 0 |
| Anderson Silva | 14 of 24 | 58% | 1 of 6 | 5 of 8 | 8 of 10 | 14 of 24 | 0 of 0 | 0 of 0 | |
| 3 | Uriah Hall | 22 of 43 | 51% | 18 of 39 | 4 of 4 | 0 of 0 | 15 of 31 | 0 of 0 | 7 of 12 |
| Anderson Silva | 17 of 38 | 44% | 8 of 26 | 5 of 8 | 4 of 4 | 15 of 35 | 2 of 3 | 0 of 0 | |
| 4 | Uriah Hall | 13 of 18 | 72% | 12 of 17 | 0 of 0 | 1 of 1 | 5 of 6 | 0 of 0 | 8 of 12 |
| Anderson Silva | 3 of 13 | 23% | 1 of 8 | 1 of 4 | 1 of 1 | 3 of 13 | 0 of 0 | 0 of 0 |
Big Brady believes Hall is the better fighter at this stage, citing Silva's age and low output. He thinks Hall should target Silva's legs early and predicts a fourth-round knockout, though a decision is also possible if Hall is cautious.
Hall has youth, speed, and athleticism on his side, and his jab is very effective. Silva is 45 and coming off a long layoff, but Hall has mental fragility issues. Hall should win by decision, but the -220 line is not appealing given the risk.
The MMA Guru hesitantly picks Uriah Hall to win by TKO in the second or third round via leg kicks. He notes that Anderson Silva has a history of leg injuries and that Hall has a reach advantage. However, he expresses uncertainty, saying he doesn't trust either fighter with his money, but ultimately believes Hall can follow the game plan of attacking Silva's lead leg.
Totals
| Fighter | KD | Sig. Str. | Sig. Str. % | Total Str. | TD | TD % | Sub. Att | Rev. | Ctrl |
|---|---|---|---|---|---|---|---|---|---|
| Jared Cannonier | 1 | 17 of 31 | 54% | 18 of 32 | 0 of 0 | --- | 0 | 0 | 0:09 |
| Anderson Silva | 0 | 8 of 15 | 53% | 8 of 15 | 0 of 0 | --- | 0 | 0 | 0:00 |
Per Round
| Rd | Fighter | KD | Sig. Str. | Sig. Str. % | Total Str. | TD | TD % | Sub. Att | Rev. | Ctrl |
|---|---|---|---|---|---|---|---|---|---|---|
| 1 | Jared Cannonier | 1 | 17 of 31 | 54% | 18 of 32 | 0 of 0 | --- | 0 | 0 | 0:09 |
| Anderson Silva | 0 | 8 of 15 | 53% | 8 of 15 | 0 of 0 | --- | 0 | 0 | 0:00 |
Significant Strikes
| Fighter | Sig. Str. | Sig. Str. % | Head | Body | Leg | Distance | Clinch | Ground |
|---|---|---|---|---|---|---|---|---|
| Jared Cannonier | 17 of 31 | 54% | 5 of 16 | 2 of 3 | 10 of 12 | 14 of 27 | 3 of 4 | 0 of 0 |
| Anderson Silva | 8 of 15 | 53% | 1 of 6 | 3 of 4 | 4 of 5 | 7 of 14 | 1 of 1 | 0 of 0 |
Significant Strikes Per Round
| Rd | Fighter | Sig. Str. | Sig. Str. % | Head | Body | Leg | Distance | Clinch | Ground |
|---|---|---|---|---|---|---|---|---|---|
| 1 | Jared Cannonier | 17 of 31 | 54% | 5 of 16 | 2 of 3 | 10 of 12 | 14 of 27 | 3 of 4 | 0 of 0 |
| Anderson Silva | 8 of 15 | 53% | 1 of 6 | 3 of 4 | 4 of 5 | 7 of 14 | 1 of 1 | 0 of 0 |
Totals
| Fighter | KD | Sig. Str. | Sig. Str. % | Total Str. | TD | TD % | Sub. Att | Rev. | Ctrl |
|---|---|---|---|---|---|---|---|---|---|
| Israel Adesanya | 0 | 65 of 132 | 49% | 65 of 132 | 0 of 0 | --- | 0 | 0 | 0:00 |
| Anderson Silva | 0 | 31 of 72 | 43% | 34 of 75 | 0 of 0 | --- | 0 | 0 | 0:00 |
Per Round
| Rd | Fighter | KD | Sig. Str. | Sig. Str. % | Total Str. | TD | TD % | Sub. Att | Rev. | Ctrl |
|---|---|---|---|---|---|---|---|---|---|---|
| 1 | Israel Adesanya | 0 | 20 of 44 | 45% | 20 of 44 | 0 of 0 | --- | 0 | 0 | 0:00 |
| Anderson Silva | 0 | 6 of 21 | 28% | 6 of 21 | 0 of 0 | --- | 0 | 0 | 0:00 | |
| 2 | Israel Adesanya | 0 | 20 of 39 | 51% | 20 of 39 | 0 of 0 | --- | 0 | 0 | 0:00 |
| Anderson Silva | 0 | 20 of 35 | 57% | 23 of 38 | 0 of 0 | --- | 0 | 0 | 0:00 | |
| 3 | Israel Adesanya | 0 | 25 of 49 | 51% | 25 of 49 | 0 of 0 | --- | 0 | 0 | 0:00 |
| Anderson Silva | 0 | 5 of 16 | 31% | 5 of 16 | 0 of 0 | --- | 0 | 0 | 0:00 |
Significant Strikes
| Fighter | Sig. Str. | Sig. Str. % | Head | Body | Leg | Distance | Clinch | Ground |
|---|---|---|---|---|---|---|---|---|
| Israel Adesanya | 65 of 132 | 49% | 27 of 79 | 9 of 22 | 29 of 31 | 63 of 129 | 2 of 3 | 0 of 0 |
| Anderson Silva | 31 of 72 | 43% | 16 of 49 | 8 of 12 | 7 of 11 | 26 of 67 | 5 of 5 | 0 of 0 |
Significant Strikes Per Round
| Rd | Fighter | Sig. Str. | Sig. Str. % | Head | Body | Leg | Distance | Clinch | Ground |
|---|---|---|---|---|---|---|---|---|---|
| 1 | Israel Adesanya | 20 of 44 | 45% | 10 of 31 | 1 of 2 | 9 of 11 | 18 of 41 | 2 of 3 | 0 of 0 |
| Anderson Silva | 6 of 21 | 28% | 2 of 16 | 1 of 1 | 3 of 4 | 6 of 21 | 0 of 0 | 0 of 0 | |
| 2 | Israel Adesanya | 20 of 39 | 51% | 8 of 23 | 3 of 7 | 9 of 9 | 20 of 39 | 0 of 0 | 0 of 0 |
| Anderson Silva | 20 of 35 | 57% | 12 of 23 | 5 of 7 | 3 of 5 | 15 of 30 | 5 of 5 | 0 of 0 | |
| 3 | Israel Adesanya | 25 of 49 | 51% | 9 of 25 | 5 of 13 | 11 of 11 | 25 of 49 | 0 of 0 | 0 of 0 |
| Anderson Silva | 5 of 16 | 31% | 2 of 10 | 2 of 4 | 1 of 2 | 5 of 16 | 0 of 0 | 0 of 0 |
Totals
| Fighter | KD | Sig. Str. | Sig. Str. % | Total Str. | TD | TD % | Sub. Att | Rev. | Ctrl |
|---|---|---|---|---|---|---|---|---|---|
| Anderson Silva | 0 | 43 of 78 | 55% | 54 of 89 | 0 of 0 | --- | 0 | 0 | 0:00 |
| Derek Brunson | 0 | 54 of 101 | 53% | 118 of 184 | 2 of 10 | 20% | 0 | 0 | 3:48 |
Per Round
| Rd | Fighter | KD | Sig. Str. | Sig. Str. % | Total Str. | TD | TD % | Sub. Att | Rev. | Ctrl |
|---|---|---|---|---|---|---|---|---|---|---|
| 1 | Anderson Silva | 0 | 8 of 20 | 40% | 9 of 21 | 0 of 0 | --- | 0 | 0 | 0:00 |
| Derek Brunson | 0 | 20 of 36 | 55% | 43 of 60 | 0 of 2 | 0% | 0 | 0 | 0:35 | |
| 2 | Anderson Silva | 0 | 10 of 19 | 52% | 17 of 26 | 0 of 0 | --- | 0 | 0 | 0:00 |
| Derek Brunson | 0 | 9 of 21 | 42% | 15 of 30 | 1 of 4 | 25% | 0 | 0 | 1:11 | |
| 3 | Anderson Silva | 0 | 25 of 39 | 64% | 28 of 42 | 0 of 0 | --- | 0 | 0 | 0:00 |
| Derek Brunson | 0 | 25 of 44 | 56% | 60 of 94 | 1 of 4 | 25% | 0 | 0 | 2:02 |
Significant Strikes
| Fighter | Sig. Str. | Sig. Str. % | Head | Body | Leg | Distance | Clinch | Ground |
|---|---|---|---|---|---|---|---|---|
| Anderson Silva | 43 of 78 | 55% | 28 of 56 | 13 of 19 | 2 of 3 | 30 of 61 | 8 of 12 | 5 of 5 |
| Derek Brunson | 54 of 101 | 53% | 36 of 80 | 5 of 5 | 13 of 16 | 33 of 68 | 19 of 30 | 2 of 3 |
Significant Strikes Per Round
| Rd | Fighter | Sig. Str. | Sig. Str. % | Head | Body | Leg | Distance | Clinch | Ground |
|---|---|---|---|---|---|---|---|---|---|
| 1 | Anderson Silva | 8 of 20 | 40% | 5 of 15 | 3 of 4 | 0 of 1 | 5 of 15 | 3 of 5 | 0 of 0 |
| Derek Brunson | 20 of 36 | 55% | 14 of 29 | 0 of 0 | 6 of 7 | 8 of 19 | 12 of 17 | 0 of 0 | |
| 2 | Anderson Silva | 10 of 19 | 52% | 7 of 15 | 2 of 3 | 1 of 1 | 10 of 18 | 0 of 1 | 0 of 0 |
| Derek Brunson | 9 of 21 | 42% | 4 of 14 | 2 of 2 | 3 of 5 | 8 of 18 | 1 of 3 | 0 of 0 | |
| 3 | Anderson Silva | 25 of 39 | 64% | 16 of 26 | 8 of 12 | 1 of 1 | 15 of 28 | 5 of 6 | 5 of 5 |
| Derek Brunson | 25 of 44 | 56% | 18 of 37 | 3 of 3 | 4 of 4 | 17 of 31 | 6 of 10 | 2 of 3 |
Totals
| Fighter | KD | Sig. Str. | Sig. Str. % | Total Str. | TD | TD % | Sub. Att | Rev. | Ctrl |
|---|---|---|---|---|---|---|---|---|---|
| Daniel Cormier | 0 | 33 of 64 | 51% | 153 of 208 | 3 of 3 | 100% | 0 | 0 | 10:34 |
| Anderson Silva | 0 | 17 of 43 | 39% | 30 of 56 | 0 of 0 | --- | 0 | 0 | 0:00 |
Per Round
| Rd | Fighter | KD | Sig. Str. | Sig. Str. % | Total Str. | TD | TD % | Sub. Att | Rev. | Ctrl |
|---|---|---|---|---|---|---|---|---|---|---|
| 1 | Daniel Cormier | 0 | 13 of 25 | 52% | 56 of 74 | 1 of 1 | 100% | 0 | 0 | 4:17 |
| Anderson Silva | 0 | 1 of 1 | 100% | 8 of 8 | 0 of 0 | --- | 0 | 0 | 0:00 | |
| 2 | Daniel Cormier | 0 | 9 of 18 | 50% | 51 of 69 | 1 of 1 | 100% | 0 | 0 | 3:28 |
| Anderson Silva | 0 | 6 of 21 | 28% | 7 of 22 | 0 of 0 | --- | 0 | 0 | 0:00 | |
| 3 | Daniel Cormier | 0 | 11 of 21 | 52% | 46 of 65 | 1 of 1 | 100% | 0 | 0 | 2:49 |
| Anderson Silva | 0 | 10 of 21 | 47% | 15 of 26 | 0 of 0 | --- | 0 | 0 | 0:00 |
Significant Strikes
| Fighter | Sig. Str. | Sig. Str. % | Head | Body | Leg | Distance | Clinch | Ground |
|---|---|---|---|---|---|---|---|---|
| Daniel Cormier | 33 of 64 | 51% | 27 of 56 | 2 of 4 | 4 of 4 | 15 of 38 | 0 of 0 | 18 of 26 |
| Anderson Silva | 17 of 43 | 39% | 9 of 30 | 4 of 7 | 4 of 6 | 16 of 42 | 1 of 1 | 0 of 0 |
Significant Strikes Per Round
| Rd | Fighter | Sig. Str. | Sig. Str. % | Head | Body | Leg | Distance | Clinch | Ground |
|---|---|---|---|---|---|---|---|---|---|
| 1 | Daniel Cormier | 13 of 25 | 52% | 12 of 24 | 1 of 1 | 0 of 0 | 0 of 9 | 0 of 0 | 13 of 16 |
| Anderson Silva | 1 of 1 | 100% | 0 of 0 | 0 of 0 | 1 of 1 | 1 of 1 | 0 of 0 | 0 of 0 | |
| 2 | Daniel Cormier | 9 of 18 | 50% | 9 of 17 | 0 of 1 | 0 of 0 | 6 of 13 | 0 of 0 | 3 of 5 |
| Anderson Silva | 6 of 21 | 28% | 3 of 16 | 2 of 2 | 1 of 3 | 6 of 21 | 0 of 0 | 0 of 0 | |
| 3 | Daniel Cormier | 11 of 21 | 52% | 6 of 15 | 1 of 2 | 4 of 4 | 9 of 16 | 0 of 0 | 2 of 5 |
| Anderson Silva | 10 of 21 | 47% | 6 of 14 | 2 of 5 | 2 of 2 | 9 of 20 | 1 of 1 | 0 of 0 |
Totals
| Fighter | KD | Sig. Str. | Sig. Str. % | Total Str. | TD | TD % | Sub. Att | Rev. | Ctrl |
|---|---|---|---|---|---|---|---|---|---|
| Michael Bisping | 1 | 75 of 135 | 55% | 75 of 135 | 0 of 0 | --- | 0 | 0 | 0:05 |
| Anderson Silva | 1 | 108 of 316 | 34% | 112 of 320 | 0 of 1 | 0% | 0 | 0 | 0:44 |
Per Round
| Rd | Fighter | KD | Sig. Str. | Sig. Str. % | Total Str. | TD | TD % | Sub. Att | Rev. | Ctrl |
|---|---|---|---|---|---|---|---|---|---|---|
| 1 | Michael Bisping | 0 | 8 of 16 | 50% | 8 of 16 | 0 of 0 | --- | 0 | 0 | 0:00 |
| Anderson Silva | 0 | 17 of 50 | 34% | 17 of 50 | 0 of 0 | --- | 0 | 0 | 0:00 | |
| 2 | Michael Bisping | 0 | 11 of 25 | 44% | 11 of 25 | 0 of 0 | --- | 0 | 0 | 0:00 |
| Anderson Silva | 1 | 24 of 66 | 36% | 27 of 69 | 0 of 0 | --- | 0 | 0 | 0:36 | |
| 3 | Michael Bisping | 1 | 18 of 32 | 56% | 18 of 32 | 0 of 0 | --- | 0 | 0 | 0:05 |
| Anderson Silva | 0 | 21 of 62 | 33% | 21 of 62 | 0 of 0 | --- | 0 | 0 | 0:00 | |
| 4 | Michael Bisping | 0 | 19 of 27 | 70% | 19 of 27 | 0 of 0 | --- | 0 | 0 | 0:00 |
| Anderson Silva | 0 | 28 of 80 | 35% | 28 of 80 | 0 of 0 | --- | 0 | 0 | 0:00 | |
| 5 | Michael Bisping | 0 | 19 of 35 | 54% | 19 of 35 | 0 of 0 | --- | 0 | 0 | 0:00 |
| Anderson Silva | 0 | 18 of 58 | 31% | 19 of 59 | 0 of 1 | 0% | 0 | 0 | 0:08 |
Significant Strikes
| Fighter | Sig. Str. | Sig. Str. % | Head | Body | Leg | Distance | Clinch | Ground |
|---|---|---|---|---|---|---|---|---|
| Michael Bisping | 75 of 135 | 55% | 47 of 104 | 15 of 18 | 13 of 13 | 69 of 126 | 4 of 5 | 2 of 4 |
| Anderson Silva | 108 of 316 | 34% | 58 of 251 | 12 of 20 | 38 of 45 | 98 of 299 | 4 of 6 | 6 of 11 |
Significant Strikes Per Round
| Rd | Fighter | Sig. Str. | Sig. Str. % | Head | Body | Leg | Distance | Clinch | Ground |
|---|---|---|---|---|---|---|---|---|---|
| 1 | Michael Bisping | 8 of 16 | 50% | 4 of 11 | 2 of 3 | 2 of 2 | 8 of 16 | 0 of 0 | 0 of 0 |
| Anderson Silva | 17 of 50 | 34% | 9 of 38 | 5 of 6 | 3 of 6 | 17 of 50 | 0 of 0 | 0 of 0 | |
| 2 | Michael Bisping | 11 of 25 | 44% | 6 of 20 | 1 of 1 | 4 of 4 | 10 of 22 | 0 of 0 | 1 of 3 |
| Anderson Silva | 24 of 66 | 36% | 12 of 52 | 0 of 2 | 12 of 12 | 18 of 55 | 0 of 0 | 6 of 11 | |
| 3 | Michael Bisping | 18 of 32 | 56% | 11 of 25 | 3 of 3 | 4 of 4 | 15 of 28 | 2 of 3 | 1 of 1 |
| Anderson Silva | 21 of 62 | 33% | 12 of 49 | 1 of 4 | 8 of 9 | 19 of 58 | 2 of 4 | 0 of 0 | |
| 4 | Michael Bisping | 19 of 27 | 70% | 12 of 19 | 4 of 5 | 3 of 3 | 19 of 27 | 0 of 0 | 0 of 0 |
| Anderson Silva | 28 of 80 | 35% | 17 of 64 | 5 of 7 | 6 of 9 | 28 of 80 | 0 of 0 | 0 of 0 | |
| 5 | Michael Bisping | 19 of 35 | 54% | 14 of 29 | 5 of 6 | 0 of 0 | 17 of 33 | 2 of 2 | 0 of 0 |
| Anderson Silva | 18 of 58 | 31% | 8 of 48 | 1 of 1 | 9 of 9 | 16 of 56 | 2 of 2 | 0 of 0 |
Totals
| Fighter | KD | Sig. Str. | Sig. Str. % | Total Str. | TD | TD % | Sub. Att | Rev. | Ctrl |
|---|---|---|---|---|---|---|---|---|---|
| Anderson Silva | 0 | 108 of 217 | 49% | 108 of 217 | 0 of 0 | --- | 0 | 0 | 0:03 |
| Nick Diaz | 0 | 77 of 223 | 34% | 80 of 226 | 0 of 1 | 0% | 0 | 0 | 0:02 |
Per Round
| Rd | Fighter | KD | Sig. Str. | Sig. Str. % | Total Str. | TD | TD % | Sub. Att | Rev. | Ctrl |
|---|---|---|---|---|---|---|---|---|---|---|
| 1 | Anderson Silva | 0 | 21 of 40 | 52% | 21 of 40 | 0 of 0 | --- | 0 | 0 | 0:03 |
| Nick Diaz | 0 | 19 of 60 | 31% | 19 of 60 | 0 of 0 | --- | 0 | 0 | 0:00 | |
| 2 | Anderson Silva | 0 | 21 of 39 | 53% | 21 of 39 | 0 of 0 | --- | 0 | 0 | 0:00 |
| Nick Diaz | 0 | 15 of 37 | 40% | 15 of 37 | 0 of 1 | 0% | 0 | 0 | 0:00 | |
| 3 | Anderson Silva | 0 | 25 of 53 | 47% | 25 of 53 | 0 of 0 | --- | 0 | 0 | 0:00 |
| Nick Diaz | 0 | 18 of 44 | 40% | 18 of 44 | 0 of 0 | --- | 0 | 0 | 0:00 | |
| 4 | Anderson Silva | 0 | 15 of 28 | 53% | 15 of 28 | 0 of 0 | --- | 0 | 0 | 0:00 |
| Nick Diaz | 0 | 14 of 41 | 34% | 14 of 41 | 0 of 0 | --- | 0 | 0 | 0:00 | |
| 5 | Anderson Silva | 0 | 26 of 57 | 45% | 26 of 57 | 0 of 0 | --- | 0 | 0 | 0:00 |
| Nick Diaz | 0 | 11 of 41 | 26% | 14 of 44 | 0 of 0 | --- | 0 | 0 | 0:02 |
Significant Strikes
| Fighter | Sig. Str. | Sig. Str. % | Head | Body | Leg | Distance | Clinch | Ground |
|---|---|---|---|---|---|---|---|---|
| Anderson Silva | 108 of 217 | 49% | 57 of 155 | 14 of 19 | 37 of 43 | 103 of 209 | 5 of 8 | 0 of 0 |
| Nick Diaz | 77 of 223 | 34% | 39 of 140 | 11 of 31 | 27 of 52 | 72 of 207 | 5 of 16 | 0 of 0 |
Significant Strikes Per Round
| Rd | Fighter | Sig. Str. | Sig. Str. % | Head | Body | Leg | Distance | Clinch | Ground |
|---|---|---|---|---|---|---|---|---|---|
| 1 | Anderson Silva | 21 of 40 | 52% | 13 of 29 | 4 of 5 | 4 of 6 | 17 of 34 | 4 of 6 | 0 of 0 |
| Nick Diaz | 19 of 60 | 31% | 11 of 43 | 3 of 7 | 5 of 10 | 18 of 54 | 1 of 6 | 0 of 0 | |
| 2 | Anderson Silva | 21 of 39 | 53% | 11 of 29 | 2 of 2 | 8 of 8 | 21 of 39 | 0 of 0 | 0 of 0 |
| Nick Diaz | 15 of 37 | 40% | 7 of 25 | 2 of 4 | 6 of 8 | 14 of 34 | 1 of 3 | 0 of 0 | |
| 3 | Anderson Silva | 25 of 53 | 47% | 11 of 34 | 4 of 7 | 10 of 12 | 25 of 53 | 0 of 0 | 0 of 0 |
| Nick Diaz | 18 of 44 | 40% | 9 of 24 | 3 of 7 | 6 of 13 | 16 of 42 | 2 of 2 | 0 of 0 | |
| 4 | Anderson Silva | 15 of 28 | 53% | 4 of 15 | 4 of 5 | 7 of 8 | 15 of 28 | 0 of 0 | 0 of 0 |
| Nick Diaz | 14 of 41 | 34% | 5 of 22 | 3 of 7 | 6 of 12 | 13 of 37 | 1 of 4 | 0 of 0 | |
| 5 | Anderson Silva | 26 of 57 | 45% | 18 of 48 | 0 of 0 | 8 of 9 | 25 of 55 | 1 of 2 | 0 of 0 |
| Nick Diaz | 11 of 41 | 26% | 7 of 26 | 0 of 6 | 4 of 9 | 11 of 40 | 0 of 1 | 0 of 0 |
Totals
| Fighter | KD | Sig. Str. | Sig. Str. % | Total Str. | TD | TD % | Sub. Att | Rev. | Ctrl |
|---|---|---|---|---|---|---|---|---|---|
| Chris Weidman | 1 | 20 of 44 | 45% | 34 of 60 | 1 of 1 | 100% | 1 | 0 | 4:21 |
| Anderson Silva | 0 | 8 of 15 | 53% | 32 of 45 | 0 of 0 | --- | 0 | 0 | 0:00 |
Per Round
| Rd | Fighter | KD | Sig. Str. | Sig. Str. % | Total Str. | TD | TD % | Sub. Att | Rev. | Ctrl |
|---|---|---|---|---|---|---|---|---|---|---|
| 1 | Chris Weidman | 1 | 19 of 38 | 50% | 33 of 54 | 1 of 1 | 100% | 1 | 0 | 4:20 |
| Anderson Silva | 0 | 6 of 7 | 85% | 30 of 37 | 0 of 0 | --- | 0 | 0 | 0:00 | |
| 2 | Chris Weidman | 0 | 1 of 6 | 16% | 1 of 6 | 0 of 0 | --- | 0 | 0 | 0:01 |
| Anderson Silva | 0 | 2 of 8 | 25% | 2 of 8 | 0 of 0 | --- | 0 | 0 | 0:00 |
Significant Strikes
| Fighter | Sig. Str. | Sig. Str. % | Head | Body | Leg | Distance | Clinch | Ground |
|---|---|---|---|---|---|---|---|---|
| Chris Weidman | 20 of 44 | 45% | 18 of 41 | 2 of 3 | 0 of 0 | 1 of 9 | 2 of 2 | 17 of 33 |
| Anderson Silva | 8 of 15 | 53% | 2 of 7 | 4 of 5 | 2 of 3 | 2 of 8 | 4 of 5 | 2 of 2 |
Significant Strikes Per Round
| Rd | Fighter | Sig. Str. | Sig. Str. % | Head | Body | Leg | Distance | Clinch | Ground |
|---|---|---|---|---|---|---|---|---|---|
| 1 | Chris Weidman | 19 of 38 | 50% | 18 of 36 | 1 of 2 | 0 of 0 | 0 of 3 | 2 of 2 | 17 of 33 |
| Anderson Silva | 6 of 7 | 85% | 2 of 3 | 4 of 4 | 0 of 0 | 0 of 0 | 4 of 5 | 2 of 2 | |
| 2 | Chris Weidman | 1 of 6 | 16% | 0 of 5 | 1 of 1 | 0 of 0 | 1 of 6 | 0 of 0 | 0 of 0 |
| Anderson Silva | 2 of 8 | 25% | 0 of 4 | 0 of 1 | 2 of 3 | 2 of 8 | 0 of 0 | 0 of 0 |
No comments yet. Be the first to share your thoughts!