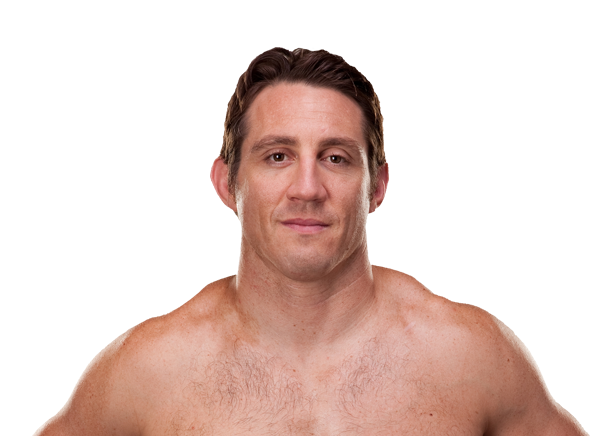
Career Averages - Yoel Romero
Career Averages - Tim Kennedy
Yoel Romero - Fight History
Totals
| Fighter | KD | Sig. Str. | Sig. Str. % | Total Str. | TD | TD % | Sub. Att | Rev. | Ctrl |
|---|---|---|---|---|---|---|---|---|---|
| Israel Adesanya | 0 | 48 of 132 | 36% | 48 of 132 | 0 of 0 | --- | 0 | 0 | 0:00 |
| Yoel Romero | 0 | 40 of 89 | 44% | 40 of 89 | 0 of 3 | 0% | 0 | 0 | 0:00 |
Per Round
| Rd | Fighter | KD | Sig. Str. | Sig. Str. % | Total Str. | TD | TD % | Sub. Att | Rev. | Ctrl |
|---|---|---|---|---|---|---|---|---|---|---|
| 1 | Israel Adesanya | 0 | 2 of 11 | 18% | 2 of 11 | 0 of 0 | --- | 0 | 0 | 0:00 |
| Yoel Romero | 0 | 4 of 6 | 66% | 4 of 6 | 0 of 0 | --- | 0 | 0 | 0:00 | |
| 2 | Israel Adesanya | 0 | 11 of 29 | 37% | 11 of 29 | 0 of 0 | --- | 0 | 0 | 0:00 |
| Yoel Romero | 0 | 7 of 14 | 50% | 7 of 14 | 0 of 0 | --- | 0 | 0 | 0:00 | |
| 3 | Israel Adesanya | 0 | 12 of 30 | 40% | 12 of 30 | 0 of 0 | --- | 0 | 0 | 0:00 |
| Yoel Romero | 0 | 9 of 14 | 64% | 9 of 14 | 0 of 0 | --- | 0 | 0 | 0:00 | |
| 4 | Israel Adesanya | 0 | 11 of 33 | 33% | 11 of 33 | 0 of 0 | --- | 0 | 0 | 0:00 |
| Yoel Romero | 0 | 6 of 22 | 27% | 6 of 22 | 0 of 2 | 0% | 0 | 0 | 0:00 | |
| 5 | Israel Adesanya | 0 | 12 of 29 | 41% | 12 of 29 | 0 of 0 | --- | 0 | 0 | 0:00 |
| Yoel Romero | 0 | 14 of 33 | 42% | 14 of 33 | 0 of 1 | 0% | 0 | 0 | 0:00 |
Significant Strikes
| Fighter | Sig. Str. | Sig. Str. % | Head | Body | Leg | Distance | Clinch | Ground |
|---|---|---|---|---|---|---|---|---|
| Israel Adesanya | 48 of 132 | 36% | 14 of 81 | 9 of 22 | 25 of 29 | 48 of 132 | 0 of 0 | 0 of 0 |
| Yoel Romero | 40 of 89 | 44% | 20 of 58 | 7 of 13 | 13 of 18 | 35 of 82 | 5 of 7 | 0 of 0 |
Significant Strikes Per Round
| Rd | Fighter | Sig. Str. | Sig. Str. % | Head | Body | Leg | Distance | Clinch | Ground |
|---|---|---|---|---|---|---|---|---|---|
| 1 | Israel Adesanya | 2 of 11 | 18% | 0 of 7 | 0 of 0 | 2 of 4 | 2 of 11 | 0 of 0 | 0 of 0 |
| Yoel Romero | 4 of 6 | 66% | 1 of 2 | 1 of 1 | 2 of 3 | 4 of 6 | 0 of 0 | 0 of 0 | |
| 2 | Israel Adesanya | 11 of 29 | 37% | 3 of 18 | 3 of 5 | 5 of 6 | 11 of 29 | 0 of 0 | 0 of 0 |
| Yoel Romero | 7 of 14 | 50% | 5 of 11 | 0 of 0 | 2 of 3 | 3 of 10 | 4 of 4 | 0 of 0 | |
| 3 | Israel Adesanya | 12 of 30 | 40% | 3 of 18 | 4 of 7 | 5 of 5 | 12 of 30 | 0 of 0 | 0 of 0 |
| Yoel Romero | 9 of 14 | 64% | 2 of 5 | 2 of 3 | 5 of 6 | 9 of 14 | 0 of 0 | 0 of 0 | |
| 4 | Israel Adesanya | 11 of 33 | 33% | 4 of 22 | 1 of 4 | 6 of 7 | 11 of 33 | 0 of 0 | 0 of 0 |
| Yoel Romero | 6 of 22 | 27% | 4 of 15 | 1 of 5 | 1 of 2 | 5 of 20 | 1 of 2 | 0 of 0 | |
| 5 | Israel Adesanya | 12 of 29 | 41% | 4 of 16 | 1 of 6 | 7 of 7 | 12 of 29 | 0 of 0 | 0 of 0 |
| Yoel Romero | 14 of 33 | 42% | 8 of 25 | 3 of 4 | 3 of 4 | 14 of 32 | 0 of 1 | 0 of 0 |
Daniel believes Adesanya's volume and distance management will be too much for Romero. He thinks Adesanya will pick Romero apart with kicks and win a lopsided decision, though he acknowledges Romero is always live for a knockout. He notes that Romero doesn't do well in fights that go the distance and that Adesanya's takedown defense and get-up game are underrated.
Adesanya's distance management, kicking, and ability to read opponents are key. He will target Romero's body to drain his cardio, then mix in head strikes. Adesanya's takedown defense is excellent; he gets back up quickly. A fourth-round TKO is likely, but a decision is also possible. The host considered a parlay with Jamall Emmers.
The MMA Guru picks Israel Adesanya, citing his striking level, reach advantage (7 inches), and ability to get up from takedowns. He notes Romero's recent close losses and age (42), and believes Adesanya will pick him apart with front kicks and knees, eventually finishing him in the third or fourth round by TKO. He also mentions Romero's tendency to leave himself open to uppercuts.
Totals
| Fighter | KD | Sig. Str. | Sig. Str. % | Total Str. | TD | TD % | Sub. Att | Rev. | Ctrl |
|---|---|---|---|---|---|---|---|---|---|
| Paulo Costa | 1 | 125 of 284 | 44% | 125 of 284 | 1 of 4 | 25% | 0 | 0 | 0:12 |
| Yoel Romero | 1 | 118 of 213 | 55% | 118 of 213 | 0 of 0 | --- | 0 | 0 | 0:06 |
Per Round
| Rd | Fighter | KD | Sig. Str. | Sig. Str. % | Total Str. | TD | TD % | Sub. Att | Rev. | Ctrl |
|---|---|---|---|---|---|---|---|---|---|---|
| 1 | Paulo Costa | 1 | 32 of 69 | 46% | 32 of 69 | 0 of 2 | 0% | 0 | 0 | 0:06 |
| Yoel Romero | 1 | 37 of 69 | 53% | 37 of 69 | 0 of 0 | --- | 0 | 0 | 0:04 | |
| 2 | Paulo Costa | 0 | 40 of 91 | 43% | 40 of 91 | 1 of 1 | 100% | 0 | 0 | 0:01 |
| Yoel Romero | 0 | 37 of 71 | 52% | 37 of 71 | 0 of 0 | --- | 0 | 0 | 0:00 | |
| 3 | Paulo Costa | 0 | 53 of 124 | 42% | 53 of 124 | 0 of 1 | 0% | 0 | 0 | 0:05 |
| Yoel Romero | 0 | 44 of 73 | 60% | 44 of 73 | 0 of 0 | --- | 0 | 0 | 0:02 |
Significant Strikes
| Fighter | Sig. Str. | Sig. Str. % | Head | Body | Leg | Distance | Clinch | Ground |
|---|---|---|---|---|---|---|---|---|
| Paulo Costa | 125 of 284 | 44% | 96 of 244 | 11 of 20 | 18 of 20 | 118 of 276 | 7 of 8 | 0 of 0 |
| Yoel Romero | 118 of 213 | 55% | 67 of 148 | 46 of 58 | 5 of 7 | 110 of 202 | 5 of 5 | 3 of 6 |
Significant Strikes Per Round
| Rd | Fighter | Sig. Str. | Sig. Str. % | Head | Body | Leg | Distance | Clinch | Ground |
|---|---|---|---|---|---|---|---|---|---|
| 1 | Paulo Costa | 32 of 69 | 46% | 23 of 54 | 2 of 7 | 7 of 8 | 31 of 68 | 1 of 1 | 0 of 0 |
| Yoel Romero | 37 of 69 | 53% | 19 of 46 | 16 of 20 | 2 of 3 | 32 of 61 | 2 of 2 | 3 of 6 | |
| 2 | Paulo Costa | 40 of 91 | 43% | 28 of 77 | 6 of 7 | 6 of 7 | 39 of 90 | 1 of 1 | 0 of 0 |
| Yoel Romero | 37 of 71 | 52% | 24 of 53 | 12 of 17 | 1 of 1 | 36 of 70 | 1 of 1 | 0 of 0 | |
| 3 | Paulo Costa | 53 of 124 | 42% | 45 of 113 | 3 of 6 | 5 of 5 | 48 of 118 | 5 of 6 | 0 of 0 |
| Yoel Romero | 44 of 73 | 60% | 24 of 49 | 18 of 21 | 2 of 3 | 42 of 71 | 2 of 2 | 0 of 0 |
Totals
| Fighter | KD | Sig. Str. | Sig. Str. % | Total Str. | TD | TD % | Sub. Att | Rev. | Ctrl |
|---|---|---|---|---|---|---|---|---|---|
| Robert Whittaker | 0 | 128 of 326 | 39% | 129 of 328 | 0 of 1 | 0% | 0 | 0 | 0:37 |
| Yoel Romero | 2 | 111 of 240 | 46% | 149 of 287 | 3 of 10 | 30% | 0 | 0 | 4:21 |
Per Round
| Rd | Fighter | KD | Sig. Str. | Sig. Str. % | Total Str. | TD | TD % | Sub. Att | Rev. | Ctrl |
|---|---|---|---|---|---|---|---|---|---|---|
| 1 | Robert Whittaker | 0 | 33 of 85 | 38% | 33 of 85 | 0 of 0 | --- | 0 | 0 | 0:00 |
| Yoel Romero | 0 | 9 of 24 | 37% | 9 of 24 | 0 of 0 | --- | 0 | 0 | 0:00 | |
| 2 | Robert Whittaker | 0 | 29 of 77 | 37% | 29 of 77 | 0 of 0 | --- | 0 | 0 | 0:00 |
| Yoel Romero | 0 | 20 of 48 | 41% | 20 of 48 | 0 of 1 | 0% | 0 | 0 | 0:00 | |
| 3 | Robert Whittaker | 0 | 18 of 42 | 42% | 19 of 43 | 0 of 0 | --- | 0 | 0 | 0:37 |
| Yoel Romero | 1 | 36 of 77 | 46% | 54 of 97 | 2 of 6 | 33% | 0 | 0 | 2:11 | |
| 4 | Robert Whittaker | 0 | 34 of 93 | 36% | 34 of 94 | 0 of 0 | --- | 0 | 0 | 0:00 |
| Yoel Romero | 0 | 20 of 44 | 45% | 20 of 44 | 0 of 0 | --- | 0 | 0 | 0:00 | |
| 5 | Robert Whittaker | 0 | 14 of 29 | 48% | 14 of 29 | 0 of 1 | 0% | 0 | 0 | 0:00 |
| Yoel Romero | 1 | 26 of 47 | 55% | 46 of 74 | 1 of 3 | 33% | 0 | 0 | 2:10 |
Significant Strikes
| Fighter | Sig. Str. | Sig. Str. % | Head | Body | Leg | Distance | Clinch | Ground |
|---|---|---|---|---|---|---|---|---|
| Robert Whittaker | 128 of 326 | 39% | 57 of 225 | 23 of 39 | 48 of 62 | 119 of 308 | 9 of 17 | 0 of 1 |
| Yoel Romero | 111 of 240 | 46% | 76 of 194 | 19 of 27 | 16 of 19 | 66 of 177 | 25 of 40 | 20 of 23 |
Significant Strikes Per Round
| Rd | Fighter | Sig. Str. | Sig. Str. % | Head | Body | Leg | Distance | Clinch | Ground |
|---|---|---|---|---|---|---|---|---|---|
| 1 | Robert Whittaker | 33 of 85 | 38% | 12 of 58 | 2 of 4 | 19 of 23 | 33 of 85 | 0 of 0 | 0 of 0 |
| Yoel Romero | 9 of 24 | 37% | 3 of 15 | 2 of 4 | 4 of 5 | 9 of 24 | 0 of 0 | 0 of 0 | |
| 2 | Robert Whittaker | 29 of 77 | 37% | 14 of 57 | 6 of 8 | 9 of 12 | 28 of 73 | 1 of 4 | 0 of 0 |
| Yoel Romero | 20 of 48 | 41% | 8 of 33 | 4 of 5 | 8 of 10 | 19 of 47 | 1 of 1 | 0 of 0 | |
| 3 | Robert Whittaker | 18 of 42 | 42% | 10 of 28 | 5 of 9 | 3 of 5 | 10 of 29 | 8 of 13 | 0 of 0 |
| Yoel Romero | 36 of 77 | 46% | 33 of 73 | 3 of 4 | 0 of 0 | 8 of 34 | 22 of 36 | 6 of 7 | |
| 4 | Robert Whittaker | 34 of 93 | 36% | 16 of 65 | 7 of 14 | 11 of 14 | 34 of 93 | 0 of 0 | 0 of 0 |
| Yoel Romero | 20 of 44 | 45% | 14 of 37 | 4 of 5 | 2 of 2 | 20 of 44 | 0 of 0 | 0 of 0 | |
| 5 | Robert Whittaker | 14 of 29 | 48% | 5 of 17 | 3 of 4 | 6 of 8 | 14 of 28 | 0 of 0 | 0 of 1 |
| Yoel Romero | 26 of 47 | 55% | 18 of 36 | 6 of 9 | 2 of 2 | 10 of 28 | 2 of 3 | 14 of 16 |
Totals
| Fighter | KD | Sig. Str. | Sig. Str. % | Total Str. | TD | TD % | Sub. Att | Rev. | Ctrl |
|---|---|---|---|---|---|---|---|---|---|
| Yoel Romero | 1 | 45 of 92 | 48% | 52 of 99 | 0 of 0 | --- | 0 | 0 | 0:08 |
| Luke Rockhold | 0 | 45 of 119 | 37% | 45 of 119 | 0 of 0 | --- | 0 | 0 | 0:00 |
Per Round
| Rd | Fighter | KD | Sig. Str. | Sig. Str. % | Total Str. | TD | TD % | Sub. Att | Rev. | Ctrl |
|---|---|---|---|---|---|---|---|---|---|---|
| 1 | Yoel Romero | 0 | 10 of 27 | 37% | 10 of 27 | 0 of 0 | --- | 0 | 0 | 0:00 |
| Luke Rockhold | 0 | 18 of 41 | 43% | 18 of 41 | 0 of 0 | --- | 0 | 0 | 0:00 | |
| 2 | Yoel Romero | 0 | 24 of 46 | 52% | 31 of 53 | 0 of 0 | --- | 0 | 0 | 0:06 |
| Luke Rockhold | 0 | 17 of 51 | 33% | 17 of 51 | 0 of 0 | --- | 0 | 0 | 0:00 | |
| 3 | Yoel Romero | 1 | 11 of 19 | 57% | 11 of 19 | 0 of 0 | --- | 0 | 0 | 0:02 |
| Luke Rockhold | 0 | 10 of 27 | 37% | 10 of 27 | 0 of 0 | --- | 0 | 0 | 0:00 |
Significant Strikes
| Fighter | Sig. Str. | Sig. Str. % | Head | Body | Leg | Distance | Clinch | Ground |
|---|---|---|---|---|---|---|---|---|
| Yoel Romero | 45 of 92 | 48% | 23 of 60 | 10 of 17 | 12 of 15 | 31 of 73 | 13 of 18 | 1 of 1 |
| Luke Rockhold | 45 of 119 | 37% | 22 of 87 | 10 of 15 | 13 of 17 | 44 of 118 | 1 of 1 | 0 of 0 |
Significant Strikes Per Round
| Rd | Fighter | Sig. Str. | Sig. Str. % | Head | Body | Leg | Distance | Clinch | Ground |
|---|---|---|---|---|---|---|---|---|---|
| 1 | Yoel Romero | 10 of 27 | 37% | 3 of 15 | 1 of 4 | 6 of 8 | 10 of 27 | 0 of 0 | 0 of 0 |
| Luke Rockhold | 18 of 41 | 43% | 3 of 21 | 4 of 7 | 11 of 13 | 18 of 41 | 0 of 0 | 0 of 0 | |
| 2 | Yoel Romero | 24 of 46 | 52% | 13 of 30 | 7 of 11 | 4 of 5 | 11 of 28 | 13 of 18 | 0 of 0 |
| Luke Rockhold | 17 of 51 | 33% | 10 of 40 | 6 of 8 | 1 of 3 | 16 of 50 | 1 of 1 | 0 of 0 | |
| 3 | Yoel Romero | 11 of 19 | 57% | 7 of 15 | 2 of 2 | 2 of 2 | 10 of 18 | 0 of 0 | 1 of 1 |
| Luke Rockhold | 10 of 27 | 37% | 9 of 26 | 0 of 0 | 1 of 1 | 10 of 27 | 0 of 0 | 0 of 0 |
Totals
| Fighter | KD | Sig. Str. | Sig. Str. % | Total Str. | TD | TD % | Sub. Att | Rev. | Ctrl |
|---|---|---|---|---|---|---|---|---|---|
| Robert Whittaker | 0 | 48 of 107 | 44% | 114 of 175 | 4 of 18 | 22% | 0 | 0 | 5:15 |
| Yoel Romero | 0 | 74 of 221 | 33% | 94 of 244 | 0 of 0 | --- | 0 | 0 | 1:33 |
Per Round
| Rd | Fighter | KD | Sig. Str. | Sig. Str. % | Total Str. | TD | TD % | Sub. Att | Rev. | Ctrl |
|---|---|---|---|---|---|---|---|---|---|---|
| 1 | Robert Whittaker | 0 | 12 of 18 | 66% | 14 of 20 | 1 of 4 | 25% | 0 | 0 | 0:53 |
| Yoel Romero | 0 | 7 of 25 | 28% | 7 of 25 | 0 of 0 | --- | 0 | 0 | 0:00 | |
| 2 | Robert Whittaker | 0 | 6 of 12 | 50% | 49 of 55 | 2 of 6 | 33% | 0 | 0 | 3:20 |
| Yoel Romero | 0 | 6 of 22 | 27% | 10 of 27 | 0 of 0 | --- | 0 | 0 | 0:00 | |
| 3 | Robert Whittaker | 0 | 5 of 16 | 31% | 5 of 16 | 0 of 3 | 0% | 0 | 0 | 0:00 |
| Yoel Romero | 0 | 11 of 53 | 20% | 13 of 55 | 0 of 0 | --- | 0 | 0 | 0:00 | |
| 4 | Robert Whittaker | 0 | 7 of 18 | 38% | 8 of 19 | 1 of 4 | 25% | 0 | 0 | 1:02 |
| Yoel Romero | 0 | 19 of 42 | 45% | 19 of 42 | 0 of 0 | --- | 0 | 0 | 0:05 | |
| 5 | Robert Whittaker | 0 | 18 of 43 | 41% | 38 of 65 | 0 of 1 | 0% | 0 | 0 | 0:00 |
| Yoel Romero | 0 | 31 of 79 | 39% | 45 of 95 | 0 of 0 | --- | 0 | 0 | 1:28 |
Significant Strikes
| Fighter | Sig. Str. | Sig. Str. % | Head | Body | Leg | Distance | Clinch | Ground |
|---|---|---|---|---|---|---|---|---|
| Robert Whittaker | 48 of 107 | 44% | 20 of 68 | 12 of 18 | 16 of 21 | 41 of 100 | 3 of 3 | 4 of 4 |
| Yoel Romero | 74 of 221 | 33% | 46 of 163 | 23 of 52 | 5 of 6 | 59 of 195 | 7 of 12 | 8 of 14 |
Significant Strikes Per Round
| Rd | Fighter | Sig. Str. | Sig. Str. % | Head | Body | Leg | Distance | Clinch | Ground |
|---|---|---|---|---|---|---|---|---|---|
| 1 | Robert Whittaker | 12 of 18 | 66% | 2 of 8 | 3 of 3 | 7 of 7 | 10 of 16 | 2 of 2 | 0 of 0 |
| Yoel Romero | 7 of 25 | 28% | 4 of 19 | 2 of 5 | 1 of 1 | 6 of 21 | 1 of 4 | 0 of 0 | |
| 2 | Robert Whittaker | 6 of 12 | 50% | 4 of 8 | 2 of 3 | 0 of 1 | 3 of 9 | 1 of 1 | 2 of 2 |
| Yoel Romero | 6 of 22 | 27% | 2 of 14 | 3 of 6 | 1 of 2 | 3 of 18 | 3 of 4 | 0 of 0 | |
| 3 | Robert Whittaker | 5 of 16 | 31% | 2 of 11 | 1 of 3 | 2 of 2 | 5 of 16 | 0 of 0 | 0 of 0 |
| Yoel Romero | 11 of 53 | 20% | 8 of 36 | 2 of 16 | 1 of 1 | 10 of 51 | 1 of 2 | 0 of 0 | |
| 4 | Robert Whittaker | 7 of 18 | 38% | 2 of 10 | 1 of 1 | 4 of 7 | 5 of 16 | 0 of 0 | 2 of 2 |
| Yoel Romero | 19 of 42 | 45% | 11 of 31 | 7 of 10 | 1 of 1 | 16 of 38 | 2 of 2 | 1 of 2 | |
| 5 | Robert Whittaker | 18 of 43 | 41% | 10 of 31 | 5 of 8 | 3 of 4 | 18 of 43 | 0 of 0 | 0 of 0 |
| Yoel Romero | 31 of 79 | 39% | 21 of 63 | 9 of 15 | 1 of 1 | 24 of 67 | 0 of 0 | 7 of 12 |
Play-by-Play
View on SherdogRound 1
Dan Miragliotta is the referee for tonight's 185-pound main event, which remains a five-rounder but is no longer a title fight due to Yoel Romero missing weight on Friday. Whittaker comes out attacking the lead leg of Romero with side kicks and oblique stomps, then switches to traditional leg kicks in between pumping his jab. Romero hasn't offered up anything through the first two minutes, seemingly content to stay on his back foot and figure out Whittaker's puzzle. When Romero does start striking, he's throwing big, single power punches. Whittaker maintains a more measured approach, dipping in and out of range, attacking Romero's legs while keeping his jab in the Cuban's face. Romero keeps his guard high, shelling up when Whittaker comes forward to jab. Whittaker crouches low, goes body-head and then ducks under a spinning backfist from Romero right at the horn.
Sherdog Scores
Tristen Critchfield scores the round 10-9 Whittaker
Ben Duffy scores the round 10-9 Whittaker
Chris Nelson scores the round 10-9 Whittaker
Round 2
Whittaker starts the second round in the same manner as the first, going after the left leg of Romero with stomps and kicks. Romero continues to fight at a sluggish pace, seemingly waiting for an opportunity to counterstrike, but rarely offering up any counters. Whittaker is staying busy, keeping his distance and picking at the "Soldier of God" with jabs and body kicks. Even when Romero comes forward, he's not throwing much, though he does manage to put a kick or knee on Whittaker's midsection. Romero whiffs on a slow-motion spinning backfist. Whittaker catches him turning and pops him with a jab, and Romero's right eye begins swelling up instantly. Romero blocks a head kick, clinches up with Whittaker, but releases the champion before attempting a takedown. In the final 30 seconds, Romero is standing stock-still in front of Whittaker, who is happy to feed his stationary target some more jabs and leg kicks.
Sherdog Scores
Tristen Critchfield scores the round 10-9 Whittaker
Ben Duffy scores the round 10-9 Whittaker
Chris Nelson scores the round 10-9 Whittaker
Round 3
Romero comes out aggressive and stings Whittaker with a huge right hand in the first 30 seconds. The champion hits the deck momentarily, then scrambles away on roller skates, trying to avoid Romero's follow-up fire. Romero can't keep Whittaker on the ground, but back on the feet, he's able to rock the young Aussie with punches and elbows up against the fence. Nearly two minutes in, Whittaker still hasn't recovered from the early knockdown, though he's started to tag Romero back as they fight in the clinch. Romero backs up to land another power punch, then hugs Whittaker against the cage. Whittaker reverses to the outside position and puts a knee in the breadbasket of Romero, who's looking tired after expending a lot of energy going for the finish. Whittaker eats another flurry of punches on the fence and is forced to go on the retreat. Romero tries to walk him down, but the "Soldier of God" marches straight into a head kick. With under a minute to go in the third, both men are starting to look spent. Whittaker takes the outside position in the clinch, and both fighters look content to take a 20-second breather at round's end.
Sherdog Scores
Tristen Critchfield scores the round 10-9 Romero
Ben Duffy scores the round 10-9 Romero
Chris Nelson scores the round 10-9 Romero
Round 4
The championship rounds begin with the fighters toe-to-toe in the center of the cage. Whittaker looks to be the fresher fighter, slightly bouncing on his toes as he sizes up the virtually motionless Romero. Backing up Romero to the fence, Whittaker keeps his distance while attacking with jabs and low kicks. Romero blocks a right high kick, so Whittaker fires a few at his knees and midsection. A front kick clips Romero on the cup, and referee Miragliotta pauses the fight to give Romero time to recover from the accidental foul. Action resumes with 3:30 on the clock, and Whittaker looks refreshed from the rest as he attacks Romero's midsection with hard front kicks. Romero nods his head in acknowledgement as he inches forward on the champion, ripping a left hand to the champion's body. The middleweights are trading shots in the final minute when a right hand from Romero puts Whittaker on rubber legs. The champion recovers before the horn, but not before taking another Cuban right hand on the chin.
Sherdog Scores
Tristen Critchfield scores the round 10-9 Romero
Ben Duffy scores the round 10-9 Romero
Chris Nelson scores the round 10-9 Romero
Round 5
Whittaker gets caught off-balance with a Romero one-two, circles away and comes back to hit the challenger with a body kick. Romero is still attempting spinning strikes, albeit very slow ones at this late stage of the bout. Meanwhile, Whittaker continues to stomp on Romero's left knee, just as he was in the opening round. Romero explodes forward and floors Whittaker with a hellacious left hand, then tries to pound out the wounded champion. Whittaker tries to drive forward on a single-leg, but the Olympic wrestler defends the takedown with ease and continues to bash Whittaker from the sprawl. Whittaker climbs back to his feet but doesn't let go of the leg, and he soon finds himself back on his knees. Whittaker stands up, eats a knee, now has his legs kicked out by Romero, who's in control from the rear waistlock position. Whittaker still hasn't recovered from the knockdown, isn't doing much of anything as the final two minutes tick away and Romero holds him in place. Referee Miragliotta separates the fighters with under a minute remaining. Whittaker catches Romero throwing a spinning kick and trips him to the ground, but Romero springs back up to finish the fight on his feet.
Sherdog Scores
Tristen Critchfield scores the round 10-9 Romero (48-47 Romero)
Ben Duffy scores the round 10-8 Romero (48-46 Romero)
Chris Nelson scores the round 10-8 Romero (48-46 Romero)
The Official Result
Robert Whittaker def. Yoel Romero via Split Decision (48-47, 48-47, 47-48) R5 5:00
Totals
| Fighter | KD | Sig. Str. | Sig. Str. % | Total Str. | TD | TD % | Sub. Att | Rev. | Ctrl |
|---|---|---|---|---|---|---|---|---|---|
| Yoel Romero | 0 | 12 of 47 | 25% | 16 of 54 | 1 of 8 | 12% | 0 | 0 | 0:25 |
| Chris Weidman | 1 | 18 of 40 | 45% | 27 of 51 | 2 of 3 | 66% | 0 | 0 | 1:52 |
Per Round
| Rd | Fighter | KD | Sig. Str. | Sig. Str. % | Total Str. | TD | TD % | Sub. Att | Rev. | Ctrl |
|---|---|---|---|---|---|---|---|---|---|---|
| 1 | Yoel Romero | 0 | 7 of 24 | 29% | 9 of 27 | 1 of 4 | 25% | 0 | 0 | 0:25 |
| Chris Weidman | 0 | 3 of 10 | 30% | 5 of 12 | 0 of 0 | --- | 0 | 0 | 0:00 | |
| 2 | Yoel Romero | 0 | 4 of 21 | 19% | 6 of 25 | 0 of 4 | 0% | 0 | 0 | 0:00 |
| Chris Weidman | 0 | 8 of 21 | 38% | 15 of 30 | 2 of 3 | 66% | 0 | 0 | 1:48 | |
| 3 | Yoel Romero | 0 | 1 of 2 | 50% | 1 of 2 | 0 of 0 | --- | 0 | 0 | 0:00 |
| Chris Weidman | 1 | 7 of 9 | 77% | 7 of 9 | 0 of 0 | --- | 0 | 0 | 0:04 |
Significant Strikes
| Fighter | Sig. Str. | Sig. Str. % | Head | Body | Leg | Distance | Clinch | Ground |
|---|---|---|---|---|---|---|---|---|
| Yoel Romero | 12 of 47 | 25% | 2 of 22 | 6 of 15 | 4 of 10 | 12 of 46 | 0 of 1 | 0 of 0 |
| Chris Weidman | 18 of 40 | 45% | 13 of 32 | 2 of 3 | 3 of 5 | 9 of 24 | 1 of 2 | 8 of 14 |
Significant Strikes Per Round
| Rd | Fighter | Sig. Str. | Sig. Str. % | Head | Body | Leg | Distance | Clinch | Ground |
|---|---|---|---|---|---|---|---|---|---|
| 1 | Yoel Romero | 7 of 24 | 29% | 1 of 11 | 4 of 8 | 2 of 5 | 7 of 23 | 0 of 1 | 0 of 0 |
| Chris Weidman | 3 of 10 | 30% | 2 of 6 | 1 of 2 | 0 of 2 | 3 of 9 | 0 of 1 | 0 of 0 | |
| 2 | Yoel Romero | 4 of 21 | 19% | 1 of 11 | 1 of 6 | 2 of 4 | 4 of 21 | 0 of 0 | 0 of 0 |
| Chris Weidman | 8 of 21 | 38% | 5 of 18 | 1 of 1 | 2 of 2 | 4 of 13 | 1 of 1 | 3 of 7 | |
| 3 | Yoel Romero | 1 of 2 | 50% | 0 of 0 | 1 of 1 | 0 of 1 | 1 of 2 | 0 of 0 | 0 of 0 |
| Chris Weidman | 7 of 9 | 77% | 6 of 8 | 0 of 0 | 1 of 1 | 2 of 2 | 0 of 0 | 5 of 7 |
Totals
| Fighter | KD | Sig. Str. | Sig. Str. % | Total Str. | TD | TD % | Sub. Att | Rev. | Ctrl |
|---|---|---|---|---|---|---|---|---|---|
| Yoel Romero | 0 | 30 of 52 | 57% | 42 of 67 | 1 of 7 | 14% | 0 | 0 | 2:33 |
| Jacare Souza | 1 | 46 of 92 | 50% | 56 of 104 | 0 of 1 | 0% | 0 | 0 | 1:58 |
Per Round
| Rd | Fighter | KD | Sig. Str. | Sig. Str. % | Total Str. | TD | TD % | Sub. Att | Rev. | Ctrl |
|---|---|---|---|---|---|---|---|---|---|---|
| 1 | Yoel Romero | 0 | 5 of 16 | 31% | 5 of 16 | 0 of 0 | --- | 0 | 0 | 0:00 |
| Jacare Souza | 1 | 27 of 57 | 47% | 30 of 61 | 0 of 0 | --- | 0 | 0 | 1:45 | |
| 2 | Yoel Romero | 0 | 7 of 13 | 53% | 7 of 13 | 0 of 4 | 0% | 0 | 0 | 0:08 |
| Jacare Souza | 0 | 6 of 14 | 42% | 6 of 14 | 0 of 1 | 0% | 0 | 0 | 0:05 | |
| 3 | Yoel Romero | 0 | 18 of 23 | 78% | 30 of 38 | 1 of 3 | 33% | 0 | 0 | 2:25 |
| Jacare Souza | 0 | 13 of 21 | 61% | 20 of 29 | 0 of 0 | --- | 0 | 0 | 0:08 |
Significant Strikes
| Fighter | Sig. Str. | Sig. Str. % | Head | Body | Leg | Distance | Clinch | Ground |
|---|---|---|---|---|---|---|---|---|
| Yoel Romero | 30 of 52 | 57% | 16 of 35 | 11 of 14 | 3 of 3 | 22 of 44 | 0 of 0 | 8 of 8 |
| Jacare Souza | 46 of 92 | 50% | 37 of 80 | 5 of 6 | 4 of 6 | 24 of 50 | 0 of 1 | 22 of 41 |
Significant Strikes Per Round
| Rd | Fighter | Sig. Str. | Sig. Str. % | Head | Body | Leg | Distance | Clinch | Ground |
|---|---|---|---|---|---|---|---|---|---|
| 1 | Yoel Romero | 5 of 16 | 31% | 1 of 10 | 3 of 5 | 1 of 1 | 5 of 16 | 0 of 0 | 0 of 0 |
| Jacare Souza | 27 of 57 | 47% | 26 of 55 | 1 of 2 | 0 of 0 | 5 of 16 | 0 of 0 | 22 of 41 | |
| 2 | Yoel Romero | 7 of 13 | 53% | 3 of 8 | 3 of 4 | 1 of 1 | 7 of 13 | 0 of 0 | 0 of 0 |
| Jacare Souza | 6 of 14 | 42% | 2 of 8 | 2 of 2 | 2 of 4 | 6 of 14 | 0 of 0 | 0 of 0 | |
| 3 | Yoel Romero | 18 of 23 | 78% | 12 of 17 | 5 of 5 | 1 of 1 | 10 of 15 | 0 of 0 | 8 of 8 |
| Jacare Souza | 13 of 21 | 61% | 9 of 17 | 2 of 2 | 2 of 2 | 13 of 20 | 0 of 1 | 0 of 0 |
Totals
| Fighter | KD | Sig. Str. | Sig. Str. % | Total Str. | TD | TD % | Sub. Att | Rev. | Ctrl |
|---|---|---|---|---|---|---|---|---|---|
| Yoel Romero | 0 | 31 of 64 | 48% | 31 of 64 | 0 of 0 | --- | 0 | 0 | 0:00 |
| Lyoto Machida | 0 | 42 of 70 | 60% | 44 of 72 | 1 of 2 | 50% | 0 | 0 | 0:05 |
Per Round
| Rd | Fighter | KD | Sig. Str. | Sig. Str. % | Total Str. | TD | TD % | Sub. Att | Rev. | Ctrl |
|---|---|---|---|---|---|---|---|---|---|---|
| 1 | Yoel Romero | 0 | 12 of 28 | 42% | 12 of 28 | 0 of 0 | --- | 0 | 0 | 0:00 |
| Lyoto Machida | 0 | 15 of 30 | 50% | 15 of 30 | 0 of 0 | --- | 0 | 0 | 0:00 | |
| 2 | Yoel Romero | 0 | 16 of 26 | 61% | 16 of 26 | 0 of 0 | --- | 0 | 0 | 0:00 |
| Lyoto Machida | 0 | 17 of 27 | 62% | 17 of 27 | 0 of 1 | 0% | 0 | 0 | 0:00 | |
| 3 | Yoel Romero | 0 | 3 of 10 | 30% | 3 of 10 | 0 of 0 | --- | 0 | 0 | 0:00 |
| Lyoto Machida | 0 | 10 of 13 | 76% | 12 of 15 | 1 of 1 | 100% | 0 | 0 | 0:05 |
Significant Strikes
| Fighter | Sig. Str. | Sig. Str. % | Head | Body | Leg | Distance | Clinch | Ground |
|---|---|---|---|---|---|---|---|---|
| Yoel Romero | 31 of 64 | 48% | 6 of 27 | 11 of 20 | 14 of 17 | 31 of 63 | 0 of 1 | 0 of 0 |
| Lyoto Machida | 42 of 70 | 60% | 16 of 31 | 9 of 18 | 17 of 21 | 35 of 63 | 1 of 1 | 6 of 6 |
Significant Strikes Per Round
| Rd | Fighter | Sig. Str. | Sig. Str. % | Head | Body | Leg | Distance | Clinch | Ground |
|---|---|---|---|---|---|---|---|---|---|
| 1 | Yoel Romero | 12 of 28 | 42% | 2 of 12 | 5 of 9 | 5 of 7 | 12 of 28 | 0 of 0 | 0 of 0 |
| Lyoto Machida | 15 of 30 | 50% | 1 of 7 | 5 of 11 | 9 of 12 | 15 of 30 | 0 of 0 | 0 of 0 | |
| 2 | Yoel Romero | 16 of 26 | 61% | 4 of 9 | 5 of 9 | 7 of 8 | 16 of 25 | 0 of 1 | 0 of 0 |
| Lyoto Machida | 17 of 27 | 62% | 8 of 15 | 3 of 5 | 6 of 7 | 16 of 26 | 1 of 1 | 0 of 0 | |
| 3 | Yoel Romero | 3 of 10 | 30% | 0 of 6 | 1 of 2 | 2 of 2 | 3 of 10 | 0 of 0 | 0 of 0 |
| Lyoto Machida | 10 of 13 | 76% | 7 of 9 | 1 of 2 | 2 of 2 | 4 of 7 | 0 of 0 | 6 of 6 |
Tim Kennedy - Fight History
Totals
| Fighter | KD | Sig. Str. | Sig. Str. % | Total Str. | TD | TD % | Sub. Att | Rev. | Ctrl |
|---|---|---|---|---|---|---|---|---|---|
| Kelvin Gastelum | 0 | 45 of 108 | 41% | 51 of 115 | 3 of 8 | 37% | 0 | 0 | 3:52 |
| Tim Kennedy | 1 | 62 of 110 | 56% | 68 of 116 | 0 of 0 | --- | 0 | 1 | 1:10 |
Per Round
| Rd | Fighter | KD | Sig. Str. | Sig. Str. % | Total Str. | TD | TD % | Sub. Att | Rev. | Ctrl |
|---|---|---|---|---|---|---|---|---|---|---|
| 1 | Kelvin Gastelum | 0 | 27 of 47 | 57% | 30 of 50 | 2 of 4 | 50% | 0 | 0 | 2:48 |
| Tim Kennedy | 0 | 12 of 26 | 46% | 12 of 26 | 0 of 0 | --- | 0 | 0 | 0:00 | |
| 2 | Kelvin Gastelum | 0 | 9 of 29 | 31% | 12 of 33 | 1 of 3 | 33% | 0 | 0 | 1:04 |
| Tim Kennedy | 0 | 21 of 41 | 51% | 24 of 44 | 0 of 0 | --- | 0 | 1 | 0:58 | |
| 3 | Kelvin Gastelum | 0 | 9 of 32 | 28% | 9 of 32 | 0 of 1 | 0% | 0 | 0 | 0:00 |
| Tim Kennedy | 1 | 29 of 43 | 67% | 32 of 46 | 0 of 0 | --- | 0 | 0 | 0:12 |
Significant Strikes
| Fighter | Sig. Str. | Sig. Str. % | Head | Body | Leg | Distance | Clinch | Ground |
|---|---|---|---|---|---|---|---|---|
| Kelvin Gastelum | 45 of 108 | 41% | 15 of 61 | 16 of 31 | 14 of 16 | 28 of 87 | 16 of 20 | 1 of 1 |
| Tim Kennedy | 62 of 110 | 56% | 49 of 91 | 12 of 17 | 1 of 2 | 56 of 101 | 5 of 8 | 1 of 1 |
Significant Strikes Per Round
| Rd | Fighter | Sig. Str. | Sig. Str. % | Head | Body | Leg | Distance | Clinch | Ground |
|---|---|---|---|---|---|---|---|---|---|
| 1 | Kelvin Gastelum | 27 of 47 | 57% | 6 of 18 | 8 of 15 | 13 of 14 | 11 of 27 | 15 of 19 | 1 of 1 |
| Tim Kennedy | 12 of 26 | 46% | 10 of 23 | 1 of 2 | 1 of 1 | 11 of 25 | 1 of 1 | 0 of 0 | |
| 2 | Kelvin Gastelum | 9 of 29 | 31% | 3 of 18 | 5 of 10 | 1 of 1 | 8 of 28 | 1 of 1 | 0 of 0 |
| Tim Kennedy | 21 of 41 | 51% | 14 of 29 | 7 of 11 | 0 of 1 | 16 of 33 | 4 of 7 | 1 of 1 | |
| 3 | Kelvin Gastelum | 9 of 32 | 28% | 6 of 25 | 3 of 6 | 0 of 1 | 9 of 32 | 0 of 0 | 0 of 0 |
| Tim Kennedy | 29 of 43 | 67% | 25 of 39 | 4 of 4 | 0 of 0 | 29 of 43 | 0 of 0 | 0 of 0 |
Totals
| Fighter | KD | Sig. Str. | Sig. Str. % | Total Str. | TD | TD % | Sub. Att | Rev. | Ctrl |
|---|---|---|---|---|---|---|---|---|---|
| Yoel Romero | 0 | 30 of 86 | 34% | 32 of 88 | 0 of 6 | 0% | 1 | 0 | 0:01 |
| Tim Kennedy | 2 | 39 of 80 | 48% | 51 of 93 | 3 of 4 | 75% | 0 | 0 | 2:06 |
Per Round
| Rd | Fighter | KD | Sig. Str. | Sig. Str. % | Total Str. | TD | TD % | Sub. Att | Rev. | Ctrl |
|---|---|---|---|---|---|---|---|---|---|---|
| 1 | Yoel Romero | 0 | 4 of 28 | 14% | 4 of 28 | 0 of 2 | 0% | 0 | 0 | 0:00 |
| Tim Kennedy | 0 | 12 of 20 | 60% | 14 of 22 | 2 of 2 | 100% | 0 | 0 | 0:15 | |
| 2 | Yoel Romero | 0 | 25 of 57 | 43% | 27 of 59 | 0 of 2 | 0% | 1 | 0 | 0:01 |
| Tim Kennedy | 0 | 9 of 32 | 28% | 12 of 36 | 1 of 2 | 50% | 0 | 0 | 1:15 | |
| 3 | Yoel Romero | 0 | 1 of 1 | 100% | 1 of 1 | 0 of 2 | 0% | 0 | 0 | 0:00 |
| Tim Kennedy | 2 | 18 of 28 | 64% | 25 of 35 | 0 of 0 | --- | 0 | 0 | 0:36 |
Significant Strikes
| Fighter | Sig. Str. | Sig. Str. % | Head | Body | Leg | Distance | Clinch | Ground |
|---|---|---|---|---|---|---|---|---|
| Yoel Romero | 30 of 86 | 34% | 17 of 58 | 9 of 21 | 4 of 7 | 21 of 71 | 9 of 15 | 0 of 0 |
| Tim Kennedy | 39 of 80 | 48% | 28 of 62 | 3 of 6 | 8 of 12 | 25 of 58 | 5 of 8 | 9 of 14 |
Significant Strikes Per Round
| Rd | Fighter | Sig. Str. | Sig. Str. % | Head | Body | Leg | Distance | Clinch | Ground |
|---|---|---|---|---|---|---|---|---|---|
| 1 | Yoel Romero | 4 of 28 | 14% | 0 of 16 | 2 of 7 | 2 of 5 | 4 of 28 | 0 of 0 | 0 of 0 |
| Tim Kennedy | 12 of 20 | 60% | 5 of 10 | 2 of 3 | 5 of 7 | 12 of 20 | 0 of 0 | 0 of 0 | |
| 2 | Yoel Romero | 25 of 57 | 43% | 17 of 42 | 6 of 13 | 2 of 2 | 16 of 42 | 9 of 15 | 0 of 0 |
| Tim Kennedy | 9 of 32 | 28% | 6 of 26 | 1 of 2 | 2 of 4 | 7 of 27 | 2 of 5 | 0 of 0 | |
| 3 | Yoel Romero | 1 of 1 | 100% | 0 of 0 | 1 of 1 | 0 of 0 | 1 of 1 | 0 of 0 | 0 of 0 |
| Tim Kennedy | 18 of 28 | 64% | 17 of 26 | 0 of 1 | 1 of 1 | 6 of 11 | 3 of 3 | 9 of 14 |
Totals
| Fighter | KD | Sig. Str. | Sig. Str. % | Total Str. | TD | TD % | Sub. Att | Rev. | Ctrl |
|---|---|---|---|---|---|---|---|---|---|
| Tim Kennedy | 0 | 40 of 137 | 29% | 53 of 151 | 0 of 0 | --- | 0 | 0 | 0:03 |
| Michael Bisping | 0 | 51 of 106 | 48% | 76 of 141 | 5 of 11 | 45% | 0 | 0 | 12:01 |
Per Round
| Rd | Fighter | KD | Sig. Str. | Sig. Str. % | Total Str. | TD | TD % | Sub. Att | Rev. | Ctrl |
|---|---|---|---|---|---|---|---|---|---|---|
| 1 | Tim Kennedy | 0 | 0 of 4 | 0% | 6 of 11 | 0 of 0 | --- | 0 | 0 | 0:00 |
| Michael Bisping | 0 | 9 of 18 | 50% | 18 of 31 | 2 of 2 | 100% | 0 | 0 | 4:42 | |
| 2 | Tim Kennedy | 0 | 17 of 49 | 34% | 19 of 51 | 0 of 0 | --- | 0 | 0 | 0:03 |
| Michael Bisping | 0 | 11 of 22 | 50% | 11 of 22 | 0 of 3 | 0% | 0 | 0 | 0:30 | |
| 3 | Tim Kennedy | 0 | 1 of 8 | 12% | 6 of 13 | 0 of 0 | --- | 0 | 0 | 0:00 |
| Michael Bisping | 0 | 5 of 9 | 55% | 19 of 29 | 1 of 1 | 100% | 0 | 0 | 4:18 | |
| 4 | Tim Kennedy | 0 | 14 of 32 | 43% | 14 of 32 | 0 of 0 | --- | 0 | 0 | 0:00 |
| Michael Bisping | 0 | 13 of 32 | 40% | 13 of 32 | 0 of 2 | 0% | 0 | 0 | 0:44 | |
| 5 | Tim Kennedy | 0 | 8 of 44 | 18% | 8 of 44 | 0 of 0 | --- | 0 | 0 | 0:00 |
| Michael Bisping | 0 | 13 of 25 | 52% | 15 of 27 | 2 of 3 | 66% | 0 | 0 | 1:47 |
Significant Strikes
| Fighter | Sig. Str. | Sig. Str. % | Head | Body | Leg | Distance | Clinch | Ground |
|---|---|---|---|---|---|---|---|---|
| Tim Kennedy | 40 of 137 | 29% | 35 of 128 | 4 of 8 | 1 of 1 | 38 of 135 | 2 of 2 | 0 of 0 |
| Michael Bisping | 51 of 106 | 48% | 32 of 78 | 12 of 19 | 7 of 9 | 36 of 82 | 6 of 7 | 9 of 17 |
Significant Strikes Per Round
| Rd | Fighter | Sig. Str. | Sig. Str. % | Head | Body | Leg | Distance | Clinch | Ground |
|---|---|---|---|---|---|---|---|---|---|
| 1 | Tim Kennedy | 0 of 4 | 0% | 0 of 4 | 0 of 0 | 0 of 0 | 0 of 4 | 0 of 0 | 0 of 0 |
| Michael Bisping | 9 of 18 | 50% | 6 of 15 | 0 of 0 | 3 of 3 | 0 of 1 | 3 of 3 | 6 of 14 | |
| 2 | Tim Kennedy | 17 of 49 | 34% | 16 of 47 | 1 of 2 | 0 of 0 | 16 of 48 | 1 of 1 | 0 of 0 |
| Michael Bisping | 11 of 22 | 50% | 4 of 14 | 6 of 7 | 1 of 1 | 10 of 21 | 1 of 1 | 0 of 0 | |
| 3 | Tim Kennedy | 1 of 8 | 12% | 1 of 8 | 0 of 0 | 0 of 0 | 1 of 8 | 0 of 0 | 0 of 0 |
| Michael Bisping | 5 of 9 | 55% | 3 of 7 | 2 of 2 | 0 of 0 | 2 of 6 | 0 of 0 | 3 of 3 | |
| 4 | Tim Kennedy | 14 of 32 | 43% | 10 of 26 | 3 of 5 | 1 of 1 | 13 of 31 | 1 of 1 | 0 of 0 |
| Michael Bisping | 13 of 32 | 40% | 10 of 22 | 1 of 6 | 2 of 4 | 12 of 30 | 1 of 2 | 0 of 0 | |
| 5 | Tim Kennedy | 8 of 44 | 18% | 8 of 43 | 0 of 1 | 0 of 0 | 8 of 44 | 0 of 0 | 0 of 0 |
| Michael Bisping | 13 of 25 | 52% | 9 of 20 | 3 of 4 | 1 of 1 | 12 of 24 | 1 of 1 | 0 of 0 |
Totals
| Fighter | KD | Sig. Str. | Sig. Str. % | Total Str. | TD | TD % | Sub. Att | Rev. | Ctrl |
|---|---|---|---|---|---|---|---|---|---|
| Tim Kennedy | 1 | 13 of 31 | 41% | 13 of 31 | 0 of 0 | --- | 0 | 0 | 0:02 |
| Rafael Natal | 0 | 13 of 35 | 37% | 13 of 35 | 0 of 1 | 0% | 0 | 0 | 0:00 |
Per Round
| Rd | Fighter | KD | Sig. Str. | Sig. Str. % | Total Str. | TD | TD % | Sub. Att | Rev. | Ctrl |
|---|---|---|---|---|---|---|---|---|---|---|
| 1 | Tim Kennedy | 1 | 13 of 31 | 41% | 13 of 31 | 0 of 0 | --- | 0 | 0 | 0:02 |
| Rafael Natal | 0 | 13 of 35 | 37% | 13 of 35 | 0 of 1 | 0% | 0 | 0 | 0:00 |
Significant Strikes
| Fighter | Sig. Str. | Sig. Str. % | Head | Body | Leg | Distance | Clinch | Ground |
|---|---|---|---|---|---|---|---|---|
| Tim Kennedy | 13 of 31 | 41% | 7 of 24 | 1 of 2 | 5 of 5 | 9 of 27 | 0 of 0 | 4 of 4 |
| Rafael Natal | 13 of 35 | 37% | 5 of 21 | 2 of 6 | 6 of 8 | 13 of 35 | 0 of 0 | 0 of 0 |
Significant Strikes Per Round
| Rd | Fighter | Sig. Str. | Sig. Str. % | Head | Body | Leg | Distance | Clinch | Ground |
|---|---|---|---|---|---|---|---|---|---|
| 1 | Tim Kennedy | 13 of 31 | 41% | 7 of 24 | 1 of 2 | 5 of 5 | 9 of 27 | 0 of 0 | 4 of 4 |
| Rafael Natal | 13 of 35 | 37% | 5 of 21 | 2 of 6 | 6 of 8 | 13 of 35 | 0 of 0 | 0 of 0 |
Totals
| Fighter | KD | Sig. Str. | Sig. Str. % | Total Str. | TD | TD % | Sub. Att | Rev. | Ctrl |
|---|---|---|---|---|---|---|---|---|---|
| Tim Kennedy | 0 | 54 of 92 | 58% | 101 of 145 | 2 of 4 | 50% | 0 | 1 | 6:11 |
| Roger Gracie | 0 | 12 of 29 | 41% | 14 of 31 | 2 of 4 | 50% | 0 | 0 | 3:26 |
Per Round
| Rd | Fighter | KD | Sig. Str. | Sig. Str. % | Total Str. | TD | TD % | Sub. Att | Rev. | Ctrl |
|---|---|---|---|---|---|---|---|---|---|---|
| 1 | Tim Kennedy | 0 | 5 of 15 | 33% | 20 of 32 | 0 of 1 | 0% | 0 | 1 | 0:47 |
| Roger Gracie | 0 | 7 of 10 | 70% | 8 of 11 | 2 of 2 | 100% | 0 | 0 | 2:52 | |
| 2 | Tim Kennedy | 0 | 26 of 36 | 72% | 44 of 56 | 2 of 2 | 100% | 0 | 0 | 3:47 |
| Roger Gracie | 0 | 4 of 8 | 50% | 5 of 9 | 0 of 0 | --- | 0 | 0 | 0:11 | |
| 3 | Tim Kennedy | 0 | 23 of 41 | 56% | 37 of 57 | 0 of 1 | 0% | 0 | 0 | 1:37 |
| Roger Gracie | 0 | 1 of 11 | 9% | 1 of 11 | 0 of 2 | 0% | 0 | 0 | 0:23 |
Significant Strikes
| Fighter | Sig. Str. | Sig. Str. % | Head | Body | Leg | Distance | Clinch | Ground |
|---|---|---|---|---|---|---|---|---|
| Tim Kennedy | 54 of 92 | 58% | 21 of 49 | 10 of 13 | 23 of 30 | 25 of 55 | 18 of 20 | 11 of 17 |
| Roger Gracie | 12 of 29 | 41% | 8 of 22 | 3 of 5 | 1 of 2 | 5 of 22 | 6 of 6 | 1 of 1 |
Significant Strikes Per Round
| Rd | Fighter | Sig. Str. | Sig. Str. % | Head | Body | Leg | Distance | Clinch | Ground |
|---|---|---|---|---|---|---|---|---|---|
| 1 | Tim Kennedy | 5 of 15 | 33% | 0 of 8 | 1 of 1 | 4 of 6 | 4 of 12 | 1 of 1 | 0 of 2 |
| Roger Gracie | 7 of 10 | 70% | 4 of 7 | 3 of 3 | 0 of 0 | 3 of 6 | 3 of 3 | 1 of 1 | |
| 2 | Tim Kennedy | 26 of 36 | 72% | 15 of 24 | 7 of 7 | 4 of 5 | 6 of 12 | 9 of 9 | 11 of 15 |
| Roger Gracie | 4 of 8 | 50% | 3 of 7 | 0 of 0 | 1 of 1 | 2 of 6 | 2 of 2 | 0 of 0 | |
| 3 | Tim Kennedy | 23 of 41 | 56% | 6 of 17 | 2 of 5 | 15 of 19 | 15 of 31 | 8 of 10 | 0 of 0 |
| Roger Gracie | 1 of 11 | 9% | 1 of 8 | 0 of 2 | 0 of 1 | 0 of 10 | 1 of 1 | 0 of 0 |
No comments yet. Be the first to share your thoughts!