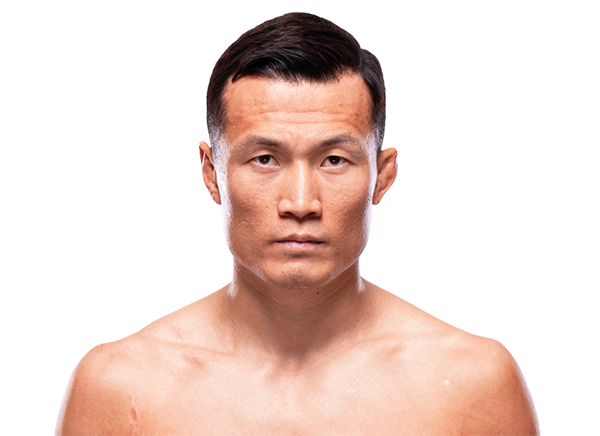
Career Averages - Chan Sung Jung
Career Averages - Leonard Garcia
Chan Sung Jung - Fight History
Totals
| Fighter | KD | Sig. Str. | Sig. Str. % | Total Str. | TD | TD % | Sub. Att | Rev. | Ctrl |
|---|---|---|---|---|---|---|---|---|---|
| Max Holloway | 2 | 75 of 128 | 58% | 75 of 128 | 0 of 0 | --- | 1 | 0 | 0:57 |
| Chan Sung Jung | 0 | 34 of 124 | 27% | 35 of 126 | 0 of 1 | 0% | 0 | 0 | 0:15 |
Per Round
| Rd | Fighter | KD | Sig. Str. | Sig. Str. % | Total Str. | TD | TD % | Sub. Att | Rev. | Ctrl |
|---|---|---|---|---|---|---|---|---|---|---|
| 1 | Max Holloway | 0 | 34 of 55 | 61% | 34 of 55 | 0 of 0 | --- | 0 | 0 | 0:00 |
| Chan Sung Jung | 0 | 15 of 50 | 30% | 15 of 51 | 0 of 1 | 0% | 0 | 0 | 0:00 | |
| 2 | Max Holloway | 1 | 36 of 62 | 58% | 36 of 62 | 0 of 0 | --- | 1 | 0 | 0:54 |
| Chan Sung Jung | 0 | 16 of 57 | 28% | 17 of 58 | 0 of 0 | --- | 0 | 0 | 0:15 | |
| 3 | Max Holloway | 1 | 5 of 11 | 45% | 5 of 11 | 0 of 0 | --- | 0 | 0 | 0:03 |
| Chan Sung Jung | 0 | 3 of 17 | 17% | 3 of 17 | 0 of 0 | --- | 0 | 0 | 0:00 |
Significant Strikes
| Fighter | Sig. Str. | Sig. Str. % | Head | Body | Leg | Distance | Clinch | Ground |
|---|---|---|---|---|---|---|---|---|
| Max Holloway | 75 of 128 | 58% | 34 of 77 | 31 of 35 | 10 of 16 | 71 of 124 | 1 of 1 | 3 of 3 |
| Chan Sung Jung | 34 of 124 | 27% | 25 of 110 | 6 of 8 | 3 of 6 | 34 of 122 | 0 of 2 | 0 of 0 |
Significant Strikes Per Round
| Rd | Fighter | Sig. Str. | Sig. Str. % | Head | Body | Leg | Distance | Clinch | Ground |
|---|---|---|---|---|---|---|---|---|---|
| 1 | Max Holloway | 34 of 55 | 61% | 12 of 28 | 14 of 15 | 8 of 12 | 34 of 55 | 0 of 0 | 0 of 0 |
| Chan Sung Jung | 15 of 50 | 30% | 9 of 40 | 4 of 5 | 2 of 5 | 15 of 50 | 0 of 0 | 0 of 0 | |
| 2 | Max Holloway | 36 of 62 | 58% | 18 of 40 | 16 of 18 | 2 of 4 | 33 of 59 | 0 of 0 | 3 of 3 |
| Chan Sung Jung | 16 of 57 | 28% | 13 of 53 | 2 of 3 | 1 of 1 | 16 of 57 | 0 of 0 | 0 of 0 | |
| 3 | Max Holloway | 5 of 11 | 45% | 4 of 9 | 1 of 2 | 0 of 0 | 4 of 10 | 1 of 1 | 0 of 0 |
| Chan Sung Jung | 3 of 17 | 17% | 3 of 17 | 0 of 0 | 0 of 0 | 3 of 15 | 0 of 2 | 0 of 0 |
Play-by-Play
View on SherdogBETTING PREVIEW | SCOUTING REPORT | ODDS: Holloway (-850), Jung (+520)
Round 1
The featherweight mainstays close the show for the UFC’s first visit to Singapore in more than a year. Stuck in Alexander Volkanovski-induced limbo, Holloway has won 17 of his past 21 fights, with three of those losses resulting from failed encounters with the current featherweight champion. Jung has not fought since he succumbed to fourth-round punches from Volkanovski in April 2022. Marc Goddard draws the final assignment as the third man in the cage. They tap gloves, as a raucous crowd roars at the start. Holloway gets going with a leg kick and trades left hands with Jung. The Hawaiian looks more tentative than usual. Jung sneaks in a left hand, then exchanges with Holloway on the run. Holloway rocks Jung with a counterpunch but remains cautious. The former champion feints low and steps into a crisp left hook, then jabs at the body. Holloway connects with a two-punch burst. Jung shovels a left hand into the Hawaiian’s face but fails to follow up. Holloway staggers him with another left, rolls into a combination and turns away an attempted takedown. When Jung, he does so with impact but usually only a punch at a time. They close with a flurry, and Jung gets the better of the exchange.
Sherdog Scores
Brian Knapp scores the round: 10-9 Holloway
Tudor Leonte scores the round: 10-9 Holloway
J.L. Kirven scores the round: 10-9 Holloway
Round 2
Holloway takes the center of the cage in Round 2 but eats a left hook. The Hawaiian drops Jung with a right hand to the temple, then bites down on a brabo choke. “The Korean Zombie” refuses to surrender and somehow escapes. Holloway delivers some hammerfists as the rise back to their feet. Jung tags the former champion with a left hook and sets of an exchange that shows Holloway to be the more surgical of the two. Holoway backs Jung to the fence, rattles him with a right and eats a heavy shot in return. They resume their dance in the center of the cage with a little more than 90 seconds to go in the rounds. Holloway jabs at the body, feints and goes upstairs. Jung may be living on borrowed time here. A left hook-overhand right connects for the Hawaiian. Holloway starting to overwhelm the South Korean with his speed, output and accuracy.
Sherdog Scores
Brian Knapp scores the round: 10-9 Holloway
Tudor Leonte scores the round: 10-9 Holloway
J.L. Kirven scores the round: 10-9 Holloway
Round 3
Jung cuts loose with punches at the start of Round 3.
Holloway stays calm under serious duress, and the furious rush of violence ends when he faceplants “The Korean Zombie” with a devastating overhand right. No follow-up shots were necessary. Jung went out on his shield
.
The Official Result
Max Holloway def. Chan Sung Jung—KO (Punch) 0:23 R3
[nggallery id=190863 type=event]
Angelo is confident Holloway will win, citing his striking volume, pressure, takedown defense, and championship experience. He notes that Holloway is an 8-to-1 favorite but he won't bet that price. He expects Holloway to dominate the striking exchanges and defend takedowns, potentially setting up another title shot.
Big Brady sees no clear path to victory for the Korean Zombie, as Holloway has superior volume, takedown defense, and durability. He notes that Zombie has looked bad in recent fights, taking significant damage against Volkanovski and Ortega. He expects Holloway to overwhelm Zombie with strikes, leading to a late-round knockout or corner stoppage.
Cody sees Holloway as a clear winner due to his legendary durability and volume striking. He notes that Holloway's speed and output will overwhelm the Korean Zombie, who is on a retirement fight and has shown decline. Cody expects Holloway to win by decision but also considers late-round finishes possible. He mentions using Holloway as a parlay anchor but warns that the minus 800 price is steep.
Daniel picks Max Holloway, citing his insane volume and output over five rounds. He notes that Holloway's path to victory is clear through sheer strike volume, while the Korean Zombie's only chance is a counter-striking power approach. He mentions that Zombie is 36 and coming off a brutal beating from Volkanovski, and that Holloway is the younger, more durable fighter. He expects a decision win for Holloway.
James is confident Max Holloway wins, believing he can finish the Korean Zombie whenever he wants. He notes Zombie hasn't looked good recently and that Holloway's volume and leg kicks will be too much. He considers Holloway by KO at -145 but passes due to the possibility of a decision or friendly fight. He thinks Holloway could finish early or late.
The host emphasizes Holloway's durability, cardio, and volume striking, and believes he will pressure the Korean Zombie and win a decision. He notes that Holloway is only 31 and has a lot to prove. The host mentions the over/under was steamed to over 2.5 and expects the fight to go the distance. He likes the Holloway by decision prop at +165.
Paul agrees Holloway wins but notes he's slowing down and more vulnerable than in the past. He points out that Holloway has taken significant damage in recent fights and may not be the same fighter, but the Korean Zombie is at the end of his career and lacks the tools to exploit that. Paul expects Holloway to win by decision or late finish, but warns that the price is too high for a straight bet.
The MMA Guru picks Max Holloway over the Korean Zombie, citing style matchup issues. He explains that Holloway struggles against shorter opponents who move side-to-side and wrestle, but the Korean Zombie is a flat-footed, linear boxer who doesn't throw leg kicks. He notes Holloway's activity and youth (31) compared to Zombie's layoff and age (36). He predicts a late-round standing TKO, similar to the Volk fight but with more volume.
Totals
| Fighter | KD | Sig. Str. | Sig. Str. % | Total Str. | TD | TD % | Sub. Att | Rev. | Ctrl |
|---|---|---|---|---|---|---|---|---|---|
| Alexander Volkanovski | 1 | 138 of 213 | 64% | 152 of 228 | 4 of 8 | 50% | 0 | 0 | 2:52 |
| Chan Sung Jung | 0 | 48 of 125 | 38% | 51 of 128 | 0 of 0 | --- | 0 | 0 | 0:00 |
Per Round
| Rd | Fighter | KD | Sig. Str. | Sig. Str. % | Total Str. | TD | TD % | Sub. Att | Rev. | Ctrl |
|---|---|---|---|---|---|---|---|---|---|---|
| 1 | Alexander Volkanovski | 0 | 37 of 54 | 68% | 40 of 57 | 1 of 2 | 50% | 0 | 0 | 0:47 |
| Chan Sung Jung | 0 | 15 of 40 | 37% | 16 of 41 | 0 of 0 | --- | 0 | 0 | 0:00 | |
| 2 | Alexander Volkanovski | 0 | 35 of 54 | 64% | 43 of 63 | 2 of 4 | 50% | 0 | 0 | 1:22 |
| Chan Sung Jung | 0 | 10 of 31 | 32% | 10 of 31 | 0 of 0 | --- | 0 | 0 | 0:00 | |
| 3 | Alexander Volkanovski | 1 | 57 of 93 | 61% | 60 of 96 | 1 of 2 | 50% | 0 | 0 | 0:43 |
| Chan Sung Jung | 0 | 21 of 50 | 42% | 23 of 52 | 0 of 0 | --- | 0 | 0 | 0:00 | |
| 4 | Alexander Volkanovski | 0 | 9 of 12 | 75% | 9 of 12 | 0 of 0 | --- | 0 | 0 | 0:00 |
| Chan Sung Jung | 0 | 2 of 4 | 50% | 2 of 4 | 0 of 0 | --- | 0 | 0 | 0:00 |
Significant Strikes
| Fighter | Sig. Str. | Sig. Str. % | Head | Body | Leg | Distance | Clinch | Ground |
|---|---|---|---|---|---|---|---|---|
| Alexander Volkanovski | 138 of 213 | 64% | 102 of 171 | 10 of 13 | 26 of 29 | 116 of 185 | 10 of 12 | 12 of 16 |
| Chan Sung Jung | 48 of 125 | 38% | 31 of 103 | 9 of 11 | 8 of 11 | 44 of 121 | 4 of 4 | 0 of 0 |
Significant Strikes Per Round
| Rd | Fighter | Sig. Str. | Sig. Str. % | Head | Body | Leg | Distance | Clinch | Ground |
|---|---|---|---|---|---|---|---|---|---|
| 1 | Alexander Volkanovski | 37 of 54 | 68% | 25 of 40 | 4 of 5 | 8 of 9 | 37 of 54 | 0 of 0 | 0 of 0 |
| Chan Sung Jung | 15 of 40 | 37% | 9 of 31 | 2 of 2 | 4 of 7 | 14 of 39 | 1 of 1 | 0 of 0 | |
| 2 | Alexander Volkanovski | 35 of 54 | 64% | 27 of 45 | 2 of 3 | 6 of 6 | 26 of 43 | 7 of 9 | 2 of 2 |
| Chan Sung Jung | 10 of 31 | 32% | 4 of 24 | 3 of 4 | 3 of 3 | 10 of 31 | 0 of 0 | 0 of 0 | |
| 3 | Alexander Volkanovski | 57 of 93 | 61% | 44 of 78 | 3 of 4 | 10 of 11 | 44 of 76 | 3 of 3 | 10 of 14 |
| Chan Sung Jung | 21 of 50 | 42% | 16 of 44 | 4 of 5 | 1 of 1 | 18 of 47 | 3 of 3 | 0 of 0 | |
| 4 | Alexander Volkanovski | 9 of 12 | 75% | 6 of 8 | 1 of 1 | 2 of 3 | 9 of 12 | 0 of 0 | 0 of 0 |
| Chan Sung Jung | 2 of 4 | 50% | 2 of 4 | 0 of 0 | 0 of 0 | 2 of 4 | 0 of 0 | 0 of 0 |
Angelo confidently picks Alexander Volkanovski by unanimous decision. He cites Volkanovski's work ethic, pace, striking volume, and takedowns as too much for the Korean Zombie. He notes Zombie's durability and power but believes Volkanovski cruises. He calls it an easy parlay piece.
Big Brady picks Alexander Volkanovski to win by dominant decision, likely 50-45. He notes Volkanovski's volume striking, takedown defense, and chin are elite. The Korean Zombie looked washed against Ortega and his only path is a knockout, but Volkanovski has never been knocked out. Brady sees no path to victory for Zombie and expects Volkanovski to outwork him everywhere.
Cody picks Volkanovski to win, noting his complete MMA game, striking, wrestling, and ability to escape dangerous submissions. He is interested in the under 4.5 rounds because Volkanovski said he'd finish within three rounds and the Korean Zombie has been compromised before. Cody acknowledges the steep -760 price but still sees Volkanovski as a solid parlay piece.
Levi praises Volkanovski's elite feinting game, calf kicks, and ability to mix takedowns. He respects the Korean Zombie's toughness and exciting style, but believes Volk is the far superior fighter. He thinks Volk will use feints to set up takedowns and land big shots, possibly finishing the fight. He acknowledges the Korean Zombie has the best chance among underdogs but still picks Volk.
I think Volkanovski is the more complete fighter and will win, but he is hittable and Korean Zombie has power. I see Volkanovski dragging the fight to the ground to be safe and winning a decision. I would not parlay him at -800; the value is on Jung. I'll play Volkanovski by decision at -150.
Paul is confident in Volkanovski's moneyline, calling him championship material with no big red flags. He highlights Volkanovski's cardio, chin, wrestling, striking, and high ring IQ, noting he can change game plans like in the Holloway rematch. Paul also likes the under 4.5 rounds and fight doesn't go the distance, believing the Korean Zombie can't sustain the beating for 25 minutes. He picks Volkanovski by TKO inside the distance.
The MMA Guru picks Alexander Volkanovski, predicting a fourth-round ground-and-pound TKO. He expects Volkanovski to get dropped in the first but recover, then chew up the Korean Zombie's legs with calf kicks and body shots. He notes the Korean Zombie's tendency to lean forward and struggle with lateral movement, and cites Volkanovski's superior cardio and recovery.
Totals
| Fighter | KD | Sig. Str. | Sig. Str. % | Total Str. | TD | TD % | Sub. Att | Rev. | Ctrl |
|---|---|---|---|---|---|---|---|---|---|
| Chan Sung Jung | 0 | 92 of 166 | 55% | 154 of 248 | 3 of 5 | 60% | 3 | 0 | 10:10 |
| Dan Ige | 0 | 80 of 168 | 47% | 137 of 237 | 0 of 4 | 0% | 0 | 0 | 1:53 |
Per Round
| Rd | Fighter | KD | Sig. Str. | Sig. Str. % | Total Str. | TD | TD % | Sub. Att | Rev. | Ctrl |
|---|---|---|---|---|---|---|---|---|---|---|
| 1 | Chan Sung Jung | 0 | 14 of 32 | 43% | 15 of 33 | 1 of 1 | 100% | 0 | 0 | 1:16 |
| Dan Ige | 0 | 10 of 32 | 31% | 17 of 39 | 0 of 0 | --- | 0 | 0 | 0:01 | |
| 2 | Chan Sung Jung | 0 | 25 of 44 | 56% | 35 of 54 | 0 of 1 | 0% | 1 | 0 | 0:49 |
| Dan Ige | 0 | 18 of 46 | 39% | 25 of 53 | 0 of 1 | 0% | 0 | 0 | 0:46 | |
| 3 | Chan Sung Jung | 0 | 5 of 7 | 71% | 34 of 43 | 1 of 1 | 100% | 2 | 0 | 4:43 |
| Dan Ige | 0 | 5 of 7 | 71% | 26 of 33 | 0 of 0 | --- | 0 | 0 | 0:00 | |
| 4 | Chan Sung Jung | 0 | 31 of 55 | 56% | 33 of 60 | 1 of 1 | 100% | 0 | 0 | 1:04 |
| Dan Ige | 0 | 22 of 47 | 46% | 29 of 57 | 0 of 0 | --- | 0 | 0 | 0:15 | |
| 5 | Chan Sung Jung | 0 | 17 of 28 | 60% | 37 of 58 | 0 of 1 | 0% | 0 | 0 | 2:18 |
| Dan Ige | 0 | 25 of 36 | 69% | 40 of 55 | 0 of 3 | 0% | 0 | 0 | 0:51 |
Significant Strikes
| Fighter | Sig. Str. | Sig. Str. % | Head | Body | Leg | Distance | Clinch | Ground |
|---|---|---|---|---|---|---|---|---|
| Chan Sung Jung | 92 of 166 | 55% | 78 of 151 | 5 of 5 | 9 of 10 | 79 of 150 | 4 of 4 | 9 of 12 |
| Dan Ige | 80 of 168 | 47% | 46 of 130 | 23 of 25 | 11 of 13 | 69 of 153 | 9 of 11 | 2 of 4 |
Significant Strikes Per Round
| Rd | Fighter | Sig. Str. | Sig. Str. % | Head | Body | Leg | Distance | Clinch | Ground |
|---|---|---|---|---|---|---|---|---|---|
| 1 | Chan Sung Jung | 14 of 32 | 43% | 10 of 28 | 1 of 1 | 3 of 3 | 13 of 31 | 0 of 0 | 1 of 1 |
| Dan Ige | 10 of 32 | 31% | 6 of 26 | 2 of 3 | 2 of 3 | 9 of 29 | 1 of 2 | 0 of 1 | |
| 2 | Chan Sung Jung | 25 of 44 | 56% | 19 of 38 | 2 of 2 | 4 of 4 | 23 of 42 | 2 of 2 | 0 of 0 |
| Dan Ige | 18 of 46 | 39% | 11 of 38 | 3 of 3 | 4 of 5 | 14 of 42 | 4 of 4 | 0 of 0 | |
| 3 | Chan Sung Jung | 5 of 7 | 71% | 4 of 6 | 0 of 0 | 1 of 1 | 2 of 3 | 0 of 0 | 3 of 4 |
| Dan Ige | 5 of 7 | 71% | 3 of 5 | 1 of 1 | 1 of 1 | 3 of 5 | 0 of 0 | 2 of 2 | |
| 4 | Chan Sung Jung | 31 of 55 | 56% | 29 of 52 | 1 of 1 | 1 of 2 | 25 of 47 | 1 of 1 | 5 of 7 |
| Dan Ige | 22 of 47 | 46% | 13 of 37 | 6 of 7 | 3 of 3 | 20 of 44 | 2 of 2 | 0 of 1 | |
| 5 | Chan Sung Jung | 17 of 28 | 60% | 16 of 27 | 1 of 1 | 0 of 0 | 16 of 27 | 1 of 1 | 0 of 0 |
| Dan Ige | 25 of 36 | 69% | 13 of 24 | 11 of 11 | 1 of 1 | 23 of 33 | 2 of 3 | 0 of 0 |
Angelo picks Dan Ige, citing his speed, power, and technical boxing. He thinks Ige can finish Jung or win a decision. He placed a bet on Ige to win inside the distance with decision no action, believing Jung's chin is vulnerable. He acknowledges recency bias but thinks Ige is the better fighter.
Big Brady gives Jung one more chance, citing his superior level of competition (Aldo, Ortega, Poirier) and a camp change to Fight Ready. He is concerned about Jung's poor performance against Ortega but thinks if Jung shows up like he did against Edgar, he wins. He predicts a decision win.
Cody picks Dan Ige, citing Ige's youth, athleticism, fast hands, and legitimate power. He notes Ige's durability and improvements, while questioning Korean Zombie's age (34), accumulated damage, and regression shown in the Ortega fight. He acknowledges Ige's limitations from the Kattar fight but believes Ige's style and momentum will carry him.
Daniel Levi leans toward Dan Ige based on Ige's recent momentum, hunger, and the concerning interview from Zombie where he seemed to be making excuses for a potential loss. He notes that Zombie has historically bounced back from losses, but the mental state and the fact that Ige is younger and more active give Ige the edge. However, he is not confident and acknowledges Zombie's ability to surprise.
Jacob picks Dan Ige, predicting he will dominate and possibly finish Jung. He thinks Ige is a future title contender and that Jung relies too much on toughness. He has both fighters in his lineup but believes Ige will win. He likes the over on strikes for both in a five-round fight.
The host picks Dan Ige, citing his speed, power, and blitzing attacks as key against the Korean Zombie, who he believes is deteriorating. He notes Ige's black belt in jiu-jitsu and durability, and expects Ige to land big shots and possibly finish Jung. He predicts a third-round knockout, as Jung's chin may be compromised. He mentions Jung's underwhelming performance against Ortega and that Ige's power is a threat. He likes the under 4.5 rounds and Ige by KO at +380.
Paul agrees with Cody on Dan Ige, noting Ige's performance against Kattar was close and that Ige gained valuable five-round experience. He mentions Ige's quick finish of Gavin Tucker and Korean Zombie's poor showing against Ortega, where he looked lost. Paul plans to bet Ige after the podcast.
The MMA Guru picks Dan Ige to win by decision (49-46 or 50-45). He compares Ige's performance to Brian Ortega's against Jung, expecting Ige to land hard shots that hurt Jung. He thinks Jung will leave himself open and get caught over the top. Ige will move around the outside and crack Jung with big shots, causing Jung to become hesitant in later rounds, similar to the Ortega fight.
Totals
| Fighter | KD | Sig. Str. | Sig. Str. % | Total Str. | TD | TD % | Sub. Att | Rev. | Ctrl |
|---|---|---|---|---|---|---|---|---|---|
| Brian Ortega | 2 | 127 of 212 | 59% | 129 of 214 | 3 of 10 | 30% | 0 | 0 | 0:57 |
| Chan Sung Jung | 0 | 62 of 163 | 38% | 64 of 166 | 0 of 0 | --- | 0 | 0 | 0:00 |
Per Round
| Rd | Fighter | KD | Sig. Str. | Sig. Str. % | Total Str. | TD | TD % | Sub. Att | Rev. | Ctrl |
|---|---|---|---|---|---|---|---|---|---|---|
| 1 | Brian Ortega | 1 | 24 of 39 | 61% | 24 of 39 | 0 of 0 | --- | 0 | 0 | 0:00 |
| Chan Sung Jung | 0 | 14 of 26 | 53% | 14 of 26 | 0 of 0 | --- | 0 | 0 | 0:00 | |
| 2 | Brian Ortega | 1 | 23 of 37 | 62% | 24 of 38 | 2 of 3 | 66% | 0 | 0 | 0:35 |
| Chan Sung Jung | 0 | 14 of 34 | 41% | 14 of 34 | 0 of 0 | --- | 0 | 0 | 0:00 | |
| 3 | Brian Ortega | 0 | 28 of 42 | 66% | 28 of 42 | 0 of 1 | 0% | 0 | 0 | 0:00 |
| Chan Sung Jung | 0 | 7 of 32 | 21% | 7 of 32 | 0 of 0 | --- | 0 | 0 | 0:00 | |
| 4 | Brian Ortega | 0 | 17 of 35 | 48% | 18 of 36 | 1 of 4 | 25% | 0 | 0 | 0:22 |
| Chan Sung Jung | 0 | 8 of 26 | 30% | 10 of 29 | 0 of 0 | --- | 0 | 0 | 0:00 | |
| 5 | Brian Ortega | 0 | 35 of 59 | 59% | 35 of 59 | 0 of 2 | 0% | 0 | 0 | 0:00 |
| Chan Sung Jung | 0 | 19 of 45 | 42% | 19 of 45 | 0 of 0 | --- | 0 | 0 | 0:00 |
Significant Strikes
| Fighter | Sig. Str. | Sig. Str. % | Head | Body | Leg | Distance | Clinch | Ground |
|---|---|---|---|---|---|---|---|---|
| Brian Ortega | 127 of 212 | 59% | 64 of 135 | 22 of 28 | 41 of 49 | 118 of 199 | 5 of 7 | 4 of 6 |
| Chan Sung Jung | 62 of 163 | 38% | 35 of 127 | 14 of 21 | 13 of 15 | 62 of 162 | 0 of 1 | 0 of 0 |
Significant Strikes Per Round
| Rd | Fighter | Sig. Str. | Sig. Str. % | Head | Body | Leg | Distance | Clinch | Ground |
|---|---|---|---|---|---|---|---|---|---|
| 1 | Brian Ortega | 24 of 39 | 61% | 11 of 24 | 5 of 6 | 8 of 9 | 24 of 39 | 0 of 0 | 0 of 0 |
| Chan Sung Jung | 14 of 26 | 53% | 4 of 15 | 4 of 5 | 6 of 6 | 14 of 26 | 0 of 0 | 0 of 0 | |
| 2 | Brian Ortega | 23 of 37 | 62% | 14 of 25 | 2 of 4 | 7 of 8 | 17 of 29 | 2 of 2 | 4 of 6 |
| Chan Sung Jung | 14 of 34 | 41% | 12 of 31 | 0 of 1 | 2 of 2 | 14 of 34 | 0 of 0 | 0 of 0 | |
| 3 | Brian Ortega | 28 of 42 | 66% | 13 of 25 | 4 of 4 | 11 of 13 | 27 of 41 | 1 of 1 | 0 of 0 |
| Chan Sung Jung | 7 of 32 | 21% | 2 of 23 | 1 of 3 | 4 of 6 | 7 of 32 | 0 of 0 | 0 of 0 | |
| 4 | Brian Ortega | 17 of 35 | 48% | 5 of 18 | 5 of 6 | 7 of 11 | 15 of 33 | 2 of 2 | 0 of 0 |
| Chan Sung Jung | 8 of 26 | 30% | 1 of 18 | 6 of 7 | 1 of 1 | 8 of 26 | 0 of 0 | 0 of 0 | |
| 5 | Brian Ortega | 35 of 59 | 59% | 21 of 43 | 6 of 8 | 8 of 8 | 35 of 57 | 0 of 2 | 0 of 0 |
| Chan Sung Jung | 19 of 45 | 42% | 16 of 40 | 3 of 5 | 0 of 0 | 19 of 44 | 0 of 1 | 0 of 0 |
Big Brady picks the Korean Zombie due to his superior striking defense and output, Ortega's poor striking defense (absorbs 7.36 strikes per minute), and the two-year layoff for Ortega. He believes the fight will stay standing because Ortega lacks wrestling to get takedowns, and Jung's takedown defense is excellent. He predicts a late stoppage (4th or 5th round).
The MMA Guru picks the Korean Zombie because Ortega is a slow starter who gets hit a lot, and Zombie is one of the best first-round fighters in the division. He notes Ortega's long layoff and the damage he took against Holloway, while Zombie has never been submitted and has crisp standup. He predicts a second-round TKO.
Totals
| Fighter | KD | Sig. Str. | Sig. Str. % | Total Str. | TD | TD % | Sub. Att | Rev. | Ctrl |
|---|---|---|---|---|---|---|---|---|---|
| Chan Sung Jung | 0 | 9 of 14 | 64% | 9 of 14 | 0 of 2 | 0% | 0 | 0 | 2:12 |
| Frankie Edgar | 1 | 46 of 60 | 76% | 79 of 97 | 0 of 0 | --- | 0 | 0 | 0:00 |
Per Round
| Rd | Fighter | KD | Sig. Str. | Sig. Str. % | Total Str. | TD | TD % | Sub. Att | Rev. | Ctrl |
|---|---|---|---|---|---|---|---|---|---|---|
| 1 | Chan Sung Jung | 0 | 9 of 14 | 64% | 9 of 14 | 0 of 2 | 0% | 0 | 0 | 2:12 |
| Frankie Edgar | 1 | 46 of 60 | 76% | 79 of 97 | 0 of 0 | --- | 0 | 0 | 0:00 |
Significant Strikes
| Fighter | Sig. Str. | Sig. Str. % | Head | Body | Leg | Distance | Clinch | Ground |
|---|---|---|---|---|---|---|---|---|
| Chan Sung Jung | 9 of 14 | 64% | 6 of 11 | 1 of 1 | 2 of 2 | 9 of 14 | 0 of 0 | 0 of 0 |
| Frankie Edgar | 46 of 60 | 76% | 46 of 60 | 0 of 0 | 0 of 0 | 8 of 18 | 0 of 0 | 38 of 42 |
Significant Strikes Per Round
| Rd | Fighter | Sig. Str. | Sig. Str. % | Head | Body | Leg | Distance | Clinch | Ground |
|---|---|---|---|---|---|---|---|---|---|
| 1 | Chan Sung Jung | 9 of 14 | 64% | 6 of 11 | 1 of 1 | 2 of 2 | 9 of 14 | 0 of 0 | 0 of 0 |
| Frankie Edgar | 46 of 60 | 76% | 46 of 60 | 0 of 0 | 0 of 0 | 8 of 18 | 0 of 0 | 38 of 42 |
Totals
| Fighter | KD | Sig. Str. | Sig. Str. % | Total Str. | TD | TD % | Sub. Att | Rev. | Ctrl |
|---|---|---|---|---|---|---|---|---|---|
| Chan Sung Jung | 0 | 0 of 3 | 0% | 0 of 3 | 0 of 0 | --- | 0 | 0 | 0:00 |
| Renato Moicano | 1 | 16 of 24 | 66% | 18 of 26 | 0 of 0 | --- | 0 | 0 | 0:26 |
Per Round
| Rd | Fighter | KD | Sig. Str. | Sig. Str. % | Total Str. | TD | TD % | Sub. Att | Rev. | Ctrl |
|---|---|---|---|---|---|---|---|---|---|---|
| 1 | Chan Sung Jung | 0 | 0 of 3 | 0% | 0 of 3 | 0 of 0 | --- | 0 | 0 | 0:00 |
| Renato Moicano | 1 | 16 of 24 | 66% | 18 of 26 | 0 of 0 | --- | 0 | 0 | 0:26 |
Significant Strikes
| Fighter | Sig. Str. | Sig. Str. % | Head | Body | Leg | Distance | Clinch | Ground |
|---|---|---|---|---|---|---|---|---|
| Chan Sung Jung | 0 of 3 | 0% | 0 of 3 | 0 of 0 | 0 of 0 | 0 of 3 | 0 of 0 | 0 of 0 |
| Renato Moicano | 16 of 24 | 66% | 15 of 23 | 0 of 0 | 1 of 1 | 3 of 6 | 0 of 0 | 13 of 18 |
Significant Strikes Per Round
| Rd | Fighter | Sig. Str. | Sig. Str. % | Head | Body | Leg | Distance | Clinch | Ground |
|---|---|---|---|---|---|---|---|---|---|
| 1 | Chan Sung Jung | 0 of 3 | 0% | 0 of 3 | 0 of 0 | 0 of 0 | 0 of 3 | 0 of 0 | 0 of 0 |
| Renato Moicano | 16 of 24 | 66% | 15 of 23 | 0 of 0 | 1 of 1 | 3 of 6 | 0 of 0 | 13 of 18 |
Totals
| Fighter | KD | Sig. Str. | Sig. Str. % | Total Str. | TD | TD % | Sub. Att | Rev. | Ctrl |
|---|---|---|---|---|---|---|---|---|---|
| Yair Rodríguez | 0 | 126 of 308 | 40% | 130 of 312 | 0 of 5 | 0% | 0 | 0 | 0:58 |
| Chan Sung Jung | 1 | 119 of 271 | 43% | 129 of 281 | 0 of 4 | 0% | 0 | 0 | 0:19 |
Per Round
| Rd | Fighter | KD | Sig. Str. | Sig. Str. % | Total Str. | TD | TD % | Sub. Att | Rev. | Ctrl |
|---|---|---|---|---|---|---|---|---|---|---|
| 1 | Yair Rodríguez | 0 | 30 of 67 | 44% | 31 of 68 | 0 of 1 | 0% | 0 | 0 | 0:01 |
| Chan Sung Jung | 0 | 23 of 41 | 56% | 23 of 41 | 0 of 1 | 0% | 0 | 0 | 0:00 | |
| 2 | Yair Rodríguez | 0 | 22 of 52 | 42% | 25 of 55 | 0 of 4 | 0% | 0 | 0 | 0:47 |
| Chan Sung Jung | 0 | 23 of 45 | 51% | 33 of 55 | 0 of 2 | 0% | 0 | 0 | 0:18 | |
| 3 | Yair Rodríguez | 0 | 24 of 67 | 35% | 24 of 67 | 0 of 0 | --- | 0 | 0 | 0:02 |
| Chan Sung Jung | 0 | 22 of 59 | 37% | 22 of 59 | 0 of 0 | --- | 0 | 0 | 0:00 | |
| 4 | Yair Rodríguez | 0 | 25 of 58 | 43% | 25 of 58 | 0 of 0 | --- | 0 | 0 | 0:08 |
| Chan Sung Jung | 0 | 19 of 53 | 35% | 19 of 53 | 0 of 0 | --- | 0 | 0 | 0:00 | |
| 5 | Yair Rodríguez | 0 | 25 of 64 | 39% | 25 of 64 | 0 of 0 | --- | 0 | 0 | 0:00 |
| Chan Sung Jung | 1 | 32 of 73 | 43% | 32 of 73 | 0 of 1 | 0% | 0 | 0 | 0:01 |
Significant Strikes
| Fighter | Sig. Str. | Sig. Str. % | Head | Body | Leg | Distance | Clinch | Ground |
|---|---|---|---|---|---|---|---|---|
| Yair Rodríguez | 126 of 308 | 40% | 111 of 285 | 9 of 14 | 6 of 9 | 114 of 293 | 12 of 15 | 0 of 0 |
| Chan Sung Jung | 119 of 271 | 43% | 59 of 190 | 24 of 38 | 36 of 43 | 113 of 262 | 6 of 9 | 0 of 0 |
Significant Strikes Per Round
| Rd | Fighter | Sig. Str. | Sig. Str. % | Head | Body | Leg | Distance | Clinch | Ground |
|---|---|---|---|---|---|---|---|---|---|
| 1 | Yair Rodríguez | 30 of 67 | 44% | 23 of 57 | 3 of 5 | 4 of 5 | 25 of 60 | 5 of 7 | 0 of 0 |
| Chan Sung Jung | 23 of 41 | 56% | 6 of 22 | 6 of 7 | 11 of 12 | 23 of 40 | 0 of 1 | 0 of 0 | |
| 2 | Yair Rodríguez | 22 of 52 | 42% | 16 of 45 | 4 of 4 | 2 of 3 | 17 of 47 | 5 of 5 | 0 of 0 |
| Chan Sung Jung | 23 of 45 | 51% | 12 of 32 | 3 of 4 | 8 of 9 | 19 of 40 | 4 of 5 | 0 of 0 | |
| 3 | Yair Rodríguez | 24 of 67 | 35% | 23 of 64 | 1 of 2 | 0 of 1 | 24 of 66 | 0 of 1 | 0 of 0 |
| Chan Sung Jung | 22 of 59 | 37% | 12 of 41 | 6 of 12 | 4 of 6 | 20 of 57 | 2 of 2 | 0 of 0 | |
| 4 | Yair Rodríguez | 25 of 58 | 43% | 25 of 57 | 0 of 1 | 0 of 0 | 24 of 57 | 1 of 1 | 0 of 0 |
| Chan Sung Jung | 19 of 53 | 35% | 13 of 44 | 3 of 6 | 3 of 3 | 19 of 53 | 0 of 0 | 0 of 0 | |
| 5 | Yair Rodríguez | 25 of 64 | 39% | 24 of 62 | 1 of 2 | 0 of 0 | 24 of 63 | 1 of 1 | 0 of 0 |
| Chan Sung Jung | 32 of 73 | 43% | 16 of 51 | 6 of 9 | 10 of 13 | 32 of 72 | 0 of 1 | 0 of 0 |
Totals
| Fighter | KD | Sig. Str. | Sig. Str. % | Total Str. | TD | TD % | Sub. Att | Rev. | Ctrl |
|---|---|---|---|---|---|---|---|---|---|
| Chan Sung Jung | 0 | 20 of 34 | 58% | 24 of 38 | 0 of 3 | 0% | 0 | 0 | 0:20 |
| Dennis Bermudez | 1 | 17 of 35 | 48% | 19 of 37 | 0 of 1 | 0% | 0 | 0 | 0:05 |
Per Round
| Rd | Fighter | KD | Sig. Str. | Sig. Str. % | Total Str. | TD | TD % | Sub. Att | Rev. | Ctrl |
|---|---|---|---|---|---|---|---|---|---|---|
| 1 | Chan Sung Jung | 0 | 20 of 34 | 58% | 24 of 38 | 0 of 3 | 0% | 0 | 0 | 0:20 |
| Dennis Bermudez | 1 | 17 of 35 | 48% | 19 of 37 | 0 of 1 | 0% | 0 | 0 | 0:05 |
Significant Strikes
| Fighter | Sig. Str. | Sig. Str. % | Head | Body | Leg | Distance | Clinch | Ground |
|---|---|---|---|---|---|---|---|---|
| Chan Sung Jung | 20 of 34 | 58% | 11 of 24 | 6 of 7 | 3 of 3 | 14 of 26 | 6 of 8 | 0 of 0 |
| Dennis Bermudez | 17 of 35 | 48% | 16 of 32 | 1 of 2 | 0 of 1 | 12 of 30 | 2 of 2 | 3 of 3 |
Significant Strikes Per Round
| Rd | Fighter | Sig. Str. | Sig. Str. % | Head | Body | Leg | Distance | Clinch | Ground |
|---|---|---|---|---|---|---|---|---|---|
| 1 | Chan Sung Jung | 20 of 34 | 58% | 11 of 24 | 6 of 7 | 3 of 3 | 14 of 26 | 6 of 8 | 0 of 0 |
| Dennis Bermudez | 17 of 35 | 48% | 16 of 32 | 1 of 2 | 0 of 1 | 12 of 30 | 2 of 2 | 3 of 3 |
Leonard Garcia - Fight History
Totals
| Fighter | KD | Sig. Str. | Sig. Str. % | Total Str. | TD | TD % | Sub. Att | Rev. | Ctrl |
|---|---|---|---|---|---|---|---|---|---|
| Cody McKenzie | 0 | 15 of 77 | 19% | 30 of 92 | 0 of 0 | --- | 0 | 0 | 0:20 |
| Leonard Garcia | 0 | 30 of 54 | 55% | 84 of 111 | 5 of 13 | 38% | 4 | 0 | 9:10 |
Per Round
| Rd | Fighter | KD | Sig. Str. | Sig. Str. % | Total Str. | TD | TD % | Sub. Att | Rev. | Ctrl |
|---|---|---|---|---|---|---|---|---|---|---|
| 1 | Cody McKenzie | 0 | 0 of 0 | --- | 7 of 7 | 0 of 0 | --- | 0 | 0 | 0:20 |
| Leonard Garcia | 0 | 6 of 6 | 100% | 36 of 39 | 2 of 2 | 100% | 4 | 0 | 4:28 | |
| 2 | Cody McKenzie | 0 | 3 of 15 | 20% | 11 of 23 | 0 of 0 | --- | 0 | 0 | 0:00 |
| Leonard Garcia | 0 | 5 of 8 | 62% | 25 of 28 | 2 of 6 | 33% | 0 | 0 | 3:54 | |
| 3 | Cody McKenzie | 0 | 12 of 62 | 19% | 12 of 62 | 0 of 0 | --- | 0 | 0 | 0:00 |
| Leonard Garcia | 0 | 19 of 40 | 47% | 23 of 44 | 1 of 5 | 20% | 0 | 0 | 0:48 |
Significant Strikes
| Fighter | Sig. Str. | Sig. Str. % | Head | Body | Leg | Distance | Clinch | Ground |
|---|---|---|---|---|---|---|---|---|
| Cody McKenzie | 15 of 77 | 19% | 10 of 70 | 4 of 4 | 1 of 3 | 11 of 73 | 2 of 2 | 2 of 2 |
| Leonard Garcia | 30 of 54 | 55% | 27 of 48 | 2 of 5 | 1 of 1 | 16 of 38 | 4 of 6 | 10 of 10 |
Significant Strikes Per Round
| Rd | Fighter | Sig. Str. | Sig. Str. % | Head | Body | Leg | Distance | Clinch | Ground |
|---|---|---|---|---|---|---|---|---|---|
| 1 | Cody McKenzie | 0 of 0 | --- | 0 of 0 | 0 of 0 | 0 of 0 | 0 of 0 | 0 of 0 | 0 of 0 |
| Leonard Garcia | 6 of 6 | 100% | 6 of 6 | 0 of 0 | 0 of 0 | 0 of 0 | 0 of 0 | 6 of 6 | |
| 2 | Cody McKenzie | 3 of 15 | 20% | 1 of 12 | 2 of 2 | 0 of 1 | 1 of 13 | 0 of 0 | 2 of 2 |
| Leonard Garcia | 5 of 8 | 62% | 4 of 7 | 1 of 1 | 0 of 0 | 1 of 4 | 1 of 1 | 3 of 3 | |
| 3 | Cody McKenzie | 12 of 62 | 19% | 9 of 58 | 2 of 2 | 1 of 2 | 10 of 60 | 2 of 2 | 0 of 0 |
| Leonard Garcia | 19 of 40 | 47% | 17 of 35 | 1 of 4 | 1 of 1 | 15 of 34 | 3 of 5 | 1 of 1 |
Totals
| Fighter | KD | Sig. Str. | Sig. Str. % | Total Str. | TD | TD % | Sub. Att | Rev. | Ctrl |
|---|---|---|---|---|---|---|---|---|---|
| Max Holloway | 0 | 89 of 359 | 24% | 92 of 367 | 2 of 4 | 50% | 0 | 0 | 1:37 |
| Leonard Garcia | 1 | 120 of 269 | 44% | 122 of 273 | 0 of 0 | --- | 0 | 0 | 0:08 |
Per Round
| Rd | Fighter | KD | Sig. Str. | Sig. Str. % | Total Str. | TD | TD % | Sub. Att | Rev. | Ctrl |
|---|---|---|---|---|---|---|---|---|---|---|
| 1 | Max Holloway | 0 | 25 of 104 | 24% | 25 of 104 | 0 of 0 | --- | 0 | 0 | 0:00 |
| Leonard Garcia | 1 | 32 of 78 | 41% | 32 of 78 | 0 of 0 | --- | 0 | 0 | 0:00 | |
| 2 | Max Holloway | 0 | 25 of 104 | 24% | 26 of 106 | 1 of 2 | 50% | 0 | 0 | 0:40 |
| Leonard Garcia | 0 | 37 of 90 | 41% | 38 of 91 | 0 of 0 | --- | 0 | 0 | 0:00 | |
| 3 | Max Holloway | 0 | 39 of 151 | 25% | 41 of 157 | 1 of 2 | 50% | 0 | 0 | 0:57 |
| Leonard Garcia | 0 | 51 of 101 | 50% | 52 of 104 | 0 of 0 | --- | 0 | 0 | 0:08 |
Significant Strikes
| Fighter | Sig. Str. | Sig. Str. % | Head | Body | Leg | Distance | Clinch | Ground |
|---|---|---|---|---|---|---|---|---|
| Max Holloway | 89 of 359 | 24% | 64 of 320 | 10 of 24 | 15 of 15 | 82 of 346 | 7 of 12 | 0 of 1 |
| Leonard Garcia | 120 of 269 | 44% | 68 of 193 | 38 of 61 | 14 of 15 | 114 of 261 | 6 of 7 | 0 of 1 |
Significant Strikes Per Round
| Rd | Fighter | Sig. Str. | Sig. Str. % | Head | Body | Leg | Distance | Clinch | Ground |
|---|---|---|---|---|---|---|---|---|---|
| 1 | Max Holloway | 25 of 104 | 24% | 13 of 86 | 4 of 10 | 8 of 8 | 23 of 101 | 2 of 3 | 0 of 0 |
| Leonard Garcia | 32 of 78 | 41% | 13 of 50 | 13 of 21 | 6 of 7 | 32 of 78 | 0 of 0 | 0 of 0 | |
| 2 | Max Holloway | 25 of 104 | 24% | 20 of 92 | 2 of 9 | 3 of 3 | 22 of 98 | 3 of 6 | 0 of 0 |
| Leonard Garcia | 37 of 90 | 41% | 24 of 69 | 10 of 18 | 3 of 3 | 34 of 86 | 3 of 4 | 0 of 0 | |
| 3 | Max Holloway | 39 of 151 | 25% | 31 of 142 | 4 of 5 | 4 of 4 | 37 of 147 | 2 of 3 | 0 of 1 |
| Leonard Garcia | 51 of 101 | 50% | 31 of 74 | 15 of 22 | 5 of 5 | 48 of 97 | 3 of 3 | 0 of 1 |
Play-by-Play
View on SherdogRound 1
Kim Winslow is in charge of this featherweight affair. Garcia takes the center of the cage with the longer Holloway on the outside, kicking at the legs of the “Bad Boy.” Garcia gives him a stiff leg kick in return and gets backed up by a teep kick to the body. Garcia rushes forward, winging punches, but Holloway uses good head movement and front kicks to keep the distance. A hard leg kick from Holloway now and Garcia tries to clinch; Holloway shoves him off. Garcia sneaks through a straight left, then another, but they’re glancing blows as Holloway turns away. A big left hand from Garcia stuns Holloway, but the Hawaiian stays vertical. The noses of both men are bloodied now as they enter the last minute. Holloway tags Garcia with a spinning kick to the body, but Garcia comes inside and mugs him with punches in the clinch.
Tristen Critchfield scores the round 10-9 Holloway
Chris Nelson scores the round 10-9 Holloway
Mike Whitman scores the round 10-9 Holloway
Round 2
PICTURE R
D. Mandel/Sherdog.com Holloway edged Garcia on two cards.
/PICTURE R
Holloway snaps off some leg kicks and punches in the early going. Garcia eats a knee on his way in but hits a takedown at the 3:00 mark; Holloway quickly posts up and stands. The featherweights exchange jabs with Holloway picking off the shorter man by virtue of his longer limbs. Garcia keeps throwing to the body and head with mixed results, but he’s got Holloway on the back foot nonetheless, and the Hawaiian’s output has slowed down. They clinch with 30 seconds left and Holloway uses knees to get out. Garcia is just throwing arm punches now but they’ve got Holloway on the retreat, pinned against the fence at the end of the frame.
Tristen Critchfield scores the round 10-9 Garcia
Chris Nelson scores the round 10-9 Garcia
Mike Whitman scores the round 10-9 Garcia
Round 3
Garcia is throwing and yelling but doesn’t appear to be landing much in the opening minute of round three. Holloway is popping the Greg Jackson charge with occasional counters, but he’s forced to stay on his bicycle as Garcia keeps pressing forward. The attack finally slows and Holloway socks Garcia with a straight right, only to be warned by ref Winslow to keep his fingers tucked. Garcia keeps pressing, throwing bombs and eating up Holloway’s counter right hooks. Midway through the frame, Garcia changes levels and hits a double-leg against the fence. Holloway posts up and scrambles to his feet, where he’s again forced to retreat under the relentless arm-punch assault of Garcia. Holloway works the body with some good hooks. Garcia is just relentless and keeps after Holloway, who gets taken down one last time and slammed back to the ground after a last-ditch kick attempt.
Tristen Critchfield scores the round 10-9 Garcia (29-28 Garcia)
Chris Nelson scores the round 10-9 Garcia (29-28 Garcia)
Mike Whitman scores the round 10-9 Garcia (29-28 Garcia)
Official result:
Max Holloway def. Leonard Garcia via Split Decision (29-28, 28-29, 29-28) R3 5:00
Totals
| Fighter | KD | Sig. Str. | Sig. Str. % | Total Str. | TD | TD % | Sub. Att | Rev. | Ctrl |
|---|---|---|---|---|---|---|---|---|---|
| Matt Grice | 0 | 2 of 69 | 2% | 30 of 101 | 0 of 0 | --- | 0 | 0 | 0:00 |
| Leonard Garcia | 0 | 61 of 113 | 53% | 136 of 194 | 4 of 7 | 57% | 1 | 0 | 9:37 |
Per Round
| Rd | Fighter | KD | Sig. Str. | Sig. Str. % | Total Str. | TD | TD % | Sub. Att | Rev. | Ctrl |
|---|---|---|---|---|---|---|---|---|---|---|
| 1 | Matt Grice | 0 | 0 of 16 | 0% | 11 of 28 | 0 of 0 | --- | 0 | 0 | 0:00 |
| Leonard Garcia | 0 | 16 of 31 | 51% | 42 of 59 | 1 of 1 | 100% | 1 | 0 | 3:36 | |
| 2 | Matt Grice | 0 | 1 of 8 | 12% | 13 of 23 | 0 of 0 | --- | 0 | 0 | 0:00 |
| Leonard Garcia | 0 | 30 of 52 | 57% | 62 of 86 | 1 of 2 | 50% | 0 | 0 | 4:08 | |
| 3 | Matt Grice | 0 | 1 of 45 | 2% | 6 of 50 | 0 of 0 | --- | 0 | 0 | 0:00 |
| Leonard Garcia | 0 | 15 of 30 | 50% | 32 of 49 | 2 of 4 | 50% | 0 | 0 | 1:53 |
Significant Strikes
| Fighter | Sig. Str. | Sig. Str. % | Head | Body | Leg | Distance | Clinch | Ground |
|---|---|---|---|---|---|---|---|---|
| Matt Grice | 2 of 69 | 2% | 1 of 62 | 1 of 4 | 0 of 3 | 2 of 67 | 0 of 2 | 0 of 0 |
| Leonard Garcia | 61 of 113 | 53% | 59 of 106 | 1 of 3 | 1 of 4 | 8 of 20 | 1 of 4 | 52 of 89 |
Significant Strikes Per Round
| Rd | Fighter | Sig. Str. | Sig. Str. % | Head | Body | Leg | Distance | Clinch | Ground |
|---|---|---|---|---|---|---|---|---|---|
| 1 | Matt Grice | 0 of 16 | 0% | 0 of 14 | 0 of 0 | 0 of 2 | 0 of 16 | 0 of 0 | 0 of 0 |
| Leonard Garcia | 16 of 31 | 51% | 15 of 28 | 0 of 0 | 1 of 3 | 1 of 6 | 0 of 0 | 15 of 25 | |
| 2 | Matt Grice | 1 of 8 | 12% | 1 of 6 | 0 of 2 | 0 of 0 | 1 of 8 | 0 of 0 | 0 of 0 |
| Leonard Garcia | 30 of 52 | 57% | 30 of 51 | 0 of 1 | 0 of 0 | 3 of 5 | 0 of 0 | 27 of 47 | |
| 3 | Matt Grice | 1 of 45 | 2% | 0 of 42 | 1 of 2 | 0 of 1 | 1 of 43 | 0 of 2 | 0 of 0 |
| Leonard Garcia | 15 of 30 | 50% | 14 of 27 | 1 of 2 | 0 of 1 | 4 of 9 | 1 of 4 | 10 of 17 |
Totals
| Fighter | KD | Sig. Str. | Sig. Str. % | Total Str. | TD | TD % | Sub. Att | Rev. | Ctrl |
|---|---|---|---|---|---|---|---|---|---|
| Matt Grice | 0 | 2 of 69 | 2% | 30 of 101 | 0 of 0 | --- | 0 | 0 | 0:00 |
| Leonard Garcia | 0 | 61 of 113 | 53% | 136 of 194 | 4 of 7 | 57% | 1 | 0 | 9:37 |
Per Round
| Rd | Fighter | KD | Sig. Str. | Sig. Str. % | Total Str. | TD | TD % | Sub. Att | Rev. | Ctrl |
|---|---|---|---|---|---|---|---|---|---|---|
| 1 | Matt Grice | 0 | 0 of 16 | 0% | 11 of 28 | 0 of 0 | --- | 0 | 0 | 0:00 |
| Leonard Garcia | 0 | 16 of 31 | 51% | 42 of 59 | 1 of 1 | 100% | 1 | 0 | 3:36 | |
| 2 | Matt Grice | 0 | 1 of 8 | 12% | 13 of 23 | 0 of 0 | --- | 0 | 0 | 0:00 |
| Leonard Garcia | 0 | 30 of 52 | 57% | 62 of 86 | 1 of 2 | 50% | 0 | 0 | 4:08 | |
| 3 | Matt Grice | 0 | 1 of 45 | 2% | 6 of 50 | 0 of 0 | --- | 0 | 0 | 0:00 |
| Leonard Garcia | 0 | 15 of 30 | 50% | 32 of 49 | 2 of 4 | 50% | 0 | 0 | 1:53 |
Significant Strikes
| Fighter | Sig. Str. | Sig. Str. % | Head | Body | Leg | Distance | Clinch | Ground |
|---|---|---|---|---|---|---|---|---|
| Matt Grice | 2 of 69 | 2% | 1 of 62 | 1 of 4 | 0 of 3 | 2 of 67 | 0 of 2 | 0 of 0 |
| Leonard Garcia | 61 of 113 | 53% | 59 of 106 | 1 of 3 | 1 of 4 | 8 of 20 | 1 of 4 | 52 of 89 |
Significant Strikes Per Round
| Rd | Fighter | Sig. Str. | Sig. Str. % | Head | Body | Leg | Distance | Clinch | Ground |
|---|---|---|---|---|---|---|---|---|---|
| 1 | Matt Grice | 0 of 16 | 0% | 0 of 14 | 0 of 0 | 0 of 2 | 0 of 16 | 0 of 0 | 0 of 0 |
| Leonard Garcia | 16 of 31 | 51% | 15 of 28 | 0 of 0 | 1 of 3 | 1 of 6 | 0 of 0 | 15 of 25 | |
| 2 | Matt Grice | 1 of 8 | 12% | 1 of 6 | 0 of 2 | 0 of 0 | 1 of 8 | 0 of 0 | 0 of 0 |
| Leonard Garcia | 30 of 52 | 57% | 30 of 51 | 0 of 1 | 0 of 0 | 3 of 5 | 0 of 0 | 27 of 47 | |
| 3 | Matt Grice | 1 of 45 | 2% | 0 of 42 | 1 of 2 | 0 of 1 | 1 of 43 | 0 of 2 | 0 of 0 |
| Leonard Garcia | 15 of 30 | 50% | 14 of 27 | 1 of 2 | 0 of 1 | 4 of 9 | 1 of 4 | 10 of 17 |
Totals
| Fighter | KD | Sig. Str. | Sig. Str. % | Total Str. | TD | TD % | Sub. Att | Rev. | Ctrl |
|---|---|---|---|---|---|---|---|---|---|
| Matt Grice | 0 | 2 of 69 | 2% | 30 of 101 | 0 of 0 | --- | 0 | 0 | 0:00 |
| Leonard Garcia | 0 | 61 of 113 | 53% | 136 of 194 | 4 of 7 | 57% | 1 | 0 | 9:37 |
Per Round
| Rd | Fighter | KD | Sig. Str. | Sig. Str. % | Total Str. | TD | TD % | Sub. Att | Rev. | Ctrl |
|---|---|---|---|---|---|---|---|---|---|---|
| 1 | Matt Grice | 0 | 0 of 16 | 0% | 11 of 28 | 0 of 0 | --- | 0 | 0 | 0:00 |
| Leonard Garcia | 0 | 16 of 31 | 51% | 42 of 59 | 1 of 1 | 100% | 1 | 0 | 3:36 | |
| 2 | Matt Grice | 0 | 1 of 8 | 12% | 13 of 23 | 0 of 0 | --- | 0 | 0 | 0:00 |
| Leonard Garcia | 0 | 30 of 52 | 57% | 62 of 86 | 1 of 2 | 50% | 0 | 0 | 4:08 | |
| 3 | Matt Grice | 0 | 1 of 45 | 2% | 6 of 50 | 0 of 0 | --- | 0 | 0 | 0:00 |
| Leonard Garcia | 0 | 15 of 30 | 50% | 32 of 49 | 2 of 4 | 50% | 0 | 0 | 1:53 |
Significant Strikes
| Fighter | Sig. Str. | Sig. Str. % | Head | Body | Leg | Distance | Clinch | Ground |
|---|---|---|---|---|---|---|---|---|
| Matt Grice | 2 of 69 | 2% | 1 of 62 | 1 of 4 | 0 of 3 | 2 of 67 | 0 of 2 | 0 of 0 |
| Leonard Garcia | 61 of 113 | 53% | 59 of 106 | 1 of 3 | 1 of 4 | 8 of 20 | 1 of 4 | 52 of 89 |
Significant Strikes Per Round
| Rd | Fighter | Sig. Str. | Sig. Str. % | Head | Body | Leg | Distance | Clinch | Ground |
|---|---|---|---|---|---|---|---|---|---|
| 1 | Matt Grice | 0 of 16 | 0% | 0 of 14 | 0 of 0 | 0 of 2 | 0 of 16 | 0 of 0 | 0 of 0 |
| Leonard Garcia | 16 of 31 | 51% | 15 of 28 | 0 of 0 | 1 of 3 | 1 of 6 | 0 of 0 | 15 of 25 | |
| 2 | Matt Grice | 1 of 8 | 12% | 1 of 6 | 0 of 2 | 0 of 0 | 1 of 8 | 0 of 0 | 0 of 0 |
| Leonard Garcia | 30 of 52 | 57% | 30 of 51 | 0 of 1 | 0 of 0 | 3 of 5 | 0 of 0 | 27 of 47 | |
| 3 | Matt Grice | 1 of 45 | 2% | 0 of 42 | 1 of 2 | 0 of 1 | 1 of 43 | 0 of 2 | 0 of 0 |
| Leonard Garcia | 15 of 30 | 50% | 14 of 27 | 1 of 2 | 0 of 1 | 4 of 9 | 1 of 4 | 10 of 17 |
Totals
| Fighter | KD | Sig. Str. | Sig. Str. % | Total Str. | TD | TD % | Sub. Att | Rev. | Ctrl |
|---|---|---|---|---|---|---|---|---|---|
| Matt Grice | 0 | 2 of 69 | 2% | 30 of 101 | 0 of 0 | --- | 0 | 0 | 0:00 |
| Leonard Garcia | 0 | 61 of 113 | 53% | 136 of 194 | 4 of 7 | 57% | 1 | 0 | 9:37 |
Per Round
| Rd | Fighter | KD | Sig. Str. | Sig. Str. % | Total Str. | TD | TD % | Sub. Att | Rev. | Ctrl |
|---|---|---|---|---|---|---|---|---|---|---|
| 1 | Matt Grice | 0 | 0 of 16 | 0% | 11 of 28 | 0 of 0 | --- | 0 | 0 | 0:00 |
| Leonard Garcia | 0 | 16 of 31 | 51% | 42 of 59 | 1 of 1 | 100% | 1 | 0 | 3:36 | |
| 2 | Matt Grice | 0 | 1 of 8 | 12% | 13 of 23 | 0 of 0 | --- | 0 | 0 | 0:00 |
| Leonard Garcia | 0 | 30 of 52 | 57% | 62 of 86 | 1 of 2 | 50% | 0 | 0 | 4:08 | |
| 3 | Matt Grice | 0 | 1 of 45 | 2% | 6 of 50 | 0 of 0 | --- | 0 | 0 | 0:00 |
| Leonard Garcia | 0 | 15 of 30 | 50% | 32 of 49 | 2 of 4 | 50% | 0 | 0 | 1:53 |
Significant Strikes
| Fighter | Sig. Str. | Sig. Str. % | Head | Body | Leg | Distance | Clinch | Ground |
|---|---|---|---|---|---|---|---|---|
| Matt Grice | 2 of 69 | 2% | 1 of 62 | 1 of 4 | 0 of 3 | 2 of 67 | 0 of 2 | 0 of 0 |
| Leonard Garcia | 61 of 113 | 53% | 59 of 106 | 1 of 3 | 1 of 4 | 8 of 20 | 1 of 4 | 52 of 89 |
Significant Strikes Per Round
| Rd | Fighter | Sig. Str. | Sig. Str. % | Head | Body | Leg | Distance | Clinch | Ground |
|---|---|---|---|---|---|---|---|---|---|
| 1 | Matt Grice | 0 of 16 | 0% | 0 of 14 | 0 of 0 | 0 of 2 | 0 of 16 | 0 of 0 | 0 of 0 |
| Leonard Garcia | 16 of 31 | 51% | 15 of 28 | 0 of 0 | 1 of 3 | 1 of 6 | 0 of 0 | 15 of 25 | |
| 2 | Matt Grice | 1 of 8 | 12% | 1 of 6 | 0 of 2 | 0 of 0 | 1 of 8 | 0 of 0 | 0 of 0 |
| Leonard Garcia | 30 of 52 | 57% | 30 of 51 | 0 of 1 | 0 of 0 | 3 of 5 | 0 of 0 | 27 of 47 | |
| 3 | Matt Grice | 1 of 45 | 2% | 0 of 42 | 1 of 2 | 0 of 1 | 1 of 43 | 0 of 2 | 0 of 0 |
| Leonard Garcia | 15 of 30 | 50% | 14 of 27 | 1 of 2 | 0 of 1 | 4 of 9 | 1 of 4 | 10 of 17 |
Totals
| Fighter | KD | Sig. Str. | Sig. Str. % | Total Str. | TD | TD % | Sub. Att | Rev. | Ctrl |
|---|---|---|---|---|---|---|---|---|---|
| Matt Grice | 0 | 2 of 69 | 2% | 30 of 101 | 0 of 0 | --- | 0 | 0 | 0:00 |
| Leonard Garcia | 0 | 61 of 113 | 53% | 136 of 194 | 4 of 7 | 57% | 1 | 0 | 9:37 |
Per Round
| Rd | Fighter | KD | Sig. Str. | Sig. Str. % | Total Str. | TD | TD % | Sub. Att | Rev. | Ctrl |
|---|---|---|---|---|---|---|---|---|---|---|
| 1 | Matt Grice | 0 | 0 of 16 | 0% | 11 of 28 | 0 of 0 | --- | 0 | 0 | 0:00 |
| Leonard Garcia | 0 | 16 of 31 | 51% | 42 of 59 | 1 of 1 | 100% | 1 | 0 | 3:36 | |
| 2 | Matt Grice | 0 | 1 of 8 | 12% | 13 of 23 | 0 of 0 | --- | 0 | 0 | 0:00 |
| Leonard Garcia | 0 | 30 of 52 | 57% | 62 of 86 | 1 of 2 | 50% | 0 | 0 | 4:08 | |
| 3 | Matt Grice | 0 | 1 of 45 | 2% | 6 of 50 | 0 of 0 | --- | 0 | 0 | 0:00 |
| Leonard Garcia | 0 | 15 of 30 | 50% | 32 of 49 | 2 of 4 | 50% | 0 | 0 | 1:53 |
Significant Strikes
| Fighter | Sig. Str. | Sig. Str. % | Head | Body | Leg | Distance | Clinch | Ground |
|---|---|---|---|---|---|---|---|---|
| Matt Grice | 2 of 69 | 2% | 1 of 62 | 1 of 4 | 0 of 3 | 2 of 67 | 0 of 2 | 0 of 0 |
| Leonard Garcia | 61 of 113 | 53% | 59 of 106 | 1 of 3 | 1 of 4 | 8 of 20 | 1 of 4 | 52 of 89 |
Significant Strikes Per Round
| Rd | Fighter | Sig. Str. | Sig. Str. % | Head | Body | Leg | Distance | Clinch | Ground |
|---|---|---|---|---|---|---|---|---|---|
| 1 | Matt Grice | 0 of 16 | 0% | 0 of 14 | 0 of 0 | 0 of 2 | 0 of 16 | 0 of 0 | 0 of 0 |
| Leonard Garcia | 16 of 31 | 51% | 15 of 28 | 0 of 0 | 1 of 3 | 1 of 6 | 0 of 0 | 15 of 25 | |
| 2 | Matt Grice | 1 of 8 | 12% | 1 of 6 | 0 of 2 | 0 of 0 | 1 of 8 | 0 of 0 | 0 of 0 |
| Leonard Garcia | 30 of 52 | 57% | 30 of 51 | 0 of 1 | 0 of 0 | 3 of 5 | 0 of 0 | 27 of 47 | |
| 3 | Matt Grice | 1 of 45 | 2% | 0 of 42 | 1 of 2 | 0 of 1 | 1 of 43 | 0 of 2 | 0 of 0 |
| Leonard Garcia | 15 of 30 | 50% | 14 of 27 | 1 of 2 | 0 of 1 | 4 of 9 | 1 of 4 | 10 of 17 |
Totals
| Fighter | KD | Sig. Str. | Sig. Str. % | Total Str. | TD | TD % | Sub. Att | Rev. | Ctrl |
|---|---|---|---|---|---|---|---|---|---|
| Nam Phan | 1 | 100 of 374 | 26% | 107 of 382 | 0 of 2 | 0% | 0 | 0 | 0:25 |
| Leonard Garcia | 0 | 174 of 339 | 51% | 195 of 360 | 1 of 1 | 100% | 0 | 0 | 1:33 |
Per Round
| Rd | Fighter | KD | Sig. Str. | Sig. Str. % | Total Str. | TD | TD % | Sub. Att | Rev. | Ctrl |
|---|---|---|---|---|---|---|---|---|---|---|
| 1 | Nam Phan | 0 | 32 of 104 | 30% | 36 of 109 | 0 of 1 | 0% | 0 | 0 | 0:00 |
| Leonard Garcia | 0 | 42 of 85 | 49% | 50 of 93 | 0 of 0 | --- | 0 | 0 | 0:57 | |
| 2 | Nam Phan | 0 | 36 of 136 | 26% | 36 of 136 | 0 of 0 | --- | 0 | 0 | 0:00 |
| Leonard Garcia | 0 | 78 of 165 | 47% | 78 of 165 | 0 of 0 | --- | 0 | 0 | 0:00 | |
| 3 | Nam Phan | 1 | 32 of 134 | 23% | 35 of 137 | 0 of 1 | 0% | 0 | 0 | 0:25 |
| Leonard Garcia | 0 | 54 of 89 | 60% | 67 of 102 | 1 of 1 | 100% | 0 | 0 | 0:36 |
Significant Strikes
| Fighter | Sig. Str. | Sig. Str. % | Head | Body | Leg | Distance | Clinch | Ground |
|---|---|---|---|---|---|---|---|---|
| Nam Phan | 100 of 374 | 26% | 56 of 321 | 19 of 28 | 25 of 25 | 99 of 371 | 1 of 3 | 0 of 0 |
| Leonard Garcia | 174 of 339 | 51% | 131 of 289 | 43 of 49 | 0 of 1 | 173 of 337 | 0 of 0 | 1 of 2 |
Significant Strikes Per Round
| Rd | Fighter | Sig. Str. | Sig. Str. % | Head | Body | Leg | Distance | Clinch | Ground |
|---|---|---|---|---|---|---|---|---|---|
| 1 | Nam Phan | 32 of 104 | 30% | 17 of 86 | 6 of 9 | 9 of 9 | 32 of 104 | 0 of 0 | 0 of 0 |
| Leonard Garcia | 42 of 85 | 49% | 28 of 66 | 14 of 18 | 0 of 1 | 41 of 83 | 0 of 0 | 1 of 2 | |
| 2 | Nam Phan | 36 of 136 | 26% | 22 of 120 | 8 of 10 | 6 of 6 | 36 of 134 | 0 of 2 | 0 of 0 |
| Leonard Garcia | 78 of 165 | 47% | 58 of 145 | 20 of 20 | 0 of 0 | 78 of 165 | 0 of 0 | 0 of 0 | |
| 3 | Nam Phan | 32 of 134 | 23% | 17 of 115 | 5 of 9 | 10 of 10 | 31 of 133 | 1 of 1 | 0 of 0 |
| Leonard Garcia | 54 of 89 | 60% | 45 of 78 | 9 of 11 | 0 of 0 | 54 of 89 | 0 of 0 | 0 of 0 |
No comments yet. Be the first to share your thoughts!