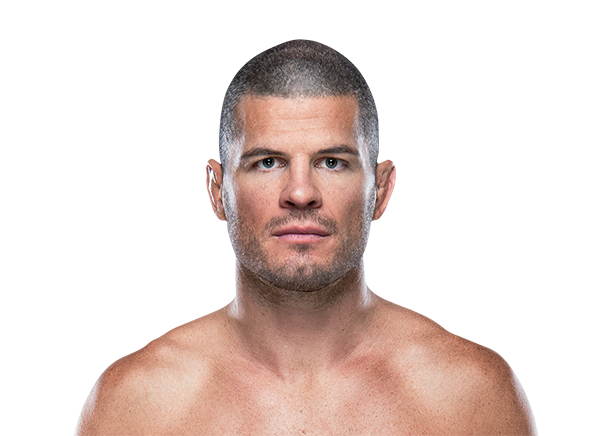
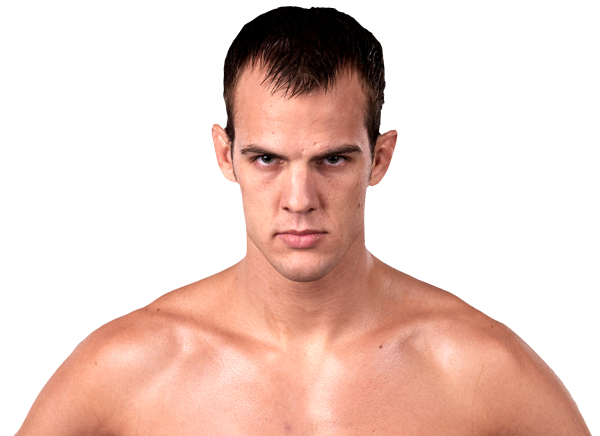
Career Averages - Matt Wiman
Career Averages - Cole Miller
Matt Wiman - Fight History
Totals
| Fighter | KD | Sig. Str. | Sig. Str. % | Total Str. | TD | TD % | Sub. Att | Rev. | Ctrl |
|---|---|---|---|---|---|---|---|---|---|
| Jordan Leavitt | 0 | 0 of 2 | 0% | 0 of 2 | 0 of 0 | --- | 0 | 0 | 0:00 |
| Matt Wiman | 0 | 1 of 1 | 100% | 1 of 1 | 1 of 2 | 50% | 0 | 0 | 0:00 |
Per Round
| Rd | Fighter | KD | Sig. Str. | Sig. Str. % | Total Str. | TD | TD % | Sub. Att | Rev. | Ctrl |
|---|---|---|---|---|---|---|---|---|---|---|
| 1 | Jordan Leavitt | 0 | 0 of 2 | 0% | 0 of 2 | 0 of 0 | --- | 0 | 0 | 0:00 |
| Matt Wiman | 0 | 1 of 1 | 100% | 1 of 1 | 1 of 2 | 50% | 0 | 0 | 0:00 |
Significant Strikes
| Fighter | Sig. Str. | Sig. Str. % | Head | Body | Leg | Distance | Clinch | Ground |
|---|---|---|---|---|---|---|---|---|
| Jordan Leavitt | 0 of 2 | 0% | 0 of 1 | 0 of 0 | 0 of 1 | 0 of 2 | 0 of 0 | 0 of 0 |
| Matt Wiman | 1 of 1 | 100% | 0 of 0 | 1 of 1 | 0 of 0 | 1 of 1 | 0 of 0 | 0 of 0 |
Significant Strikes Per Round
| Rd | Fighter | Sig. Str. | Sig. Str. % | Head | Body | Leg | Distance | Clinch | Ground |
|---|---|---|---|---|---|---|---|---|---|
| 1 | Jordan Leavitt | 0 of 2 | 0% | 0 of 1 | 0 of 0 | 0 of 1 | 0 of 2 | 0 of 0 | 0 of 0 |
| Matt Wiman | 1 of 1 | 100% | 0 of 0 | 1 of 1 | 0 of 0 | 1 of 1 | 0 of 0 | 0 of 0 |
Play-by-Play
View on SherdogRound 1
To begin the five-fight main card on ESPN2, longtime vet Wiman (16-9, 10-7 UFC) tries to get his first win in many years – Wiman last prevailed in 2014, three years before Leavitt (7-0, 0-0 UFC) made his pro debut. This bout with a tremendous disparity in experience will be overseen by referee Chris Tognoni, and there is nothing but respect as the two lightweights touch gloves to start out. Leavitt walks Wiman down and kicks him to the body, and he drops down for a double leg takedown to lift Wiman up.
Leavitt calmly walks him over to his corner, and as Wiman holds him tight, Leavitt slams him with all his might to the ground. Wiman’s head clatters off the canvas, and he is completely unconscious.
“The Monkey King” knows that his opponent is out cold, and he does not need to land any strikes and instead stands back up to walk away. Wow! After a few scary moments, Wiman wakes back up and can move his limbs – he is going to be ok as he eventually sits up. The victor runs to his corner and dives into his corner's waiting arms to get lifted in the air in a glorious reference to "Dirty Dancing." After his gets his hand raised for the official decision, Leavitt leaves the cage to go over to Wiman’s wife and pay his respects. What a wild, brutal knockout!
The Official Result
Jordan Leavitt def. Matt Wiman R1 0:22 via KO (Slam)
Big Brady picks Jordan Leavitt but is not impressed by his tape, calling his striking non-existent. He believes Leavitt's relentless takedowns will be key against a washed-up Matt Wiman, who has looked awful in recent fights. He notes Wiman is a black belt in BJJ and has never been submitted, so he expects Leavitt to win a decision rather than a finish. He strongly advises against betting Leavitt at -400, calling the line crazy.
Daniel picks Jordan Leavitt but is not confident laying -400. He notes that while Leavitt has good jiu-jitsu and is improving, he is a purple belt, not a black belt like Salkilld, who couldn't submit Wiman. He points out that Wiman is a tough veteran with good submission defense and has survived against high-level grapplers. However, Wiman's takedown defense is poor, and Leavitt should win via takedowns and top control. He also mentions Leavitt's quirky personality and that he enjoys watching him fight.
The host picks Jordan Leavitt to win by submission in the first or second round. He notes Leavitt's unorthodox grappling and submission hunting, and that Matt Wiman's takedown defense and age are weaknesses. However, he is not comfortable betting Leavitt at -390 due to his poor striking and red flags, and sees this as a pass for betting. He expects Leavitt to get the submission but will look to fade him next time.
The MMA Guru picks Jordan Leavitt by unanimous decision, praising his strategic ground game and methodical approach. He notes that Leavitt's win over Luke Flores showed his education on the ground, but he doesn't expect a submission because Wiman is an experienced veteran. He predicts Leavitt will control the fight with takedowns and submission attempts.
Totals
| Fighter | KD | Sig. Str. | Sig. Str. % | Total Str. | TD | TD % | Sub. Att | Rev. | Ctrl |
|---|---|---|---|---|---|---|---|---|---|
| Joe Solecki | 0 | 56 of 70 | 80% | 177 of 217 | 4 of 5 | 80% | 0 | 0 | 12:29 |
| Matt Wiman | 0 | 10 of 22 | 45% | 20 of 33 | 0 of 0 | --- | 0 | 1 | 0:06 |
Per Round
| Rd | Fighter | KD | Sig. Str. | Sig. Str. % | Total Str. | TD | TD % | Sub. Att | Rev. | Ctrl |
|---|---|---|---|---|---|---|---|---|---|---|
| 1 | Joe Solecki | 0 | 33 of 41 | 80% | 84 of 98 | 1 of 1 | 100% | 0 | 0 | 4:31 |
| Matt Wiman | 0 | 3 of 4 | 75% | 5 of 6 | 0 of 0 | --- | 0 | 0 | 0:00 | |
| 2 | Joe Solecki | 0 | 14 of 20 | 70% | 49 of 61 | 2 of 2 | 100% | 0 | 0 | 3:41 |
| Matt Wiman | 0 | 3 of 12 | 25% | 6 of 16 | 0 of 0 | --- | 0 | 0 | 0:00 | |
| 3 | Joe Solecki | 0 | 9 of 9 | 100% | 44 of 58 | 1 of 2 | 50% | 0 | 0 | 4:17 |
| Matt Wiman | 0 | 4 of 6 | 66% | 9 of 11 | 0 of 0 | --- | 0 | 1 | 0:06 |
Significant Strikes
| Fighter | Sig. Str. | Sig. Str. % | Head | Body | Leg | Distance | Clinch | Ground |
|---|---|---|---|---|---|---|---|---|
| Joe Solecki | 56 of 70 | 80% | 50 of 63 | 4 of 5 | 2 of 2 | 7 of 8 | 1 of 1 | 48 of 61 |
| Matt Wiman | 10 of 22 | 45% | 7 of 19 | 1 of 1 | 2 of 2 | 3 of 15 | 1 of 1 | 6 of 6 |
Significant Strikes Per Round
| Rd | Fighter | Sig. Str. | Sig. Str. % | Head | Body | Leg | Distance | Clinch | Ground |
|---|---|---|---|---|---|---|---|---|---|
| 1 | Joe Solecki | 33 of 41 | 80% | 32 of 40 | 0 of 0 | 1 of 1 | 1 of 1 | 0 of 0 | 32 of 40 |
| Matt Wiman | 3 of 4 | 75% | 1 of 2 | 0 of 0 | 2 of 2 | 2 of 3 | 0 of 0 | 1 of 1 | |
| 2 | Joe Solecki | 14 of 20 | 70% | 12 of 17 | 1 of 2 | 1 of 1 | 5 of 6 | 0 of 0 | 9 of 14 |
| Matt Wiman | 3 of 12 | 25% | 3 of 12 | 0 of 0 | 0 of 0 | 1 of 10 | 0 of 0 | 2 of 2 | |
| 3 | Joe Solecki | 9 of 9 | 100% | 6 of 6 | 3 of 3 | 0 of 0 | 1 of 1 | 1 of 1 | 7 of 7 |
| Matt Wiman | 4 of 6 | 66% | 3 of 5 | 1 of 1 | 0 of 0 | 0 of 2 | 1 of 1 | 3 of 3 |
Totals
| Fighter | KD | Sig. Str. | Sig. Str. % | Total Str. | TD | TD % | Sub. Att | Rev. | Ctrl |
|---|---|---|---|---|---|---|---|---|---|
| Luis Peña | 0 | 24 of 42 | 57% | 28 of 46 | 1 of 3 | 33% | 0 | 0 | 0:14 |
| Matt Wiman | 0 | 87 of 148 | 58% | 98 of 160 | 1 of 1 | 100% | 1 | 1 | 7:32 |
Per Round
| Rd | Fighter | KD | Sig. Str. | Sig. Str. % | Total Str. | TD | TD % | Sub. Att | Rev. | Ctrl |
|---|---|---|---|---|---|---|---|---|---|---|
| 1 | Luis Peña | 0 | 8 of 14 | 57% | 10 of 16 | 1 of 2 | 50% | 0 | 0 | 0:10 |
| Matt Wiman | 0 | 35 of 65 | 53% | 38 of 68 | 0 of 0 | --- | 0 | 1 | 3:09 | |
| 2 | Luis Peña | 0 | 9 of 15 | 60% | 11 of 17 | 0 of 1 | 0% | 0 | 0 | 0:04 |
| Matt Wiman | 0 | 29 of 40 | 72% | 37 of 49 | 1 of 1 | 100% | 1 | 0 | 4:03 | |
| 3 | Luis Peña | 0 | 7 of 13 | 53% | 7 of 13 | 0 of 0 | --- | 0 | 0 | 0:00 |
| Matt Wiman | 0 | 23 of 43 | 53% | 23 of 43 | 0 of 0 | --- | 0 | 0 | 0:20 |
Significant Strikes
| Fighter | Sig. Str. | Sig. Str. % | Head | Body | Leg | Distance | Clinch | Ground |
|---|---|---|---|---|---|---|---|---|
| Luis Peña | 24 of 42 | 57% | 2 of 18 | 3 of 4 | 19 of 20 | 24 of 36 | 0 of 2 | 0 of 4 |
| Matt Wiman | 87 of 148 | 58% | 84 of 144 | 3 of 4 | 0 of 0 | 18 of 45 | 9 of 12 | 60 of 91 |
Significant Strikes Per Round
| Rd | Fighter | Sig. Str. | Sig. Str. % | Head | Body | Leg | Distance | Clinch | Ground |
|---|---|---|---|---|---|---|---|---|---|
| 1 | Luis Peña | 8 of 14 | 57% | 0 of 4 | 0 of 1 | 8 of 9 | 8 of 11 | 0 of 2 | 0 of 1 |
| Matt Wiman | 35 of 65 | 53% | 33 of 62 | 2 of 3 | 0 of 0 | 0 of 11 | 9 of 12 | 26 of 42 | |
| 2 | Luis Peña | 9 of 15 | 60% | 2 of 8 | 2 of 2 | 5 of 5 | 9 of 12 | 0 of 0 | 0 of 3 |
| Matt Wiman | 29 of 40 | 72% | 29 of 40 | 0 of 0 | 0 of 0 | 8 of 14 | 0 of 0 | 21 of 26 | |
| 3 | Luis Peña | 7 of 13 | 53% | 0 of 6 | 1 of 1 | 6 of 6 | 7 of 13 | 0 of 0 | 0 of 0 |
| Matt Wiman | 23 of 43 | 53% | 22 of 42 | 1 of 1 | 0 of 0 | 10 of 20 | 0 of 0 | 13 of 23 |
Totals
| Fighter | KD | Sig. Str. | Sig. Str. % | Total Str. | TD | TD % | Sub. Att | Rev. | Ctrl |
|---|---|---|---|---|---|---|---|---|---|
| Matt Wiman | 0 | 68 of 101 | 67% | 104 of 140 | 0 of 3 | 0% | 0 | 0 | 5:05 |
| Isaac Vallie-Flagg | 0 | 80 of 121 | 66% | 120 of 165 | 0 of 5 | 0% | 0 | 0 | 5:36 |
Per Round
| Rd | Fighter | KD | Sig. Str. | Sig. Str. % | Total Str. | TD | TD % | Sub. Att | Rev. | Ctrl |
|---|---|---|---|---|---|---|---|---|---|---|
| 1 | Matt Wiman | 0 | 22 of 28 | 78% | 41 of 47 | 0 of 1 | 0% | 0 | 0 | 0:32 |
| Isaac Vallie-Flagg | 0 | 27 of 41 | 65% | 39 of 53 | 0 of 2 | 0% | 0 | 0 | 3:39 | |
| 2 | Matt Wiman | 0 | 32 of 46 | 69% | 39 of 53 | 0 of 1 | 0% | 0 | 0 | 1:06 |
| Isaac Vallie-Flagg | 0 | 35 of 54 | 64% | 45 of 64 | 0 of 2 | 0% | 0 | 0 | 1:43 | |
| 3 | Matt Wiman | 0 | 14 of 27 | 51% | 24 of 40 | 0 of 1 | 0% | 0 | 0 | 3:27 |
| Isaac Vallie-Flagg | 0 | 18 of 26 | 69% | 36 of 48 | 0 of 1 | 0% | 0 | 0 | 0:14 |
Significant Strikes
| Fighter | Sig. Str. | Sig. Str. % | Head | Body | Leg | Distance | Clinch | Ground |
|---|---|---|---|---|---|---|---|---|
| Matt Wiman | 68 of 101 | 67% | 49 of 77 | 14 of 16 | 5 of 8 | 21 of 44 | 45 of 55 | 2 of 2 |
| Isaac Vallie-Flagg | 80 of 121 | 66% | 51 of 87 | 19 of 21 | 10 of 13 | 22 of 44 | 57 of 76 | 1 of 1 |
Significant Strikes Per Round
| Rd | Fighter | Sig. Str. | Sig. Str. % | Head | Body | Leg | Distance | Clinch | Ground |
|---|---|---|---|---|---|---|---|---|---|
| 1 | Matt Wiman | 22 of 28 | 78% | 15 of 20 | 5 of 5 | 2 of 3 | 4 of 8 | 17 of 19 | 1 of 1 |
| Isaac Vallie-Flagg | 27 of 41 | 65% | 15 of 29 | 5 of 5 | 7 of 7 | 4 of 10 | 22 of 30 | 1 of 1 | |
| 2 | Matt Wiman | 32 of 46 | 69% | 23 of 37 | 7 of 7 | 2 of 2 | 11 of 22 | 21 of 24 | 0 of 0 |
| Isaac Vallie-Flagg | 35 of 54 | 64% | 25 of 41 | 8 of 9 | 2 of 4 | 12 of 22 | 23 of 32 | 0 of 0 | |
| 3 | Matt Wiman | 14 of 27 | 51% | 11 of 20 | 2 of 4 | 1 of 3 | 6 of 14 | 7 of 12 | 1 of 1 |
| Isaac Vallie-Flagg | 18 of 26 | 69% | 11 of 17 | 6 of 7 | 1 of 2 | 6 of 12 | 12 of 14 | 0 of 0 |
Totals
| Fighter | KD | Sig. Str. | Sig. Str. % | Total Str. | TD | TD % | Sub. Att | Rev. | Ctrl |
|---|---|---|---|---|---|---|---|---|---|
| T. J. Grant | 1 | 54 of 93 | 58% | 56 of 96 | 0 of 0 | --- | 0 | 0 | 1:10 |
| Matt Wiman | 0 | 18 of 57 | 31% | 18 of 58 | 0 of 1 | 0% | 0 | 0 | 0:00 |
Per Round
| Rd | Fighter | KD | Sig. Str. | Sig. Str. % | Total Str. | TD | TD % | Sub. Att | Rev. | Ctrl |
|---|---|---|---|---|---|---|---|---|---|---|
| 1 | T. J. Grant | 1 | 54 of 93 | 58% | 56 of 96 | 0 of 0 | --- | 0 | 0 | 1:10 |
| Matt Wiman | 0 | 18 of 57 | 31% | 18 of 58 | 0 of 1 | 0% | 0 | 0 | 0:00 |
Significant Strikes
| Fighter | Sig. Str. | Sig. Str. % | Head | Body | Leg | Distance | Clinch | Ground |
|---|---|---|---|---|---|---|---|---|
| T. J. Grant | 54 of 93 | 58% | 37 of 73 | 15 of 18 | 2 of 2 | 25 of 54 | 20 of 24 | 9 of 15 |
| Matt Wiman | 18 of 57 | 31% | 9 of 44 | 2 of 5 | 7 of 8 | 16 of 51 | 2 of 6 | 0 of 0 |
Significant Strikes Per Round
| Rd | Fighter | Sig. Str. | Sig. Str. % | Head | Body | Leg | Distance | Clinch | Ground |
|---|---|---|---|---|---|---|---|---|---|
| 1 | T. J. Grant | 54 of 93 | 58% | 37 of 73 | 15 of 18 | 2 of 2 | 25 of 54 | 20 of 24 | 9 of 15 |
| Matt Wiman | 18 of 57 | 31% | 9 of 44 | 2 of 5 | 7 of 8 | 16 of 51 | 2 of 6 | 0 of 0 |
Totals
| Fighter | KD | Sig. Str. | Sig. Str. % | Total Str. | TD | TD % | Sub. Att | Rev. | Ctrl |
|---|---|---|---|---|---|---|---|---|---|
| Matt Wiman | 0 | 6 of 10 | 60% | 14 of 19 | 1 of 1 | 100% | 0 | 0 | 2:56 |
| Paul Sass | 0 | 3 of 4 | 75% | 7 of 8 | 0 of 0 | --- | 2 | 0 | 0:40 |
Per Round
| Rd | Fighter | KD | Sig. Str. | Sig. Str. % | Total Str. | TD | TD % | Sub. Att | Rev. | Ctrl |
|---|---|---|---|---|---|---|---|---|---|---|
| 1 | Matt Wiman | 0 | 6 of 10 | 60% | 14 of 19 | 1 of 1 | 100% | 0 | 0 | 2:56 |
| Paul Sass | 0 | 3 of 4 | 75% | 7 of 8 | 0 of 0 | --- | 2 | 0 | 0:40 |
Significant Strikes
| Fighter | Sig. Str. | Sig. Str. % | Head | Body | Leg | Distance | Clinch | Ground |
|---|---|---|---|---|---|---|---|---|
| Matt Wiman | 6 of 10 | 60% | 4 of 8 | 2 of 2 | 0 of 0 | 0 of 0 | 0 of 0 | 6 of 10 |
| Paul Sass | 3 of 4 | 75% | 2 of 3 | 0 of 0 | 1 of 1 | 1 of 1 | 0 of 0 | 2 of 3 |
Significant Strikes Per Round
| Rd | Fighter | Sig. Str. | Sig. Str. % | Head | Body | Leg | Distance | Clinch | Ground |
|---|---|---|---|---|---|---|---|---|---|
| 1 | Matt Wiman | 6 of 10 | 60% | 4 of 8 | 2 of 2 | 0 of 0 | 0 of 0 | 0 of 0 | 6 of 10 |
| Paul Sass | 3 of 4 | 75% | 2 of 3 | 0 of 0 | 1 of 1 | 1 of 1 | 0 of 0 | 2 of 3 |
Totals
| Fighter | KD | Sig. Str. | Sig. Str. % | Total Str. | TD | TD % | Sub. Att | Rev. | Ctrl |
|---|---|---|---|---|---|---|---|---|---|
| Matt Wiman | 0 | 93 of 141 | 65% | 119 of 169 | 2 of 7 | 28% | 1 | 1 | 4:06 |
| Mac Danzig | 0 | 66 of 107 | 61% | 193 of 255 | 2 of 6 | 33% | 1 | 0 | 4:57 |
Per Round
| Rd | Fighter | KD | Sig. Str. | Sig. Str. % | Total Str. | TD | TD % | Sub. Att | Rev. | Ctrl |
|---|---|---|---|---|---|---|---|---|---|---|
| 1 | Matt Wiman | 0 | 40 of 62 | 64% | 48 of 71 | 2 of 4 | 50% | 0 | 0 | 1:12 |
| Mac Danzig | 0 | 31 of 48 | 64% | 79 of 100 | 1 of 4 | 25% | 0 | 0 | 0:33 | |
| 2 | Matt Wiman | 0 | 25 of 36 | 69% | 32 of 44 | 0 of 1 | 0% | 1 | 0 | 0:11 |
| Mac Danzig | 0 | 16 of 28 | 57% | 52 of 78 | 1 of 1 | 100% | 0 | 0 | 3:14 | |
| 3 | Matt Wiman | 0 | 28 of 43 | 65% | 39 of 54 | 0 of 2 | 0% | 0 | 1 | 2:43 |
| Mac Danzig | 0 | 19 of 31 | 61% | 62 of 77 | 0 of 1 | 0% | 1 | 0 | 1:10 |
Significant Strikes
| Fighter | Sig. Str. | Sig. Str. % | Head | Body | Leg | Distance | Clinch | Ground |
|---|---|---|---|---|---|---|---|---|
| Matt Wiman | 93 of 141 | 65% | 58 of 105 | 19 of 20 | 16 of 16 | 44 of 80 | 44 of 55 | 5 of 6 |
| Mac Danzig | 66 of 107 | 61% | 54 of 95 | 12 of 12 | 0 of 0 | 44 of 83 | 21 of 23 | 1 of 1 |
Significant Strikes Per Round
| Rd | Fighter | Sig. Str. | Sig. Str. % | Head | Body | Leg | Distance | Clinch | Ground |
|---|---|---|---|---|---|---|---|---|---|
| 1 | Matt Wiman | 40 of 62 | 64% | 19 of 41 | 11 of 11 | 10 of 10 | 22 of 37 | 18 of 25 | 0 of 0 |
| Mac Danzig | 31 of 48 | 64% | 25 of 42 | 6 of 6 | 0 of 0 | 21 of 37 | 10 of 11 | 0 of 0 | |
| 2 | Matt Wiman | 25 of 36 | 69% | 15 of 26 | 5 of 5 | 5 of 5 | 13 of 21 | 12 of 15 | 0 of 0 |
| Mac Danzig | 16 of 28 | 57% | 15 of 27 | 1 of 1 | 0 of 0 | 10 of 21 | 5 of 6 | 1 of 1 | |
| 3 | Matt Wiman | 28 of 43 | 65% | 24 of 38 | 3 of 4 | 1 of 1 | 9 of 22 | 14 of 15 | 5 of 6 |
| Mac Danzig | 19 of 31 | 61% | 14 of 26 | 5 of 5 | 0 of 0 | 13 of 25 | 6 of 6 | 0 of 0 |
Totals
| Fighter | KD | Sig. Str. | Sig. Str. % | Total Str. | TD | TD % | Sub. Att | Rev. | Ctrl |
|---|---|---|---|---|---|---|---|---|---|
| Dennis Siver | 0 | 31 of 111 | 27% | 128 of 213 | 1 of 1 | 100% | 0 | 0 | 1:29 |
| Matt Wiman | 0 | 26 of 73 | 35% | 34 of 86 | 5 of 16 | 31% | 2 | 0 | 7:33 |
Per Round
| Rd | Fighter | KD | Sig. Str. | Sig. Str. % | Total Str. | TD | TD % | Sub. Att | Rev. | Ctrl |
|---|---|---|---|---|---|---|---|---|---|---|
| 1 | Dennis Siver | 0 | 17 of 57 | 29% | 38 of 79 | 1 of 1 | 100% | 0 | 0 | 0:20 |
| Matt Wiman | 0 | 8 of 28 | 28% | 9 of 29 | 2 of 5 | 40% | 0 | 0 | 1:40 | |
| 2 | Dennis Siver | 0 | 3 of 6 | 50% | 43 of 49 | 0 of 0 | --- | 0 | 0 | 0:00 |
| Matt Wiman | 0 | 12 of 25 | 48% | 19 of 37 | 1 of 4 | 25% | 0 | 0 | 4:43 | |
| 3 | Dennis Siver | 0 | 11 of 48 | 22% | 47 of 85 | 0 of 0 | --- | 0 | 0 | 1:09 |
| Matt Wiman | 0 | 6 of 20 | 30% | 6 of 20 | 2 of 7 | 28% | 2 | 0 | 1:10 |
Significant Strikes
| Fighter | Sig. Str. | Sig. Str. % | Head | Body | Leg | Distance | Clinch | Ground |
|---|---|---|---|---|---|---|---|---|
| Dennis Siver | 31 of 111 | 27% | 14 of 85 | 5 of 10 | 12 of 16 | 28 of 96 | 3 of 14 | 0 of 1 |
| Matt Wiman | 26 of 73 | 35% | 18 of 58 | 1 of 2 | 7 of 13 | 13 of 45 | 1 of 2 | 12 of 26 |
Significant Strikes Per Round
| Rd | Fighter | Sig. Str. | Sig. Str. % | Head | Body | Leg | Distance | Clinch | Ground |
|---|---|---|---|---|---|---|---|---|---|
| 1 | Dennis Siver | 17 of 57 | 29% | 8 of 46 | 2 of 2 | 7 of 9 | 14 of 45 | 3 of 12 | 0 of 0 |
| Matt Wiman | 8 of 28 | 28% | 3 of 18 | 1 of 2 | 4 of 8 | 7 of 25 | 1 of 2 | 0 of 1 | |
| 2 | Dennis Siver | 3 of 6 | 50% | 1 of 4 | 1 of 1 | 1 of 1 | 3 of 5 | 0 of 1 | 0 of 0 |
| Matt Wiman | 12 of 25 | 48% | 12 of 25 | 0 of 0 | 0 of 0 | 0 of 0 | 0 of 0 | 12 of 25 | |
| 3 | Dennis Siver | 11 of 48 | 22% | 5 of 35 | 2 of 7 | 4 of 6 | 11 of 46 | 0 of 1 | 0 of 1 |
| Matt Wiman | 6 of 20 | 30% | 3 of 15 | 0 of 0 | 3 of 5 | 6 of 20 | 0 of 0 | 0 of 0 |
Cole Miller - Fight History
Totals
| Fighter | KD | Sig. Str. | Sig. Str. % | Total Str. | TD | TD % | Sub. Att | Rev. | Ctrl |
|---|---|---|---|---|---|---|---|---|---|
| Mizuto Hirota | 0 | 21 of 60 | 35% | 22 of 61 | 0 of 0 | --- | 0 | 1 | 1:03 |
| Cole Miller | 0 | 57 of 114 | 50% | 165 of 242 | 6 of 7 | 85% | 0 | 0 | 9:49 |
Per Round
| Rd | Fighter | KD | Sig. Str. | Sig. Str. % | Total Str. | TD | TD % | Sub. Att | Rev. | Ctrl |
|---|---|---|---|---|---|---|---|---|---|---|
| 1 | Mizuto Hirota | 0 | 11 of 31 | 35% | 11 of 31 | 0 of 0 | --- | 0 | 0 | 0:00 |
| Cole Miller | 0 | 23 of 48 | 47% | 47 of 74 | 4 of 4 | 100% | 0 | 0 | 2:27 | |
| 2 | Mizuto Hirota | 0 | 3 of 13 | 23% | 3 of 13 | 0 of 0 | --- | 0 | 1 | 1:03 |
| Cole Miller | 0 | 16 of 32 | 50% | 58 of 79 | 1 of 1 | 100% | 0 | 0 | 3:12 | |
| 3 | Mizuto Hirota | 0 | 7 of 16 | 43% | 8 of 17 | 0 of 0 | --- | 0 | 0 | 0:00 |
| Cole Miller | 0 | 18 of 34 | 52% | 60 of 89 | 1 of 2 | 50% | 0 | 0 | 4:10 |
Significant Strikes
| Fighter | Sig. Str. | Sig. Str. % | Head | Body | Leg | Distance | Clinch | Ground |
|---|---|---|---|---|---|---|---|---|
| Mizuto Hirota | 21 of 60 | 35% | 11 of 44 | 5 of 9 | 5 of 7 | 20 of 59 | 0 of 0 | 1 of 1 |
| Cole Miller | 57 of 114 | 50% | 43 of 95 | 7 of 11 | 7 of 8 | 26 of 60 | 1 of 1 | 30 of 53 |
Significant Strikes Per Round
| Rd | Fighter | Sig. Str. | Sig. Str. % | Head | Body | Leg | Distance | Clinch | Ground |
|---|---|---|---|---|---|---|---|---|---|
| 1 | Mizuto Hirota | 11 of 31 | 35% | 4 of 21 | 4 of 6 | 3 of 4 | 10 of 30 | 0 of 0 | 1 of 1 |
| Cole Miller | 23 of 48 | 47% | 15 of 38 | 3 of 5 | 5 of 5 | 16 of 30 | 1 of 1 | 6 of 17 | |
| 2 | Mizuto Hirota | 3 of 13 | 23% | 3 of 11 | 0 of 1 | 0 of 1 | 3 of 13 | 0 of 0 | 0 of 0 |
| Cole Miller | 16 of 32 | 50% | 14 of 28 | 1 of 2 | 1 of 2 | 3 of 12 | 0 of 0 | 13 of 20 | |
| 3 | Mizuto Hirota | 7 of 16 | 43% | 4 of 12 | 1 of 2 | 2 of 2 | 7 of 16 | 0 of 0 | 0 of 0 |
| Cole Miller | 18 of 34 | 52% | 14 of 29 | 3 of 4 | 1 of 1 | 7 of 18 | 0 of 0 | 11 of 16 |
Totals
| Fighter | KD | Sig. Str. | Sig. Str. % | Total Str. | TD | TD % | Sub. Att | Rev. | Ctrl |
|---|---|---|---|---|---|---|---|---|---|
| Alex Caceres | 0 | 33 of 127 | 25% | 39 of 134 | 3 of 3 | 100% | 1 | 0 | 2:33 |
| Cole Miller | 1 | 97 of 156 | 62% | 108 of 167 | 5 of 5 | 100% | 0 | 1 | 3:01 |
Per Round
| Rd | Fighter | KD | Sig. Str. | Sig. Str. % | Total Str. | TD | TD % | Sub. Att | Rev. | Ctrl |
|---|---|---|---|---|---|---|---|---|---|---|
| 1 | Alex Caceres | 0 | 8 of 42 | 19% | 8 of 42 | 2 of 2 | 100% | 0 | 0 | 0:52 |
| Cole Miller | 1 | 27 of 38 | 71% | 33 of 44 | 2 of 2 | 100% | 0 | 1 | 1:13 | |
| 2 | Alex Caceres | 0 | 13 of 50 | 26% | 13 of 50 | 0 of 0 | --- | 0 | 0 | 0:00 |
| Cole Miller | 0 | 46 of 81 | 56% | 47 of 82 | 2 of 2 | 100% | 0 | 0 | 0:26 | |
| 3 | Alex Caceres | 0 | 12 of 35 | 34% | 18 of 42 | 1 of 1 | 100% | 1 | 0 | 1:41 |
| Cole Miller | 0 | 24 of 37 | 64% | 28 of 41 | 1 of 1 | 100% | 0 | 0 | 1:22 |
Significant Strikes
| Fighter | Sig. Str. | Sig. Str. % | Head | Body | Leg | Distance | Clinch | Ground |
|---|---|---|---|---|---|---|---|---|
| Alex Caceres | 33 of 127 | 25% | 24 of 111 | 5 of 11 | 4 of 5 | 30 of 122 | 1 of 2 | 2 of 3 |
| Cole Miller | 97 of 156 | 62% | 65 of 120 | 22 of 26 | 10 of 10 | 77 of 130 | 10 of 14 | 10 of 12 |
Significant Strikes Per Round
| Rd | Fighter | Sig. Str. | Sig. Str. % | Head | Body | Leg | Distance | Clinch | Ground |
|---|---|---|---|---|---|---|---|---|---|
| 1 | Alex Caceres | 8 of 42 | 19% | 3 of 35 | 2 of 3 | 3 of 4 | 7 of 41 | 1 of 1 | 0 of 0 |
| Cole Miller | 27 of 38 | 71% | 16 of 27 | 8 of 8 | 3 of 3 | 18 of 29 | 5 of 5 | 4 of 4 | |
| 2 | Alex Caceres | 13 of 50 | 26% | 10 of 44 | 2 of 5 | 1 of 1 | 13 of 50 | 0 of 0 | 0 of 0 |
| Cole Miller | 46 of 81 | 56% | 28 of 59 | 11 of 15 | 7 of 7 | 41 of 72 | 4 of 8 | 1 of 1 | |
| 3 | Alex Caceres | 12 of 35 | 34% | 11 of 32 | 1 of 3 | 0 of 0 | 10 of 31 | 0 of 1 | 2 of 3 |
| Cole Miller | 24 of 37 | 64% | 21 of 34 | 3 of 3 | 0 of 0 | 18 of 29 | 1 of 1 | 5 of 7 |
Totals
| Fighter | KD | Sig. Str. | Sig. Str. % | Total Str. | TD | TD % | Sub. Att | Rev. | Ctrl |
|---|---|---|---|---|---|---|---|---|---|
| Cole Miller | 0 | 28 of 77 | 36% | 29 of 78 | 0 of 0 | --- | 0 | 0 | 0:00 |
| Jim Alers | 0 | 25 of 79 | 31% | 25 of 79 | 0 of 0 | --- | 0 | 0 | 0:00 |
Per Round
| Rd | Fighter | KD | Sig. Str. | Sig. Str. % | Total Str. | TD | TD % | Sub. Att | Rev. | Ctrl |
|---|---|---|---|---|---|---|---|---|---|---|
| 1 | Cole Miller | 0 | 22 of 54 | 40% | 23 of 55 | 0 of 0 | --- | 0 | 0 | 0:00 |
| Jim Alers | 0 | 19 of 58 | 32% | 19 of 58 | 0 of 0 | --- | 0 | 0 | 0:00 | |
| 2 | Cole Miller | 0 | 6 of 23 | 26% | 6 of 23 | 0 of 0 | --- | 0 | 0 | 0:00 |
| Jim Alers | 0 | 6 of 21 | 28% | 6 of 21 | 0 of 0 | --- | 0 | 0 | 0:00 |
Significant Strikes
| Fighter | Sig. Str. | Sig. Str. % | Head | Body | Leg | Distance | Clinch | Ground |
|---|---|---|---|---|---|---|---|---|
| Cole Miller | 28 of 77 | 36% | 17 of 64 | 7 of 9 | 4 of 4 | 26 of 75 | 2 of 2 | 0 of 0 |
| Jim Alers | 25 of 79 | 31% | 9 of 55 | 6 of 11 | 10 of 13 | 24 of 77 | 1 of 2 | 0 of 0 |
Significant Strikes Per Round
| Rd | Fighter | Sig. Str. | Sig. Str. % | Head | Body | Leg | Distance | Clinch | Ground |
|---|---|---|---|---|---|---|---|---|---|
| 1 | Cole Miller | 22 of 54 | 40% | 14 of 45 | 5 of 6 | 3 of 3 | 21 of 53 | 1 of 1 | 0 of 0 |
| Jim Alers | 19 of 58 | 32% | 6 of 39 | 5 of 9 | 8 of 10 | 18 of 56 | 1 of 2 | 0 of 0 | |
| 2 | Cole Miller | 6 of 23 | 26% | 3 of 19 | 2 of 3 | 1 of 1 | 5 of 22 | 1 of 1 | 0 of 0 |
| Jim Alers | 6 of 21 | 28% | 3 of 16 | 1 of 2 | 2 of 3 | 6 of 21 | 0 of 0 | 0 of 0 |
Totals
| Fighter | KD | Sig. Str. | Sig. Str. % | Total Str. | TD | TD % | Sub. Att | Rev. | Ctrl |
|---|---|---|---|---|---|---|---|---|---|
| Max Holloway | 0 | 57 of 176 | 32% | 66 of 186 | 1 of 1 | 100% | 0 | 0 | 2:33 |
| Cole Miller | 0 | 31 of 132 | 23% | 35 of 137 | 0 of 2 | 0% | 0 | 0 | 0:31 |
Per Round
| Rd | Fighter | KD | Sig. Str. | Sig. Str. % | Total Str. | TD | TD % | Sub. Att | Rev. | Ctrl |
|---|---|---|---|---|---|---|---|---|---|---|
| 1 | Max Holloway | 0 | 12 of 48 | 25% | 14 of 51 | 0 of 0 | --- | 0 | 0 | 1:15 |
| Cole Miller | 0 | 10 of 39 | 25% | 11 of 40 | 0 of 0 | --- | 0 | 0 | 0:00 | |
| 2 | Max Holloway | 0 | 12 of 50 | 24% | 14 of 52 | 1 of 1 | 100% | 0 | 0 | 0:37 |
| Cole Miller | 0 | 12 of 45 | 26% | 13 of 47 | 0 of 1 | 0% | 0 | 0 | 0:03 | |
| 3 | Max Holloway | 0 | 33 of 78 | 42% | 38 of 83 | 0 of 0 | --- | 0 | 0 | 0:41 |
| Cole Miller | 0 | 9 of 48 | 18% | 11 of 50 | 0 of 1 | 0% | 0 | 0 | 0:28 |
Significant Strikes
| Fighter | Sig. Str. | Sig. Str. % | Head | Body | Leg | Distance | Clinch | Ground |
|---|---|---|---|---|---|---|---|---|
| Max Holloway | 57 of 176 | 32% | 40 of 145 | 13 of 23 | 4 of 8 | 46 of 159 | 7 of 11 | 4 of 6 |
| Cole Miller | 31 of 132 | 23% | 12 of 93 | 8 of 19 | 11 of 20 | 26 of 123 | 5 of 8 | 0 of 1 |
Significant Strikes Per Round
| Rd | Fighter | Sig. Str. | Sig. Str. % | Head | Body | Leg | Distance | Clinch | Ground |
|---|---|---|---|---|---|---|---|---|---|
| 1 | Max Holloway | 12 of 48 | 25% | 4 of 34 | 5 of 7 | 3 of 7 | 8 of 42 | 3 of 4 | 1 of 2 |
| Cole Miller | 10 of 39 | 25% | 0 of 20 | 5 of 11 | 5 of 8 | 6 of 34 | 4 of 5 | 0 of 0 | |
| 2 | Max Holloway | 12 of 50 | 24% | 10 of 45 | 2 of 5 | 0 of 0 | 9 of 46 | 1 of 1 | 2 of 3 |
| Cole Miller | 12 of 45 | 26% | 4 of 32 | 3 of 4 | 5 of 9 | 12 of 45 | 0 of 0 | 0 of 0 | |
| 3 | Max Holloway | 33 of 78 | 42% | 26 of 66 | 6 of 11 | 1 of 1 | 29 of 71 | 3 of 6 | 1 of 1 |
| Cole Miller | 9 of 48 | 18% | 8 of 41 | 0 of 4 | 1 of 3 | 8 of 44 | 1 of 3 | 0 of 1 |
Play-by-Play
View on SherdogRound 1
Holloway strikes first with a pair of kicks to the outside of Miller’s lead leg. Miller checks a third and gives the Hawaiian a low kick in return. The featherweights continue trading kicks through the first 80 seconds, Miller mixing in a few to the body. Holloway threatens and probes with punches, looking for an opening against the taller man. The fighters clash kicks, knocking Holloway to the ground, but he pops back up without incident. Holloway slaps Miller’s breadbasket with a loud kick, then tacks on a leg kick, answered in kind by Miller. A straight right lands for Miller before the 145ers clinch up. Holloway takes the driver’s seat in the clinch, shoving Miller to the fence and throwing knees to the body. They fight back to the center, where Miller looks to clinch and eats a hook. He decks Holloway with an elbow as he’s pushed against the cage, and now Miller drops to guard at the base of the fence. Miller sits up and drops back on a heel hook, then gives it up to stand, reach between his legs and rolls through on a kneebar attempt to end the round.
Sherdog Scores
Jordan Breen scores the round 10-9 Holloway
TJ De Santis scores the round 10-9 Holloway
Chris Nelson scores the round 10-9 Holloway
Round 2
Miller pushes Holloway backward with front and low kicks, keeping the smaller man out of striking range. Holloway answers with a spinning-back kick to the midsection, takes another slap to the lead leg and circles out to reset. Holloway is touching Miller’s chin with reaching punches but the strikes don’t appear to have a lot behind them. Miller continues his leg-kicking before shooting for a double-leg two minutes into the round. When it looks like Holloway will defend, Miller pulls guard and Holloway bails. Back up comes Miller halfway through the round and the fight, and Holloway catches him with a spinning-back fist. Holloway rushes into the pocket, swinging hands, but his head slams into the outside of Miller’s left eye. Miller drops to a knee, bleeding from the spot of the accidental clash of heads, and referee Adam Martinez pauses the fight. The bleeding subsides after a minute and Miller indicates that he’s ready to go. Holloway checks an inside leg kick and puts a kick on Miller’s body. A slapping body kick lands on Holloway’s left side courtesy of Miller, who backpedals around the outside while Holloway works from the center. Holloway closes the distance and shoves Miller against the fence with underhooks. Miller shakes him off with 30 seconds on the clock, but Holloway is soon back in his face with a leaping knee and another clinch to close the round. Miller’s eye is bleeding again at the end of the round, and the fighter tells referee Martinez that Holloway headbutted him again at the end of the round.
Sherdog Scores
Jordan Breen scores the round 10-9 Holloway
TJ De Santis scores the round 10-9 Holloway
Chris Nelson scores the round 10-9 Holloway
Round 3
Miller swings punches upstairs but is having less success at the start of round three, as Holloway is changing levels while striking and throwing body shots. A spinning-back fist clips Miller near the fence before Holloway denies a clinch and throws the taller fighter to the ground. Holloway tags Miller with a combination before the featherweights tie up away from the fence and trade knees to the body. An overhand right gets Miller turning to his right side, where Holloway is waiting with a follow-up left hook. Holloway goes body-head with a combo and narrowly misses with another spinning shot. Holloway ducks under a left hand from Miller and cracks him with a straight counter than sends “Magrinho” moving backward to the fence. With 90 seconds left, Holloway backs off and draws Miller forward, cracking the American Top Team fighter with a pair of hooks to the damaged eye. Miller tries a double-leg on the fence, can’t get it and pulls guard instead. Holloway stands and invites Miller to do the same with less than one minute remaining. Holloway is going wild before the bell, launching a variety of flashy spinning kicks at Miller, though none appear to land cleanly.
Sherdog Scores
Jordan Breen scores the round 10-9 Holloway (30-27 Holloway)
TJ De Santis scores the round 10-9 Holloway (30-27 Holloway)
Chris Nelson scores the round 10-9 Holloway (30-27 Holloway)
The Official Result
Max Holloway def. Cole Miller via Unanimous Decision (30-27, 29-28, 29-28) R3 5:00
Totals
| Fighter | KD | Sig. Str. | Sig. Str. % | Total Str. | TD | TD % | Sub. Att | Rev. | Ctrl |
|---|---|---|---|---|---|---|---|---|---|
| Cole Miller | 1 | 38 of 91 | 41% | 38 of 91 | 0 of 0 | --- | 1 | 0 | 0:24 |
| Sam Sicilia | 0 | 14 of 56 | 25% | 14 of 56 | 0 of 2 | 0% | 0 | 0 | 0:00 |
Per Round
| Rd | Fighter | KD | Sig. Str. | Sig. Str. % | Total Str. | TD | TD % | Sub. Att | Rev. | Ctrl |
|---|---|---|---|---|---|---|---|---|---|---|
| 1 | Cole Miller | 0 | 24 of 62 | 38% | 24 of 62 | 0 of 0 | --- | 0 | 0 | 0:00 |
| Sam Sicilia | 0 | 8 of 45 | 17% | 8 of 45 | 0 of 0 | --- | 0 | 0 | 0:00 | |
| 2 | Cole Miller | 1 | 14 of 29 | 48% | 14 of 29 | 0 of 0 | --- | 1 | 0 | 0:24 |
| Sam Sicilia | 0 | 6 of 11 | 54% | 6 of 11 | 0 of 2 | 0% | 0 | 0 | 0:00 |
Significant Strikes
| Fighter | Sig. Str. | Sig. Str. % | Head | Body | Leg | Distance | Clinch | Ground |
|---|---|---|---|---|---|---|---|---|
| Cole Miller | 38 of 91 | 41% | 27 of 74 | 4 of 10 | 7 of 7 | 37 of 88 | 0 of 2 | 1 of 1 |
| Sam Sicilia | 14 of 56 | 25% | 5 of 47 | 5 of 5 | 4 of 4 | 14 of 56 | 0 of 0 | 0 of 0 |
Significant Strikes Per Round
| Rd | Fighter | Sig. Str. | Sig. Str. % | Head | Body | Leg | Distance | Clinch | Ground |
|---|---|---|---|---|---|---|---|---|---|
| 1 | Cole Miller | 24 of 62 | 38% | 16 of 49 | 2 of 7 | 6 of 6 | 24 of 62 | 0 of 0 | 0 of 0 |
| Sam Sicilia | 8 of 45 | 17% | 4 of 41 | 1 of 1 | 3 of 3 | 8 of 45 | 0 of 0 | 0 of 0 | |
| 2 | Cole Miller | 14 of 29 | 48% | 11 of 25 | 2 of 3 | 1 of 1 | 13 of 26 | 0 of 2 | 1 of 1 |
| Sam Sicilia | 6 of 11 | 54% | 1 of 6 | 4 of 4 | 1 of 1 | 6 of 11 | 0 of 0 | 0 of 0 |
Totals
| Fighter | KD | Sig. Str. | Sig. Str. % | Total Str. | TD | TD % | Sub. Att | Rev. | Ctrl |
|---|---|---|---|---|---|---|---|---|---|
| Cole Miller | 0 | 27 of 51 | 52% | 112 of 138 | 2 of 6 | 33% | 0 | 0 | 7:44 |
| Andy Ogle | 0 | 21 of 40 | 52% | 55 of 75 | 0 of 0 | --- | 1 | 2 | 4:27 |
Per Round
| Rd | Fighter | KD | Sig. Str. | Sig. Str. % | Total Str. | TD | TD % | Sub. Att | Rev. | Ctrl |
|---|---|---|---|---|---|---|---|---|---|---|
| 1 | Cole Miller | 0 | 2 of 8 | 25% | 44 of 51 | 1 of 2 | 50% | 0 | 0 | 1:11 |
| Andy Ogle | 0 | 12 of 18 | 66% | 18 of 24 | 0 of 0 | --- | 0 | 1 | 2:57 | |
| 2 | Cole Miller | 0 | 4 of 6 | 66% | 18 of 21 | 0 of 3 | 0% | 0 | 0 | 2:46 |
| Andy Ogle | 0 | 3 of 8 | 37% | 24 of 30 | 0 of 0 | --- | 1 | 1 | 1:30 | |
| 3 | Cole Miller | 0 | 21 of 37 | 56% | 50 of 66 | 1 of 1 | 100% | 0 | 0 | 3:47 |
| Andy Ogle | 0 | 6 of 14 | 42% | 13 of 21 | 0 of 0 | --- | 0 | 0 | 0:00 |
Significant Strikes
| Fighter | Sig. Str. | Sig. Str. % | Head | Body | Leg | Distance | Clinch | Ground |
|---|---|---|---|---|---|---|---|---|
| Cole Miller | 27 of 51 | 52% | 14 of 34 | 8 of 12 | 5 of 5 | 23 of 42 | 0 of 0 | 4 of 9 |
| Andy Ogle | 21 of 40 | 52% | 17 of 34 | 4 of 5 | 0 of 1 | 16 of 35 | 3 of 3 | 2 of 2 |
Significant Strikes Per Round
| Rd | Fighter | Sig. Str. | Sig. Str. % | Head | Body | Leg | Distance | Clinch | Ground |
|---|---|---|---|---|---|---|---|---|---|
| 1 | Cole Miller | 2 of 8 | 25% | 0 of 5 | 2 of 3 | 0 of 0 | 2 of 8 | 0 of 0 | 0 of 0 |
| Andy Ogle | 12 of 18 | 66% | 9 of 15 | 3 of 3 | 0 of 0 | 7 of 13 | 3 of 3 | 2 of 2 | |
| 2 | Cole Miller | 4 of 6 | 66% | 2 of 4 | 0 of 0 | 2 of 2 | 4 of 6 | 0 of 0 | 0 of 0 |
| Andy Ogle | 3 of 8 | 37% | 3 of 8 | 0 of 0 | 0 of 0 | 3 of 8 | 0 of 0 | 0 of 0 | |
| 3 | Cole Miller | 21 of 37 | 56% | 12 of 25 | 6 of 9 | 3 of 3 | 17 of 28 | 0 of 0 | 4 of 9 |
| Andy Ogle | 6 of 14 | 42% | 5 of 11 | 1 of 2 | 0 of 1 | 6 of 14 | 0 of 0 | 0 of 0 |
Totals
| Fighter | KD | Sig. Str. | Sig. Str. % | Total Str. | TD | TD % | Sub. Att | Rev. | Ctrl |
|---|---|---|---|---|---|---|---|---|---|
| Manvel Gamburyan | 0 | 23 of 62 | 37% | 84 of 126 | 5 of 7 | 71% | 0 | 0 | 7:52 |
| Cole Miller | 0 | 32 of 112 | 28% | 94 of 175 | 0 of 0 | --- | 0 | 0 | 0:06 |
Per Round
| Rd | Fighter | KD | Sig. Str. | Sig. Str. % | Total Str. | TD | TD % | Sub. Att | Rev. | Ctrl |
|---|---|---|---|---|---|---|---|---|---|---|
| 1 | Manvel Gamburyan | 0 | 6 of 23 | 26% | 11 of 28 | 1 of 1 | 100% | 0 | 0 | 1:28 |
| Cole Miller | 0 | 11 of 48 | 22% | 16 of 53 | 0 of 0 | --- | 0 | 0 | 0:00 | |
| 2 | Manvel Gamburyan | 0 | 6 of 14 | 42% | 31 of 39 | 3 of 5 | 60% | 0 | 0 | 3:15 |
| Cole Miller | 0 | 14 of 33 | 42% | 23 of 42 | 0 of 0 | --- | 0 | 0 | 0:06 | |
| 3 | Manvel Gamburyan | 0 | 11 of 25 | 44% | 42 of 59 | 1 of 1 | 100% | 0 | 0 | 3:09 |
| Cole Miller | 0 | 7 of 31 | 22% | 55 of 80 | 0 of 0 | --- | 0 | 0 | 0:00 |
Significant Strikes
| Fighter | Sig. Str. | Sig. Str. % | Head | Body | Leg | Distance | Clinch | Ground |
|---|---|---|---|---|---|---|---|---|
| Manvel Gamburyan | 23 of 62 | 37% | 12 of 45 | 3 of 7 | 8 of 10 | 15 of 47 | 2 of 4 | 6 of 11 |
| Cole Miller | 32 of 112 | 28% | 28 of 105 | 4 of 7 | 0 of 0 | 22 of 101 | 8 of 9 | 2 of 2 |
Significant Strikes Per Round
| Rd | Fighter | Sig. Str. | Sig. Str. % | Head | Body | Leg | Distance | Clinch | Ground |
|---|---|---|---|---|---|---|---|---|---|
| 1 | Manvel Gamburyan | 6 of 23 | 26% | 5 of 19 | 0 of 2 | 1 of 2 | 3 of 20 | 1 of 1 | 2 of 2 |
| Cole Miller | 11 of 48 | 22% | 11 of 46 | 0 of 2 | 0 of 0 | 8 of 45 | 1 of 1 | 2 of 2 | |
| 2 | Manvel Gamburyan | 6 of 14 | 42% | 2 of 9 | 0 of 0 | 4 of 5 | 4 of 10 | 1 of 3 | 1 of 1 |
| Cole Miller | 14 of 33 | 42% | 11 of 30 | 3 of 3 | 0 of 0 | 7 of 25 | 7 of 8 | 0 of 0 | |
| 3 | Manvel Gamburyan | 11 of 25 | 44% | 5 of 17 | 3 of 5 | 3 of 3 | 8 of 17 | 0 of 0 | 3 of 8 |
| Cole Miller | 7 of 31 | 22% | 6 of 29 | 1 of 2 | 0 of 0 | 7 of 31 | 0 of 0 | 0 of 0 |
Totals
| Fighter | KD | Sig. Str. | Sig. Str. % | Total Str. | TD | TD % | Sub. Att | Rev. | Ctrl |
|---|---|---|---|---|---|---|---|---|---|
| Cole Miller | 0 | 5 of 43 | 11% | 6 of 44 | 1 of 1 | 100% | 1 | 0 | 0:45 |
| Bart Palaszewski | 0 | 18 of 62 | 29% | 18 of 62 | 0 of 0 | --- | 0 | 0 | 0:00 |
Per Round
| Rd | Fighter | KD | Sig. Str. | Sig. Str. % | Total Str. | TD | TD % | Sub. Att | Rev. | Ctrl |
|---|---|---|---|---|---|---|---|---|---|---|
| 1 | Cole Miller | 0 | 5 of 43 | 11% | 6 of 44 | 1 of 1 | 100% | 1 | 0 | 0:45 |
| Bart Palaszewski | 0 | 18 of 62 | 29% | 18 of 62 | 0 of 0 | --- | 0 | 0 | 0:00 |
Significant Strikes
| Fighter | Sig. Str. | Sig. Str. % | Head | Body | Leg | Distance | Clinch | Ground |
|---|---|---|---|---|---|---|---|---|
| Cole Miller | 5 of 43 | 11% | 1 of 36 | 1 of 4 | 3 of 3 | 5 of 43 | 0 of 0 | 0 of 0 |
| Bart Palaszewski | 18 of 62 | 29% | 7 of 48 | 2 of 4 | 9 of 10 | 17 of 61 | 0 of 0 | 1 of 1 |
Significant Strikes Per Round
| Rd | Fighter | Sig. Str. | Sig. Str. % | Head | Body | Leg | Distance | Clinch | Ground |
|---|---|---|---|---|---|---|---|---|---|
| 1 | Cole Miller | 5 of 43 | 11% | 1 of 36 | 1 of 4 | 3 of 3 | 5 of 43 | 0 of 0 | 0 of 0 |
| Bart Palaszewski | 18 of 62 | 29% | 7 of 48 | 2 of 4 | 9 of 10 | 17 of 61 | 0 of 0 | 1 of 1 |
No comments yet. Be the first to share your thoughts!