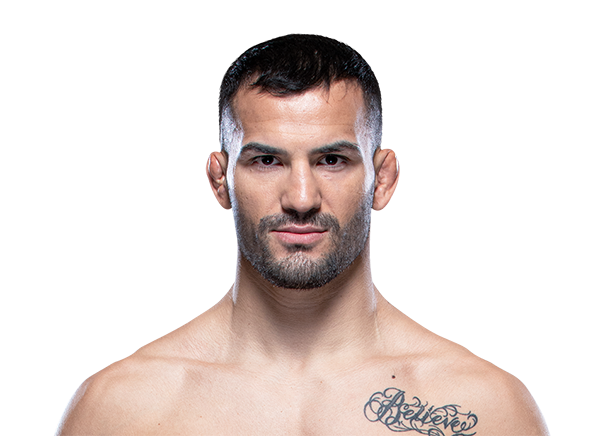
Career Averages - Mirsad Bektić
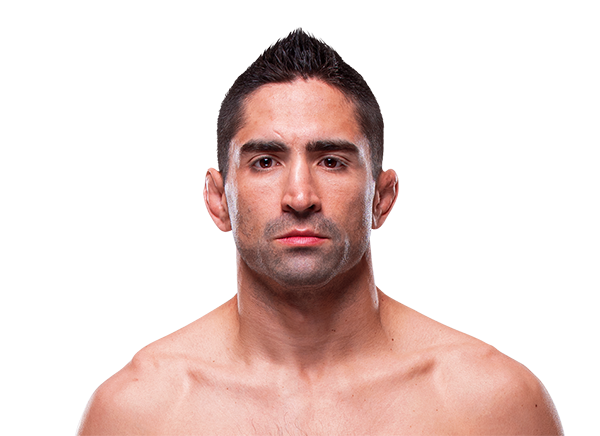
Career Averages - Ricardo Lamas
Mirsad Bektić - Fight History
Totals
| Fighter | KD | Sig. Str. | Sig. Str. % | Total Str. | TD | TD % | Sub. Att | Rev. | Ctrl |
|---|---|---|---|---|---|---|---|---|---|
| Damon Jackson | 0 | 13 of 21 | 61% | 76 of 102 | 7 of 9 | 77% | 0 | 0 | 9:24 |
| Mirsad Bektić | 0 | 12 of 26 | 46% | 20 of 34 | 0 of 0 | --- | 7 | 1 | 0:56 |
Per Round
| Rd | Fighter | KD | Sig. Str. | Sig. Str. % | Total Str. | TD | TD % | Sub. Att | Rev. | Ctrl |
|---|---|---|---|---|---|---|---|---|---|---|
| 1 | Damon Jackson | 0 | 11 of 16 | 68% | 38 of 55 | 4 of 5 | 80% | 0 | 0 | 4:25 |
| Mirsad Bektić | 0 | 1 of 3 | 33% | 1 of 3 | 0 of 0 | --- | 3 | 0 | 0:00 | |
| 2 | Damon Jackson | 0 | 2 of 5 | 40% | 35 of 44 | 2 of 3 | 66% | 0 | 0 | 4:28 |
| Mirsad Bektić | 0 | 7 of 11 | 63% | 9 of 13 | 0 of 0 | --- | 2 | 0 | 0:23 | |
| 3 | Damon Jackson | 0 | 0 of 0 | --- | 3 of 3 | 1 of 1 | 100% | 0 | 0 | 0:31 |
| Mirsad Bektić | 0 | 4 of 12 | 33% | 10 of 18 | 0 of 0 | --- | 2 | 1 | 0:33 |
Significant Strikes
| Fighter | Sig. Str. | Sig. Str. % | Head | Body | Leg | Distance | Clinch | Ground |
|---|---|---|---|---|---|---|---|---|
| Damon Jackson | 13 of 21 | 61% | 9 of 16 | 1 of 2 | 3 of 3 | 4 of 10 | 0 of 1 | 9 of 10 |
| Mirsad Bektić | 12 of 26 | 46% | 10 of 23 | 2 of 3 | 0 of 0 | 2 of 12 | 3 of 3 | 7 of 11 |
Significant Strikes Per Round
| Rd | Fighter | Sig. Str. | Sig. Str. % | Head | Body | Leg | Distance | Clinch | Ground |
|---|---|---|---|---|---|---|---|---|---|
| 1 | Damon Jackson | 11 of 16 | 68% | 8 of 13 | 1 of 1 | 2 of 2 | 2 of 6 | 0 of 0 | 9 of 10 |
| Mirsad Bektić | 1 of 3 | 33% | 1 of 2 | 0 of 1 | 0 of 0 | 1 of 2 | 0 of 0 | 0 of 1 | |
| 2 | Damon Jackson | 2 of 5 | 40% | 1 of 3 | 0 of 1 | 1 of 1 | 2 of 4 | 0 of 1 | 0 of 0 |
| Mirsad Bektić | 7 of 11 | 63% | 7 of 11 | 0 of 0 | 0 of 0 | 0 of 1 | 0 of 0 | 7 of 10 | |
| 3 | Damon Jackson | 0 of 0 | --- | 0 of 0 | 0 of 0 | 0 of 0 | 0 of 0 | 0 of 0 | 0 of 0 |
| Mirsad Bektić | 4 of 12 | 33% | 2 of 10 | 2 of 2 | 0 of 0 | 1 of 9 | 3 of 3 | 0 of 0 |
The host sees value in Damon Jackson as a short-notice replacement who has been training and is in shape, while Mirsad Bektić is on a losing streak and may be mentally down. He believes Jackson's jiu-jitsu and scrambling will give Bektić trouble, especially in later rounds where Bektić fades. He predicts a submission win for Jackson in the second or third round.
The host picks Mirsad Bektić over Damon Jackson (referred to as Eduardo Gagori, but clearly the opponent is Damon Jackson). He notes Bektić's close fight with Dan Ige and his experience against top competition, while Jackson's record is padded with lesser opponents. He predicts a second-round submission by rear-naked choke.
Totals
| Fighter | KD | Sig. Str. | Sig. Str. % | Total Str. | TD | TD % | Sub. Att | Rev. | Ctrl |
|---|---|---|---|---|---|---|---|---|---|
| Dan Ige | 0 | 17 of 60 | 28% | 29 of 74 | 3 of 10 | 30% | 1 | 0 | 6:32 |
| Mirsad Bektić | 0 | 43 of 88 | 48% | 64 of 117 | 1 of 2 | 50% | 0 | 0 | 0:53 |
Per Round
| Rd | Fighter | KD | Sig. Str. | Sig. Str. % | Total Str. | TD | TD % | Sub. Att | Rev. | Ctrl |
|---|---|---|---|---|---|---|---|---|---|---|
| 1 | Dan Ige | 0 | 7 of 26 | 26% | 9 of 28 | 0 of 3 | 0% | 0 | 0 | 0:02 |
| Mirsad Bektić | 0 | 26 of 45 | 57% | 30 of 52 | 1 of 2 | 50% | 0 | 0 | 0:51 | |
| 2 | Dan Ige | 0 | 5 of 13 | 38% | 11 of 19 | 2 of 3 | 66% | 1 | 0 | 4:31 |
| Mirsad Bektić | 0 | 4 of 8 | 50% | 13 of 19 | 0 of 0 | --- | 0 | 0 | 0:00 | |
| 3 | Dan Ige | 0 | 5 of 21 | 23% | 9 of 27 | 1 of 4 | 25% | 0 | 0 | 1:59 |
| Mirsad Bektić | 0 | 13 of 35 | 37% | 21 of 46 | 0 of 0 | --- | 0 | 0 | 0:02 |
Significant Strikes
| Fighter | Sig. Str. | Sig. Str. % | Head | Body | Leg | Distance | Clinch | Ground |
|---|---|---|---|---|---|---|---|---|
| Dan Ige | 17 of 60 | 28% | 14 of 56 | 3 of 4 | 0 of 0 | 14 of 54 | 3 of 6 | 0 of 0 |
| Mirsad Bektić | 43 of 88 | 48% | 27 of 70 | 15 of 17 | 1 of 1 | 28 of 68 | 12 of 16 | 3 of 4 |
Significant Strikes Per Round
| Rd | Fighter | Sig. Str. | Sig. Str. % | Head | Body | Leg | Distance | Clinch | Ground |
|---|---|---|---|---|---|---|---|---|---|
| 1 | Dan Ige | 7 of 26 | 26% | 6 of 24 | 1 of 2 | 0 of 0 | 4 of 20 | 3 of 6 | 0 of 0 |
| Mirsad Bektić | 26 of 45 | 57% | 15 of 34 | 10 of 10 | 1 of 1 | 16 of 30 | 7 of 11 | 3 of 4 | |
| 2 | Dan Ige | 5 of 13 | 38% | 3 of 11 | 2 of 2 | 0 of 0 | 5 of 13 | 0 of 0 | 0 of 0 |
| Mirsad Bektić | 4 of 8 | 50% | 1 of 5 | 3 of 3 | 0 of 0 | 4 of 8 | 0 of 0 | 0 of 0 | |
| 3 | Dan Ige | 5 of 21 | 23% | 5 of 21 | 0 of 0 | 0 of 0 | 5 of 21 | 0 of 0 | 0 of 0 |
| Mirsad Bektić | 13 of 35 | 37% | 11 of 31 | 2 of 4 | 0 of 0 | 8 of 30 | 5 of 5 | 0 of 0 |
Daniel Levi picks Mirsad Bektić by split decision, but is hesitant due to Bektić's suspect chin. He acknowledges Dan Ige's power and momentum, but believes Bektić's physicality and wrestling will be the difference. He warns against betting heavily on Bektić.
The host picks Mirsad Bektić by decision, believing he is undervalued due to recency bias. He notes that Bektić has better grappling and athleticism than Dan Ige, and that Ige's wins have come against lower-level competition. He expects Bektić to outgrapple Ige and control the fight, and plans to bet 1.5-2 units on him.
The MMA Guru picks Dan Ige to win by TKO in the second round. He likes Ige's reach, range control, and recent win streak. He is concerned about Bektić's KO loss to Josh Emmett via jab, which makes it hard to back him. Ige is a monster and will get a big win.
Totals
| Fighter | KD | Sig. Str. | Sig. Str. % | Total Str. | TD | TD % | Sub. Att | Rev. | Ctrl |
|---|---|---|---|---|---|---|---|---|---|
| Josh Emmett | 1 | 27 of 52 | 51% | 33 of 60 | 0 of 0 | --- | 0 | 0 | 0:29 |
| Mirsad Bektić | 0 | 10 of 65 | 15% | 10 of 65 | 0 of 0 | --- | 0 | 0 | 0:00 |
Per Round
| Rd | Fighter | KD | Sig. Str. | Sig. Str. % | Total Str. | TD | TD % | Sub. Att | Rev. | Ctrl |
|---|---|---|---|---|---|---|---|---|---|---|
| 1 | Josh Emmett | 1 | 27 of 52 | 51% | 33 of 60 | 0 of 0 | --- | 0 | 0 | 0:29 |
| Mirsad Bektić | 0 | 10 of 65 | 15% | 10 of 65 | 0 of 0 | --- | 0 | 0 | 0:00 |
Significant Strikes
| Fighter | Sig. Str. | Sig. Str. % | Head | Body | Leg | Distance | Clinch | Ground |
|---|---|---|---|---|---|---|---|---|
| Josh Emmett | 27 of 52 | 51% | 22 of 43 | 3 of 6 | 2 of 3 | 12 of 32 | 0 of 0 | 15 of 20 |
| Mirsad Bektić | 10 of 65 | 15% | 8 of 62 | 1 of 2 | 1 of 1 | 10 of 65 | 0 of 0 | 0 of 0 |
Significant Strikes Per Round
| Rd | Fighter | Sig. Str. | Sig. Str. % | Head | Body | Leg | Distance | Clinch | Ground |
|---|---|---|---|---|---|---|---|---|---|
| 1 | Josh Emmett | 27 of 52 | 51% | 22 of 43 | 3 of 6 | 2 of 3 | 12 of 32 | 0 of 0 | 15 of 20 |
| Mirsad Bektić | 10 of 65 | 15% | 8 of 62 | 1 of 2 | 1 of 1 | 10 of 65 | 0 of 0 | 0 of 0 |
Totals
| Fighter | KD | Sig. Str. | Sig. Str. % | Total Str. | TD | TD % | Sub. Att | Rev. | Ctrl |
|---|---|---|---|---|---|---|---|---|---|
| Mirsad Bektić | 0 | 34 of 62 | 54% | 69 of 97 | 0 of 4 | 0% | 2 | 1 | 0:54 |
| Ricardo Lamas | 0 | 31 of 89 | 34% | 97 of 174 | 2 of 4 | 50% | 0 | 0 | 8:37 |
Per Round
| Rd | Fighter | KD | Sig. Str. | Sig. Str. % | Total Str. | TD | TD % | Sub. Att | Rev. | Ctrl |
|---|---|---|---|---|---|---|---|---|---|---|
| 1 | Mirsad Bektić | 0 | 12 of 21 | 57% | 17 of 26 | 0 of 3 | 0% | 0 | 0 | 0:49 |
| Ricardo Lamas | 0 | 12 of 28 | 42% | 53 of 82 | 1 of 1 | 100% | 0 | 0 | 2:12 | |
| 2 | Mirsad Bektić | 0 | 18 of 29 | 62% | 30 of 41 | 0 of 1 | 0% | 0 | 0 | 0:00 |
| Ricardo Lamas | 0 | 13 of 45 | 28% | 23 of 59 | 0 of 0 | --- | 0 | 0 | 2:19 | |
| 3 | Mirsad Bektić | 0 | 4 of 12 | 33% | 22 of 30 | 0 of 0 | --- | 2 | 1 | 0:05 |
| Ricardo Lamas | 0 | 6 of 16 | 37% | 21 of 33 | 1 of 3 | 33% | 0 | 0 | 4:06 |
Significant Strikes
| Fighter | Sig. Str. | Sig. Str. % | Head | Body | Leg | Distance | Clinch | Ground |
|---|---|---|---|---|---|---|---|---|
| Mirsad Bektić | 34 of 62 | 54% | 8 of 34 | 21 of 23 | 5 of 5 | 15 of 40 | 19 of 20 | 0 of 2 |
| Ricardo Lamas | 31 of 89 | 34% | 12 of 65 | 15 of 18 | 4 of 6 | 15 of 62 | 14 of 23 | 2 of 4 |
Significant Strikes Per Round
| Rd | Fighter | Sig. Str. | Sig. Str. % | Head | Body | Leg | Distance | Clinch | Ground |
|---|---|---|---|---|---|---|---|---|---|
| 1 | Mirsad Bektić | 12 of 21 | 57% | 1 of 9 | 10 of 11 | 1 of 1 | 1 of 9 | 11 of 12 | 0 of 0 |
| Ricardo Lamas | 12 of 28 | 42% | 2 of 15 | 9 of 10 | 1 of 3 | 3 of 14 | 8 of 11 | 1 of 3 | |
| 2 | Mirsad Bektić | 18 of 29 | 62% | 5 of 15 | 9 of 10 | 4 of 4 | 10 of 21 | 8 of 8 | 0 of 0 |
| Ricardo Lamas | 13 of 45 | 28% | 7 of 37 | 3 of 5 | 3 of 3 | 7 of 33 | 6 of 12 | 0 of 0 | |
| 3 | Mirsad Bektić | 4 of 12 | 33% | 2 of 10 | 2 of 2 | 0 of 0 | 4 of 10 | 0 of 0 | 0 of 2 |
| Ricardo Lamas | 6 of 16 | 37% | 3 of 13 | 3 of 3 | 0 of 0 | 5 of 15 | 0 of 0 | 1 of 1 |
Totals
| Fighter | KD | Sig. Str. | Sig. Str. % | Total Str. | TD | TD % | Sub. Att | Rev. | Ctrl |
|---|---|---|---|---|---|---|---|---|---|
| Mirsad Bektić | 1 | 12 of 33 | 36% | 12 of 34 | 0 of 0 | --- | 0 | 0 | 0:04 |
| Godofredo Pepey | 0 | 5 of 17 | 29% | 5 of 17 | 0 of 0 | --- | 0 | 0 | 0:00 |
Per Round
| Rd | Fighter | KD | Sig. Str. | Sig. Str. % | Total Str. | TD | TD % | Sub. Att | Rev. | Ctrl |
|---|---|---|---|---|---|---|---|---|---|---|
| 1 | Mirsad Bektić | 1 | 12 of 33 | 36% | 12 of 34 | 0 of 0 | --- | 0 | 0 | 0:04 |
| Godofredo Pepey | 0 | 5 of 17 | 29% | 5 of 17 | 0 of 0 | --- | 0 | 0 | 0:00 |
Significant Strikes
| Fighter | Sig. Str. | Sig. Str. % | Head | Body | Leg | Distance | Clinch | Ground |
|---|---|---|---|---|---|---|---|---|
| Mirsad Bektić | 12 of 33 | 36% | 7 of 24 | 1 of 4 | 4 of 5 | 9 of 29 | 0 of 0 | 3 of 4 |
| Godofredo Pepey | 5 of 17 | 29% | 2 of 12 | 2 of 4 | 1 of 1 | 4 of 16 | 1 of 1 | 0 of 0 |
Significant Strikes Per Round
| Rd | Fighter | Sig. Str. | Sig. Str. % | Head | Body | Leg | Distance | Clinch | Ground |
|---|---|---|---|---|---|---|---|---|---|
| 1 | Mirsad Bektić | 12 of 33 | 36% | 7 of 24 | 1 of 4 | 4 of 5 | 9 of 29 | 0 of 0 | 3 of 4 |
| Godofredo Pepey | 5 of 17 | 29% | 2 of 12 | 2 of 4 | 1 of 1 | 4 of 16 | 1 of 1 | 0 of 0 |
Totals
| Fighter | KD | Sig. Str. | Sig. Str. % | Total Str. | TD | TD % | Sub. Att | Rev. | Ctrl |
|---|---|---|---|---|---|---|---|---|---|
| Darren Elkins | 0 | 60 of 98 | 61% | 146 of 196 | 4 of 10 | 40% | 0 | 0 | 9:05 |
| Mirsad Bektić | 1 | 28 of 59 | 47% | 72 of 109 | 0 of 1 | 0% | 1 | 1 | 1:22 |
Per Round
| Rd | Fighter | KD | Sig. Str. | Sig. Str. % | Total Str. | TD | TD % | Sub. Att | Rev. | Ctrl |
|---|---|---|---|---|---|---|---|---|---|---|
| 1 | Darren Elkins | 0 | 39 of 57 | 68% | 102 of 129 | 1 of 1 | 100% | 0 | 0 | 4:22 |
| Mirsad Bektić | 0 | 3 of 11 | 27% | 6 of 14 | 0 of 0 | --- | 0 | 0 | 0:00 | |
| 2 | Darren Elkins | 0 | 16 of 22 | 72% | 39 of 48 | 2 of 5 | 40% | 0 | 0 | 3:27 |
| Mirsad Bektić | 0 | 13 of 21 | 61% | 44 of 54 | 0 of 1 | 0% | 0 | 0 | 0:38 | |
| 3 | Darren Elkins | 0 | 5 of 19 | 26% | 5 of 19 | 1 of 4 | 25% | 0 | 0 | 1:16 |
| Mirsad Bektić | 1 | 12 of 27 | 44% | 22 of 41 | 0 of 0 | --- | 1 | 1 | 0:44 |
Significant Strikes
| Fighter | Sig. Str. | Sig. Str. % | Head | Body | Leg | Distance | Clinch | Ground |
|---|---|---|---|---|---|---|---|---|
| Darren Elkins | 60 of 98 | 61% | 55 of 91 | 4 of 5 | 1 of 2 | 17 of 48 | 7 of 8 | 36 of 42 |
| Mirsad Bektić | 28 of 59 | 47% | 14 of 45 | 10 of 10 | 4 of 4 | 6 of 36 | 10 of 11 | 12 of 12 |
Significant Strikes Per Round
| Rd | Fighter | Sig. Str. | Sig. Str. % | Head | Body | Leg | Distance | Clinch | Ground |
|---|---|---|---|---|---|---|---|---|---|
| 1 | Darren Elkins | 39 of 57 | 68% | 38 of 55 | 1 of 2 | 0 of 0 | 6 of 18 | 0 of 0 | 33 of 39 |
| Mirsad Bektić | 3 of 11 | 27% | 3 of 11 | 0 of 0 | 0 of 0 | 3 of 11 | 0 of 0 | 0 of 0 | |
| 2 | Darren Elkins | 16 of 22 | 72% | 12 of 17 | 3 of 3 | 1 of 2 | 6 of 11 | 7 of 8 | 3 of 3 |
| Mirsad Bektić | 13 of 21 | 61% | 5 of 13 | 6 of 6 | 2 of 2 | 0 of 8 | 6 of 6 | 7 of 7 | |
| 3 | Darren Elkins | 5 of 19 | 26% | 5 of 19 | 0 of 0 | 0 of 0 | 5 of 19 | 0 of 0 | 0 of 0 |
| Mirsad Bektić | 12 of 27 | 44% | 6 of 21 | 4 of 4 | 2 of 2 | 3 of 17 | 4 of 5 | 5 of 5 |
Totals
| Fighter | KD | Sig. Str. | Sig. Str. % | Total Str. | TD | TD % | Sub. Att | Rev. | Ctrl |
|---|---|---|---|---|---|---|---|---|---|
| Mirsad Bektić | 0 | 4 of 10 | 40% | 20 of 27 | 4 of 6 | 66% | 2 | 0 | 3:21 |
| Russell Doane | 0 | 6 of 15 | 40% | 6 of 16 | 0 of 0 | --- | 0 | 0 | 0:00 |
Per Round
| Rd | Fighter | KD | Sig. Str. | Sig. Str. % | Total Str. | TD | TD % | Sub. Att | Rev. | Ctrl |
|---|---|---|---|---|---|---|---|---|---|---|
| 1 | Mirsad Bektić | 0 | 4 of 10 | 40% | 20 of 27 | 4 of 6 | 66% | 2 | 0 | 3:21 |
| Russell Doane | 0 | 6 of 15 | 40% | 6 of 16 | 0 of 0 | --- | 0 | 0 | 0:00 |
Significant Strikes
| Fighter | Sig. Str. | Sig. Str. % | Head | Body | Leg | Distance | Clinch | Ground |
|---|---|---|---|---|---|---|---|---|
| Mirsad Bektić | 4 of 10 | 40% | 4 of 10 | 0 of 0 | 0 of 0 | 4 of 10 | 0 of 0 | 0 of 0 |
| Russell Doane | 6 of 15 | 40% | 3 of 9 | 0 of 1 | 3 of 5 | 4 of 11 | 1 of 1 | 1 of 3 |
Significant Strikes Per Round
| Rd | Fighter | Sig. Str. | Sig. Str. % | Head | Body | Leg | Distance | Clinch | Ground |
|---|---|---|---|---|---|---|---|---|---|
| 1 | Mirsad Bektić | 4 of 10 | 40% | 4 of 10 | 0 of 0 | 0 of 0 | 4 of 10 | 0 of 0 | 0 of 0 |
| Russell Doane | 6 of 15 | 40% | 3 of 9 | 0 of 1 | 3 of 5 | 4 of 11 | 1 of 1 | 1 of 3 |
Totals
| Fighter | KD | Sig. Str. | Sig. Str. % | Total Str. | TD | TD % | Sub. Att | Rev. | Ctrl |
|---|---|---|---|---|---|---|---|---|---|
| Mirsad Bektić | 0 | 7 of 23 | 30% | 11 of 27 | 0 of 0 | --- | 0 | 0 | 0:00 |
| Lucas Martins | 1 | 39 of 69 | 56% | 78 of 123 | 3 of 5 | 60% | 0 | 0 | 4:50 |
Per Round
| Rd | Fighter | KD | Sig. Str. | Sig. Str. % | Total Str. | TD | TD % | Sub. Att | Rev. | Ctrl |
|---|---|---|---|---|---|---|---|---|---|---|
| 1 | Mirsad Bektić | 0 | 5 of 18 | 27% | 9 of 22 | 0 of 0 | --- | 0 | 0 | 0:00 |
| Lucas Martins | 0 | 17 of 25 | 68% | 52 of 73 | 3 of 5 | 60% | 0 | 0 | 4:27 | |
| 2 | Mirsad Bektić | 0 | 2 of 5 | 40% | 2 of 5 | 0 of 0 | --- | 0 | 0 | 0:00 |
| Lucas Martins | 1 | 22 of 44 | 50% | 26 of 50 | 0 of 0 | --- | 0 | 0 | 0:23 |
Significant Strikes
| Fighter | Sig. Str. | Sig. Str. % | Head | Body | Leg | Distance | Clinch | Ground |
|---|---|---|---|---|---|---|---|---|
| Mirsad Bektić | 7 of 23 | 30% | 7 of 23 | 0 of 0 | 0 of 0 | 7 of 23 | 0 of 0 | 0 of 0 |
| Lucas Martins | 39 of 69 | 56% | 38 of 68 | 1 of 1 | 0 of 0 | 8 of 17 | 0 of 0 | 31 of 52 |
Significant Strikes Per Round
| Rd | Fighter | Sig. Str. | Sig. Str. % | Head | Body | Leg | Distance | Clinch | Ground |
|---|---|---|---|---|---|---|---|---|---|
| 1 | Mirsad Bektić | 5 of 18 | 27% | 5 of 18 | 0 of 0 | 0 of 0 | 5 of 18 | 0 of 0 | 0 of 0 |
| Lucas Martins | 17 of 25 | 68% | 16 of 24 | 1 of 1 | 0 of 0 | 6 of 13 | 0 of 0 | 11 of 12 | |
| 2 | Mirsad Bektić | 2 of 5 | 40% | 2 of 5 | 0 of 0 | 0 of 0 | 2 of 5 | 0 of 0 | 0 of 0 |
| Lucas Martins | 22 of 44 | 50% | 22 of 44 | 0 of 0 | 0 of 0 | 2 of 4 | 0 of 0 | 20 of 40 |
Ricardo Lamas - Fight History
Totals
| Fighter | KD | Sig. Str. | Sig. Str. % | Total Str. | TD | TD % | Sub. Att | Rev. | Ctrl |
|---|---|---|---|---|---|---|---|---|---|
| Ricardo Lamas | 0 | 104 of 156 | 66% | 127 of 180 | 5 of 11 | 45% | 0 | 1 | 6:13 |
| Bill Algeo | 0 | 89 of 168 | 52% | 145 of 224 | 1 of 1 | 100% | 0 | 0 | 1:19 |
Per Round
| Rd | Fighter | KD | Sig. Str. | Sig. Str. % | Total Str. | TD | TD % | Sub. Att | Rev. | Ctrl |
|---|---|---|---|---|---|---|---|---|---|---|
| 1 | Ricardo Lamas | 0 | 47 of 71 | 66% | 48 of 72 | 1 of 2 | 50% | 0 | 0 | 0:32 |
| Bill Algeo | 0 | 41 of 80 | 51% | 47 of 86 | 0 of 0 | --- | 0 | 0 | 0:35 | |
| 2 | Ricardo Lamas | 0 | 23 of 38 | 60% | 23 of 38 | 1 of 4 | 25% | 0 | 1 | 1:53 |
| Bill Algeo | 0 | 34 of 65 | 52% | 66 of 97 | 1 of 1 | 100% | 0 | 0 | 0:44 | |
| 3 | Ricardo Lamas | 0 | 34 of 47 | 72% | 56 of 70 | 3 of 5 | 60% | 0 | 0 | 3:48 |
| Bill Algeo | 0 | 14 of 23 | 60% | 32 of 41 | 0 of 0 | --- | 0 | 0 | 0:00 |
Significant Strikes
| Fighter | Sig. Str. | Sig. Str. % | Head | Body | Leg | Distance | Clinch | Ground |
|---|---|---|---|---|---|---|---|---|
| Ricardo Lamas | 104 of 156 | 66% | 64 of 106 | 20 of 25 | 20 of 25 | 62 of 108 | 14 of 15 | 28 of 33 |
| Bill Algeo | 89 of 168 | 52% | 57 of 124 | 22 of 32 | 10 of 12 | 71 of 145 | 16 of 21 | 2 of 2 |
Significant Strikes Per Round
| Rd | Fighter | Sig. Str. | Sig. Str. % | Head | Body | Leg | Distance | Clinch | Ground |
|---|---|---|---|---|---|---|---|---|---|
| 1 | Ricardo Lamas | 47 of 71 | 66% | 25 of 45 | 10 of 13 | 12 of 13 | 42 of 65 | 5 of 6 | 0 of 0 |
| Bill Algeo | 41 of 80 | 51% | 28 of 60 | 8 of 14 | 5 of 6 | 37 of 75 | 4 of 5 | 0 of 0 | |
| 2 | Ricardo Lamas | 23 of 38 | 60% | 11 of 23 | 7 of 8 | 5 of 7 | 15 of 30 | 8 of 8 | 0 of 0 |
| Bill Algeo | 34 of 65 | 52% | 22 of 50 | 11 of 13 | 1 of 2 | 22 of 49 | 12 of 16 | 0 of 0 | |
| 3 | Ricardo Lamas | 34 of 47 | 72% | 28 of 38 | 3 of 4 | 3 of 5 | 5 of 13 | 1 of 1 | 28 of 33 |
| Bill Algeo | 14 of 23 | 60% | 7 of 14 | 3 of 5 | 4 of 4 | 12 of 21 | 0 of 0 | 2 of 2 |
Big Brady is confident in Lamas, citing his elite competition history and superior wrestling and BJJ. He sees Algeo as a step down in competition and expects Lamas to win via ground-and-pound or submission, predicting a second-round finish. He notes Lamas' chin is a concern but Algeo is not a big puncher.
Daniel Levi picks Ricardo Lamas but is hesitant due to Lamas's age (38) and history of brutal knockouts. He believes Lamas is better everywhere and more experienced, but notes that Algeo is long and tough, and could potentially catch Lamas with a shot. He expects Lamas to win by unanimous decision but warns against the price.
Lamas is a veteran with far superior competition and a well-rounded game including kickboxing, wrestling, and jiu-jitsu. Algeo's record is padded with cans and he struggled against wrestlers. Lamas will implement a grappling-heavy game plan and likely submit Algeo in the second round.
Totals
| Fighter | KD | Sig. Str. | Sig. Str. % | Total Str. | TD | TD % | Sub. Att | Rev. | Ctrl |
|---|---|---|---|---|---|---|---|---|---|
| Calvin Kattar | 0 | 12 of 29 | 41% | 12 of 29 | 0 of 1 | 0% | 0 | 0 | 0:00 |
| Ricardo Lamas | 1 | 22 of 41 | 53% | 22 of 41 | 0 of 0 | --- | 0 | 0 | 0:02 |
Per Round
| Rd | Fighter | KD | Sig. Str. | Sig. Str. % | Total Str. | TD | TD % | Sub. Att | Rev. | Ctrl |
|---|---|---|---|---|---|---|---|---|---|---|
| 1 | Calvin Kattar | 0 | 12 of 29 | 41% | 12 of 29 | 0 of 1 | 0% | 0 | 0 | 0:00 |
| Ricardo Lamas | 1 | 22 of 41 | 53% | 22 of 41 | 0 of 0 | --- | 0 | 0 | 0:02 |
Significant Strikes
| Fighter | Sig. Str. | Sig. Str. % | Head | Body | Leg | Distance | Clinch | Ground |
|---|---|---|---|---|---|---|---|---|
| Calvin Kattar | 12 of 29 | 41% | 2 of 12 | 4 of 5 | 6 of 12 | 12 of 29 | 0 of 0 | 0 of 0 |
| Ricardo Lamas | 22 of 41 | 53% | 11 of 28 | 11 of 13 | 0 of 0 | 16 of 34 | 2 of 2 | 4 of 5 |
Significant Strikes Per Round
| Rd | Fighter | Sig. Str. | Sig. Str. % | Head | Body | Leg | Distance | Clinch | Ground |
|---|---|---|---|---|---|---|---|---|---|
| 1 | Calvin Kattar | 12 of 29 | 41% | 2 of 12 | 4 of 5 | 6 of 12 | 12 of 29 | 0 of 0 | 0 of 0 |
| Ricardo Lamas | 22 of 41 | 53% | 11 of 28 | 11 of 13 | 0 of 0 | 16 of 34 | 2 of 2 | 4 of 5 |
Totals
| Fighter | KD | Sig. Str. | Sig. Str. % | Total Str. | TD | TD % | Sub. Att | Rev. | Ctrl |
|---|---|---|---|---|---|---|---|---|---|
| Ricardo Lamas | 0 | 70 of 123 | 56% | 80 of 134 | 3 of 5 | 60% | 0 | 1 | 2:32 |
| Darren Elkins | 0 | 62 of 174 | 35% | 81 of 196 | 3 of 6 | 50% | 0 | 0 | 2:39 |
Per Round
| Rd | Fighter | KD | Sig. Str. | Sig. Str. % | Total Str. | TD | TD % | Sub. Att | Rev. | Ctrl |
|---|---|---|---|---|---|---|---|---|---|---|
| 1 | Ricardo Lamas | 0 | 14 of 30 | 46% | 17 of 33 | 1 of 1 | 100% | 0 | 0 | 0:26 |
| Darren Elkins | 0 | 20 of 53 | 37% | 28 of 62 | 2 of 4 | 50% | 0 | 0 | 1:42 | |
| 2 | Ricardo Lamas | 0 | 28 of 53 | 52% | 29 of 54 | 1 of 1 | 100% | 0 | 1 | 0:35 |
| Darren Elkins | 0 | 21 of 61 | 34% | 24 of 65 | 1 of 1 | 100% | 0 | 0 | 0:46 | |
| 3 | Ricardo Lamas | 0 | 28 of 40 | 70% | 34 of 47 | 1 of 3 | 33% | 0 | 0 | 1:31 |
| Darren Elkins | 0 | 21 of 60 | 35% | 29 of 69 | 0 of 1 | 0% | 0 | 0 | 0:11 |
Significant Strikes
| Fighter | Sig. Str. | Sig. Str. % | Head | Body | Leg | Distance | Clinch | Ground |
|---|---|---|---|---|---|---|---|---|
| Ricardo Lamas | 70 of 123 | 56% | 39 of 88 | 14 of 15 | 17 of 20 | 43 of 93 | 10 of 12 | 17 of 18 |
| Darren Elkins | 62 of 174 | 35% | 50 of 151 | 10 of 21 | 2 of 2 | 48 of 151 | 13 of 21 | 1 of 2 |
Significant Strikes Per Round
| Rd | Fighter | Sig. Str. | Sig. Str. % | Head | Body | Leg | Distance | Clinch | Ground |
|---|---|---|---|---|---|---|---|---|---|
| 1 | Ricardo Lamas | 14 of 30 | 46% | 6 of 21 | 3 of 4 | 5 of 5 | 12 of 26 | 2 of 4 | 0 of 0 |
| Darren Elkins | 20 of 53 | 37% | 14 of 43 | 5 of 9 | 1 of 1 | 14 of 45 | 6 of 8 | 0 of 0 | |
| 2 | Ricardo Lamas | 28 of 53 | 52% | 15 of 37 | 5 of 5 | 8 of 11 | 20 of 45 | 3 of 3 | 5 of 5 |
| Darren Elkins | 21 of 61 | 34% | 17 of 52 | 4 of 9 | 0 of 0 | 18 of 56 | 3 of 5 | 0 of 0 | |
| 3 | Ricardo Lamas | 28 of 40 | 70% | 18 of 30 | 6 of 6 | 4 of 4 | 11 of 22 | 5 of 5 | 12 of 13 |
| Darren Elkins | 21 of 60 | 35% | 19 of 56 | 1 of 3 | 1 of 1 | 16 of 50 | 4 of 8 | 1 of 2 |
Totals
| Fighter | KD | Sig. Str. | Sig. Str. % | Total Str. | TD | TD % | Sub. Att | Rev. | Ctrl |
|---|---|---|---|---|---|---|---|---|---|
| Mirsad Bektić | 0 | 34 of 62 | 54% | 69 of 97 | 0 of 4 | 0% | 2 | 1 | 0:54 |
| Ricardo Lamas | 0 | 31 of 89 | 34% | 97 of 174 | 2 of 4 | 50% | 0 | 0 | 8:37 |
Per Round
| Rd | Fighter | KD | Sig. Str. | Sig. Str. % | Total Str. | TD | TD % | Sub. Att | Rev. | Ctrl |
|---|---|---|---|---|---|---|---|---|---|---|
| 1 | Mirsad Bektić | 0 | 12 of 21 | 57% | 17 of 26 | 0 of 3 | 0% | 0 | 0 | 0:49 |
| Ricardo Lamas | 0 | 12 of 28 | 42% | 53 of 82 | 1 of 1 | 100% | 0 | 0 | 2:12 | |
| 2 | Mirsad Bektić | 0 | 18 of 29 | 62% | 30 of 41 | 0 of 1 | 0% | 0 | 0 | 0:00 |
| Ricardo Lamas | 0 | 13 of 45 | 28% | 23 of 59 | 0 of 0 | --- | 0 | 0 | 2:19 | |
| 3 | Mirsad Bektić | 0 | 4 of 12 | 33% | 22 of 30 | 0 of 0 | --- | 2 | 1 | 0:05 |
| Ricardo Lamas | 0 | 6 of 16 | 37% | 21 of 33 | 1 of 3 | 33% | 0 | 0 | 4:06 |
Significant Strikes
| Fighter | Sig. Str. | Sig. Str. % | Head | Body | Leg | Distance | Clinch | Ground |
|---|---|---|---|---|---|---|---|---|
| Mirsad Bektić | 34 of 62 | 54% | 8 of 34 | 21 of 23 | 5 of 5 | 15 of 40 | 19 of 20 | 0 of 2 |
| Ricardo Lamas | 31 of 89 | 34% | 12 of 65 | 15 of 18 | 4 of 6 | 15 of 62 | 14 of 23 | 2 of 4 |
Significant Strikes Per Round
| Rd | Fighter | Sig. Str. | Sig. Str. % | Head | Body | Leg | Distance | Clinch | Ground |
|---|---|---|---|---|---|---|---|---|---|
| 1 | Mirsad Bektić | 12 of 21 | 57% | 1 of 9 | 10 of 11 | 1 of 1 | 1 of 9 | 11 of 12 | 0 of 0 |
| Ricardo Lamas | 12 of 28 | 42% | 2 of 15 | 9 of 10 | 1 of 3 | 3 of 14 | 8 of 11 | 1 of 3 | |
| 2 | Mirsad Bektić | 18 of 29 | 62% | 5 of 15 | 9 of 10 | 4 of 4 | 10 of 21 | 8 of 8 | 0 of 0 |
| Ricardo Lamas | 13 of 45 | 28% | 7 of 37 | 3 of 5 | 3 of 3 | 7 of 33 | 6 of 12 | 0 of 0 | |
| 3 | Mirsad Bektić | 4 of 12 | 33% | 2 of 10 | 2 of 2 | 0 of 0 | 4 of 10 | 0 of 0 | 0 of 2 |
| Ricardo Lamas | 6 of 16 | 37% | 3 of 13 | 3 of 3 | 0 of 0 | 5 of 15 | 0 of 0 | 1 of 1 |
Totals
| Fighter | KD | Sig. Str. | Sig. Str. % | Total Str. | TD | TD % | Sub. Att | Rev. | Ctrl |
|---|---|---|---|---|---|---|---|---|---|
| Josh Emmett | 0 | 17 of 37 | 45% | 17 of 37 | 0 of 0 | --- | 0 | 0 | 0:00 |
| Ricardo Lamas | 1 | 10 of 38 | 26% | 10 of 38 | 0 of 0 | --- | 0 | 0 | 0:00 |
Per Round
| Rd | Fighter | KD | Sig. Str. | Sig. Str. % | Total Str. | TD | TD % | Sub. Att | Rev. | Ctrl |
|---|---|---|---|---|---|---|---|---|---|---|
| 1 | Josh Emmett | 0 | 17 of 37 | 45% | 17 of 37 | 0 of 0 | --- | 0 | 0 | 0:00 |
| Ricardo Lamas | 1 | 10 of 38 | 26% | 10 of 38 | 0 of 0 | --- | 0 | 0 | 0:00 |
Significant Strikes
| Fighter | Sig. Str. | Sig. Str. % | Head | Body | Leg | Distance | Clinch | Ground |
|---|---|---|---|---|---|---|---|---|
| Josh Emmett | 17 of 37 | 45% | 3 of 18 | 4 of 5 | 10 of 14 | 17 of 37 | 0 of 0 | 0 of 0 |
| Ricardo Lamas | 10 of 38 | 26% | 6 of 32 | 1 of 2 | 3 of 4 | 10 of 38 | 0 of 0 | 0 of 0 |
Significant Strikes Per Round
| Rd | Fighter | Sig. Str. | Sig. Str. % | Head | Body | Leg | Distance | Clinch | Ground |
|---|---|---|---|---|---|---|---|---|---|
| 1 | Josh Emmett | 17 of 37 | 45% | 3 of 18 | 4 of 5 | 10 of 14 | 17 of 37 | 0 of 0 | 0 of 0 |
| Ricardo Lamas | 10 of 38 | 26% | 6 of 32 | 1 of 2 | 3 of 4 | 10 of 38 | 0 of 0 | 0 of 0 |
Totals
| Fighter | KD | Sig. Str. | Sig. Str. % | Total Str. | TD | TD % | Sub. Att | Rev. | Ctrl |
|---|---|---|---|---|---|---|---|---|---|
| Ricardo Lamas | 0 | 42 of 62 | 67% | 43 of 63 | 1 of 1 | 100% | 0 | 0 | 2:57 |
| Jason Knight | 0 | 8 of 35 | 22% | 18 of 45 | 0 of 1 | 0% | 0 | 0 | 0:00 |
Per Round
| Rd | Fighter | KD | Sig. Str. | Sig. Str. % | Total Str. | TD | TD % | Sub. Att | Rev. | Ctrl |
|---|---|---|---|---|---|---|---|---|---|---|
| 1 | Ricardo Lamas | 0 | 42 of 62 | 67% | 43 of 63 | 1 of 1 | 100% | 0 | 0 | 2:57 |
| Jason Knight | 0 | 8 of 35 | 22% | 18 of 45 | 0 of 1 | 0% | 0 | 0 | 0:00 |
Significant Strikes
| Fighter | Sig. Str. | Sig. Str. % | Head | Body | Leg | Distance | Clinch | Ground |
|---|---|---|---|---|---|---|---|---|
| Ricardo Lamas | 42 of 62 | 67% | 37 of 55 | 2 of 4 | 3 of 3 | 25 of 40 | 7 of 9 | 10 of 13 |
| Jason Knight | 8 of 35 | 22% | 7 of 33 | 1 of 1 | 0 of 1 | 5 of 26 | 2 of 7 | 1 of 2 |
Significant Strikes Per Round
| Rd | Fighter | Sig. Str. | Sig. Str. % | Head | Body | Leg | Distance | Clinch | Ground |
|---|---|---|---|---|---|---|---|---|---|
| 1 | Ricardo Lamas | 42 of 62 | 67% | 37 of 55 | 2 of 4 | 3 of 3 | 25 of 40 | 7 of 9 | 10 of 13 |
| Jason Knight | 8 of 35 | 22% | 7 of 33 | 1 of 1 | 0 of 1 | 5 of 26 | 2 of 7 | 1 of 2 |
Totals
| Fighter | KD | Sig. Str. | Sig. Str. % | Total Str. | TD | TD % | Sub. Att | Rev. | Ctrl |
|---|---|---|---|---|---|---|---|---|---|
| Ricardo Lamas | 0 | 11 of 20 | 55% | 13 of 22 | 1 of 1 | 100% | 1 | 1 | 2:27 |
| Charles Oliveira | 0 | 13 of 18 | 72% | 36 of 42 | 2 of 2 | 100% | 2 | 0 | 3:37 |
Per Round
| Rd | Fighter | KD | Sig. Str. | Sig. Str. % | Total Str. | TD | TD % | Sub. Att | Rev. | Ctrl |
|---|---|---|---|---|---|---|---|---|---|---|
| 1 | Ricardo Lamas | 0 | 5 of 11 | 45% | 7 of 13 | 1 of 1 | 100% | 0 | 0 | 1:11 |
| Charles Oliveira | 0 | 7 of 10 | 70% | 26 of 30 | 1 of 1 | 100% | 2 | 0 | 3:13 | |
| 2 | Ricardo Lamas | 0 | 6 of 9 | 66% | 6 of 9 | 0 of 0 | --- | 1 | 1 | 1:16 |
| Charles Oliveira | 0 | 6 of 8 | 75% | 10 of 12 | 1 of 1 | 100% | 0 | 0 | 0:24 |
Significant Strikes
| Fighter | Sig. Str. | Sig. Str. % | Head | Body | Leg | Distance | Clinch | Ground |
|---|---|---|---|---|---|---|---|---|
| Ricardo Lamas | 11 of 20 | 55% | 7 of 14 | 1 of 3 | 3 of 3 | 8 of 15 | 0 of 0 | 3 of 5 |
| Charles Oliveira | 13 of 18 | 72% | 11 of 16 | 1 of 1 | 1 of 1 | 6 of 9 | 1 of 2 | 6 of 7 |
Significant Strikes Per Round
| Rd | Fighter | Sig. Str. | Sig. Str. % | Head | Body | Leg | Distance | Clinch | Ground |
|---|---|---|---|---|---|---|---|---|---|
| 1 | Ricardo Lamas | 5 of 11 | 45% | 3 of 9 | 0 of 0 | 2 of 2 | 3 of 8 | 0 of 0 | 2 of 3 |
| Charles Oliveira | 7 of 10 | 70% | 7 of 10 | 0 of 0 | 0 of 0 | 1 of 3 | 0 of 0 | 6 of 7 | |
| 2 | Ricardo Lamas | 6 of 9 | 66% | 4 of 5 | 1 of 3 | 1 of 1 | 5 of 7 | 0 of 0 | 1 of 2 |
| Charles Oliveira | 6 of 8 | 75% | 4 of 6 | 1 of 1 | 1 of 1 | 5 of 6 | 1 of 2 | 0 of 0 |
Totals
| Fighter | KD | Sig. Str. | Sig. Str. % | Total Str. | TD | TD % | Sub. Att | Rev. | Ctrl |
|---|---|---|---|---|---|---|---|---|---|
| Max Holloway | 0 | 103 of 205 | 50% | 111 of 213 | 0 of 0 | --- | 2 | 0 | 1:37 |
| Ricardo Lamas | 0 | 64 of 135 | 47% | 66 of 137 | 0 of 6 | 0% | 0 | 0 | 0:44 |
Per Round
| Rd | Fighter | KD | Sig. Str. | Sig. Str. % | Total Str. | TD | TD % | Sub. Att | Rev. | Ctrl |
|---|---|---|---|---|---|---|---|---|---|---|
| 1 | Max Holloway | 0 | 25 of 48 | 52% | 26 of 49 | 0 of 0 | --- | 0 | 0 | 0:20 |
| Ricardo Lamas | 0 | 18 of 36 | 50% | 18 of 36 | 0 of 2 | 0% | 0 | 0 | 0:25 | |
| 2 | Max Holloway | 0 | 42 of 74 | 56% | 46 of 78 | 0 of 0 | --- | 2 | 0 | 1:09 |
| Ricardo Lamas | 0 | 19 of 44 | 43% | 20 of 45 | 0 of 3 | 0% | 0 | 0 | 0:04 | |
| 3 | Max Holloway | 0 | 36 of 83 | 43% | 39 of 86 | 0 of 0 | --- | 0 | 0 | 0:08 |
| Ricardo Lamas | 0 | 27 of 55 | 49% | 28 of 56 | 0 of 1 | 0% | 0 | 0 | 0:15 |
Significant Strikes
| Fighter | Sig. Str. | Sig. Str. % | Head | Body | Leg | Distance | Clinch | Ground |
|---|---|---|---|---|---|---|---|---|
| Max Holloway | 103 of 205 | 50% | 80 of 179 | 12 of 12 | 11 of 14 | 82 of 181 | 11 of 13 | 10 of 11 |
| Ricardo Lamas | 64 of 135 | 47% | 35 of 103 | 4 of 4 | 25 of 28 | 57 of 127 | 6 of 7 | 1 of 1 |
Significant Strikes Per Round
| Rd | Fighter | Sig. Str. | Sig. Str. % | Head | Body | Leg | Distance | Clinch | Ground |
|---|---|---|---|---|---|---|---|---|---|
| 1 | Max Holloway | 25 of 48 | 52% | 17 of 38 | 4 of 4 | 4 of 6 | 22 of 44 | 3 of 4 | 0 of 0 |
| Ricardo Lamas | 18 of 36 | 50% | 4 of 21 | 4 of 4 | 10 of 11 | 16 of 33 | 2 of 3 | 0 of 0 | |
| 2 | Max Holloway | 42 of 74 | 56% | 34 of 66 | 4 of 4 | 4 of 4 | 30 of 60 | 2 of 3 | 10 of 11 |
| Ricardo Lamas | 19 of 44 | 43% | 13 of 37 | 0 of 0 | 6 of 7 | 18 of 43 | 0 of 0 | 1 of 1 | |
| 3 | Max Holloway | 36 of 83 | 43% | 29 of 75 | 4 of 4 | 3 of 4 | 30 of 77 | 6 of 6 | 0 of 0 |
| Ricardo Lamas | 27 of 55 | 49% | 18 of 45 | 0 of 0 | 9 of 10 | 23 of 51 | 4 of 4 | 0 of 0 |
Play-by-Play
View on SherdogRound 1
Holloway presses out from the center of the cage, reaching out his long jab and getting a kick to the lead leg in return. He catches Lamas throwing a leg kick and nearly takes out the base of “The Bully,” but both men stay upright. Lamas is moving to his right around the outside, toward the power hand of the southpaw, and Holloway is using the momentum to land some hard lefts. Lamas covers up after one attack, so Holloway gives him a few rib roasters instead. Lamas barges off the fence, diving on a double-leg, but Holloway sprawls all over it and forces him to the ground. Lamas is twisted up underneath the Hawaiian but still glued to a single-leg, so Holloway opts to return to his feet. Another single-leg attempt from Lamas gets Holloway hopping on one leg, scooting backward to defend the shot against the cage. Holloway plants his feet in the gap at the base of the Octagon, and eventually Lamas is forced to give up on the takedown attempt. Holloway finishes strong, forcing Lamas to deflect a spinning kick and tapping him with a right hook on the chin.
Sherdog Scores
Jordan Breen scores the round 10-9 Holloway
Brian Knapp scores the round 10-9 Holloway
Chris Nelson scores the round 10-9 Holloway
Round 2
The featherweights trade leg kicks in the opening minute before Lamas ties up and puts a few punches on Holloway’s body. Holloway goes right back to stalking Lamas around the edge of the cage, keeping the WEC vet’s back near the fence. It’s a relatively slow couple of minutes before Holloway explodes into a flurry of knees and long punches, zapping Lamas with more than one hard right hand. Holloway seems content to take Lamas’ return fire as long as he’s scoring with shots, too. Lamas dives for a takedown and gets headlocked, then spun to the ground, with Holloway landing in north-south position. Lamas wraps up Holloway by the waist and tries to sweep, but he only manages to get his back on the mat. Both fighters work back to their feet with just over 90 seconds left in the round. Lamas, now bleeding from the nose, comes over the top with a right hand. Holloway waits for him to come inside again and gives him a snappy pair of slapping punches to the sides of the face. Lamas tries another single-leg, switches to a double and winds up in a bizarre reverse-guillotine choke while seated on the ground. Holloway releases and switches to a rear-naked choke, but he’s only got one hook in and Lamas is able to slide free. Holloway spends the last 20 seconds dropping punches and elbows on his defensive opponent.
Sherdog Scores
Jordan Breen scores the round 10-9 Holloway
Brian Knapp scores the round 10-9 Holloway
Chris Nelson scores the round 10-9 Holloway
Round 3
Lamas tries a capoeira kick as he attempts to string together some offense in the final frame, but Holloway easily avoids the strike. Stiff jab lands for Holloway, then he blocks a Lamas high kick and pops him with another. The Hawaiian’s reach continues to cause trouble for Lamas here in the third round, with Holloway able to reach in and touch Lamas without much fear of retaliation. Lamas tries to clinch and gets shoved against the fence, then released. He puts a right high kick on Holloway’s ear, but there’s not much behind it and Holloway just keeps coming. Holloway connects with an uppercut, then jacks Lamas’ jaw with a blistering left straight. Lamas looks to be in trouble as he grabs hold of Holloway’s legs and forces him against the cage. Holloway shoves him away, and the featherweights come back to the center for the final 20 seconds. It’s all mean-mugging and gunslinging from Holloway as he stands toe-to-toe with Lamas, both men throwing bombs until the final horn.
Sherdog Scores
Jordan Breen scores the round 10-9 Holloway (30-27 Holloway)
Brian Knapp scores the round 10-9 Holloway (30-27 Holloway)
Chris Nelson scores the round 10-9 Holloway (30-27 Holloway)
The Official Result
Max Holloway def. Ricardo Lamas via Unanimous Decision (30-27, 30-27, 30-27) R3 5:00
No comments yet. Be the first to share your thoughts!