Career Averages - Oskar Piechota
Career Averages - Tim Williams
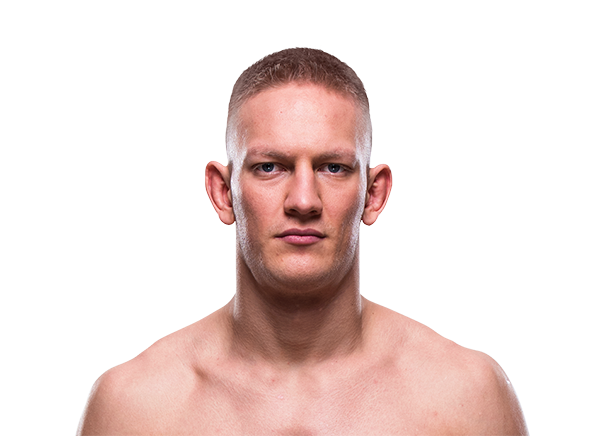
Oskar Piechota - Fight History
Totals
| Fighter | KD | Sig. Str. | Sig. Str. % | Total Str. | TD | TD % | Sub. Att | Rev. | Ctrl |
|---|---|---|---|---|---|---|---|---|---|
| Marc-André Barriault | 1 | 74 of 137 | 54% | 74 of 137 | 1 of 1 | 100% | 0 | 0 | 1:45 |
| Oskar Piechota | 0 | 37 of 84 | 44% | 38 of 85 | 0 of 1 | 0% | 0 | 0 | 0:07 |
Per Round
| Rd | Fighter | KD | Sig. Str. | Sig. Str. % | Total Str. | TD | TD % | Sub. Att | Rev. | Ctrl |
|---|---|---|---|---|---|---|---|---|---|---|
| 1 | Marc-André Barriault | 0 | 27 of 62 | 43% | 27 of 62 | 0 of 0 | --- | 0 | 0 | 0:11 |
| Oskar Piechota | 0 | 20 of 47 | 42% | 21 of 48 | 0 of 1 | 0% | 0 | 0 | 0:07 | |
| 2 | Marc-André Barriault | 1 | 47 of 75 | 62% | 47 of 75 | 1 of 1 | 100% | 0 | 0 | 1:34 |
| Oskar Piechota | 0 | 17 of 37 | 45% | 17 of 37 | 0 of 0 | --- | 0 | 0 | 0:00 |
Significant Strikes
| Fighter | Sig. Str. | Sig. Str. % | Head | Body | Leg | Distance | Clinch | Ground |
|---|---|---|---|---|---|---|---|---|
| Marc-André Barriault | 74 of 137 | 54% | 61 of 121 | 5 of 7 | 8 of 9 | 37 of 90 | 23 of 29 | 14 of 18 |
| Oskar Piechota | 37 of 84 | 44% | 27 of 72 | 7 of 8 | 3 of 4 | 33 of 80 | 4 of 4 | 0 of 0 |
Significant Strikes Per Round
| Rd | Fighter | Sig. Str. | Sig. Str. % | Head | Body | Leg | Distance | Clinch | Ground |
|---|---|---|---|---|---|---|---|---|---|
| 1 | Marc-André Barriault | 27 of 62 | 43% | 23 of 55 | 1 of 3 | 3 of 4 | 16 of 46 | 9 of 13 | 2 of 3 |
| Oskar Piechota | 20 of 47 | 42% | 13 of 39 | 5 of 6 | 2 of 2 | 17 of 44 | 3 of 3 | 0 of 0 | |
| 2 | Marc-André Barriault | 47 of 75 | 62% | 38 of 66 | 4 of 4 | 5 of 5 | 21 of 44 | 14 of 16 | 12 of 15 |
| Oskar Piechota | 17 of 37 | 45% | 14 of 33 | 2 of 2 | 1 of 2 | 16 of 36 | 1 of 1 | 0 of 0 |
Big Brady picks Marc-André Barriault as an underdog, citing his power and cardio advantage. He thinks Barriault will stuff takedowns and take over later in the fight, possibly finishing Piechota in the second or third round. However, he is not confident due to Barriault's low volume and tendency to be gun-shy.
Daniel Levi picks Marc-André Barriault as an underdog, noting that Oskar Piechota is a frontrunner who panics if he doesn't get an early finish. He believes Barriault's forward pressure and toughness will break Piechota in the later rounds. Levi expects Barriault to get his first UFC win, possibly by TKO in the third round.
Barriault has a grinding style that will be effective in the smaller cage. Piechota is coming off a KO loss and may be desperate, falling into Barriault's game plan. Barriault is the bigger guy and will get the job done.
Totals
| Fighter | KD | Sig. Str. | Sig. Str. % | Total Str. | TD | TD % | Sub. Att | Rev. | Ctrl |
|---|---|---|---|---|---|---|---|---|---|
| Punahele Soriano | 2 | 26 of 44 | 59% | 26 of 46 | 1 of 1 | 100% | 0 | 0 | 1:14 |
| Oskar Piechota | 0 | 8 of 17 | 47% | 11 of 20 | 0 of 0 | --- | 0 | 1 | 0:18 |
Per Round
| Rd | Fighter | KD | Sig. Str. | Sig. Str. % | Total Str. | TD | TD % | Sub. Att | Rev. | Ctrl |
|---|---|---|---|---|---|---|---|---|---|---|
| 1 | Punahele Soriano | 2 | 26 of 44 | 59% | 26 of 46 | 1 of 1 | 100% | 0 | 0 | 1:14 |
| Oskar Piechota | 0 | 8 of 17 | 47% | 11 of 20 | 0 of 0 | --- | 0 | 1 | 0:18 |
Significant Strikes
| Fighter | Sig. Str. | Sig. Str. % | Head | Body | Leg | Distance | Clinch | Ground |
|---|---|---|---|---|---|---|---|---|
| Punahele Soriano | 26 of 44 | 59% | 20 of 37 | 6 of 7 | 0 of 0 | 10 of 19 | 2 of 3 | 14 of 22 |
| Oskar Piechota | 8 of 17 | 47% | 4 of 11 | 3 of 4 | 1 of 2 | 3 of 12 | 4 of 4 | 1 of 1 |
Significant Strikes Per Round
| Rd | Fighter | Sig. Str. | Sig. Str. % | Head | Body | Leg | Distance | Clinch | Ground |
|---|---|---|---|---|---|---|---|---|---|
| 1 | Punahele Soriano | 26 of 44 | 59% | 20 of 37 | 6 of 7 | 0 of 0 | 10 of 19 | 2 of 3 | 14 of 22 |
| Oskar Piechota | 8 of 17 | 47% | 4 of 11 | 3 of 4 | 1 of 2 | 3 of 12 | 4 of 4 | 1 of 1 |
Totals
| Fighter | KD | Sig. Str. | Sig. Str. % | Total Str. | TD | TD % | Sub. Att | Rev. | Ctrl |
|---|---|---|---|---|---|---|---|---|---|
| Rodolfo Vieira | 0 | 18 of 39 | 46% | 37 of 62 | 3 of 7 | 42% | 1 | 0 | 5:31 |
| Oskar Piechota | 0 | 22 of 43 | 51% | 51 of 76 | 0 of 0 | --- | 0 | 0 | 0:00 |
Per Round
| Rd | Fighter | KD | Sig. Str. | Sig. Str. % | Total Str. | TD | TD % | Sub. Att | Rev. | Ctrl |
|---|---|---|---|---|---|---|---|---|---|---|
| 1 | Rodolfo Vieira | 0 | 10 of 21 | 47% | 18 of 31 | 1 of 3 | 33% | 0 | 0 | 2:40 |
| Oskar Piechota | 0 | 18 of 27 | 66% | 29 of 39 | 0 of 0 | --- | 0 | 0 | 0:00 | |
| 2 | Rodolfo Vieira | 0 | 8 of 18 | 44% | 19 of 31 | 2 of 4 | 50% | 1 | 0 | 2:51 |
| Oskar Piechota | 0 | 4 of 16 | 25% | 22 of 37 | 0 of 0 | --- | 0 | 0 | 0:00 |
Significant Strikes
| Fighter | Sig. Str. | Sig. Str. % | Head | Body | Leg | Distance | Clinch | Ground |
|---|---|---|---|---|---|---|---|---|
| Rodolfo Vieira | 18 of 39 | 46% | 16 of 36 | 1 of 2 | 1 of 1 | 5 of 16 | 1 of 1 | 12 of 22 |
| Oskar Piechota | 22 of 43 | 51% | 19 of 36 | 3 of 7 | 0 of 0 | 8 of 27 | 12 of 14 | 2 of 2 |
Significant Strikes Per Round
| Rd | Fighter | Sig. Str. | Sig. Str. % | Head | Body | Leg | Distance | Clinch | Ground |
|---|---|---|---|---|---|---|---|---|---|
| 1 | Rodolfo Vieira | 10 of 21 | 47% | 9 of 19 | 1 of 2 | 0 of 0 | 3 of 9 | 0 of 0 | 7 of 12 |
| Oskar Piechota | 18 of 27 | 66% | 16 of 23 | 2 of 4 | 0 of 0 | 4 of 11 | 12 of 14 | 2 of 2 | |
| 2 | Rodolfo Vieira | 8 of 18 | 44% | 7 of 17 | 0 of 0 | 1 of 1 | 2 of 7 | 1 of 1 | 5 of 10 |
| Oskar Piechota | 4 of 16 | 25% | 3 of 13 | 1 of 3 | 0 of 0 | 4 of 16 | 0 of 0 | 0 of 0 |
Play-by-Play
View on SherdogRound 1
Up next is a middleweight contest between a pair of promising 29-year-old prospects, as Piechota Piechota (11-1-1, 2-1 UFC) looks to spoil the Octagon debut of ADCC champ Vieira (5-0, 0-0 UFC). Drawing the assignment is referee Osiris Maia. The two touch gloves and Vieira immediately presses forward and lands a solid jab. Piechota wings a right hand but is well short of his target. Vieira stings Piechota with another jab, and Piechota tries to throw back but goes wide. Vieira drops down for a single leg takedown, and Piechota escapes and gets to his feet. Piechota lands a left-right that briefly backs Vieira away. Vieira tries for another takedown, and successfully lands it this time. Piechota protects himself with his guard and attempts a triangle, but Vieira shrugs it off and lands a few punches from the top. Vieira keeps a heavy top pressure, landing a few hammerfists along the way until he stands up and drops back down with a strong right hand. Piechota throws a few powerful upkicks that back away Vieira, and as Vieira looks for one final takedown in the round Piechota scores over a dozen elbows to the side of Vieira's head. The first round ends.
Sherdog Scores
Jay Pettry scores the round: 10-9 Vieira
Tyler Treese scores the round: 10-9 Vieira
Mike Sloan scores the round: 10-9 Vieira
Round 2
To begin the second round the two trade jabs, and Piechota comes over the top with a right hand. Punch for punch momentarily, Vieira attempts another takedown but is stuffed, and Piechota scores an uppercut on the break that appears to mark up Vieira's face. Piechota follows Vieira around but Vieira times a takedown and gets Piechota on his back. Vieira advances to mount but Piechota times his scramble perfectly as he bucks off Vieira and gets back to his feet. Vieira immediately shoots in for another takedown, but gets stood up and instead maintains the clinch position. After some more pressing, Vieira slowly drags Piechota back down. Vieira stands up in his opponent's guard and lands some powerful ground-and-pound, while Piechota is trapped up against the fence. Piechota tries to get out of this bad position but in doing so almost gives up his back.
Vieira takes advantage by taking three-quarter mount, then full mount, then side control to set up the arm-triangle choke like a snake slowly devouring its prey. The choke is very tight, and Piechota fights it off for as long as he can until he is forced to tap out before he goes to sleep.
With the win, Vieira advances his record to 6-0 with six finishes.
The Official Result
Rodolfo Vieira def. Oskar Piechota R2 4:26 via Submission (Arm-Triangle Choke)
Totals
| Fighter | KD | Sig. Str. | Sig. Str. % | Total Str. | TD | TD % | Sub. Att | Rev. | Ctrl |
|---|---|---|---|---|---|---|---|---|---|
| Gerald Meerschaert | 0 | 51 of 104 | 49% | 98 of 159 | 3 of 4 | 75% | 2 | 1 | 2:30 |
| Oskar Piechota | 1 | 23 of 53 | 43% | 31 of 63 | 1 of 1 | 100% | 2 | 0 | 3:21 |
Per Round
| Rd | Fighter | KD | Sig. Str. | Sig. Str. % | Total Str. | TD | TD % | Sub. Att | Rev. | Ctrl |
|---|---|---|---|---|---|---|---|---|---|---|
| 1 | Gerald Meerschaert | 0 | 4 of 14 | 28% | 10 of 20 | 0 of 0 | --- | 0 | 1 | 0:18 |
| Oskar Piechota | 1 | 10 of 17 | 58% | 16 of 25 | 1 of 1 | 100% | 1 | 0 | 3:17 | |
| 2 | Gerald Meerschaert | 0 | 47 of 90 | 52% | 88 of 139 | 3 of 4 | 75% | 2 | 0 | 2:12 |
| Oskar Piechota | 0 | 13 of 36 | 36% | 15 of 38 | 0 of 0 | --- | 1 | 0 | 0:04 |
Significant Strikes
| Fighter | Sig. Str. | Sig. Str. % | Head | Body | Leg | Distance | Clinch | Ground |
|---|---|---|---|---|---|---|---|---|
| Gerald Meerschaert | 51 of 104 | 49% | 43 of 95 | 6 of 7 | 2 of 2 | 9 of 43 | 20 of 28 | 22 of 33 |
| Oskar Piechota | 23 of 53 | 43% | 17 of 46 | 3 of 4 | 3 of 3 | 18 of 42 | 3 of 7 | 2 of 4 |
Significant Strikes Per Round
| Rd | Fighter | Sig. Str. | Sig. Str. % | Head | Body | Leg | Distance | Clinch | Ground |
|---|---|---|---|---|---|---|---|---|---|
| 1 | Gerald Meerschaert | 4 of 14 | 28% | 0 of 9 | 3 of 4 | 1 of 1 | 1 of 11 | 0 of 0 | 3 of 3 |
| Oskar Piechota | 10 of 17 | 58% | 7 of 14 | 3 of 3 | 0 of 0 | 8 of 13 | 0 of 0 | 2 of 4 | |
| 2 | Gerald Meerschaert | 47 of 90 | 52% | 43 of 86 | 3 of 3 | 1 of 1 | 8 of 32 | 20 of 28 | 19 of 30 |
| Oskar Piechota | 13 of 36 | 36% | 10 of 32 | 0 of 1 | 3 of 3 | 10 of 29 | 3 of 7 | 0 of 0 |
Play-by-Play
View on SherdogRound 1
Piechota barges inside to clinch, gets pushed against the wall, then hits an outside trip to put Meerschaert on his back at the foot of the fence. Piechota lands in full mount but steps off to half guard in order to better control the position. Now it's side control for Piechota, spinning to north-south position as Meerschaert gets to his knees. Piechota immediately begins hunting for a D'arce choke, forcing Meerschaert to surrender mount again as he drops to his back. Meerschaert rolls to his knees again, giving Piechota another opportunity to try a front choke. Meerschaert drops to his back and puts Piechota back in guard, and the Pole stays there long enough to hear a stand-up command from referee Chris Tognoni. Piechota stings Meerschaert with a right-handed counter, then floors him with another. This time, Piechota attaches himself to Meerschaert's back, locks on a rear-naked choke, but loses his hooks and the RNC as they hit the 20-second mark. Meerschaert looks to get up and catch Piechota in a late choke attempt as the round comes to a close.
Sherdog Scores
Jordan Breen scores the round 10-8 Piechota
Brian Knapp scores the round 10-9 Piechota
Chris Nelson scores the round 10-8 Piechota
Round 2
Meerschaert works from the center in the first minute of round two, stalking Piechota around the outside, though neither man finds much of an advantage in the striking exchanges. Meerschaert tries a takedown of his own, nearly gets mounted, but keeps driving and completes the shot near the fence. Piechota lands on his back with a headlock, but he can't secure it before Meerschaert passes to side control. Piechota gives up his back but is able to stand from the dangerous position. Meerschaert catches him in a guillotine, then hangs onto it as Piechota drops to his back. Piechota escapes the choke, but as he stands up, Meerschaert attacks him with both hands, now adding some knees into the mix. Piechota is in serious trouble, propping himself up against the fence as Meerschaert unloads with clinch knees and short elbows. Referee Tognoni is taking a close look, telling Piechota to fight back. Meerschaert opts to change levels and hit another takedown, trying to pound out Piechota on the floor. Piechota tries to roll over and gets caught in a rear-naked choke.
Piechota somehow stays conscious for a few seconds despite offering no defense for the fully-locked choke, but soon enough he goes to sleep
and referee Tognoni stops the bout.
The Official Result
Gerald Meerschaert def. Oskar Piechota via Technical Submission (Rear-Naked Choke) R2 4:55
Totals
| Fighter | KD | Sig. Str. | Sig. Str. % | Total Str. | TD | TD % | Sub. Att | Rev. | Ctrl |
|---|---|---|---|---|---|---|---|---|---|
| Oskar Piechota | 1 | 17 of 22 | 77% | 17 of 22 | 0 of 0 | --- | 0 | 0 | 0:04 |
| Tim Williams | 0 | 8 of 18 | 44% | 8 of 18 | 0 of 0 | --- | 0 | 0 | 0:00 |
Per Round
| Rd | Fighter | KD | Sig. Str. | Sig. Str. % | Total Str. | TD | TD % | Sub. Att | Rev. | Ctrl |
|---|---|---|---|---|---|---|---|---|---|---|
| 1 | Oskar Piechota | 1 | 17 of 22 | 77% | 17 of 22 | 0 of 0 | --- | 0 | 0 | 0:04 |
| Tim Williams | 0 | 8 of 18 | 44% | 8 of 18 | 0 of 0 | --- | 0 | 0 | 0:00 |
Significant Strikes
| Fighter | Sig. Str. | Sig. Str. % | Head | Body | Leg | Distance | Clinch | Ground |
|---|---|---|---|---|---|---|---|---|
| Oskar Piechota | 17 of 22 | 77% | 13 of 18 | 2 of 2 | 2 of 2 | 10 of 14 | 0 of 0 | 7 of 8 |
| Tim Williams | 8 of 18 | 44% | 4 of 12 | 0 of 0 | 4 of 6 | 8 of 18 | 0 of 0 | 0 of 0 |
Significant Strikes Per Round
| Rd | Fighter | Sig. Str. | Sig. Str. % | Head | Body | Leg | Distance | Clinch | Ground |
|---|---|---|---|---|---|---|---|---|---|
| 1 | Oskar Piechota | 17 of 22 | 77% | 13 of 18 | 2 of 2 | 2 of 2 | 10 of 14 | 0 of 0 | 7 of 8 |
| Tim Williams | 8 of 18 | 44% | 4 of 12 | 0 of 0 | 4 of 6 | 8 of 18 | 0 of 0 | 0 of 0 |
Totals
| Fighter | KD | Sig. Str. | Sig. Str. % | Total Str. | TD | TD % | Sub. Att | Rev. | Ctrl |
|---|---|---|---|---|---|---|---|---|---|
| Oskar Piechota | 1 | 56 of 93 | 60% | 80 of 121 | 1 of 3 | 33% | 3 | 0 | 4:20 |
| Jonathan Wilson | 0 | 17 of 60 | 28% | 17 of 60 | 0 of 0 | --- | 0 | 0 | 0:22 |
Per Round
| Rd | Fighter | KD | Sig. Str. | Sig. Str. % | Total Str. | TD | TD % | Sub. Att | Rev. | Ctrl |
|---|---|---|---|---|---|---|---|---|---|---|
| 1 | Oskar Piechota | 0 | 18 of 26 | 69% | 28 of 40 | 0 of 2 | 0% | 2 | 0 | 2:03 |
| Jonathan Wilson | 0 | 4 of 15 | 26% | 4 of 15 | 0 of 0 | --- | 0 | 0 | 0:00 | |
| 2 | Oskar Piechota | 1 | 16 of 33 | 48% | 16 of 33 | 0 of 0 | --- | 0 | 0 | 0:03 |
| Jonathan Wilson | 0 | 10 of 33 | 30% | 10 of 33 | 0 of 0 | --- | 0 | 0 | 0:00 | |
| 3 | Oskar Piechota | 0 | 22 of 34 | 64% | 36 of 48 | 1 of 1 | 100% | 1 | 0 | 2:14 |
| Jonathan Wilson | 0 | 3 of 12 | 25% | 3 of 12 | 0 of 0 | --- | 0 | 0 | 0:22 |
Significant Strikes
| Fighter | Sig. Str. | Sig. Str. % | Head | Body | Leg | Distance | Clinch | Ground |
|---|---|---|---|---|---|---|---|---|
| Oskar Piechota | 56 of 93 | 60% | 40 of 72 | 8 of 12 | 8 of 9 | 30 of 64 | 12 of 13 | 14 of 16 |
| Jonathan Wilson | 17 of 60 | 28% | 9 of 50 | 2 of 3 | 6 of 7 | 17 of 60 | 0 of 0 | 0 of 0 |
Significant Strikes Per Round
| Rd | Fighter | Sig. Str. | Sig. Str. % | Head | Body | Leg | Distance | Clinch | Ground |
|---|---|---|---|---|---|---|---|---|---|
| 1 | Oskar Piechota | 18 of 26 | 69% | 13 of 20 | 1 of 2 | 4 of 4 | 6 of 13 | 12 of 13 | 0 of 0 |
| Jonathan Wilson | 4 of 15 | 26% | 1 of 11 | 1 of 1 | 2 of 3 | 4 of 15 | 0 of 0 | 0 of 0 | |
| 2 | Oskar Piechota | 16 of 33 | 48% | 8 of 23 | 4 of 6 | 4 of 4 | 15 of 31 | 0 of 0 | 1 of 2 |
| Jonathan Wilson | 10 of 33 | 30% | 5 of 27 | 1 of 2 | 4 of 4 | 10 of 33 | 0 of 0 | 0 of 0 | |
| 3 | Oskar Piechota | 22 of 34 | 64% | 19 of 29 | 3 of 4 | 0 of 1 | 9 of 20 | 0 of 0 | 13 of 14 |
| Jonathan Wilson | 3 of 12 | 25% | 3 of 12 | 0 of 0 | 0 of 0 | 3 of 12 | 0 of 0 | 0 of 0 |
Tim Williams - Fight History
Totals
| Fighter | KD | Sig. Str. | Sig. Str. % | Total Str. | TD | TD % | Sub. Att | Rev. | Ctrl |
|---|---|---|---|---|---|---|---|---|---|
| Eryk Anders | 2 | 42 of 93 | 45% | 46 of 97 | 0 of 1 | 0% | 0 | 0 | 1:11 |
| Tim Williams | 0 | 43 of 113 | 38% | 52 of 126 | 2 of 5 | 40% | 0 | 0 | 1:32 |
Per Round
| Rd | Fighter | KD | Sig. Str. | Sig. Str. % | Total Str. | TD | TD % | Sub. Att | Rev. | Ctrl |
|---|---|---|---|---|---|---|---|---|---|---|
| 1 | Eryk Anders | 0 | 5 of 12 | 41% | 7 of 14 | 0 of 0 | --- | 0 | 0 | 0:00 |
| Tim Williams | 0 | 16 of 29 | 55% | 21 of 34 | 1 of 1 | 100% | 0 | 0 | 0:52 | |
| 2 | Eryk Anders | 0 | 23 of 52 | 44% | 25 of 54 | 0 of 1 | 0% | 0 | 0 | 0:49 |
| Tim Williams | 0 | 10 of 38 | 26% | 14 of 45 | 1 of 3 | 33% | 0 | 0 | 0:40 | |
| 3 | Eryk Anders | 2 | 14 of 29 | 48% | 14 of 29 | 0 of 0 | --- | 0 | 0 | 0:22 |
| Tim Williams | 0 | 17 of 46 | 36% | 17 of 47 | 0 of 1 | 0% | 0 | 0 | 0:00 |
Significant Strikes
| Fighter | Sig. Str. | Sig. Str. % | Head | Body | Leg | Distance | Clinch | Ground |
|---|---|---|---|---|---|---|---|---|
| Eryk Anders | 42 of 93 | 45% | 30 of 80 | 12 of 13 | 0 of 0 | 38 of 84 | 4 of 7 | 0 of 2 |
| Tim Williams | 43 of 113 | 38% | 29 of 89 | 5 of 13 | 9 of 11 | 38 of 101 | 3 of 8 | 2 of 4 |
Significant Strikes Per Round
| Rd | Fighter | Sig. Str. | Sig. Str. % | Head | Body | Leg | Distance | Clinch | Ground |
|---|---|---|---|---|---|---|---|---|---|
| 1 | Eryk Anders | 5 of 12 | 41% | 1 of 8 | 4 of 4 | 0 of 0 | 4 of 11 | 1 of 1 | 0 of 0 |
| Tim Williams | 16 of 29 | 55% | 9 of 19 | 3 of 6 | 4 of 4 | 13 of 24 | 1 of 3 | 2 of 2 | |
| 2 | Eryk Anders | 23 of 52 | 44% | 17 of 46 | 6 of 6 | 0 of 0 | 20 of 45 | 3 of 6 | 0 of 1 |
| Tim Williams | 10 of 38 | 26% | 8 of 31 | 1 of 5 | 1 of 2 | 8 of 33 | 2 of 5 | 0 of 0 | |
| 3 | Eryk Anders | 14 of 29 | 48% | 12 of 26 | 2 of 3 | 0 of 0 | 14 of 28 | 0 of 0 | 0 of 1 |
| Tim Williams | 17 of 46 | 36% | 12 of 39 | 1 of 2 | 4 of 5 | 17 of 44 | 0 of 0 | 0 of 2 |
Totals
| Fighter | KD | Sig. Str. | Sig. Str. % | Total Str. | TD | TD % | Sub. Att | Rev. | Ctrl |
|---|---|---|---|---|---|---|---|---|---|
| Oskar Piechota | 1 | 17 of 22 | 77% | 17 of 22 | 0 of 0 | --- | 0 | 0 | 0:04 |
| Tim Williams | 0 | 8 of 18 | 44% | 8 of 18 | 0 of 0 | --- | 0 | 0 | 0:00 |
Per Round
| Rd | Fighter | KD | Sig. Str. | Sig. Str. % | Total Str. | TD | TD % | Sub. Att | Rev. | Ctrl |
|---|---|---|---|---|---|---|---|---|---|---|
| 1 | Oskar Piechota | 1 | 17 of 22 | 77% | 17 of 22 | 0 of 0 | --- | 0 | 0 | 0:04 |
| Tim Williams | 0 | 8 of 18 | 44% | 8 of 18 | 0 of 0 | --- | 0 | 0 | 0:00 |
Significant Strikes
| Fighter | Sig. Str. | Sig. Str. % | Head | Body | Leg | Distance | Clinch | Ground |
|---|---|---|---|---|---|---|---|---|
| Oskar Piechota | 17 of 22 | 77% | 13 of 18 | 2 of 2 | 2 of 2 | 10 of 14 | 0 of 0 | 7 of 8 |
| Tim Williams | 8 of 18 | 44% | 4 of 12 | 0 of 0 | 4 of 6 | 8 of 18 | 0 of 0 | 0 of 0 |
Significant Strikes Per Round
| Rd | Fighter | Sig. Str. | Sig. Str. % | Head | Body | Leg | Distance | Clinch | Ground |
|---|---|---|---|---|---|---|---|---|---|
| 1 | Oskar Piechota | 17 of 22 | 77% | 13 of 18 | 2 of 2 | 2 of 2 | 10 of 14 | 0 of 0 | 7 of 8 |
| Tim Williams | 8 of 18 | 44% | 4 of 12 | 0 of 0 | 4 of 6 | 8 of 18 | 0 of 0 | 0 of 0 |
No comments yet. Be the first to share your thoughts!