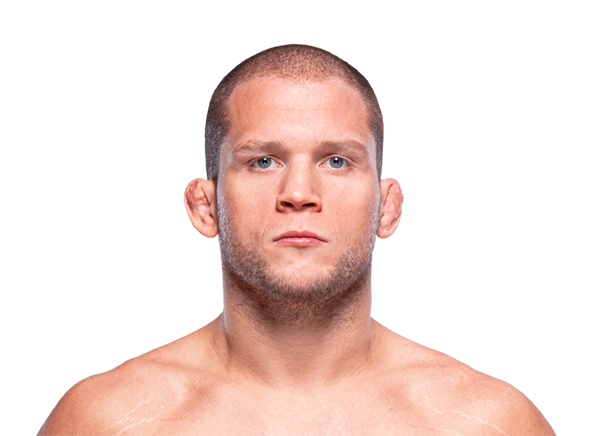
Career Averages - Alex Morono
Career Averages - Joshua Burkman
No career stats available
Alex Morono - Fight History
Totals
| Fighter | KD | Sig. Str. | Sig. Str. % | Total Str. | TD | TD % | Sub. Att | Rev. | Ctrl |
|---|---|---|---|---|---|---|---|---|---|
| Alex Morono | 0 | 40 of 146 | 27% | 48 of 154 | 0 of 0 | --- | 0 | 0 | 0:00 |
| Daniil Donchenko | 1 | 100 of 162 | 61% | 134 of 214 | 0 of 0 | --- | 0 | 0 | 2:20 |
Per Round
| Rd | Fighter | KD | Sig. Str. | Sig. Str. % | Total Str. | TD | TD % | Sub. Att | Rev. | Ctrl |
|---|---|---|---|---|---|---|---|---|---|---|
| 1 | Alex Morono | 0 | 16 of 38 | 42% | 22 of 44 | 0 of 0 | --- | 0 | 0 | 0:00 |
| Daniil Donchenko | 1 | 39 of 59 | 66% | 70 of 108 | 0 of 0 | --- | 0 | 0 | 1:44 | |
| 2 | Alex Morono | 0 | 6 of 43 | 13% | 7 of 44 | 0 of 0 | --- | 0 | 0 | 0:00 |
| Daniil Donchenko | 0 | 27 of 40 | 67% | 30 of 43 | 0 of 0 | --- | 0 | 0 | 0:35 | |
| 3 | Alex Morono | 0 | 18 of 65 | 27% | 19 of 66 | 0 of 0 | --- | 0 | 0 | 0:00 |
| Daniil Donchenko | 0 | 34 of 63 | 53% | 34 of 63 | 0 of 0 | --- | 0 | 0 | 0:01 |
Significant Strikes
| Fighter | Sig. Str. | Sig. Str. % | Head | Body | Leg | Distance | Clinch | Ground |
|---|---|---|---|---|---|---|---|---|
| Alex Morono | 40 of 146 | 27% | 37 of 138 | 2 of 7 | 1 of 1 | 36 of 137 | 4 of 9 | 0 of 0 |
| Daniil Donchenko | 100 of 162 | 61% | 45 of 99 | 21 of 28 | 34 of 35 | 82 of 134 | 7 of 11 | 11 of 17 |
Significant Strikes Per Round
| Rd | Fighter | Sig. Str. | Sig. Str. % | Head | Body | Leg | Distance | Clinch | Ground |
|---|---|---|---|---|---|---|---|---|---|
| 1 | Alex Morono | 16 of 38 | 42% | 13 of 33 | 2 of 4 | 1 of 1 | 14 of 35 | 2 of 3 | 0 of 0 |
| Daniil Donchenko | 39 of 59 | 66% | 23 of 42 | 8 of 9 | 8 of 8 | 25 of 37 | 3 of 5 | 11 of 17 | |
| 2 | Alex Morono | 6 of 43 | 13% | 6 of 42 | 0 of 1 | 0 of 0 | 5 of 39 | 1 of 4 | 0 of 0 |
| Daniil Donchenko | 27 of 40 | 67% | 9 of 18 | 7 of 10 | 11 of 12 | 24 of 37 | 3 of 3 | 0 of 0 | |
| 3 | Alex Morono | 18 of 65 | 27% | 18 of 63 | 0 of 2 | 0 of 0 | 17 of 63 | 1 of 2 | 0 of 0 |
| Daniil Donchenko | 34 of 63 | 53% | 13 of 39 | 6 of 9 | 15 of 15 | 33 of 60 | 1 of 3 | 0 of 0 |
Play-by-Play
View on SherdogBETTING PREVIEW | SCOUTING REPORT | ODDS: Donchenko (-550); Morono (+425)
Round 1
There is no glove touch in sight, as Morono instead leaps to engage and blasts Donchenko in the face with a huge right hand. Donchenko gathers his thoughts and starts chopping Morono’s lead leg down like a tree, aiming at Morono’s knee brace with both feet. Donchenko hurls a heavy punch salvo and kicks Morono’s leg out beneath him, and Morono scrambles upright and puts his back to the fence as the charging Donchenko clinches him. Donchenko rifles off a short elbow on the inside, and Morono retaliates with a strong right hand to break off. Donchenko hacks at the front leg with a kick, and he dances away from kicks including a wheel kick. Donchenko jabs to set up a left hand and an uppercut, snapping Morono’s head back like a Pez dispenser. Morono toughs it out, and Donchenko bears down on him with hurled fists. Donchenko’s aggression puts them into another clinch, and he looks for an elbow but can only graze the side. He lifts Morono off the ground with a knee, and just misses with an elbow on the break.
Donchenko stomp-kicks the front leg and chambers a kick on the side, and Morono counters and opens a cut on the bridge of Donchenko’s nose. Morono attempts an intercepting front kick, and Donchenko hammers him with a low kick that makes Morono hop around in pain. Donchenko reaches out with his fingers extended, and Peterson calls time to tell him to stop that. They get back to it, and Donchenko loads up on a huge right hand that staggers “The Great White.” Morono tries to step into the pocket to trade it out, and he narrowly evades a left hook that would knock out a mongoose. Donchenko blasts Morono with a pair of huge punches, knocking Morono to the mat, and he drops down vicious ground-and-pound. Several elbows land to the back of Morono’s head while Donchenko is unleashing a fury, and Morono turns over and gets his face sliced open with ground strikes from the Ukrainian. Donchenko lowers himself into the guard, and Morono threatens with an armbar from his back to give him space to turn over. When Morono gets to his knees, Donchenko pounds away with right hands. Morono survives the onslaught and works his way up, and he smashes Donchenko in the face with a shocking right hand. Morono might be out on his feet but he is still swinging, and he nails Donchenko with an elbow right before the break.
Sherdog Scores
Jay Pettry scores the round: 10-8 Donchenko
Dayne Fox scores the round: 10-8 Donchenko
Tristen Critchfield scores the round: 10-8 Donchenko
Round 2
Morono watches the replay between rounds and laughs at his spinning attempt. The second round kicks off with Morono coming out gingerly, and it takes one kick from Donchenko to knock him to the mat. Donchenko allows him to stand back up, blood trickling down Morono’s left nostril, and Morono obliges him. Morono loads up with a fiery right hand that Donchenko ducks before seeing coming, and he tries to evade a left hook but gets caught cleanly. Rather than keep swinging, Donchenko presses the Houston native to the fence for a few seconds, with Morono looking for an attack on the break. Donchenko leans back to watch a high kick whiz past him, and he blasts the front leg of Morono and nearly takes him down again. Morono takes a kick on the inside, and he hurls a right hand forward but has nothing on his plant leg. Donchenko circles and kicks at the leg a few times, and he ducks into an uppercut and makes a face to show that he did not get hurt from it. Donchenko fakes a takedown and a high kick, and he settles for a body shot when Morono is escaping. Donchenko slaps a kick to the inside of Morono’s leg, and Morono hobbles around and takes another body shot before just avoiding a spinning elbow.
Morono sticks out straight punches, both nostrils now leaking, and Donchenko targets the left leg and hurts it badly. Morono can barely put weight on it, and he tries to slug it out but Donchenko takes the blows on the chin and keeps pushing. Donchenko goes to the body with a kick, and Morono switches stances a few times to remove his bum wheel from the equation. They both spin with back elbows at the same time and clash like Beyblades, and a low kick from Donchenko leads to another spin that busts Morono’s nose open much further. Donchenko hacks at the lead leg with two more kicks, the second of which checked, and Morono presses forward and swings with reckless abandon. Donchenko presses on Morono, and he elbows him on the break. Morono bounces off the wall and gets his leg kicked out, and Donchenko walks off as the round wraps.
Sherdog Scores
Jay Pettry scores the round: 10-9 Donchenko
Dayne Fox scores the round: 10-9 Donchenko
Tristen Critchfield scores the round: 10-9 Donchenko
Round 3
Morono admits to his corner that the leg kicks hurt a great deal, profanity redacted because this is family programming. The Texan opens up after taking serious damage the last 10 minutes behind his jab, and Donchenko targets the front leg several times in hopes of taking any momentum out of Morono. Morono surges forward, leaning back to avoid a spin as he backs Donchenko to the wall. Morono tries his own spin that bounces off the guard, and he ducks a pair of haymakers but cannot get out of the way of another calf kick. Donchenko kicks the inside and out, working the body and head, attacking any spot that is open. Morono takes another kick and limps around, and he loads up on a huge right hand that Donchenko easily ducks. Morono doubles up on a jab, and his follow-up right goes wide. He checks a kick, but still does not like the impact of the blow. Donchenko kicks him twice and then avoids a wheel kick, and Morono pushes off his face to protect himself from subsequent swings.
Donchenko jabs a front kick to the body and follows it with a left hand, and he circles away and just avoids an elbow from up close. The Ukrainian mixes in punches with low kicks, keeping his guard up to defend the eventual counters. Morono’s jabs have opened up the cut on Donchenko’s nose, and Donchenko bends over and seems to allow Morono to wrap him up and knee him in the face. Donchenko beans Morono behind the ear, and Morono takes it flush and bounces off the fencing when absorbing another. Morono partially checks a low kick, and he splits the guard with a left and a right. Donchenko stares at him, hands down, and unleashes a heavy leg kick. Donchenko wraps a right hand around the guard, and sends Morono spinning to his knees with a left. The Texan climbs back up and presses the action, jabbing to set up his right. Donchenko showboats and laughs at him when Morono lands, and he points to the ground to initiate a torrid brawl. Donchenko knocks Morono off his feet in the ensuing melee, and he is kicked in the chest to back him off right before the third round is over.
Sherdog Scores
Jay Pettry scores the round: 10-9 Donchenko (30-26 Donchenko)
Dayne Fox scores the round: 10-9 Donchenko (30-26 Donchenko)
Tristen Critchfield scores the round: 10-9 Donchenko (30-26 Donchenko)
The Official Result
Daniil Donchenko def. Alex Morono via Unanimous Decision (30-26, 30-26, 30-27)
Angelo picks Daniil Donchenko despite believing Alex Morono is the better fighter skill-for-skill. He explains that Morono is a 'moron' who will stand and trade instead of using his high-level jiu-jitsu. Donchenko hits hard and Morono is on a three-fight skid. He thinks Morono has the easiest path to victory by grappling but won't do it, so he picks Donchenko.
Big Brady picks Daniil Donchenko, praising his aggressive style and dangerous striking. He questions Alex Morono's commitment to fighting, noting he has other pursuits and has looked poor in recent fights. He expects Donchenko to pressure and finish Morono early, similar to Carlos Liao's win over Morono.
Cody agrees, highlighting Donchenko's power and Morono's chin issues. He notes Donchenko's tendency to gas but expects an early finish. Cody suggests betting Donchenko live after the first round if he doesn't finish, but overall picks Donchenko.
Connor agrees with Zane, emphasizing that Morono is a subpar athlete who has lost his speed and durability. He notes that Donchenko is young and technical, and that Morono's wins were over past-prime fighters. Connor concludes that Donchenko will win purely based on age and physical decline.
Lucrative James picks Daniil Donchenko to win by TKO in round two or three. He trusts Donchenko's youth, physicality, and improvement, while noting that Morono is aging and has a questionable chin. James expects Morono to start well but fade as the fight progresses.
The host picks Donchenko by first-round knockout, calling it a horrible stylistic matchup for Morono. He highlights Donchenko's Muay Thai, especially his elbows and knees, and his aggressive pressure. He notes Morono's chin is fading and he struggles with cardio, making him vulnerable to an early finish.
Paul picks Daniil Donchenko, citing his power and aggression. He notes Morono's recent losses and declining durability. Paul expects Donchenko to finish early but warns about his cardio if it goes past the first round. He suggests betting Donchenko but not at heavy favorite odds.
The host picks Daniil Donchenko over Alex Morono. He is very confident, predicting a first-round TKO. He notes Donchenko's aggressive style, elbows, body work, and low kicks. He thinks Morono can take a beating but Donchenko's cutting shots and pressure will overwhelm him early.
Zane picks Donchenko based on age and decline of Morono. He notes that Morono is slower and more fragile, and that Donchenko is a young, technical, and violent fighter who can execute at multiple levels. Zane believes Donchenko will simply wreck Morono, as Morono has lost to late-career Niko Price and is past his prime.
Totals
| Fighter | KD | Sig. Str. | Sig. Str. % | Total Str. | TD | TD % | Sub. Att | Rev. | Ctrl |
|---|---|---|---|---|---|---|---|---|---|
| Alex Morono | 0 | 40 of 95 | 42% | 41 of 96 | 0 of 1 | 0% | 0 | 0 | 0:20 |
| Carlos Leal | 0 | 79 of 120 | 65% | 81 of 123 | 0 of 0 | --- | 0 | 0 | 0:03 |
Per Round
| Rd | Fighter | KD | Sig. Str. | Sig. Str. % | Total Str. | TD | TD % | Sub. Att | Rev. | Ctrl |
|---|---|---|---|---|---|---|---|---|---|---|
| 1 | Alex Morono | 0 | 40 of 95 | 42% | 41 of 96 | 0 of 1 | 0% | 0 | 0 | 0:20 |
| Carlos Leal | 0 | 79 of 120 | 65% | 81 of 123 | 0 of 0 | --- | 0 | 0 | 0:03 |
Significant Strikes
| Fighter | Sig. Str. | Sig. Str. % | Head | Body | Leg | Distance | Clinch | Ground |
|---|---|---|---|---|---|---|---|---|
| Alex Morono | 40 of 95 | 42% | 32 of 82 | 4 of 9 | 4 of 4 | 35 of 87 | 5 of 8 | 0 of 0 |
| Carlos Leal | 79 of 120 | 65% | 49 of 89 | 28 of 29 | 2 of 2 | 54 of 91 | 25 of 29 | 0 of 0 |
Significant Strikes Per Round
| Rd | Fighter | Sig. Str. | Sig. Str. % | Head | Body | Leg | Distance | Clinch | Ground |
|---|---|---|---|---|---|---|---|---|---|
| 1 | Alex Morono | 40 of 95 | 42% | 32 of 82 | 4 of 9 | 4 of 4 | 35 of 87 | 5 of 8 | 0 of 0 |
| Carlos Leal | 79 of 120 | 65% | 49 of 89 | 28 of 29 | 2 of 2 | 54 of 91 | 25 of 29 | 0 of 0 |
Totals
| Fighter | KD | Sig. Str. | Sig. Str. % | Total Str. | TD | TD % | Sub. Att | Rev. | Ctrl |
|---|---|---|---|---|---|---|---|---|---|
| Daniel Rodriguez | 0 | 123 of 257 | 47% | 126 of 260 | 1 of 1 | 100% | 0 | 0 | 0:56 |
| Alex Morono | 0 | 74 of 257 | 28% | 91 of 276 | 0 of 1 | 0% | 0 | 0 | 0:00 |
Per Round
| Rd | Fighter | KD | Sig. Str. | Sig. Str. % | Total Str. | TD | TD % | Sub. Att | Rev. | Ctrl |
|---|---|---|---|---|---|---|---|---|---|---|
| 1 | Daniel Rodriguez | 0 | 25 of 56 | 44% | 25 of 56 | 0 of 0 | --- | 0 | 0 | 0:00 |
| Alex Morono | 0 | 31 of 81 | 38% | 31 of 81 | 0 of 0 | --- | 0 | 0 | 0:00 | |
| 2 | Daniel Rodriguez | 0 | 44 of 99 | 44% | 44 of 99 | 0 of 0 | --- | 0 | 0 | 0:00 |
| Alex Morono | 0 | 23 of 91 | 25% | 23 of 91 | 0 of 0 | --- | 0 | 0 | 0:00 | |
| 3 | Daniel Rodriguez | 0 | 54 of 102 | 52% | 57 of 105 | 1 of 1 | 100% | 0 | 0 | 0:56 |
| Alex Morono | 0 | 20 of 85 | 23% | 37 of 104 | 0 of 1 | 0% | 0 | 0 | 0:00 |
Significant Strikes
| Fighter | Sig. Str. | Sig. Str. % | Head | Body | Leg | Distance | Clinch | Ground |
|---|---|---|---|---|---|---|---|---|
| Daniel Rodriguez | 123 of 257 | 47% | 44 of 153 | 56 of 80 | 23 of 24 | 117 of 251 | 6 of 6 | 0 of 0 |
| Alex Morono | 74 of 257 | 28% | 58 of 228 | 9 of 21 | 7 of 8 | 74 of 256 | 0 of 1 | 0 of 0 |
Significant Strikes Per Round
| Rd | Fighter | Sig. Str. | Sig. Str. % | Head | Body | Leg | Distance | Clinch | Ground |
|---|---|---|---|---|---|---|---|---|---|
| 1 | Daniel Rodriguez | 25 of 56 | 44% | 7 of 32 | 11 of 17 | 7 of 7 | 25 of 56 | 0 of 0 | 0 of 0 |
| Alex Morono | 31 of 81 | 38% | 20 of 67 | 5 of 8 | 6 of 6 | 31 of 81 | 0 of 0 | 0 of 0 | |
| 2 | Daniel Rodriguez | 44 of 99 | 44% | 19 of 65 | 18 of 27 | 7 of 7 | 44 of 99 | 0 of 0 | 0 of 0 |
| Alex Morono | 23 of 91 | 25% | 20 of 83 | 2 of 7 | 1 of 1 | 23 of 91 | 0 of 0 | 0 of 0 | |
| 3 | Daniel Rodriguez | 54 of 102 | 52% | 18 of 56 | 27 of 36 | 9 of 10 | 48 of 96 | 6 of 6 | 0 of 0 |
| Alex Morono | 20 of 85 | 23% | 18 of 78 | 2 of 6 | 0 of 1 | 20 of 84 | 0 of 1 | 0 of 0 |
Play-by-Play
View on SherdogBETTING PREVIEW | SCOUTING REPORT | ODDS: Rodriguez (-198), Morono (+164)
Round 1
Action is on the menu with this welterweight main card opener. Recent middleweight Rodriguez (17-5, 7-4 UFC) realized after his last outing that he is better suited for 170 pounds, and Morono (24-10, 1 NC; 13-7, 1 NC UFC) will serve as a more-than-willing dance partner. Referee Herb Dean will have his hands full as long as this one goes, and the fighters elect not to touch ‘em up. Morono stays on the outside chipping with low kicks, and Rodriguez marches forward looking for left hands. Morono loads up with a right, and he gets Rodriguez’ attention and is forced to parry a response. Morono reaches out with two punches, and he catches Rodriguez ducking in to score a right. The Texan keeps moving, absorbing a low kick and firing off a right over the top. Rodriguez eats a pair of punches when coming forward, and he shines up Morono’s right eye with a counter. Morono pursues a high kick, and he chambers and fires a right hand on the counter. Morono backs Rodriguez up with another right, and they trade kicks. Morono’s head kick comes up short, and Rodriguez tries and fail to land his own. Morono bounces his way in and out to attack, not absorbing much back from “D-Rod.” Morono lets off a right hand, and he gets clipped on the way turning himself around after spinning for a back fist. Morono sits down on a thudding right hand that forces Rodriguez to blink it out, and Rodriguez escapes and pushes out a jab to the belly. Morono absorbs a flush body kick and throws back with three punches up top. Morono jabs, flicks out a low kick and releases a trio of fists high. Rodriguez snaps the head back with a sharp jab, and he gets knocked back a few steps from a winging right hand. Morono keeps him guessing with a wide variety of strikes, but his short right hands do as well as anything he puts out. Morono whiffs on another high kick, and he slips a punch to fire off a haymaker that misses by a whisker. Morono kicks low and is met with a pair of heavy punches, and Rodriguez smiles. They trade low kicks, and Morono connects with three big overhand rights. Rodriguez wears them well, blocks a spin and the round ends.
Sherdog Scores
Jay Pettry scores the round: 10-9 Morono
Brian Knapp scores the round: 10-9 Morono
Tristen Critchfield scores the round: 10-9 Morono
Round 2
The welterweight strikers pick up where they left off, trading blows without fear. Rodriguez fight behind his jab, and Morono looks for counters. One heavy right sends Rodriguez careening back, and Rodriguez gathers his thoughts and wades forward to re-engage. Morono takes a right hook on the chin and reloads to slug it out with Rodriguez. A right from Morono glides off the shiny head of his opponent, and Rodriguez keeps jabbing away. Morono’s face is marked up from the jabs, and he jumps forward with a Superman punch that misses the mark. Rodriguez jabs the body with his foot, and Morono meets him with a step-in right hand. Morono puts a jab on Rodriguez’s face when Rodriguez resets, and he scores a right over the top. Rodriguez fires off a high kick, and Morono comes up short on another Superman punch. Morono jabs his way into a right hand, and his subsequent haymaker bounces off the guard. When Morono slings another, it gets through. Rodriguez barely flinches when taking it flush, and he retaliates with counters on counters. Rodriguez lines up a body kick and swats his way into action, only to walk face-first into a home run punch. Rodriguez again does not waver as he takes the power strike cleanly, and Morono strings three more together over the top before getting out. Morono ducks a jab and releases a right hand, and Rodriguez’ jaw hangs open slightly as if it sustained some damage. Rodriguez’ job stays busy, and he uses it to cut off the looping striker. Morono still gets off a thudding right hand, and he goes to the body with a kick and follows with a right hook. Rodriguez scores to back Morono off, and Morono rushes back at him throwing fire. Rodriguez goes after a one-two to the body, and the two trade furiously until the bell.
Sherdog Scores
Jay Pettry scores the round: 10-9 Morono
Brian Knapp scores the round: 10-9 Rodriguez
Tristen Critchfield scores the round: 10-9 Rodriguez
Round 3
The two men are ready and willing to get after it as soon as Dean calls for them to begin. Morono cracks Rodriguez with an effective right hand at the end of a flurry, and Rodriguez calms himself down and pushes out with a front kick and one to the lead leg. Morono chambers and fires a big right hand that partially connects, and he gets knocked back from a short left. Rodriguez follows with a hard left, and Morono staggers back to get his bearings. Instead of shelling up, Morono steels himself and comes out swinging even harder than before. The wild attacks of “The Great White” catch Rodriguez a few times, and Rodriguez’ speed is making a difference as he tends to land first. Morono catches a kick and pushes his man back, but he lets it go instead of pursuing a takedown. Morono jabs his way into an overhand right, and as Rodriguez responds, Morono bombs back. Rodriguez pokes out a leg kick and slides back from a salvo of fists, and he kicks the lead leg again and leans back from the massive counter. Rodriguez sticks Morono a few times with his piston-like left, giving Morono something to think about each time. Morono loads up with his right hand from down by his hip, and Rodriguez absorbs it cleanly and pecks at his foe with a clean right. Morono spins his way in with a back fist, and Rodriguez ducks it and tags him with a left. Rodriguez pushes the Texan against the fence, kneeing him a few times in the midsection while stifling Morono’s trip attempts. Rodriguez digs a few punches to the body on the break, and he sits down on counters with Morono bearing down on him. Rodriguez snipes him with a short right, and he slips back when Morono sells out on fastballs. Morono walks his foe down but cannot corner him or land cleanly, with Rodriguez playing defense until he ducks a spinning back fist and hurls Morono to the floor. Morono explodes back upright, and the horn blares to call an end to what should be a close one, depending on how the second round was scored.
Sherdog Scores
Jay Pettry scores the round: 10-9 Rodriguez (29-28 Morono)
Brian Knapp scores the round: 10-9 Rodriguez (29-28 Rodriguez)
Tristen Critchfield scores the round: 10-9 Rodriguez (29-28 Rodriguez)
The Official Result
Daniel Rodriguez def. Alex Morono via Split Decision (28-29, 29-28, 29-28)
Angelo makes a low-confidence pick for Daniel Rodriguez, citing Alex Morono's unreliability. He notes that Morono is the overall better fighter but can never be trusted. Angelo suggests a plus 3.5 bet on Morono instead, as he believes Morono can win at least one round. He does not bet the moneyline on either fighter.
Big Brady picks Daniel Rodriguez to win by decision, but notes he needs to see the weigh-ins to confirm. He criticizes Morono's awful performance against Niko Price, where he was gassed after one minute, and notes Morono is on short notice again. He thinks Rodriguez is the better striker and less washed, though both are declining. If Morono looks bad on the scale, Brady would change his pick to a knockout. He expects a decision but is open to a finish if Morono looks terrible.
Connor agrees with Zane, noting that Rodriguez is a technical brawler who throws combinations and sets up shots, while Morono is a bad athlete who relies on game planning. He points out that Morono's jab is his best weapon but Rodriguez hits harder and is more durable. Connor expects Rodriguez to win a competitive fight.
Daniel notes that Rodriguez has declined significantly in speed and reflexes, as seen in the Kelvin Gastelum fight, but he still has a speed advantage over Morono, who has never been fast. He thinks Rodriguez's jab and straight punches will get there first against Morono's wild overhands. However, he is not confident and expects the fight to be closer than the odds suggest.
Rodriguez is more well-rounded and technical than Morono. Morono uses footwork but will struggle with Rodriguez's counters and straight shots down the pipe. Rodriguez will walk Morono down, land big strikes, and win on the scorecards.
The MMA Guru picks Daniel Rodriguez, criticizing Alex Morono for lacking talent, athleticism, and fast-twitch fibers. He praises Rodriguez's crisp, technical boxing and power, and expects a TKO in the second round. He dismisses Morono's grappling and overall game, calling him a 'flabby soft no Talent having hard worker'.
Zane picks Rodriguez because he believes Rodriguez's power and durability will be too much for Morono. He notes that Morono often struggles against athletic fighters with power, and Rodriguez, despite being messy, has the tools to outwork and hurt Morono. Zane thinks Morono may have moments but will eventually get cracked.
Totals
| Fighter | KD | Sig. Str. | Sig. Str. % | Total Str. | TD | TD % | Sub. Att | Rev. | Ctrl |
|---|---|---|---|---|---|---|---|---|---|
| Niko Price | 0 | 108 of 224 | 48% | 138 of 259 | 5 of 5 | 100% | 0 | 1 | 3:37 |
| Alex Morono | 0 | 96 of 210 | 45% | 111 of 225 | 1 of 1 | 100% | 0 | 0 | 0:56 |
Per Round
| Rd | Fighter | KD | Sig. Str. | Sig. Str. % | Total Str. | TD | TD % | Sub. Att | Rev. | Ctrl |
|---|---|---|---|---|---|---|---|---|---|---|
| 1 | Niko Price | 0 | 16 of 51 | 31% | 21 of 58 | 1 of 1 | 100% | 0 | 1 | 1:10 |
| Alex Morono | 0 | 34 of 72 | 47% | 40 of 78 | 1 of 1 | 100% | 0 | 0 | 0:29 | |
| 2 | Niko Price | 0 | 34 of 65 | 52% | 50 of 83 | 3 of 3 | 100% | 0 | 0 | 2:04 |
| Alex Morono | 0 | 21 of 43 | 48% | 30 of 52 | 0 of 0 | --- | 0 | 0 | 0:27 | |
| 3 | Niko Price | 0 | 58 of 108 | 53% | 67 of 118 | 1 of 1 | 100% | 0 | 0 | 0:23 |
| Alex Morono | 0 | 41 of 95 | 43% | 41 of 95 | 0 of 0 | --- | 0 | 0 | 0:00 |
Significant Strikes
| Fighter | Sig. Str. | Sig. Str. % | Head | Body | Leg | Distance | Clinch | Ground |
|---|---|---|---|---|---|---|---|---|
| Niko Price | 108 of 224 | 48% | 78 of 181 | 24 of 33 | 6 of 10 | 78 of 182 | 9 of 19 | 21 of 23 |
| Alex Morono | 96 of 210 | 45% | 74 of 184 | 13 of 15 | 9 of 11 | 91 of 204 | 2 of 3 | 3 of 3 |
Significant Strikes Per Round
| Rd | Fighter | Sig. Str. | Sig. Str. % | Head | Body | Leg | Distance | Clinch | Ground |
|---|---|---|---|---|---|---|---|---|---|
| 1 | Niko Price | 16 of 51 | 31% | 12 of 45 | 4 of 5 | 0 of 1 | 14 of 47 | 0 of 2 | 2 of 2 |
| Alex Morono | 34 of 72 | 47% | 26 of 63 | 4 of 4 | 4 of 5 | 32 of 70 | 0 of 0 | 2 of 2 | |
| 2 | Niko Price | 34 of 65 | 52% | 22 of 48 | 8 of 12 | 4 of 5 | 16 of 44 | 3 of 5 | 15 of 16 |
| Alex Morono | 21 of 43 | 48% | 19 of 40 | 1 of 2 | 1 of 1 | 20 of 42 | 0 of 0 | 1 of 1 | |
| 3 | Niko Price | 58 of 108 | 53% | 44 of 88 | 12 of 16 | 2 of 4 | 48 of 91 | 6 of 12 | 4 of 5 |
| Alex Morono | 41 of 95 | 43% | 29 of 81 | 8 of 9 | 4 of 5 | 39 of 92 | 2 of 3 | 0 of 0 |
Angelo picks Alex Morono, ignoring their first fight because it was a while ago and both have evolved. He believes Morono is the more technical striker and better grappler, and that his awkward striking will avoid Niko Price's power. He notes Price is always dangerous but thinks Morono's well-roundedness will prevail.
Big Brady thinks this fight ends inside the distance with someone getting knocked out. He leans toward Alex Morono getting the knockout, citing Niko Price's shot durability and recent KO loss to Robbie Lawler. He compares it to Morono's KO of Donald Cerrone. However, he notes Price has power and a 90% finish rate, so he will play both sides. He considers Price a live dog at 7,300.
Cody leans toward Price, noting his volume and power. He acknowledges Price's durability is questionable but believes Morono's low volume and lack of power make Price live. Cody mentions Price's previous KO of Morono in 2017 and thinks Price can do it again. He warns that Morono may wait for a perfect shot, but Price's pressure could overwhelm him.
Daniel recalls Morono's struggle against Court McGee and notes Price's power. He thinks it's a dog or pass situation and picks Price to win again.
The host expects a repeat of their first fight, where Morono dominated before getting caught. Price's chin is compromised after recent knockouts, and his confidence is low. Morono's stick-and-move style, power, and defensive jiu-jitsu should allow him to land big shots and finish Price, likely by knockout in the second round.
Paul leans toward Price, despite acknowledging Price's durability may be fading. He notes Price has sickening volume and power, and Morono's recent performance against Court McGee was poor. Paul thinks Price can outwork Morono and possibly land a KO. He mentions Price's power is the last thing to go and that Morono may be over the hill.
The MMA Guru picks Alex Morono, citing Niko Price's recent chin issues and inactivity. He notes that Price has lost his last two by TKO and looked scripted against Lawler. Morono has been more active and consistent, though he didn't look great in his last fight. He predicts Morono by decision, possibly TKO.
Totals
| Fighter | KD | Sig. Str. | Sig. Str. % | Total Str. | TD | TD % | Sub. Att | Rev. | Ctrl |
|---|---|---|---|---|---|---|---|---|---|
| Alex Morono | 0 | 60 of 160 | 37% | 78 of 184 | 1 of 6 | 16% | 0 | 0 | 3:20 |
| Court McGee | 0 | 38 of 141 | 26% | 42 of 149 | 0 of 0 | --- | 1 | 0 | 0:00 |
Per Round
| Rd | Fighter | KD | Sig. Str. | Sig. Str. % | Total Str. | TD | TD % | Sub. Att | Rev. | Ctrl |
|---|---|---|---|---|---|---|---|---|---|---|
| 1 | Alex Morono | 0 | 22 of 52 | 42% | 22 of 52 | 0 of 0 | --- | 0 | 0 | 0:00 |
| Court McGee | 0 | 12 of 50 | 24% | 12 of 50 | 0 of 0 | --- | 0 | 0 | 0:00 | |
| 2 | Alex Morono | 0 | 20 of 41 | 48% | 36 of 61 | 0 of 2 | 0% | 0 | 0 | 3:12 |
| Court McGee | 0 | 9 of 28 | 32% | 12 of 34 | 0 of 0 | --- | 1 | 0 | 0:00 | |
| 3 | Alex Morono | 0 | 18 of 67 | 26% | 20 of 71 | 1 of 4 | 25% | 0 | 0 | 0:08 |
| Court McGee | 0 | 17 of 63 | 26% | 18 of 65 | 0 of 0 | --- | 0 | 0 | 0:00 |
Significant Strikes
| Fighter | Sig. Str. | Sig. Str. % | Head | Body | Leg | Distance | Clinch | Ground |
|---|---|---|---|---|---|---|---|---|
| Alex Morono | 60 of 160 | 37% | 14 of 73 | 29 of 55 | 17 of 32 | 52 of 148 | 0 of 1 | 8 of 11 |
| Court McGee | 38 of 141 | 26% | 26 of 118 | 9 of 18 | 3 of 5 | 38 of 139 | 0 of 2 | 0 of 0 |
Significant Strikes Per Round
| Rd | Fighter | Sig. Str. | Sig. Str. % | Head | Body | Leg | Distance | Clinch | Ground |
|---|---|---|---|---|---|---|---|---|---|
| 1 | Alex Morono | 22 of 52 | 42% | 3 of 16 | 13 of 25 | 6 of 11 | 22 of 52 | 0 of 0 | 0 of 0 |
| Court McGee | 12 of 50 | 24% | 8 of 42 | 2 of 6 | 2 of 2 | 12 of 50 | 0 of 0 | 0 of 0 | |
| 2 | Alex Morono | 20 of 41 | 48% | 7 of 21 | 8 of 12 | 5 of 8 | 12 of 30 | 0 of 1 | 8 of 10 |
| Court McGee | 9 of 28 | 32% | 6 of 25 | 3 of 3 | 0 of 0 | 9 of 28 | 0 of 0 | 0 of 0 | |
| 3 | Alex Morono | 18 of 67 | 26% | 4 of 36 | 8 of 18 | 6 of 13 | 18 of 66 | 0 of 0 | 0 of 1 |
| Court McGee | 17 of 63 | 26% | 12 of 51 | 4 of 9 | 1 of 3 | 17 of 61 | 0 of 2 | 0 of 0 |
Angelo picks Alex Morono because he believes Morono is a step ahead everywhere in this fight and could potentially finish an aging Court McGee. He notes that McGee relied on his work ethic and chin, but at 39, that chin is gone and hard work alone won't get wins. Morono is somewhat unreliable himself, but Angelo thinks he should be good here.
Big Brady picks Alex Morono to win by decision. He notes that Morono is six years younger, has better striking volume, and good jiu-jitsu. He believes Court McGee's durability is waning after recent knockouts, but doesn't expect a finish. He thinks Morono will be better wherever the fight goes.
Cody agrees, noting McGee's recent knockout losses to Matt Brown and Jeremiah Wells. He thinks Morono's volume and speed will be too much, and that McGee's pressure game won't work against a more technical striker. Cody also mentions Morono's competitive fight with Joaquin Buckley has aged well.
Daniel Vreeland confidently picks Alex Morono to finish Court McGee in the first round. He compares McGee to past veterans Morono has stopped, like Josh Burkman and Tim Means, noting McGee is 40 and slow. Vreeland believes Morono's speed, power, and vicious intent will overwhelm McGee, and even if taken down, Morono can pop back up. He predicts a first-round knockout or submission.
Morono is younger, more durable, and has better striking volume and power. McGee's chin is fading after recent knockouts. Morono's defensive grappling should be enough to keep the fight standing, where he can land damaging combinations. Expect a finish in the second or third round.
Paul is confident in Morono, citing McGee's age, declining durability, and recent knockout losses. He notes McGee's wins are over one-dimensional grapplers, while Morono has better footwork, volume, and takedown defense. Paul thinks Morono will outwork McGee and possibly knock him out, as McGee's durability is gone.
The host picks Morono based on output and commitment. He notes Morono looked amazing against Buckley and is better than Ventre. He criticizes McGee's recent losses to Matt Brown and Jeremiah Wells. He predicts neither will get a KO or dominate grappling, so Morono's higher volume will win a decision.
Totals
| Fighter | KD | Sig. Str. | Sig. Str. % | Total Str. | TD | TD % | Sub. Att | Rev. | Ctrl |
|---|---|---|---|---|---|---|---|---|---|
| Joaquin Buckley | 0 | 40 of 141 | 28% | 54 of 161 | 1 of 2 | 50% | 0 | 0 | 0:13 |
| Alex Morono | 0 | 68 of 176 | 38% | 77 of 186 | 2 of 4 | 50% | 0 | 0 | 2:21 |
Per Round
| Rd | Fighter | KD | Sig. Str. | Sig. Str. % | Total Str. | TD | TD % | Sub. Att | Rev. | Ctrl |
|---|---|---|---|---|---|---|---|---|---|---|
| 1 | Joaquin Buckley | 0 | 12 of 33 | 36% | 12 of 35 | 0 of 0 | --- | 0 | 0 | 0:00 |
| Alex Morono | 0 | 10 of 41 | 24% | 14 of 45 | 2 of 4 | 50% | 0 | 0 | 0:35 | |
| 2 | Joaquin Buckley | 0 | 15 of 52 | 28% | 25 of 62 | 0 of 0 | --- | 0 | 0 | 0:00 |
| Alex Morono | 0 | 18 of 45 | 40% | 18 of 45 | 0 of 0 | --- | 0 | 0 | 0:27 | |
| 3 | Joaquin Buckley | 0 | 13 of 56 | 23% | 17 of 64 | 1 of 2 | 50% | 0 | 0 | 0:13 |
| Alex Morono | 0 | 40 of 90 | 44% | 45 of 96 | 0 of 0 | --- | 0 | 0 | 1:19 |
Significant Strikes
| Fighter | Sig. Str. | Sig. Str. % | Head | Body | Leg | Distance | Clinch | Ground |
|---|---|---|---|---|---|---|---|---|
| Joaquin Buckley | 40 of 141 | 28% | 29 of 122 | 10 of 17 | 1 of 2 | 37 of 133 | 3 of 8 | 0 of 0 |
| Alex Morono | 68 of 176 | 38% | 41 of 134 | 24 of 36 | 3 of 6 | 55 of 141 | 2 of 9 | 11 of 26 |
Significant Strikes Per Round
| Rd | Fighter | Sig. Str. | Sig. Str. % | Head | Body | Leg | Distance | Clinch | Ground |
|---|---|---|---|---|---|---|---|---|---|
| 1 | Joaquin Buckley | 12 of 33 | 36% | 9 of 29 | 3 of 4 | 0 of 0 | 12 of 31 | 0 of 2 | 0 of 0 |
| Alex Morono | 10 of 41 | 24% | 6 of 32 | 2 of 6 | 2 of 3 | 10 of 41 | 0 of 0 | 0 of 0 | |
| 2 | Joaquin Buckley | 15 of 52 | 28% | 11 of 44 | 3 of 6 | 1 of 2 | 15 of 51 | 0 of 1 | 0 of 0 |
| Alex Morono | 18 of 45 | 40% | 10 of 31 | 8 of 13 | 0 of 1 | 17 of 41 | 1 of 4 | 0 of 0 | |
| 3 | Joaquin Buckley | 13 of 56 | 23% | 9 of 49 | 4 of 7 | 0 of 0 | 10 of 51 | 3 of 5 | 0 of 0 |
| Alex Morono | 40 of 90 | 44% | 25 of 71 | 14 of 17 | 1 of 2 | 28 of 59 | 1 of 5 | 11 of 26 |
Play-by-Play
View on SherdogBETTING PREVIEW | SCOUTING REPORT | ODDS: Buckley (-175), Morono (+145)
Round 1
From one action fight to the next we go, as exciting welterweights Morono (23-8, 1 NC; 12-5, 1 NC UFC) and Buckley (16-6, 6-4 UFC) toe the line in search of another highlight-reel finish. Referee Kerry Hatley will have his hands full, as the match could take place anywhere and end in the blink of an eye. Buckley dances his way to the cage with Beyonce playing, while Morono goes hard with Prong. There is no glove touch to start the fight, and instead Buckley charges like a bull, throwing fists. He ends up grabbing hold of Morono’s legs. Morono pulls his limbs out and returns to striking range, and the welterweights calm down and proceed to measure one another with single blows. Buckley lands a body kick, and Morono splits the guard with a right hand. Morono ducks away from a haymaker and counters with a right hand. Morono catches his man with a right, and Buckley loads up with a right in response to put his man on rubber legs. Morono shakes out the cobwebs and bounces off the fencing, and he chambers a right hand that just misses the forehead. Buckley springs into action with an uppercut, and he spins with a back kick that ends up getting crowded by the Texan. Morono drives a straight right hand after following a jab, and the power punch in response from Buckley grazes off the side of his noggin. Buckley blitzes with a few punches, and Morono is able to parry or avoid them all. A second surge from “New Mansa” also misses the mark each and every time, but Morono does not make him pay for these reckless attacks and instead allows Buckley to hit air. Buckley leaps at him with a knee extended, but Morono is nowhere to be found. Morono hand-fights until putting a right hand on the jaw, and Buckley races after him and tags him right back. Buckley attempts to spin, and Morono’s safe distance disallows it from succeeding. From out of nowhere, Buckley runs at his foe and lifts him off the ground with a double. Morono hits his back and defends with an armbar, and Buckley wriggles his arm out and backs off to escape the guard before upkicks or other submission attempts find him. Buckley lifts him up again, and Morono latches onto a guillotine choke. Buckley ends up slamming Morono down hard to break up the submission, and the energetic round ends.
Sherdog Scores
Jay Pettry scores the round: 10-9 Buckley
Brian Knapp scores the round: 10-9 Buckley
Tyler Treese scores the round: 10-9 Buckley
Round 2
At the beginning of the round, Buckley is not quite as wild as before, instead lining up a head kick. The Texan counters him with a picture-perfect right hand that sends Buckley flying, and Buckley scrambles back to his feet. Morono allows him to reset so that he can further trade with his opponent, and Buckley aims a few strikes to the body. Morono looks for a high kick that is feet away from the target, and he leans back from a pair of looping hooks that whiz at him. Buckley lumbers forward and suddenly unloads a few huge hooks, and Morono is out of range in time. Morono aims a front kick down the middle when he expected Buckley will come at him, but Buckley does not bite. Buckley kicks the body, and Morono responds with a kick that slaps him in the posterior and makes Buckley grin. Buckley explodes into a combination that is largely blocked and defended by the Fortis MMA fighter, and when he backs off to measure his man, he drills Morono in the ribs with a stern kick. Morono flicks out a number of jabs, and he leans and ducks a punch so that he can catch Buckley with a right hook on the side of the head. Morono measures and releases a head kick that pounds into the guard, and Buckley kicks him in the body again. Buckley tries to corner his foe with a flurry of punches, but Morono will not have it and backs Buckley off. Buckley whiffs on a kick but lands with a body shot, and he ducks a spinning back fist just in the nick of time. Morono strings a few punches together, gets clipped, and responds with a right. Buckley continues to target the body and head indiscriminately in attacks, keeping Morono guessing and not allowing a pattern to emerge. Buckley digs a left to the body and aims a right over the top, but it is a charging left hook when Morono dodges him that catches Morono. Buckley rushes at his man to jam him up against the fencing, and they trade knees before separating at the bell.
Sherdog Scores
Jay Pettry scores the round: 10-9 Buckley
Brian Knapp scores the round: 10-9 Buckley
Tyler Treese scores the round: 10-9 Buckley
Round 3
The welterweights meet in the middle, and Buckley leads the dance with a series of punches. Commentator Daniel Cormier starts barking when saying that the fighters “need to bring the dog out,” and Buckley lashes out with power strikes that finally find their home cleanly. A left hand from “New Mansa” busts Morono’s lip, and blood immediately trickles out of his mouth. Morono aims counters, but Buckley appears slightly fresher and able to beat his foe to the punch. Buckley runs forward with a looping left hook, and he slams his right fist into the body. Morono backs him off with a front kick, and the kick rams into his cup. Buckley waves off Hatley and does not want to allow Morono to recover. Morono eats several clean shots, and he is taking damage and trying to back off to survive. Buckley lays into him with a number of unanswered body shots and a few to the head, and Morono hits nothing but air when he replies with a right hand. Buckley spins with a wheel kick, and Morono tackles him to the ground. Buckley bursts back to his feet after only a few seconds on his back, and he smashes Morono in the face with a left hand. Buckley hammers his foe with a number of punches to the body and head, and Morono is leaning against the fence and struggling to stay on his feet. Morono shoots desperately for a takedown, and it is a feeble attempt as he falls to his knees. Buckley lets him stand up so that he can punch the Texan in the face again and again. Morono takes a deep breath and starts firing back, but it is a takedown shot that he goes for a full-throated effort. Buckley stonewalls him and pushes Morono to his back, and he lowers himself into the guard to drop down some heavy ground-and-pound. Morono maintains a high guard, and Buckley opens up with several right hands until Morono adjusts. Buckley keeps tightly pressed to “The Great White” to not allow Morono to latch on with a submission, and he sneaks in some ground strikes when he finds openings. Buckley stands up, and lets Morono up with 15 seconds to spare. Morono meanders forward, and he throws everything into one final right hand that ultimately misses and sends him toppling to the mat. Morono rolls to his back, and Buckley returns to the guard to do a little more damage before the final horn sounds.
Sherdog Scores
Jay Pettry scores the round: 10-8 Buckley (30-26 Buckley)
Brian Knapp scores the round: 10-9 Buckley (30-27 Buckley)
Tyler Treese scores the round: 10-9 Buckley (30-27 Buckley)
The Official Result
Joaquin Buckley def. Alex Morono via Unanimous Decision (30-27, 30-27, 30-26)
Angelo picks Joaquin Buckley because he is the much better striker with more power, speed, and technique. He notes that Alex Morono is well-rounded and underrated but has low takedown accuracy (20%), so he cannot trust him to wrestle. Buckley has decent takedown defense and has faced good wrestlers. Angelo plans to avoid betting on this fight.
Big Brady picks Joaquin Buckley, emphasizing Buckley's significant power advantage over Alex Morono. He notes that Morono is more of a decision fighter and has been hurt more often recently. He expects the fight to stay standing and that Buckley will eventually land a big shot, predicting a third-round knockout.
Cody picks Buckley, citing his speed, athleticism, and ability to land the more impactful strikes. He notes that Morono has taken a lot of damage recently and may be hesitant. Buckley's takedowns and movement should allow him to win rounds, though Cody acknowledges Buckley's history of getting knocked out.
Daniel Levi picks Joaquin Buckley, citing his superior speed, athleticism, and hand speed. He notes that both fighters have suspect chins but Buckley is the better athlete and is dropping to his proper weight class at 170. He expects Buckley's speed and explosiveness to be the difference, though he acknowledges a chance someone gets knocked out.
Lucrative James picks Buckley by knockout in round two or three. He thinks Morono will be winning early but Buckley will figure out his awkwardness and land heavy shots. He compares it to the Ponzinibbio fight where Morono kept getting caught. He likes over 1.5 rounds as well.
Buckley has the power and agility to catch Morono in pocket exchanges. Morono is durable but leaves openings and has been knocked out before. Buckley should land a big shot and finish him. Morono may win minutes but Buckley's power is the difference. Expect a knockout victory for Buckley.
Paul picks Buckley, expecting a close fight that goes to decision with Buckley landing the more damaging strikes. He notes that both fighters are similar in size, which favors Buckley. Paul mentions that Morono has a questionable chin but hasn't been knocked out recently, so he leans toward Buckley by decision.
The MMA Guru picks Joaquin Buckley over Alex Morono, predicting a TKO in the second round. He believes Buckley's intention to take Morono's head off will be the difference, as Morono tries to outpoint to a decision. He notes Morono was doing well against Ponzinibbio until he got knocked out in round three, and that Morono's wins haven't aged well. He also mentions Buckley's size and reach advantage.
Totals
| Fighter | KD | Sig. Str. | Sig. Str. % | Total Str. | TD | TD % | Sub. Att | Rev. | Ctrl |
|---|---|---|---|---|---|---|---|---|---|
| Alex Morono | 0 | 40 of 87 | 45% | 45 of 92 | 2 of 2 | 100% | 0 | 0 | 0:46 |
| Tim Means | 0 | 33 of 92 | 35% | 42 of 102 | 0 of 0 | --- | 1 | 0 | 0:00 |
Per Round
| Rd | Fighter | KD | Sig. Str. | Sig. Str. % | Total Str. | TD | TD % | Sub. Att | Rev. | Ctrl |
|---|---|---|---|---|---|---|---|---|---|---|
| 1 | Alex Morono | 0 | 32 of 64 | 50% | 34 of 66 | 0 of 0 | --- | 0 | 0 | 0:27 |
| Tim Means | 0 | 18 of 58 | 31% | 27 of 68 | 0 of 0 | --- | 0 | 0 | 0:00 | |
| 2 | Alex Morono | 0 | 8 of 23 | 34% | 11 of 26 | 2 of 2 | 100% | 0 | 0 | 0:19 |
| Tim Means | 0 | 15 of 34 | 44% | 15 of 34 | 0 of 0 | --- | 1 | 0 | 0:00 |
Significant Strikes
| Fighter | Sig. Str. | Sig. Str. % | Head | Body | Leg | Distance | Clinch | Ground |
|---|---|---|---|---|---|---|---|---|
| Alex Morono | 40 of 87 | 45% | 16 of 52 | 18 of 29 | 6 of 6 | 30 of 74 | 10 of 13 | 0 of 0 |
| Tim Means | 33 of 92 | 35% | 29 of 86 | 4 of 6 | 0 of 0 | 31 of 86 | 2 of 6 | 0 of 0 |
Significant Strikes Per Round
| Rd | Fighter | Sig. Str. | Sig. Str. % | Head | Body | Leg | Distance | Clinch | Ground |
|---|---|---|---|---|---|---|---|---|---|
| 1 | Alex Morono | 32 of 64 | 50% | 10 of 32 | 16 of 26 | 6 of 6 | 23 of 52 | 9 of 12 | 0 of 0 |
| Tim Means | 18 of 58 | 31% | 16 of 55 | 2 of 3 | 0 of 0 | 16 of 52 | 2 of 6 | 0 of 0 | |
| 2 | Alex Morono | 8 of 23 | 34% | 6 of 20 | 2 of 3 | 0 of 0 | 7 of 22 | 1 of 1 | 0 of 0 |
| Tim Means | 15 of 34 | 44% | 13 of 31 | 2 of 3 | 0 of 0 | 15 of 34 | 0 of 0 | 0 of 0 |
Angelo leans on Morono, noting his clean striking and recent improvements. He says Tim Means is gritty and well-rounded, and that unless you're ranked or dangerous, you shouldn't be a 2-to-1 favorite over Means. He calls it a close fight and is not betting on it.
Big Brady is a huge Tim Means fan but has serious concerns about Means' durability at 39 years old and after 48 fights. He notes Means has been getting dropped and finished recently, and questions his focus as he seems more into coaching. Brady compares this to the Morono vs. Cerrone fight, predicting Morono will land a big shot, swarm, and finish Means. He picks Morono by second-round knockout and suggests Means may retire after this fight.
Cody picks Morono, citing Tim Means' age (39) and 50 pro fights, leading to durability and speed decline. He notes Means' tendency to gas after the first round and Morono's volume and pressure. He expects Morono to chew away at Means and possibly get a late stoppage. He acknowledges Means' skill but believes his best days are behind him.
Connor picks Morono, agreeing that Means is past his prime and gets hurt too often. He highlights Morono's lateral movement, jab, and counter-punching, which will frustrate Means. He thinks Means will have moments but ultimately lose a decision or get dropped.
Daniel Levi picks Alex Morono but with low confidence, citing Tim Means' age (39-40) and declining durability as the deciding factor. He notes that statistically, Means is competitive and would be a live dog if younger, but Means' recent fights show he can't take damage like before. Levi expects a competitive fight but favors Morono's unorthodox style and durability. He passes on betting due to the price, calling it a dog-or-pass situation.
Morono's pressure, pace, and volume will be too much for Means, who has diminished durability at 39. Means is the better technical striker but can't take shots like before. Morono will march forward, land big shots, and likely find a knockout or submission. Means may have moments but Morono's relentless style will overwhelm him.
Paul agrees with Cody, picking Morono. He notes that Means gasses after 6-7 minutes and lacks a grappling game. He mentions that Morono might mix in takedowns and fish for a submission, and that the market has moved on that prop. He sees Morono as the rightful favorite.
The MMA Guru picks Alex Morono, noting that he had a full training camp and has better hand speed and cardio. He believes Tim Means has slowed down and will struggle with Morono's pace. He predicts a dominant decision or a late finish.
Zane picks Morono, citing Tim Means' age (39) and tendency to get hurt now. He notes that Means' pressure-counter style leaves him vulnerable, and Morono's awkward but effective striking, good footwork, and jab will cause problems. He thinks Morono will land a big counter and potentially drop Means, though a decision is likely.
Totals
| Fighter | KD | Sig. Str. | Sig. Str. % | Total Str. | TD | TD % | Sub. Att | Rev. | Ctrl |
|---|---|---|---|---|---|---|---|---|---|
| Santiago Ponzinibbio | 1 | 66 of 155 | 42% | 66 of 155 | 0 of 1 | 0% | 0 | 0 | 0:01 |
| Alex Morono | 1 | 38 of 131 | 29% | 38 of 131 | 0 of 0 | --- | 0 | 0 | 0:08 |
Per Round
| Rd | Fighter | KD | Sig. Str. | Sig. Str. % | Total Str. | TD | TD % | Sub. Att | Rev. | Ctrl |
|---|---|---|---|---|---|---|---|---|---|---|
| 1 | Santiago Ponzinibbio | 0 | 22 of 42 | 52% | 22 of 42 | 0 of 0 | --- | 0 | 0 | 0:00 |
| Alex Morono | 1 | 17 of 55 | 30% | 17 of 55 | 0 of 0 | --- | 0 | 0 | 0:08 | |
| 2 | Santiago Ponzinibbio | 0 | 26 of 73 | 35% | 26 of 73 | 0 of 1 | 0% | 0 | 0 | 0:00 |
| Alex Morono | 0 | 13 of 50 | 26% | 13 of 50 | 0 of 0 | --- | 0 | 0 | 0:00 | |
| 3 | Santiago Ponzinibbio | 1 | 18 of 40 | 45% | 18 of 40 | 0 of 0 | --- | 0 | 0 | 0:01 |
| Alex Morono | 0 | 8 of 26 | 30% | 8 of 26 | 0 of 0 | --- | 0 | 0 | 0:00 |
Significant Strikes
| Fighter | Sig. Str. | Sig. Str. % | Head | Body | Leg | Distance | Clinch | Ground |
|---|---|---|---|---|---|---|---|---|
| Santiago Ponzinibbio | 66 of 155 | 42% | 31 of 99 | 26 of 47 | 9 of 9 | 65 of 153 | 0 of 0 | 1 of 2 |
| Alex Morono | 38 of 131 | 29% | 34 of 120 | 4 of 11 | 0 of 0 | 34 of 124 | 0 of 0 | 4 of 7 |
Significant Strikes Per Round
| Rd | Fighter | Sig. Str. | Sig. Str. % | Head | Body | Leg | Distance | Clinch | Ground |
|---|---|---|---|---|---|---|---|---|---|
| 1 | Santiago Ponzinibbio | 22 of 42 | 52% | 6 of 19 | 11 of 18 | 5 of 5 | 22 of 42 | 0 of 0 | 0 of 0 |
| Alex Morono | 17 of 55 | 30% | 14 of 51 | 3 of 4 | 0 of 0 | 13 of 48 | 0 of 0 | 4 of 7 | |
| 2 | Santiago Ponzinibbio | 26 of 73 | 35% | 12 of 48 | 12 of 23 | 2 of 2 | 26 of 73 | 0 of 0 | 0 of 0 |
| Alex Morono | 13 of 50 | 26% | 12 of 45 | 1 of 5 | 0 of 0 | 13 of 50 | 0 of 0 | 0 of 0 | |
| 3 | Santiago Ponzinibbio | 18 of 40 | 45% | 13 of 32 | 3 of 6 | 2 of 2 | 17 of 38 | 0 of 0 | 1 of 2 |
| Alex Morono | 8 of 26 | 30% | 8 of 24 | 0 of 2 | 0 of 0 | 8 of 26 | 0 of 0 | 0 of 0 |
Angelo picks Ponzinibbio, noting his clean striking, range control, and volume. He warns that Ponzinibbio must avoid Lawler's power and treat him with respect. He believes Ponzinibbio can get a finish if he maintains a high pace like Barbarena did. He acknowledges Lawler is dangerous even at 40 but thinks Ponzinibbio's technical approach will win.
Big Brady picks Santiago Ponzinibbio, but is not confident in the price. He notes Ponzinibbio has lost a step but still competes at a high level, while Morono is a short-notice replacement. He expects a close fight that goes to decision, with Ponzinibbio outpointing Morono.
Cody picks Ponzinibbio, citing his volume striking, footwork, and ability to absorb damage. He notes Ponzinibbio has been competitive against high-level guys despite recent split decision losses. He thinks Morono is a 50/50 fighter who fights to his opponent's level and is taking the fight on short notice. He expects Ponzinibbio to win by decision.
Connor picks Ponzinibbio, citing his full camp, powerful straight punches, and low kicks. He notes Morono is a short-notice replacement and lacks the athleticism to handle Ponzinibbio's sustained offense. Connor believes Ponzinibbio's persistence and power will overwhelm Morono, who tends to put himself in danger.
Daniel Levi picks Santiago Ponzinibbio but with low confidence due to Ponzinibbio's diminished form after a health scare. He praises Ponzinibbio's prime style: stalking footwork, calf kicks, and a beautiful straight right. However, he notes Ponzinibbio is a step slower now and has gone 1-3 in his last four. Levi acknowledges Morono's toughness and awkward brawling style, but believes Ponzinibbio's cleaner striking and experience should carry him. He warns not to be surprised if Morono wins.
Lock likes Ponzinibbio to win, believing he will torch Morono from the jump and eventually knock him out. He sees Morono as a plodding forward fighter whose durability holds up some nights but not against Ponzinibbio's striking. From a long-term perspective, he thinks Ponzinibbio will get a decent bump but will lose against higher-level competition. He recommends a pump and dump on Ponzinibbio this weekend.
Paul agrees with Cody, picking Ponzinibbio. He notes that Ponzinibbio has been preparing for this fight for a long time while Morono is on short notice. He thinks the minus 180 line is fair and is surprised it's not higher given the circumstances. He sees Ponzinibbio's experience and preparation as key factors.
The MMA Guru picks Santiago Ponzinibbio over Robbie Lawler (note: transcript says Lawler but fight is Ponzinibbio vs Morono; likely error). He believes Ponzinibbio will jab Lawler's face off and win by TKO in round two or three. He criticizes Lawler's age and recent performances, and thinks Ponzinibbio's range striking will be too much.
Zane picks Ponzinibbio, emphasizing his ability to rally back in fights and his power. He notes Morono's grit but says Ponzinibbio's sustained offense and punching power are a level above Morono's recent opponents. Zane is concerned about Morono's short notice but trusts Ponzinibbio's experience.
Joshua Burkman - Fight History
Totals
| Fighter | KD | Sig. Str. | Sig. Str. % | Total Str. | TD | TD % | Sub. Att | Rev. | Ctrl |
|---|---|---|---|---|---|---|---|---|---|
| Alex Morono | 0 | 4 of 13 | 30% | 4 of 13 | 0 of 0 | --- | 0 | 0 | 0:06 |
| Joshua Burkman | 1 | 7 of 19 | 36% | 7 of 19 | 0 of 0 | --- | 1 | 0 | 0:01 |
Per Round
| Rd | Fighter | KD | Sig. Str. | Sig. Str. % | Total Str. | TD | TD % | Sub. Att | Rev. | Ctrl |
|---|---|---|---|---|---|---|---|---|---|---|
| 1 | Alex Morono | 0 | 4 of 13 | 30% | 4 of 13 | 0 of 0 | --- | 0 | 0 | 0:06 |
| Joshua Burkman | 1 | 7 of 19 | 36% | 7 of 19 | 0 of 0 | --- | 1 | 0 | 0:01 |
Significant Strikes
| Fighter | Sig. Str. | Sig. Str. % | Head | Body | Leg | Distance | Clinch | Ground |
|---|---|---|---|---|---|---|---|---|
| Alex Morono | 4 of 13 | 30% | 0 of 5 | 0 of 3 | 4 of 5 | 4 of 13 | 0 of 0 | 0 of 0 |
| Joshua Burkman | 7 of 19 | 36% | 2 of 12 | 0 of 0 | 5 of 7 | 7 of 19 | 0 of 0 | 0 of 0 |
Significant Strikes Per Round
| Rd | Fighter | Sig. Str. | Sig. Str. % | Head | Body | Leg | Distance | Clinch | Ground |
|---|---|---|---|---|---|---|---|---|---|
| 1 | Alex Morono | 4 of 13 | 30% | 0 of 5 | 0 of 3 | 4 of 5 | 4 of 13 | 0 of 0 | 0 of 0 |
| Joshua Burkman | 7 of 19 | 36% | 2 of 12 | 0 of 0 | 5 of 7 | 7 of 19 | 0 of 0 | 0 of 0 |
Totals
| Fighter | KD | Sig. Str. | Sig. Str. % | Total Str. | TD | TD % | Sub. Att | Rev. | Ctrl |
|---|---|---|---|---|---|---|---|---|---|
| Drew Dober | 0 | 11 of 18 | 61% | 11 of 18 | 0 of 1 | 0% | 0 | 0 | 0:00 |
| Joshua Burkman | 1 | 15 of 29 | 51% | 20 of 34 | 0 of 1 | 0% | 0 | 0 | 1:07 |
Per Round
| Rd | Fighter | KD | Sig. Str. | Sig. Str. % | Total Str. | TD | TD % | Sub. Att | Rev. | Ctrl |
|---|---|---|---|---|---|---|---|---|---|---|
| 1 | Drew Dober | 0 | 11 of 18 | 61% | 11 of 18 | 0 of 1 | 0% | 0 | 0 | 0:00 |
| Joshua Burkman | 1 | 15 of 29 | 51% | 20 of 34 | 0 of 1 | 0% | 0 | 0 | 1:07 |
Significant Strikes
| Fighter | Sig. Str. | Sig. Str. % | Head | Body | Leg | Distance | Clinch | Ground |
|---|---|---|---|---|---|---|---|---|
| Drew Dober | 11 of 18 | 61% | 4 of 7 | 4 of 6 | 3 of 5 | 7 of 14 | 4 of 4 | 0 of 0 |
| Joshua Burkman | 15 of 29 | 51% | 5 of 17 | 4 of 6 | 6 of 6 | 9 of 21 | 5 of 7 | 1 of 1 |
Significant Strikes Per Round
| Rd | Fighter | Sig. Str. | Sig. Str. % | Head | Body | Leg | Distance | Clinch | Ground |
|---|---|---|---|---|---|---|---|---|---|
| 1 | Drew Dober | 11 of 18 | 61% | 4 of 7 | 4 of 6 | 3 of 5 | 7 of 14 | 4 of 4 | 0 of 0 |
| Joshua Burkman | 15 of 29 | 51% | 5 of 17 | 4 of 6 | 6 of 6 | 9 of 21 | 5 of 7 | 1 of 1 |
Totals
| Fighter | KD | Sig. Str. | Sig. Str. % | Total Str. | TD | TD % | Sub. Att | Rev. | Ctrl |
|---|---|---|---|---|---|---|---|---|---|
| Michel Prazeres | 0 | 24 of 34 | 70% | 34 of 45 | 2 of 3 | 66% | 1 | 0 | 1:11 |
| Joshua Burkman | 0 | 1 of 1 | 100% | 1 of 1 | 0 of 1 | 0% | 0 | 0 | 0:00 |
Per Round
| Rd | Fighter | KD | Sig. Str. | Sig. Str. % | Total Str. | TD | TD % | Sub. Att | Rev. | Ctrl |
|---|---|---|---|---|---|---|---|---|---|---|
| 1 | Michel Prazeres | 0 | 24 of 34 | 70% | 34 of 45 | 2 of 3 | 66% | 1 | 0 | 1:11 |
| Joshua Burkman | 0 | 1 of 1 | 100% | 1 of 1 | 0 of 1 | 0% | 0 | 0 | 0:00 |
Significant Strikes
| Fighter | Sig. Str. | Sig. Str. % | Head | Body | Leg | Distance | Clinch | Ground |
|---|---|---|---|---|---|---|---|---|
| Michel Prazeres | 24 of 34 | 70% | 24 of 34 | 0 of 0 | 0 of 0 | 4 of 7 | 12 of 19 | 8 of 8 |
| Joshua Burkman | 1 of 1 | 100% | 0 of 0 | 0 of 0 | 1 of 1 | 1 of 1 | 0 of 0 | 0 of 0 |
Significant Strikes Per Round
| Rd | Fighter | Sig. Str. | Sig. Str. % | Head | Body | Leg | Distance | Clinch | Ground |
|---|---|---|---|---|---|---|---|---|---|
| 1 | Michel Prazeres | 24 of 34 | 70% | 24 of 34 | 0 of 0 | 0 of 0 | 4 of 7 | 12 of 19 | 8 of 8 |
| Joshua Burkman | 1 of 1 | 100% | 0 of 0 | 0 of 0 | 1 of 1 | 1 of 1 | 0 of 0 | 0 of 0 |
Totals
| Fighter | KD | Sig. Str. | Sig. Str. % | Total Str. | TD | TD % | Sub. Att | Rev. | Ctrl |
|---|---|---|---|---|---|---|---|---|---|
| Zak Ottow | 0 | 47 of 126 | 37% | 50 of 129 | 1 of 4 | 25% | 0 | 0 | 1:16 |
| Joshua Burkman | 0 | 65 of 149 | 43% | 80 of 165 | 0 of 2 | 0% | 1 | 0 | 0:09 |
Per Round
| Rd | Fighter | KD | Sig. Str. | Sig. Str. % | Total Str. | TD | TD % | Sub. Att | Rev. | Ctrl |
|---|---|---|---|---|---|---|---|---|---|---|
| 1 | Zak Ottow | 0 | 17 of 38 | 44% | 17 of 38 | 0 of 1 | 0% | 0 | 0 | 0:00 |
| Joshua Burkman | 0 | 16 of 37 | 43% | 16 of 37 | 0 of 0 | --- | 0 | 0 | 0:00 | |
| 2 | Zak Ottow | 0 | 13 of 47 | 27% | 13 of 47 | 0 of 1 | 0% | 0 | 0 | 0:00 |
| Joshua Burkman | 0 | 28 of 61 | 45% | 28 of 61 | 0 of 0 | --- | 0 | 0 | 0:00 | |
| 3 | Zak Ottow | 0 | 17 of 41 | 41% | 20 of 44 | 1 of 2 | 50% | 0 | 0 | 1:16 |
| Joshua Burkman | 0 | 21 of 51 | 41% | 36 of 67 | 0 of 2 | 0% | 1 | 0 | 0:09 |
Significant Strikes
| Fighter | Sig. Str. | Sig. Str. % | Head | Body | Leg | Distance | Clinch | Ground |
|---|---|---|---|---|---|---|---|---|
| Zak Ottow | 47 of 126 | 37% | 12 of 74 | 8 of 19 | 27 of 33 | 42 of 120 | 5 of 6 | 0 of 0 |
| Joshua Burkman | 65 of 149 | 43% | 31 of 106 | 14 of 20 | 20 of 23 | 62 of 144 | 2 of 3 | 1 of 2 |
Significant Strikes Per Round
| Rd | Fighter | Sig. Str. | Sig. Str. % | Head | Body | Leg | Distance | Clinch | Ground |
|---|---|---|---|---|---|---|---|---|---|
| 1 | Zak Ottow | 17 of 38 | 44% | 4 of 20 | 3 of 7 | 10 of 11 | 17 of 38 | 0 of 0 | 0 of 0 |
| Joshua Burkman | 16 of 37 | 43% | 7 of 24 | 3 of 7 | 6 of 6 | 15 of 36 | 1 of 1 | 0 of 0 | |
| 2 | Zak Ottow | 13 of 47 | 27% | 4 of 29 | 2 of 8 | 7 of 10 | 13 of 47 | 0 of 0 | 0 of 0 |
| Joshua Burkman | 28 of 61 | 45% | 13 of 45 | 8 of 8 | 7 of 8 | 28 of 60 | 0 of 1 | 0 of 0 | |
| 3 | Zak Ottow | 17 of 41 | 41% | 4 of 25 | 3 of 4 | 10 of 12 | 12 of 35 | 5 of 6 | 0 of 0 |
| Joshua Burkman | 21 of 51 | 41% | 11 of 37 | 3 of 5 | 7 of 9 | 19 of 48 | 1 of 1 | 1 of 2 |
Totals
| Fighter | KD | Sig. Str. | Sig. Str. % | Total Str. | TD | TD % | Sub. Att | Rev. | Ctrl |
|---|---|---|---|---|---|---|---|---|---|
| Paul Felder | 0 | 40 of 97 | 41% | 41 of 98 | 3 of 6 | 50% | 0 | 0 | 3:24 |
| Joshua Burkman | 0 | 41 of 95 | 43% | 53 of 107 | 0 of 2 | 0% | 0 | 0 | 1:13 |
Per Round
| Rd | Fighter | KD | Sig. Str. | Sig. Str. % | Total Str. | TD | TD % | Sub. Att | Rev. | Ctrl |
|---|---|---|---|---|---|---|---|---|---|---|
| 1 | Paul Felder | 0 | 25 of 42 | 59% | 26 of 43 | 1 of 2 | 50% | 0 | 0 | 1:16 |
| Joshua Burkman | 0 | 8 of 29 | 27% | 10 of 31 | 0 of 0 | --- | 0 | 0 | 0:00 | |
| 2 | Paul Felder | 0 | 5 of 28 | 17% | 5 of 28 | 0 of 1 | 0% | 0 | 0 | 1:01 |
| Joshua Burkman | 0 | 17 of 35 | 48% | 22 of 40 | 0 of 1 | 0% | 0 | 0 | 0:39 | |
| 3 | Paul Felder | 0 | 10 of 27 | 37% | 10 of 27 | 2 of 3 | 66% | 0 | 0 | 1:07 |
| Joshua Burkman | 0 | 16 of 31 | 51% | 21 of 36 | 0 of 1 | 0% | 0 | 0 | 0:34 |
Significant Strikes
| Fighter | Sig. Str. | Sig. Str. % | Head | Body | Leg | Distance | Clinch | Ground |
|---|---|---|---|---|---|---|---|---|
| Paul Felder | 40 of 97 | 41% | 16 of 58 | 6 of 10 | 18 of 29 | 38 of 93 | 2 of 4 | 0 of 0 |
| Joshua Burkman | 41 of 95 | 43% | 15 of 63 | 14 of 17 | 12 of 15 | 36 of 89 | 5 of 6 | 0 of 0 |
Significant Strikes Per Round
| Rd | Fighter | Sig. Str. | Sig. Str. % | Head | Body | Leg | Distance | Clinch | Ground |
|---|---|---|---|---|---|---|---|---|---|
| 1 | Paul Felder | 25 of 42 | 59% | 10 of 20 | 4 of 5 | 11 of 17 | 24 of 41 | 1 of 1 | 0 of 0 |
| Joshua Burkman | 8 of 29 | 27% | 5 of 23 | 2 of 3 | 1 of 3 | 8 of 29 | 0 of 0 | 0 of 0 | |
| 2 | Paul Felder | 5 of 28 | 17% | 2 of 20 | 1 of 2 | 2 of 6 | 4 of 26 | 1 of 2 | 0 of 0 |
| Joshua Burkman | 17 of 35 | 48% | 7 of 24 | 6 of 7 | 4 of 4 | 14 of 31 | 3 of 4 | 0 of 0 | |
| 3 | Paul Felder | 10 of 27 | 37% | 4 of 18 | 1 of 3 | 5 of 6 | 10 of 26 | 0 of 1 | 0 of 0 |
| Joshua Burkman | 16 of 31 | 51% | 3 of 16 | 6 of 7 | 7 of 8 | 14 of 29 | 2 of 2 | 0 of 0 |
Totals
| Fighter | KD | Sig. Str. | Sig. Str. % | Total Str. | TD | TD % | Sub. Att | Rev. | Ctrl |
|---|---|---|---|---|---|---|---|---|---|
| Joshua Burkman | 0 | 57 of 108 | 52% | 62 of 114 | 3 of 10 | 30% | 0 | 0 | 3:04 |
| K. J. Noons | 0 | 33 of 63 | 52% | 45 of 76 | 0 of 0 | --- | 0 | 0 | 0:00 |
Per Round
| Rd | Fighter | KD | Sig. Str. | Sig. Str. % | Total Str. | TD | TD % | Sub. Att | Rev. | Ctrl |
|---|---|---|---|---|---|---|---|---|---|---|
| 1 | Joshua Burkman | 0 | 19 of 37 | 51% | 19 of 37 | 0 of 0 | --- | 0 | 0 | 0:00 |
| K. J. Noons | 0 | 3 of 7 | 42% | 3 of 7 | 0 of 0 | --- | 0 | 0 | 0:00 | |
| 2 | Joshua Burkman | 0 | 24 of 44 | 54% | 24 of 44 | 1 of 1 | 100% | 0 | 0 | 0:27 |
| K. J. Noons | 0 | 10 of 18 | 55% | 10 of 18 | 0 of 0 | --- | 0 | 0 | 0:00 | |
| 3 | Joshua Burkman | 0 | 14 of 27 | 51% | 19 of 33 | 2 of 9 | 22% | 0 | 0 | 2:37 |
| K. J. Noons | 0 | 20 of 38 | 52% | 32 of 51 | 0 of 0 | --- | 0 | 0 | 0:00 |
Significant Strikes
| Fighter | Sig. Str. | Sig. Str. % | Head | Body | Leg | Distance | Clinch | Ground |
|---|---|---|---|---|---|---|---|---|
| Joshua Burkman | 57 of 108 | 52% | 16 of 59 | 11 of 13 | 30 of 36 | 51 of 99 | 3 of 4 | 3 of 5 |
| K. J. Noons | 33 of 63 | 52% | 26 of 50 | 7 of 13 | 0 of 0 | 20 of 48 | 13 of 15 | 0 of 0 |
Significant Strikes Per Round
| Rd | Fighter | Sig. Str. | Sig. Str. % | Head | Body | Leg | Distance | Clinch | Ground |
|---|---|---|---|---|---|---|---|---|---|
| 1 | Joshua Burkman | 19 of 37 | 51% | 2 of 15 | 5 of 7 | 12 of 15 | 18 of 36 | 1 of 1 | 0 of 0 |
| K. J. Noons | 3 of 7 | 42% | 2 of 6 | 1 of 1 | 0 of 0 | 3 of 7 | 0 of 0 | 0 of 0 | |
| 2 | Joshua Burkman | 24 of 44 | 54% | 6 of 24 | 3 of 3 | 15 of 17 | 23 of 43 | 1 of 1 | 0 of 0 |
| K. J. Noons | 10 of 18 | 55% | 6 of 11 | 4 of 7 | 0 of 0 | 7 of 14 | 3 of 4 | 0 of 0 | |
| 3 | Joshua Burkman | 14 of 27 | 51% | 8 of 20 | 3 of 3 | 3 of 4 | 10 of 20 | 1 of 2 | 3 of 5 |
| K. J. Noons | 20 of 38 | 52% | 18 of 33 | 2 of 5 | 0 of 0 | 10 of 27 | 10 of 11 | 0 of 0 |
Totals
| Fighter | KD | Sig. Str. | Sig. Str. % | Total Str. | TD | TD % | Sub. Att | Rev. | Ctrl |
|---|---|---|---|---|---|---|---|---|---|
| Patrick Côté | 1 | 60 of 93 | 64% | 106 of 140 | 0 of 4 | 0% | 0 | 0 | 2:39 |
| Joshua Burkman | 0 | 45 of 91 | 49% | 49 of 95 | 1 of 1 | 100% | 0 | 0 | 1:00 |
Per Round
| Rd | Fighter | KD | Sig. Str. | Sig. Str. % | Total Str. | TD | TD % | Sub. Att | Rev. | Ctrl |
|---|---|---|---|---|---|---|---|---|---|---|
| 1 | Patrick Côté | 0 | 17 of 25 | 68% | 41 of 50 | 0 of 3 | 0% | 0 | 0 | 1:38 |
| Joshua Burkman | 0 | 23 of 37 | 62% | 23 of 37 | 0 of 0 | --- | 0 | 0 | 0:28 | |
| 2 | Patrick Côté | 0 | 14 of 29 | 48% | 33 of 48 | 0 of 1 | 0% | 0 | 0 | 0:47 |
| Joshua Burkman | 0 | 7 of 26 | 26% | 11 of 30 | 1 of 1 | 100% | 0 | 0 | 0:32 | |
| 3 | Patrick Côté | 1 | 29 of 39 | 74% | 32 of 42 | 0 of 0 | --- | 0 | 0 | 0:14 |
| Joshua Burkman | 0 | 15 of 28 | 53% | 15 of 28 | 0 of 0 | --- | 0 | 0 | 0:00 |
Significant Strikes
| Fighter | Sig. Str. | Sig. Str. % | Head | Body | Leg | Distance | Clinch | Ground |
|---|---|---|---|---|---|---|---|---|
| Patrick Côté | 60 of 93 | 64% | 48 of 70 | 3 of 10 | 9 of 13 | 31 of 63 | 9 of 10 | 20 of 20 |
| Joshua Burkman | 45 of 91 | 49% | 26 of 66 | 12 of 14 | 7 of 11 | 39 of 84 | 6 of 7 | 0 of 0 |
Significant Strikes Per Round
| Rd | Fighter | Sig. Str. | Sig. Str. % | Head | Body | Leg | Distance | Clinch | Ground |
|---|---|---|---|---|---|---|---|---|---|
| 1 | Patrick Côté | 17 of 25 | 68% | 12 of 18 | 2 of 4 | 3 of 3 | 10 of 17 | 7 of 8 | 0 of 0 |
| Joshua Burkman | 23 of 37 | 62% | 12 of 23 | 7 of 8 | 4 of 6 | 18 of 32 | 5 of 5 | 0 of 0 | |
| 2 | Patrick Côté | 14 of 29 | 48% | 9 of 16 | 1 of 6 | 4 of 7 | 12 of 27 | 2 of 2 | 0 of 0 |
| Joshua Burkman | 7 of 26 | 26% | 2 of 18 | 2 of 3 | 3 of 5 | 6 of 24 | 1 of 2 | 0 of 0 | |
| 3 | Patrick Côté | 29 of 39 | 74% | 27 of 36 | 0 of 0 | 2 of 3 | 9 of 19 | 0 of 0 | 20 of 20 |
| Joshua Burkman | 15 of 28 | 53% | 12 of 25 | 3 of 3 | 0 of 0 | 15 of 28 | 0 of 0 | 0 of 0 |
Totals
| Fighter | KD | Sig. Str. | Sig. Str. % | Total Str. | TD | TD % | Sub. Att | Rev. | Ctrl |
|---|---|---|---|---|---|---|---|---|---|
| Dong Hyun Kim | 0 | 30 of 44 | 68% | 135 of 165 | 1 of 8 | 12% | 1 | 0 | 7:44 |
| Joshua Burkman | 0 | 20 of 44 | 45% | 21 of 46 | 0 of 2 | 0% | 0 | 0 | 1:19 |
Per Round
| Rd | Fighter | KD | Sig. Str. | Sig. Str. % | Total Str. | TD | TD % | Sub. Att | Rev. | Ctrl |
|---|---|---|---|---|---|---|---|---|---|---|
| 1 | Dong Hyun Kim | 0 | 9 of 14 | 64% | 29 of 41 | 0 of 7 | 0% | 0 | 0 | 3:02 |
| Joshua Burkman | 0 | 7 of 16 | 43% | 8 of 18 | 0 of 1 | 0% | 0 | 0 | 0:47 | |
| 2 | Dong Hyun Kim | 0 | 20 of 26 | 76% | 105 of 120 | 0 of 0 | --- | 0 | 0 | 3:30 |
| Joshua Burkman | 0 | 5 of 12 | 41% | 5 of 12 | 0 of 1 | 0% | 0 | 0 | 0:32 | |
| 3 | Dong Hyun Kim | 0 | 1 of 4 | 25% | 1 of 4 | 1 of 1 | 100% | 1 | 0 | 1:12 |
| Joshua Burkman | 0 | 8 of 16 | 50% | 8 of 16 | 0 of 0 | --- | 0 | 0 | 0:00 |
Significant Strikes
| Fighter | Sig. Str. | Sig. Str. % | Head | Body | Leg | Distance | Clinch | Ground |
|---|---|---|---|---|---|---|---|---|
| Dong Hyun Kim | 30 of 44 | 68% | 26 of 37 | 3 of 6 | 1 of 1 | 4 of 13 | 7 of 11 | 19 of 20 |
| Joshua Burkman | 20 of 44 | 45% | 9 of 29 | 4 of 7 | 7 of 8 | 11 of 26 | 9 of 18 | 0 of 0 |
Significant Strikes Per Round
| Rd | Fighter | Sig. Str. | Sig. Str. % | Head | Body | Leg | Distance | Clinch | Ground |
|---|---|---|---|---|---|---|---|---|---|
| 1 | Dong Hyun Kim | 9 of 14 | 64% | 5 of 7 | 3 of 6 | 1 of 1 | 2 of 4 | 7 of 10 | 0 of 0 |
| Joshua Burkman | 7 of 16 | 43% | 0 of 6 | 1 of 3 | 6 of 7 | 4 of 11 | 3 of 5 | 0 of 0 | |
| 2 | Dong Hyun Kim | 20 of 26 | 76% | 20 of 26 | 0 of 0 | 0 of 0 | 1 of 5 | 0 of 1 | 19 of 20 |
| Joshua Burkman | 5 of 12 | 41% | 3 of 9 | 1 of 2 | 1 of 1 | 4 of 8 | 1 of 4 | 0 of 0 | |
| 3 | Dong Hyun Kim | 1 of 4 | 25% | 1 of 4 | 0 of 0 | 0 of 0 | 1 of 4 | 0 of 0 | 0 of 0 |
| Joshua Burkman | 8 of 16 | 50% | 6 of 14 | 2 of 2 | 0 of 0 | 3 of 7 | 5 of 9 | 0 of 0 |
No comments yet. Be the first to share your thoughts!