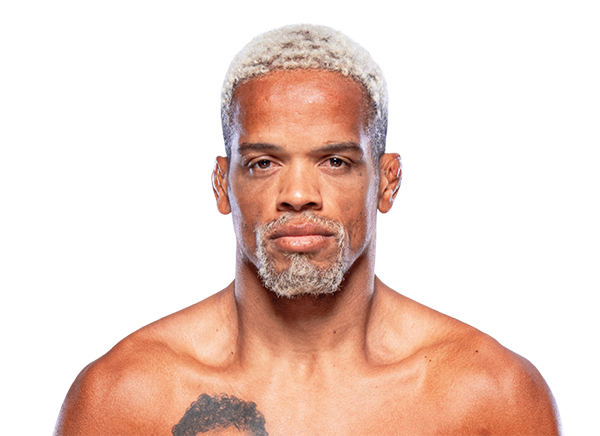
Career Averages - Alan Patrick
Career Averages - Stevie Ray
Alan Patrick - Fight History
Totals
| Fighter | KD | Sig. Str. | Sig. Str. % | Total Str. | TD | TD % | Sub. Att | Rev. | Ctrl |
|---|---|---|---|---|---|---|---|---|---|
| Michael Johnson | 1 | 30 of 48 | 62% | 40 of 61 | 1 of 1 | 100% | 0 | 0 | 2:01 |
| Alan Patrick | 0 | 22 of 47 | 46% | 30 of 56 | 0 of 5 | 0% | 0 | 0 | 0:12 |
Per Round
| Rd | Fighter | KD | Sig. Str. | Sig. Str. % | Total Str. | TD | TD % | Sub. Att | Rev. | Ctrl |
|---|---|---|---|---|---|---|---|---|---|---|
| 1 | Michael Johnson | 0 | 11 of 22 | 50% | 18 of 32 | 1 of 1 | 100% | 0 | 0 | 1:33 |
| Alan Patrick | 0 | 13 of 21 | 61% | 17 of 26 | 0 of 3 | 0% | 0 | 0 | 0:12 | |
| 2 | Michael Johnson | 1 | 19 of 26 | 73% | 22 of 29 | 0 of 0 | --- | 0 | 0 | 0:28 |
| Alan Patrick | 0 | 9 of 26 | 34% | 13 of 30 | 0 of 2 | 0% | 0 | 0 | 0:00 |
Significant Strikes
| Fighter | Sig. Str. | Sig. Str. % | Head | Body | Leg | Distance | Clinch | Ground |
|---|---|---|---|---|---|---|---|---|
| Michael Johnson | 30 of 48 | 62% | 18 of 35 | 9 of 9 | 3 of 4 | 25 of 43 | 2 of 2 | 3 of 3 |
| Alan Patrick | 22 of 47 | 46% | 7 of 30 | 9 of 11 | 6 of 6 | 20 of 42 | 2 of 5 | 0 of 0 |
Significant Strikes Per Round
| Rd | Fighter | Sig. Str. | Sig. Str. % | Head | Body | Leg | Distance | Clinch | Ground |
|---|---|---|---|---|---|---|---|---|---|
| 1 | Michael Johnson | 11 of 22 | 50% | 5 of 15 | 4 of 4 | 2 of 3 | 9 of 20 | 1 of 1 | 1 of 1 |
| Alan Patrick | 13 of 21 | 61% | 4 of 10 | 6 of 8 | 3 of 3 | 11 of 18 | 2 of 3 | 0 of 0 | |
| 2 | Michael Johnson | 19 of 26 | 73% | 13 of 20 | 5 of 5 | 1 of 1 | 16 of 23 | 1 of 1 | 2 of 2 |
| Alan Patrick | 9 of 26 | 34% | 3 of 20 | 3 of 3 | 3 of 3 | 9 of 24 | 0 of 2 | 0 of 0 |
Cody picks Johnson but is hesitant, noting Johnson is a serial 'stunt artist' who finds ways to lose. He acknowledges Johnson's takedown defense is poor and Patrick could take him down. However, he thinks Patrick quit in his last fight and Johnson at least goes out on his shield. He says it's a dogger pass and not a top ticket fight.
Paul leans slightly toward Johnson but is very hesitant. He notes Johnson's pattern of losing fights he should win, but thinks the UFC is giving him a winnable fight against Patrick, who quit in his last outing. He says there are better dogs on the card and it's a pass for him unless weigh-ins change his mind.
Totals
| Fighter | KD | Sig. Str. | Sig. Str. % | Total Str. | TD | TD % | Sub. Att | Rev. | Ctrl |
|---|---|---|---|---|---|---|---|---|---|
| Alan Patrick | 0 | 10 of 32 | 31% | 14 of 39 | 0 of 4 | 0% | 0 | 0 | 0:02 |
| Mason Jones | 0 | 46 of 85 | 54% | 57 of 100 | 2 of 3 | 66% | 0 | 0 | 3:41 |
Per Round
| Rd | Fighter | KD | Sig. Str. | Sig. Str. % | Total Str. | TD | TD % | Sub. Att | Rev. | Ctrl |
|---|---|---|---|---|---|---|---|---|---|---|
| 1 | Alan Patrick | 0 | 7 of 28 | 25% | 7 of 30 | 0 of 3 | 0% | 0 | 0 | 0:00 |
| Mason Jones | 0 | 38 of 71 | 53% | 44 of 78 | 1 of 2 | 50% | 0 | 0 | 2:00 | |
| 2 | Alan Patrick | 0 | 3 of 4 | 75% | 7 of 9 | 0 of 1 | 0% | 0 | 0 | 0:02 |
| Mason Jones | 0 | 8 of 14 | 57% | 13 of 22 | 1 of 1 | 100% | 0 | 0 | 1:41 |
Significant Strikes
| Fighter | Sig. Str. | Sig. Str. % | Head | Body | Leg | Distance | Clinch | Ground |
|---|---|---|---|---|---|---|---|---|
| Alan Patrick | 10 of 32 | 31% | 5 of 25 | 5 of 7 | 0 of 0 | 7 of 29 | 3 of 3 | 0 of 0 |
| Mason Jones | 46 of 85 | 54% | 32 of 67 | 13 of 17 | 1 of 1 | 11 of 37 | 9 of 13 | 26 of 35 |
Significant Strikes Per Round
| Rd | Fighter | Sig. Str. | Sig. Str. % | Head | Body | Leg | Distance | Clinch | Ground |
|---|---|---|---|---|---|---|---|---|---|
| 1 | Alan Patrick | 7 of 28 | 25% | 3 of 22 | 4 of 6 | 0 of 0 | 4 of 25 | 3 of 3 | 0 of 0 |
| Mason Jones | 38 of 71 | 53% | 28 of 58 | 10 of 13 | 0 of 0 | 10 of 32 | 8 of 12 | 20 of 27 | |
| 2 | Alan Patrick | 3 of 4 | 75% | 2 of 3 | 1 of 1 | 0 of 0 | 3 of 4 | 0 of 0 | 0 of 0 |
| Mason Jones | 8 of 14 | 57% | 4 of 9 | 3 of 4 | 1 of 1 | 1 of 5 | 1 of 1 | 6 of 8 |
Big Brady is very confident in Mason Jones, calling him the biggest favorite on the card for a reason. He notes Jones is well-rounded with great striking and a black belt in BJJ, while Patrick is 37, has poor striking defense, and gets wobbled by every shot. He believes Jones will win the striking exchanges by a mile and predicts a knockout, as Patrick's chin is not there.
Cody picks Jones confidently, noting his durability and improvement. He thinks Jones will stop Patrick's takedowns and win on the feet. Cody sees Jones as one of the safer favorites on the card.
Daniel picks Mason Jones to finish the fight, likely by body shot knockout in the second or third round. He notes that Alan Patrick is almost 40, has slowed down, and his athleticism has diminished. Daniel points out that Patrick's takedown defense and get-up game have declined, and he cannot keep up with Jones's pace. He praises Jones's volume, calf kicks, and durability, and believes Jones will overwhelm Patrick and eventually land a fight-ending body shot.
Patrick is one-dimensional and relies on takedowns, but Jones has good takedown defense and get-up ability. Jones has power and will finish Patrick, likely by TKO.
Paul picks Jones confidently, citing his youth, momentum, and well-rounded skills. He notes Patrick's one-dimensional wrestling and inability to get takedowns against better competition. Paul thinks Jones will stuff takedowns and win on the feet. He sees Jones as a safe parlay piece.
The Guru picks Mason Jones, believing Alan Patrick is past his prime and lacks cardio. He thinks Jones is younger, hungrier, and better in all areas, with good jiu-jitsu to neutralize Patrick's grappling. He predicts a third-round TKO via knees against the cage after Patrick fades, though he notes risky moments early where Patrick might get a takedown.
Totals
| Fighter | KD | Sig. Str. | Sig. Str. % | Total Str. | TD | TD % | Sub. Att | Rev. | Ctrl |
|---|---|---|---|---|---|---|---|---|---|
| King Green | 0 | 61 of 95 | 64% | 109 of 149 | 4 of 6 | 66% | 0 | 0 | 7:31 |
| Alan Patrick | 0 | 19 of 69 | 27% | 38 of 89 | 1 of 6 | 16% | 0 | 0 | 1:43 |
Per Round
| Rd | Fighter | KD | Sig. Str. | Sig. Str. % | Total Str. | TD | TD % | Sub. Att | Rev. | Ctrl |
|---|---|---|---|---|---|---|---|---|---|---|
| 1 | King Green | 0 | 16 of 20 | 80% | 35 of 41 | 2 of 3 | 66% | 0 | 0 | 3:52 |
| Alan Patrick | 0 | 2 of 4 | 50% | 8 of 10 | 0 of 3 | 0% | 0 | 0 | 0:50 | |
| 2 | King Green | 0 | 15 of 28 | 53% | 32 of 46 | 1 of 1 | 100% | 0 | 0 | 2:03 |
| Alan Patrick | 0 | 8 of 30 | 26% | 20 of 43 | 0 of 2 | 0% | 0 | 0 | 0:26 | |
| 3 | King Green | 0 | 30 of 47 | 63% | 42 of 62 | 1 of 2 | 50% | 0 | 0 | 1:36 |
| Alan Patrick | 0 | 9 of 35 | 25% | 10 of 36 | 1 of 1 | 100% | 0 | 0 | 0:27 |
Significant Strikes
| Fighter | Sig. Str. | Sig. Str. % | Head | Body | Leg | Distance | Clinch | Ground |
|---|---|---|---|---|---|---|---|---|
| King Green | 61 of 95 | 64% | 41 of 74 | 18 of 19 | 2 of 2 | 35 of 63 | 17 of 18 | 9 of 14 |
| Alan Patrick | 19 of 69 | 27% | 8 of 50 | 7 of 15 | 4 of 4 | 18 of 68 | 0 of 0 | 1 of 1 |
Significant Strikes Per Round
| Rd | Fighter | Sig. Str. | Sig. Str. % | Head | Body | Leg | Distance | Clinch | Ground |
|---|---|---|---|---|---|---|---|---|---|
| 1 | King Green | 16 of 20 | 80% | 6 of 10 | 10 of 10 | 0 of 0 | 2 of 2 | 10 of 10 | 4 of 8 |
| Alan Patrick | 2 of 4 | 50% | 1 of 3 | 1 of 1 | 0 of 0 | 1 of 3 | 0 of 0 | 1 of 1 | |
| 2 | King Green | 15 of 28 | 53% | 13 of 25 | 2 of 3 | 0 of 0 | 9 of 20 | 2 of 3 | 4 of 5 |
| Alan Patrick | 8 of 30 | 26% | 2 of 20 | 2 of 6 | 4 of 4 | 8 of 30 | 0 of 0 | 0 of 0 | |
| 3 | King Green | 30 of 47 | 63% | 22 of 39 | 6 of 6 | 2 of 2 | 24 of 41 | 5 of 5 | 1 of 1 |
| Alan Patrick | 9 of 35 | 25% | 5 of 27 | 4 of 8 | 0 of 0 | 9 of 35 | 0 of 0 | 0 of 0 |
Play-by-Play
View on SherdogRound 1
At lightweight, Green (26-10-1, 7-5-1 UFC) makes a quick turnaround as he takes on Brazilian Patrick (15-2, 5-2 UFC) before referee Herb Dean. The glove touch a formality before the two start swinging, and Green walks forward but ends up having to duck a superman punch immediately. Patrick transitions instantly into a takedown attempt, and Green reverses him and plants the Brazilian on his back. Patrick scrambles and gets back to his feet, but Green lifts him up and slams him back down. Green drops down with a single elbow while he sits in side control, and although he cannot get to mount, he postures up a few times to smack Patrick with single punches. Patrick gets to a knee and stands up, but he eats a knee on the way up. Patrick goes all-in for a takedown, and Green stuffs him and knees him in the chin. Patrick falls forward, and Green lifts him up to knee him in the chest. Green drops down for his own takedown, and Patrick nearly reverses him but winds up on his back again. Patrick throws his legs up and sets up an armbar, and Green spins out as they are both face-down. Green guts out the submission attempt and springs back over to his opponent’s half guard. Green delivers a few elbows to the jaw, and sprinkles in a couple punches for good measure. A few more elbows from Green find their home on Patrick’s face, and the Brazilian attempts to kick him off but decides to get Green back to his full guard. When Patrick tries to pull off a triangle, Green stands up and jogs away. Patrick leaps to his feet, runs after Green and throws a right hand that sends him off-balance. The odd exchange concludes the first frame.
Sherdog Scores
Jay Pettry scores the round: 10-9 Green
Scottie Smith scores the round: 10-9 Green
Tyler Treese scores the round: 10-9 Green
Round 2
Patrick comes out swinging wildly just like he left off at the end of the last round, and he winds up in a clinch before Green shucks him off. Patrick dives forward to take Green down, but Green easily stands him up and uses the body lock position to slam Patrick down. Patrick keeps an open guard and flirts with a triangle choke, but Green shrugs it off and drills him with some punches and elbows. Patrick tries to kick off, but in the process, he actually gives up worse position as Green advances to half guard while dropping down left hands. Green works the body and head indiscriminately, leading Patrick to attack the leg for a heel hook. Green stands up before it is remotely close, and the two tie back up in the clinch. Green pushes away and takes front kick, and he ducks the oncoming hooks with ease as Patrick telegraphs them from afar. When he kicks Green in the torso again, Green shakes his head at him and backs away from a spinning kick without a concern in the world. Green’s hands are down as he lets Patrick kick and miss, as he evades the strikes before darting in with a few punches. Patrick chops at the lead leg before falling forward for a takedown, and Green uses one hand to stop it. Patrick wings a left hook and comes up short, allowing Green to counter him with a shorter left. This same exchange happens again, only this time Patrick gives him a pair of leg kicks at the end. The wild and sloppy striking lead both men to fall around the cage, and the accuracy is low as the two stare at one another before Green lands one last body kick before the horn.
Sherdog Scores
Jay Pettry scores the round: 10-9 Green
Scottie Smith scores the round: 10-9 Green
Tyler Treese scores the round: 10-9 Green
Round 3
A single front kick from Patrick opens the third round, and he uses the kick to attack with more strikes, but Green grabs hold of him. “King” elevates him and puts him down hard on the cage floor, where he is in side control in the blink of an eye. Green stays heavy to keep Patrick grounded, and in the process he has a right hand open to occasionally punch Patrick in the face. Patrick scoots his back to the fence, and Green slams a few left hands on the nose. The punches are not enough to keep Patrick down, as the Brazilian pops back up and jumps forward with a pair of punches that are nowhere near the mark. Green drops his hands once more as he taunts Patrick, with “Nuguette” missing on every wild, looping strike. Green fires back with a couple short shots, and the two clash together until Green circles around and takes Patrick from behind. Green uses the opportunity to push Patrick down, but the Brazilian spins about and takes Green’s back for a moment. Green bucks him off and the two return to standing position. Green stands before his man getting off a few strikes and dodging the counters, while feeling his flow state. Although Green is not landing much of note, he gets off two punches before Patrick boots him in the side of his head. Patrick uses the momentum to get Green down, but the fresher Green springs back up and marches forward. A few punches from Green wobble the legs, and Patrick is fatigued and falling all over the cage. Green snaps his head back with a few punches, and he clips his adversary with a right hand. Green ducks and dodges a few looping shots, and he walks forward to deliver some hooks right on the chin. Green’s hands are by his waist as he shrugs off a spinning kick, and stings Patrick with a few punches as the woozy Brazilian stumbles backwards. The round ends before Green can get the finish he was pursuing.
Sherdog Scores
Jay Pettry scores the round: 10-9 Green (30-27 Green)
Scottie Smith scores the round: 10-9 Green (30-27 Green)
Tyler Treese scores the round: 10-9 Green (30-27 Green)
The Official Result
Bobby Green def. Alan Patrick via Unanimous Decision (30-27, 30-27, 30-27)
Big Brady picks King Green, believing this is a winnable fight for him. He notes Green has a huge advantage on the feet and decent takedown defense and get-up game. He is fairly confident but acknowledges Green tends to lose close decisions. He predicts Green by decision, as Patrick has never lost by decision.
The host likes Patrick's grinding style and believes he can push Green against the cage and secure takedowns, but is hesitant due to Patrick's two-year layoff. He thinks the line is too wide on Green and would prefer Green at -150, but ultimately picks Patrick by decision while staying away from betting the fight.
The MMA Guru picks Bobby Green (King Green) due to his excellent takedown defense and superior striking. He notes that Alan Patrick has a good ground game but hasn't fought since 2018 and has had multiple cancellations, while Green has been active and looked great against Lando Vannata. He expects Green to stuff takedowns, jab Patrick's face, and win a competitive unanimous decision.
Totals
| Fighter | KD | Sig. Str. | Sig. Str. % | Total Str. | TD | TD % | Sub. Att | Rev. | Ctrl |
|---|---|---|---|---|---|---|---|---|---|
| Scott Holtzman | 1 | 73 of 111 | 65% | 96 of 138 | 1 of 2 | 50% | 0 | 0 | 5:33 |
| Alan Patrick | 0 | 25 of 62 | 40% | 27 of 65 | 0 of 4 | 0% | 0 | 0 | 0:13 |
Per Round
| Rd | Fighter | KD | Sig. Str. | Sig. Str. % | Total Str. | TD | TD % | Sub. Att | Rev. | Ctrl |
|---|---|---|---|---|---|---|---|---|---|---|
| 1 | Scott Holtzman | 0 | 19 of 34 | 55% | 20 of 35 | 0 of 0 | --- | 0 | 0 | 1:13 |
| Alan Patrick | 0 | 11 of 25 | 44% | 12 of 26 | 0 of 1 | 0% | 0 | 0 | 0:00 | |
| 2 | Scott Holtzman | 0 | 23 of 35 | 65% | 34 of 48 | 1 of 2 | 50% | 0 | 0 | 2:13 |
| Alan Patrick | 0 | 11 of 25 | 44% | 12 of 26 | 0 of 3 | 0% | 0 | 0 | 0:13 | |
| 3 | Scott Holtzman | 1 | 31 of 42 | 73% | 42 of 55 | 0 of 0 | --- | 0 | 0 | 2:07 |
| Alan Patrick | 0 | 3 of 12 | 25% | 3 of 13 | 0 of 0 | --- | 0 | 0 | 0:00 |
Significant Strikes
| Fighter | Sig. Str. | Sig. Str. % | Head | Body | Leg | Distance | Clinch | Ground |
|---|---|---|---|---|---|---|---|---|
| Scott Holtzman | 73 of 111 | 65% | 55 of 91 | 8 of 10 | 10 of 10 | 27 of 56 | 6 of 6 | 40 of 49 |
| Alan Patrick | 25 of 62 | 40% | 16 of 45 | 8 of 14 | 1 of 3 | 22 of 58 | 3 of 3 | 0 of 1 |
Significant Strikes Per Round
| Rd | Fighter | Sig. Str. | Sig. Str. % | Head | Body | Leg | Distance | Clinch | Ground |
|---|---|---|---|---|---|---|---|---|---|
| 1 | Scott Holtzman | 19 of 34 | 55% | 10 of 25 | 4 of 4 | 5 of 5 | 13 of 26 | 1 of 1 | 5 of 7 |
| Alan Patrick | 11 of 25 | 44% | 5 of 15 | 5 of 7 | 1 of 3 | 9 of 22 | 2 of 2 | 0 of 1 | |
| 2 | Scott Holtzman | 23 of 35 | 65% | 16 of 26 | 3 of 5 | 4 of 4 | 9 of 18 | 5 of 5 | 9 of 12 |
| Alan Patrick | 11 of 25 | 44% | 8 of 19 | 3 of 6 | 0 of 0 | 10 of 24 | 1 of 1 | 0 of 0 | |
| 3 | Scott Holtzman | 31 of 42 | 73% | 29 of 40 | 1 of 1 | 1 of 1 | 5 of 12 | 0 of 0 | 26 of 30 |
| Alan Patrick | 3 of 12 | 25% | 3 of 11 | 0 of 1 | 0 of 0 | 3 of 12 | 0 of 0 | 0 of 0 |
Totals
| Fighter | KD | Sig. Str. | Sig. Str. % | Total Str. | TD | TD % | Sub. Att | Rev. | Ctrl |
|---|---|---|---|---|---|---|---|---|---|
| Alan Patrick | 0 | 28 of 45 | 62% | 91 of 129 | 9 of 15 | 60% | 0 | 0 | 12:29 |
| Damir Hadžović | 0 | 20 of 25 | 80% | 67 of 81 | 0 of 0 | --- | 1 | 0 | 0:48 |
Per Round
| Rd | Fighter | KD | Sig. Str. | Sig. Str. % | Total Str. | TD | TD % | Sub. Att | Rev. | Ctrl |
|---|---|---|---|---|---|---|---|---|---|---|
| 1 | Alan Patrick | 0 | 17 of 22 | 77% | 45 of 65 | 6 of 9 | 66% | 0 | 0 | 3:33 |
| Damir Hadžović | 0 | 12 of 14 | 85% | 24 of 27 | 0 of 0 | --- | 1 | 0 | 0:48 | |
| 2 | Alan Patrick | 0 | 5 of 12 | 41% | 26 of 39 | 1 of 2 | 50% | 0 | 0 | 4:41 |
| Damir Hadžović | 0 | 1 of 2 | 50% | 27 of 35 | 0 of 0 | --- | 0 | 0 | 0:00 | |
| 3 | Alan Patrick | 0 | 6 of 11 | 54% | 20 of 25 | 2 of 4 | 50% | 0 | 0 | 4:15 |
| Damir Hadžović | 0 | 7 of 9 | 77% | 16 of 19 | 0 of 0 | --- | 0 | 0 | 0:00 |
Significant Strikes
| Fighter | Sig. Str. | Sig. Str. % | Head | Body | Leg | Distance | Clinch | Ground |
|---|---|---|---|---|---|---|---|---|
| Alan Patrick | 28 of 45 | 62% | 20 of 35 | 5 of 7 | 3 of 3 | 8 of 18 | 3 of 4 | 17 of 23 |
| Damir Hadžović | 20 of 25 | 80% | 5 of 8 | 15 of 17 | 0 of 0 | 6 of 9 | 11 of 12 | 3 of 4 |
Significant Strikes Per Round
| Rd | Fighter | Sig. Str. | Sig. Str. % | Head | Body | Leg | Distance | Clinch | Ground |
|---|---|---|---|---|---|---|---|---|---|
| 1 | Alan Patrick | 17 of 22 | 77% | 14 of 18 | 2 of 3 | 1 of 1 | 3 of 4 | 2 of 3 | 12 of 15 |
| Damir Hadžović | 12 of 14 | 85% | 4 of 6 | 8 of 8 | 0 of 0 | 2 of 2 | 7 of 8 | 3 of 4 | |
| 2 | Alan Patrick | 5 of 12 | 41% | 4 of 10 | 0 of 1 | 1 of 1 | 2 of 8 | 0 of 0 | 3 of 4 |
| Damir Hadžović | 1 of 2 | 50% | 0 of 0 | 1 of 2 | 0 of 0 | 1 of 2 | 0 of 0 | 0 of 0 | |
| 3 | Alan Patrick | 6 of 11 | 54% | 2 of 7 | 3 of 3 | 1 of 1 | 3 of 6 | 1 of 1 | 2 of 4 |
| Damir Hadžović | 7 of 9 | 77% | 1 of 2 | 6 of 7 | 0 of 0 | 3 of 5 | 4 of 4 | 0 of 0 |
Totals
| Fighter | KD | Sig. Str. | Sig. Str. % | Total Str. | TD | TD % | Sub. Att | Rev. | Ctrl |
|---|---|---|---|---|---|---|---|---|---|
| Alan Patrick | 0 | 7 of 12 | 58% | 60 of 75 | 5 of 8 | 62% | 1 | 0 | 12:12 |
| Stevie Ray | 0 | 2 of 9 | 22% | 56 of 65 | 0 of 0 | --- | 1 | 0 | 1:32 |
Per Round
| Rd | Fighter | KD | Sig. Str. | Sig. Str. % | Total Str. | TD | TD % | Sub. Att | Rev. | Ctrl |
|---|---|---|---|---|---|---|---|---|---|---|
| 1 | Alan Patrick | 0 | 2 of 4 | 50% | 12 of 16 | 3 of 5 | 60% | 0 | 0 | 4:29 |
| Stevie Ray | 0 | 1 of 1 | 100% | 17 of 17 | 0 of 0 | --- | 1 | 0 | 0:19 | |
| 2 | Alan Patrick | 0 | 3 of 4 | 75% | 18 of 24 | 1 of 2 | 50% | 0 | 0 | 3:22 |
| Stevie Ray | 0 | 0 of 5 | 0% | 27 of 33 | 0 of 0 | --- | 0 | 0 | 0:58 | |
| 3 | Alan Patrick | 0 | 2 of 4 | 50% | 30 of 35 | 1 of 1 | 100% | 1 | 0 | 4:21 |
| Stevie Ray | 0 | 1 of 3 | 33% | 12 of 15 | 0 of 0 | --- | 0 | 0 | 0:15 |
Significant Strikes
| Fighter | Sig. Str. | Sig. Str. % | Head | Body | Leg | Distance | Clinch | Ground |
|---|---|---|---|---|---|---|---|---|
| Alan Patrick | 7 of 12 | 58% | 7 of 11 | 0 of 1 | 0 of 0 | 3 of 6 | 0 of 0 | 4 of 6 |
| Stevie Ray | 2 of 9 | 22% | 2 of 9 | 0 of 0 | 0 of 0 | 0 of 7 | 0 of 0 | 2 of 2 |
Significant Strikes Per Round
| Rd | Fighter | Sig. Str. | Sig. Str. % | Head | Body | Leg | Distance | Clinch | Ground |
|---|---|---|---|---|---|---|---|---|---|
| 1 | Alan Patrick | 2 of 4 | 50% | 2 of 4 | 0 of 0 | 0 of 0 | 0 of 1 | 0 of 0 | 2 of 3 |
| Stevie Ray | 1 of 1 | 100% | 1 of 1 | 0 of 0 | 0 of 0 | 0 of 0 | 0 of 0 | 1 of 1 | |
| 2 | Alan Patrick | 3 of 4 | 75% | 3 of 3 | 0 of 1 | 0 of 0 | 2 of 3 | 0 of 0 | 1 of 1 |
| Stevie Ray | 0 of 5 | 0% | 0 of 5 | 0 of 0 | 0 of 0 | 0 of 5 | 0 of 0 | 0 of 0 | |
| 3 | Alan Patrick | 2 of 4 | 50% | 2 of 4 | 0 of 0 | 0 of 0 | 1 of 2 | 0 of 0 | 1 of 2 |
| Stevie Ray | 1 of 3 | 33% | 1 of 3 | 0 of 0 | 0 of 0 | 0 of 2 | 0 of 0 | 1 of 1 |
Totals
| Fighter | KD | Sig. Str. | Sig. Str. % | Total Str. | TD | TD % | Sub. Att | Rev. | Ctrl |
|---|---|---|---|---|---|---|---|---|---|
| Alan Patrick | 0 | 25 of 39 | 64% | 117 of 147 | 5 of 7 | 71% | 1 | 0 | 12:24 |
| Damien Brown | 0 | 15 of 25 | 60% | 51 of 64 | 1 of 3 | 33% | 1 | 0 | 0:37 |
Per Round
| Rd | Fighter | KD | Sig. Str. | Sig. Str. % | Total Str. | TD | TD % | Sub. Att | Rev. | Ctrl |
|---|---|---|---|---|---|---|---|---|---|---|
| 1 | Alan Patrick | 0 | 8 of 13 | 61% | 37 of 45 | 2 of 2 | 100% | 1 | 0 | 3:26 |
| Damien Brown | 0 | 8 of 12 | 66% | 19 of 24 | 1 of 2 | 50% | 0 | 0 | 0:37 | |
| 2 | Alan Patrick | 0 | 10 of 18 | 55% | 61 of 81 | 1 of 2 | 50% | 0 | 0 | 4:50 |
| Damien Brown | 0 | 3 of 6 | 50% | 28 of 33 | 0 of 0 | --- | 1 | 0 | 0:00 | |
| 3 | Alan Patrick | 0 | 7 of 8 | 87% | 19 of 21 | 2 of 3 | 66% | 0 | 0 | 4:08 |
| Damien Brown | 0 | 4 of 7 | 57% | 4 of 7 | 0 of 1 | 0% | 0 | 0 | 0:00 |
Significant Strikes
| Fighter | Sig. Str. | Sig. Str. % | Head | Body | Leg | Distance | Clinch | Ground |
|---|---|---|---|---|---|---|---|---|
| Alan Patrick | 25 of 39 | 64% | 23 of 36 | 1 of 2 | 1 of 1 | 7 of 12 | 0 of 0 | 18 of 27 |
| Damien Brown | 15 of 25 | 60% | 13 of 21 | 2 of 3 | 0 of 1 | 6 of 11 | 1 of 2 | 8 of 12 |
Significant Strikes Per Round
| Rd | Fighter | Sig. Str. | Sig. Str. % | Head | Body | Leg | Distance | Clinch | Ground |
|---|---|---|---|---|---|---|---|---|---|
| 1 | Alan Patrick | 8 of 13 | 61% | 7 of 11 | 1 of 2 | 0 of 0 | 4 of 7 | 0 of 0 | 4 of 6 |
| Damien Brown | 8 of 12 | 66% | 7 of 11 | 1 of 1 | 0 of 0 | 3 of 5 | 0 of 0 | 5 of 7 | |
| 2 | Alan Patrick | 10 of 18 | 55% | 9 of 17 | 0 of 0 | 1 of 1 | 1 of 2 | 0 of 0 | 9 of 16 |
| Damien Brown | 3 of 6 | 50% | 3 of 5 | 0 of 1 | 0 of 0 | 0 of 0 | 0 of 1 | 3 of 5 | |
| 3 | Alan Patrick | 7 of 8 | 87% | 7 of 8 | 0 of 0 | 0 of 0 | 2 of 3 | 0 of 0 | 5 of 5 |
| Damien Brown | 4 of 7 | 57% | 3 of 5 | 1 of 1 | 0 of 1 | 3 of 6 | 1 of 1 | 0 of 0 |
Totals
| Fighter | KD | Sig. Str. | Sig. Str. % | Total Str. | TD | TD % | Sub. Att | Rev. | Ctrl |
|---|---|---|---|---|---|---|---|---|---|
| Mairbek Taisumov | 1 | 23 of 43 | 53% | 24 of 44 | 0 of 0 | --- | 0 | 0 | 0:15 |
| Alan Patrick | 0 | 17 of 38 | 44% | 17 of 38 | 0 of 7 | 0% | 0 | 0 | 0:23 |
Per Round
| Rd | Fighter | KD | Sig. Str. | Sig. Str. % | Total Str. | TD | TD % | Sub. Att | Rev. | Ctrl |
|---|---|---|---|---|---|---|---|---|---|---|
| 1 | Mairbek Taisumov | 0 | 10 of 21 | 47% | 11 of 22 | 0 of 0 | --- | 0 | 0 | 0:03 |
| Alan Patrick | 0 | 14 of 27 | 51% | 14 of 27 | 0 of 5 | 0% | 0 | 0 | 0:23 | |
| 2 | Mairbek Taisumov | 1 | 13 of 22 | 59% | 13 of 22 | 0 of 0 | --- | 0 | 0 | 0:12 |
| Alan Patrick | 0 | 3 of 11 | 27% | 3 of 11 | 0 of 2 | 0% | 0 | 0 | 0:00 |
Significant Strikes
| Fighter | Sig. Str. | Sig. Str. % | Head | Body | Leg | Distance | Clinch | Ground |
|---|---|---|---|---|---|---|---|---|
| Mairbek Taisumov | 23 of 43 | 53% | 15 of 34 | 7 of 8 | 1 of 1 | 14 of 29 | 1 of 1 | 8 of 13 |
| Alan Patrick | 17 of 38 | 44% | 5 of 24 | 8 of 10 | 4 of 4 | 15 of 35 | 2 of 3 | 0 of 0 |
Significant Strikes Per Round
| Rd | Fighter | Sig. Str. | Sig. Str. % | Head | Body | Leg | Distance | Clinch | Ground |
|---|---|---|---|---|---|---|---|---|---|
| 1 | Mairbek Taisumov | 10 of 21 | 47% | 5 of 15 | 5 of 6 | 0 of 0 | 9 of 20 | 1 of 1 | 0 of 0 |
| Alan Patrick | 14 of 27 | 51% | 4 of 15 | 7 of 9 | 3 of 3 | 13 of 26 | 1 of 1 | 0 of 0 | |
| 2 | Mairbek Taisumov | 13 of 22 | 59% | 10 of 19 | 2 of 2 | 1 of 1 | 5 of 9 | 0 of 0 | 8 of 13 |
| Alan Patrick | 3 of 11 | 27% | 1 of 9 | 1 of 1 | 1 of 1 | 2 of 9 | 1 of 2 | 0 of 0 |
Stevie Ray - Fight History
Totals
| Fighter | KD | Sig. Str. | Sig. Str. % | Total Str. | TD | TD % | Sub. Att | Rev. | Ctrl |
|---|---|---|---|---|---|---|---|---|---|
| Stevie Ray | 0 | 78 of 173 | 45% | 81 of 176 | 0 of 0 | --- | 0 | 0 | 0:00 |
| Michael Johnson | 0 | 85 of 188 | 45% | 104 of 207 | 1 of 4 | 25% | 0 | 0 | 2:54 |
Per Round
| Rd | Fighter | KD | Sig. Str. | Sig. Str. % | Total Str. | TD | TD % | Sub. Att | Rev. | Ctrl |
|---|---|---|---|---|---|---|---|---|---|---|
| 1 | Stevie Ray | 0 | 27 of 59 | 45% | 27 of 59 | 0 of 0 | --- | 0 | 0 | 0:00 |
| Michael Johnson | 0 | 24 of 55 | 43% | 25 of 56 | 0 of 1 | 0% | 0 | 0 | 0:00 | |
| 2 | Stevie Ray | 0 | 37 of 84 | 44% | 37 of 84 | 0 of 0 | --- | 0 | 0 | 0:00 |
| Michael Johnson | 0 | 24 of 62 | 38% | 24 of 62 | 0 of 1 | 0% | 0 | 0 | 0:00 | |
| 3 | Stevie Ray | 0 | 14 of 30 | 46% | 17 of 33 | 0 of 0 | --- | 0 | 0 | 0:00 |
| Michael Johnson | 0 | 37 of 71 | 52% | 55 of 89 | 1 of 2 | 50% | 0 | 0 | 2:54 |
Significant Strikes
| Fighter | Sig. Str. | Sig. Str. % | Head | Body | Leg | Distance | Clinch | Ground |
|---|---|---|---|---|---|---|---|---|
| Stevie Ray | 78 of 173 | 45% | 46 of 134 | 19 of 26 | 13 of 13 | 77 of 172 | 1 of 1 | 0 of 0 |
| Michael Johnson | 85 of 188 | 45% | 59 of 156 | 4 of 4 | 22 of 28 | 57 of 142 | 0 of 0 | 28 of 46 |
Significant Strikes Per Round
| Rd | Fighter | Sig. Str. | Sig. Str. % | Head | Body | Leg | Distance | Clinch | Ground |
|---|---|---|---|---|---|---|---|---|---|
| 1 | Stevie Ray | 27 of 59 | 45% | 14 of 44 | 7 of 9 | 6 of 6 | 26 of 58 | 1 of 1 | 0 of 0 |
| Michael Johnson | 24 of 55 | 43% | 11 of 39 | 2 of 2 | 11 of 14 | 24 of 55 | 0 of 0 | 0 of 0 | |
| 2 | Stevie Ray | 37 of 84 | 44% | 21 of 64 | 10 of 14 | 6 of 6 | 37 of 84 | 0 of 0 | 0 of 0 |
| Michael Johnson | 24 of 62 | 38% | 16 of 51 | 1 of 1 | 7 of 10 | 24 of 62 | 0 of 0 | 0 of 0 | |
| 3 | Stevie Ray | 14 of 30 | 46% | 11 of 26 | 2 of 3 | 1 of 1 | 14 of 30 | 0 of 0 | 0 of 0 |
| Michael Johnson | 37 of 71 | 52% | 32 of 66 | 1 of 1 | 4 of 4 | 9 of 25 | 0 of 0 | 28 of 46 |
Totals
| Fighter | KD | Sig. Str. | Sig. Str. % | Total Str. | TD | TD % | Sub. Att | Rev. | Ctrl |
|---|---|---|---|---|---|---|---|---|---|
| Leonardo Santos | 0 | 2 of 11 | 18% | 2 of 11 | 0 of 0 | --- | 0 | 0 | 0:00 |
| Stevie Ray | 1 | 12 of 16 | 75% | 12 of 16 | 0 of 0 | --- | 0 | 0 | 0:01 |
Per Round
| Rd | Fighter | KD | Sig. Str. | Sig. Str. % | Total Str. | TD | TD % | Sub. Att | Rev. | Ctrl |
|---|---|---|---|---|---|---|---|---|---|---|
| 1 | Leonardo Santos | 0 | 2 of 11 | 18% | 2 of 11 | 0 of 0 | --- | 0 | 0 | 0:00 |
| Stevie Ray | 1 | 12 of 16 | 75% | 12 of 16 | 0 of 0 | --- | 0 | 0 | 0:01 |
Significant Strikes
| Fighter | Sig. Str. | Sig. Str. % | Head | Body | Leg | Distance | Clinch | Ground |
|---|---|---|---|---|---|---|---|---|
| Leonardo Santos | 2 of 11 | 18% | 0 of 8 | 0 of 1 | 2 of 2 | 2 of 11 | 0 of 0 | 0 of 0 |
| Stevie Ray | 12 of 16 | 75% | 4 of 5 | 6 of 9 | 2 of 2 | 12 of 16 | 0 of 0 | 0 of 0 |
Significant Strikes Per Round
| Rd | Fighter | Sig. Str. | Sig. Str. % | Head | Body | Leg | Distance | Clinch | Ground |
|---|---|---|---|---|---|---|---|---|---|
| 1 | Leonardo Santos | 2 of 11 | 18% | 0 of 8 | 0 of 1 | 2 of 2 | 2 of 11 | 0 of 0 | 0 of 0 |
| Stevie Ray | 12 of 16 | 75% | 4 of 5 | 6 of 9 | 2 of 2 | 12 of 16 | 0 of 0 | 0 of 0 |
Totals
| Fighter | KD | Sig. Str. | Sig. Str. % | Total Str. | TD | TD % | Sub. Att | Rev. | Ctrl |
|---|---|---|---|---|---|---|---|---|---|
| Stevie Ray | 0 | 75 of 174 | 43% | 75 of 174 | 0 of 0 | --- | 0 | 0 | 0:00 |
| Jessin Ayari | 0 | 63 of 138 | 45% | 64 of 139 | 0 of 0 | --- | 0 | 0 | 0:06 |
Per Round
| Rd | Fighter | KD | Sig. Str. | Sig. Str. % | Total Str. | TD | TD % | Sub. Att | Rev. | Ctrl |
|---|---|---|---|---|---|---|---|---|---|---|
| 1 | Stevie Ray | 0 | 19 of 41 | 46% | 19 of 41 | 0 of 0 | --- | 0 | 0 | 0:00 |
| Jessin Ayari | 0 | 17 of 30 | 56% | 17 of 30 | 0 of 0 | --- | 0 | 0 | 0:05 | |
| 2 | Stevie Ray | 0 | 30 of 61 | 49% | 30 of 61 | 0 of 0 | --- | 0 | 0 | 0:00 |
| Jessin Ayari | 0 | 22 of 50 | 44% | 22 of 50 | 0 of 0 | --- | 0 | 0 | 0:01 | |
| 3 | Stevie Ray | 0 | 26 of 72 | 36% | 26 of 72 | 0 of 0 | --- | 0 | 0 | 0:00 |
| Jessin Ayari | 0 | 24 of 58 | 41% | 25 of 59 | 0 of 0 | --- | 0 | 0 | 0:00 |
Significant Strikes
| Fighter | Sig. Str. | Sig. Str. % | Head | Body | Leg | Distance | Clinch | Ground |
|---|---|---|---|---|---|---|---|---|
| Stevie Ray | 75 of 174 | 43% | 23 of 107 | 6 of 11 | 46 of 56 | 72 of 171 | 3 of 3 | 0 of 0 |
| Jessin Ayari | 63 of 138 | 45% | 49 of 121 | 7 of 9 | 7 of 8 | 60 of 131 | 3 of 7 | 0 of 0 |
Significant Strikes Per Round
| Rd | Fighter | Sig. Str. | Sig. Str. % | Head | Body | Leg | Distance | Clinch | Ground |
|---|---|---|---|---|---|---|---|---|---|
| 1 | Stevie Ray | 19 of 41 | 46% | 5 of 21 | 2 of 4 | 12 of 16 | 17 of 39 | 2 of 2 | 0 of 0 |
| Jessin Ayari | 17 of 30 | 56% | 13 of 26 | 2 of 2 | 2 of 2 | 15 of 28 | 2 of 2 | 0 of 0 | |
| 2 | Stevie Ray | 30 of 61 | 49% | 11 of 37 | 0 of 1 | 19 of 23 | 30 of 61 | 0 of 0 | 0 of 0 |
| Jessin Ayari | 22 of 50 | 44% | 15 of 40 | 4 of 6 | 3 of 4 | 21 of 48 | 1 of 2 | 0 of 0 | |
| 3 | Stevie Ray | 26 of 72 | 36% | 7 of 49 | 4 of 6 | 15 of 17 | 25 of 71 | 1 of 1 | 0 of 0 |
| Jessin Ayari | 24 of 58 | 41% | 21 of 55 | 1 of 1 | 2 of 2 | 24 of 55 | 0 of 3 | 0 of 0 |
Totals
| Fighter | KD | Sig. Str. | Sig. Str. % | Total Str. | TD | TD % | Sub. Att | Rev. | Ctrl |
|---|---|---|---|---|---|---|---|---|---|
| Kajan Johnson | 0 | 24 of 62 | 38% | 37 of 78 | 3 of 4 | 75% | 1 | 0 | 1:40 |
| Stevie Ray | 0 | 33 of 54 | 61% | 37 of 58 | 2 of 4 | 50% | 0 | 0 | 4:12 |
Per Round
| Rd | Fighter | KD | Sig. Str. | Sig. Str. % | Total Str. | TD | TD % | Sub. Att | Rev. | Ctrl |
|---|---|---|---|---|---|---|---|---|---|---|
| 1 | Kajan Johnson | 0 | 4 of 17 | 23% | 4 of 17 | 0 of 0 | --- | 0 | 0 | 0:00 |
| Stevie Ray | 0 | 14 of 21 | 66% | 14 of 21 | 0 of 0 | --- | 0 | 0 | 0:00 | |
| 2 | Kajan Johnson | 0 | 4 of 15 | 26% | 10 of 24 | 2 of 2 | 100% | 1 | 0 | 0:50 |
| Stevie Ray | 0 | 11 of 17 | 64% | 11 of 17 | 2 of 3 | 66% | 0 | 0 | 2:14 | |
| 3 | Kajan Johnson | 0 | 16 of 30 | 53% | 23 of 37 | 1 of 2 | 50% | 0 | 0 | 0:50 |
| Stevie Ray | 0 | 8 of 16 | 50% | 12 of 20 | 0 of 1 | 0% | 0 | 0 | 1:58 |
Significant Strikes
| Fighter | Sig. Str. | Sig. Str. % | Head | Body | Leg | Distance | Clinch | Ground |
|---|---|---|---|---|---|---|---|---|
| Kajan Johnson | 24 of 62 | 38% | 18 of 52 | 1 of 3 | 5 of 7 | 16 of 51 | 1 of 2 | 7 of 9 |
| Stevie Ray | 33 of 54 | 61% | 7 of 22 | 13 of 16 | 13 of 16 | 24 of 42 | 0 of 1 | 9 of 11 |
Significant Strikes Per Round
| Rd | Fighter | Sig. Str. | Sig. Str. % | Head | Body | Leg | Distance | Clinch | Ground |
|---|---|---|---|---|---|---|---|---|---|
| 1 | Kajan Johnson | 4 of 17 | 23% | 0 of 9 | 1 of 3 | 3 of 5 | 4 of 17 | 0 of 0 | 0 of 0 |
| Stevie Ray | 14 of 21 | 66% | 0 of 4 | 7 of 8 | 7 of 9 | 14 of 21 | 0 of 0 | 0 of 0 | |
| 2 | Kajan Johnson | 4 of 15 | 26% | 2 of 13 | 0 of 0 | 2 of 2 | 3 of 13 | 1 of 2 | 0 of 0 |
| Stevie Ray | 11 of 17 | 64% | 3 of 8 | 4 of 5 | 4 of 4 | 5 of 10 | 0 of 1 | 6 of 6 | |
| 3 | Kajan Johnson | 16 of 30 | 53% | 16 of 30 | 0 of 0 | 0 of 0 | 9 of 21 | 0 of 0 | 7 of 9 |
| Stevie Ray | 8 of 16 | 50% | 4 of 10 | 2 of 3 | 2 of 3 | 5 of 11 | 0 of 0 | 3 of 5 |
Totals
| Fighter | KD | Sig. Str. | Sig. Str. % | Total Str. | TD | TD % | Sub. Att | Rev. | Ctrl |
|---|---|---|---|---|---|---|---|---|---|
| Paul Felder | 0 | 5 of 9 | 55% | 11 of 15 | 0 of 1 | 0% | 0 | 0 | 1:45 |
| Stevie Ray | 1 | 23 of 35 | 65% | 28 of 41 | 0 of 0 | --- | 0 | 0 | 1:05 |
Per Round
| Rd | Fighter | KD | Sig. Str. | Sig. Str. % | Total Str. | TD | TD % | Sub. Att | Rev. | Ctrl |
|---|---|---|---|---|---|---|---|---|---|---|
| 1 | Paul Felder | 0 | 5 of 9 | 55% | 11 of 15 | 0 of 1 | 0% | 0 | 0 | 1:45 |
| Stevie Ray | 1 | 23 of 35 | 65% | 28 of 41 | 0 of 0 | --- | 0 | 0 | 1:05 |
Significant Strikes
| Fighter | Sig. Str. | Sig. Str. % | Head | Body | Leg | Distance | Clinch | Ground |
|---|---|---|---|---|---|---|---|---|
| Paul Felder | 5 of 9 | 55% | 2 of 6 | 2 of 2 | 1 of 1 | 2 of 4 | 3 of 5 | 0 of 0 |
| Stevie Ray | 23 of 35 | 65% | 14 of 24 | 7 of 9 | 2 of 2 | 4 of 7 | 7 of 10 | 12 of 18 |
Significant Strikes Per Round
| Rd | Fighter | Sig. Str. | Sig. Str. % | Head | Body | Leg | Distance | Clinch | Ground |
|---|---|---|---|---|---|---|---|---|---|
| 1 | Paul Felder | 5 of 9 | 55% | 2 of 6 | 2 of 2 | 1 of 1 | 2 of 4 | 3 of 5 | 0 of 0 |
| Stevie Ray | 23 of 35 | 65% | 14 of 24 | 7 of 9 | 2 of 2 | 4 of 7 | 7 of 10 | 12 of 18 |
Totals
| Fighter | KD | Sig. Str. | Sig. Str. % | Total Str. | TD | TD % | Sub. Att | Rev. | Ctrl |
|---|---|---|---|---|---|---|---|---|---|
| Stevie Ray | 0 | 46 of 76 | 60% | 65 of 97 | 5 of 7 | 71% | 1 | 0 | 8:12 |
| Joe Lauzon | 0 | 109 of 196 | 55% | 139 of 237 | 0 of 0 | --- | 1 | 0 | 0:35 |
Per Round
| Rd | Fighter | KD | Sig. Str. | Sig. Str. % | Total Str. | TD | TD % | Sub. Att | Rev. | Ctrl |
|---|---|---|---|---|---|---|---|---|---|---|
| 1 | Stevie Ray | 0 | 19 of 21 | 90% | 30 of 33 | 3 of 3 | 100% | 1 | 0 | 4:27 |
| Joe Lauzon | 0 | 4 of 5 | 80% | 9 of 11 | 0 of 0 | --- | 0 | 0 | 0:03 | |
| 2 | Stevie Ray | 0 | 12 of 25 | 48% | 16 of 30 | 1 of 2 | 50% | 0 | 0 | 1:56 |
| Joe Lauzon | 0 | 28 of 64 | 43% | 36 of 74 | 0 of 0 | --- | 0 | 0 | 0:00 | |
| 3 | Stevie Ray | 0 | 15 of 30 | 50% | 19 of 34 | 1 of 2 | 50% | 0 | 0 | 1:49 |
| Joe Lauzon | 0 | 77 of 127 | 60% | 94 of 152 | 0 of 0 | --- | 1 | 0 | 0:32 |
Significant Strikes
| Fighter | Sig. Str. | Sig. Str. % | Head | Body | Leg | Distance | Clinch | Ground |
|---|---|---|---|---|---|---|---|---|
| Stevie Ray | 46 of 76 | 60% | 42 of 72 | 4 of 4 | 0 of 0 | 20 of 43 | 1 of 4 | 25 of 29 |
| Joe Lauzon | 109 of 196 | 55% | 94 of 179 | 14 of 16 | 1 of 1 | 67 of 140 | 18 of 29 | 24 of 27 |
Significant Strikes Per Round
| Rd | Fighter | Sig. Str. | Sig. Str. % | Head | Body | Leg | Distance | Clinch | Ground |
|---|---|---|---|---|---|---|---|---|---|
| 1 | Stevie Ray | 19 of 21 | 90% | 19 of 21 | 0 of 0 | 0 of 0 | 0 of 0 | 1 of 1 | 18 of 20 |
| Joe Lauzon | 4 of 5 | 80% | 1 of 2 | 2 of 2 | 1 of 1 | 3 of 4 | 1 of 1 | 0 of 0 | |
| 2 | Stevie Ray | 12 of 25 | 48% | 10 of 23 | 2 of 2 | 0 of 0 | 7 of 18 | 0 of 2 | 5 of 5 |
| Joe Lauzon | 28 of 64 | 43% | 22 of 57 | 6 of 7 | 0 of 0 | 21 of 52 | 4 of 7 | 3 of 5 | |
| 3 | Stevie Ray | 15 of 30 | 50% | 13 of 28 | 2 of 2 | 0 of 0 | 13 of 25 | 0 of 1 | 2 of 4 |
| Joe Lauzon | 77 of 127 | 60% | 71 of 120 | 6 of 7 | 0 of 0 | 43 of 84 | 13 of 21 | 21 of 22 |
Totals
| Fighter | KD | Sig. Str. | Sig. Str. % | Total Str. | TD | TD % | Sub. Att | Rev. | Ctrl |
|---|---|---|---|---|---|---|---|---|---|
| Stevie Ray | 0 | 38 of 92 | 41% | 48 of 104 | 0 of 0 | --- | 0 | 0 | 0:08 |
| Ross Pearson | 0 | 49 of 117 | 41% | 50 of 119 | 1 of 3 | 33% | 0 | 0 | 3:11 |
Per Round
| Rd | Fighter | KD | Sig. Str. | Sig. Str. % | Total Str. | TD | TD % | Sub. Att | Rev. | Ctrl |
|---|---|---|---|---|---|---|---|---|---|---|
| 1 | Stevie Ray | 0 | 11 of 19 | 57% | 17 of 26 | 0 of 0 | --- | 0 | 0 | 0:08 |
| Ross Pearson | 0 | 13 of 30 | 43% | 13 of 30 | 1 of 1 | 100% | 0 | 0 | 0:21 | |
| 2 | Stevie Ray | 0 | 12 of 31 | 38% | 15 of 35 | 0 of 0 | --- | 0 | 0 | 0:00 |
| Ross Pearson | 0 | 20 of 38 | 52% | 21 of 40 | 0 of 2 | 0% | 0 | 0 | 2:50 | |
| 3 | Stevie Ray | 0 | 15 of 42 | 35% | 16 of 43 | 0 of 0 | --- | 0 | 0 | 0:00 |
| Ross Pearson | 0 | 16 of 49 | 32% | 16 of 49 | 0 of 0 | --- | 0 | 0 | 0:00 |
Significant Strikes
| Fighter | Sig. Str. | Sig. Str. % | Head | Body | Leg | Distance | Clinch | Ground |
|---|---|---|---|---|---|---|---|---|
| Stevie Ray | 38 of 92 | 41% | 5 of 40 | 26 of 45 | 7 of 7 | 36 of 89 | 2 of 3 | 0 of 0 |
| Ross Pearson | 49 of 117 | 41% | 13 of 71 | 14 of 21 | 22 of 25 | 46 of 108 | 3 of 9 | 0 of 0 |
Significant Strikes Per Round
| Rd | Fighter | Sig. Str. | Sig. Str. % | Head | Body | Leg | Distance | Clinch | Ground |
|---|---|---|---|---|---|---|---|---|---|
| 1 | Stevie Ray | 11 of 19 | 57% | 0 of 7 | 8 of 9 | 3 of 3 | 10 of 18 | 1 of 1 | 0 of 0 |
| Ross Pearson | 13 of 30 | 43% | 4 of 15 | 5 of 10 | 4 of 5 | 12 of 27 | 1 of 3 | 0 of 0 | |
| 2 | Stevie Ray | 12 of 31 | 38% | 3 of 12 | 8 of 18 | 1 of 1 | 12 of 30 | 0 of 1 | 0 of 0 |
| Ross Pearson | 20 of 38 | 52% | 5 of 22 | 7 of 7 | 8 of 9 | 18 of 32 | 2 of 6 | 0 of 0 | |
| 3 | Stevie Ray | 15 of 42 | 35% | 2 of 21 | 10 of 18 | 3 of 3 | 14 of 41 | 1 of 1 | 0 of 0 |
| Ross Pearson | 16 of 49 | 32% | 4 of 34 | 2 of 4 | 10 of 11 | 16 of 49 | 0 of 0 | 0 of 0 |
Totals
| Fighter | KD | Sig. Str. | Sig. Str. % | Total Str. | TD | TD % | Sub. Att | Rev. | Ctrl |
|---|---|---|---|---|---|---|---|---|---|
| Alan Patrick | 0 | 7 of 12 | 58% | 60 of 75 | 5 of 8 | 62% | 1 | 0 | 12:12 |
| Stevie Ray | 0 | 2 of 9 | 22% | 56 of 65 | 0 of 0 | --- | 1 | 0 | 1:32 |
Per Round
| Rd | Fighter | KD | Sig. Str. | Sig. Str. % | Total Str. | TD | TD % | Sub. Att | Rev. | Ctrl |
|---|---|---|---|---|---|---|---|---|---|---|
| 1 | Alan Patrick | 0 | 2 of 4 | 50% | 12 of 16 | 3 of 5 | 60% | 0 | 0 | 4:29 |
| Stevie Ray | 0 | 1 of 1 | 100% | 17 of 17 | 0 of 0 | --- | 1 | 0 | 0:19 | |
| 2 | Alan Patrick | 0 | 3 of 4 | 75% | 18 of 24 | 1 of 2 | 50% | 0 | 0 | 3:22 |
| Stevie Ray | 0 | 0 of 5 | 0% | 27 of 33 | 0 of 0 | --- | 0 | 0 | 0:58 | |
| 3 | Alan Patrick | 0 | 2 of 4 | 50% | 30 of 35 | 1 of 1 | 100% | 1 | 0 | 4:21 |
| Stevie Ray | 0 | 1 of 3 | 33% | 12 of 15 | 0 of 0 | --- | 0 | 0 | 0:15 |
Significant Strikes
| Fighter | Sig. Str. | Sig. Str. % | Head | Body | Leg | Distance | Clinch | Ground |
|---|---|---|---|---|---|---|---|---|
| Alan Patrick | 7 of 12 | 58% | 7 of 11 | 0 of 1 | 0 of 0 | 3 of 6 | 0 of 0 | 4 of 6 |
| Stevie Ray | 2 of 9 | 22% | 2 of 9 | 0 of 0 | 0 of 0 | 0 of 7 | 0 of 0 | 2 of 2 |
Significant Strikes Per Round
| Rd | Fighter | Sig. Str. | Sig. Str. % | Head | Body | Leg | Distance | Clinch | Ground |
|---|---|---|---|---|---|---|---|---|---|
| 1 | Alan Patrick | 2 of 4 | 50% | 2 of 4 | 0 of 0 | 0 of 0 | 0 of 1 | 0 of 0 | 2 of 3 |
| Stevie Ray | 1 of 1 | 100% | 1 of 1 | 0 of 0 | 0 of 0 | 0 of 0 | 0 of 0 | 1 of 1 | |
| 2 | Alan Patrick | 3 of 4 | 75% | 3 of 3 | 0 of 1 | 0 of 0 | 2 of 3 | 0 of 0 | 1 of 1 |
| Stevie Ray | 0 of 5 | 0% | 0 of 5 | 0 of 0 | 0 of 0 | 0 of 5 | 0 of 0 | 0 of 0 | |
| 3 | Alan Patrick | 2 of 4 | 50% | 2 of 4 | 0 of 0 | 0 of 0 | 1 of 2 | 0 of 0 | 1 of 2 |
| Stevie Ray | 1 of 3 | 33% | 1 of 3 | 0 of 0 | 0 of 0 | 0 of 2 | 0 of 0 | 1 of 1 |
No comments yet. Be the first to share your thoughts!