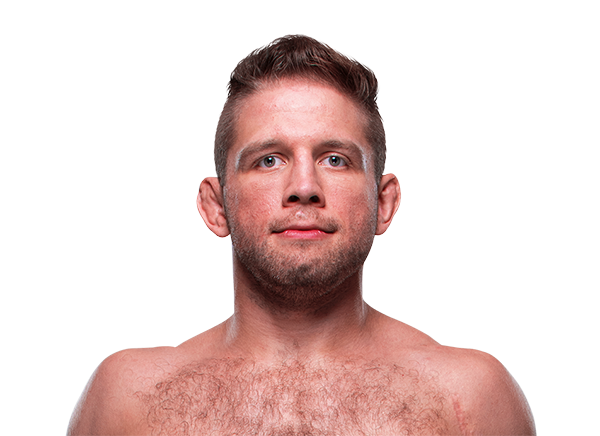
Career Averages - Nik Lentz
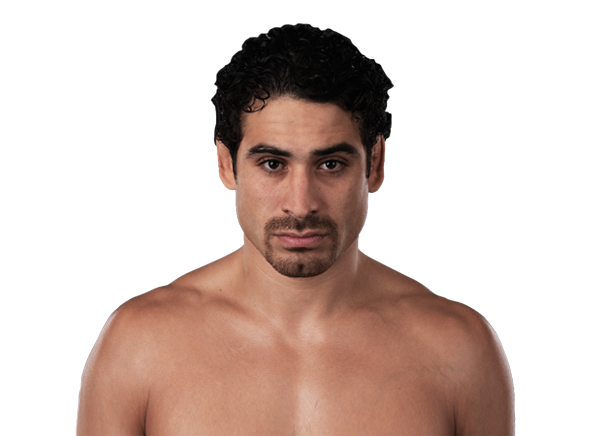
Career Averages - Danny Castillo
Nik Lentz - Fight History
Totals
| Fighter | KD | Sig. Str. | Sig. Str. % | Total Str. | TD | TD % | Sub. Att | Rev. | Ctrl |
|---|---|---|---|---|---|---|---|---|---|
| Movsar Evloev | 0 | 46 of 127 | 36% | 50 of 137 | 1 of 5 | 20% | 2 | 1 | 1:26 |
| Nik Lentz | 0 | 82 of 170 | 48% | 137 of 235 | 2 of 2 | 100% | 0 | 0 | 4:36 |
Per Round
| Rd | Fighter | KD | Sig. Str. | Sig. Str. % | Total Str. | TD | TD % | Sub. Att | Rev. | Ctrl |
|---|---|---|---|---|---|---|---|---|---|---|
| 1 | Movsar Evloev | 0 | 7 of 15 | 46% | 8 of 17 | 0 of 2 | 0% | 1 | 1 | 0:46 |
| Nik Lentz | 0 | 7 of 15 | 46% | 37 of 49 | 1 of 1 | 100% | 0 | 0 | 3:22 | |
| 2 | Movsar Evloev | 0 | 20 of 45 | 44% | 20 of 50 | 1 of 2 | 50% | 1 | 0 | 0:33 |
| Nik Lentz | 0 | 28 of 55 | 50% | 34 of 64 | 1 of 1 | 100% | 0 | 0 | 0:59 | |
| 3 | Movsar Evloev | 0 | 19 of 67 | 28% | 22 of 70 | 0 of 1 | 0% | 0 | 0 | 0:07 |
| Nik Lentz | 0 | 47 of 100 | 47% | 66 of 122 | 0 of 0 | --- | 0 | 0 | 0:15 |
Significant Strikes
| Fighter | Sig. Str. | Sig. Str. % | Head | Body | Leg | Distance | Clinch | Ground |
|---|---|---|---|---|---|---|---|---|
| Movsar Evloev | 46 of 127 | 36% | 24 of 100 | 15 of 20 | 7 of 7 | 41 of 120 | 5 of 7 | 0 of 0 |
| Nik Lentz | 82 of 170 | 48% | 70 of 153 | 7 of 10 | 5 of 7 | 78 of 165 | 0 of 0 | 4 of 5 |
Significant Strikes Per Round
| Rd | Fighter | Sig. Str. | Sig. Str. % | Head | Body | Leg | Distance | Clinch | Ground |
|---|---|---|---|---|---|---|---|---|---|
| 1 | Movsar Evloev | 7 of 15 | 46% | 3 of 11 | 3 of 3 | 1 of 1 | 5 of 13 | 2 of 2 | 0 of 0 |
| Nik Lentz | 7 of 15 | 46% | 6 of 14 | 1 of 1 | 0 of 0 | 3 of 10 | 0 of 0 | 4 of 5 | |
| 2 | Movsar Evloev | 20 of 45 | 44% | 9 of 33 | 7 of 8 | 4 of 4 | 17 of 41 | 3 of 4 | 0 of 0 |
| Nik Lentz | 28 of 55 | 50% | 25 of 48 | 2 of 4 | 1 of 3 | 28 of 55 | 0 of 0 | 0 of 0 | |
| 3 | Movsar Evloev | 19 of 67 | 28% | 12 of 56 | 5 of 9 | 2 of 2 | 19 of 66 | 0 of 1 | 0 of 0 |
| Nik Lentz | 47 of 100 | 47% | 39 of 91 | 4 of 5 | 4 of 4 | 47 of 100 | 0 of 0 | 0 of 0 |
Big Brady picks Movsar Evloev by decision, citing his striking and wrestling advantages. He notes Evloev is 13-0 and younger, while Lentz has eye problems and is coming off a layoff. He warns about Lentz's guillotine but believes Evloev can keep the fight standing or control on the ground. He thinks Evloev is a fine parlay piece at -450.
Daniel Levi picks Movsar Evloev, calling him a top prospect with elite scrambling and improving boxing. He notes Evloev's impressive performance against Mike Grundy, where he survived a deep choke and dominated. Levi believes Evloev is better in every category and will win by decision, possibly 30-26 or 30-27.
Evloev is a huge prospect with championship potential, and he has been improving on a fight-to-fight basis. He has a solid striking game, good grappling, and has shown he can get back to his feet if taken down. Lentz is durable and has underrated power, but he is outmatched in terms of trajectory and skill. Evloev should be able to grind out a decision, though he may have trouble finishing Lentz. I'm a huge Evloev fan and think he wins this fight.
The MMA Guru picks Movsar Evloev to win by 30-27 unanimous decision. He praises Evloev's takedown defense and reach, which will neutralize Nik Lentz's wrestling. He notes that Lentz is tough but will be out-struck on the feet. He does not see a finish due to Lentz's durability. He expects Evloev to keep the fight standing and pick Lentz apart for three rounds.
Totals
| Fighter | KD | Sig. Str. | Sig. Str. % | Total Str. | TD | TD % | Sub. Att | Rev. | Ctrl |
|---|---|---|---|---|---|---|---|---|---|
| Arnold Allen | 0 | 63 of 131 | 48% | 68 of 137 | 0 of 1 | 0% | 0 | 0 | 1:21 |
| Nik Lentz | 0 | 49 of 172 | 28% | 63 of 190 | 0 of 9 | 0% | 0 | 0 | 1:17 |
Per Round
| Rd | Fighter | KD | Sig. Str. | Sig. Str. % | Total Str. | TD | TD % | Sub. Att | Rev. | Ctrl |
|---|---|---|---|---|---|---|---|---|---|---|
| 1 | Arnold Allen | 0 | 20 of 41 | 48% | 20 of 41 | 0 of 1 | 0% | 0 | 0 | 0:07 |
| Nik Lentz | 0 | 16 of 49 | 32% | 20 of 55 | 0 of 4 | 0% | 0 | 0 | 0:56 | |
| 2 | Arnold Allen | 0 | 29 of 56 | 51% | 30 of 57 | 0 of 0 | --- | 0 | 0 | 0:17 |
| Nik Lentz | 0 | 24 of 68 | 35% | 27 of 73 | 0 of 2 | 0% | 0 | 0 | 0:17 | |
| 3 | Arnold Allen | 0 | 14 of 34 | 41% | 18 of 39 | 0 of 0 | --- | 0 | 0 | 0:57 |
| Nik Lentz | 0 | 9 of 55 | 16% | 16 of 62 | 0 of 3 | 0% | 0 | 0 | 0:04 |
Significant Strikes
| Fighter | Sig. Str. | Sig. Str. % | Head | Body | Leg | Distance | Clinch | Ground |
|---|---|---|---|---|---|---|---|---|
| Arnold Allen | 63 of 131 | 48% | 58 of 124 | 5 of 7 | 0 of 0 | 61 of 128 | 2 of 3 | 0 of 0 |
| Nik Lentz | 49 of 172 | 28% | 25 of 140 | 16 of 23 | 8 of 9 | 42 of 162 | 7 of 10 | 0 of 0 |
Significant Strikes Per Round
| Rd | Fighter | Sig. Str. | Sig. Str. % | Head | Body | Leg | Distance | Clinch | Ground |
|---|---|---|---|---|---|---|---|---|---|
| 1 | Arnold Allen | 20 of 41 | 48% | 19 of 39 | 1 of 2 | 0 of 0 | 20 of 41 | 0 of 0 | 0 of 0 |
| Nik Lentz | 16 of 49 | 32% | 8 of 41 | 6 of 6 | 2 of 2 | 14 of 47 | 2 of 2 | 0 of 0 | |
| 2 | Arnold Allen | 29 of 56 | 51% | 27 of 53 | 2 of 3 | 0 of 0 | 28 of 54 | 1 of 2 | 0 of 0 |
| Nik Lentz | 24 of 68 | 35% | 13 of 54 | 8 of 10 | 3 of 4 | 19 of 60 | 5 of 8 | 0 of 0 | |
| 3 | Arnold Allen | 14 of 34 | 41% | 12 of 32 | 2 of 2 | 0 of 0 | 13 of 33 | 1 of 1 | 0 of 0 |
| Nik Lentz | 9 of 55 | 16% | 4 of 45 | 2 of 7 | 3 of 3 | 9 of 55 | 0 of 0 | 0 of 0 |
Play-by-Play
View on SherdogRound 1
In a featherweight affair, gritty veteran Lentz (30-10-2, 1 NC; 14-7-1, 1 NC UFC) steps in on short notice to try to hand Allen (15-1, 6-0 UFC) his first career defeat in the Las Vegas-based promotion. The third man inside the Octagon is referee Wayne Spinola. There is no glove touch, as Allen instead prefers to walk down his opponent. Lentz is the first to land, in the form of a big overhand right. Allen takes it and throws back at him, but Lentz darts out of the way and throws a head kick that gets blocked. Allen lands a one-two, and then avoids Lentz' advancement and scores another. Allen sits down on an uppercut, but Lentz avoids it and lands a few punches before they separate. Lentz rushes forward and tries to throws a looping left hand, but Allen tags him on the forehead with a solid combination that marks up the forehead of "The Carny." Allen dings him with a jab, but Lentz is firing back furiously and catches him with one of his punches. Allen tags him again with a left, and as Lentz blitzes him, Allen hits him with a right and pushes him away. Lentz throws a leg kick and then goes after the takedown. The Brit spins out and in the process gives up his back and a takedown for a brief moment. Lentz throws a few knees to the back of his opponent's thigh, but is more intent on dragging the fight down, which he does again. Lentz is relentless with his takedown, and the commentary booth is squabbling over the level of wrestling in the United Kingdom. In the meantime, Allen secures separation and lands heavily on the chin. Lentz ignores the shots and walks through them before landing a few punches of his own. Lentz flips up a head kick that careens off the shoulder, and Allen then shoves away a brief takedown attempt. Allen continues to strike from a distance, and cracks Lentz on the jaw with an uppercut to stop a level change. Lentz continues to put on the pressure, and narrowly avoids another big uppercut as he comes forward. Allen may have hurt Lentz with a left hand, but Lentz wears it well as the two trade to the bell.
Sherdog Scores
Jay Pettry scores the round: 10-9 Allen
Brian Knapp scores the round: 10-9 Allen
Scottie Smith scores the round: 10-9 Allen
Round 2
Lentz begins the round with a leg kick, and follows that with a head kick that is well off the mark. He misses another as Lentz sticks him with the jab, and plays matador to a bull rush from Lentz. The American throws a few more loud leg kicks, and then chases after Allen with a left-right. Allen keeps his range and lands flush, before slamming a powerful left hand that staggers Lentz for a moment. "The Carny" blocks a head kick, and shakes out the cobwebs as Allen chains a few more punches together. Lentz lands with a left, and then a right that makes Allen clinch up. The quick, accurate strikes from Allen have bloodied up the nose of his adversary. In the clinch, Allen tries to work but Lentz defends himself, and as they separate Allen lands again. Allen ducks out of harm’s way as Lentz continues the pressure, and the two go punch-for-punch for a few moments. The jab from Allen is finding its home on the reddening face of Lentz, who can then evade the strikes coming back at him. A looping left hand from Allen gets around the guard of Lentz, and makes the American stagger again. He regains his composure and the two clinch up, where they trade knees and short punches. Lentz comes forward and eats an uppercut, but is not concerned as he wades through it to land a knee, before coming close to securing a takedown. Lentz tries with all his might to land one as the round ends, and the two break apart to swing until and after the bell, but both apologize immediately after.
Sherdog Scores
Jay Pettry scores the round: 10-9 Allen
Brian Knapp scores the round: 10-9 Allen
Scottie Smith scores the round: 10-9 Allen
Round 3
The round begins slower than before, and Lentz is the first to land in the form of two body kicks and a low kick. The American scores a one-two, but Allen is right back at him with a pair of jabs and out of the way when the head kick comes his direction. Allen continues to flick the jab out there, and follows it with a vicious left hook that Lentz is just able to duck in time. Allen tags him, and Lentz does not let him get away with it and lands right back. A jab is followed by a powerful left from Allen, but the chin of Lentz is sturdy. Another one-two from Allen scores, and he follows that with a head kick that nearly lands cleanly. The two clinch up against the cage, and Lentz goes after a single leg takedown but the Brit stuffs it as he has multiple times throughout the bout. Allen presses Lentz against the fence, and separates with a strong left hand that Lentz practically laughs at. "Almighty" keeps his right jab in the face of his opponent, and Lentz blocks a big left coming his way. When we hear the 10-second clapper, Allen digs deep for an uppercut and then smashes a left hook on the jaw of his durable foe. The round ends, and both celebrate for a bout well-fought. Should Allen take home the win, he will increase his win streak to seven in the UFC.
Sherdog Scores
Jay Pettry scores the round: 10-9 Allen (30-27 Allen)
Brian Knapp scores the round: 10-9 Allen (30-27 Allen)
Scottie Smith scores the round: 10-9 Allen (30-27 Allen)
The Official Result
Arnold Allen def. Nik Lentz via Unanimous Decision (29-28, 29-28, 30-27)
Daniel picks Arnold Allen to win all three rounds, citing his youth, speed, and well-rounded skills. He notes that Allen has improved his takedown defense and should be too sharp for Lentz. He mentions that Lentz is a crafty veteran but coming off a KO loss and that Allen is a decade younger.
The MMA Guru picks Arnold Allen, emphasizing his 6-0 UFC record and youth at 25. He believes Allen is more athletic, trains at Tristar with Kevin Lee and Maksudbek, and will dominate Nik Lentz similarly to his win over Gilbert Melendez. He stresses Allen needs a finish to make a statement and expects him to get it.
Totals
| Fighter | KD | Sig. Str. | Sig. Str. % | Total Str. | TD | TD % | Sub. Att | Rev. | Ctrl |
|---|---|---|---|---|---|---|---|---|---|
| Charles Oliveira | 1 | 38 of 59 | 64% | 43 of 64 | 0 of 0 | --- | 1 | 1 | 1:38 |
| Nik Lentz | 0 | 18 of 49 | 36% | 21 of 53 | 2 of 4 | 50% | 0 | 0 | 1:40 |
Per Round
| Rd | Fighter | KD | Sig. Str. | Sig. Str. % | Total Str. | TD | TD % | Sub. Att | Rev. | Ctrl |
|---|---|---|---|---|---|---|---|---|---|---|
| 1 | Charles Oliveira | 0 | 24 of 39 | 61% | 28 of 43 | 0 of 0 | --- | 0 | 1 | 1:30 |
| Nik Lentz | 0 | 12 of 38 | 31% | 13 of 39 | 1 of 2 | 50% | 0 | 0 | 0:16 | |
| 2 | Charles Oliveira | 1 | 14 of 20 | 70% | 15 of 21 | 0 of 0 | --- | 1 | 0 | 0:08 |
| Nik Lentz | 0 | 6 of 11 | 54% | 8 of 14 | 1 of 2 | 50% | 0 | 0 | 1:24 |
Significant Strikes
| Fighter | Sig. Str. | Sig. Str. % | Head | Body | Leg | Distance | Clinch | Ground |
|---|---|---|---|---|---|---|---|---|
| Charles Oliveira | 38 of 59 | 64% | 23 of 38 | 13 of 19 | 2 of 2 | 20 of 34 | 10 of 17 | 8 of 8 |
| Nik Lentz | 18 of 49 | 36% | 10 of 36 | 5 of 9 | 3 of 4 | 10 of 39 | 6 of 8 | 2 of 2 |
Significant Strikes Per Round
| Rd | Fighter | Sig. Str. | Sig. Str. % | Head | Body | Leg | Distance | Clinch | Ground |
|---|---|---|---|---|---|---|---|---|---|
| 1 | Charles Oliveira | 24 of 39 | 61% | 15 of 25 | 7 of 12 | 2 of 2 | 14 of 24 | 7 of 12 | 3 of 3 |
| Nik Lentz | 12 of 38 | 31% | 7 of 30 | 2 of 4 | 3 of 4 | 10 of 35 | 2 of 3 | 0 of 0 | |
| 2 | Charles Oliveira | 14 of 20 | 70% | 8 of 13 | 6 of 7 | 0 of 0 | 6 of 10 | 3 of 5 | 5 of 5 |
| Nik Lentz | 6 of 11 | 54% | 3 of 6 | 3 of 5 | 0 of 0 | 0 of 4 | 4 of 5 | 2 of 2 |
Totals
| Fighter | KD | Sig. Str. | Sig. Str. % | Total Str. | TD | TD % | Sub. Att | Rev. | Ctrl |
|---|---|---|---|---|---|---|---|---|---|
| Nik Lentz | 0 | 54 of 122 | 44% | 86 of 157 | 0 of 0 | --- | 0 | 0 | 0:18 |
| Scott Holtzman | 0 | 71 of 122 | 58% | 79 of 130 | 5 of 19 | 26% | 1 | 0 | 6:48 |
Per Round
| Rd | Fighter | KD | Sig. Str. | Sig. Str. % | Total Str. | TD | TD % | Sub. Att | Rev. | Ctrl |
|---|---|---|---|---|---|---|---|---|---|---|
| 1 | Nik Lentz | 0 | 5 of 20 | 25% | 20 of 38 | 0 of 0 | --- | 0 | 0 | 0:03 |
| Scott Holtzman | 0 | 32 of 43 | 74% | 38 of 49 | 2 of 8 | 25% | 0 | 0 | 2:44 | |
| 2 | Nik Lentz | 0 | 17 of 48 | 35% | 23 of 54 | 0 of 0 | --- | 0 | 0 | 0:15 |
| Scott Holtzman | 0 | 23 of 45 | 51% | 23 of 45 | 2 of 5 | 40% | 1 | 0 | 1:45 | |
| 3 | Nik Lentz | 0 | 32 of 54 | 59% | 43 of 65 | 0 of 0 | --- | 0 | 0 | 0:00 |
| Scott Holtzman | 0 | 16 of 34 | 47% | 18 of 36 | 1 of 6 | 16% | 0 | 0 | 2:19 |
Significant Strikes
| Fighter | Sig. Str. | Sig. Str. % | Head | Body | Leg | Distance | Clinch | Ground |
|---|---|---|---|---|---|---|---|---|
| Nik Lentz | 54 of 122 | 44% | 39 of 99 | 13 of 21 | 2 of 2 | 40 of 107 | 7 of 8 | 7 of 7 |
| Scott Holtzman | 71 of 122 | 58% | 39 of 88 | 16 of 18 | 16 of 16 | 55 of 105 | 16 of 17 | 0 of 0 |
Significant Strikes Per Round
| Rd | Fighter | Sig. Str. | Sig. Str. % | Head | Body | Leg | Distance | Clinch | Ground |
|---|---|---|---|---|---|---|---|---|---|
| 1 | Nik Lentz | 5 of 20 | 25% | 3 of 14 | 1 of 5 | 1 of 1 | 5 of 20 | 0 of 0 | 0 of 0 |
| Scott Holtzman | 32 of 43 | 74% | 11 of 21 | 7 of 8 | 14 of 14 | 17 of 27 | 15 of 16 | 0 of 0 | |
| 2 | Nik Lentz | 17 of 48 | 35% | 11 of 40 | 5 of 7 | 1 of 1 | 16 of 46 | 1 of 2 | 0 of 0 |
| Scott Holtzman | 23 of 45 | 51% | 14 of 35 | 7 of 8 | 2 of 2 | 22 of 44 | 1 of 1 | 0 of 0 | |
| 3 | Nik Lentz | 32 of 54 | 59% | 25 of 45 | 7 of 9 | 0 of 0 | 19 of 41 | 6 of 6 | 7 of 7 |
| Scott Holtzman | 16 of 34 | 47% | 14 of 32 | 2 of 2 | 0 of 0 | 16 of 34 | 0 of 0 | 0 of 0 |
Totals
| Fighter | KD | Sig. Str. | Sig. Str. % | Total Str. | TD | TD % | Sub. Att | Rev. | Ctrl |
|---|---|---|---|---|---|---|---|---|---|
| Nik Lentz | 0 | 13 of 27 | 48% | 13 of 27 | 0 of 0 | --- | 0 | 0 | 0:08 |
| Gray Maynard | 1 | 75 of 101 | 74% | 92 of 121 | 2 of 5 | 40% | 1 | 0 | 3:34 |
Per Round
| Rd | Fighter | KD | Sig. Str. | Sig. Str. % | Total Str. | TD | TD % | Sub. Att | Rev. | Ctrl |
|---|---|---|---|---|---|---|---|---|---|---|
| 1 | Nik Lentz | 0 | 5 of 11 | 45% | 5 of 11 | 0 of 0 | --- | 0 | 0 | 0:08 |
| Gray Maynard | 0 | 64 of 80 | 80% | 81 of 100 | 2 of 5 | 40% | 1 | 0 | 3:32 | |
| 2 | Nik Lentz | 0 | 8 of 16 | 50% | 8 of 16 | 0 of 0 | --- | 0 | 0 | 0:00 |
| Gray Maynard | 1 | 11 of 21 | 52% | 11 of 21 | 0 of 0 | --- | 0 | 0 | 0:02 |
Significant Strikes
| Fighter | Sig. Str. | Sig. Str. % | Head | Body | Leg | Distance | Clinch | Ground |
|---|---|---|---|---|---|---|---|---|
| Nik Lentz | 13 of 27 | 48% | 11 of 25 | 2 of 2 | 0 of 0 | 11 of 23 | 2 of 4 | 0 of 0 |
| Gray Maynard | 75 of 101 | 74% | 67 of 93 | 5 of 5 | 3 of 3 | 23 of 34 | 12 of 16 | 40 of 51 |
Significant Strikes Per Round
| Rd | Fighter | Sig. Str. | Sig. Str. % | Head | Body | Leg | Distance | Clinch | Ground |
|---|---|---|---|---|---|---|---|---|---|
| 1 | Nik Lentz | 5 of 11 | 45% | 4 of 10 | 1 of 1 | 0 of 0 | 3 of 7 | 2 of 4 | 0 of 0 |
| Gray Maynard | 64 of 80 | 80% | 56 of 72 | 5 of 5 | 3 of 3 | 15 of 18 | 11 of 15 | 38 of 47 | |
| 2 | Nik Lentz | 8 of 16 | 50% | 7 of 15 | 1 of 1 | 0 of 0 | 8 of 16 | 0 of 0 | 0 of 0 |
| Gray Maynard | 11 of 21 | 52% | 11 of 21 | 0 of 0 | 0 of 0 | 8 of 16 | 1 of 1 | 2 of 4 |
Totals
| Fighter | KD | Sig. Str. | Sig. Str. % | Total Str. | TD | TD % | Sub. Att | Rev. | Ctrl |
|---|---|---|---|---|---|---|---|---|---|
| David Teymur | 0 | 61 of 144 | 42% | 63 of 146 | 0 of 5 | 0% | 0 | 0 | 0:44 |
| Nik Lentz | 0 | 67 of 187 | 35% | 72 of 192 | 0 of 0 | --- | 0 | 0 | 0:06 |
Per Round
| Rd | Fighter | KD | Sig. Str. | Sig. Str. % | Total Str. | TD | TD % | Sub. Att | Rev. | Ctrl |
|---|---|---|---|---|---|---|---|---|---|---|
| 1 | David Teymur | 0 | 25 of 49 | 51% | 26 of 50 | 0 of 3 | 0% | 0 | 0 | 0:35 |
| Nik Lentz | 0 | 23 of 63 | 36% | 27 of 67 | 0 of 0 | --- | 0 | 0 | 0:00 | |
| 2 | David Teymur | 0 | 15 of 42 | 35% | 15 of 42 | 0 of 1 | 0% | 0 | 0 | 0:02 |
| Nik Lentz | 0 | 18 of 56 | 32% | 18 of 56 | 0 of 0 | --- | 0 | 0 | 0:00 | |
| 3 | David Teymur | 0 | 21 of 53 | 39% | 22 of 54 | 0 of 1 | 0% | 0 | 0 | 0:07 |
| Nik Lentz | 0 | 26 of 68 | 38% | 27 of 69 | 0 of 0 | --- | 0 | 0 | 0:06 |
Significant Strikes
| Fighter | Sig. Str. | Sig. Str. % | Head | Body | Leg | Distance | Clinch | Ground |
|---|---|---|---|---|---|---|---|---|
| David Teymur | 61 of 144 | 42% | 31 of 107 | 24 of 28 | 6 of 9 | 61 of 144 | 0 of 0 | 0 of 0 |
| Nik Lentz | 67 of 187 | 35% | 31 of 141 | 12 of 20 | 24 of 26 | 67 of 187 | 0 of 0 | 0 of 0 |
Significant Strikes Per Round
| Rd | Fighter | Sig. Str. | Sig. Str. % | Head | Body | Leg | Distance | Clinch | Ground |
|---|---|---|---|---|---|---|---|---|---|
| 1 | David Teymur | 25 of 49 | 51% | 13 of 33 | 9 of 12 | 3 of 4 | 25 of 49 | 0 of 0 | 0 of 0 |
| Nik Lentz | 23 of 63 | 36% | 13 of 51 | 3 of 5 | 7 of 7 | 23 of 63 | 0 of 0 | 0 of 0 | |
| 2 | David Teymur | 15 of 42 | 35% | 5 of 29 | 8 of 9 | 2 of 4 | 15 of 42 | 0 of 0 | 0 of 0 |
| Nik Lentz | 18 of 56 | 32% | 5 of 39 | 4 of 7 | 9 of 10 | 18 of 56 | 0 of 0 | 0 of 0 | |
| 3 | David Teymur | 21 of 53 | 39% | 13 of 45 | 7 of 7 | 1 of 1 | 21 of 53 | 0 of 0 | 0 of 0 |
| Nik Lentz | 26 of 68 | 38% | 13 of 51 | 5 of 8 | 8 of 9 | 26 of 68 | 0 of 0 | 0 of 0 |
Totals
| Fighter | KD | Sig. Str. | Sig. Str. % | Total Str. | TD | TD % | Sub. Att | Rev. | Ctrl |
|---|---|---|---|---|---|---|---|---|---|
| Nik Lentz | 0 | 34 of 82 | 41% | 40 of 88 | 0 of 2 | 0% | 1 | 1 | 0:46 |
| Will Brooks | 0 | 49 of 78 | 62% | 49 of 78 | 2 of 4 | 50% | 1 | 0 | 0:45 |
Per Round
| Rd | Fighter | KD | Sig. Str. | Sig. Str. % | Total Str. | TD | TD % | Sub. Att | Rev. | Ctrl |
|---|---|---|---|---|---|---|---|---|---|---|
| 1 | Nik Lentz | 0 | 23 of 52 | 44% | 28 of 57 | 0 of 1 | 0% | 0 | 0 | 0:46 |
| Will Brooks | 0 | 26 of 43 | 60% | 26 of 43 | 1 of 3 | 33% | 1 | 0 | 0:33 | |
| 2 | Nik Lentz | 0 | 11 of 30 | 36% | 12 of 31 | 0 of 1 | 0% | 1 | 1 | 0:00 |
| Will Brooks | 0 | 23 of 35 | 65% | 23 of 35 | 1 of 1 | 100% | 0 | 0 | 0:12 |
Significant Strikes
| Fighter | Sig. Str. | Sig. Str. % | Head | Body | Leg | Distance | Clinch | Ground |
|---|---|---|---|---|---|---|---|---|
| Nik Lentz | 34 of 82 | 41% | 15 of 58 | 7 of 9 | 12 of 15 | 25 of 71 | 9 of 11 | 0 of 0 |
| Will Brooks | 49 of 78 | 62% | 42 of 70 | 2 of 2 | 5 of 6 | 42 of 70 | 7 of 8 | 0 of 0 |
Significant Strikes Per Round
| Rd | Fighter | Sig. Str. | Sig. Str. % | Head | Body | Leg | Distance | Clinch | Ground |
|---|---|---|---|---|---|---|---|---|---|
| 1 | Nik Lentz | 23 of 52 | 44% | 11 of 36 | 3 of 5 | 9 of 11 | 15 of 43 | 8 of 9 | 0 of 0 |
| Will Brooks | 26 of 43 | 60% | 19 of 35 | 2 of 2 | 5 of 6 | 22 of 39 | 4 of 4 | 0 of 0 | |
| 2 | Nik Lentz | 11 of 30 | 36% | 4 of 22 | 4 of 4 | 3 of 4 | 10 of 28 | 1 of 2 | 0 of 0 |
| Will Brooks | 23 of 35 | 65% | 23 of 35 | 0 of 0 | 0 of 0 | 20 of 31 | 3 of 4 | 0 of 0 |
Totals
| Fighter | KD | Sig. Str. | Sig. Str. % | Total Str. | TD | TD % | Sub. Att | Rev. | Ctrl |
|---|---|---|---|---|---|---|---|---|---|
| Islam Makhachev | 0 | 13 of 35 | 37% | 35 of 61 | 0 of 2 | 0% | 1 | 0 | 0:30 |
| Nik Lentz | 0 | 43 of 58 | 74% | 98 of 127 | 5 of 5 | 100% | 0 | 0 | 11:53 |
Per Round
| Rd | Fighter | KD | Sig. Str. | Sig. Str. % | Total Str. | TD | TD % | Sub. Att | Rev. | Ctrl |
|---|---|---|---|---|---|---|---|---|---|---|
| 1 | Islam Makhachev | 0 | 6 of 9 | 66% | 14 of 18 | 0 of 0 | --- | 1 | 0 | 0:06 |
| Nik Lentz | 0 | 9 of 9 | 100% | 26 of 31 | 2 of 2 | 100% | 0 | 0 | 4:31 | |
| 2 | Islam Makhachev | 0 | 5 of 14 | 35% | 15 of 25 | 0 of 0 | --- | 0 | 0 | 0:00 |
| Nik Lentz | 0 | 11 of 24 | 45% | 31 of 48 | 1 of 1 | 100% | 0 | 0 | 3:51 | |
| 3 | Islam Makhachev | 0 | 2 of 12 | 16% | 6 of 18 | 0 of 2 | 0% | 0 | 0 | 0:24 |
| Nik Lentz | 0 | 23 of 25 | 92% | 41 of 48 | 2 of 2 | 100% | 0 | 0 | 3:31 |
Significant Strikes
| Fighter | Sig. Str. | Sig. Str. % | Head | Body | Leg | Distance | Clinch | Ground |
|---|---|---|---|---|---|---|---|---|
| Islam Makhachev | 13 of 35 | 37% | 3 of 19 | 7 of 11 | 3 of 5 | 6 of 26 | 5 of 7 | 2 of 2 |
| Nik Lentz | 43 of 58 | 74% | 37 of 52 | 6 of 6 | 0 of 0 | 13 of 25 | 0 of 1 | 30 of 32 |
Significant Strikes Per Round
| Rd | Fighter | Sig. Str. | Sig. Str. % | Head | Body | Leg | Distance | Clinch | Ground |
|---|---|---|---|---|---|---|---|---|---|
| 1 | Islam Makhachev | 6 of 9 | 66% | 1 of 2 | 4 of 6 | 1 of 1 | 1 of 2 | 4 of 6 | 1 of 1 |
| Nik Lentz | 9 of 9 | 100% | 8 of 8 | 1 of 1 | 0 of 0 | 2 of 2 | 0 of 0 | 7 of 7 | |
| 2 | Islam Makhachev | 5 of 14 | 35% | 2 of 10 | 3 of 4 | 0 of 0 | 3 of 12 | 1 of 1 | 1 of 1 |
| Nik Lentz | 11 of 24 | 45% | 9 of 22 | 2 of 2 | 0 of 0 | 7 of 18 | 0 of 1 | 4 of 5 | |
| 3 | Islam Makhachev | 2 of 12 | 16% | 0 of 7 | 0 of 1 | 2 of 4 | 2 of 12 | 0 of 0 | 0 of 0 |
| Nik Lentz | 23 of 25 | 92% | 20 of 22 | 3 of 3 | 0 of 0 | 4 of 5 | 0 of 0 | 19 of 20 |
Danny Castillo - Fight History
Totals
| Fighter | KD | Sig. Str. | Sig. Str. % | Total Str. | TD | TD % | Sub. Att | Rev. | Ctrl |
|---|---|---|---|---|---|---|---|---|---|
| Nik Lentz | 0 | 59 of 132 | 44% | 72 of 148 | 3 of 6 | 50% | 2 | 0 | 1:35 |
| Danny Castillo | 0 | 57 of 124 | 45% | 60 of 127 | 2 of 6 | 33% | 0 | 0 | 3:33 |
Per Round
| Rd | Fighter | KD | Sig. Str. | Sig. Str. % | Total Str. | TD | TD % | Sub. Att | Rev. | Ctrl |
|---|---|---|---|---|---|---|---|---|---|---|
| 1 | Nik Lentz | 0 | 12 of 31 | 38% | 16 of 38 | 1 of 2 | 50% | 2 | 0 | 0:29 |
| Danny Castillo | 0 | 15 of 23 | 65% | 17 of 25 | 0 of 3 | 0% | 0 | 0 | 1:57 | |
| 2 | Nik Lentz | 0 | 25 of 54 | 46% | 29 of 58 | 1 of 1 | 100% | 0 | 0 | 0:33 |
| Danny Castillo | 0 | 18 of 51 | 35% | 19 of 52 | 0 of 1 | 0% | 0 | 0 | 0:45 | |
| 3 | Nik Lentz | 0 | 22 of 47 | 46% | 27 of 52 | 1 of 3 | 33% | 0 | 0 | 0:33 |
| Danny Castillo | 0 | 24 of 50 | 48% | 24 of 50 | 2 of 2 | 100% | 0 | 0 | 0:51 |
Significant Strikes
| Fighter | Sig. Str. | Sig. Str. % | Head | Body | Leg | Distance | Clinch | Ground |
|---|---|---|---|---|---|---|---|---|
| Nik Lentz | 59 of 132 | 44% | 38 of 101 | 16 of 25 | 5 of 6 | 50 of 115 | 9 of 17 | 0 of 0 |
| Danny Castillo | 57 of 124 | 45% | 47 of 112 | 4 of 5 | 6 of 7 | 51 of 115 | 6 of 7 | 0 of 2 |
Significant Strikes Per Round
| Rd | Fighter | Sig. Str. | Sig. Str. % | Head | Body | Leg | Distance | Clinch | Ground |
|---|---|---|---|---|---|---|---|---|---|
| 1 | Nik Lentz | 12 of 31 | 38% | 7 of 24 | 5 of 6 | 0 of 1 | 9 of 26 | 3 of 5 | 0 of 0 |
| Danny Castillo | 15 of 23 | 65% | 12 of 19 | 1 of 2 | 2 of 2 | 11 of 17 | 4 of 5 | 0 of 1 | |
| 2 | Nik Lentz | 25 of 54 | 46% | 15 of 40 | 8 of 12 | 2 of 2 | 22 of 49 | 3 of 5 | 0 of 0 |
| Danny Castillo | 18 of 51 | 35% | 15 of 47 | 2 of 2 | 1 of 2 | 18 of 50 | 0 of 0 | 0 of 1 | |
| 3 | Nik Lentz | 22 of 47 | 46% | 16 of 37 | 3 of 7 | 3 of 3 | 19 of 40 | 3 of 7 | 0 of 0 |
| Danny Castillo | 24 of 50 | 48% | 20 of 46 | 1 of 1 | 3 of 3 | 22 of 48 | 2 of 2 | 0 of 0 |
Totals
| Fighter | KD | Sig. Str. | Sig. Str. % | Total Str. | TD | TD % | Sub. Att | Rev. | Ctrl |
|---|---|---|---|---|---|---|---|---|---|
| Jim Miller | 0 | 45 of 110 | 40% | 61 of 127 | 2 of 3 | 66% | 0 | 0 | 2:10 |
| Danny Castillo | 0 | 35 of 103 | 33% | 51 of 120 | 0 of 6 | 0% | 0 | 0 | 2:20 |
Per Round
| Rd | Fighter | KD | Sig. Str. | Sig. Str. % | Total Str. | TD | TD % | Sub. Att | Rev. | Ctrl |
|---|---|---|---|---|---|---|---|---|---|---|
| 1 | Jim Miller | 0 | 4 of 11 | 36% | 20 of 28 | 1 of 1 | 100% | 0 | 0 | 2:04 |
| Danny Castillo | 0 | 4 of 15 | 26% | 15 of 27 | 0 of 1 | 0% | 0 | 0 | 1:33 | |
| 2 | Jim Miller | 0 | 23 of 47 | 48% | 23 of 47 | 0 of 0 | --- | 0 | 0 | 0:00 |
| Danny Castillo | 0 | 16 of 46 | 34% | 16 of 46 | 0 of 1 | 0% | 0 | 0 | 0:00 | |
| 3 | Jim Miller | 0 | 18 of 52 | 34% | 18 of 52 | 1 of 2 | 50% | 0 | 0 | 0:06 |
| Danny Castillo | 0 | 15 of 42 | 35% | 20 of 47 | 0 of 4 | 0% | 0 | 0 | 0:47 |
Significant Strikes
| Fighter | Sig. Str. | Sig. Str. % | Head | Body | Leg | Distance | Clinch | Ground |
|---|---|---|---|---|---|---|---|---|
| Jim Miller | 45 of 110 | 40% | 21 of 78 | 8 of 14 | 16 of 18 | 42 of 103 | 1 of 5 | 2 of 2 |
| Danny Castillo | 35 of 103 | 33% | 22 of 82 | 5 of 11 | 8 of 10 | 33 of 98 | 0 of 2 | 2 of 3 |
Significant Strikes Per Round
| Rd | Fighter | Sig. Str. | Sig. Str. % | Head | Body | Leg | Distance | Clinch | Ground |
|---|---|---|---|---|---|---|---|---|---|
| 1 | Jim Miller | 4 of 11 | 36% | 2 of 6 | 0 of 2 | 2 of 3 | 2 of 9 | 0 of 0 | 2 of 2 |
| Danny Castillo | 4 of 15 | 26% | 3 of 12 | 0 of 0 | 1 of 3 | 2 of 12 | 0 of 0 | 2 of 3 | |
| 2 | Jim Miller | 23 of 47 | 48% | 9 of 31 | 6 of 8 | 8 of 8 | 23 of 45 | 0 of 2 | 0 of 0 |
| Danny Castillo | 16 of 46 | 34% | 9 of 36 | 2 of 5 | 5 of 5 | 16 of 45 | 0 of 1 | 0 of 0 | |
| 3 | Jim Miller | 18 of 52 | 34% | 10 of 41 | 2 of 4 | 6 of 7 | 17 of 49 | 1 of 3 | 0 of 0 |
| Danny Castillo | 15 of 42 | 35% | 10 of 34 | 3 of 6 | 2 of 2 | 15 of 41 | 0 of 1 | 0 of 0 |
Play-by-Play
View on SherdogRound 1
Miller walks Castillo toward the fence with leg kicks, then catches a kick from the Team Alpha Male product and runs him to the ground. Thirty seconds into the fight, Miller works from Castillo’s half guard, going heavy as Castillo tries to use an elevator sweep. Miller passes to full mount, looks like he’ll go for an armbar, then gets heavy again and secures the position with knees on the ground. Castillo tries to bump and escape, nearly gets caught in a triangle as he rolls to his knees, then slips out of a reverse triangle and rushes forward to take top position. Miller puts him in closed guard, then creeps his legs up Castillo’s body with two minutes left in the round. Miller goes back to closed guard and hits Castillo with an elbow to the face along the way. Miller spins and grabs for a heel hook, forcing Castillo to bail, and now the lightweights are back on their feet with one minute to go. There’s not much clean offense between them as the round ends, but a leaping knee from Castillo appears to graze Miller’s cup as the round ends.
Sherdog Scores
Mike Fridley scores the round 10-9 Miller
Brian Knapp scores the round 10-9 Miller
Chris Nelson scores the round 10-9 Miller
Round 2
Miller ducks under a high kick and charges Castillo with a pair of punches. When Castillo tries to step into range, Miller sweeps him out with a check right hook. Miller knocks Castillo off balance, making him miss on a combination thanks to an inside leg kick. Now, Miller goes to the outside of the leg with a kick, misses with an overhand left. Castillo comes down the center with a clean right hand and follows with a hard body kick. Miller backs up Castillo to the fence and scores with a body kick, then blocks a Castillo right high kick. Miller is keeping the pressure on, forcing Castillo to the outside, and now he defends as the Team Alpha Male product grabs for a double-leg. Down to the final minute of the round, Miller continues to press forward on Castillo with leg kicks. He gets clipped with a right high kick from Castillo, tries to catch it but can’t convert to a takedown. Castillo goes to the body with a right kick, partially catching the arm of Miller.
Sherdog Scores
Mike Fridley scores the round 10-9 Castillo
Brian Knapp scores the round 10-9 Miller
Chris Nelson scores the round 10-9 Miller
Round 3
Miller closes the distance on Castillo but has to back out as the Californian lands a right cross of his back foot. Castillo tries a takedown, gets stuffed and comes back to meet Miller in the center of the cage. Miller backs him up with a pair of punches and a leg kick, then catches a kick and takes down Castillo in the middle. Castillo scrambles back to his feet, gets caught in a headlock and takes a few knees from Miller before being released. Miller whiffs on a high kick, lands a hard one to the inside of Castillo’s lead leg. Castillo shoots again and is stuffed by Miller, pushed the New Jerseyan to the fence but has to disengage when Miller grabs for his neck. The 155ers are back in the middle with two minutes remaining, and Miller pushes Castillo backward with a lead uppercut. Castillo lands an outside leg kick and gets one right back from Miller, then eats a jab and gives Miller one in return. A body kick catches Miller on the arm, followed by a right hand upstairs by Castillo. “Last Call” is coming on strong in the latter half of the round, and now he stuffs a shot from Miller. The subsequent scramble yields top position for Castillo in the last half minute of the round, and he ends the fight in side control.
Sherdog Scores
Mike Fridley scores the round 10-9 Castillo (29-28 Castillo)
Brian Knapp scores the round 10-9 Castillo (29-28 Miller)
Chris Nelson scores the round 10-9 Castillo (29-28 Miller)
The Official Result
Jim Miller def. Danny Castillo via Split Decision (30-27, 29-28, 28-29) R3 5:00
Totals
| Fighter | KD | Sig. Str. | Sig. Str. % | Total Str. | TD | TD % | Sub. Att | Rev. | Ctrl |
|---|---|---|---|---|---|---|---|---|---|
| Paul Felder | 0 | 21 of 52 | 40% | 21 of 52 | 0 of 2 | 0% | 0 | 0 | 0:00 |
| Danny Castillo | 1 | 33 of 94 | 35% | 33 of 94 | 0 of 0 | --- | 0 | 0 | 0:02 |
Per Round
| Rd | Fighter | KD | Sig. Str. | Sig. Str. % | Total Str. | TD | TD % | Sub. Att | Rev. | Ctrl |
|---|---|---|---|---|---|---|---|---|---|---|
| 1 | Paul Felder | 0 | 15 of 33 | 45% | 15 of 33 | 0 of 1 | 0% | 0 | 0 | 0:00 |
| Danny Castillo | 0 | 20 of 63 | 31% | 20 of 63 | 0 of 0 | --- | 0 | 0 | 0:00 | |
| 2 | Paul Felder | 0 | 6 of 19 | 31% | 6 of 19 | 0 of 1 | 0% | 0 | 0 | 0:00 |
| Danny Castillo | 1 | 13 of 31 | 41% | 13 of 31 | 0 of 0 | --- | 0 | 0 | 0:02 |
Significant Strikes
| Fighter | Sig. Str. | Sig. Str. % | Head | Body | Leg | Distance | Clinch | Ground |
|---|---|---|---|---|---|---|---|---|
| Paul Felder | 21 of 52 | 40% | 9 of 38 | 8 of 9 | 4 of 5 | 21 of 52 | 0 of 0 | 0 of 0 |
| Danny Castillo | 33 of 94 | 35% | 10 of 65 | 5 of 11 | 18 of 18 | 31 of 90 | 1 of 2 | 1 of 2 |
Significant Strikes Per Round
| Rd | Fighter | Sig. Str. | Sig. Str. % | Head | Body | Leg | Distance | Clinch | Ground |
|---|---|---|---|---|---|---|---|---|---|
| 1 | Paul Felder | 15 of 33 | 45% | 5 of 21 | 6 of 7 | 4 of 5 | 15 of 33 | 0 of 0 | 0 of 0 |
| Danny Castillo | 20 of 63 | 31% | 4 of 45 | 2 of 4 | 14 of 14 | 20 of 62 | 0 of 1 | 0 of 0 | |
| 2 | Paul Felder | 6 of 19 | 31% | 4 of 17 | 2 of 2 | 0 of 0 | 6 of 19 | 0 of 0 | 0 of 0 |
| Danny Castillo | 13 of 31 | 41% | 6 of 20 | 3 of 7 | 4 of 4 | 11 of 28 | 1 of 1 | 1 of 2 |
Totals
| Fighter | KD | Sig. Str. | Sig. Str. % | Total Str. | TD | TD % | Sub. Att | Rev. | Ctrl |
|---|---|---|---|---|---|---|---|---|---|
| Tony Ferguson | 0 | 23 of 80 | 28% | 71 of 130 | 0 of 0 | --- | 1 | 1 | 0:07 |
| Danny Castillo | 0 | 23 of 105 | 21% | 30 of 114 | 2 of 8 | 25% | 1 | 1 | 9:29 |
Per Round
| Rd | Fighter | KD | Sig. Str. | Sig. Str. % | Total Str. | TD | TD % | Sub. Att | Rev. | Ctrl |
|---|---|---|---|---|---|---|---|---|---|---|
| 1 | Tony Ferguson | 0 | 11 of 33 | 33% | 18 of 40 | 0 of 0 | --- | 1 | 0 | 0:02 |
| Danny Castillo | 0 | 11 of 48 | 22% | 11 of 48 | 0 of 2 | 0% | 0 | 0 | 2:31 | |
| 2 | Tony Ferguson | 0 | 10 of 32 | 31% | 35 of 57 | 0 of 0 | --- | 0 | 1 | 0:05 |
| Danny Castillo | 0 | 12 of 44 | 27% | 15 of 48 | 0 of 3 | 0% | 0 | 1 | 2:32 | |
| 3 | Tony Ferguson | 0 | 2 of 15 | 13% | 18 of 33 | 0 of 0 | --- | 0 | 0 | 0:00 |
| Danny Castillo | 0 | 0 of 13 | 0% | 4 of 18 | 2 of 3 | 66% | 1 | 0 | 4:26 |
Significant Strikes
| Fighter | Sig. Str. | Sig. Str. % | Head | Body | Leg | Distance | Clinch | Ground |
|---|---|---|---|---|---|---|---|---|
| Tony Ferguson | 23 of 80 | 28% | 10 of 62 | 3 of 3 | 10 of 15 | 22 of 76 | 0 of 3 | 1 of 1 |
| Danny Castillo | 23 of 105 | 21% | 23 of 102 | 0 of 3 | 0 of 0 | 21 of 95 | 0 of 0 | 2 of 10 |
Significant Strikes Per Round
| Rd | Fighter | Sig. Str. | Sig. Str. % | Head | Body | Leg | Distance | Clinch | Ground |
|---|---|---|---|---|---|---|---|---|---|
| 1 | Tony Ferguson | 11 of 33 | 33% | 5 of 24 | 2 of 2 | 4 of 7 | 11 of 33 | 0 of 0 | 0 of 0 |
| Danny Castillo | 11 of 48 | 22% | 11 of 47 | 0 of 1 | 0 of 0 | 9 of 45 | 0 of 0 | 2 of 3 | |
| 2 | Tony Ferguson | 10 of 32 | 31% | 4 of 25 | 1 of 1 | 5 of 6 | 10 of 30 | 0 of 2 | 0 of 0 |
| Danny Castillo | 12 of 44 | 27% | 12 of 42 | 0 of 2 | 0 of 0 | 12 of 42 | 0 of 0 | 0 of 2 | |
| 3 | Tony Ferguson | 2 of 15 | 13% | 1 of 13 | 0 of 0 | 1 of 2 | 1 of 13 | 0 of 1 | 1 of 1 |
| Danny Castillo | 0 of 13 | 0% | 0 of 13 | 0 of 0 | 0 of 0 | 0 of 8 | 0 of 0 | 0 of 5 |
Totals
| Fighter | KD | Sig. Str. | Sig. Str. % | Total Str. | TD | TD % | Sub. Att | Rev. | Ctrl |
|---|---|---|---|---|---|---|---|---|---|
| Danny Castillo | 1 | 16 of 21 | 76% | 20 of 25 | 0 of 3 | 0% | 0 | 1 | 0:57 |
| Charlie Brenneman | 0 | 13 of 21 | 61% | 35 of 44 | 2 of 4 | 50% | 0 | 0 | 2:08 |
Per Round
| Rd | Fighter | KD | Sig. Str. | Sig. Str. % | Total Str. | TD | TD % | Sub. Att | Rev. | Ctrl |
|---|---|---|---|---|---|---|---|---|---|---|
| 1 | Danny Castillo | 0 | 15 of 20 | 75% | 19 of 24 | 0 of 3 | 0% | 0 | 1 | 0:56 |
| Charlie Brenneman | 0 | 12 of 20 | 60% | 34 of 43 | 2 of 4 | 50% | 0 | 0 | 2:08 | |
| 2 | Danny Castillo | 1 | 1 of 1 | 100% | 1 of 1 | 0 of 0 | --- | 0 | 0 | 0:01 |
| Charlie Brenneman | 0 | 1 of 1 | 100% | 1 of 1 | 0 of 0 | --- | 0 | 0 | 0:00 |
Significant Strikes
| Fighter | Sig. Str. | Sig. Str. % | Head | Body | Leg | Distance | Clinch | Ground |
|---|---|---|---|---|---|---|---|---|
| Danny Castillo | 16 of 21 | 76% | 3 of 6 | 3 of 4 | 10 of 11 | 8 of 13 | 8 of 8 | 0 of 0 |
| Charlie Brenneman | 13 of 21 | 61% | 3 of 11 | 8 of 8 | 2 of 2 | 5 of 12 | 1 of 2 | 7 of 7 |
Significant Strikes Per Round
| Rd | Fighter | Sig. Str. | Sig. Str. % | Head | Body | Leg | Distance | Clinch | Ground |
|---|---|---|---|---|---|---|---|---|---|
| 1 | Danny Castillo | 15 of 20 | 75% | 2 of 5 | 3 of 4 | 10 of 11 | 7 of 12 | 8 of 8 | 0 of 0 |
| Charlie Brenneman | 12 of 20 | 60% | 3 of 11 | 8 of 8 | 1 of 1 | 4 of 11 | 1 of 2 | 7 of 7 | |
| 2 | Danny Castillo | 1 of 1 | 100% | 1 of 1 | 0 of 0 | 0 of 0 | 1 of 1 | 0 of 0 | 0 of 0 |
| Charlie Brenneman | 1 of 1 | 100% | 0 of 0 | 0 of 0 | 1 of 1 | 1 of 1 | 0 of 0 | 0 of 0 |
Totals
| Fighter | KD | Sig. Str. | Sig. Str. % | Total Str. | TD | TD % | Sub. Att | Rev. | Ctrl |
|---|---|---|---|---|---|---|---|---|---|
| Edson Barboza | 0 | 55 of 125 | 44% | 67 of 140 | 1 of 10 | 10% | 1 | 0 | 3:02 |
| Danny Castillo | 1 | 43 of 123 | 34% | 43 of 125 | 0 of 1 | 0% | 1 | 0 | 0:54 |
Per Round
| Rd | Fighter | KD | Sig. Str. | Sig. Str. % | Total Str. | TD | TD % | Sub. Att | Rev. | Ctrl |
|---|---|---|---|---|---|---|---|---|---|---|
| 1 | Edson Barboza | 0 | 41 of 72 | 56% | 48 of 82 | 1 of 3 | 33% | 1 | 0 | 3:02 |
| Danny Castillo | 0 | 5 of 30 | 16% | 5 of 32 | 0 of 0 | --- | 0 | 0 | 0:00 | |
| 2 | Edson Barboza | 0 | 5 of 20 | 25% | 10 of 25 | 0 of 2 | 0% | 0 | 0 | 0:00 |
| Danny Castillo | 1 | 22 of 46 | 47% | 22 of 46 | 0 of 0 | --- | 1 | 0 | 0:53 | |
| 3 | Edson Barboza | 0 | 9 of 33 | 27% | 9 of 33 | 0 of 5 | 0% | 0 | 0 | 0:00 |
| Danny Castillo | 0 | 16 of 47 | 34% | 16 of 47 | 0 of 1 | 0% | 0 | 0 | 0:01 |
Significant Strikes
| Fighter | Sig. Str. | Sig. Str. % | Head | Body | Leg | Distance | Clinch | Ground |
|---|---|---|---|---|---|---|---|---|
| Edson Barboza | 55 of 125 | 44% | 53 of 120 | 1 of 4 | 1 of 1 | 27 of 73 | 1 of 1 | 27 of 51 |
| Danny Castillo | 43 of 123 | 34% | 16 of 84 | 11 of 22 | 16 of 17 | 35 of 109 | 0 of 0 | 8 of 14 |
Significant Strikes Per Round
| Rd | Fighter | Sig. Str. | Sig. Str. % | Head | Body | Leg | Distance | Clinch | Ground |
|---|---|---|---|---|---|---|---|---|---|
| 1 | Edson Barboza | 41 of 72 | 56% | 41 of 71 | 0 of 1 | 0 of 0 | 14 of 21 | 0 of 0 | 27 of 51 |
| Danny Castillo | 5 of 30 | 16% | 4 of 22 | 1 of 8 | 0 of 0 | 5 of 28 | 0 of 0 | 0 of 2 | |
| 2 | Edson Barboza | 5 of 20 | 25% | 4 of 18 | 1 of 2 | 0 of 0 | 4 of 19 | 1 of 1 | 0 of 0 |
| Danny Castillo | 22 of 46 | 47% | 8 of 29 | 5 of 8 | 9 of 9 | 14 of 34 | 0 of 0 | 8 of 12 | |
| 3 | Edson Barboza | 9 of 33 | 27% | 8 of 31 | 0 of 1 | 1 of 1 | 9 of 33 | 0 of 0 | 0 of 0 |
| Danny Castillo | 16 of 47 | 34% | 4 of 33 | 5 of 6 | 7 of 8 | 16 of 47 | 0 of 0 | 0 of 0 |
Totals
| Fighter | KD | Sig. Str. | Sig. Str. % | Total Str. | TD | TD % | Sub. Att | Rev. | Ctrl |
|---|---|---|---|---|---|---|---|---|---|
| Danny Castillo | 0 | 25 of 79 | 31% | 59 of 115 | 6 of 8 | 75% | 0 | 0 | 5:36 |
| Tim Means | 0 | 38 of 93 | 40% | 126 of 184 | 0 of 0 | --- | 0 | 1 | 0:41 |
Per Round
| Rd | Fighter | KD | Sig. Str. | Sig. Str. % | Total Str. | TD | TD % | Sub. Att | Rev. | Ctrl |
|---|---|---|---|---|---|---|---|---|---|---|
| 1 | Danny Castillo | 0 | 3 of 7 | 42% | 30 of 35 | 3 of 3 | 100% | 0 | 0 | 4:01 |
| Tim Means | 0 | 5 of 8 | 62% | 73 of 79 | 0 of 0 | --- | 0 | 0 | 0:00 | |
| 2 | Danny Castillo | 0 | 10 of 33 | 30% | 17 of 41 | 2 of 3 | 66% | 0 | 0 | 1:25 |
| Tim Means | 0 | 12 of 33 | 36% | 25 of 46 | 0 of 0 | --- | 0 | 0 | 0:00 | |
| 3 | Danny Castillo | 0 | 12 of 39 | 30% | 12 of 39 | 1 of 2 | 50% | 0 | 0 | 0:10 |
| Tim Means | 0 | 21 of 52 | 40% | 28 of 59 | 0 of 0 | --- | 0 | 1 | 0:41 |
Significant Strikes
| Fighter | Sig. Str. | Sig. Str. % | Head | Body | Leg | Distance | Clinch | Ground |
|---|---|---|---|---|---|---|---|---|
| Danny Castillo | 25 of 79 | 31% | 17 of 68 | 5 of 8 | 3 of 3 | 24 of 77 | 0 of 0 | 1 of 2 |
| Tim Means | 38 of 93 | 40% | 19 of 70 | 15 of 19 | 4 of 4 | 32 of 87 | 4 of 4 | 2 of 2 |
Significant Strikes Per Round
| Rd | Fighter | Sig. Str. | Sig. Str. % | Head | Body | Leg | Distance | Clinch | Ground |
|---|---|---|---|---|---|---|---|---|---|
| 1 | Danny Castillo | 3 of 7 | 42% | 1 of 5 | 2 of 2 | 0 of 0 | 3 of 6 | 0 of 0 | 0 of 1 |
| Tim Means | 5 of 8 | 62% | 4 of 7 | 1 of 1 | 0 of 0 | 4 of 7 | 1 of 1 | 0 of 0 | |
| 2 | Danny Castillo | 10 of 33 | 30% | 5 of 26 | 3 of 5 | 2 of 2 | 9 of 32 | 0 of 0 | 1 of 1 |
| Tim Means | 12 of 33 | 36% | 6 of 25 | 5 of 7 | 1 of 1 | 11 of 32 | 1 of 1 | 0 of 0 | |
| 3 | Danny Castillo | 12 of 39 | 30% | 11 of 37 | 0 of 1 | 1 of 1 | 12 of 39 | 0 of 0 | 0 of 0 |
| Tim Means | 21 of 52 | 40% | 9 of 38 | 9 of 11 | 3 of 3 | 17 of 48 | 2 of 2 | 2 of 2 |
Totals
| Fighter | KD | Sig. Str. | Sig. Str. % | Total Str. | TD | TD % | Sub. Att | Rev. | Ctrl |
|---|---|---|---|---|---|---|---|---|---|
| Danny Castillo | 0 | 4 of 23 | 17% | 23 of 47 | 0 of 0 | --- | 5 | 0 | 0:00 |
| Paul Sass | 0 | 38 of 67 | 56% | 67 of 104 | 4 of 6 | 66% | 0 | 0 | 12:13 |
Per Round
| Rd | Fighter | KD | Sig. Str. | Sig. Str. % | Total Str. | TD | TD % | Sub. Att | Rev. | Ctrl |
|---|---|---|---|---|---|---|---|---|---|---|
| 1 | Danny Castillo | 0 | 0 of 2 | 0% | 5 of 8 | 0 of 0 | --- | 4 | 0 | 0:00 |
| Paul Sass | 0 | 11 of 23 | 47% | 17 of 34 | 1 of 2 | 50% | 0 | 0 | 4:28 | |
| 2 | Danny Castillo | 0 | 1 of 7 | 14% | 9 of 18 | 0 of 0 | --- | 1 | 0 | 0:00 |
| Paul Sass | 0 | 18 of 29 | 62% | 30 of 43 | 2 of 2 | 100% | 0 | 0 | 4:16 | |
| 3 | Danny Castillo | 0 | 3 of 14 | 21% | 9 of 21 | 0 of 0 | --- | 0 | 0 | 0:00 |
| Paul Sass | 0 | 9 of 15 | 60% | 20 of 27 | 1 of 2 | 50% | 0 | 0 | 3:29 |
Significant Strikes
| Fighter | Sig. Str. | Sig. Str. % | Head | Body | Leg | Distance | Clinch | Ground |
|---|---|---|---|---|---|---|---|---|
| Danny Castillo | 4 of 23 | 17% | 2 of 20 | 1 of 1 | 1 of 2 | 4 of 23 | 0 of 0 | 0 of 0 |
| Paul Sass | 38 of 67 | 56% | 35 of 64 | 1 of 1 | 2 of 2 | 1 of 7 | 0 of 0 | 37 of 60 |
Significant Strikes Per Round
| Rd | Fighter | Sig. Str. | Sig. Str. % | Head | Body | Leg | Distance | Clinch | Ground |
|---|---|---|---|---|---|---|---|---|---|
| 1 | Danny Castillo | 0 of 2 | 0% | 0 of 2 | 0 of 0 | 0 of 0 | 0 of 2 | 0 of 0 | 0 of 0 |
| Paul Sass | 11 of 23 | 47% | 11 of 23 | 0 of 0 | 0 of 0 | 0 of 1 | 0 of 0 | 11 of 22 | |
| 2 | Danny Castillo | 1 of 7 | 14% | 0 of 6 | 1 of 1 | 0 of 0 | 1 of 7 | 0 of 0 | 0 of 0 |
| Paul Sass | 18 of 29 | 62% | 16 of 27 | 1 of 1 | 1 of 1 | 0 of 3 | 0 of 0 | 18 of 26 | |
| 3 | Danny Castillo | 3 of 14 | 21% | 2 of 12 | 0 of 0 | 1 of 2 | 3 of 14 | 0 of 0 | 0 of 0 |
| Paul Sass | 9 of 15 | 60% | 8 of 14 | 0 of 0 | 1 of 1 | 1 of 3 | 0 of 0 | 8 of 12 |
No comments yet. Be the first to share your thoughts!