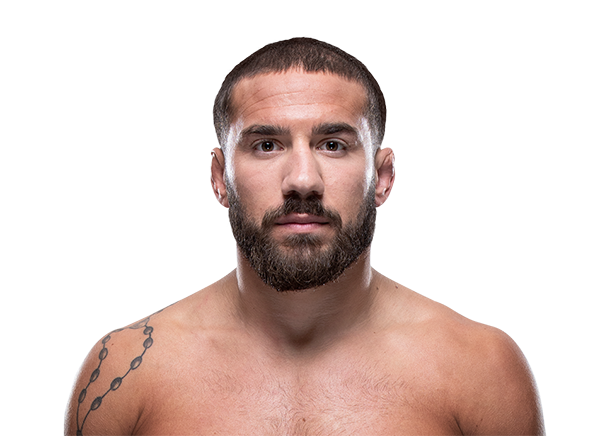
Career Averages - Jimmie Rivera
Career Averages - Marcus Brimage
Jimmie Rivera - Fight History
Totals
| Fighter | KD | Sig. Str. | Sig. Str. % | Total Str. | TD | TD % | Sub. Att | Rev. | Ctrl |
|---|---|---|---|---|---|---|---|---|---|
| Pedro Munhoz | 0 | 94 of 194 | 48% | 94 of 194 | 0 of 0 | --- | 0 | 0 | 0:03 |
| Jimmie Rivera | 0 | 65 of 193 | 33% | 65 of 193 | 1 of 5 | 20% | 0 | 0 | 0:04 |
Per Round
| Rd | Fighter | KD | Sig. Str. | Sig. Str. % | Total Str. | TD | TD % | Sub. Att | Rev. | Ctrl |
|---|---|---|---|---|---|---|---|---|---|---|
| 1 | Pedro Munhoz | 0 | 37 of 72 | 51% | 37 of 72 | 0 of 0 | --- | 0 | 0 | 0:00 |
| Jimmie Rivera | 0 | 31 of 80 | 38% | 31 of 80 | 0 of 1 | 0% | 0 | 0 | 0:00 | |
| 2 | Pedro Munhoz | 0 | 26 of 49 | 53% | 26 of 49 | 0 of 0 | --- | 0 | 0 | 0:03 |
| Jimmie Rivera | 0 | 18 of 50 | 36% | 18 of 50 | 1 of 3 | 33% | 0 | 0 | 0:04 | |
| 3 | Pedro Munhoz | 0 | 31 of 73 | 42% | 31 of 73 | 0 of 0 | --- | 0 | 0 | 0:00 |
| Jimmie Rivera | 0 | 16 of 63 | 25% | 16 of 63 | 0 of 1 | 0% | 0 | 0 | 0:00 |
Significant Strikes
| Fighter | Sig. Str. | Sig. Str. % | Head | Body | Leg | Distance | Clinch | Ground |
|---|---|---|---|---|---|---|---|---|
| Pedro Munhoz | 94 of 194 | 48% | 35 of 115 | 19 of 27 | 40 of 52 | 93 of 193 | 1 of 1 | 0 of 0 |
| Jimmie Rivera | 65 of 193 | 33% | 48 of 168 | 4 of 8 | 13 of 17 | 65 of 193 | 0 of 0 | 0 of 0 |
Significant Strikes Per Round
| Rd | Fighter | Sig. Str. | Sig. Str. % | Head | Body | Leg | Distance | Clinch | Ground |
|---|---|---|---|---|---|---|---|---|---|
| 1 | Pedro Munhoz | 37 of 72 | 51% | 12 of 40 | 5 of 7 | 20 of 25 | 37 of 72 | 0 of 0 | 0 of 0 |
| Jimmie Rivera | 31 of 80 | 38% | 20 of 67 | 3 of 5 | 8 of 8 | 31 of 80 | 0 of 0 | 0 of 0 | |
| 2 | Pedro Munhoz | 26 of 49 | 53% | 8 of 26 | 7 of 8 | 11 of 15 | 25 of 48 | 1 of 1 | 0 of 0 |
| Jimmie Rivera | 18 of 50 | 36% | 14 of 43 | 0 of 0 | 4 of 7 | 18 of 50 | 0 of 0 | 0 of 0 | |
| 3 | Pedro Munhoz | 31 of 73 | 42% | 15 of 49 | 7 of 12 | 9 of 12 | 31 of 73 | 0 of 0 | 0 of 0 |
| Jimmie Rivera | 16 of 63 | 25% | 14 of 58 | 1 of 3 | 1 of 2 | 16 of 63 | 0 of 0 | 0 of 0 |
Big Brady picks Jimmie Rivera to win by decision. He highlights Rivera's 92% takedown defense and speed advantage. He notes Munhoz is extremely hittable, absorbing more strikes than he lands, and that Rivera will outvolume him. He thinks Munhoz needs a finish to win, but Rivera has only been knocked out once and Munhoz has never been finished. He mentions Rivera is in his prime and has lost only to top competition. He likes the moneyline at -150 and considers a decision prop.
Daniel Levi picks Jimmie Rivera, but with hesitation. He notes Rivera is the cleaner striker and historically does well in decisions, while Munhoz has more finishing potential. Levi worries about Rivera's chin but thinks if it goes to the scorecards, Rivera edges it. He acknowledges Munhoz's power and calf kicks but leans Rivera by decision.
Rivera is a Muay Thai specialist with superior footwork and striking technique. Munhoz is a walking punching bag who marches forward, but Rivera's calf kicks and combinations should outclass him. Rivera's takedown defense is strong, and Munhoz's only chance is a knockout, which is unlikely given Rivera's durability. Expect a decision win for Rivera.
The MMA Guru picks Jimmie Rivera, believing he won the first fight clearly and has improved more than Munhoz since then. He notes Rivera is now in his prime while Munhoz is past his, and expects Rivera to outbox Munhoz over three rounds, winning a unanimous decision 30-27. He mentions Munhoz's only chance is a knockout, but Rivera is aware of that threat.
Totals
| Fighter | KD | Sig. Str. | Sig. Str. % | Total Str. | TD | TD % | Sub. Att | Rev. | Ctrl |
|---|---|---|---|---|---|---|---|---|---|
| Jimmie Rivera | 0 | 48 of 89 | 53% | 90 of 134 | 2 of 3 | 66% | 1 | 0 | 1:59 |
| Cody Stamann | 0 | 26 of 72 | 36% | 62 of 108 | 1 of 5 | 20% | 0 | 0 | 4:25 |
Per Round
| Rd | Fighter | KD | Sig. Str. | Sig. Str. % | Total Str. | TD | TD % | Sub. Att | Rev. | Ctrl |
|---|---|---|---|---|---|---|---|---|---|---|
| 1 | Jimmie Rivera | 0 | 15 of 25 | 60% | 27 of 37 | 1 of 2 | 50% | 0 | 0 | 0:33 |
| Cody Stamann | 0 | 7 of 16 | 43% | 14 of 23 | 0 of 1 | 0% | 0 | 0 | 1:20 | |
| 2 | Jimmie Rivera | 0 | 15 of 23 | 65% | 21 of 32 | 1 of 1 | 100% | 0 | 0 | 0:52 |
| Cody Stamann | 0 | 11 of 28 | 39% | 28 of 45 | 1 of 2 | 50% | 0 | 0 | 1:27 | |
| 3 | Jimmie Rivera | 0 | 18 of 41 | 43% | 42 of 65 | 0 of 0 | --- | 1 | 0 | 0:34 |
| Cody Stamann | 0 | 8 of 28 | 28% | 20 of 40 | 0 of 2 | 0% | 0 | 0 | 1:38 |
Significant Strikes
| Fighter | Sig. Str. | Sig. Str. % | Head | Body | Leg | Distance | Clinch | Ground |
|---|---|---|---|---|---|---|---|---|
| Jimmie Rivera | 48 of 89 | 53% | 16 of 44 | 13 of 16 | 19 of 29 | 32 of 68 | 12 of 16 | 4 of 5 |
| Cody Stamann | 26 of 72 | 36% | 13 of 55 | 8 of 11 | 5 of 6 | 18 of 61 | 8 of 11 | 0 of 0 |
Significant Strikes Per Round
| Rd | Fighter | Sig. Str. | Sig. Str. % | Head | Body | Leg | Distance | Clinch | Ground |
|---|---|---|---|---|---|---|---|---|---|
| 1 | Jimmie Rivera | 15 of 25 | 60% | 5 of 11 | 1 of 1 | 9 of 13 | 11 of 17 | 1 of 4 | 3 of 4 |
| Cody Stamann | 7 of 16 | 43% | 5 of 13 | 0 of 0 | 2 of 3 | 6 of 15 | 1 of 1 | 0 of 0 | |
| 2 | Jimmie Rivera | 15 of 23 | 65% | 7 of 11 | 5 of 6 | 3 of 6 | 10 of 18 | 4 of 4 | 1 of 1 |
| Cody Stamann | 11 of 28 | 39% | 4 of 19 | 5 of 7 | 2 of 2 | 7 of 22 | 4 of 6 | 0 of 0 | |
| 3 | Jimmie Rivera | 18 of 41 | 43% | 4 of 22 | 7 of 9 | 7 of 10 | 11 of 33 | 7 of 8 | 0 of 0 |
| Cody Stamann | 8 of 28 | 28% | 4 of 23 | 3 of 4 | 1 of 1 | 5 of 24 | 3 of 4 | 0 of 0 |
Big Brady picks Jimmie Rivera, believing he is the better striker and faster fighter. He thinks Rivera's 95% takedown defense will neutralize Stamann's wrestling, and that Rivera will land more and harder strikes. He predicts a decision win, noting neither fighter is a finisher, and suggests betting on Rivera by decision or the fight going to decision.
Daniel Levi picks Cody Stamann as a live underdog, citing his versatility, fight IQ, and ability to fight in multiple stances. He believes Rivera has an old-school style and hasn't evolved, while Stamann can outpoint and outwork him, possibly even knocking him down.
The Guru picks Jimmie Rivera, noting his losses are to elite fighters (Petr Yan, Aljamain Sterling, Marlon Moraes) while his wins include John Dodson, Thomas Almeida, and Urijah Faber. He believes Rivera's takedown defense and reach advantage will be key. Cody Stamann's best win is over Song Yadong, but that win has lost value. Rivera is a level above and should win by decision.
Totals
| Fighter | KD | Sig. Str. | Sig. Str. % | Total Str. | TD | TD % | Sub. Att | Rev. | Ctrl |
|---|---|---|---|---|---|---|---|---|---|
| Petr Yan | 0 | 73 of 192 | 38% | 76 of 195 | 0 of 3 | 0% | 0 | 0 | 0:39 |
| Jimmie Rivera | 2 | 56 of 189 | 29% | 58 of 192 | 1 of 3 | 33% | 0 | 0 | 0:39 |
Per Round
| Rd | Fighter | KD | Sig. Str. | Sig. Str. % | Total Str. | TD | TD % | Sub. Att | Rev. | Ctrl |
|---|---|---|---|---|---|---|---|---|---|---|
| 1 | Petr Yan | 0 | 17 of 40 | 42% | 19 of 42 | 0 of 0 | --- | 0 | 0 | 0:14 |
| Jimmie Rivera | 1 | 14 of 55 | 25% | 15 of 56 | 0 of 2 | 0% | 0 | 0 | 0:17 | |
| 2 | Petr Yan | 0 | 27 of 63 | 42% | 28 of 64 | 0 of 1 | 0% | 0 | 0 | 0:25 |
| Jimmie Rivera | 1 | 24 of 64 | 37% | 25 of 66 | 0 of 0 | --- | 0 | 0 | 0:08 | |
| 3 | Petr Yan | 0 | 29 of 89 | 32% | 29 of 89 | 0 of 2 | 0% | 0 | 0 | 0:00 |
| Jimmie Rivera | 0 | 18 of 70 | 25% | 18 of 70 | 1 of 1 | 100% | 0 | 0 | 0:14 |
Significant Strikes
| Fighter | Sig. Str. | Sig. Str. % | Head | Body | Leg | Distance | Clinch | Ground |
|---|---|---|---|---|---|---|---|---|
| Petr Yan | 73 of 192 | 38% | 42 of 145 | 15 of 24 | 16 of 23 | 60 of 173 | 9 of 15 | 4 of 4 |
| Jimmie Rivera | 56 of 189 | 29% | 40 of 166 | 13 of 19 | 3 of 4 | 42 of 167 | 10 of 12 | 4 of 10 |
Significant Strikes Per Round
| Rd | Fighter | Sig. Str. | Sig. Str. % | Head | Body | Leg | Distance | Clinch | Ground |
|---|---|---|---|---|---|---|---|---|---|
| 1 | Petr Yan | 17 of 40 | 42% | 7 of 26 | 2 of 3 | 8 of 11 | 12 of 34 | 5 of 6 | 0 of 0 |
| Jimmie Rivera | 14 of 55 | 25% | 9 of 47 | 4 of 7 | 1 of 1 | 6 of 42 | 5 of 6 | 3 of 7 | |
| 2 | Petr Yan | 27 of 63 | 42% | 16 of 48 | 5 of 6 | 6 of 9 | 24 of 60 | 3 of 3 | 0 of 0 |
| Jimmie Rivera | 24 of 64 | 37% | 19 of 58 | 3 of 4 | 2 of 2 | 20 of 57 | 3 of 4 | 1 of 3 | |
| 3 | Petr Yan | 29 of 89 | 32% | 19 of 71 | 8 of 15 | 2 of 3 | 24 of 79 | 1 of 6 | 4 of 4 |
| Jimmie Rivera | 18 of 70 | 25% | 12 of 61 | 6 of 8 | 0 of 1 | 16 of 68 | 2 of 2 | 0 of 0 |
Totals
| Fighter | KD | Sig. Str. | Sig. Str. % | Total Str. | TD | TD % | Sub. Att | Rev. | Ctrl |
|---|---|---|---|---|---|---|---|---|---|
| Aljamain Sterling | 0 | 24 of 84 | 28% | 36 of 97 | 0 of 0 | --- | 0 | 0 | 2:49 |
| Jimmie Rivera | 0 | 101 of 176 | 57% | 129 of 206 | 0 of 7 | 0% | 0 | 0 | 2:44 |
Per Round
| Rd | Fighter | KD | Sig. Str. | Sig. Str. % | Total Str. | TD | TD % | Sub. Att | Rev. | Ctrl |
|---|---|---|---|---|---|---|---|---|---|---|
| 1 | Aljamain Sterling | 0 | 7 of 12 | 58% | 11 of 16 | 0 of 0 | --- | 0 | 0 | 1:27 |
| Jimmie Rivera | 0 | 21 of 30 | 70% | 46 of 57 | 0 of 3 | 0% | 0 | 0 | 2:08 | |
| 2 | Aljamain Sterling | 0 | 9 of 26 | 34% | 14 of 32 | 0 of 0 | --- | 0 | 0 | 0:49 |
| Jimmie Rivera | 0 | 48 of 80 | 60% | 50 of 82 | 0 of 2 | 0% | 0 | 0 | 0:36 | |
| 3 | Aljamain Sterling | 0 | 8 of 46 | 17% | 11 of 49 | 0 of 0 | --- | 0 | 0 | 0:33 |
| Jimmie Rivera | 0 | 32 of 66 | 48% | 33 of 67 | 0 of 2 | 0% | 0 | 0 | 0:00 |
Significant Strikes
| Fighter | Sig. Str. | Sig. Str. % | Head | Body | Leg | Distance | Clinch | Ground |
|---|---|---|---|---|---|---|---|---|
| Aljamain Sterling | 24 of 84 | 28% | 8 of 59 | 7 of 16 | 9 of 9 | 17 of 77 | 7 of 7 | 0 of 0 |
| Jimmie Rivera | 101 of 176 | 57% | 36 of 96 | 39 of 51 | 26 of 29 | 77 of 146 | 23 of 29 | 1 of 1 |
Significant Strikes Per Round
| Rd | Fighter | Sig. Str. | Sig. Str. % | Head | Body | Leg | Distance | Clinch | Ground |
|---|---|---|---|---|---|---|---|---|---|
| 1 | Aljamain Sterling | 7 of 12 | 58% | 1 of 4 | 2 of 4 | 4 of 4 | 2 of 7 | 5 of 5 | 0 of 0 |
| Jimmie Rivera | 21 of 30 | 70% | 0 of 7 | 16 of 18 | 5 of 5 | 4 of 10 | 17 of 20 | 0 of 0 | |
| 2 | Aljamain Sterling | 9 of 26 | 34% | 2 of 16 | 3 of 6 | 4 of 4 | 8 of 25 | 1 of 1 | 0 of 0 |
| Jimmie Rivera | 48 of 80 | 60% | 19 of 47 | 15 of 18 | 14 of 15 | 42 of 71 | 6 of 9 | 0 of 0 | |
| 3 | Aljamain Sterling | 8 of 46 | 17% | 5 of 39 | 2 of 6 | 1 of 1 | 7 of 45 | 1 of 1 | 0 of 0 |
| Jimmie Rivera | 32 of 66 | 48% | 17 of 42 | 8 of 15 | 7 of 9 | 31 of 65 | 0 of 0 | 1 of 1 |
Play-by-Play
View on SherdogRound 1
It’s time for the preliminary main event between bantamweight contenders Aljamain Sterling and Jimmie Rivera. The referee is Ryan Brueggeman. Sterling immediately shoots for a double leg but Rivera stuffs it and they clinch. Sterling starts to work for the body lock takedown but Rivera defends it well and switches positions along the fence. Rivera lets go and they are back in the center of the Octagon. Sterling with a low kick. Rivera lands a right hook. Sterling shoots in for a single leg and once again Rivera stuffs it. Sterling switches to a body lock and nearly slams Rivera but Rivera is exhibiting exceptional takedown defense and balance here. Sterling is landing some nice knees and foot stops along the fence. The crowd is booing but Sterling is still working. For some reason the ref breaks the clinch. Very strange call by the ref there. Rivera lands a leg kick. Sterling just misses a left high kick. Rivera ducks under and now has Sterling in the clinch along the fence. Rivera is working for a body lock takedown but Sterling is defending it well. The round is over.
Sherdog Scores
Adam Martin scores the round: 10-9 Sterling
Ant Walker scores the round: 10-9 Sterling
Jordan Colbert scores the round: 10-9 Sterling
Round 2
Round two begins. Low kick by Sterling. He tries for a jumping knee but Rivera catches him and is now on top of Sterling on the mat. Sterling explodes and gets back to his feet. Sterling dives in for a double leg takedown and Rivera is now trying to defend against it along the cage. Sterling is now landing some hard knees to Rivera’s thighs. Rivera reverses the position and the fighters break from the clinch. Low kick by Sterling lands. Rivera really needs to get going here. Sterling lands a right high kick that is partially blocked. Sterling lands a spinning back fist. Now an overhand right by Sterling. He has Rivera against the fence and is unloading on him now. Straight left by Sterling land and a right hook. Rivera’s mouthpiece falls out and the ref warns him about a point being taken away if it happens again. Sterling shoots for a double leg takedown but Rivera sprawls and now has Sterling in a headlock. Sterling escapes and lands a low kick on the feet. Front kick to the body by Sterling. Another low kick by Sterling. The 10-second clapper hits and the round is over shortly afterwards.
Sherdog Scores
Adam Martin scores the round: 10-9 Sterling
Ant Walker scores the round: 10-9 Sterling
Jordan Colbert scores the round: 10-9 Sterling
Round 3
In-between rounds Rivera’s corner tells him he needs a knockout and they are likely correct in their assessment. Rivera moves forward to start the round. He lands a right straight. Body kick by Rivera. He just misses a big overhand right. Low kick by Sterling and he just misses a spinning back fist on the break. Sterling shoots for a single leg takedown but Rivera stuffs it. Low kick by Sterling. Body kick by Sterling and a counter straight right by Rivera. Sterling looks to land a high kick but Rivera blocks it and sends Sterling to the mat. Rivera is on top of Sterling in side control now. Sterling grabs a single and uses it to get back up. Rivera with a left hook to the body. Low kick by Sterling. Jab from Sterling and a counter left hook by Rivera. Low kick by Rivera and Sterling follows it up with a jab. Low kick by Sterling. Sterling shoots in for a late single leg takedown but Rivera stuffs it and the fight is over.
Sherdog Scores
Adam Martin scores the round: 10-9 Rivera (29-28 Sterling)
Ant Walker scores the round: 10-9 Sterling (30-27 Sterling)
Jordan Colbert scores the round: 10-9 Sterling (30-27 Sterling)
The Result
Aljamain Sterling def. Jimmie Rivera via Unanimous Decision (30-27, 30-27, 30-27)
Totals
| Fighter | KD | Sig. Str. | Sig. Str. % | Total Str. | TD | TD % | Sub. Att | Rev. | Ctrl |
|---|---|---|---|---|---|---|---|---|---|
| Jimmie Rivera | 0 | 62 of 125 | 49% | 63 of 126 | 0 of 3 | 0% | 0 | 0 | 0:04 |
| John Dodson | 0 | 41 of 117 | 35% | 41 of 117 | 0 of 1 | 0% | 0 | 0 | 0:02 |
Per Round
| Rd | Fighter | KD | Sig. Str. | Sig. Str. % | Total Str. | TD | TD % | Sub. Att | Rev. | Ctrl |
|---|---|---|---|---|---|---|---|---|---|---|
| 1 | Jimmie Rivera | 0 | 23 of 30 | 76% | 24 of 31 | 0 of 2 | 0% | 0 | 0 | 0:04 |
| John Dodson | 0 | 9 of 33 | 27% | 9 of 33 | 0 of 1 | 0% | 0 | 0 | 0:02 | |
| 2 | Jimmie Rivera | 0 | 15 of 41 | 36% | 15 of 41 | 0 of 1 | 0% | 0 | 0 | 0:00 |
| John Dodson | 0 | 10 of 32 | 31% | 10 of 32 | 0 of 0 | --- | 0 | 0 | 0:00 | |
| 3 | Jimmie Rivera | 0 | 24 of 54 | 44% | 24 of 54 | 0 of 0 | --- | 0 | 0 | 0:00 |
| John Dodson | 0 | 22 of 52 | 42% | 22 of 52 | 0 of 0 | --- | 0 | 0 | 0:00 |
Significant Strikes
| Fighter | Sig. Str. | Sig. Str. % | Head | Body | Leg | Distance | Clinch | Ground |
|---|---|---|---|---|---|---|---|---|
| Jimmie Rivera | 62 of 125 | 49% | 25 of 79 | 16 of 21 | 21 of 25 | 60 of 121 | 2 of 4 | 0 of 0 |
| John Dodson | 41 of 117 | 35% | 21 of 95 | 15 of 17 | 5 of 5 | 34 of 109 | 7 of 8 | 0 of 0 |
Significant Strikes Per Round
| Rd | Fighter | Sig. Str. | Sig. Str. % | Head | Body | Leg | Distance | Clinch | Ground |
|---|---|---|---|---|---|---|---|---|---|
| 1 | Jimmie Rivera | 23 of 30 | 76% | 9 of 13 | 4 of 6 | 10 of 11 | 23 of 29 | 0 of 1 | 0 of 0 |
| John Dodson | 9 of 33 | 27% | 5 of 27 | 2 of 4 | 2 of 2 | 8 of 31 | 1 of 2 | 0 of 0 | |
| 2 | Jimmie Rivera | 15 of 41 | 36% | 7 of 28 | 3 of 6 | 5 of 7 | 15 of 40 | 0 of 1 | 0 of 0 |
| John Dodson | 10 of 32 | 31% | 3 of 25 | 6 of 6 | 1 of 1 | 10 of 32 | 0 of 0 | 0 of 0 | |
| 3 | Jimmie Rivera | 24 of 54 | 44% | 9 of 38 | 9 of 9 | 6 of 7 | 22 of 52 | 2 of 2 | 0 of 0 |
| John Dodson | 22 of 52 | 42% | 13 of 43 | 7 of 7 | 2 of 2 | 16 of 46 | 6 of 6 | 0 of 0 |
Totals
| Fighter | KD | Sig. Str. | Sig. Str. % | Total Str. | TD | TD % | Sub. Att | Rev. | Ctrl |
|---|---|---|---|---|---|---|---|---|---|
| Marlon Moraes | 0 | 0 of 3 | 0% | 0 of 3 | 0 of 0 | --- | 0 | 0 | 0:00 |
| Jimmie Rivera | 1 | 7 of 9 | 77% | 7 of 9 | 0 of 0 | --- | 0 | 0 | 0:00 |
Per Round
| Rd | Fighter | KD | Sig. Str. | Sig. Str. % | Total Str. | TD | TD % | Sub. Att | Rev. | Ctrl |
|---|---|---|---|---|---|---|---|---|---|---|
| 1 | Marlon Moraes | 0 | 0 of 3 | 0% | 0 of 3 | 0 of 0 | --- | 0 | 0 | 0:00 |
| Jimmie Rivera | 1 | 7 of 9 | 77% | 7 of 9 | 0 of 0 | --- | 0 | 0 | 0:00 |
Significant Strikes
| Fighter | Sig. Str. | Sig. Str. % | Head | Body | Leg | Distance | Clinch | Ground |
|---|---|---|---|---|---|---|---|---|
| Marlon Moraes | 0 of 3 | 0% | 0 of 3 | 0 of 0 | 0 of 0 | 0 of 3 | 0 of 0 | 0 of 0 |
| Jimmie Rivera | 7 of 9 | 77% | 6 of 8 | 0 of 0 | 1 of 1 | 2 of 3 | 0 of 0 | 5 of 6 |
Significant Strikes Per Round
| Rd | Fighter | Sig. Str. | Sig. Str. % | Head | Body | Leg | Distance | Clinch | Ground |
|---|---|---|---|---|---|---|---|---|---|
| 1 | Marlon Moraes | 0 of 3 | 0% | 0 of 3 | 0 of 0 | 0 of 0 | 0 of 3 | 0 of 0 | 0 of 0 |
| Jimmie Rivera | 7 of 9 | 77% | 6 of 8 | 0 of 0 | 1 of 1 | 2 of 3 | 0 of 0 | 5 of 6 |
Totals
| Fighter | KD | Sig. Str. | Sig. Str. % | Total Str. | TD | TD % | Sub. Att | Rev. | Ctrl |
|---|---|---|---|---|---|---|---|---|---|
| Jimmie Rivera | 2 | 70 of 160 | 43% | 75 of 165 | 2 of 6 | 33% | 0 | 0 | 1:48 |
| Thomas Almeida | 0 | 72 of 167 | 43% | 72 of 167 | 0 of 0 | --- | 0 | 0 | 0:16 |
Per Round
| Rd | Fighter | KD | Sig. Str. | Sig. Str. % | Total Str. | TD | TD % | Sub. Att | Rev. | Ctrl |
|---|---|---|---|---|---|---|---|---|---|---|
| 1 | Jimmie Rivera | 2 | 22 of 56 | 39% | 22 of 56 | 0 of 1 | 0% | 0 | 0 | 0:11 |
| Thomas Almeida | 0 | 28 of 47 | 59% | 28 of 47 | 0 of 0 | --- | 0 | 0 | 0:16 | |
| 2 | Jimmie Rivera | 0 | 24 of 53 | 45% | 26 of 55 | 0 of 2 | 0% | 0 | 0 | 0:03 |
| Thomas Almeida | 0 | 19 of 60 | 31% | 19 of 60 | 0 of 0 | --- | 0 | 0 | 0:00 | |
| 3 | Jimmie Rivera | 0 | 24 of 51 | 47% | 27 of 54 | 2 of 3 | 66% | 0 | 0 | 1:34 |
| Thomas Almeida | 0 | 25 of 60 | 41% | 25 of 60 | 0 of 0 | --- | 0 | 0 | 0:00 |
Significant Strikes
| Fighter | Sig. Str. | Sig. Str. % | Head | Body | Leg | Distance | Clinch | Ground |
|---|---|---|---|---|---|---|---|---|
| Jimmie Rivera | 70 of 160 | 43% | 38 of 114 | 17 of 29 | 15 of 17 | 58 of 146 | 8 of 10 | 4 of 4 |
| Thomas Almeida | 72 of 167 | 43% | 36 of 121 | 13 of 20 | 23 of 26 | 67 of 160 | 5 of 7 | 0 of 0 |
Significant Strikes Per Round
| Rd | Fighter | Sig. Str. | Sig. Str. % | Head | Body | Leg | Distance | Clinch | Ground |
|---|---|---|---|---|---|---|---|---|---|
| 1 | Jimmie Rivera | 22 of 56 | 39% | 8 of 37 | 7 of 11 | 7 of 8 | 18 of 52 | 1 of 1 | 3 of 3 |
| Thomas Almeida | 28 of 47 | 59% | 14 of 31 | 4 of 5 | 10 of 11 | 28 of 47 | 0 of 0 | 0 of 0 | |
| 2 | Jimmie Rivera | 24 of 53 | 45% | 15 of 39 | 5 of 10 | 4 of 4 | 23 of 52 | 1 of 1 | 0 of 0 |
| Thomas Almeida | 19 of 60 | 31% | 8 of 46 | 4 of 6 | 7 of 8 | 19 of 59 | 0 of 1 | 0 of 0 | |
| 3 | Jimmie Rivera | 24 of 51 | 47% | 15 of 38 | 5 of 8 | 4 of 5 | 17 of 42 | 6 of 8 | 1 of 1 |
| Thomas Almeida | 25 of 60 | 41% | 14 of 44 | 5 of 9 | 6 of 7 | 20 of 54 | 5 of 6 | 0 of 0 |
Totals
| Fighter | KD | Sig. Str. | Sig. Str. % | Total Str. | TD | TD % | Sub. Att | Rev. | Ctrl |
|---|---|---|---|---|---|---|---|---|---|
| Jimmie Rivera | 0 | 22 of 112 | 19% | 23 of 113 | 0 of 4 | 0% | 0 | 0 | 0:00 |
| Urijah Faber | 0 | 54 of 160 | 33% | 55 of 162 | 0 of 0 | --- | 0 | 0 | 0:00 |
Per Round
| Rd | Fighter | KD | Sig. Str. | Sig. Str. % | Total Str. | TD | TD % | Sub. Att | Rev. | Ctrl |
|---|---|---|---|---|---|---|---|---|---|---|
| 1 | Jimmie Rivera | 0 | 9 of 40 | 22% | 10 of 41 | 0 of 2 | 0% | 0 | 0 | 0:00 |
| Urijah Faber | 0 | 12 of 46 | 26% | 12 of 47 | 0 of 0 | --- | 0 | 0 | 0:00 | |
| 2 | Jimmie Rivera | 0 | 8 of 33 | 24% | 8 of 33 | 0 of 1 | 0% | 0 | 0 | 0:00 |
| Urijah Faber | 0 | 23 of 60 | 38% | 24 of 61 | 0 of 0 | --- | 0 | 0 | 0:00 | |
| 3 | Jimmie Rivera | 0 | 5 of 39 | 12% | 5 of 39 | 0 of 1 | 0% | 0 | 0 | 0:00 |
| Urijah Faber | 0 | 19 of 54 | 35% | 19 of 54 | 0 of 0 | --- | 0 | 0 | 0:00 |
Significant Strikes
| Fighter | Sig. Str. | Sig. Str. % | Head | Body | Leg | Distance | Clinch | Ground |
|---|---|---|---|---|---|---|---|---|
| Jimmie Rivera | 22 of 112 | 19% | 11 of 94 | 5 of 9 | 6 of 9 | 19 of 109 | 3 of 3 | 0 of 0 |
| Urijah Faber | 54 of 160 | 33% | 21 of 113 | 9 of 20 | 24 of 27 | 50 of 154 | 4 of 6 | 0 of 0 |
Significant Strikes Per Round
| Rd | Fighter | Sig. Str. | Sig. Str. % | Head | Body | Leg | Distance | Clinch | Ground |
|---|---|---|---|---|---|---|---|---|---|
| 1 | Jimmie Rivera | 9 of 40 | 22% | 4 of 31 | 3 of 5 | 2 of 4 | 7 of 38 | 2 of 2 | 0 of 0 |
| Urijah Faber | 12 of 46 | 26% | 5 of 36 | 1 of 3 | 6 of 7 | 10 of 42 | 2 of 4 | 0 of 0 | |
| 2 | Jimmie Rivera | 8 of 33 | 24% | 4 of 27 | 2 of 3 | 2 of 3 | 7 of 32 | 1 of 1 | 0 of 0 |
| Urijah Faber | 23 of 60 | 38% | 10 of 40 | 2 of 7 | 11 of 13 | 21 of 58 | 2 of 2 | 0 of 0 | |
| 3 | Jimmie Rivera | 5 of 39 | 12% | 3 of 36 | 0 of 1 | 2 of 2 | 5 of 39 | 0 of 0 | 0 of 0 |
| Urijah Faber | 19 of 54 | 35% | 6 of 37 | 6 of 10 | 7 of 7 | 19 of 54 | 0 of 0 | 0 of 0 |
Marcus Brimage - Fight History
Totals
| Fighter | KD | Sig. Str. | Sig. Str. % | Total Str. | TD | TD % | Sub. Att | Rev. | Ctrl |
|---|---|---|---|---|---|---|---|---|---|
| Jimmie Rivera | 0 | 9 of 17 | 52% | 9 of 17 | 0 of 0 | --- | 0 | 0 | 0:00 |
| Marcus Brimage | 1 | 15 of 27 | 55% | 15 of 27 | 0 of 0 | --- | 0 | 0 | 0:01 |
Per Round
| Rd | Fighter | KD | Sig. Str. | Sig. Str. % | Total Str. | TD | TD % | Sub. Att | Rev. | Ctrl |
|---|---|---|---|---|---|---|---|---|---|---|
| 1 | Jimmie Rivera | 0 | 9 of 17 | 52% | 9 of 17 | 0 of 0 | --- | 0 | 0 | 0:00 |
| Marcus Brimage | 1 | 15 of 27 | 55% | 15 of 27 | 0 of 0 | --- | 0 | 0 | 0:01 |
Significant Strikes
| Fighter | Sig. Str. | Sig. Str. % | Head | Body | Leg | Distance | Clinch | Ground |
|---|---|---|---|---|---|---|---|---|
| Jimmie Rivera | 9 of 17 | 52% | 4 of 12 | 4 of 4 | 1 of 1 | 9 of 17 | 0 of 0 | 0 of 0 |
| Marcus Brimage | 15 of 27 | 55% | 10 of 20 | 3 of 5 | 2 of 2 | 14 of 26 | 0 of 0 | 1 of 1 |
Significant Strikes Per Round
| Rd | Fighter | Sig. Str. | Sig. Str. % | Head | Body | Leg | Distance | Clinch | Ground |
|---|---|---|---|---|---|---|---|---|---|
| 1 | Jimmie Rivera | 9 of 17 | 52% | 4 of 12 | 4 of 4 | 1 of 1 | 9 of 17 | 0 of 0 | 0 of 0 |
| Marcus Brimage | 15 of 27 | 55% | 10 of 20 | 3 of 5 | 2 of 2 | 14 of 26 | 0 of 0 | 1 of 1 |
Totals
| Fighter | KD | Sig. Str. | Sig. Str. % | Total Str. | TD | TD % | Sub. Att | Rev. | Ctrl |
|---|---|---|---|---|---|---|---|---|---|
| Cody Garbrandt | 0 | 43 of 132 | 32% | 48 of 137 | 0 of 0 | --- | 0 | 0 | 0:17 |
| Marcus Brimage | 2 | 49 of 134 | 36% | 50 of 135 | 1 of 3 | 33% | 0 | 0 | 0:29 |
Per Round
| Rd | Fighter | KD | Sig. Str. | Sig. Str. % | Total Str. | TD | TD % | Sub. Att | Rev. | Ctrl |
|---|---|---|---|---|---|---|---|---|---|---|
| 1 | Cody Garbrandt | 0 | 9 of 32 | 28% | 9 of 32 | 0 of 0 | --- | 0 | 0 | 0:00 |
| Marcus Brimage | 0 | 11 of 35 | 31% | 12 of 36 | 1 of 1 | 100% | 0 | 0 | 0:25 | |
| 2 | Cody Garbrandt | 0 | 18 of 56 | 32% | 18 of 56 | 0 of 0 | --- | 0 | 0 | 0:00 |
| Marcus Brimage | 0 | 14 of 46 | 30% | 14 of 46 | 0 of 1 | 0% | 0 | 0 | 0:00 | |
| 3 | Cody Garbrandt | 0 | 16 of 44 | 36% | 21 of 49 | 0 of 0 | --- | 0 | 0 | 0:17 |
| Marcus Brimage | 2 | 24 of 53 | 45% | 24 of 53 | 0 of 1 | 0% | 0 | 0 | 0:04 |
Significant Strikes
| Fighter | Sig. Str. | Sig. Str. % | Head | Body | Leg | Distance | Clinch | Ground |
|---|---|---|---|---|---|---|---|---|
| Cody Garbrandt | 43 of 132 | 32% | 24 of 100 | 11 of 23 | 8 of 9 | 42 of 129 | 1 of 3 | 0 of 0 |
| Marcus Brimage | 49 of 134 | 36% | 42 of 122 | 5 of 8 | 2 of 4 | 45 of 125 | 0 of 2 | 4 of 7 |
Significant Strikes Per Round
| Rd | Fighter | Sig. Str. | Sig. Str. % | Head | Body | Leg | Distance | Clinch | Ground |
|---|---|---|---|---|---|---|---|---|---|
| 1 | Cody Garbrandt | 9 of 32 | 28% | 3 of 23 | 2 of 4 | 4 of 5 | 9 of 32 | 0 of 0 | 0 of 0 |
| Marcus Brimage | 11 of 35 | 31% | 10 of 32 | 0 of 0 | 1 of 3 | 10 of 33 | 0 of 0 | 1 of 2 | |
| 2 | Cody Garbrandt | 18 of 56 | 32% | 13 of 47 | 4 of 8 | 1 of 1 | 17 of 53 | 1 of 3 | 0 of 0 |
| Marcus Brimage | 14 of 46 | 30% | 11 of 41 | 2 of 4 | 1 of 1 | 14 of 45 | 0 of 1 | 0 of 0 | |
| 3 | Cody Garbrandt | 16 of 44 | 36% | 8 of 30 | 5 of 11 | 3 of 3 | 16 of 44 | 0 of 0 | 0 of 0 |
| Marcus Brimage | 24 of 53 | 45% | 21 of 49 | 3 of 4 | 0 of 0 | 21 of 47 | 0 of 1 | 3 of 5 |
Play-by-Play
View on SherdogRound 1
Garbrandt slaps up high with a pair of head kicks while the southpaw Brimage stays on the outside, pumping his jab and looking for an entrance. An inside low kick catches Garbrandt square on the cup, but the Team Alpha Male fighter is quick to recover and lands a quick hook that puts Brimage off-balance soon after they resume. The bantamweights trade hooks in close quarters, then Garbrandt deflects a high kick from Brimage. Leaping into the air, Garbrandt misses on a flying knee but comes out unscathed as Brimage gets turned around. Brimage tags the incoming Garbrandt with a left hand on the next exchange, but then another low kick hits Garbrandt on the cup. Referee Herb Dean gives Brimage another warning, and the fight soon gets going again. Garbrandt opens up with strikes and seems to hurt Brimage with punches against the fence, but the round ends in the middle of the exchange.
Sherdog Scores
Jordan Breen scores the round 10-9 Garbrandt
Chris Nelson scores the round 10-9 Garbrandt
Jeff Sherwood scores the round 10-9 Garbrandt
Round 2
Brimage ducks under a high kick and blitzes Garbrandt with punches, but not many in the flurry appear to connect and Garbrandt circles out to the center of the cage, seemingly unscathed. Garbrandt steps into range with a hard left hand, then counters Brimage’s next combo with a sweeping right. Brimage times a low kick and catches Garbrandt upstairs with a left hook. Garbrandt lands a left, raises his right hand and lands it again, but Brimage connects with one of his own simultaneously. Midway through the round, Brimage cracks Garbrandt with a high left hook, then tries a Superman punch and catches only air. The pace slows in the latter half of the round, the 135ers circling and feinting. Brimage is finding the mark with his left hand when he throws it, but his combos come up short when he tries to chase down Garbrandt. The Team Alpha Male fighters slips throwing a kick in the last 20 seconds but Brimage can’t capitalize before Garbrandt pops back to his feet.
Sherdog Scores
Jordan Breen scores the round 10-9 Garbrandt
Chris Nelson scores the round 10-9 Garbrandt
Jeff Sherwood scores the round 10-9 Brimage
Round 3
Brimage whips a right hand up top and lands it to counter a Garbrandt low kick as the bantamweights fight near the fence. “The Bama Beast” puts a left hook on Garbrandt’s body, then eats an uppercut as he tries to step into range with his head down. Garbrandt throws a kick and has it caught by Brimage, who dumps Garbrandt to the ground and follows him down. As soon as Garbrandt threatens with a triangle choke, Brimage lifts him to slam and escapes back to his feet as Garbrandt releases. Garbrandt puts a kick on the body of Brimage, who answers with a straight right. A left hook from Garbrandt causes a mouse to pop up on Brimage’s right eye, and Garbrandt adds an uppercut soon after. Garbrandt shuts down a takedown attempt. As Brimage chases after him with strikes, Garbrandt drops him with a three-punch combination. Brimage gets back to his feet in a daze, staggering around the cage while Garbrandt tries to tee him up for the homerun shot. Garbrandt connects with another combo that sends Brimage back to the mat, and now referee Dean steps in to rescue Brimage from further damage.
The Official Result
Cody Garbrandt def. Marcus Brimage via TKO (Punches) R3 4:50
Totals
| Fighter | KD | Sig. Str. | Sig. Str. % | Total Str. | TD | TD % | Sub. Att | Rev. | Ctrl |
|---|---|---|---|---|---|---|---|---|---|
| Marcus Brimage | 0 | 6 of 15 | 40% | 6 of 15 | 0 of 0 | --- | 0 | 0 | 0:00 |
| Jumabieke Tuerxun | 1 | 5 of 16 | 31% | 6 of 17 | 0 of 0 | --- | 0 | 0 | 0:02 |
Per Round
| Rd | Fighter | KD | Sig. Str. | Sig. Str. % | Total Str. | TD | TD % | Sub. Att | Rev. | Ctrl |
|---|---|---|---|---|---|---|---|---|---|---|
| 1 | Marcus Brimage | 0 | 6 of 15 | 40% | 6 of 15 | 0 of 0 | --- | 0 | 0 | 0:00 |
| Jumabieke Tuerxun | 1 | 5 of 16 | 31% | 6 of 17 | 0 of 0 | --- | 0 | 0 | 0:02 |
Significant Strikes
| Fighter | Sig. Str. | Sig. Str. % | Head | Body | Leg | Distance | Clinch | Ground |
|---|---|---|---|---|---|---|---|---|
| Marcus Brimage | 6 of 15 | 40% | 1 of 7 | 2 of 2 | 3 of 6 | 6 of 15 | 0 of 0 | 0 of 0 |
| Jumabieke Tuerxun | 5 of 16 | 31% | 3 of 10 | 0 of 1 | 2 of 5 | 4 of 14 | 0 of 0 | 1 of 2 |
Significant Strikes Per Round
| Rd | Fighter | Sig. Str. | Sig. Str. % | Head | Body | Leg | Distance | Clinch | Ground |
|---|---|---|---|---|---|---|---|---|---|
| 1 | Marcus Brimage | 6 of 15 | 40% | 1 of 7 | 2 of 2 | 3 of 6 | 6 of 15 | 0 of 0 | 0 of 0 |
| Jumabieke Tuerxun | 5 of 16 | 31% | 3 of 10 | 0 of 1 | 2 of 5 | 4 of 14 | 0 of 0 | 1 of 2 |
Totals
| Fighter | KD | Sig. Str. | Sig. Str. % | Total Str. | TD | TD % | Sub. Att | Rev. | Ctrl |
|---|---|---|---|---|---|---|---|---|---|
| Russell Doane | 0 | 27 of 75 | 36% | 33 of 81 | 2 of 2 | 100% | 0 | 0 | 0:31 |
| Marcus Brimage | 0 | 24 of 72 | 33% | 37 of 86 | 3 of 9 | 33% | 0 | 0 | 4:37 |
Per Round
| Rd | Fighter | KD | Sig. Str. | Sig. Str. % | Total Str. | TD | TD % | Sub. Att | Rev. | Ctrl |
|---|---|---|---|---|---|---|---|---|---|---|
| 1 | Russell Doane | 0 | 3 of 22 | 13% | 3 of 22 | 0 of 0 | --- | 0 | 0 | 0:00 |
| Marcus Brimage | 0 | 8 of 19 | 42% | 14 of 25 | 1 of 1 | 100% | 0 | 0 | 3:02 | |
| 2 | Russell Doane | 0 | 13 of 27 | 48% | 18 of 32 | 0 of 0 | --- | 0 | 0 | 0:16 |
| Marcus Brimage | 0 | 7 of 19 | 36% | 14 of 27 | 2 of 6 | 33% | 0 | 0 | 1:35 | |
| 3 | Russell Doane | 0 | 11 of 26 | 42% | 12 of 27 | 2 of 2 | 100% | 0 | 0 | 0:15 |
| Marcus Brimage | 0 | 9 of 34 | 26% | 9 of 34 | 0 of 2 | 0% | 0 | 0 | 0:00 |
Significant Strikes
| Fighter | Sig. Str. | Sig. Str. % | Head | Body | Leg | Distance | Clinch | Ground |
|---|---|---|---|---|---|---|---|---|
| Russell Doane | 27 of 75 | 36% | 9 of 52 | 2 of 3 | 16 of 20 | 24 of 71 | 3 of 4 | 0 of 0 |
| Marcus Brimage | 24 of 72 | 33% | 15 of 62 | 8 of 9 | 1 of 1 | 14 of 62 | 5 of 5 | 5 of 5 |
Significant Strikes Per Round
| Rd | Fighter | Sig. Str. | Sig. Str. % | Head | Body | Leg | Distance | Clinch | Ground |
|---|---|---|---|---|---|---|---|---|---|
| 1 | Russell Doane | 3 of 22 | 13% | 0 of 16 | 0 of 1 | 3 of 5 | 3 of 22 | 0 of 0 | 0 of 0 |
| Marcus Brimage | 8 of 19 | 42% | 6 of 17 | 2 of 2 | 0 of 0 | 4 of 15 | 0 of 0 | 4 of 4 | |
| 2 | Russell Doane | 13 of 27 | 48% | 6 of 19 | 1 of 1 | 6 of 7 | 10 of 23 | 3 of 4 | 0 of 0 |
| Marcus Brimage | 7 of 19 | 36% | 2 of 14 | 4 of 4 | 1 of 1 | 3 of 15 | 3 of 3 | 1 of 1 | |
| 3 | Russell Doane | 11 of 26 | 42% | 3 of 17 | 1 of 1 | 7 of 8 | 11 of 26 | 0 of 0 | 0 of 0 |
| Marcus Brimage | 9 of 34 | 26% | 7 of 31 | 2 of 3 | 0 of 0 | 7 of 32 | 2 of 2 | 0 of 0 |
Totals
| Fighter | KD | Sig. Str. | Sig. Str. % | Total Str. | TD | TD % | Sub. Att | Rev. | Ctrl |
|---|---|---|---|---|---|---|---|---|---|
| Conor McGregor | 0 | 12 of 41 | 29% | 12 of 41 | 0 of 0 | --- | 0 | 0 | 0:00 |
| Marcus Brimage | 1 | 21 of 35 | 60% | 22 of 36 | 0 of 0 | --- | 0 | 0 | 0:05 |
Per Round
| Rd | Fighter | KD | Sig. Str. | Sig. Str. % | Total Str. | TD | TD % | Sub. Att | Rev. | Ctrl |
|---|---|---|---|---|---|---|---|---|---|---|
| 1 | Conor McGregor | 0 | 12 of 41 | 29% | 12 of 41 | 0 of 0 | --- | 0 | 0 | 0:00 |
| Marcus Brimage | 1 | 21 of 35 | 60% | 22 of 36 | 0 of 0 | --- | 0 | 0 | 0:05 |
Significant Strikes
| Fighter | Sig. Str. | Sig. Str. % | Head | Body | Leg | Distance | Clinch | Ground |
|---|---|---|---|---|---|---|---|---|
| Conor McGregor | 12 of 41 | 29% | 7 of 34 | 2 of 2 | 3 of 5 | 12 of 41 | 0 of 0 | 0 of 0 |
| Marcus Brimage | 21 of 35 | 60% | 20 of 34 | 1 of 1 | 0 of 0 | 16 of 29 | 0 of 0 | 5 of 6 |
Significant Strikes Per Round
| Rd | Fighter | Sig. Str. | Sig. Str. % | Head | Body | Leg | Distance | Clinch | Ground |
|---|---|---|---|---|---|---|---|---|---|
| 1 | Conor McGregor | 12 of 41 | 29% | 7 of 34 | 2 of 2 | 3 of 5 | 12 of 41 | 0 of 0 | 0 of 0 |
| Marcus Brimage | 21 of 35 | 60% | 20 of 34 | 1 of 1 | 0 of 0 | 16 of 29 | 0 of 0 | 5 of 6 |
Play-by-Play
View on SherdogRound 1
There’s no touch of gloves as Brimage comes straight at McGregor, swinging overhand punches at the taller man. McGregor breaks up the momentum with a hard uppercut, then makes Brimage think twice about coming in with a left hook. Another pair of uppercuts have Brimage hitting the deck, where McGregor pounds away with thunderous punches until referee Robert Sundel is forced to intervene. Conor McGregor needs just 67 seconds to win his UFC debut in impressive fashion.
Totals
| Fighter | KD | Sig. Str. | Sig. Str. % | Total Str. | TD | TD % | Sub. Att | Rev. | Ctrl |
|---|---|---|---|---|---|---|---|---|---|
| Marcus Brimage | 0 | 87 of 175 | 49% | 113 of 204 | 2 of 9 | 22% | 0 | 0 | 2:35 |
| Jimy Hettes | 1 | 111 of 282 | 39% | 120 of 294 | 0 of 0 | --- | 0 | 0 | 0:16 |
Per Round
| Rd | Fighter | KD | Sig. Str. | Sig. Str. % | Total Str. | TD | TD % | Sub. Att | Rev. | Ctrl |
|---|---|---|---|---|---|---|---|---|---|---|
| 1 | Marcus Brimage | 0 | 31 of 69 | 44% | 32 of 70 | 0 of 3 | 0% | 0 | 0 | 0:00 |
| Jimy Hettes | 1 | 50 of 128 | 39% | 57 of 136 | 0 of 0 | --- | 0 | 0 | 0:13 | |
| 2 | Marcus Brimage | 0 | 24 of 40 | 60% | 48 of 66 | 2 of 4 | 50% | 0 | 0 | 2:35 |
| Jimy Hettes | 0 | 16 of 52 | 30% | 18 of 56 | 0 of 0 | --- | 0 | 0 | 0:03 | |
| 3 | Marcus Brimage | 0 | 32 of 66 | 48% | 33 of 68 | 0 of 2 | 0% | 0 | 0 | 0:00 |
| Jimy Hettes | 0 | 45 of 102 | 44% | 45 of 102 | 0 of 0 | --- | 0 | 0 | 0:00 |
Significant Strikes
| Fighter | Sig. Str. | Sig. Str. % | Head | Body | Leg | Distance | Clinch | Ground |
|---|---|---|---|---|---|---|---|---|
| Marcus Brimage | 87 of 175 | 49% | 81 of 169 | 4 of 4 | 2 of 2 | 78 of 164 | 4 of 5 | 5 of 6 |
| Jimy Hettes | 111 of 282 | 39% | 52 of 179 | 49 of 93 | 10 of 10 | 105 of 268 | 5 of 10 | 1 of 4 |
Significant Strikes Per Round
| Rd | Fighter | Sig. Str. | Sig. Str. % | Head | Body | Leg | Distance | Clinch | Ground |
|---|---|---|---|---|---|---|---|---|---|
| 1 | Marcus Brimage | 31 of 69 | 44% | 27 of 65 | 3 of 3 | 1 of 1 | 28 of 65 | 3 of 4 | 0 of 0 |
| Jimy Hettes | 50 of 128 | 39% | 24 of 75 | 24 of 51 | 2 of 2 | 47 of 120 | 2 of 4 | 1 of 4 | |
| 2 | Marcus Brimage | 24 of 40 | 60% | 23 of 39 | 0 of 0 | 1 of 1 | 19 of 34 | 0 of 0 | 5 of 6 |
| Jimy Hettes | 16 of 52 | 30% | 6 of 38 | 10 of 14 | 0 of 0 | 13 of 46 | 3 of 6 | 0 of 0 | |
| 3 | Marcus Brimage | 32 of 66 | 48% | 31 of 65 | 1 of 1 | 0 of 0 | 31 of 65 | 1 of 1 | 0 of 0 |
| Jimy Hettes | 45 of 102 | 44% | 22 of 66 | 15 of 28 | 8 of 8 | 45 of 102 | 0 of 0 | 0 of 0 |
Totals
| Fighter | KD | Sig. Str. | Sig. Str. % | Total Str. | TD | TD % | Sub. Att | Rev. | Ctrl |
|---|---|---|---|---|---|---|---|---|---|
| Marcus Brimage | 0 | 24 of 136 | 17% | 24 of 136 | 0 of 0 | --- | 0 | 0 | 0:01 |
| Maximo Blanco | 0 | 18 of 78 | 23% | 18 of 78 | 0 of 3 | 0% | 0 | 0 | 0:01 |
Per Round
| Rd | Fighter | KD | Sig. Str. | Sig. Str. % | Total Str. | TD | TD % | Sub. Att | Rev. | Ctrl |
|---|---|---|---|---|---|---|---|---|---|---|
| 1 | Marcus Brimage | 0 | 8 of 42 | 19% | 8 of 42 | 0 of 0 | --- | 0 | 0 | 0:00 |
| Maximo Blanco | 0 | 6 of 22 | 27% | 6 of 22 | 0 of 1 | 0% | 0 | 0 | 0:01 | |
| 2 | Marcus Brimage | 0 | 6 of 43 | 13% | 6 of 43 | 0 of 0 | --- | 0 | 0 | 0:01 |
| Maximo Blanco | 0 | 6 of 26 | 23% | 6 of 26 | 0 of 0 | --- | 0 | 0 | 0:00 | |
| 3 | Marcus Brimage | 0 | 10 of 51 | 19% | 10 of 51 | 0 of 0 | --- | 0 | 0 | 0:00 |
| Maximo Blanco | 0 | 6 of 30 | 20% | 6 of 30 | 0 of 2 | 0% | 0 | 0 | 0:00 |
Significant Strikes
| Fighter | Sig. Str. | Sig. Str. % | Head | Body | Leg | Distance | Clinch | Ground |
|---|---|---|---|---|---|---|---|---|
| Marcus Brimage | 24 of 136 | 17% | 15 of 108 | 2 of 11 | 7 of 17 | 24 of 132 | 0 of 3 | 0 of 1 |
| Maximo Blanco | 18 of 78 | 23% | 9 of 59 | 4 of 10 | 5 of 9 | 17 of 74 | 1 of 3 | 0 of 1 |
Significant Strikes Per Round
| Rd | Fighter | Sig. Str. | Sig. Str. % | Head | Body | Leg | Distance | Clinch | Ground |
|---|---|---|---|---|---|---|---|---|---|
| 1 | Marcus Brimage | 8 of 42 | 19% | 6 of 36 | 1 of 2 | 1 of 4 | 8 of 41 | 0 of 1 | 0 of 0 |
| Maximo Blanco | 6 of 22 | 27% | 3 of 16 | 0 of 3 | 3 of 3 | 6 of 20 | 0 of 2 | 0 of 0 | |
| 2 | Marcus Brimage | 6 of 43 | 13% | 4 of 31 | 0 of 5 | 2 of 7 | 6 of 42 | 0 of 0 | 0 of 1 |
| Maximo Blanco | 6 of 26 | 23% | 3 of 19 | 2 of 3 | 1 of 4 | 6 of 26 | 0 of 0 | 0 of 0 | |
| 3 | Marcus Brimage | 10 of 51 | 19% | 5 of 41 | 1 of 4 | 4 of 6 | 10 of 49 | 0 of 2 | 0 of 0 |
| Maximo Blanco | 6 of 30 | 20% | 3 of 24 | 2 of 4 | 1 of 2 | 5 of 28 | 1 of 1 | 0 of 1 |
Totals
| Fighter | KD | Sig. Str. | Sig. Str. % | Total Str. | TD | TD % | Sub. Att | Rev. | Ctrl |
|---|---|---|---|---|---|---|---|---|---|
| Marcus Brimage | 0 | 88 of 197 | 44% | 99 of 211 | 1 of 1 | 100% | 0 | 0 | 0:41 |
| Stephen Bass | 0 | 73 of 140 | 52% | 78 of 145 | 0 of 6 | 0% | 0 | 0 | 0:24 |
Per Round
| Rd | Fighter | KD | Sig. Str. | Sig. Str. % | Total Str. | TD | TD % | Sub. Att | Rev. | Ctrl |
|---|---|---|---|---|---|---|---|---|---|---|
| 1 | Marcus Brimage | 0 | 34 of 62 | 54% | 45 of 76 | 0 of 0 | --- | 0 | 0 | 0:22 |
| Stephen Bass | 0 | 24 of 32 | 75% | 25 of 33 | 0 of 2 | 0% | 0 | 0 | 0:16 | |
| 2 | Marcus Brimage | 0 | 24 of 57 | 42% | 24 of 57 | 0 of 0 | --- | 0 | 0 | 0:04 |
| Stephen Bass | 0 | 16 of 45 | 35% | 17 of 46 | 0 of 3 | 0% | 0 | 0 | 0:06 | |
| 3 | Marcus Brimage | 0 | 30 of 78 | 38% | 30 of 78 | 1 of 1 | 100% | 0 | 0 | 0:15 |
| Stephen Bass | 0 | 33 of 63 | 52% | 36 of 66 | 0 of 1 | 0% | 0 | 0 | 0:02 |
Significant Strikes
| Fighter | Sig. Str. | Sig. Str. % | Head | Body | Leg | Distance | Clinch | Ground |
|---|---|---|---|---|---|---|---|---|
| Marcus Brimage | 88 of 197 | 44% | 61 of 159 | 13 of 21 | 14 of 17 | 79 of 181 | 9 of 16 | 0 of 0 |
| Stephen Bass | 73 of 140 | 52% | 39 of 101 | 24 of 26 | 10 of 13 | 59 of 126 | 13 of 13 | 1 of 1 |
Significant Strikes Per Round
| Rd | Fighter | Sig. Str. | Sig. Str. % | Head | Body | Leg | Distance | Clinch | Ground |
|---|---|---|---|---|---|---|---|---|---|
| 1 | Marcus Brimage | 34 of 62 | 54% | 24 of 51 | 5 of 5 | 5 of 6 | 25 of 49 | 9 of 13 | 0 of 0 |
| Stephen Bass | 24 of 32 | 75% | 8 of 16 | 12 of 12 | 4 of 4 | 14 of 22 | 10 of 10 | 0 of 0 | |
| 2 | Marcus Brimage | 24 of 57 | 42% | 15 of 44 | 2 of 5 | 7 of 8 | 24 of 55 | 0 of 2 | 0 of 0 |
| Stephen Bass | 16 of 45 | 35% | 8 of 34 | 5 of 5 | 3 of 6 | 13 of 42 | 3 of 3 | 0 of 0 | |
| 3 | Marcus Brimage | 30 of 78 | 38% | 22 of 64 | 6 of 11 | 2 of 3 | 30 of 77 | 0 of 1 | 0 of 0 |
| Stephen Bass | 33 of 63 | 52% | 23 of 51 | 7 of 9 | 3 of 3 | 32 of 62 | 0 of 0 | 1 of 1 |
No comments yet. Be the first to share your thoughts!