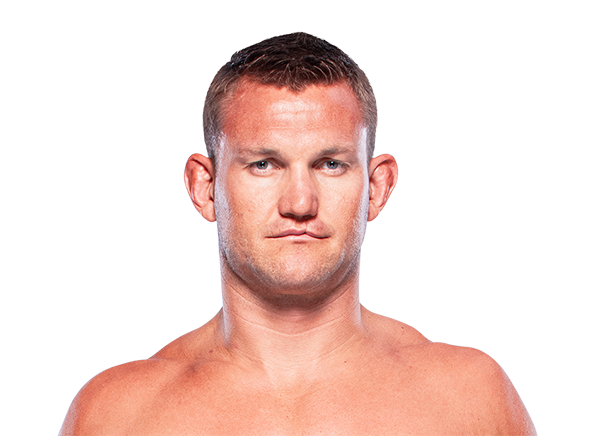
Career Averages - Ian Heinisch
Career Averages - Cezar Ferreira
Ian Heinisch - Fight History
Totals
| Fighter | KD | Sig. Str. | Sig. Str. % | Total Str. | TD | TD % | Sub. Att | Rev. | Ctrl |
|---|---|---|---|---|---|---|---|---|---|
| Nassourdine Imavov | 0 | 39 of 96 | 40% | 46 of 103 | 1 of 1 | 100% | 0 | 0 | 1:11 |
| Ian Heinisch | 0 | 24 of 52 | 46% | 25 of 53 | 0 of 3 | 0% | 0 | 0 | 1:03 |
Per Round
| Rd | Fighter | KD | Sig. Str. | Sig. Str. % | Total Str. | TD | TD % | Sub. Att | Rev. | Ctrl |
|---|---|---|---|---|---|---|---|---|---|---|
| 1 | Nassourdine Imavov | 0 | 16 of 35 | 45% | 23 of 42 | 0 of 0 | --- | 0 | 0 | 0:39 |
| Ian Heinisch | 0 | 14 of 25 | 56% | 15 of 26 | 0 of 2 | 0% | 0 | 0 | 1:03 | |
| 2 | Nassourdine Imavov | 0 | 23 of 61 | 37% | 23 of 61 | 1 of 1 | 100% | 0 | 0 | 0:32 |
| Ian Heinisch | 0 | 10 of 27 | 37% | 10 of 27 | 0 of 1 | 0% | 0 | 0 | 0:00 |
Significant Strikes
| Fighter | Sig. Str. | Sig. Str. % | Head | Body | Leg | Distance | Clinch | Ground |
|---|---|---|---|---|---|---|---|---|
| Nassourdine Imavov | 39 of 96 | 40% | 32 of 82 | 7 of 14 | 0 of 0 | 29 of 72 | 6 of 6 | 4 of 18 |
| Ian Heinisch | 24 of 52 | 46% | 4 of 25 | 2 of 4 | 18 of 23 | 22 of 50 | 2 of 2 | 0 of 0 |
Significant Strikes Per Round
| Rd | Fighter | Sig. Str. | Sig. Str. % | Head | Body | Leg | Distance | Clinch | Ground |
|---|---|---|---|---|---|---|---|---|---|
| 1 | Nassourdine Imavov | 16 of 35 | 45% | 11 of 28 | 5 of 7 | 0 of 0 | 12 of 31 | 4 of 4 | 0 of 0 |
| Ian Heinisch | 14 of 25 | 56% | 2 of 10 | 2 of 3 | 10 of 12 | 13 of 24 | 1 of 1 | 0 of 0 | |
| 2 | Nassourdine Imavov | 23 of 61 | 37% | 21 of 54 | 2 of 7 | 0 of 0 | 17 of 41 | 2 of 2 | 4 of 18 |
| Ian Heinisch | 10 of 27 | 37% | 2 of 15 | 0 of 1 | 8 of 11 | 9 of 26 | 1 of 1 | 0 of 0 |
Angelo picks Ian Heinisch but notes it's a close fight. He thinks Heinisch's wrestling and pressure will be key, but Imavov is a good counter-striker and has decent grappling. He expects Heinisch to win a decision or via grappling control. He likes the more/more on monkey knife fight because both fighters will be busy. He does not have Heinisch in his DraftKings lineup at $8,500 but thinks he's not a terrible play.
Big Brady picks Ian Heinisch by decision, citing a massive step down in competition for Heinisch and a step up for Imavov. He notes Heinisch can replicate Phil Hawes' game plan of holding Imavov against the cage and mixing takedowns. Despite Heinisch's low takedown accuracy (18%), he attributes it to facing elite wrestlers, while Imavov has been taken down frequently. He expects Heinisch's relentless wrestling and pace to overwhelm Imavov.
Cody picks Heinisch, arguing that Imavov is not a wrestler and that Heinisch will finally be able to strike without worrying about takedowns. He notes Heinisch has fought elite grapplers and has good takedown defense. He expects Heinisch to mix in his own wrestling and win by decision. He also likes the over.
Daniel Levi leans toward Ian Heinisch, acknowledging he should be favored but at the current price it's a pass or Imavov. He expects a close fight with clinch exchanges, predicting Heinisch via split decision. Levi notes that Heinisch has fought better competition but has been losing rounds, while Imavov is a dog who won't quit.
Jacob picks Ian Heinisch because he believes Heinisch will out-wrestle Imavov, who tends to accept grappling positions. He notes that Imavov gassed in his last fight against Jordan Williams and that Heinisch, being a tough Rikers guy, won't tire. He doesn't like Heinisch enough to put him in his DraftKings lineup because if the wrestling fails, things could go south quickly.
The host picks Ian Heinisch, citing his wrestling and pressure advantage over Imavov. He believes Heinisch will take Imavov down and control him, especially as the fight progresses. He notes Imavov's grappling deficiencies and recent hand injury. He likes Heinisch by decision at +145 and also mentions a potential third-round finish.
Paul also picks Heinisch, noting his move to Sanford MMA and improved training. He thinks Imavov looked awful against Phil Hawes and has poor ring IQ. He likes Heinisch's power and has a small bet on Heinisch by KO at +700 and round 1 KO at +2000. He thinks the finish props have value.
The Guru picks Heinisch, valuing his close decision loss to Kelvin Gastelum over Imavov's loss to Phil Hawes. He notes Heinisch's grappling, power, and solid chin, and believes Imavov is open to getting clipped early. He also mentions Heinisch is fighting to stay relevant. He predicts a TKO win.
Totals
| Fighter | KD | Sig. Str. | Sig. Str. % | Total Str. | TD | TD % | Sub. Att | Rev. | Ctrl |
|---|---|---|---|---|---|---|---|---|---|
| Kelvin Gastelum | 0 | 38 of 84 | 45% | 51 of 115 | 6 of 14 | 42% | 0 | 1 | 6:50 |
| Ian Heinisch | 0 | 27 of 67 | 40% | 56 of 107 | 1 of 6 | 16% | 2 | 1 | 1:11 |
Per Round
| Rd | Fighter | KD | Sig. Str. | Sig. Str. % | Total Str. | TD | TD % | Sub. Att | Rev. | Ctrl |
|---|---|---|---|---|---|---|---|---|---|---|
| 1 | Kelvin Gastelum | 0 | 6 of 13 | 46% | 13 of 25 | 3 of 5 | 60% | 0 | 0 | 3:25 |
| Ian Heinisch | 0 | 6 of 15 | 40% | 10 of 21 | 0 of 2 | 0% | 2 | 0 | 0:03 | |
| 2 | Kelvin Gastelum | 0 | 16 of 34 | 47% | 21 of 48 | 1 of 4 | 25% | 0 | 0 | 2:03 |
| Ian Heinisch | 0 | 12 of 31 | 38% | 23 of 42 | 0 of 1 | 0% | 0 | 0 | 0:00 | |
| 3 | Kelvin Gastelum | 0 | 16 of 37 | 43% | 17 of 42 | 2 of 5 | 40% | 0 | 1 | 1:22 |
| Ian Heinisch | 0 | 9 of 21 | 42% | 23 of 44 | 1 of 3 | 33% | 0 | 1 | 1:08 |
Significant Strikes
| Fighter | Sig. Str. | Sig. Str. % | Head | Body | Leg | Distance | Clinch | Ground |
|---|---|---|---|---|---|---|---|---|
| Kelvin Gastelum | 38 of 84 | 45% | 20 of 62 | 10 of 13 | 8 of 9 | 28 of 69 | 8 of 11 | 2 of 4 |
| Ian Heinisch | 27 of 67 | 40% | 10 of 42 | 6 of 11 | 11 of 14 | 26 of 64 | 0 of 0 | 1 of 3 |
Significant Strikes Per Round
| Rd | Fighter | Sig. Str. | Sig. Str. % | Head | Body | Leg | Distance | Clinch | Ground |
|---|---|---|---|---|---|---|---|---|---|
| 1 | Kelvin Gastelum | 6 of 13 | 46% | 3 of 10 | 2 of 2 | 1 of 1 | 6 of 12 | 0 of 0 | 0 of 1 |
| Ian Heinisch | 6 of 15 | 40% | 0 of 7 | 1 of 2 | 5 of 6 | 6 of 15 | 0 of 0 | 0 of 0 | |
| 2 | Kelvin Gastelum | 16 of 34 | 47% | 6 of 21 | 4 of 6 | 6 of 7 | 13 of 28 | 3 of 5 | 0 of 1 |
| Ian Heinisch | 12 of 31 | 38% | 5 of 20 | 3 of 6 | 4 of 5 | 12 of 31 | 0 of 0 | 0 of 0 | |
| 3 | Kelvin Gastelum | 16 of 37 | 43% | 11 of 31 | 4 of 5 | 1 of 1 | 9 of 29 | 5 of 6 | 2 of 2 |
| Ian Heinisch | 9 of 21 | 42% | 5 of 15 | 2 of 3 | 2 of 3 | 8 of 18 | 0 of 0 | 1 of 3 |
Big Brady picks Kelvin Gastelum to win by decision, but with no confidence. He thinks Gastelum's recent losses are to top competition and that Heinisch is a step down. He believes Gastelum has better takedown defense, cardio, and striking. However, he acknowledges Gastelum has looked awful and Heinisch has heart and grit. He advises staying away from betting this fight.
Daniel Levi picks Kelvin Gastelum but with low confidence, calling it a 'dog or pass' situation. He acknowledges Gastelum is the better fighter on paper but questions his motivation and recent performances since the Adesanya fight. He notes Gastelum's inconsistency and that Heinisch could sneak a decision if Gastelum doesn't show up. He ultimately picks Gastelum as a pure pick but advises against betting him at -225.
The host believes Gastelum has the better hands and will be able to keep the fight on the feet, outstriking Heinisch. He notes that Heinisch's grappling-heavy style has struggled against wrestlers like Brunson and Akhmedov, and that Gastelum is a crafty grappler himself. He predicts a third-round TKO as Gastelum's power and pace overwhelm Heinisch late.
The Guru picks Kelvin Gastelum, believing he is more technical and has better takedown defense. He notes that Ian Heinisch slows down in later rounds, and Gastelum's youth and cardio will allow him to push the pace and finish Heinisch in the third round via TKO. He compares the matchup to Gastelum's win over Tim Kennedy.
Totals
| Fighter | KD | Sig. Str. | Sig. Str. % | Total Str. | TD | TD % | Sub. Att | Rev. | Ctrl |
|---|---|---|---|---|---|---|---|---|---|
| Ian Heinisch | 1 | 20 of 25 | 80% | 22 of 27 | 0 of 0 | --- | 0 | 0 | 0:13 |
| Gerald Meerschaert | 0 | 3 of 10 | 30% | 3 of 10 | 0 of 0 | --- | 0 | 0 | 0:00 |
Per Round
| Rd | Fighter | KD | Sig. Str. | Sig. Str. % | Total Str. | TD | TD % | Sub. Att | Rev. | Ctrl |
|---|---|---|---|---|---|---|---|---|---|---|
| 1 | Ian Heinisch | 1 | 20 of 25 | 80% | 22 of 27 | 0 of 0 | --- | 0 | 0 | 0:13 |
| Gerald Meerschaert | 0 | 3 of 10 | 30% | 3 of 10 | 0 of 0 | --- | 0 | 0 | 0:00 |
Significant Strikes
| Fighter | Sig. Str. | Sig. Str. % | Head | Body | Leg | Distance | Clinch | Ground |
|---|---|---|---|---|---|---|---|---|
| Ian Heinisch | 20 of 25 | 80% | 17 of 22 | 1 of 1 | 2 of 2 | 5 of 5 | 0 of 0 | 15 of 20 |
| Gerald Meerschaert | 3 of 10 | 30% | 1 of 8 | 2 of 2 | 0 of 0 | 3 of 10 | 0 of 0 | 0 of 0 |
Significant Strikes Per Round
| Rd | Fighter | Sig. Str. | Sig. Str. % | Head | Body | Leg | Distance | Clinch | Ground |
|---|---|---|---|---|---|---|---|---|---|
| 1 | Ian Heinisch | 20 of 25 | 80% | 17 of 22 | 1 of 1 | 2 of 2 | 5 of 5 | 0 of 0 | 15 of 20 |
| Gerald Meerschaert | 3 of 10 | 30% | 1 of 8 | 2 of 2 | 0 of 0 | 3 of 10 | 0 of 0 | 0 of 0 |
Play-by-Play
View on SherdogRound 1
Back to the middleweight division we go, where we will get to see a match between Heinisch (13-3, 2-2 UFC) and Meerschaert (31-12, 6-4 UFC) that was briefly pulled from the lineup when one of Heinisch’s new cornermen tested positive for COVID-19. How the UFC can determine that the corner’s first test was a false positive and not that the second test was a false negative, we may never know. Everyone including referee Chris Tognoni has their fingers crossed for this one. There is no glove touch, and Heinisch nearly kicks out the lead leg on his first kick. He fires another, and Meerschaert does not wear it well. Heinisch targets that lead leg once more, and Meerschaert comes at him with a few long punches that glance off the target. “GM3” lands a body kick and comes up short with a left, but more importantly successfully avoids the counter right hand that flies at his head.
Heinisch ducks down and blasts him with a monster right hand that sets Meerschaert down, and “GM3” is hurt badly. “Hurricane” lets loose a storm of thunderous punches that continue to batter Meerschaert one after the other. Turtled up on his knees, Meerschaert keeps taking punches on both sides of his head until Tognoni has seen more than enough and calls the fight.
From being yanked off the card to recording a crushing victory in mere days, this is an important and emphatic win for Heinisch.
The Official Result
Ian Heinisch def. Gerald Meerschaert R1 1:14 via TKO (Punches)
Big Brady leans toward Ian Heinisch, believing the matchup favors him stylistically. He thinks Heinisch can close the distance, land takedowns, and avoid Meerschaert's BJJ. He notes Meerschaert's reach advantage and improved striking but feels Heinisch's wrestling and pressure will earn a close decision. He acknowledges Meerschaert is underrated.
Daniel finds it hard to cap Meerschaert because he often wins despite looking slow and unathletic. He sees this as a 50/50 fight and leans toward Meerschaert as the dog, citing his veteran savvy, jiu-jitsu black belt, and ability to capitalize on mistakes. He acknowledges Heinisch's cardio and will but thinks Meerschaert can snatch a submission or win a decision.
Ian Heinisch has great cardio and submission defense, which should help him avoid Gerald Meerschaert's submissions. Heinisch has the speed advantage and should be able to get in and out. However, his output has been a concern in past fights. If he lets his hands go, he can outpace Meerschaert. The pick is Heinisch, but not confident enough to bet.
The MMA Guru picks Ian Heinisch over Gerald Meerschaert. He questions the quality of Meerschaert's recent wins, noting that Trevin Giles and Deron Winn are overrated. He believes Heinisch's takedown defense and power will be too much, and that Heinisch will win by decision, becoming a mainstay in the rankings.
Totals
| Fighter | KD | Sig. Str. | Sig. Str. % | Total Str. | TD | TD % | Sub. Att | Rev. | Ctrl |
|---|---|---|---|---|---|---|---|---|---|
| Omari Akhmedov | 0 | 53 of 103 | 51% | 70 of 121 | 3 of 10 | 30% | 0 | 0 | 2:29 |
| Ian Heinisch | 0 | 55 of 166 | 33% | 69 of 180 | 2 of 4 | 50% | 0 | 0 | 1:31 |
Per Round
| Rd | Fighter | KD | Sig. Str. | Sig. Str. % | Total Str. | TD | TD % | Sub. Att | Rev. | Ctrl |
|---|---|---|---|---|---|---|---|---|---|---|
| 1 | Omari Akhmedov | 0 | 13 of 28 | 46% | 17 of 32 | 0 of 2 | 0% | 0 | 0 | 0:00 |
| Ian Heinisch | 0 | 19 of 54 | 35% | 21 of 56 | 1 of 1 | 100% | 0 | 0 | 0:37 | |
| 2 | Omari Akhmedov | 0 | 17 of 31 | 54% | 19 of 33 | 1 of 3 | 33% | 0 | 0 | 0:51 |
| Ian Heinisch | 0 | 18 of 60 | 30% | 25 of 67 | 1 of 1 | 100% | 0 | 0 | 0:31 | |
| 3 | Omari Akhmedov | 0 | 23 of 44 | 52% | 34 of 56 | 2 of 5 | 40% | 0 | 0 | 1:38 |
| Ian Heinisch | 0 | 18 of 52 | 34% | 23 of 57 | 0 of 2 | 0% | 0 | 0 | 0:23 |
Significant Strikes
| Fighter | Sig. Str. | Sig. Str. % | Head | Body | Leg | Distance | Clinch | Ground |
|---|---|---|---|---|---|---|---|---|
| Omari Akhmedov | 53 of 103 | 51% | 26 of 62 | 13 of 27 | 14 of 14 | 46 of 94 | 4 of 6 | 3 of 3 |
| Ian Heinisch | 55 of 166 | 33% | 41 of 139 | 10 of 23 | 4 of 4 | 48 of 159 | 7 of 7 | 0 of 0 |
Significant Strikes Per Round
| Rd | Fighter | Sig. Str. | Sig. Str. % | Head | Body | Leg | Distance | Clinch | Ground |
|---|---|---|---|---|---|---|---|---|---|
| 1 | Omari Akhmedov | 13 of 28 | 46% | 3 of 11 | 1 of 8 | 9 of 9 | 13 of 28 | 0 of 0 | 0 of 0 |
| Ian Heinisch | 19 of 54 | 35% | 12 of 46 | 4 of 5 | 3 of 3 | 17 of 52 | 2 of 2 | 0 of 0 | |
| 2 | Omari Akhmedov | 17 of 31 | 54% | 7 of 17 | 7 of 11 | 3 of 3 | 15 of 28 | 1 of 2 | 1 of 1 |
| Ian Heinisch | 18 of 60 | 30% | 14 of 49 | 3 of 10 | 1 of 1 | 15 of 57 | 3 of 3 | 0 of 0 | |
| 3 | Omari Akhmedov | 23 of 44 | 52% | 16 of 34 | 5 of 8 | 2 of 2 | 18 of 38 | 3 of 4 | 2 of 2 |
| Ian Heinisch | 18 of 52 | 34% | 15 of 44 | 3 of 8 | 0 of 0 | 16 of 50 | 2 of 2 | 0 of 0 |
Totals
| Fighter | KD | Sig. Str. | Sig. Str. % | Total Str. | TD | TD % | Sub. Att | Rev. | Ctrl |
|---|---|---|---|---|---|---|---|---|---|
| Derek Brunson | 0 | 81 of 185 | 43% | 102 of 207 | 2 of 10 | 20% | 0 | 0 | 2:13 |
| Ian Heinisch | 0 | 58 of 143 | 40% | 65 of 150 | 0 of 8 | 0% | 0 | 0 | 0:00 |
Per Round
| Rd | Fighter | KD | Sig. Str. | Sig. Str. % | Total Str. | TD | TD % | Sub. Att | Rev. | Ctrl |
|---|---|---|---|---|---|---|---|---|---|---|
| 1 | Derek Brunson | 0 | 16 of 42 | 38% | 27 of 54 | 0 of 4 | 0% | 0 | 0 | 0:58 |
| Ian Heinisch | 0 | 19 of 43 | 44% | 21 of 45 | 0 of 2 | 0% | 0 | 0 | 0:00 | |
| 2 | Derek Brunson | 0 | 29 of 55 | 52% | 35 of 61 | 0 of 1 | 0% | 0 | 0 | 0:38 |
| Ian Heinisch | 0 | 13 of 34 | 38% | 13 of 34 | 0 of 5 | 0% | 0 | 0 | 0:00 | |
| 3 | Derek Brunson | 0 | 36 of 88 | 40% | 40 of 92 | 2 of 5 | 40% | 0 | 0 | 0:37 |
| Ian Heinisch | 0 | 26 of 66 | 39% | 31 of 71 | 0 of 1 | 0% | 0 | 0 | 0:00 |
Significant Strikes
| Fighter | Sig. Str. | Sig. Str. % | Head | Body | Leg | Distance | Clinch | Ground |
|---|---|---|---|---|---|---|---|---|
| Derek Brunson | 81 of 185 | 43% | 51 of 142 | 26 of 37 | 4 of 6 | 69 of 170 | 7 of 9 | 5 of 6 |
| Ian Heinisch | 58 of 143 | 40% | 37 of 114 | 16 of 23 | 5 of 6 | 49 of 130 | 8 of 12 | 1 of 1 |
Significant Strikes Per Round
| Rd | Fighter | Sig. Str. | Sig. Str. % | Head | Body | Leg | Distance | Clinch | Ground |
|---|---|---|---|---|---|---|---|---|---|
| 1 | Derek Brunson | 16 of 42 | 38% | 10 of 35 | 5 of 6 | 1 of 1 | 12 of 37 | 4 of 5 | 0 of 0 |
| Ian Heinisch | 19 of 43 | 44% | 8 of 31 | 7 of 8 | 4 of 4 | 14 of 36 | 5 of 7 | 0 of 0 | |
| 2 | Derek Brunson | 29 of 55 | 52% | 21 of 41 | 7 of 11 | 1 of 3 | 23 of 48 | 1 of 1 | 5 of 6 |
| Ian Heinisch | 13 of 34 | 38% | 7 of 22 | 6 of 11 | 0 of 1 | 11 of 31 | 1 of 2 | 1 of 1 | |
| 3 | Derek Brunson | 36 of 88 | 40% | 20 of 66 | 14 of 20 | 2 of 2 | 34 of 85 | 2 of 3 | 0 of 0 |
| Ian Heinisch | 26 of 66 | 39% | 22 of 61 | 3 of 4 | 1 of 1 | 24 of 63 | 2 of 3 | 0 of 0 |
Totals
| Fighter | KD | Sig. Str. | Sig. Str. % | Total Str. | TD | TD % | Sub. Att | Rev. | Ctrl |
|---|---|---|---|---|---|---|---|---|---|
| Ian Heinisch | 0 | 15 of 33 | 45% | 25 of 43 | 4 of 11 | 36% | 0 | 1 | 6:23 |
| Antônio Carlos Júnior | 0 | 39 of 67 | 58% | 79 of 115 | 1 of 1 | 100% | 0 | 0 | 4:42 |
Per Round
| Rd | Fighter | KD | Sig. Str. | Sig. Str. % | Total Str. | TD | TD % | Sub. Att | Rev. | Ctrl |
|---|---|---|---|---|---|---|---|---|---|---|
| 1 | Ian Heinisch | 0 | 8 of 12 | 66% | 13 of 17 | 3 of 6 | 50% | 0 | 0 | 4:11 |
| Antônio Carlos Júnior | 0 | 1 of 4 | 25% | 8 of 11 | 0 of 0 | --- | 0 | 0 | 0:05 | |
| 2 | Ian Heinisch | 0 | 3 of 12 | 25% | 5 of 14 | 1 of 3 | 33% | 0 | 0 | 1:27 |
| Antônio Carlos Júnior | 0 | 18 of 30 | 60% | 39 of 54 | 0 of 0 | --- | 0 | 0 | 1:58 | |
| 3 | Ian Heinisch | 0 | 4 of 9 | 44% | 7 of 12 | 0 of 2 | 0% | 0 | 1 | 0:45 |
| Antônio Carlos Júnior | 0 | 20 of 33 | 60% | 32 of 50 | 1 of 1 | 100% | 0 | 0 | 2:39 |
Significant Strikes
| Fighter | Sig. Str. | Sig. Str. % | Head | Body | Leg | Distance | Clinch | Ground |
|---|---|---|---|---|---|---|---|---|
| Ian Heinisch | 15 of 33 | 45% | 10 of 27 | 1 of 2 | 4 of 4 | 11 of 28 | 2 of 2 | 2 of 3 |
| Antônio Carlos Júnior | 39 of 67 | 58% | 26 of 48 | 2 of 5 | 11 of 14 | 13 of 31 | 5 of 7 | 21 of 29 |
Significant Strikes Per Round
| Rd | Fighter | Sig. Str. | Sig. Str. % | Head | Body | Leg | Distance | Clinch | Ground |
|---|---|---|---|---|---|---|---|---|---|
| 1 | Ian Heinisch | 8 of 12 | 66% | 5 of 8 | 0 of 1 | 3 of 3 | 4 of 7 | 2 of 2 | 2 of 3 |
| Antônio Carlos Júnior | 1 of 4 | 25% | 0 of 0 | 0 of 1 | 1 of 3 | 1 of 4 | 0 of 0 | 0 of 0 | |
| 2 | Ian Heinisch | 3 of 12 | 25% | 2 of 11 | 0 of 0 | 1 of 1 | 3 of 12 | 0 of 0 | 0 of 0 |
| Antônio Carlos Júnior | 18 of 30 | 60% | 11 of 22 | 1 of 2 | 6 of 6 | 5 of 13 | 2 of 3 | 11 of 14 | |
| 3 | Ian Heinisch | 4 of 9 | 44% | 3 of 8 | 1 of 1 | 0 of 0 | 4 of 9 | 0 of 0 | 0 of 0 |
| Antônio Carlos Júnior | 20 of 33 | 60% | 15 of 26 | 1 of 2 | 4 of 5 | 7 of 14 | 3 of 4 | 10 of 15 |
Totals
| Fighter | KD | Sig. Str. | Sig. Str. % | Total Str. | TD | TD % | Sub. Att | Rev. | Ctrl |
|---|---|---|---|---|---|---|---|---|---|
| Ian Heinisch | 0 | 26 of 55 | 47% | 38 of 68 | 5 of 11 | 45% | 0 | 0 | 5:20 |
| Cezar Ferreira | 1 | 55 of 95 | 57% | 90 of 133 | 1 of 7 | 14% | 2 | 0 | 1:30 |
Per Round
| Rd | Fighter | KD | Sig. Str. | Sig. Str. % | Total Str. | TD | TD % | Sub. Att | Rev. | Ctrl |
|---|---|---|---|---|---|---|---|---|---|---|
| 1 | Ian Heinisch | 0 | 6 of 9 | 66% | 7 of 10 | 1 of 4 | 25% | 0 | 0 | 2:25 |
| Cezar Ferreira | 0 | 13 of 21 | 61% | 20 of 29 | 0 of 0 | --- | 2 | 0 | 0:00 | |
| 2 | Ian Heinisch | 0 | 9 of 18 | 50% | 18 of 27 | 3 of 4 | 75% | 0 | 0 | 1:28 |
| Cezar Ferreira | 1 | 13 of 27 | 48% | 13 of 27 | 0 of 1 | 0% | 0 | 0 | 0:04 | |
| 3 | Ian Heinisch | 0 | 11 of 28 | 39% | 13 of 31 | 1 of 3 | 33% | 0 | 0 | 1:27 |
| Cezar Ferreira | 0 | 29 of 47 | 61% | 57 of 77 | 1 of 6 | 16% | 0 | 0 | 1:26 |
Significant Strikes
| Fighter | Sig. Str. | Sig. Str. % | Head | Body | Leg | Distance | Clinch | Ground |
|---|---|---|---|---|---|---|---|---|
| Ian Heinisch | 26 of 55 | 47% | 17 of 39 | 3 of 9 | 6 of 7 | 22 of 47 | 4 of 8 | 0 of 0 |
| Cezar Ferreira | 55 of 95 | 57% | 38 of 74 | 10 of 10 | 7 of 11 | 30 of 59 | 14 of 21 | 11 of 15 |
Significant Strikes Per Round
| Rd | Fighter | Sig. Str. | Sig. Str. % | Head | Body | Leg | Distance | Clinch | Ground |
|---|---|---|---|---|---|---|---|---|---|
| 1 | Ian Heinisch | 6 of 9 | 66% | 3 of 4 | 0 of 2 | 3 of 3 | 6 of 9 | 0 of 0 | 0 of 0 |
| Cezar Ferreira | 13 of 21 | 61% | 5 of 10 | 6 of 6 | 2 of 5 | 8 of 15 | 1 of 2 | 4 of 4 | |
| 2 | Ian Heinisch | 9 of 18 | 50% | 6 of 11 | 2 of 5 | 1 of 2 | 9 of 18 | 0 of 0 | 0 of 0 |
| Cezar Ferreira | 13 of 27 | 48% | 7 of 20 | 2 of 2 | 4 of 5 | 8 of 18 | 0 of 1 | 5 of 8 | |
| 3 | Ian Heinisch | 11 of 28 | 39% | 8 of 24 | 1 of 2 | 2 of 2 | 7 of 20 | 4 of 8 | 0 of 0 |
| Cezar Ferreira | 29 of 47 | 61% | 26 of 44 | 2 of 2 | 1 of 1 | 14 of 26 | 13 of 18 | 2 of 3 |
Cezar Ferreira - Fight History
Totals
| Fighter | KD | Sig. Str. | Sig. Str. % | Total Str. | TD | TD % | Sub. Att | Rev. | Ctrl |
|---|---|---|---|---|---|---|---|---|---|
| Marvin Vettori | 0 | 78 of 148 | 52% | 106 of 176 | 2 of 4 | 50% | 0 | 0 | 2:34 |
| Cezar Ferreira | 0 | 39 of 88 | 44% | 41 of 90 | 0 of 5 | 0% | 0 | 0 | 0:09 |
Per Round
| Rd | Fighter | KD | Sig. Str. | Sig. Str. % | Total Str. | TD | TD % | Sub. Att | Rev. | Ctrl |
|---|---|---|---|---|---|---|---|---|---|---|
| 1 | Marvin Vettori | 0 | 23 of 46 | 50% | 39 of 62 | 1 of 1 | 100% | 0 | 0 | 0:49 |
| Cezar Ferreira | 0 | 17 of 30 | 56% | 17 of 30 | 0 of 0 | --- | 0 | 0 | 0:00 | |
| 2 | Marvin Vettori | 0 | 24 of 44 | 54% | 36 of 56 | 1 of 2 | 50% | 0 | 0 | 1:38 |
| Cezar Ferreira | 0 | 12 of 26 | 46% | 14 of 28 | 0 of 1 | 0% | 0 | 0 | 0:00 | |
| 3 | Marvin Vettori | 0 | 31 of 58 | 53% | 31 of 58 | 0 of 1 | 0% | 0 | 0 | 0:07 |
| Cezar Ferreira | 0 | 10 of 32 | 31% | 10 of 32 | 0 of 4 | 0% | 0 | 0 | 0:09 |
Significant Strikes
| Fighter | Sig. Str. | Sig. Str. % | Head | Body | Leg | Distance | Clinch | Ground |
|---|---|---|---|---|---|---|---|---|
| Marvin Vettori | 78 of 148 | 52% | 69 of 137 | 7 of 9 | 2 of 2 | 50 of 107 | 20 of 30 | 8 of 11 |
| Cezar Ferreira | 39 of 88 | 44% | 17 of 54 | 7 of 13 | 15 of 21 | 33 of 81 | 6 of 7 | 0 of 0 |
Significant Strikes Per Round
| Rd | Fighter | Sig. Str. | Sig. Str. % | Head | Body | Leg | Distance | Clinch | Ground |
|---|---|---|---|---|---|---|---|---|---|
| 1 | Marvin Vettori | 23 of 46 | 50% | 21 of 42 | 2 of 4 | 0 of 0 | 13 of 31 | 4 of 6 | 6 of 9 |
| Cezar Ferreira | 17 of 30 | 56% | 2 of 12 | 5 of 7 | 10 of 11 | 16 of 29 | 1 of 1 | 0 of 0 | |
| 2 | Marvin Vettori | 24 of 44 | 54% | 22 of 42 | 2 of 2 | 0 of 0 | 14 of 32 | 8 of 10 | 2 of 2 |
| Cezar Ferreira | 12 of 26 | 46% | 6 of 16 | 2 of 4 | 4 of 6 | 10 of 24 | 2 of 2 | 0 of 0 | |
| 3 | Marvin Vettori | 31 of 58 | 53% | 26 of 53 | 3 of 3 | 2 of 2 | 23 of 44 | 8 of 14 | 0 of 0 |
| Cezar Ferreira | 10 of 32 | 31% | 9 of 26 | 0 of 2 | 1 of 4 | 7 of 28 | 3 of 4 | 0 of 0 |
Play-by-Play
View on SherdogRound 1
Vettori absorbs an eye poke during an initial exchange, so we have a break in the action. Ferreira gets a warning and the fight resumes. Ferreira lands a low kick and Vettori grins. Vettori is stalking, coming forward with punches. Ferreira blocks most of them, though. “Mutante” lands a nice body shot. Vettori steps in with a left hand. The Italian fighter pursues and lands a one-two. Ferreira answers back with a pair of hard low kicks. Ferreira steps in with an uppercut, Vettori shakes his head and attacks with a combination. Ferreira is having his most success with low kicks. Another heavy low kick from Ferreira. Vettori catches the next kick and lands a takedown with about 1:00 to go. The Italian passes to full mount and lands some ground-and-pound. Ferreira regains guard with 20 seconds, but Vettori drops some elbows that appear to have cut the Brazilian at the end of the frame.
Sherdog Scores
Tristen Critchfield scores the round: 10-9 Vettori
Cole Shelton scores the round: 10-9 Vettori
Jay Pettry scores the round: 10-9 Vettori
Round 2
A right hook connects early, but Vettori counters with a shot of his own that makes the Brazilian stumble backward. Vettori times a level change and puts Ferreira on the mat. Ferreira scrambles up and eats a knee and some punches. They clinch and Vettori drops for a takedown. Ferreira lands some elbows to the side of the head, so Vettori resets. They separate with about 3:00 to go and Vettori lands a stiff jab and then a right hook moments later. Ferreira lands a hard left hand, and Vettori shakes it off. Vettori slips and counters with a straight left hand. Ferreira goes back to the low kick. Vettori puts the Brazilian on his bike with a combination. Vettori swarms with more punches after Ferreira momentarily slips. Ferreira steps in with a body-head combination. Ferreira attempts a level change and Vettori reverses his man and drives him into the fence. Not much action from the clinch as the round draws to a close. They’ll end in that position.
Sherdog Scores
Tristen Critchfield scores the round: 10-9 Vettori
Cole Shelton scores the round: 10-9 Vettori
Jay Pettry scores the round: 10-9 Vettori
Round 3
Ferreira shoots for a takedown early, but Vettori shrugs him off. They trade in the pocket, and it’s Vettori landing with more volume. Vettori is working behind his jab. Ferreira shoots again, clinging to a single leg. Vettori frees himself and lands some heavy punches on the feet. Ferreira stumbles on a kick and Vettori forces the clinch. They break and return to the center of the cage. Vettori lands a one-two. The pace is slowing somewhat, and Vettori stuffs a takedown. A clean one-two combo lands for Vettori. Vettori sidesteps a shot and lands a right hook. He tags Ferreira with a couple more clean shots. Vettori snaps his foe’s head back with a hard combination. A left cross connects for the Italian, as he’s feeling comfortable in the late moments of the fight, holding his hands low. Ferreira can’t capitalize, and this one should belong to Vettori.
Sherdog Scores
Tristen Critchfield scores the round: 10-9 Vettori (30-27 Vettori)
Cole Shelton scores the round: 10-9 Vettori (30-27 Vettori)
Jay Pettry scores the round: 10-9 Vettori (30-27 Vettori)
The Official Result
Marvin Vettori def. Cezar Ferreira via Unanimous Decision (30-27, 30-27, 30-27) R3 5:00
Totals
| Fighter | KD | Sig. Str. | Sig. Str. % | Total Str. | TD | TD % | Sub. Att | Rev. | Ctrl |
|---|---|---|---|---|---|---|---|---|---|
| Ian Heinisch | 0 | 26 of 55 | 47% | 38 of 68 | 5 of 11 | 45% | 0 | 0 | 5:20 |
| Cezar Ferreira | 1 | 55 of 95 | 57% | 90 of 133 | 1 of 7 | 14% | 2 | 0 | 1:30 |
Per Round
| Rd | Fighter | KD | Sig. Str. | Sig. Str. % | Total Str. | TD | TD % | Sub. Att | Rev. | Ctrl |
|---|---|---|---|---|---|---|---|---|---|---|
| 1 | Ian Heinisch | 0 | 6 of 9 | 66% | 7 of 10 | 1 of 4 | 25% | 0 | 0 | 2:25 |
| Cezar Ferreira | 0 | 13 of 21 | 61% | 20 of 29 | 0 of 0 | --- | 2 | 0 | 0:00 | |
| 2 | Ian Heinisch | 0 | 9 of 18 | 50% | 18 of 27 | 3 of 4 | 75% | 0 | 0 | 1:28 |
| Cezar Ferreira | 1 | 13 of 27 | 48% | 13 of 27 | 0 of 1 | 0% | 0 | 0 | 0:04 | |
| 3 | Ian Heinisch | 0 | 11 of 28 | 39% | 13 of 31 | 1 of 3 | 33% | 0 | 0 | 1:27 |
| Cezar Ferreira | 0 | 29 of 47 | 61% | 57 of 77 | 1 of 6 | 16% | 0 | 0 | 1:26 |
Significant Strikes
| Fighter | Sig. Str. | Sig. Str. % | Head | Body | Leg | Distance | Clinch | Ground |
|---|---|---|---|---|---|---|---|---|
| Ian Heinisch | 26 of 55 | 47% | 17 of 39 | 3 of 9 | 6 of 7 | 22 of 47 | 4 of 8 | 0 of 0 |
| Cezar Ferreira | 55 of 95 | 57% | 38 of 74 | 10 of 10 | 7 of 11 | 30 of 59 | 14 of 21 | 11 of 15 |
Significant Strikes Per Round
| Rd | Fighter | Sig. Str. | Sig. Str. % | Head | Body | Leg | Distance | Clinch | Ground |
|---|---|---|---|---|---|---|---|---|---|
| 1 | Ian Heinisch | 6 of 9 | 66% | 3 of 4 | 0 of 2 | 3 of 3 | 6 of 9 | 0 of 0 | 0 of 0 |
| Cezar Ferreira | 13 of 21 | 61% | 5 of 10 | 6 of 6 | 2 of 5 | 8 of 15 | 1 of 2 | 4 of 4 | |
| 2 | Ian Heinisch | 9 of 18 | 50% | 6 of 11 | 2 of 5 | 1 of 2 | 9 of 18 | 0 of 0 | 0 of 0 |
| Cezar Ferreira | 13 of 27 | 48% | 7 of 20 | 2 of 2 | 4 of 5 | 8 of 18 | 0 of 1 | 5 of 8 | |
| 3 | Ian Heinisch | 11 of 28 | 39% | 8 of 24 | 1 of 2 | 2 of 2 | 7 of 20 | 4 of 8 | 0 of 0 |
| Cezar Ferreira | 29 of 47 | 61% | 26 of 44 | 2 of 2 | 1 of 1 | 14 of 26 | 13 of 18 | 2 of 3 |
Totals
| Fighter | KD | Sig. Str. | Sig. Str. % | Total Str. | TD | TD % | Sub. Att | Rev. | Ctrl |
|---|---|---|---|---|---|---|---|---|---|
| Cezar Ferreira | 0 | 5 of 6 | 83% | 14 of 16 | 2 of 3 | 66% | 1 | 0 | 4:21 |
| Karl Roberson | 0 | 4 of 6 | 66% | 20 of 26 | 0 of 0 | --- | 0 | 0 | 0:00 |
Per Round
| Rd | Fighter | KD | Sig. Str. | Sig. Str. % | Total Str. | TD | TD % | Sub. Att | Rev. | Ctrl |
|---|---|---|---|---|---|---|---|---|---|---|
| 1 | Cezar Ferreira | 0 | 5 of 6 | 83% | 14 of 16 | 2 of 3 | 66% | 1 | 0 | 4:21 |
| Karl Roberson | 0 | 4 of 6 | 66% | 20 of 26 | 0 of 0 | --- | 0 | 0 | 0:00 |
Significant Strikes
| Fighter | Sig. Str. | Sig. Str. % | Head | Body | Leg | Distance | Clinch | Ground |
|---|---|---|---|---|---|---|---|---|
| Cezar Ferreira | 5 of 6 | 83% | 4 of 5 | 1 of 1 | 0 of 0 | 1 of 1 | 0 of 0 | 4 of 5 |
| Karl Roberson | 4 of 6 | 66% | 3 of 5 | 0 of 0 | 1 of 1 | 1 of 3 | 2 of 2 | 1 of 1 |
Significant Strikes Per Round
| Rd | Fighter | Sig. Str. | Sig. Str. % | Head | Body | Leg | Distance | Clinch | Ground |
|---|---|---|---|---|---|---|---|---|---|
| 1 | Cezar Ferreira | 5 of 6 | 83% | 4 of 5 | 1 of 1 | 0 of 0 | 1 of 1 | 0 of 0 | 4 of 5 |
| Karl Roberson | 4 of 6 | 66% | 3 of 5 | 0 of 0 | 1 of 1 | 1 of 3 | 2 of 2 | 1 of 1 |
Totals
| Fighter | KD | Sig. Str. | Sig. Str. % | Total Str. | TD | TD % | Sub. Att | Rev. | Ctrl |
|---|---|---|---|---|---|---|---|---|---|
| Cezar Ferreira | 1 | 36 of 65 | 55% | 51 of 82 | 0 of 2 | 0% | 0 | 0 | 0:41 |
| Nate Marquardt | 0 | 47 of 81 | 58% | 96 of 135 | 2 of 4 | 50% | 0 | 0 | 4:44 |
Per Round
| Rd | Fighter | KD | Sig. Str. | Sig. Str. % | Total Str. | TD | TD % | Sub. Att | Rev. | Ctrl |
|---|---|---|---|---|---|---|---|---|---|---|
| 1 | Cezar Ferreira | 0 | 8 of 18 | 44% | 8 of 18 | 0 of 1 | 0% | 0 | 0 | 0:00 |
| Nate Marquardt | 0 | 16 of 29 | 55% | 16 of 29 | 0 of 0 | --- | 0 | 0 | 0:00 | |
| 2 | Cezar Ferreira | 1 | 20 of 37 | 54% | 21 of 38 | 0 of 1 | 0% | 0 | 0 | 0:26 |
| Nate Marquardt | 0 | 18 of 38 | 47% | 18 of 38 | 0 of 1 | 0% | 0 | 0 | 0:18 | |
| 3 | Cezar Ferreira | 0 | 8 of 10 | 80% | 22 of 26 | 0 of 0 | --- | 0 | 0 | 0:15 |
| Nate Marquardt | 0 | 13 of 14 | 92% | 62 of 68 | 2 of 3 | 66% | 0 | 0 | 4:26 |
Significant Strikes
| Fighter | Sig. Str. | Sig. Str. % | Head | Body | Leg | Distance | Clinch | Ground |
|---|---|---|---|---|---|---|---|---|
| Cezar Ferreira | 36 of 65 | 55% | 22 of 49 | 8 of 9 | 6 of 7 | 23 of 51 | 7 of 8 | 6 of 6 |
| Nate Marquardt | 47 of 81 | 58% | 14 of 41 | 15 of 21 | 18 of 19 | 35 of 68 | 1 of 2 | 11 of 11 |
Significant Strikes Per Round
| Rd | Fighter | Sig. Str. | Sig. Str. % | Head | Body | Leg | Distance | Clinch | Ground |
|---|---|---|---|---|---|---|---|---|---|
| 1 | Cezar Ferreira | 8 of 18 | 44% | 4 of 13 | 1 of 1 | 3 of 4 | 8 of 18 | 0 of 0 | 0 of 0 |
| Nate Marquardt | 16 of 29 | 55% | 4 of 15 | 2 of 4 | 10 of 10 | 16 of 28 | 0 of 1 | 0 of 0 | |
| 2 | Cezar Ferreira | 20 of 37 | 54% | 11 of 27 | 6 of 7 | 3 of 3 | 14 of 30 | 6 of 7 | 0 of 0 |
| Nate Marquardt | 18 of 38 | 47% | 8 of 23 | 3 of 7 | 7 of 8 | 17 of 37 | 1 of 1 | 0 of 0 | |
| 3 | Cezar Ferreira | 8 of 10 | 80% | 7 of 9 | 1 of 1 | 0 of 0 | 1 of 3 | 1 of 1 | 6 of 6 |
| Nate Marquardt | 13 of 14 | 92% | 2 of 3 | 10 of 10 | 1 of 1 | 2 of 3 | 0 of 0 | 11 of 11 |
Totals
| Fighter | KD | Sig. Str. | Sig. Str. % | Total Str. | TD | TD % | Sub. Att | Rev. | Ctrl |
|---|---|---|---|---|---|---|---|---|---|
| Elias Theodorou | 0 | 38 of 116 | 32% | 70 of 155 | 1 of 4 | 25% | 0 | 2 | 2:39 |
| Cezar Ferreira | 0 | 11 of 38 | 28% | 11 of 38 | 3 of 6 | 50% | 2 | 0 | 1:46 |
Per Round
| Rd | Fighter | KD | Sig. Str. | Sig. Str. % | Total Str. | TD | TD % | Sub. Att | Rev. | Ctrl |
|---|---|---|---|---|---|---|---|---|---|---|
| 1 | Elias Theodorou | 0 | 12 of 51 | 23% | 18 of 63 | 0 of 1 | 0% | 0 | 0 | 0:39 |
| Cezar Ferreira | 0 | 9 of 19 | 47% | 9 of 19 | 0 of 0 | --- | 0 | 0 | 0:00 | |
| 2 | Elias Theodorou | 0 | 15 of 31 | 48% | 32 of 48 | 1 of 2 | 50% | 0 | 1 | 1:44 |
| Cezar Ferreira | 0 | 1 of 9 | 11% | 1 of 9 | 2 of 3 | 66% | 2 | 0 | 0:49 | |
| 3 | Elias Theodorou | 0 | 11 of 34 | 32% | 20 of 44 | 0 of 1 | 0% | 0 | 1 | 0:16 |
| Cezar Ferreira | 0 | 1 of 10 | 10% | 1 of 10 | 1 of 3 | 33% | 0 | 0 | 0:57 |
Significant Strikes
| Fighter | Sig. Str. | Sig. Str. % | Head | Body | Leg | Distance | Clinch | Ground |
|---|---|---|---|---|---|---|---|---|
| Elias Theodorou | 38 of 116 | 32% | 18 of 80 | 8 of 16 | 12 of 20 | 28 of 104 | 3 of 3 | 7 of 9 |
| Cezar Ferreira | 11 of 38 | 28% | 4 of 26 | 3 of 6 | 4 of 6 | 11 of 36 | 0 of 2 | 0 of 0 |
Significant Strikes Per Round
| Rd | Fighter | Sig. Str. | Sig. Str. % | Head | Body | Leg | Distance | Clinch | Ground |
|---|---|---|---|---|---|---|---|---|---|
| 1 | Elias Theodorou | 12 of 51 | 23% | 2 of 33 | 5 of 10 | 5 of 8 | 11 of 50 | 1 of 1 | 0 of 0 |
| Cezar Ferreira | 9 of 19 | 47% | 4 of 14 | 3 of 3 | 2 of 2 | 9 of 19 | 0 of 0 | 0 of 0 | |
| 2 | Elias Theodorou | 15 of 31 | 48% | 12 of 25 | 1 of 3 | 2 of 3 | 7 of 21 | 1 of 1 | 7 of 9 |
| Cezar Ferreira | 1 of 9 | 11% | 0 of 5 | 0 of 2 | 1 of 2 | 1 of 7 | 0 of 2 | 0 of 0 | |
| 3 | Elias Theodorou | 11 of 34 | 32% | 4 of 22 | 2 of 3 | 5 of 9 | 10 of 33 | 1 of 1 | 0 of 0 |
| Cezar Ferreira | 1 of 10 | 10% | 0 of 7 | 0 of 1 | 1 of 2 | 1 of 10 | 0 of 0 | 0 of 0 |
Totals
| Fighter | KD | Sig. Str. | Sig. Str. % | Total Str. | TD | TD % | Sub. Att | Rev. | Ctrl |
|---|---|---|---|---|---|---|---|---|---|
| Cezar Ferreira | 0 | 10 of 30 | 33% | 10 of 30 | 1 of 1 | 100% | 1 | 0 | 1:21 |
| Jack Hermansson | 0 | 14 of 49 | 28% | 14 of 49 | 0 of 0 | --- | 0 | 0 | 0:02 |
Per Round
| Rd | Fighter | KD | Sig. Str. | Sig. Str. % | Total Str. | TD | TD % | Sub. Att | Rev. | Ctrl |
|---|---|---|---|---|---|---|---|---|---|---|
| 1 | Cezar Ferreira | 0 | 8 of 26 | 30% | 8 of 26 | 0 of 0 | --- | 0 | 0 | 0:00 |
| Jack Hermansson | 0 | 9 of 35 | 25% | 9 of 35 | 0 of 0 | --- | 0 | 0 | 0:02 | |
| 2 | Cezar Ferreira | 0 | 2 of 4 | 50% | 2 of 4 | 1 of 1 | 100% | 1 | 0 | 1:21 |
| Jack Hermansson | 0 | 5 of 14 | 35% | 5 of 14 | 0 of 0 | --- | 0 | 0 | 0:00 |
Significant Strikes
| Fighter | Sig. Str. | Sig. Str. % | Head | Body | Leg | Distance | Clinch | Ground |
|---|---|---|---|---|---|---|---|---|
| Cezar Ferreira | 10 of 30 | 33% | 3 of 20 | 5 of 6 | 2 of 4 | 10 of 30 | 0 of 0 | 0 of 0 |
| Jack Hermansson | 14 of 49 | 28% | 3 of 21 | 3 of 9 | 8 of 19 | 14 of 48 | 0 of 1 | 0 of 0 |
Significant Strikes Per Round
| Rd | Fighter | Sig. Str. | Sig. Str. % | Head | Body | Leg | Distance | Clinch | Ground |
|---|---|---|---|---|---|---|---|---|---|
| 1 | Cezar Ferreira | 8 of 26 | 30% | 3 of 18 | 3 of 4 | 2 of 4 | 8 of 26 | 0 of 0 | 0 of 0 |
| Jack Hermansson | 9 of 35 | 25% | 3 of 16 | 1 of 6 | 5 of 13 | 9 of 34 | 0 of 1 | 0 of 0 | |
| 2 | Cezar Ferreira | 2 of 4 | 50% | 0 of 2 | 2 of 2 | 0 of 0 | 2 of 4 | 0 of 0 | 0 of 0 |
| Jack Hermansson | 5 of 14 | 35% | 0 of 5 | 2 of 3 | 3 of 6 | 5 of 14 | 0 of 0 | 0 of 0 |
Totals
| Fighter | KD | Sig. Str. | Sig. Str. % | Total Str. | TD | TD % | Sub. Att | Rev. | Ctrl |
|---|---|---|---|---|---|---|---|---|---|
| Cezar Ferreira | 0 | 30 of 51 | 58% | 120 of 148 | 6 of 6 | 100% | 0 | 0 | 8:39 |
| Anthony Smith | 0 | 33 of 63 | 52% | 41 of 71 | 0 of 0 | --- | 1 | 0 | 0:03 |
Per Round
| Rd | Fighter | KD | Sig. Str. | Sig. Str. % | Total Str. | TD | TD % | Sub. Att | Rev. | Ctrl |
|---|---|---|---|---|---|---|---|---|---|---|
| 1 | Cezar Ferreira | 0 | 11 of 18 | 61% | 18 of 25 | 2 of 2 | 100% | 0 | 0 | 2:33 |
| Anthony Smith | 0 | 13 of 24 | 54% | 13 of 24 | 0 of 0 | --- | 0 | 0 | 0:00 | |
| 2 | Cezar Ferreira | 0 | 14 of 24 | 58% | 32 of 42 | 2 of 2 | 100% | 0 | 0 | 1:50 |
| Anthony Smith | 0 | 15 of 31 | 48% | 16 of 32 | 0 of 0 | --- | 0 | 0 | 0:03 | |
| 3 | Cezar Ferreira | 0 | 5 of 9 | 55% | 70 of 81 | 2 of 2 | 100% | 0 | 0 | 4:16 |
| Anthony Smith | 0 | 5 of 8 | 62% | 12 of 15 | 0 of 0 | --- | 1 | 0 | 0:00 |
Significant Strikes
| Fighter | Sig. Str. | Sig. Str. % | Head | Body | Leg | Distance | Clinch | Ground |
|---|---|---|---|---|---|---|---|---|
| Cezar Ferreira | 30 of 51 | 58% | 17 of 35 | 6 of 8 | 7 of 8 | 23 of 41 | 1 of 1 | 6 of 9 |
| Anthony Smith | 33 of 63 | 52% | 22 of 45 | 6 of 13 | 5 of 5 | 26 of 54 | 6 of 7 | 1 of 2 |
Significant Strikes Per Round
| Rd | Fighter | Sig. Str. | Sig. Str. % | Head | Body | Leg | Distance | Clinch | Ground |
|---|---|---|---|---|---|---|---|---|---|
| 1 | Cezar Ferreira | 11 of 18 | 61% | 7 of 12 | 4 of 6 | 0 of 0 | 7 of 13 | 0 of 0 | 4 of 5 |
| Anthony Smith | 13 of 24 | 54% | 7 of 17 | 3 of 4 | 3 of 3 | 12 of 23 | 1 of 1 | 0 of 0 | |
| 2 | Cezar Ferreira | 14 of 24 | 58% | 7 of 17 | 0 of 0 | 7 of 7 | 12 of 21 | 1 of 1 | 1 of 2 |
| Anthony Smith | 15 of 31 | 48% | 11 of 21 | 3 of 9 | 1 of 1 | 10 of 25 | 5 of 6 | 0 of 0 | |
| 3 | Cezar Ferreira | 5 of 9 | 55% | 3 of 6 | 2 of 2 | 0 of 1 | 4 of 7 | 0 of 0 | 1 of 2 |
| Anthony Smith | 5 of 8 | 62% | 4 of 7 | 0 of 0 | 1 of 1 | 4 of 6 | 0 of 0 | 1 of 2 |
Totals
| Fighter | KD | Sig. Str. | Sig. Str. % | Total Str. | TD | TD % | Sub. Att | Rev. | Ctrl |
|---|---|---|---|---|---|---|---|---|---|
| Cezar Ferreira | 1 | 20 of 51 | 39% | 66 of 107 | 0 of 0 | --- | 0 | 0 | 0:55 |
| Oluwale Bamgbose | 0 | 26 of 58 | 44% | 62 of 99 | 3 of 5 | 60% | 0 | 0 | 6:49 |
Per Round
| Rd | Fighter | KD | Sig. Str. | Sig. Str. % | Total Str. | TD | TD % | Sub. Att | Rev. | Ctrl |
|---|---|---|---|---|---|---|---|---|---|---|
| 1 | Cezar Ferreira | 1 | 17 of 38 | 44% | 23 of 46 | 0 of 0 | --- | 0 | 0 | 0:55 |
| Oluwale Bamgbose | 0 | 4 of 15 | 26% | 7 of 18 | 1 of 2 | 50% | 0 | 0 | 0:54 | |
| 2 | Cezar Ferreira | 0 | 1 of 4 | 25% | 40 of 51 | 0 of 0 | --- | 0 | 0 | 0:00 |
| Oluwale Bamgbose | 0 | 14 of 24 | 58% | 40 of 54 | 1 of 1 | 100% | 0 | 0 | 4:09 | |
| 3 | Cezar Ferreira | 0 | 2 of 9 | 22% | 3 of 10 | 0 of 0 | --- | 0 | 0 | 0:00 |
| Oluwale Bamgbose | 0 | 8 of 19 | 42% | 15 of 27 | 1 of 2 | 50% | 0 | 0 | 1:46 |
Significant Strikes
| Fighter | Sig. Str. | Sig. Str. % | Head | Body | Leg | Distance | Clinch | Ground |
|---|---|---|---|---|---|---|---|---|
| Cezar Ferreira | 20 of 51 | 39% | 13 of 41 | 3 of 5 | 4 of 5 | 12 of 36 | 0 of 0 | 8 of 15 |
| Oluwale Bamgbose | 26 of 58 | 44% | 21 of 47 | 1 of 4 | 4 of 7 | 8 of 27 | 0 of 0 | 18 of 31 |
Significant Strikes Per Round
| Rd | Fighter | Sig. Str. | Sig. Str. % | Head | Body | Leg | Distance | Clinch | Ground |
|---|---|---|---|---|---|---|---|---|---|
| 1 | Cezar Ferreira | 17 of 38 | 44% | 11 of 32 | 2 of 2 | 4 of 4 | 9 of 24 | 0 of 0 | 8 of 14 |
| Oluwale Bamgbose | 4 of 15 | 26% | 2 of 10 | 0 of 1 | 2 of 4 | 2 of 10 | 0 of 0 | 2 of 5 | |
| 2 | Cezar Ferreira | 1 of 4 | 25% | 0 of 2 | 1 of 2 | 0 of 0 | 1 of 3 | 0 of 0 | 0 of 1 |
| Oluwale Bamgbose | 14 of 24 | 58% | 12 of 22 | 1 of 1 | 1 of 1 | 3 of 4 | 0 of 0 | 11 of 20 | |
| 3 | Cezar Ferreira | 2 of 9 | 22% | 2 of 7 | 0 of 1 | 0 of 1 | 2 of 9 | 0 of 0 | 0 of 0 |
| Oluwale Bamgbose | 8 of 19 | 42% | 7 of 15 | 0 of 2 | 1 of 2 | 3 of 13 | 0 of 0 | 5 of 6 |
No comments yet. Be the first to share your thoughts!