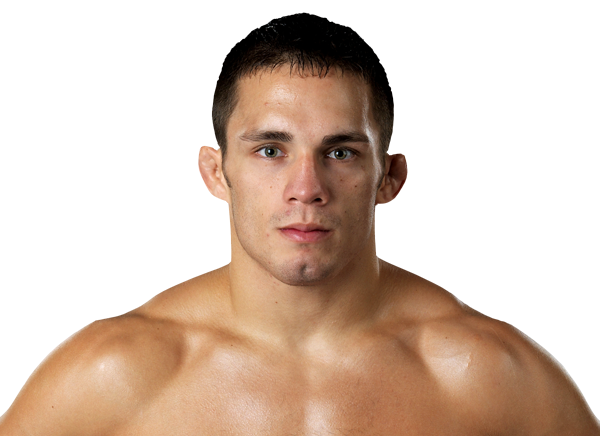
Career Averages - Mike Perry
Career Averages - Jake Ellenberger
Mike Perry - Fight History
Totals
| Fighter | KD | Sig. Str. | Sig. Str. % | Total Str. | TD | TD % | Sub. Att | Rev. | Ctrl |
|---|---|---|---|---|---|---|---|---|---|
| Daniel Rodriguez | 0 | 61 of 132 | 46% | 65 of 137 | 2 of 4 | 50% | 0 | 0 | 2:49 |
| Mike Perry | 0 | 129 of 235 | 54% | 145 of 252 | 0 of 1 | 0% | 0 | 0 | 0:00 |
Per Round
| Rd | Fighter | KD | Sig. Str. | Sig. Str. % | Total Str. | TD | TD % | Sub. Att | Rev. | Ctrl |
|---|---|---|---|---|---|---|---|---|---|---|
| 1 | Daniel Rodriguez | 0 | 21 of 42 | 50% | 25 of 47 | 1 of 1 | 100% | 0 | 0 | 1:26 |
| Mike Perry | 0 | 33 of 63 | 52% | 36 of 67 | 0 of 0 | --- | 0 | 0 | 0:00 | |
| 2 | Daniel Rodriguez | 0 | 16 of 42 | 38% | 16 of 42 | 1 of 2 | 50% | 0 | 0 | 0:51 |
| Mike Perry | 0 | 43 of 81 | 53% | 47 of 85 | 0 of 0 | --- | 0 | 0 | 0:00 | |
| 3 | Daniel Rodriguez | 0 | 24 of 48 | 50% | 24 of 48 | 0 of 1 | 0% | 0 | 0 | 0:32 |
| Mike Perry | 0 | 53 of 91 | 58% | 62 of 100 | 0 of 1 | 0% | 0 | 0 | 0:00 |
Significant Strikes
| Fighter | Sig. Str. | Sig. Str. % | Head | Body | Leg | Distance | Clinch | Ground |
|---|---|---|---|---|---|---|---|---|
| Daniel Rodriguez | 61 of 132 | 46% | 27 of 85 | 14 of 21 | 20 of 26 | 60 of 130 | 1 of 2 | 0 of 0 |
| Mike Perry | 129 of 235 | 54% | 90 of 191 | 11 of 14 | 28 of 30 | 129 of 235 | 0 of 0 | 0 of 0 |
Significant Strikes Per Round
| Rd | Fighter | Sig. Str. | Sig. Str. % | Head | Body | Leg | Distance | Clinch | Ground |
|---|---|---|---|---|---|---|---|---|---|
| 1 | Daniel Rodriguez | 21 of 42 | 50% | 5 of 22 | 3 of 6 | 13 of 14 | 21 of 42 | 0 of 0 | 0 of 0 |
| Mike Perry | 33 of 63 | 52% | 22 of 50 | 2 of 4 | 9 of 9 | 33 of 63 | 0 of 0 | 0 of 0 | |
| 2 | Daniel Rodriguez | 16 of 42 | 38% | 9 of 31 | 5 of 6 | 2 of 5 | 15 of 41 | 1 of 1 | 0 of 0 |
| Mike Perry | 43 of 81 | 53% | 30 of 65 | 4 of 5 | 9 of 11 | 43 of 81 | 0 of 0 | 0 of 0 | |
| 3 | Daniel Rodriguez | 24 of 48 | 50% | 13 of 32 | 6 of 9 | 5 of 7 | 24 of 47 | 0 of 1 | 0 of 0 |
| Mike Perry | 53 of 91 | 58% | 38 of 76 | 5 of 5 | 10 of 10 | 53 of 91 | 0 of 0 | 0 of 0 |
Play-by-Play
View on SherdogRound 1
The main card begins with what should be a violent encounter at welterweight, when Perry (14-7, 7-7 UFC) tries to get back in the win column against “D-Rod” Rodriguez (13-2, 3-1 UFC). The latter walked out to DMX’s “What’s My Name” but the organization did not have the good sense to televise the only walkout tonight with a DMX track, moments after posting a memorial image for the recently passed rap icon. Both men sport exactly 11 finishes in their respective careers, and referee Mike Beltran will need to keep his head on a swivel for this potential banger. There is a glove touch before these two handle their business. Rodriguez scores a few leg kicks from the outside while Perry closes the distance, and “D-Rod” slings a head kick up quick. Perry eats it and responds with one to the body, before winging a right hand that catches Rodriguez on the brow. “Platinum” walks forward into a few punches, and he is not rattled when he throws a leg kick back. Rodriguez surprises Perry with a one-two, and there is already damage to Perry’s nose. Rodriguez gets off a leg kick, and Perry replies in kind. Perry eats a body kick and charges in to attack, landing a right hand as Rodriguez tries to roll with it. A huge leg kick is followed by a nasty one-two that rocks Perry, and Rodriguez does not go wild searching for a finish and keeps doing damage. Rodriguez sticks out several jabs and leg kicks, and a right hand sends Perry off-balance. Perry wings a right hand but comes up shy of the mark, as Rodriguez chips away at his lead leg. “Platinum” has a head kick blocked, and he backs off when Rodriguez chases after him with a pair of punches. Rodriguez stings him with another one-two and a huge inside leg kick, and Perry is flustered as he keeps taking shots. Rodriguez dings him with another one-two, and the leg kick has Perry take a funny step back. Perry throws a huge right hand that is well off the mark, and he shoots in for a takedown to lift Rodriguez in the air. Rodriguez defends with a guillotine choke off his back, and Perry is suddenly in trouble and scrambling wildly. Perry puts down heavy shoulder pressure to possibly set up a Von Preux choke as Rodriguez has not let go of his guillotine of his back. As Perry aims to pass guard, Rodriguez bails on the choke and gets him back to full guard. Perry advances to half guard as he lays on his opponent, and he frees a hand to try to drop down shots. The round ends before Perry can land anything of note.
Sherdog Scores
Jay Pettry scores the round: 10-9 Rodriguez
Tristen Critchfield scores the round: 10-9 Rodriguez
Tyler Treese scores the round: 10-9 Rodriguez
Round 2
Rodriguez comes out confidently from his corner, and he walks into a leg kick as he lines up a punch. Rodriguez paws out a jab, and he ducks out of the way when Perry jumps at him with a superman punch. Rodriguez keeps jabbing, and he clacks Perry in the body with a kick. Perry throws back the same kick, so Rodriguez eats it and kicks the lead leg. Rodriguez puts a one-two on Perry’s jaw, and he snaps the head back with a few jabs. The two welterweights go kick for kick, as Rodriguez lands one and Perry try to pay him back. Rodriguez reaches out with a few more jabs and leg kicks, but steps in with a power punch that nearly allows him to get countered. Perry walks through the danger to grab hold of “D-Rod,” and he lands a body lock takedown to put the California native on his back. Rodriguez scoots to the fence and climbs back up without staying down for long, and he walks directly into a big right hand. Rodriguez takes it on the chin and keeps Perry at bay with a quick uppercut. Perry begins to throw wide, telegraphed strikes while Rodriguez is largely keeping them straighter, and his quicker strikes disrupt an advancing Perry. Rodriguez snaps out his jab and body kick as Perry has no answer, with the polarizing Floridian taking a one-two flush on the way out. Both men land clean left hands at the same time, and Perry is busted up on the side of his eyebrows as they trade bombs. Rodriguez has opened up a welt on the side of Perry’s head that is swelling quickly, and he targets the same spot with a barrage of punches. Perry throws single strikes back, but Rodriguez is able to answer with punches in bunches. Perry, who strides through the fire to get there, presses into the clinch to attempt a takedown. This time, Rodriguez rebuffs him and keeps his balance to the bell. When they separate, Perry’s nose appears two shades of Andrei Arlovski or Olaf Alfonso.
Sherdog Scores
Jay Pettry scores the round: 10-9 Rodriguez
Tristen Critchfield scores the round: 10-9 Rodriguez
Tyler Treese scores the round: 10-9 Rodriguez
Round 3
Perry shows some major damage coming out of his corner, but he is ready to continue fighting without issue. He pushes the pace in the early going, throwing looping shots that Rodriguez is easily able to avoid. Rodriguez chops his lead leg down with a few kicks, and Perry resorts to single punches to the body and head to try to keep his distance. “Platinum” rushes out with a superman punch and a head kick, and neither connect squarely as Rodriguez is on him with a body kick and a left hand. Perry throws a right hand into a takedown attempt, and Rodriguez is able to bully him over and put Perry on his hindquarters for a moment. Perry powers back up, and he eats a right hand for his effort. “D-Rod” scores a crisp one-two and a low kick to punctuate the combination, and he gets off several big shots that Perry absorbs without issue. Perry tries to respond with a few leg kicks, and a big hook is way off the mark. Rodriguez clocks Perry with a left hand, and Perry’s chin holds up as he takes a one-two and another. Both land shots at the same time, and Rodriguez follows it with a left hook. Perry loads up on a few right hands that get Rodriguez’ attention, but Rodriguez is unconcerned as he lands a right over the top. When Perry aims a leg kick, Rodriguez cracks him with a trio of punches. Perry’s head is ripe for the taking, as Rodriguez tees off on him at close range. Rodriguez reaches in with long, straight punches that snap Perry’s head back repeatedly, and he breaks up his salvos with kicks low and high. Two big punches and a body kick come from Rodriguez, and Perry’s durability is about all that remains on display. Rodriguez smashes him in the face with a brutal one-two, and Perry’s face is a bloody mess as he cannot seem to make him pay. Rodriguez suddenly changes levels for a takedown attempt to keep Perry guessing, but the Floridian turns him around and presses him into the wire. After a brief clinch, Rodriguez drills Perry with a long chain of punches until the final bell. This was largely one-way traffic for the man known as “D-Rod,” who put on a show on the first fight of the ABC portion of the event.
Sherdog Scores
Jay Pettry scores the round: 10-9 Rodriguez (30-27 Rodriguez)
Tristen Critchfield scores the round: 10-9 Rodriguez (30-27 Rodriguez)
Tyler Treese scores the round: 10-9 Rodriguez (30-27 Rodriguez)
The Official Result
Daniel Rodriguez def. Mike Perry via Unanimous Decision (30-27, 30-27, 30-26)
Big Brady picks Rodriguez to win a close decision, but he is not confident and is passing on betting. He notes that Perry is taking the fight seriously and looks in great shape, but he cannot trust Perry due to his poor striking defense and tendency to absorb damage. Brady thinks Rodriguez is more defensively sound and durable, and the fight likely goes to decision. He mentions the over might be a good look but does not bet.
Cody picks Rodriguez hesitantly, citing his output and sharper striking. He notes Perry's inconsistency and poor weight cuts, but acknowledges Perry's power and potential if in shape. He thinks Rodriguez's volume and reach advantage could be key.
Daniel Levi picks Mike Perry, viewing the fight as a coin flip. He notes that Perry has been in a good place mentally, training at MMA Masters, and that his last two fights he didn't train properly. Levi is skeptical of Daniel Rodriguez, citing his suspect chin and close fights against Gabriel Green and Nicolas Dalby. He thinks Perry's power and improved camp could be the difference.
The host is buying into the 'Papa Perry' narrative and the move to MMA Masters, expecting improvements in Perry's game, particularly calf kicks. He thinks Rodriguez is overrated and that Perry's power and durability could be key. He picks Perry to win by decision, though he acknowledges the weight cut is a concern.
Paul leans Rodriguez, noting Perry's mental and physical issues. He mentions Perry's poor weight cuts and lack of training, but acknowledges Perry's live underdog potential. He thinks Rodriguez's striking and cardio give him an edge.
The MMA Guru picks Daniel Rodriguez by second-round submission (d'arce choke). He believes Rodriguez will rock Perry on the feet, causing Perry to shoot for a takedown into a choke. He notes Perry's decline since his nose injury and poor performance against Mickey Gall. He highlights Rodriguez's 10th Planet jiu-jitsu and recovery skills. He predicts a back-and-forth first round before Rodriguez finishes in the second.
Totals
| Fighter | KD | Sig. Str. | Sig. Str. % | Total Str. | TD | TD % | Sub. Att | Rev. | Ctrl |
|---|---|---|---|---|---|---|---|---|---|
| Tim Means | 0 | 64 of 161 | 39% | 69 of 166 | 1 of 5 | 20% | 2 | 0 | 3:08 |
| Mike Perry | 0 | 128 of 192 | 66% | 143 of 207 | 0 of 1 | 0% | 0 | 1 | 0:39 |
Per Round
| Rd | Fighter | KD | Sig. Str. | Sig. Str. % | Total Str. | TD | TD % | Sub. Att | Rev. | Ctrl |
|---|---|---|---|---|---|---|---|---|---|---|
| 1 | Tim Means | 0 | 14 of 31 | 45% | 14 of 31 | 1 of 2 | 50% | 2 | 0 | 2:22 |
| Mike Perry | 0 | 27 of 40 | 67% | 30 of 43 | 0 of 0 | --- | 0 | 1 | 0:09 | |
| 2 | Tim Means | 0 | 20 of 60 | 33% | 20 of 60 | 0 of 1 | 0% | 0 | 0 | 0:13 |
| Mike Perry | 0 | 44 of 60 | 73% | 44 of 60 | 0 of 0 | --- | 0 | 0 | 0:04 | |
| 3 | Tim Means | 0 | 30 of 70 | 42% | 35 of 75 | 0 of 2 | 0% | 0 | 0 | 0:33 |
| Mike Perry | 0 | 57 of 92 | 61% | 69 of 104 | 0 of 1 | 0% | 0 | 0 | 0:26 |
Significant Strikes
| Fighter | Sig. Str. | Sig. Str. % | Head | Body | Leg | Distance | Clinch | Ground |
|---|---|---|---|---|---|---|---|---|
| Tim Means | 64 of 161 | 39% | 44 of 134 | 8 of 12 | 12 of 15 | 62 of 157 | 2 of 4 | 0 of 0 |
| Mike Perry | 128 of 192 | 66% | 86 of 147 | 26 of 28 | 16 of 17 | 121 of 184 | 6 of 7 | 1 of 1 |
Significant Strikes Per Round
| Rd | Fighter | Sig. Str. | Sig. Str. % | Head | Body | Leg | Distance | Clinch | Ground |
|---|---|---|---|---|---|---|---|---|---|
| 1 | Tim Means | 14 of 31 | 45% | 7 of 24 | 3 of 3 | 4 of 4 | 13 of 30 | 1 of 1 | 0 of 0 |
| Mike Perry | 27 of 40 | 67% | 18 of 31 | 7 of 7 | 2 of 2 | 24 of 36 | 2 of 3 | 1 of 1 | |
| 2 | Tim Means | 20 of 60 | 33% | 11 of 46 | 3 of 6 | 6 of 8 | 20 of 59 | 0 of 1 | 0 of 0 |
| Mike Perry | 44 of 60 | 73% | 28 of 43 | 10 of 10 | 6 of 7 | 42 of 58 | 2 of 2 | 0 of 0 | |
| 3 | Tim Means | 30 of 70 | 42% | 26 of 64 | 2 of 3 | 2 of 3 | 29 of 68 | 1 of 2 | 0 of 0 |
| Mike Perry | 57 of 92 | 61% | 40 of 73 | 9 of 11 | 8 of 8 | 55 of 90 | 2 of 2 | 0 of 0 |
Big Brady hesitantly picks Tim Means to win by decision. He thinks Means is the more technical and well-rounded fighter, but has durability concerns after being knocked out recently. He notes Perry's headspace is questionable and he didn't look great against Gall, but Means is on short notice.
Daniel picks Means, citing his superior boxing and overall MMA skills. He notes Perry's lack of head movement and poor corner situation. He believes Means can stay disciplined, use volume, and mix in takedowns to avoid Perry's power. He thinks Means should be the favorite.
The host picks Tim Means to win by decision, noting his superior skill set and ability to keep Perry at range with leg kicks and teeps. He is skeptical of Perry's power and thinks Means can outpoint him. He would only bet Means if the line reaches plus 150.
The MMA Guru picks Mike Perry to win by unanimous decision (29-28), but expresses worry. He notes Means took the fight on short notice, and Perry has a full camp now. He expects Perry to use takedowns and outwork Means in the later rounds, but admits Means is dangerous and a full-camp Means might beat Perry.
Totals
| Fighter | KD | Sig. Str. | Sig. Str. % | Total Str. | TD | TD % | Sub. Att | Rev. | Ctrl |
|---|---|---|---|---|---|---|---|---|---|
| Mike Perry | 1 | 76 of 131 | 58% | 103 of 158 | 1 of 1 | 100% | 0 | 0 | 5:44 |
| Mickey Gall | 0 | 55 of 106 | 51% | 59 of 111 | 0 of 6 | 0% | 0 | 1 | 0:51 |
Per Round
| Rd | Fighter | KD | Sig. Str. | Sig. Str. % | Total Str. | TD | TD % | Sub. Att | Rev. | Ctrl |
|---|---|---|---|---|---|---|---|---|---|---|
| 1 | Mike Perry | 0 | 20 of 51 | 39% | 20 of 51 | 1 of 1 | 100% | 0 | 0 | 1:28 |
| Mickey Gall | 0 | 21 of 40 | 52% | 23 of 42 | 0 of 0 | --- | 0 | 0 | 0:00 | |
| 2 | Mike Perry | 1 | 26 of 33 | 78% | 41 of 48 | 0 of 0 | --- | 0 | 0 | 2:05 |
| Mickey Gall | 0 | 12 of 24 | 50% | 12 of 24 | 0 of 3 | 0% | 0 | 1 | 0:51 | |
| 3 | Mike Perry | 0 | 30 of 47 | 63% | 42 of 59 | 0 of 0 | --- | 0 | 0 | 2:11 |
| Mickey Gall | 0 | 22 of 42 | 52% | 24 of 45 | 0 of 3 | 0% | 0 | 0 | 0:00 |
Significant Strikes
| Fighter | Sig. Str. | Sig. Str. % | Head | Body | Leg | Distance | Clinch | Ground |
|---|---|---|---|---|---|---|---|---|
| Mike Perry | 76 of 131 | 58% | 49 of 98 | 14 of 20 | 13 of 13 | 51 of 100 | 6 of 6 | 19 of 25 |
| Mickey Gall | 55 of 106 | 51% | 39 of 89 | 8 of 9 | 8 of 8 | 51 of 97 | 3 of 6 | 1 of 3 |
Significant Strikes Per Round
| Rd | Fighter | Sig. Str. | Sig. Str. % | Head | Body | Leg | Distance | Clinch | Ground |
|---|---|---|---|---|---|---|---|---|---|
| 1 | Mike Perry | 20 of 51 | 39% | 10 of 39 | 5 of 7 | 5 of 5 | 15 of 41 | 2 of 2 | 3 of 8 |
| Mickey Gall | 21 of 40 | 52% | 11 of 30 | 5 of 5 | 5 of 5 | 19 of 36 | 2 of 3 | 0 of 1 | |
| 2 | Mike Perry | 26 of 33 | 78% | 20 of 26 | 2 of 3 | 4 of 4 | 13 of 19 | 2 of 2 | 11 of 12 |
| Mickey Gall | 12 of 24 | 50% | 9 of 20 | 3 of 4 | 0 of 0 | 10 of 21 | 1 of 2 | 1 of 1 | |
| 3 | Mike Perry | 30 of 47 | 63% | 19 of 33 | 7 of 10 | 4 of 4 | 23 of 40 | 2 of 2 | 5 of 5 |
| Mickey Gall | 22 of 42 | 52% | 19 of 39 | 0 of 0 | 3 of 3 | 22 of 40 | 0 of 1 | 0 of 1 |
Big Brady picks Mike Perry despite concerns about Perry's personal life (girlfriend cornering him). He believes Perry's wrestling and strength will neutralize Gall's takedown attempts, and that Perry's superior competition and power will lead to a first-round knockout. He notes that Gall's only path is getting Perry down, which he thinks is unlikely.
Daniel Levi picks Mickey Gall for the upset, citing Perry's chaotic personal life, lack of coaching, and stagnation in skill development. He notes Gall's improvement in his last fight against Salim Touahri, showing better fight IQ and cardio. Levi believes Gall's jiu-jitsu black belt and submission threat could catch Perry if he overextends. He acknowledges Perry's strength and clinch game but thinks the line is too wide and Gall has a chance to submit him.
The MMA Guru confidently picks Mike Perry to win by KO, stating that Mickey Gall's only chance is to get the fight to the ground, but Perry's takedown defense is strong. He predicts Perry will break Gall in the clinch and land an elbow or shot for a first-round TKO. He dismisses concerns about Perry's girlfriend being in his corner, believing his gym will prevent that from being a distraction.
Totals
| Fighter | KD | Sig. Str. | Sig. Str. % | Total Str. | TD | TD % | Sub. Att | Rev. | Ctrl |
|---|---|---|---|---|---|---|---|---|---|
| Geoff Neal | 1 | 15 of 23 | 65% | 15 of 23 | 0 of 0 | --- | 0 | 0 | 0:02 |
| Mike Perry | 0 | 5 of 10 | 50% | 5 of 10 | 0 of 0 | --- | 0 | 0 | 0:00 |
Per Round
| Rd | Fighter | KD | Sig. Str. | Sig. Str. % | Total Str. | TD | TD % | Sub. Att | Rev. | Ctrl |
|---|---|---|---|---|---|---|---|---|---|---|
| 1 | Geoff Neal | 1 | 15 of 23 | 65% | 15 of 23 | 0 of 0 | --- | 0 | 0 | 0:02 |
| Mike Perry | 0 | 5 of 10 | 50% | 5 of 10 | 0 of 0 | --- | 0 | 0 | 0:00 |
Significant Strikes
| Fighter | Sig. Str. | Sig. Str. % | Head | Body | Leg | Distance | Clinch | Ground |
|---|---|---|---|---|---|---|---|---|
| Geoff Neal | 15 of 23 | 65% | 12 of 18 | 1 of 3 | 2 of 2 | 12 of 20 | 0 of 0 | 3 of 3 |
| Mike Perry | 5 of 10 | 50% | 1 of 3 | 2 of 4 | 2 of 3 | 5 of 10 | 0 of 0 | 0 of 0 |
Significant Strikes Per Round
| Rd | Fighter | Sig. Str. | Sig. Str. % | Head | Body | Leg | Distance | Clinch | Ground |
|---|---|---|---|---|---|---|---|---|---|
| 1 | Geoff Neal | 15 of 23 | 65% | 12 of 18 | 1 of 3 | 2 of 2 | 12 of 20 | 0 of 0 | 3 of 3 |
| Mike Perry | 5 of 10 | 50% | 1 of 3 | 2 of 4 | 2 of 3 | 5 of 10 | 0 of 0 | 0 of 0 |
Totals
| Fighter | KD | Sig. Str. | Sig. Str. % | Total Str. | TD | TD % | Sub. Att | Rev. | Ctrl |
|---|---|---|---|---|---|---|---|---|---|
| Vicente Luque | 0 | 84 of 179 | 46% | 85 of 180 | 0 of 0 | --- | 1 | 0 | 0:00 |
| Mike Perry | 0 | 87 of 175 | 49% | 116 of 204 | 0 of 2 | 0% | 0 | 0 | 3:19 |
Per Round
| Rd | Fighter | KD | Sig. Str. | Sig. Str. % | Total Str. | TD | TD % | Sub. Att | Rev. | Ctrl |
|---|---|---|---|---|---|---|---|---|---|---|
| 1 | Vicente Luque | 0 | 28 of 61 | 45% | 28 of 61 | 0 of 0 | --- | 0 | 0 | 0:00 |
| Mike Perry | 0 | 32 of 71 | 45% | 32 of 71 | 0 of 0 | --- | 0 | 0 | 0:00 | |
| 2 | Vicente Luque | 0 | 41 of 82 | 50% | 41 of 82 | 0 of 0 | --- | 0 | 0 | 0:00 |
| Mike Perry | 0 | 41 of 75 | 54% | 41 of 75 | 0 of 0 | --- | 0 | 0 | 0:50 | |
| 3 | Vicente Luque | 0 | 15 of 36 | 41% | 16 of 37 | 0 of 0 | --- | 1 | 0 | 0:00 |
| Mike Perry | 0 | 14 of 29 | 48% | 43 of 58 | 0 of 2 | 0% | 0 | 0 | 2:29 |
Significant Strikes
| Fighter | Sig. Str. | Sig. Str. % | Head | Body | Leg | Distance | Clinch | Ground |
|---|---|---|---|---|---|---|---|---|
| Vicente Luque | 84 of 179 | 46% | 43 of 125 | 6 of 9 | 35 of 45 | 83 of 178 | 1 of 1 | 0 of 0 |
| Mike Perry | 87 of 175 | 49% | 56 of 135 | 11 of 17 | 20 of 23 | 75 of 157 | 12 of 18 | 0 of 0 |
Significant Strikes Per Round
| Rd | Fighter | Sig. Str. | Sig. Str. % | Head | Body | Leg | Distance | Clinch | Ground |
|---|---|---|---|---|---|---|---|---|---|
| 1 | Vicente Luque | 28 of 61 | 45% | 12 of 38 | 4 of 4 | 12 of 19 | 27 of 60 | 1 of 1 | 0 of 0 |
| Mike Perry | 32 of 71 | 45% | 22 of 59 | 4 of 6 | 6 of 6 | 32 of 69 | 0 of 2 | 0 of 0 | |
| 2 | Vicente Luque | 41 of 82 | 50% | 28 of 65 | 1 of 3 | 12 of 14 | 41 of 82 | 0 of 0 | 0 of 0 |
| Mike Perry | 41 of 75 | 54% | 28 of 58 | 5 of 8 | 8 of 9 | 34 of 65 | 7 of 10 | 0 of 0 | |
| 3 | Vicente Luque | 15 of 36 | 41% | 3 of 22 | 1 of 2 | 11 of 12 | 15 of 36 | 0 of 0 | 0 of 0 |
| Mike Perry | 14 of 29 | 48% | 6 of 18 | 2 of 3 | 6 of 8 | 9 of 23 | 5 of 6 | 0 of 0 |
Totals
| Fighter | KD | Sig. Str. | Sig. Str. % | Total Str. | TD | TD % | Sub. Att | Rev. | Ctrl |
|---|---|---|---|---|---|---|---|---|---|
| Mike Perry | 0 | 48 of 137 | 35% | 50 of 139 | 0 of 1 | 0% | 0 | 0 | 1:18 |
| Alex Oliveira | 0 | 65 of 110 | 59% | 75 of 120 | 0 of 1 | 0% | 0 | 0 | 2:09 |
Per Round
| Rd | Fighter | KD | Sig. Str. | Sig. Str. % | Total Str. | TD | TD % | Sub. Att | Rev. | Ctrl |
|---|---|---|---|---|---|---|---|---|---|---|
| 1 | Mike Perry | 0 | 17 of 48 | 35% | 19 of 50 | 0 of 1 | 0% | 0 | 0 | 1:04 |
| Alex Oliveira | 0 | 20 of 29 | 68% | 21 of 30 | 0 of 0 | --- | 0 | 0 | 0:22 | |
| 2 | Mike Perry | 0 | 16 of 34 | 47% | 16 of 34 | 0 of 0 | --- | 0 | 0 | 0:14 |
| Alex Oliveira | 0 | 21 of 36 | 58% | 30 of 45 | 0 of 1 | 0% | 0 | 0 | 1:42 | |
| 3 | Mike Perry | 0 | 15 of 55 | 27% | 15 of 55 | 0 of 0 | --- | 0 | 0 | 0:00 |
| Alex Oliveira | 0 | 24 of 45 | 53% | 24 of 45 | 0 of 0 | --- | 0 | 0 | 0:05 |
Significant Strikes
| Fighter | Sig. Str. | Sig. Str. % | Head | Body | Leg | Distance | Clinch | Ground |
|---|---|---|---|---|---|---|---|---|
| Mike Perry | 48 of 137 | 35% | 30 of 110 | 7 of 16 | 11 of 11 | 42 of 125 | 6 of 11 | 0 of 1 |
| Alex Oliveira | 65 of 110 | 59% | 48 of 90 | 6 of 8 | 11 of 12 | 32 of 72 | 18 of 19 | 15 of 19 |
Significant Strikes Per Round
| Rd | Fighter | Sig. Str. | Sig. Str. % | Head | Body | Leg | Distance | Clinch | Ground |
|---|---|---|---|---|---|---|---|---|---|
| 1 | Mike Perry | 17 of 48 | 35% | 11 of 37 | 4 of 9 | 2 of 2 | 14 of 42 | 3 of 6 | 0 of 0 |
| Alex Oliveira | 20 of 29 | 68% | 13 of 22 | 3 of 3 | 4 of 4 | 13 of 22 | 7 of 7 | 0 of 0 | |
| 2 | Mike Perry | 16 of 34 | 47% | 10 of 27 | 2 of 3 | 4 of 4 | 13 of 29 | 3 of 5 | 0 of 0 |
| Alex Oliveira | 21 of 36 | 58% | 17 of 31 | 1 of 1 | 3 of 4 | 5 of 16 | 2 of 2 | 14 of 18 | |
| 3 | Mike Perry | 15 of 55 | 27% | 9 of 46 | 1 of 4 | 5 of 5 | 15 of 54 | 0 of 0 | 0 of 1 |
| Alex Oliveira | 24 of 45 | 53% | 18 of 37 | 2 of 4 | 4 of 4 | 14 of 34 | 9 of 10 | 1 of 1 |
Totals
| Fighter | KD | Sig. Str. | Sig. Str. % | Total Str. | TD | TD % | Sub. Att | Rev. | Ctrl |
|---|---|---|---|---|---|---|---|---|---|
| Donald Cerrone | 0 | 9 of 13 | 69% | 10 of 14 | 0 of 1 | 0% | 1 | 1 | 0:40 |
| Mike Perry | 0 | 11 of 20 | 55% | 11 of 20 | 1 of 1 | 100% | 0 | 0 | 0:58 |
Per Round
| Rd | Fighter | KD | Sig. Str. | Sig. Str. % | Total Str. | TD | TD % | Sub. Att | Rev. | Ctrl |
|---|---|---|---|---|---|---|---|---|---|---|
| 1 | Donald Cerrone | 0 | 9 of 13 | 69% | 10 of 14 | 0 of 1 | 0% | 1 | 1 | 0:40 |
| Mike Perry | 0 | 11 of 20 | 55% | 11 of 20 | 1 of 1 | 100% | 0 | 0 | 0:58 |
Significant Strikes
| Fighter | Sig. Str. | Sig. Str. % | Head | Body | Leg | Distance | Clinch | Ground |
|---|---|---|---|---|---|---|---|---|
| Donald Cerrone | 9 of 13 | 69% | 2 of 5 | 4 of 5 | 3 of 3 | 4 of 8 | 5 of 5 | 0 of 0 |
| Mike Perry | 11 of 20 | 55% | 0 of 9 | 6 of 6 | 5 of 5 | 4 of 13 | 6 of 6 | 1 of 1 |
Significant Strikes Per Round
| Rd | Fighter | Sig. Str. | Sig. Str. % | Head | Body | Leg | Distance | Clinch | Ground |
|---|---|---|---|---|---|---|---|---|---|
| 1 | Donald Cerrone | 9 of 13 | 69% | 2 of 5 | 4 of 5 | 3 of 3 | 4 of 8 | 5 of 5 | 0 of 0 |
| Mike Perry | 11 of 20 | 55% | 0 of 9 | 6 of 6 | 5 of 5 | 4 of 13 | 6 of 6 | 1 of 1 |
Totals
| Fighter | KD | Sig. Str. | Sig. Str. % | Total Str. | TD | TD % | Sub. Att | Rev. | Ctrl |
|---|---|---|---|---|---|---|---|---|---|
| Mike Perry | 0 | 56 of 120 | 46% | 64 of 128 | 0 of 1 | 0% | 0 | 0 | 0:45 |
| Paul Felder | 0 | 62 of 110 | 56% | 66 of 114 | 2 of 3 | 66% | 0 | 0 | 3:00 |
Per Round
| Rd | Fighter | KD | Sig. Str. | Sig. Str. % | Total Str. | TD | TD % | Sub. Att | Rev. | Ctrl |
|---|---|---|---|---|---|---|---|---|---|---|
| 1 | Mike Perry | 0 | 22 of 41 | 53% | 27 of 46 | 0 of 1 | 0% | 0 | 0 | 0:45 |
| Paul Felder | 0 | 23 of 44 | 52% | 24 of 45 | 0 of 0 | --- | 0 | 0 | 0:21 | |
| 2 | Mike Perry | 0 | 12 of 34 | 35% | 12 of 34 | 0 of 0 | --- | 0 | 0 | 0:00 |
| Paul Felder | 0 | 17 of 22 | 77% | 18 of 23 | 2 of 2 | 100% | 0 | 0 | 1:41 | |
| 3 | Mike Perry | 0 | 22 of 45 | 48% | 25 of 48 | 0 of 0 | --- | 0 | 0 | 0:00 |
| Paul Felder | 0 | 22 of 44 | 50% | 24 of 46 | 0 of 1 | 0% | 0 | 0 | 0:58 |
Significant Strikes
| Fighter | Sig. Str. | Sig. Str. % | Head | Body | Leg | Distance | Clinch | Ground |
|---|---|---|---|---|---|---|---|---|
| Mike Perry | 56 of 120 | 46% | 27 of 79 | 16 of 24 | 13 of 17 | 48 of 110 | 7 of 9 | 1 of 1 |
| Paul Felder | 62 of 110 | 56% | 34 of 78 | 15 of 18 | 13 of 14 | 42 of 86 | 17 of 21 | 3 of 3 |
Significant Strikes Per Round
| Rd | Fighter | Sig. Str. | Sig. Str. % | Head | Body | Leg | Distance | Clinch | Ground |
|---|---|---|---|---|---|---|---|---|---|
| 1 | Mike Perry | 22 of 41 | 53% | 11 of 27 | 5 of 7 | 6 of 7 | 19 of 37 | 3 of 4 | 0 of 0 |
| Paul Felder | 23 of 44 | 52% | 11 of 30 | 6 of 8 | 6 of 6 | 15 of 32 | 8 of 12 | 0 of 0 | |
| 2 | Mike Perry | 12 of 34 | 35% | 6 of 20 | 2 of 7 | 4 of 7 | 11 of 32 | 1 of 2 | 0 of 0 |
| Paul Felder | 17 of 22 | 77% | 10 of 15 | 6 of 6 | 1 of 1 | 9 of 14 | 5 of 5 | 3 of 3 | |
| 3 | Mike Perry | 22 of 45 | 48% | 10 of 32 | 9 of 10 | 3 of 3 | 18 of 41 | 3 of 3 | 1 of 1 |
| Paul Felder | 22 of 44 | 50% | 13 of 33 | 3 of 4 | 6 of 7 | 18 of 40 | 4 of 4 | 0 of 0 |
Jake Ellenberger - Fight History
Totals
| Fighter | KD | Sig. Str. | Sig. Str. % | Total Str. | TD | TD % | Sub. Att | Rev. | Ctrl |
|---|---|---|---|---|---|---|---|---|---|
| Bryan Barberena | 0 | 12 of 14 | 85% | 12 of 14 | 0 of 0 | --- | 0 | 0 | 0:22 |
| Jake Ellenberger | 2 | 19 of 35 | 54% | 31 of 47 | 0 of 0 | --- | 0 | 0 | 0:00 |
Per Round
| Rd | Fighter | KD | Sig. Str. | Sig. Str. % | Total Str. | TD | TD % | Sub. Att | Rev. | Ctrl |
|---|---|---|---|---|---|---|---|---|---|---|
| 1 | Bryan Barberena | 0 | 12 of 14 | 85% | 12 of 14 | 0 of 0 | --- | 0 | 0 | 0:22 |
| Jake Ellenberger | 2 | 19 of 35 | 54% | 31 of 47 | 0 of 0 | --- | 0 | 0 | 0:00 |
Significant Strikes
| Fighter | Sig. Str. | Sig. Str. % | Head | Body | Leg | Distance | Clinch | Ground |
|---|---|---|---|---|---|---|---|---|
| Bryan Barberena | 12 of 14 | 85% | 6 of 8 | 2 of 2 | 4 of 4 | 10 of 11 | 2 of 3 | 0 of 0 |
| Jake Ellenberger | 19 of 35 | 54% | 17 of 33 | 1 of 1 | 1 of 1 | 7 of 21 | 2 of 2 | 10 of 12 |
Significant Strikes Per Round
| Rd | Fighter | Sig. Str. | Sig. Str. % | Head | Body | Leg | Distance | Clinch | Ground |
|---|---|---|---|---|---|---|---|---|---|
| 1 | Bryan Barberena | 12 of 14 | 85% | 6 of 8 | 2 of 2 | 4 of 4 | 10 of 11 | 2 of 3 | 0 of 0 |
| Jake Ellenberger | 19 of 35 | 54% | 17 of 33 | 1 of 1 | 1 of 1 | 7 of 21 | 2 of 2 | 10 of 12 |
Totals
| Fighter | KD | Sig. Str. | Sig. Str. % | Total Str. | TD | TD % | Sub. Att | Rev. | Ctrl |
|---|---|---|---|---|---|---|---|---|---|
| Ben Saunders | 0 | 5 of 9 | 55% | 7 of 12 | 0 of 0 | --- | 0 | 0 | 0:40 |
| Jake Ellenberger | 1 | 10 of 21 | 47% | 11 of 22 | 0 of 0 | --- | 0 | 0 | 0:00 |
Per Round
| Rd | Fighter | KD | Sig. Str. | Sig. Str. % | Total Str. | TD | TD % | Sub. Att | Rev. | Ctrl |
|---|---|---|---|---|---|---|---|---|---|---|
| 1 | Ben Saunders | 0 | 5 of 9 | 55% | 7 of 12 | 0 of 0 | --- | 0 | 0 | 0:40 |
| Jake Ellenberger | 1 | 10 of 21 | 47% | 11 of 22 | 0 of 0 | --- | 0 | 0 | 0:00 |
Significant Strikes
| Fighter | Sig. Str. | Sig. Str. % | Head | Body | Leg | Distance | Clinch | Ground |
|---|---|---|---|---|---|---|---|---|
| Ben Saunders | 5 of 9 | 55% | 4 of 8 | 1 of 1 | 0 of 0 | 1 of 2 | 4 of 7 | 0 of 0 |
| Jake Ellenberger | 10 of 21 | 47% | 7 of 17 | 3 of 4 | 0 of 0 | 1 of 8 | 7 of 10 | 2 of 3 |
Significant Strikes Per Round
| Rd | Fighter | Sig. Str. | Sig. Str. % | Head | Body | Leg | Distance | Clinch | Ground |
|---|---|---|---|---|---|---|---|---|---|
| 1 | Ben Saunders | 5 of 9 | 55% | 4 of 8 | 1 of 1 | 0 of 0 | 1 of 2 | 4 of 7 | 0 of 0 |
| Jake Ellenberger | 10 of 21 | 47% | 7 of 17 | 3 of 4 | 0 of 0 | 1 of 8 | 7 of 10 | 2 of 3 |
Totals
| Fighter | KD | Sig. Str. | Sig. Str. % | Total Str. | TD | TD % | Sub. Att | Rev. | Ctrl |
|---|---|---|---|---|---|---|---|---|---|
| Mike Perry | 0 | 17 of 41 | 41% | 20 of 44 | 1 of 4 | 25% | 0 | 0 | 0:29 |
| Jake Ellenberger | 2 | 26 of 55 | 47% | 28 of 57 | 0 of 0 | --- | 0 | 0 | 0:09 |
Per Round
| Rd | Fighter | KD | Sig. Str. | Sig. Str. % | Total Str. | TD | TD % | Sub. Att | Rev. | Ctrl |
|---|---|---|---|---|---|---|---|---|---|---|
| 1 | Mike Perry | 0 | 12 of 30 | 40% | 15 of 33 | 1 of 4 | 25% | 0 | 0 | 0:28 |
| Jake Ellenberger | 0 | 22 of 47 | 46% | 24 of 49 | 0 of 0 | --- | 0 | 0 | 0:00 | |
| 2 | Mike Perry | 0 | 5 of 11 | 45% | 5 of 11 | 0 of 0 | --- | 0 | 0 | 0:01 |
| Jake Ellenberger | 2 | 4 of 8 | 50% | 4 of 8 | 0 of 0 | --- | 0 | 0 | 0:09 |
Significant Strikes
| Fighter | Sig. Str. | Sig. Str. % | Head | Body | Leg | Distance | Clinch | Ground |
|---|---|---|---|---|---|---|---|---|
| Mike Perry | 17 of 41 | 41% | 13 of 35 | 4 of 6 | 0 of 0 | 13 of 35 | 4 of 6 | 0 of 0 |
| Jake Ellenberger | 26 of 55 | 47% | 10 of 32 | 4 of 10 | 12 of 13 | 24 of 51 | 2 of 3 | 0 of 1 |
Significant Strikes Per Round
| Rd | Fighter | Sig. Str. | Sig. Str. % | Head | Body | Leg | Distance | Clinch | Ground |
|---|---|---|---|---|---|---|---|---|---|
| 1 | Mike Perry | 12 of 30 | 40% | 10 of 26 | 2 of 4 | 0 of 0 | 10 of 28 | 2 of 2 | 0 of 0 |
| Jake Ellenberger | 22 of 47 | 46% | 8 of 28 | 4 of 8 | 10 of 11 | 21 of 46 | 1 of 1 | 0 of 0 | |
| 2 | Mike Perry | 5 of 11 | 45% | 3 of 9 | 2 of 2 | 0 of 0 | 3 of 7 | 2 of 4 | 0 of 0 |
| Jake Ellenberger | 4 of 8 | 50% | 2 of 4 | 0 of 2 | 2 of 2 | 3 of 5 | 1 of 2 | 0 of 1 |
Totals
| Fighter | KD | Sig. Str. | Sig. Str. % | Total Str. | TD | TD % | Sub. Att | Rev. | Ctrl |
|---|---|---|---|---|---|---|---|---|---|
| Jorge Masvidal | 0 | 11 of 31 | 35% | 11 of 31 | 0 of 1 | 0% | 0 | 0 | 0:03 |
| Jake Ellenberger | 0 | 44 of 63 | 69% | 50 of 70 | 0 of 0 | --- | 0 | 0 | 0:38 |
Per Round
| Rd | Fighter | KD | Sig. Str. | Sig. Str. % | Total Str. | TD | TD % | Sub. Att | Rev. | Ctrl |
|---|---|---|---|---|---|---|---|---|---|---|
| 1 | Jorge Masvidal | 0 | 11 of 31 | 35% | 11 of 31 | 0 of 1 | 0% | 0 | 0 | 0:03 |
| Jake Ellenberger | 0 | 44 of 63 | 69% | 50 of 70 | 0 of 0 | --- | 0 | 0 | 0:38 |
Significant Strikes
| Fighter | Sig. Str. | Sig. Str. % | Head | Body | Leg | Distance | Clinch | Ground |
|---|---|---|---|---|---|---|---|---|
| Jorge Masvidal | 11 of 31 | 35% | 7 of 24 | 1 of 2 | 3 of 5 | 9 of 26 | 2 of 5 | 0 of 0 |
| Jake Ellenberger | 44 of 63 | 69% | 26 of 40 | 9 of 12 | 9 of 11 | 26 of 39 | 12 of 17 | 6 of 7 |
Significant Strikes Per Round
| Rd | Fighter | Sig. Str. | Sig. Str. % | Head | Body | Leg | Distance | Clinch | Ground |
|---|---|---|---|---|---|---|---|---|---|
| 1 | Jorge Masvidal | 11 of 31 | 35% | 7 of 24 | 1 of 2 | 3 of 5 | 9 of 26 | 2 of 5 | 0 of 0 |
| Jake Ellenberger | 44 of 63 | 69% | 26 of 40 | 9 of 12 | 9 of 11 | 26 of 39 | 12 of 17 | 6 of 7 |
Totals
| Fighter | KD | Sig. Str. | Sig. Str. % | Total Str. | TD | TD % | Sub. Att | Rev. | Ctrl |
|---|---|---|---|---|---|---|---|---|---|
| Jake Ellenberger | 0 | 7 of 17 | 41% | 7 of 17 | 0 of 1 | 0% | 0 | 0 | 0:00 |
| Matt Brown | 2 | 21 of 34 | 61% | 29 of 43 | 0 of 0 | --- | 0 | 0 | 0:41 |
Per Round
| Rd | Fighter | KD | Sig. Str. | Sig. Str. % | Total Str. | TD | TD % | Sub. Att | Rev. | Ctrl |
|---|---|---|---|---|---|---|---|---|---|---|
| 1 | Jake Ellenberger | 0 | 7 of 17 | 41% | 7 of 17 | 0 of 1 | 0% | 0 | 0 | 0:00 |
| Matt Brown | 2 | 21 of 34 | 61% | 29 of 43 | 0 of 0 | --- | 0 | 0 | 0:41 |
Significant Strikes
| Fighter | Sig. Str. | Sig. Str. % | Head | Body | Leg | Distance | Clinch | Ground |
|---|---|---|---|---|---|---|---|---|
| Jake Ellenberger | 7 of 17 | 41% | 5 of 15 | 2 of 2 | 0 of 0 | 5 of 15 | 2 of 2 | 0 of 0 |
| Matt Brown | 21 of 34 | 61% | 18 of 31 | 2 of 2 | 1 of 1 | 7 of 15 | 0 of 0 | 14 of 19 |
Significant Strikes Per Round
| Rd | Fighter | Sig. Str. | Sig. Str. % | Head | Body | Leg | Distance | Clinch | Ground |
|---|---|---|---|---|---|---|---|---|---|
| 1 | Jake Ellenberger | 7 of 17 | 41% | 5 of 15 | 2 of 2 | 0 of 0 | 5 of 15 | 2 of 2 | 0 of 0 |
| Matt Brown | 21 of 34 | 61% | 18 of 31 | 2 of 2 | 1 of 1 | 7 of 15 | 0 of 0 | 14 of 19 |
Totals
| Fighter | KD | Sig. Str. | Sig. Str. % | Total Str. | TD | TD % | Sub. Att | Rev. | Ctrl |
|---|---|---|---|---|---|---|---|---|---|
| Tarec Saffiedine | 0 | 54 of 131 | 41% | 58 of 135 | 0 of 1 | 0% | 0 | 0 | 1:01 |
| Jake Ellenberger | 0 | 30 of 99 | 30% | 39 of 109 | 0 of 4 | 0% | 0 | 0 | 0:54 |
Per Round
| Rd | Fighter | KD | Sig. Str. | Sig. Str. % | Total Str. | TD | TD % | Sub. Att | Rev. | Ctrl |
|---|---|---|---|---|---|---|---|---|---|---|
| 1 | Tarec Saffiedine | 0 | 18 of 45 | 40% | 19 of 46 | 0 of 0 | --- | 0 | 0 | 0:00 |
| Jake Ellenberger | 0 | 12 of 39 | 30% | 14 of 41 | 0 of 0 | --- | 0 | 0 | 0:22 | |
| 2 | Tarec Saffiedine | 0 | 16 of 44 | 36% | 17 of 45 | 0 of 1 | 0% | 0 | 0 | 0:00 |
| Jake Ellenberger | 0 | 9 of 33 | 27% | 9 of 33 | 0 of 1 | 0% | 0 | 0 | 0:04 | |
| 3 | Tarec Saffiedine | 0 | 20 of 42 | 47% | 22 of 44 | 0 of 0 | --- | 0 | 0 | 1:01 |
| Jake Ellenberger | 0 | 9 of 27 | 33% | 16 of 35 | 0 of 3 | 0% | 0 | 0 | 0:28 |
Significant Strikes
| Fighter | Sig. Str. | Sig. Str. % | Head | Body | Leg | Distance | Clinch | Ground |
|---|---|---|---|---|---|---|---|---|
| Tarec Saffiedine | 54 of 131 | 41% | 30 of 103 | 13 of 17 | 11 of 11 | 44 of 118 | 10 of 13 | 0 of 0 |
| Jake Ellenberger | 30 of 99 | 30% | 24 of 90 | 6 of 9 | 0 of 0 | 20 of 86 | 10 of 13 | 0 of 0 |
Significant Strikes Per Round
| Rd | Fighter | Sig. Str. | Sig. Str. % | Head | Body | Leg | Distance | Clinch | Ground |
|---|---|---|---|---|---|---|---|---|---|
| 1 | Tarec Saffiedine | 18 of 45 | 40% | 9 of 35 | 6 of 7 | 3 of 3 | 12 of 38 | 6 of 7 | 0 of 0 |
| Jake Ellenberger | 12 of 39 | 30% | 10 of 35 | 2 of 4 | 0 of 0 | 9 of 34 | 3 of 5 | 0 of 0 | |
| 2 | Tarec Saffiedine | 16 of 44 | 36% | 11 of 37 | 3 of 5 | 2 of 2 | 15 of 42 | 1 of 2 | 0 of 0 |
| Jake Ellenberger | 9 of 33 | 27% | 7 of 30 | 2 of 3 | 0 of 0 | 7 of 30 | 2 of 3 | 0 of 0 | |
| 3 | Tarec Saffiedine | 20 of 42 | 47% | 10 of 31 | 4 of 5 | 6 of 6 | 17 of 38 | 3 of 4 | 0 of 0 |
| Jake Ellenberger | 9 of 27 | 33% | 7 of 25 | 2 of 2 | 0 of 0 | 4 of 22 | 5 of 5 | 0 of 0 |
Totals
| Fighter | KD | Sig. Str. | Sig. Str. % | Total Str. | TD | TD % | Sub. Att | Rev. | Ctrl |
|---|---|---|---|---|---|---|---|---|---|
| Stephen Thompson | 1 | 5 of 14 | 35% | 14 of 23 | 0 of 1 | 0% | 0 | 0 | 0:01 |
| Jake Ellenberger | 2 | 20 of 35 | 57% | 29 of 47 | 1 of 3 | 33% | 0 | 0 | 1:56 |
Per Round
| Rd | Fighter | KD | Sig. Str. | Sig. Str. % | Total Str. | TD | TD % | Sub. Att | Rev. | Ctrl |
|---|---|---|---|---|---|---|---|---|---|---|
| 1 | Stephen Thompson | 1 | 5 of 14 | 35% | 14 of 23 | 0 of 1 | 0% | 0 | 0 | 0:01 |
| Jake Ellenberger | 2 | 20 of 35 | 57% | 29 of 47 | 1 of 3 | 33% | 0 | 0 | 1:56 |
Significant Strikes
| Fighter | Sig. Str. | Sig. Str. % | Head | Body | Leg | Distance | Clinch | Ground |
|---|---|---|---|---|---|---|---|---|
| Stephen Thompson | 5 of 14 | 35% | 4 of 12 | 1 of 1 | 0 of 1 | 1 of 7 | 4 of 7 | 0 of 0 |
| Jake Ellenberger | 20 of 35 | 57% | 17 of 29 | 2 of 5 | 1 of 1 | 12 of 22 | 1 of 3 | 7 of 10 |
Significant Strikes Per Round
| Rd | Fighter | Sig. Str. | Sig. Str. % | Head | Body | Leg | Distance | Clinch | Ground |
|---|---|---|---|---|---|---|---|---|---|
| 1 | Stephen Thompson | 5 of 14 | 35% | 4 of 12 | 1 of 1 | 0 of 1 | 1 of 7 | 4 of 7 | 0 of 0 |
| Jake Ellenberger | 20 of 35 | 57% | 17 of 29 | 2 of 5 | 1 of 1 | 12 of 22 | 1 of 3 | 7 of 10 |
Totals
| Fighter | KD | Sig. Str. | Sig. Str. % | Total Str. | TD | TD % | Sub. Att | Rev. | Ctrl |
|---|---|---|---|---|---|---|---|---|---|
| Jake Ellenberger | 0 | 15 of 52 | 28% | 26 of 64 | 0 of 0 | --- | 1 | 0 | 0:21 |
| Josh Koscheck | 0 | 7 of 40 | 17% | 21 of 55 | 1 of 6 | 16% | 0 | 0 | 3:32 |
Per Round
| Rd | Fighter | KD | Sig. Str. | Sig. Str. % | Total Str. | TD | TD % | Sub. Att | Rev. | Ctrl |
|---|---|---|---|---|---|---|---|---|---|---|
| 1 | Jake Ellenberger | 0 | 10 of 31 | 32% | 17 of 38 | 0 of 0 | --- | 0 | 0 | 0:00 |
| Josh Koscheck | 0 | 3 of 27 | 11% | 12 of 37 | 1 of 3 | 33% | 0 | 0 | 1:56 | |
| 2 | Jake Ellenberger | 0 | 5 of 21 | 23% | 9 of 26 | 0 of 0 | --- | 1 | 0 | 0:21 |
| Josh Koscheck | 0 | 4 of 13 | 30% | 9 of 18 | 0 of 3 | 0% | 0 | 0 | 1:36 |
Significant Strikes
| Fighter | Sig. Str. | Sig. Str. % | Head | Body | Leg | Distance | Clinch | Ground |
|---|---|---|---|---|---|---|---|---|
| Jake Ellenberger | 15 of 52 | 28% | 14 of 51 | 1 of 1 | 0 of 0 | 13 of 50 | 2 of 2 | 0 of 0 |
| Josh Koscheck | 7 of 40 | 17% | 5 of 35 | 2 of 5 | 0 of 0 | 5 of 38 | 2 of 2 | 0 of 0 |
Significant Strikes Per Round
| Rd | Fighter | Sig. Str. | Sig. Str. % | Head | Body | Leg | Distance | Clinch | Ground |
|---|---|---|---|---|---|---|---|---|---|
| 1 | Jake Ellenberger | 10 of 31 | 32% | 9 of 30 | 1 of 1 | 0 of 0 | 9 of 30 | 1 of 1 | 0 of 0 |
| Josh Koscheck | 3 of 27 | 11% | 1 of 22 | 2 of 5 | 0 of 0 | 1 of 25 | 2 of 2 | 0 of 0 | |
| 2 | Jake Ellenberger | 5 of 21 | 23% | 5 of 21 | 0 of 0 | 0 of 0 | 4 of 20 | 1 of 1 | 0 of 0 |
| Josh Koscheck | 4 of 13 | 30% | 4 of 13 | 0 of 0 | 0 of 0 | 4 of 13 | 0 of 0 | 0 of 0 |
No comments yet. Be the first to share your thoughts!