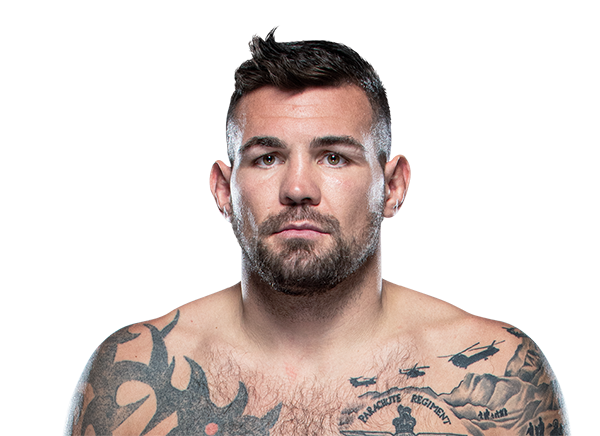
Career Averages - Thiago Santos
Career Averages - Jack Marshman
Thiago Santos - Fight History
Totals
| Fighter | KD | Sig. Str. | Sig. Str. % | Total Str. | TD | TD % | Sub. Att | Rev. | Ctrl |
|---|---|---|---|---|---|---|---|---|---|
| Jamahal Hill | 0 | 53 of 94 | 56% | 56 of 98 | 6 of 20 | 30% | 0 | 0 | 5:54 |
| Thiago Santos | 0 | 89 of 152 | 58% | 130 of 194 | 0 of 0 | --- | 0 | 0 | 1:26 |
Per Round
| Rd | Fighter | KD | Sig. Str. | Sig. Str. % | Total Str. | TD | TD % | Sub. Att | Rev. | Ctrl |
|---|---|---|---|---|---|---|---|---|---|---|
| 1 | Jamahal Hill | 0 | 10 of 18 | 55% | 11 of 19 | 0 of 4 | 0% | 0 | 0 | 1:23 |
| Thiago Santos | 0 | 9 of 30 | 30% | 18 of 39 | 0 of 0 | --- | 0 | 0 | 0:00 | |
| 2 | Jamahal Hill | 0 | 16 of 38 | 42% | 16 of 38 | 1 of 4 | 25% | 0 | 0 | 0:41 |
| Thiago Santos | 0 | 31 of 52 | 59% | 35 of 56 | 0 of 0 | --- | 0 | 0 | 0:22 | |
| 3 | Jamahal Hill | 0 | 8 of 11 | 72% | 10 of 14 | 5 of 11 | 45% | 0 | 0 | 3:50 |
| Thiago Santos | 0 | 9 of 11 | 81% | 23 of 26 | 0 of 0 | --- | 0 | 0 | 0:33 | |
| 4 | Jamahal Hill | 0 | 19 of 27 | 70% | 19 of 27 | 0 of 1 | 0% | 0 | 0 | 0:00 |
| Thiago Santos | 0 | 40 of 59 | 67% | 54 of 73 | 0 of 0 | --- | 0 | 0 | 0:31 |
Significant Strikes
| Fighter | Sig. Str. | Sig. Str. % | Head | Body | Leg | Distance | Clinch | Ground |
|---|---|---|---|---|---|---|---|---|
| Jamahal Hill | 53 of 94 | 56% | 28 of 66 | 13 of 16 | 12 of 12 | 43 of 82 | 8 of 9 | 2 of 3 |
| Thiago Santos | 89 of 152 | 58% | 68 of 131 | 12 of 12 | 9 of 9 | 52 of 107 | 19 of 21 | 18 of 24 |
Significant Strikes Per Round
| Rd | Fighter | Sig. Str. | Sig. Str. % | Head | Body | Leg | Distance | Clinch | Ground |
|---|---|---|---|---|---|---|---|---|---|
| 1 | Jamahal Hill | 10 of 18 | 55% | 1 of 8 | 3 of 4 | 6 of 6 | 9 of 17 | 1 of 1 | 0 of 0 |
| Thiago Santos | 9 of 30 | 30% | 5 of 26 | 4 of 4 | 0 of 0 | 5 of 26 | 4 of 4 | 0 of 0 | |
| 2 | Jamahal Hill | 16 of 38 | 42% | 9 of 29 | 5 of 7 | 2 of 2 | 14 of 35 | 2 of 2 | 0 of 1 |
| Thiago Santos | 31 of 52 | 59% | 19 of 40 | 5 of 5 | 7 of 7 | 28 of 48 | 3 of 4 | 0 of 0 | |
| 3 | Jamahal Hill | 8 of 11 | 72% | 6 of 9 | 1 of 1 | 1 of 1 | 3 of 6 | 3 of 3 | 2 of 2 |
| Thiago Santos | 9 of 11 | 81% | 5 of 7 | 3 of 3 | 1 of 1 | 2 of 4 | 7 of 7 | 0 of 0 | |
| 4 | Jamahal Hill | 19 of 27 | 70% | 12 of 20 | 4 of 4 | 3 of 3 | 17 of 24 | 2 of 3 | 0 of 0 |
| Thiago Santos | 40 of 59 | 67% | 39 of 58 | 0 of 0 | 1 of 1 | 17 of 29 | 5 of 6 | 18 of 24 |
Angelo picks Jamahal Hill, citing Thiago Santos's decline in power and speed since his injuries. He notes Hill's excellent striking differential and accuracy, and believes he can outpoint Santos. However, he acknowledges Santos's durability and championship-round experience, leaving some uncertainty if the fight goes deep. He cannot bet on 'survive logic' and sticks with Hill.
Big Brady picks Jamahal Hill, noting his high volume and power compared to Thiago Santos, who has been low-volume and inactive in his recent fights. He acknowledges Santos's power and the fact that Hill is hittable, but believes Hill's pressure and output will overwhelm Santos. He predicts a second or third-round knockout win for Hill, expressing hope that Hill makes it exciting after Santos's recent boring performances.
Cody also picks Hill, citing Santos's decline since the Jones fight and his knee injuries. He notes that Santos has become a shell of himself, with low output and a tendency to wait for counters. Cody believes Hill's length, southpaw stance, and left hand will be key, and that Hill can carry his power into later rounds. He predicts a late stoppage or decision for Hill.
Daniel Levi picks Jamahal Hill, citing his superior output (nearly double Santos's), power, and heart. He notes Hill's ability to fight in the pocket and force Santos to engage, while Santos has declined since knee surgeries and lacks the output to keep up. Levi is concerned about Santos's power and opportunistic hooks but believes Hill's durability and pace will prevail. He parlayed Hill with Oleksiejczuk to win 2 units.
Paul picks Jamahal Hill, noting that Hill is too fast for Thiago Santos. He points out that Santos has been in a decline since his fight with Jon Jones, with knee injuries and poor performances. Paul is concerned about the -315 price but still sees Hill as the rightful favorite. He mentions that Hill's speed and power should be enough to win, possibly by late stoppage or decision.
The MMA Guru picks Jamahal Hill by second-round TKO. He notes Santos's age (38) and lack of leg kicks since injury. He believes Hill's rangy punching and pressure will be effective, and compares to David Branch's KO of Santos. He expects Hill to land a one-two against the cage after a competitive first round.
Totals
| Fighter | KD | Sig. Str. | Sig. Str. % | Total Str. | TD | TD % | Sub. Att | Rev. | Ctrl |
|---|---|---|---|---|---|---|---|---|---|
| Magomed Ankalaev | 1 | 60 of 138 | 43% | 81 of 160 | 0 of 0 | --- | 0 | 0 | 0:17 |
| Thiago Santos | 0 | 78 of 155 | 50% | 114 of 191 | 1 of 2 | 50% | 0 | 0 | 3:35 |
Per Round
| Rd | Fighter | KD | Sig. Str. | Sig. Str. % | Total Str. | TD | TD % | Sub. Att | Rev. | Ctrl |
|---|---|---|---|---|---|---|---|---|---|---|
| 1 | Magomed Ankalaev | 0 | 10 of 21 | 47% | 10 of 21 | 0 of 0 | --- | 0 | 0 | 0:00 |
| Thiago Santos | 0 | 8 of 23 | 34% | 8 of 23 | 0 of 0 | --- | 0 | 0 | 0:00 | |
| 2 | Magomed Ankalaev | 1 | 15 of 36 | 41% | 18 of 39 | 0 of 0 | --- | 0 | 0 | 0:17 |
| Thiago Santos | 0 | 15 of 32 | 46% | 15 of 32 | 0 of 0 | --- | 0 | 0 | 0:00 | |
| 3 | Magomed Ankalaev | 0 | 18 of 30 | 60% | 18 of 30 | 0 of 0 | --- | 0 | 0 | 0:00 |
| Thiago Santos | 0 | 19 of 31 | 61% | 19 of 31 | 0 of 0 | --- | 0 | 0 | 0:00 | |
| 4 | Magomed Ankalaev | 0 | 10 of 32 | 31% | 16 of 38 | 0 of 0 | --- | 0 | 0 | 0:00 |
| Thiago Santos | 0 | 21 of 48 | 43% | 36 of 63 | 1 of 1 | 100% | 0 | 0 | 0:56 | |
| 5 | Magomed Ankalaev | 0 | 7 of 19 | 36% | 19 of 32 | 0 of 0 | --- | 0 | 0 | 0:00 |
| Thiago Santos | 0 | 15 of 21 | 71% | 36 of 42 | 0 of 1 | 0% | 0 | 0 | 2:39 |
Significant Strikes
| Fighter | Sig. Str. | Sig. Str. % | Head | Body | Leg | Distance | Clinch | Ground |
|---|---|---|---|---|---|---|---|---|
| Magomed Ankalaev | 60 of 138 | 43% | 14 of 75 | 16 of 26 | 30 of 37 | 57 of 135 | 1 of 1 | 2 of 2 |
| Thiago Santos | 78 of 155 | 50% | 33 of 94 | 35 of 51 | 10 of 10 | 64 of 140 | 12 of 13 | 2 of 2 |
Significant Strikes Per Round
| Rd | Fighter | Sig. Str. | Sig. Str. % | Head | Body | Leg | Distance | Clinch | Ground |
|---|---|---|---|---|---|---|---|---|---|
| 1 | Magomed Ankalaev | 10 of 21 | 47% | 0 of 6 | 3 of 6 | 7 of 9 | 10 of 21 | 0 of 0 | 0 of 0 |
| Thiago Santos | 8 of 23 | 34% | 3 of 13 | 4 of 9 | 1 of 1 | 8 of 23 | 0 of 0 | 0 of 0 | |
| 2 | Magomed Ankalaev | 15 of 36 | 41% | 7 of 22 | 3 of 6 | 5 of 8 | 13 of 34 | 0 of 0 | 2 of 2 |
| Thiago Santos | 15 of 32 | 46% | 6 of 18 | 6 of 11 | 3 of 3 | 14 of 31 | 1 of 1 | 0 of 0 | |
| 3 | Magomed Ankalaev | 18 of 30 | 60% | 2 of 13 | 4 of 4 | 12 of 13 | 18 of 30 | 0 of 0 | 0 of 0 |
| Thiago Santos | 19 of 31 | 61% | 7 of 17 | 7 of 9 | 5 of 5 | 18 of 30 | 1 of 1 | 0 of 0 | |
| 4 | Magomed Ankalaev | 10 of 32 | 31% | 4 of 23 | 4 of 7 | 2 of 2 | 10 of 32 | 0 of 0 | 0 of 0 |
| Thiago Santos | 21 of 48 | 43% | 13 of 38 | 8 of 10 | 0 of 0 | 18 of 45 | 1 of 1 | 2 of 2 | |
| 5 | Magomed Ankalaev | 7 of 19 | 36% | 1 of 11 | 2 of 3 | 4 of 5 | 6 of 18 | 1 of 1 | 0 of 0 |
| Thiago Santos | 15 of 21 | 71% | 4 of 8 | 10 of 12 | 1 of 1 | 6 of 11 | 9 of 10 | 0 of 0 |
Angelo picks Magomed Ankalaev, noting that Thiago Santos has slowed down at 38 and is not the same fighter who knocked out Jan Blachowicz. He believes Ankalaev's forward pressure, heavy kicks, and constant takedown threats will be too much. He expects a one-sided win, though not necessarily a stoppage.
Big Brady picks Magomed Ankalaev to win by decision. He notes Santos is 38, looks washed, has low volume (44 strikes in 25 minutes vs Walker), and has never recovered from his knee injuries after the Jones fight. He thinks Ankalaev is well-rounded, has power, and will outpoint Santos easily over five rounds. He expects the fight to be somewhat uneventful but Ankalaev will dominate. He mentions the line has moved from -330 to -500.
Cody is confident in Ankalaev, citing his pace, cardio, chin, and improved striking. He notes Santos is 38, has declined since knee surgery, and lacks volume. Cody sees Ankalaev as the best at 205 and expects him to win via pressure and volume, possibly a late stoppage. He mentions a parlay with Murzakanov at -106.
Daniel Levi picks Magomed Ankalaev to win, citing Ankalaev's upward trajectory and the emergence of a new era of light heavyweights. He notes that Thiago Santos has had lackluster performances since the Jon Jones fight, with his knees falling apart. Levi expects a chess match early but sees Ankalaev landing a big counter or takedown with ground and pound. He acknowledges Santos's power but believes Ankalaev's counters are sharp and that he will eventually get a title shot.
Ankalaev is seen as the uncrowned champ, with a seven-fight win streak and granite chin. He's a technical striker with high striking defense, and his ability to adjust mid-fight is praised. Santos is past his prime at 38, with ACL surgery and tentative performances. Ankalaev is expected to win via decision, possibly a one-sided chess match.
Paul echoes Cody's view, emphasizing Santos' decline and Ankalaev's advantages in speed, volume, and wrestling. He notes the price is high but believes Ankalaev is the best in the division. He also mentions a parlay with Murzakanov.
The MMA Guru picks Magomed Ankalaev over Thiago Santos, citing Santos' hesitancy and lack of ligaments in his leg. He believes Ankalaev will chop at the legs early, mix in takedowns, and expose Santos' poor ground game as Glover Teixeira did. He expects a late second-round ground-and-pound TKO, noting that Ankalaev's patient counter-striking style works well against Santos. He admits Santos is a decent underdog but says the odds won't sway him, as Ankalaev wins this fight seven or eight times out of ten.
Totals
| Fighter | KD | Sig. Str. | Sig. Str. % | Total Str. | TD | TD % | Sub. Att | Rev. | Ctrl |
|---|---|---|---|---|---|---|---|---|---|
| Thiago Santos | 0 | 44 of 105 | 41% | 44 of 105 | 0 of 1 | 0% | 0 | 0 | 0:00 |
| Johnny Walker | 0 | 48 of 130 | 36% | 48 of 130 | 0 of 0 | --- | 0 | 0 | 0:00 |
Per Round
| Rd | Fighter | KD | Sig. Str. | Sig. Str. % | Total Str. | TD | TD % | Sub. Att | Rev. | Ctrl |
|---|---|---|---|---|---|---|---|---|---|---|
| 1 | Thiago Santos | 0 | 3 of 13 | 23% | 3 of 13 | 0 of 0 | --- | 0 | 0 | 0:00 |
| Johnny Walker | 0 | 9 of 15 | 60% | 9 of 15 | 0 of 0 | --- | 0 | 0 | 0:00 | |
| 2 | Thiago Santos | 0 | 11 of 22 | 50% | 11 of 22 | 0 of 1 | 0% | 0 | 0 | 0:00 |
| Johnny Walker | 0 | 10 of 20 | 50% | 10 of 20 | 0 of 0 | --- | 0 | 0 | 0:00 | |
| 3 | Thiago Santos | 0 | 11 of 25 | 44% | 11 of 25 | 0 of 0 | --- | 0 | 0 | 0:00 |
| Johnny Walker | 0 | 10 of 25 | 40% | 10 of 25 | 0 of 0 | --- | 0 | 0 | 0:00 | |
| 4 | Thiago Santos | 0 | 9 of 22 | 40% | 9 of 22 | 0 of 0 | --- | 0 | 0 | 0:00 |
| Johnny Walker | 0 | 11 of 41 | 26% | 11 of 41 | 0 of 0 | --- | 0 | 0 | 0:00 | |
| 5 | Thiago Santos | 0 | 10 of 23 | 43% | 10 of 23 | 0 of 0 | --- | 0 | 0 | 0:00 |
| Johnny Walker | 0 | 8 of 29 | 27% | 8 of 29 | 0 of 0 | --- | 0 | 0 | 0:00 |
Significant Strikes
| Fighter | Sig. Str. | Sig. Str. % | Head | Body | Leg | Distance | Clinch | Ground |
|---|---|---|---|---|---|---|---|---|
| Thiago Santos | 44 of 105 | 41% | 9 of 40 | 16 of 28 | 19 of 37 | 42 of 103 | 2 of 2 | 0 of 0 |
| Johnny Walker | 48 of 130 | 36% | 7 of 55 | 9 of 20 | 32 of 55 | 46 of 127 | 2 of 3 | 0 of 0 |
Significant Strikes Per Round
| Rd | Fighter | Sig. Str. | Sig. Str. % | Head | Body | Leg | Distance | Clinch | Ground |
|---|---|---|---|---|---|---|---|---|---|
| 1 | Thiago Santos | 3 of 13 | 23% | 0 of 6 | 1 of 4 | 2 of 3 | 3 of 13 | 0 of 0 | 0 of 0 |
| Johnny Walker | 9 of 15 | 60% | 0 of 2 | 1 of 3 | 8 of 10 | 9 of 15 | 0 of 0 | 0 of 0 | |
| 2 | Thiago Santos | 11 of 22 | 50% | 2 of 5 | 6 of 8 | 3 of 9 | 9 of 20 | 2 of 2 | 0 of 0 |
| Johnny Walker | 10 of 20 | 50% | 2 of 6 | 2 of 3 | 6 of 11 | 8 of 17 | 2 of 3 | 0 of 0 | |
| 3 | Thiago Santos | 11 of 25 | 44% | 2 of 10 | 1 of 4 | 8 of 11 | 11 of 25 | 0 of 0 | 0 of 0 |
| Johnny Walker | 10 of 25 | 40% | 2 of 10 | 2 of 6 | 6 of 9 | 10 of 25 | 0 of 0 | 0 of 0 | |
| 4 | Thiago Santos | 9 of 22 | 40% | 2 of 9 | 4 of 6 | 3 of 7 | 9 of 22 | 0 of 0 | 0 of 0 |
| Johnny Walker | 11 of 41 | 26% | 1 of 22 | 2 of 3 | 8 of 16 | 11 of 41 | 0 of 0 | 0 of 0 | |
| 5 | Thiago Santos | 10 of 23 | 43% | 3 of 10 | 4 of 6 | 3 of 7 | 10 of 23 | 0 of 0 | 0 of 0 |
| Johnny Walker | 8 of 29 | 27% | 2 of 15 | 2 of 5 | 4 of 9 | 8 of 29 | 0 of 0 | 0 of 0 |
Angelo picks Johnny Walker, expecting his forward pressure, craziness, and size to frustrate Thiago Santos, who is a shell of his former self after knee injuries and three straight losses. He notes that Santos has massive power and could knock anyone out, but his cardio suffers and he may be gun-shy. Walker is never afraid to throw and will stay busy. Angelo likes Walker at plus 145 moneyline and in DraftKings at $7,400. He also likes the over on rounds and the more more monkey knife fight pick.
Big Brady picks Thiago Santos to win, citing his experience, better competition, and more paths to victory. He notes Santos has fought Jon Jones, Glover Teixeira, and Rakic, while Walker's best wins are over lesser competition. Walker is very hittable (31% striking defense) and chinny, while Santos hits hard. Santos has better cardio, having gone five rounds with Jones, while Walker fades after the first round. Brady suggests a ground game path for Santos, similar to his win over Kevin Holland. He recommends a violence play rather than the moneyline.
Cody picks Thiago Santos based on superior experience and durability. He notes that Santos has slowed down and his knees are shot, but he still hits hard and can drag the fight into later rounds. He expects Santos to survive Walker's early explosiveness and then pressure him, eventually landing a finish in the second, third, or fourth round. He highlights that Santos outstruck Alexander Rakic in their fight and has better cardio than Walker, who has never gone five rounds.
Daniel Levi picks Johnny Walker as the underdog, citing that both fighters have declined since their surgeries—Santos after ACL surgery and Walker after shoulder injury. He notes Walker's dynamic striking and finishing ability but acknowledges his poor durability and tendency to flop when hit. Levi believes the fight is a coin flip about who lands first, but he leans Walker because of motivation concerns for the nearly 40-year-old Santos with a baby on the way. He expects a knockout either way and takes the underdog.
I think Santos is the more disciplined striker and should be able to counter Walker's wildness. Walker is explosive but hittable and has poor durability. However, I'm concerned about Santos's recent performances and knee surgeries. I like Santos inside the distance at -120 and also like the under 1.5 rounds. I'm picking Santos but not with high confidence.
Paul agrees with Cody, picking Santos but with less confidence. He notes that Walker is dangerous early but has never gone five rounds and his cardio is suspect. He believes Santos's chin holds up better at 205 and that Walker's grappling is not a major concern. He does not have a bet on Santos straight up but suggests looking at live betting after the first round if Santos survives.
The MMA Guru picks Thiago Santos, despite rooting for Johnny Walker. He notes Santos' check hook is his best weapon and Walker leaves himself open when rushing in. Walker has been KO'd in most of his losses by rushing in. Santos has five-round experience and still has power. He predicts Santos will catch Walker with a check hook and finish him by KO.
Totals
| Fighter | KD | Sig. Str. | Sig. Str. % | Total Str. | TD | TD % | Sub. Att | Rev. | Ctrl |
|---|---|---|---|---|---|---|---|---|---|
| Aleksandar Rakić | 0 | 49 of 97 | 50% | 61 of 109 | 0 of 1 | 0% | 0 | 0 | 0:00 |
| Thiago Santos | 0 | 36 of 89 | 40% | 50 of 103 | 0 of 2 | 0% | 0 | 0 | 2:32 |
Per Round
| Rd | Fighter | KD | Sig. Str. | Sig. Str. % | Total Str. | TD | TD % | Sub. Att | Rev. | Ctrl |
|---|---|---|---|---|---|---|---|---|---|---|
| 1 | Aleksandar Rakić | 0 | 15 of 27 | 55% | 15 of 27 | 0 of 0 | --- | 0 | 0 | 0:00 |
| Thiago Santos | 0 | 14 of 30 | 46% | 14 of 30 | 0 of 0 | --- | 0 | 0 | 0:00 | |
| 2 | Aleksandar Rakić | 0 | 11 of 31 | 35% | 18 of 38 | 0 of 0 | --- | 0 | 0 | 0:00 |
| Thiago Santos | 0 | 15 of 35 | 42% | 24 of 44 | 0 of 0 | --- | 0 | 0 | 1:11 | |
| 3 | Aleksandar Rakić | 0 | 23 of 39 | 58% | 28 of 44 | 0 of 1 | 0% | 0 | 0 | 0:00 |
| Thiago Santos | 0 | 7 of 24 | 29% | 12 of 29 | 0 of 2 | 0% | 0 | 0 | 1:21 |
Significant Strikes
| Fighter | Sig. Str. | Sig. Str. % | Head | Body | Leg | Distance | Clinch | Ground |
|---|---|---|---|---|---|---|---|---|
| Aleksandar Rakić | 49 of 97 | 50% | 10 of 41 | 23 of 33 | 16 of 23 | 35 of 82 | 14 of 15 | 0 of 0 |
| Thiago Santos | 36 of 89 | 40% | 8 of 47 | 13 of 16 | 15 of 26 | 29 of 82 | 7 of 7 | 0 of 0 |
Significant Strikes Per Round
| Rd | Fighter | Sig. Str. | Sig. Str. % | Head | Body | Leg | Distance | Clinch | Ground |
|---|---|---|---|---|---|---|---|---|---|
| 1 | Aleksandar Rakić | 15 of 27 | 55% | 1 of 8 | 8 of 11 | 6 of 8 | 15 of 27 | 0 of 0 | 0 of 0 |
| Thiago Santos | 14 of 30 | 46% | 3 of 16 | 3 of 4 | 8 of 10 | 14 of 30 | 0 of 0 | 0 of 0 | |
| 2 | Aleksandar Rakić | 11 of 31 | 35% | 3 of 16 | 6 of 10 | 2 of 5 | 5 of 25 | 6 of 6 | 0 of 0 |
| Thiago Santos | 15 of 35 | 42% | 3 of 17 | 8 of 9 | 4 of 9 | 8 of 28 | 7 of 7 | 0 of 0 | |
| 3 | Aleksandar Rakić | 23 of 39 | 58% | 6 of 17 | 9 of 12 | 8 of 10 | 15 of 30 | 8 of 9 | 0 of 0 |
| Thiago Santos | 7 of 24 | 29% | 2 of 14 | 2 of 3 | 3 of 7 | 7 of 24 | 0 of 0 | 0 of 0 |
Play-by-Play
View on SherdogRound 1
Officially the heaviest bout of the night at a solid 412 pounds, two light heavyweights who vastly prefer the knockout come to blows in the main card opener. Brazil’s Santos (21-8, 13-7 UFC) will be attempting to get back to title contention and defuse “Rocket” Rakic (13-2, 5-1 UFC) on the way back up. Keeping his head on a swivel will be referee Herb Dean, as fists and feet will soon be flying in all directions following the glove touch. Rakic slowly and patiently advances, sticking out his jab early and avoiding a counter right hook. Santos pushes out a front kick and lifts his leg to avoid a leg kick, and rushes in to attack. Rakic deflects the strikes and he takes a kick to the knee, but there is no major damage done. Both men score leg kicks, and Santos winds up on a big left hand. Rakic is able to avoid the bomb and throw a kick back, and Santos returns fire with one of his own. Rakic slings a head kick that the Brazilian is barely able to block in time. Santos delivers a big body kick and has one glance off his torso as he backs away. Santos once more scores a heavy body kick, and he takes a kick square on the knee that nearly makes it buckle. “Marreta” throws a hammer of a right hand that crashes into Rakic’s jaw, but the Austrian wears it well and kicks the leg on his way out. Rakic pressures forward and slaps a leg kick off the mark, and Santos replies with a kick. Santos swings with a massive left hand, and when it misses, he barely ducks a head kick that brushes past his cleanly shaven head. Santos whiffs on a massive punch to the body, but he does kick the body to make Rakic exhale sharply. Neither man is willing to pull the trigger on anything of note, and they trade leg kicks and body kicks. Santos jumps and misses with a flying knee, and the round ends.
Sherdog Scores
Jay Pettry scores the round: 10-9 Rakic
Brian Knapp scores the round: 10-9 Rakic
Tristen Critchfield scores the round: 10-9 Rakic
Round 2
The light heavyweights touch gloves, and Rakic resumes his pressure to make Santos back away to the fence. Rakic sticks Santos with a low kick and a jab, and the Brazilian tries and fails to counter effectively. Santos comes up short on a superman punch, and he looses a head kick that Rakic easily blocks. Rakic slowly advances and throws a long left jab and a leg kick that makes Santos turn about. Santos responds with his own leg kick, but the two are largely throwing single strikes and not engaging often. Rakic chops at the leg, and Santos charges at him but hits air as he has his lead leg hacked at once more. Santos pushes into a clinch, and Rakic easily reverses him and lands a few knees on the inside. The Brazilian gives him a few back, as they stall out against the cage wall. Santos breaks and scores on the end of a left hook, and when he backs off, he checks a kick to make Rakic recoil it sharply. Rakic kicks the chest, and Santos gives Rakic a heavy reply with a slapping kick to the knee. Santos charges but pulls back before throwing a strike, and Rakic plants his left hand on the chin to no effect. Santos jumps in with a switch kick, but it gets blocked and he is countered with a stiff left hand. Rakic nails Santos with a flying knee, and the two clinch up to end the slow round.
Sherdog Scores
Jay Pettry scores the round: 10-9 Rakic
Brian Knapp scores the round: 10-9 Rakic
Tristen Critchfield scores the round: 10-9 Rakic
Round 3
There is a final glove touch to open the last round, and Rakic starts things off with a head kick that is easily blocked. Santos punches the thigh, and “Rocket” starts rocketing out several stiff jabs to keep Santos at bay. The Brazilian walks through them to charge in for a takedown, and Rakic stuffs it without breaking a sweat and turns Santos around into the wire. Santos fights out of the clinch but cannot land any of merit on the break, and he takes a jab to score a leg kick. Both men kick at one another’s knee, and Santos kicks the leg once more to draw a smile from his opponent. When Rakic rushes in, Santos belts him with a spinning back kick to the body, and Rakic keeps a solid poker face by not showing that it hurt. Rakic pokes and prods at Santos with a few jabs, one-twos and low kicks. Santos loads up on a head kick, and Rakic sees it coming and pays it no mind. Santos narrowly misses a blazing fast left hook, and Rakic tries to fire one back but also comes up short. Santos slams his shin into the body, and Rakic stays patient on the outside with sporadic jabs. The jab does enough to slow an advancing Santos, and Rakic makes Santos bounce off the cage wall with a kick. Rakic ducks an overhand left to shoot in for a takedown, and Santos defends with several elbows to the side of the head. Rakic does not like these strikes, and he bails on the attempt to put himself in a better position away from those damaging shots. Rakic grinds on Santos against the fence, mashing his man into the chain-link as precious seconds tick off the clock. The Brazilian finally pushes off, and he takes a hard leg kick on the inside. Santos comes back with one, and the two swing and miss until the tepid fight mercifully comes to a close.
Sherdog Scores
Jay Pettry scores the round: 10-9 Santos (29-28 Rakic)
Brian Knapp scores the round: 10-9 Santos (29-28 Rakic)
Tristen Critchfield scores the round: 10-9 Santos (29-28 Rakic)
The Official Result
Aleksandar Rakic def. Thiago Santos via Unanimous Decision (29-28, 29-28, 30-27)
Big Brady picks Aleksandar Rakić, favoring him on the feet and heavily on the ground. He notes Rakić has been dropped before (by Devin Clark) and is hittable, while Santos has one-shot power. He recommends a ground game plan and predicts a TKO ground-and-pound finish in the second round, but passes on betting.
Daniel picks Aleksandar Rakić to win, citing his well-rounded game, wrestling, and smart game planning. He notes Santos' submission defense issues and believes Rakić can mix in takedowns and possibly finish on the mat or win a decision.
Rakić is younger, stronger, and has a wrestling advantage. Santos is 37 with knee injuries and poor jiu-jitsu off his back. The host expects Rakić to use his kicks and takedowns to control the fight and win by decision.
The MMA Guru picks Aleksandar Rakić over Thiago Santos. He highlights Rakić's dangerous leg kicks and improved grappling, and notes Santos has no ligaments in his legs. He believes Rakić will chop at Santos's legs, inhibit his movement, and win by 30-27 unanimous decision, possibly mixing in takedowns.
Totals
| Fighter | KD | Sig. Str. | Sig. Str. % | Total Str. | TD | TD % | Sub. Att | Rev. | Ctrl |
|---|---|---|---|---|---|---|---|---|---|
| Glover Teixeira | 1 | 40 of 64 | 62% | 81 of 109 | 0 of 0 | --- | 0 | 0 | 1:18 |
| Thiago Santos | 0 | 46 of 63 | 73% | 148 of 180 | 4 of 7 | 57% | 2 | 0 | 9:03 |
Per Round
| Rd | Fighter | KD | Sig. Str. | Sig. Str. % | Total Str. | TD | TD % | Sub. Att | Rev. | Ctrl |
|---|---|---|---|---|---|---|---|---|---|---|
| 1 | Glover Teixeira | 0 | 15 of 24 | 62% | 40 of 52 | 0 of 0 | --- | 0 | 0 | 0:04 |
| Thiago Santos | 0 | 20 of 27 | 74% | 77 of 87 | 2 of 4 | 50% | 0 | 0 | 4:02 | |
| 2 | Glover Teixeira | 0 | 3 of 7 | 42% | 9 of 14 | 0 of 0 | --- | 0 | 0 | 0:00 |
| Thiago Santos | 0 | 22 of 31 | 70% | 58 of 78 | 1 of 1 | 100% | 1 | 0 | 4:39 | |
| 3 | Glover Teixeira | 1 | 22 of 33 | 66% | 32 of 43 | 0 of 0 | --- | 0 | 0 | 1:14 |
| Thiago Santos | 0 | 4 of 5 | 80% | 13 of 15 | 1 of 2 | 50% | 1 | 0 | 0:22 |
Significant Strikes
| Fighter | Sig. Str. | Sig. Str. % | Head | Body | Leg | Distance | Clinch | Ground |
|---|---|---|---|---|---|---|---|---|
| Glover Teixeira | 40 of 64 | 62% | 38 of 58 | 0 of 4 | 2 of 2 | 11 of 24 | 0 of 0 | 29 of 40 |
| Thiago Santos | 46 of 63 | 73% | 46 of 63 | 0 of 0 | 0 of 0 | 2 of 5 | 0 of 0 | 44 of 58 |
Significant Strikes Per Round
| Rd | Fighter | Sig. Str. | Sig. Str. % | Head | Body | Leg | Distance | Clinch | Ground |
|---|---|---|---|---|---|---|---|---|---|
| 1 | Glover Teixeira | 15 of 24 | 62% | 15 of 23 | 0 of 1 | 0 of 0 | 8 of 16 | 0 of 0 | 7 of 8 |
| Thiago Santos | 20 of 27 | 74% | 20 of 27 | 0 of 0 | 0 of 0 | 1 of 3 | 0 of 0 | 19 of 24 | |
| 2 | Glover Teixeira | 3 of 7 | 42% | 1 of 3 | 0 of 2 | 2 of 2 | 2 of 6 | 0 of 0 | 1 of 1 |
| Thiago Santos | 22 of 31 | 70% | 22 of 31 | 0 of 0 | 0 of 0 | 1 of 1 | 0 of 0 | 21 of 30 | |
| 3 | Glover Teixeira | 22 of 33 | 66% | 22 of 32 | 0 of 1 | 0 of 0 | 1 of 2 | 0 of 0 | 21 of 31 |
| Thiago Santos | 4 of 5 | 80% | 4 of 5 | 0 of 0 | 0 of 0 | 0 of 1 | 0 of 0 | 4 of 4 |
Big Brady picks Teixeira as an underdog, citing Santos' injury layoff and questionable losses. He thinks Teixeira has more paths to victory, including takedowns and submissions. He notes Teixeira's recent form and improved conditioning.
Daniel Levi leans toward Glover Teixeira as a betting pick, despite acknowledging Thiago Santos should be the favorite. He believes Teixeira's ground game is a huge edge; if he gets Santos down, the fight is likely over via submission. Levi notes that Santos is explosive and powerful on the feet, and Teixeira has been wobbled before, but he thinks Teixeira can take him down and submit him. He calls it a 'dog or pass' situation and picks Teixeira at plus money.
The host is very confident in Glover Teixeira at plus money, citing Thiago Santos coming off a severe ACL injury and a 16-month layoff. He believes Glover's durability, top pressure, and jiu-jitsu will be too much, especially in a five-round fight where Glover can drown Santos. He notes that Santos is not a one-punch knockout artist and that Glover has only been finished once in 3.5 years. He plans to wait for a better line, expecting it to reach +200.
The MMA Guru picks Thiago Santos to win by first-round TKO. He believes Santos is too dangerous in the first round and Teixeira has a habit of getting cracked early. He notes Santos's power and cardio, and that Teixeira cannot afford to take the same shots he took against lesser opponents.
Totals
| Fighter | KD | Sig. Str. | Sig. Str. % | Total Str. | TD | TD % | Sub. Att | Rev. | Ctrl |
|---|---|---|---|---|---|---|---|---|---|
| Jon Jones | 0 | 59 of 90 | 65% | 59 of 90 | 0 of 1 | 0% | 0 | 0 | 0:00 |
| Thiago Santos | 0 | 43 of 166 | 25% | 43 of 166 | 0 of 0 | --- | 0 | 0 | 0:00 |
Per Round
| Rd | Fighter | KD | Sig. Str. | Sig. Str. % | Total Str. | TD | TD % | Sub. Att | Rev. | Ctrl |
|---|---|---|---|---|---|---|---|---|---|---|
| 1 | Jon Jones | 0 | 7 of 16 | 43% | 7 of 16 | 0 of 1 | 0% | 0 | 0 | 0:00 |
| Thiago Santos | 0 | 11 of 26 | 42% | 11 of 26 | 0 of 0 | --- | 0 | 0 | 0:00 | |
| 2 | Jon Jones | 0 | 11 of 17 | 64% | 11 of 17 | 0 of 0 | --- | 0 | 0 | 0:00 |
| Thiago Santos | 0 | 7 of 42 | 16% | 7 of 42 | 0 of 0 | --- | 0 | 0 | 0:00 | |
| 3 | Jon Jones | 0 | 14 of 19 | 73% | 14 of 19 | 0 of 0 | --- | 0 | 0 | 0:00 |
| Thiago Santos | 0 | 6 of 33 | 18% | 6 of 33 | 0 of 0 | --- | 0 | 0 | 0:00 | |
| 4 | Jon Jones | 0 | 11 of 17 | 64% | 11 of 17 | 0 of 0 | --- | 0 | 0 | 0:00 |
| Thiago Santos | 0 | 8 of 28 | 28% | 8 of 28 | 0 of 0 | --- | 0 | 0 | 0:00 | |
| 5 | Jon Jones | 0 | 16 of 21 | 76% | 16 of 21 | 0 of 0 | --- | 0 | 0 | 0:00 |
| Thiago Santos | 0 | 11 of 37 | 29% | 11 of 37 | 0 of 0 | --- | 0 | 0 | 0:00 |
Significant Strikes
| Fighter | Sig. Str. | Sig. Str. % | Head | Body | Leg | Distance | Clinch | Ground |
|---|---|---|---|---|---|---|---|---|
| Jon Jones | 59 of 90 | 65% | 11 of 32 | 16 of 19 | 32 of 39 | 55 of 84 | 4 of 6 | 0 of 0 |
| Thiago Santos | 43 of 166 | 25% | 9 of 92 | 7 of 21 | 27 of 53 | 42 of 159 | 1 of 7 | 0 of 0 |
Significant Strikes Per Round
| Rd | Fighter | Sig. Str. | Sig. Str. % | Head | Body | Leg | Distance | Clinch | Ground |
|---|---|---|---|---|---|---|---|---|---|
| 1 | Jon Jones | 7 of 16 | 43% | 0 of 4 | 3 of 5 | 4 of 7 | 7 of 16 | 0 of 0 | 0 of 0 |
| Thiago Santos | 11 of 26 | 42% | 3 of 12 | 1 of 1 | 7 of 13 | 11 of 26 | 0 of 0 | 0 of 0 | |
| 2 | Jon Jones | 11 of 17 | 64% | 2 of 7 | 4 of 4 | 5 of 6 | 10 of 15 | 1 of 2 | 0 of 0 |
| Thiago Santos | 7 of 42 | 16% | 1 of 25 | 2 of 6 | 4 of 11 | 6 of 38 | 1 of 4 | 0 of 0 | |
| 3 | Jon Jones | 14 of 19 | 73% | 4 of 7 | 4 of 4 | 6 of 8 | 11 of 15 | 3 of 4 | 0 of 0 |
| Thiago Santos | 6 of 33 | 18% | 1 of 17 | 1 of 6 | 4 of 10 | 6 of 30 | 0 of 3 | 0 of 0 | |
| 4 | Jon Jones | 11 of 17 | 64% | 2 of 7 | 2 of 3 | 7 of 7 | 11 of 17 | 0 of 0 | 0 of 0 |
| Thiago Santos | 8 of 28 | 28% | 0 of 13 | 1 of 5 | 7 of 10 | 8 of 28 | 0 of 0 | 0 of 0 | |
| 5 | Jon Jones | 16 of 21 | 76% | 3 of 7 | 3 of 3 | 10 of 11 | 16 of 21 | 0 of 0 | 0 of 0 |
| Thiago Santos | 11 of 37 | 29% | 4 of 25 | 2 of 3 | 5 of 9 | 11 of 37 | 0 of 0 | 0 of 0 |
Totals
| Fighter | KD | Sig. Str. | Sig. Str. % | Total Str. | TD | TD % | Sub. Att | Rev. | Ctrl |
|---|---|---|---|---|---|---|---|---|---|
| Thiago Santos | 0 | 20 of 53 | 37% | 20 of 53 | 0 of 1 | 0% | 0 | 0 | 0:05 |
| Jan Błachowicz | 1 | 52 of 104 | 50% | 52 of 104 | 1 of 1 | 100% | 0 | 0 | 0:08 |
Per Round
| Rd | Fighter | KD | Sig. Str. | Sig. Str. % | Total Str. | TD | TD % | Sub. Att | Rev. | Ctrl |
|---|---|---|---|---|---|---|---|---|---|---|
| 1 | Thiago Santos | 0 | 7 of 27 | 25% | 7 of 27 | 0 of 1 | 0% | 0 | 0 | 0:05 |
| Jan Błachowicz | 0 | 22 of 44 | 50% | 22 of 44 | 0 of 0 | --- | 0 | 0 | 0:00 | |
| 2 | Thiago Santos | 0 | 12 of 23 | 52% | 12 of 23 | 0 of 0 | --- | 0 | 0 | 0:00 |
| Jan Błachowicz | 0 | 13 of 34 | 38% | 13 of 34 | 0 of 0 | --- | 0 | 0 | 0:00 | |
| 3 | Thiago Santos | 0 | 1 of 3 | 33% | 1 of 3 | 0 of 0 | --- | 0 | 0 | 0:00 |
| Jan Błachowicz | 1 | 17 of 26 | 65% | 17 of 26 | 1 of 1 | 100% | 0 | 0 | 0:08 |
Significant Strikes
| Fighter | Sig. Str. | Sig. Str. % | Head | Body | Leg | Distance | Clinch | Ground |
|---|---|---|---|---|---|---|---|---|
| Thiago Santos | 20 of 53 | 37% | 7 of 31 | 6 of 12 | 7 of 10 | 19 of 51 | 1 of 2 | 0 of 0 |
| Jan Błachowicz | 52 of 104 | 50% | 21 of 58 | 5 of 10 | 26 of 36 | 38 of 82 | 1 of 1 | 13 of 21 |
Significant Strikes Per Round
| Rd | Fighter | Sig. Str. | Sig. Str. % | Head | Body | Leg | Distance | Clinch | Ground |
|---|---|---|---|---|---|---|---|---|---|
| 1 | Thiago Santos | 7 of 27 | 25% | 3 of 16 | 2 of 7 | 2 of 4 | 6 of 25 | 1 of 2 | 0 of 0 |
| Jan Błachowicz | 22 of 44 | 50% | 4 of 19 | 4 of 7 | 14 of 18 | 21 of 43 | 1 of 1 | 0 of 0 | |
| 2 | Thiago Santos | 12 of 23 | 52% | 3 of 12 | 4 of 5 | 5 of 6 | 12 of 23 | 0 of 0 | 0 of 0 |
| Jan Błachowicz | 13 of 34 | 38% | 2 of 16 | 1 of 3 | 10 of 15 | 13 of 34 | 0 of 0 | 0 of 0 | |
| 3 | Thiago Santos | 1 of 3 | 33% | 1 of 3 | 0 of 0 | 0 of 0 | 1 of 3 | 0 of 0 | 0 of 0 |
| Jan Błachowicz | 17 of 26 | 65% | 15 of 23 | 0 of 0 | 2 of 3 | 4 of 5 | 0 of 0 | 13 of 21 |
Play-by-Play
View on SherdogRound 1
We’ve finally arrived at the main event, a five-round fight between top light heavyweight contenders Jan Blachowicz and Thiago Santos. Herb Dean is the referee for this main event. They touch gloves. Santos with a body kick. Blachowicz lands a beautiful jab. Blachowicz just misses a high kick, but he lands a body kick for good measure. They exchange heavy low kicks. Blachowicz lands another jab and Santos returns with a low kick. Blachowicz lands a heavy low kick of his own. Santos returns a low kick now. Blachowicz lands a jab but Santos returns with a heavy counter right cross. Blachowicz lands another low kick. Santos lands a heavy left hook but Blachowicz eats it. Santos lands a low kick but Blachowicz catches the kick and nearly lands a double leg takedown. Santos stuffs it and they break. They exchange low kicks and the round is over.
Sherdog Scores
Adam Martin scores the round: 10-9 Blachowicz
John Brannigan scores the round: 10-9 Santos
Tyler Treese scores the round: 10-9 Santos
Round 2
Round two starts. Blachowicz lands a low kick, and then a body kick. They continue to exchange low kicks. Santos moves in for a clubbing left hand but Blachowicz moves away. Blachowicz lands a nice body kick, and then a hard low kick. Blachowicz lands an overhand right and then follows it up with a kick to the body. Santos with a low kick. He just misses a spinning wheel kick as Blachowicz circles away. Blachowicz leads with the uppercut but Santos circles away from danger. Blachowicz with the jab and Santos returns fire with a low kick. Blachowicz lands a low kick of his own. Santos just misses landing a huge left hook. Blachowicz lands another low kick. Santos nearly lands a straight left but Blachowicz backs away. The 10-second clapper rings and the round is soon over.
Sherdog Scores
Adam Martin scores the round: 10-9 Santos
John Brannigan scores the round: 10-9 Blachowicz
Tyler Treese scores the round: 10-9 Santos
Round 3
Time for the third round. Santos starts off with a low kick.
Blachowicz charges in with his chin down and Santos lands a right hook and then a brutal left hook that drops him. Blachowicz is down on the mat and Santos is pounding away at the head of Blachowicz, who is trying his best to cover up. Santos keeps pounding away and the referee has seen enough and the fight is over
. Huge win for Santos.
The Official Result
Thiago Santos def. Jan Blachowicz via TKO (Punches) R3, 0:39
Totals
| Fighter | KD | Sig. Str. | Sig. Str. % | Total Str. | TD | TD % | Sub. Att | Rev. | Ctrl |
|---|---|---|---|---|---|---|---|---|---|
| Thiago Santos | 0 | 27 of 42 | 64% | 30 of 45 | 0 of 2 | 0% | 0 | 0 | 2:25 |
| Jimi Manuwa | 2 | 42 of 74 | 56% | 65 of 97 | 1 of 3 | 33% | 0 | 0 | 1:19 |
Per Round
| Rd | Fighter | KD | Sig. Str. | Sig. Str. % | Total Str. | TD | TD % | Sub. Att | Rev. | Ctrl |
|---|---|---|---|---|---|---|---|---|---|---|
| 1 | Thiago Santos | 0 | 26 of 36 | 72% | 29 of 39 | 0 of 1 | 0% | 0 | 0 | 2:23 |
| Jimi Manuwa | 1 | 33 of 55 | 60% | 55 of 77 | 1 of 3 | 33% | 0 | 0 | 1:16 | |
| 2 | Thiago Santos | 0 | 1 of 6 | 16% | 1 of 6 | 0 of 1 | 0% | 0 | 0 | 0:02 |
| Jimi Manuwa | 1 | 9 of 19 | 47% | 10 of 20 | 0 of 0 | --- | 0 | 0 | 0:03 |
Significant Strikes
| Fighter | Sig. Str. | Sig. Str. % | Head | Body | Leg | Distance | Clinch | Ground |
|---|---|---|---|---|---|---|---|---|
| Thiago Santos | 27 of 42 | 64% | 15 of 30 | 12 of 12 | 0 of 0 | 8 of 20 | 17 of 19 | 2 of 3 |
| Jimi Manuwa | 42 of 74 | 56% | 27 of 58 | 13 of 14 | 2 of 2 | 20 of 45 | 22 of 28 | 0 of 1 |
Significant Strikes Per Round
| Rd | Fighter | Sig. Str. | Sig. Str. % | Head | Body | Leg | Distance | Clinch | Ground |
|---|---|---|---|---|---|---|---|---|---|
| 1 | Thiago Santos | 26 of 36 | 72% | 15 of 25 | 11 of 11 | 0 of 0 | 7 of 15 | 17 of 18 | 2 of 3 |
| Jimi Manuwa | 33 of 55 | 60% | 20 of 41 | 11 of 12 | 2 of 2 | 15 of 32 | 18 of 22 | 0 of 1 | |
| 2 | Thiago Santos | 1 of 6 | 16% | 0 of 5 | 1 of 1 | 0 of 0 | 1 of 5 | 0 of 1 | 0 of 0 |
| Jimi Manuwa | 9 of 19 | 47% | 7 of 17 | 2 of 2 | 0 of 0 | 5 of 13 | 4 of 6 | 0 of 0 |
Jack Marshman - Fight History
Totals
| Fighter | KD | Sig. Str. | Sig. Str. % | Total Str. | TD | TD % | Sub. Att | Rev. | Ctrl |
|---|---|---|---|---|---|---|---|---|---|
| Sean Strickland | 0 | 106 of 227 | 46% | 106 of 227 | 0 of 0 | --- | 0 | 0 | 0:00 |
| Jack Marshman | 0 | 48 of 252 | 19% | 48 of 252 | 0 of 0 | --- | 0 | 0 | 0:00 |
Per Round
| Rd | Fighter | KD | Sig. Str. | Sig. Str. % | Total Str. | TD | TD % | Sub. Att | Rev. | Ctrl |
|---|---|---|---|---|---|---|---|---|---|---|
| 1 | Sean Strickland | 0 | 39 of 84 | 46% | 39 of 84 | 0 of 0 | --- | 0 | 0 | 0:00 |
| Jack Marshman | 0 | 20 of 81 | 24% | 20 of 81 | 0 of 0 | --- | 0 | 0 | 0:00 | |
| 2 | Sean Strickland | 0 | 27 of 60 | 45% | 27 of 60 | 0 of 0 | --- | 0 | 0 | 0:00 |
| Jack Marshman | 0 | 10 of 69 | 14% | 10 of 69 | 0 of 0 | --- | 0 | 0 | 0:00 | |
| 3 | Sean Strickland | 0 | 40 of 83 | 48% | 40 of 83 | 0 of 0 | --- | 0 | 0 | 0:00 |
| Jack Marshman | 0 | 18 of 102 | 17% | 18 of 102 | 0 of 0 | --- | 0 | 0 | 0:00 |
Significant Strikes
| Fighter | Sig. Str. | Sig. Str. % | Head | Body | Leg | Distance | Clinch | Ground |
|---|---|---|---|---|---|---|---|---|
| Sean Strickland | 106 of 227 | 46% | 88 of 203 | 15 of 21 | 3 of 3 | 106 of 227 | 0 of 0 | 0 of 0 |
| Jack Marshman | 48 of 252 | 19% | 19 of 176 | 18 of 59 | 11 of 17 | 48 of 252 | 0 of 0 | 0 of 0 |
Significant Strikes Per Round
| Rd | Fighter | Sig. Str. | Sig. Str. % | Head | Body | Leg | Distance | Clinch | Ground |
|---|---|---|---|---|---|---|---|---|---|
| 1 | Sean Strickland | 39 of 84 | 46% | 29 of 72 | 7 of 9 | 3 of 3 | 39 of 84 | 0 of 0 | 0 of 0 |
| Jack Marshman | 20 of 81 | 24% | 7 of 59 | 5 of 13 | 8 of 9 | 20 of 81 | 0 of 0 | 0 of 0 | |
| 2 | Sean Strickland | 27 of 60 | 45% | 22 of 52 | 5 of 8 | 0 of 0 | 27 of 60 | 0 of 0 | 0 of 0 |
| Jack Marshman | 10 of 69 | 14% | 4 of 43 | 5 of 21 | 1 of 5 | 10 of 69 | 0 of 0 | 0 of 0 | |
| 3 | Sean Strickland | 40 of 83 | 48% | 37 of 79 | 3 of 4 | 0 of 0 | 40 of 83 | 0 of 0 | 0 of 0 |
| Jack Marshman | 18 of 102 | 17% | 8 of 74 | 8 of 25 | 2 of 3 | 18 of 102 | 0 of 0 | 0 of 0 |
Play-by-Play
View on SherdogRound 1
Returning from a major motorcycle accident that kept him out of action for just over two years, Strickland (20-3, 7-3 UFC) makes his return to the promotion against hard-hitting Welshman Marshman (23-9, 3-4 UFC). Drawing the assignment for this catchweight bout – Marshman eclipsed the 186-pound limit by a pound and a half – is referee Keith Peterson, who will tolerate no nonsense in the cage tonight. They touch gloves, and Marshman throws out a leg kick to start things off. Strickland walks the Welshman down, and starts landing a series of one-twos to get Marshman to retreat. Marshman returns fire with a leg kick and an overhand right, but Strickland completely ignores it as he plods forward. Strickland slaps at the lead leg of his opponent, and he reaches in with a left hand and ducks back to avoid the looping shot from the Welshman. Marshman gets jabbed in the face, and Strickland follows it with a crisp one-two. Marshman tries to bomb him with some big shots, and Strickland rolls with then and fires back. Strickland checks a leg kick, and he starts to work a long left jab. Marshman commits to power strikes, but none are landing flush as Strickland’s are straighter and quicker in and out. Strickland sticks him with a right hand, and Marshman nearly gives him one back but it does not have full steam on it. Strickland gets off a right hand, and then a one-two makes Marshman back off to gather his thoughts. Strickland nails him with a leg kick, and Marshman responds with one of his own but he takes a jab at the end of it. Strickland marches forward with long strikes, unconcerned with Marshman’s wide shots. Strickland checks another leg kick, and he makes Marshman reach at him by staying just the end of his punches. A jab to a right hand stings Marshman, and Strickland follows it with a lengthy combination that pins Marshman to the cage. The Welshman defends himself but eats a plethora of shots, and he circles away as he cannot put strikes to get to get Strickland off of him. Marshman paws with a leg kick, and Strickland boots him in the chest. When Strickland puts his leg down, Marshman clocks him with a huge right hook, stunning “Tarzan” with his biggest shot of the round. Strickland gathers his thoughts and walks his man down until the horn ends the round.
Sherdog Scores
Jay Pettry scores the round: 10-9 Strickland
Tristen Critchfield scores the round: 10-9 Strickland
Tyler Treese scores the round: 10-9 Strickland
Round 2
The two middleweights touch gloves, and Strickland starts off where he left off by putting Marshman on his back foot with long punches. Strickland clicks a left hand off the brow, and Marshman starts to follow the work of his opponent by reaching out with a few long left hands to the head and body. Marshman targets the body again, and he flicks out a jab. Strickland uses a double jab to pop Marshman on the chops, and a right hand comes around to catch Marshman on the jaw. Strickland disrupts Marshman’s winging shots with jabs, and occasionally he will reach with his right after landing the left for a very effective one-two that bloodies up the Welshman. Strickland’s accuracy is sky high as he is working Marshman over with his jab and sporadic kicks, and Marshman makes him pay with a combination by ripping the body with a left hand. Marshman jabs to the body a few times, and Strickland cracks him with a few stiff left hands that make Marshman try to shake it out. The Welshman gets his bearings about him, and when he swings and misses, Strickland nails him with another one-two. Strickland blocks a few jabs to the midsection and tattoos Marshman’s face with his own jabs, and they are starting to damage the nose as Marshman begins to check it. Marshman swings and misses with a leg kick, and Strickland is loose and sticks and moves him. Marshman is active trying to line up a big right hand, but Strickland dances out of the way. The two come together to land a few heavy shots, and Marshman is winding up with a right hand but is just out of range. Two left hands from Marshman find their mark, and Strickland pushes him off with a front kick. He pushes out another to the torso, and a right hand breaks up the leaping flurry from Marshman as the round ends.
Sherdog Scores
Jay Pettry scores the round: 10-9 Strickland
Tristen Critchfield scores the round: 10-9 Strickland
Tyler Treese scores the round: 10-9 Strickland
Round 3
One final glove touch checks in the last round, and Strickland races forward as he flicks out a few jabs and a right hand that folds the nose of his opponent. Marshman double jabs his way in to the body, and he tries again but Strickland sees it coming and paws it away. Marshman goes after the same combination, and Strickland laughs at him and tells him to stand in the center of the cage and fight. Marshman obliges, and the two start trading wildly in a brawl. Strickland is able to get the better of the exchanges by being quicker to the punch, but a few Marshman shots have marked up Strickland’s face. Marshman swings and misses, and Strickland goads him on by saying “Come on, Jack.” Both men start trading heavy leather, and Strickland is telling Marshman to throw with “full power.” Marshman tries to unload with heavy shots, but Strickland sticks him with a right hand and evades the follow-up. Strickland nails Marshman with some huge punches, and he shouts “Why won’t you fall?” Strickland keeps landing virtually at-will, and Marshman stands right in front of him and slugs right back. Strickland clips him with a right hand, and Marshman’s wobble. Strickland is fired up and telling Marshman to give it everything he has, and he cracks Marshman in the head. Marshman stands strong and Strickland tells him to fall down, but instead Marshman races in with a few punches. The Welshman puts together a chain of punches, and Strickland dodges most of them but a few get in. Strickland tells Marshman that he will give him a chance to win, if Marshman goes hard. They stand in front of each other and start brawling recklessly and wildly, and Strickland spins with a back kick. The two trade and land, all while Strickland urges Marshman to empty his gas tank in one final slugfest. They swing right to the final bell, and then embrace after a hard-fought but tactical battle.
Sherdog Scores
Jay Pettry scores the round: 10-9 Strickland (30-27 Strickland)
Tristen Critchfield scores the round: 10-9 Strickland (30-27 Strickland)
Tyler Treese scores the round: 10-9 Strickland (30-27 Strickland)
The Official Result
Sean Strickland def. Jack Marshman via Unanimous Decision (30-27, 30-27. 30-27)
Big Brady sees Strickland as the much more technical striker with multiple paths to victory. He notes Marshman's low output and poor accuracy, and believes Strickland can win on the feet or via submission. He predicts a dominant decision win, possibly 30-27.
Strickland is a much better all-around fighter with superior striking and range management. Marshman is a one-dimensional brawler who can be faded. Strickland should see everything coming and win by decision, though a submission is possible.
The MMA Guru is very confident in Sean Strickland, calling Jack Marshman 'somewhat complete trash' and noting that Marshman has lost to good fighters and taken too much damage. He believes Strickland will get the job done easily at middleweight.
Totals
| Fighter | KD | Sig. Str. | Sig. Str. % | Total Str. | TD | TD % | Sub. Att | Rev. | Ctrl |
|---|---|---|---|---|---|---|---|---|---|
| Edmen Shahbazyan | 0 | 13 of 24 | 54% | 13 of 24 | 1 of 1 | 100% | 1 | 0 | 0:33 |
| Jack Marshman | 0 | 0 of 7 | 0% | 0 of 7 | 0 of 0 | --- | 0 | 0 | 0:00 |
Per Round
| Rd | Fighter | KD | Sig. Str. | Sig. Str. % | Total Str. | TD | TD % | Sub. Att | Rev. | Ctrl |
|---|---|---|---|---|---|---|---|---|---|---|
| 1 | Edmen Shahbazyan | 0 | 13 of 24 | 54% | 13 of 24 | 1 of 1 | 100% | 1 | 0 | 0:33 |
| Jack Marshman | 0 | 0 of 7 | 0% | 0 of 7 | 0 of 0 | --- | 0 | 0 | 0:00 |
Significant Strikes
| Fighter | Sig. Str. | Sig. Str. % | Head | Body | Leg | Distance | Clinch | Ground |
|---|---|---|---|---|---|---|---|---|
| Edmen Shahbazyan | 13 of 24 | 54% | 11 of 22 | 1 of 1 | 1 of 1 | 3 of 6 | 0 of 0 | 10 of 18 |
| Jack Marshman | 0 of 7 | 0% | 0 of 7 | 0 of 0 | 0 of 0 | 0 of 7 | 0 of 0 | 0 of 0 |
Significant Strikes Per Round
| Rd | Fighter | Sig. Str. | Sig. Str. % | Head | Body | Leg | Distance | Clinch | Ground |
|---|---|---|---|---|---|---|---|---|---|
| 1 | Edmen Shahbazyan | 13 of 24 | 54% | 11 of 22 | 1 of 1 | 1 of 1 | 3 of 6 | 0 of 0 | 10 of 18 |
| Jack Marshman | 0 of 7 | 0% | 0 of 7 | 0 of 0 | 0 of 0 | 0 of 7 | 0 of 0 | 0 of 0 |
Play-by-Play
View on SherdogRound 1
The next fight is a middleweight bout between Jack Marshman and Edmen Shahbazyan. The referee is Marc Goddard. Shahbazyan takes the center of the Octagon and lands a low kick right away. He lands a straight right. Body kick by Shahbazyan. He changes levels and shoots for a single leg takedown and completes it. Shahbazyan is landing some vicious ground and pound right now.
Shahbazyan moves into side control and then transitions to the back. He has Marshman flattened out and gets the rear-naked choke
. That was quick!
The Official Result
Edmen Shahbazyan def. Jack Marshman via Submission (Rear-Naked Choke) R1, 1:12
Totals
| Fighter | KD | Sig. Str. | Sig. Str. % | Total Str. | TD | TD % | Sub. Att | Rev. | Ctrl |
|---|---|---|---|---|---|---|---|---|---|
| Jack Marshman | 0 | 31 of 149 | 20% | 31 of 149 | 0 of 0 | --- | 0 | 0 | 0:00 |
| John Phillips | 1 | 32 of 95 | 33% | 35 of 99 | 0 of 0 | --- | 0 | 0 | 0:36 |
Per Round
| Rd | Fighter | KD | Sig. Str. | Sig. Str. % | Total Str. | TD | TD % | Sub. Att | Rev. | Ctrl |
|---|---|---|---|---|---|---|---|---|---|---|
| 1 | Jack Marshman | 0 | 11 of 31 | 35% | 11 of 31 | 0 of 0 | --- | 0 | 0 | 0:00 |
| John Phillips | 1 | 11 of 32 | 34% | 14 of 36 | 0 of 0 | --- | 0 | 0 | 0:36 | |
| 2 | Jack Marshman | 0 | 9 of 50 | 18% | 9 of 50 | 0 of 0 | --- | 0 | 0 | 0:00 |
| John Phillips | 0 | 10 of 23 | 43% | 10 of 23 | 0 of 0 | --- | 0 | 0 | 0:00 | |
| 3 | Jack Marshman | 0 | 11 of 68 | 16% | 11 of 68 | 0 of 0 | --- | 0 | 0 | 0:00 |
| John Phillips | 0 | 11 of 40 | 27% | 11 of 40 | 0 of 0 | --- | 0 | 0 | 0:00 |
Significant Strikes
| Fighter | Sig. Str. | Sig. Str. % | Head | Body | Leg | Distance | Clinch | Ground |
|---|---|---|---|---|---|---|---|---|
| Jack Marshman | 31 of 149 | 20% | 19 of 135 | 10 of 11 | 2 of 3 | 31 of 149 | 0 of 0 | 0 of 0 |
| John Phillips | 32 of 95 | 33% | 15 of 70 | 8 of 15 | 9 of 10 | 29 of 90 | 3 of 5 | 0 of 0 |
Significant Strikes Per Round
| Rd | Fighter | Sig. Str. | Sig. Str. % | Head | Body | Leg | Distance | Clinch | Ground |
|---|---|---|---|---|---|---|---|---|---|
| 1 | Jack Marshman | 11 of 31 | 35% | 8 of 28 | 2 of 2 | 1 of 1 | 11 of 31 | 0 of 0 | 0 of 0 |
| John Phillips | 11 of 32 | 34% | 3 of 18 | 4 of 10 | 4 of 4 | 9 of 28 | 2 of 4 | 0 of 0 | |
| 2 | Jack Marshman | 9 of 50 | 18% | 4 of 43 | 5 of 6 | 0 of 1 | 9 of 50 | 0 of 0 | 0 of 0 |
| John Phillips | 10 of 23 | 43% | 5 of 18 | 2 of 2 | 3 of 3 | 9 of 22 | 1 of 1 | 0 of 0 | |
| 3 | Jack Marshman | 11 of 68 | 16% | 7 of 64 | 3 of 3 | 1 of 1 | 11 of 68 | 0 of 0 | 0 of 0 |
| John Phillips | 11 of 40 | 27% | 7 of 34 | 2 of 3 | 2 of 3 | 11 of 40 | 0 of 0 | 0 of 0 |
Totals
| Fighter | KD | Sig. Str. | Sig. Str. % | Total Str. | TD | TD % | Sub. Att | Rev. | Ctrl |
|---|---|---|---|---|---|---|---|---|---|
| Karl Roberson | 0 | 34 of 71 | 47% | 90 of 135 | 2 of 3 | 66% | 0 | 0 | 5:06 |
| Jack Marshman | 0 | 21 of 98 | 21% | 30 of 108 | 0 of 0 | --- | 0 | 0 | 0:00 |
Per Round
| Rd | Fighter | KD | Sig. Str. | Sig. Str. % | Total Str. | TD | TD % | Sub. Att | Rev. | Ctrl |
|---|---|---|---|---|---|---|---|---|---|---|
| 1 | Karl Roberson | 0 | 15 of 32 | 46% | 15 of 32 | 0 of 1 | 0% | 0 | 0 | 0:18 |
| Jack Marshman | 0 | 13 of 52 | 25% | 16 of 55 | 0 of 0 | --- | 0 | 0 | 0:00 | |
| 2 | Karl Roberson | 0 | 8 of 20 | 40% | 35 of 51 | 1 of 1 | 100% | 0 | 0 | 2:15 |
| Jack Marshman | 0 | 8 of 31 | 25% | 10 of 33 | 0 of 0 | --- | 0 | 0 | 0:00 | |
| 3 | Karl Roberson | 0 | 11 of 19 | 57% | 40 of 52 | 1 of 1 | 100% | 0 | 0 | 2:33 |
| Jack Marshman | 0 | 0 of 15 | 0% | 4 of 20 | 0 of 0 | --- | 0 | 0 | 0:00 |
Significant Strikes
| Fighter | Sig. Str. | Sig. Str. % | Head | Body | Leg | Distance | Clinch | Ground |
|---|---|---|---|---|---|---|---|---|
| Karl Roberson | 34 of 71 | 47% | 24 of 58 | 6 of 8 | 4 of 5 | 24 of 57 | 5 of 7 | 5 of 7 |
| Jack Marshman | 21 of 98 | 21% | 12 of 80 | 3 of 5 | 6 of 13 | 19 of 95 | 2 of 3 | 0 of 0 |
Significant Strikes Per Round
| Rd | Fighter | Sig. Str. | Sig. Str. % | Head | Body | Leg | Distance | Clinch | Ground |
|---|---|---|---|---|---|---|---|---|---|
| 1 | Karl Roberson | 15 of 32 | 46% | 6 of 23 | 6 of 6 | 3 of 3 | 10 of 25 | 5 of 7 | 0 of 0 |
| Jack Marshman | 13 of 52 | 25% | 8 of 42 | 2 of 2 | 3 of 8 | 11 of 50 | 2 of 2 | 0 of 0 | |
| 2 | Karl Roberson | 8 of 20 | 40% | 8 of 18 | 0 of 2 | 0 of 0 | 7 of 19 | 0 of 0 | 1 of 1 |
| Jack Marshman | 8 of 31 | 25% | 4 of 25 | 1 of 3 | 3 of 3 | 8 of 30 | 0 of 1 | 0 of 0 | |
| 3 | Karl Roberson | 11 of 19 | 57% | 10 of 17 | 0 of 0 | 1 of 2 | 7 of 13 | 0 of 0 | 4 of 6 |
| Jack Marshman | 0 of 15 | 0% | 0 of 13 | 0 of 0 | 0 of 2 | 0 of 15 | 0 of 0 | 0 of 0 |
Totals
| Fighter | KD | Sig. Str. | Sig. Str. % | Total Str. | TD | TD % | Sub. Att | Rev. | Ctrl |
|---|---|---|---|---|---|---|---|---|---|
| Antônio Carlos Júnior | 0 | 11 of 27 | 40% | 35 of 51 | 1 of 1 | 100% | 1 | 0 | 3:09 |
| Jack Marshman | 0 | 1 of 15 | 6% | 4 of 18 | 0 of 0 | --- | 0 | 0 | 0:00 |
Per Round
| Rd | Fighter | KD | Sig. Str. | Sig. Str. % | Total Str. | TD | TD % | Sub. Att | Rev. | Ctrl |
|---|---|---|---|---|---|---|---|---|---|---|
| 1 | Antônio Carlos Júnior | 0 | 11 of 27 | 40% | 35 of 51 | 1 of 1 | 100% | 1 | 0 | 3:09 |
| Jack Marshman | 0 | 1 of 15 | 6% | 4 of 18 | 0 of 0 | --- | 0 | 0 | 0:00 |
Significant Strikes
| Fighter | Sig. Str. | Sig. Str. % | Head | Body | Leg | Distance | Clinch | Ground |
|---|---|---|---|---|---|---|---|---|
| Antônio Carlos Júnior | 11 of 27 | 40% | 9 of 23 | 0 of 2 | 2 of 2 | 5 of 16 | 0 of 1 | 6 of 10 |
| Jack Marshman | 1 of 15 | 6% | 0 of 13 | 1 of 1 | 0 of 1 | 1 of 15 | 0 of 0 | 0 of 0 |
Significant Strikes Per Round
| Rd | Fighter | Sig. Str. | Sig. Str. % | Head | Body | Leg | Distance | Clinch | Ground |
|---|---|---|---|---|---|---|---|---|---|
| 1 | Antônio Carlos Júnior | 11 of 27 | 40% | 9 of 23 | 0 of 2 | 2 of 2 | 5 of 16 | 0 of 1 | 6 of 10 |
| Jack Marshman | 1 of 15 | 6% | 0 of 13 | 1 of 1 | 0 of 1 | 1 of 15 | 0 of 0 | 0 of 0 |
Totals
| Fighter | KD | Sig. Str. | Sig. Str. % | Total Str. | TD | TD % | Sub. Att | Rev. | Ctrl |
|---|---|---|---|---|---|---|---|---|---|
| Jack Marshman | 0 | 75 of 217 | 34% | 83 of 225 | 0 of 0 | --- | 0 | 0 | 0:00 |
| Ryan Janes | 0 | 83 of 189 | 43% | 119 of 227 | 0 of 0 | --- | 0 | 0 | 1:44 |
Per Round
| Rd | Fighter | KD | Sig. Str. | Sig. Str. % | Total Str. | TD | TD % | Sub. Att | Rev. | Ctrl |
|---|---|---|---|---|---|---|---|---|---|---|
| 1 | Jack Marshman | 0 | 24 of 82 | 29% | 25 of 83 | 0 of 0 | --- | 0 | 0 | 0:00 |
| Ryan Janes | 0 | 25 of 56 | 44% | 27 of 58 | 0 of 0 | --- | 0 | 0 | 0:06 | |
| 2 | Jack Marshman | 0 | 23 of 66 | 34% | 29 of 72 | 0 of 0 | --- | 0 | 0 | 0:00 |
| Ryan Janes | 0 | 18 of 47 | 38% | 44 of 75 | 0 of 0 | --- | 0 | 0 | 1:30 | |
| 3 | Jack Marshman | 0 | 28 of 69 | 40% | 29 of 70 | 0 of 0 | --- | 0 | 0 | 0:00 |
| Ryan Janes | 0 | 40 of 86 | 46% | 48 of 94 | 0 of 0 | --- | 0 | 0 | 0:08 |
Significant Strikes
| Fighter | Sig. Str. | Sig. Str. % | Head | Body | Leg | Distance | Clinch | Ground |
|---|---|---|---|---|---|---|---|---|
| Jack Marshman | 75 of 217 | 34% | 55 of 178 | 11 of 29 | 9 of 10 | 73 of 214 | 2 of 3 | 0 of 0 |
| Ryan Janes | 83 of 189 | 43% | 58 of 152 | 21 of 32 | 4 of 5 | 68 of 171 | 15 of 18 | 0 of 0 |
Significant Strikes Per Round
| Rd | Fighter | Sig. Str. | Sig. Str. % | Head | Body | Leg | Distance | Clinch | Ground |
|---|---|---|---|---|---|---|---|---|---|
| 1 | Jack Marshman | 24 of 82 | 29% | 16 of 69 | 4 of 9 | 4 of 4 | 23 of 81 | 1 of 1 | 0 of 0 |
| Ryan Janes | 25 of 56 | 44% | 18 of 45 | 7 of 10 | 0 of 1 | 24 of 55 | 1 of 1 | 0 of 0 | |
| 2 | Jack Marshman | 23 of 66 | 34% | 17 of 52 | 4 of 11 | 2 of 3 | 22 of 65 | 1 of 1 | 0 of 0 |
| Ryan Janes | 18 of 47 | 38% | 9 of 35 | 8 of 11 | 1 of 1 | 11 of 40 | 7 of 7 | 0 of 0 | |
| 3 | Jack Marshman | 28 of 69 | 40% | 22 of 57 | 3 of 9 | 3 of 3 | 28 of 68 | 0 of 1 | 0 of 0 |
| Ryan Janes | 40 of 86 | 46% | 31 of 72 | 6 of 11 | 3 of 3 | 33 of 76 | 7 of 10 | 0 of 0 |
Totals
| Fighter | KD | Sig. Str. | Sig. Str. % | Total Str. | TD | TD % | Sub. Att | Rev. | Ctrl |
|---|---|---|---|---|---|---|---|---|---|
| Thiago Santos | 1 | 6 of 46 | 13% | 11 of 51 | 0 of 0 | --- | 0 | 0 | 0:03 |
| Jack Marshman | 1 | 27 of 71 | 38% | 32 of 76 | 1 of 2 | 50% | 0 | 0 | 1:40 |
Per Round
| Rd | Fighter | KD | Sig. Str. | Sig. Str. % | Total Str. | TD | TD % | Sub. Att | Rev. | Ctrl |
|---|---|---|---|---|---|---|---|---|---|---|
| 1 | Thiago Santos | 1 | 5 of 36 | 13% | 10 of 41 | 0 of 0 | --- | 0 | 0 | 0:03 |
| Jack Marshman | 0 | 16 of 44 | 36% | 21 of 49 | 1 of 2 | 50% | 0 | 0 | 1:37 | |
| 2 | Thiago Santos | 0 | 1 of 10 | 10% | 1 of 10 | 0 of 0 | --- | 0 | 0 | 0:00 |
| Jack Marshman | 1 | 11 of 27 | 40% | 11 of 27 | 0 of 0 | --- | 0 | 0 | 0:03 |
Significant Strikes
| Fighter | Sig. Str. | Sig. Str. % | Head | Body | Leg | Distance | Clinch | Ground |
|---|---|---|---|---|---|---|---|---|
| Thiago Santos | 6 of 46 | 13% | 6 of 44 | 0 of 1 | 0 of 1 | 5 of 42 | 1 of 4 | 0 of 0 |
| Jack Marshman | 27 of 71 | 38% | 14 of 50 | 4 of 12 | 9 of 9 | 18 of 55 | 1 of 1 | 8 of 15 |
Significant Strikes Per Round
| Rd | Fighter | Sig. Str. | Sig. Str. % | Head | Body | Leg | Distance | Clinch | Ground |
|---|---|---|---|---|---|---|---|---|---|
| 1 | Thiago Santos | 5 of 36 | 13% | 5 of 35 | 0 of 0 | 0 of 1 | 4 of 32 | 1 of 4 | 0 of 0 |
| Jack Marshman | 16 of 44 | 36% | 7 of 30 | 3 of 8 | 6 of 6 | 10 of 33 | 1 of 1 | 5 of 10 | |
| 2 | Thiago Santos | 1 of 10 | 10% | 1 of 9 | 0 of 1 | 0 of 0 | 1 of 10 | 0 of 0 | 0 of 0 |
| Jack Marshman | 11 of 27 | 40% | 7 of 20 | 1 of 4 | 3 of 3 | 8 of 22 | 0 of 0 | 3 of 5 |
Totals
| Fighter | KD | Sig. Str. | Sig. Str. % | Total Str. | TD | TD % | Sub. Att | Rev. | Ctrl |
|---|---|---|---|---|---|---|---|---|---|
| Jack Marshman | 0 | 36 of 83 | 43% | 78 of 136 | 3 of 3 | 100% | 0 | 0 | 4:29 |
| Magnus Cedenblad | 2 | 42 of 91 | 46% | 50 of 107 | 0 of 0 | --- | 0 | 0 | 0:13 |
Per Round
| Rd | Fighter | KD | Sig. Str. | Sig. Str. % | Total Str. | TD | TD % | Sub. Att | Rev. | Ctrl |
|---|---|---|---|---|---|---|---|---|---|---|
| 1 | Jack Marshman | 0 | 13 of 27 | 48% | 54 of 79 | 2 of 2 | 100% | 0 | 0 | 4:17 |
| Magnus Cedenblad | 1 | 10 of 17 | 58% | 18 of 33 | 0 of 0 | --- | 0 | 0 | 0:01 | |
| 2 | Jack Marshman | 0 | 23 of 56 | 41% | 24 of 57 | 1 of 1 | 100% | 0 | 0 | 0:12 |
| Magnus Cedenblad | 1 | 32 of 74 | 43% | 32 of 74 | 0 of 0 | --- | 0 | 0 | 0:12 |
Significant Strikes
| Fighter | Sig. Str. | Sig. Str. % | Head | Body | Leg | Distance | Clinch | Ground |
|---|---|---|---|---|---|---|---|---|
| Jack Marshman | 36 of 83 | 43% | 25 of 68 | 6 of 9 | 5 of 6 | 25 of 65 | 0 of 0 | 11 of 18 |
| Magnus Cedenblad | 42 of 91 | 46% | 33 of 75 | 7 of 11 | 2 of 5 | 32 of 74 | 0 of 0 | 10 of 17 |
Significant Strikes Per Round
| Rd | Fighter | Sig. Str. | Sig. Str. % | Head | Body | Leg | Distance | Clinch | Ground |
|---|---|---|---|---|---|---|---|---|---|
| 1 | Jack Marshman | 13 of 27 | 48% | 12 of 24 | 1 of 3 | 0 of 0 | 2 of 9 | 0 of 0 | 11 of 18 |
| Magnus Cedenblad | 10 of 17 | 58% | 7 of 13 | 3 of 4 | 0 of 0 | 4 of 7 | 0 of 0 | 6 of 10 | |
| 2 | Jack Marshman | 23 of 56 | 41% | 13 of 44 | 5 of 6 | 5 of 6 | 23 of 56 | 0 of 0 | 0 of 0 |
| Magnus Cedenblad | 32 of 74 | 43% | 26 of 62 | 4 of 7 | 2 of 5 | 28 of 67 | 0 of 0 | 4 of 7 |
No comments yet. Be the first to share your thoughts!