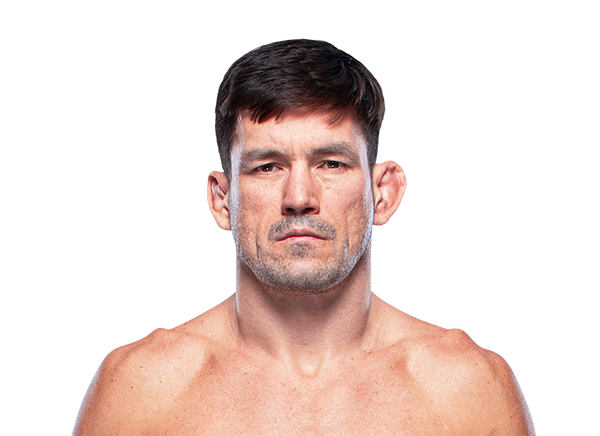
Career Averages - Demian Maia
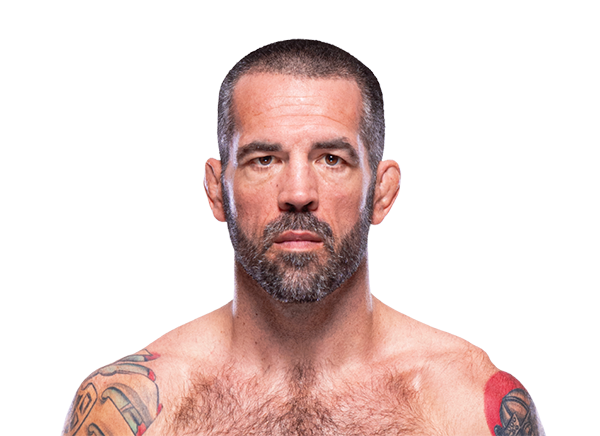
Career Averages - Matt Brown
Demian Maia - Fight History
Totals
| Fighter | KD | Sig. Str. | Sig. Str. % | Total Str. | TD | TD % | Sub. Att | Rev. | Ctrl |
|---|---|---|---|---|---|---|---|---|---|
| Belal Muhammad | 0 | 21 of 53 | 39% | 23 of 55 | 1 of 21 | 4% | 0 | 0 | 4:14 |
| Demian Maia | 0 | 45 of 127 | 35% | 92 of 177 | 0 of 0 | --- | 0 | 0 | 0:00 |
Per Round
| Rd | Fighter | KD | Sig. Str. | Sig. Str. % | Total Str. | TD | TD % | Sub. Att | Rev. | Ctrl |
|---|---|---|---|---|---|---|---|---|---|---|
| 1 | Belal Muhammad | 0 | 2 of 5 | 40% | 4 of 7 | 1 of 11 | 9% | 0 | 0 | 2:30 |
| Demian Maia | 0 | 5 of 21 | 23% | 10 of 27 | 0 of 0 | --- | 0 | 0 | 0:00 | |
| 2 | Belal Muhammad | 0 | 7 of 19 | 36% | 7 of 19 | 0 of 4 | 0% | 0 | 0 | 0:46 |
| Demian Maia | 0 | 19 of 47 | 40% | 34 of 63 | 0 of 0 | --- | 0 | 0 | 0:00 | |
| 3 | Belal Muhammad | 0 | 12 of 29 | 41% | 12 of 29 | 0 of 6 | 0% | 0 | 0 | 0:58 |
| Demian Maia | 0 | 21 of 59 | 35% | 48 of 87 | 0 of 0 | --- | 0 | 0 | 0:00 |
Significant Strikes
| Fighter | Sig. Str. | Sig. Str. % | Head | Body | Leg | Distance | Clinch | Ground |
|---|---|---|---|---|---|---|---|---|
| Belal Muhammad | 21 of 53 | 39% | 21 of 53 | 0 of 0 | 0 of 0 | 20 of 52 | 1 of 1 | 0 of 0 |
| Demian Maia | 45 of 127 | 35% | 38 of 119 | 3 of 4 | 4 of 4 | 43 of 123 | 2 of 4 | 0 of 0 |
Significant Strikes Per Round
| Rd | Fighter | Sig. Str. | Sig. Str. % | Head | Body | Leg | Distance | Clinch | Ground |
|---|---|---|---|---|---|---|---|---|---|
| 1 | Belal Muhammad | 2 of 5 | 40% | 2 of 5 | 0 of 0 | 0 of 0 | 2 of 5 | 0 of 0 | 0 of 0 |
| Demian Maia | 5 of 21 | 23% | 5 of 21 | 0 of 0 | 0 of 0 | 5 of 20 | 0 of 1 | 0 of 0 | |
| 2 | Belal Muhammad | 7 of 19 | 36% | 7 of 19 | 0 of 0 | 0 of 0 | 7 of 19 | 0 of 0 | 0 of 0 |
| Demian Maia | 19 of 47 | 40% | 14 of 41 | 1 of 2 | 4 of 4 | 18 of 45 | 1 of 2 | 0 of 0 | |
| 3 | Belal Muhammad | 12 of 29 | 41% | 12 of 29 | 0 of 0 | 0 of 0 | 11 of 28 | 1 of 1 | 0 of 0 |
| Demian Maia | 21 of 59 | 35% | 19 of 57 | 2 of 2 | 0 of 0 | 20 of 58 | 1 of 1 | 0 of 0 |
Play-by-Play
View on SherdogRound 1
This next match at welterweight is a grappler’s delight, as the legendary submission specialist Maia (28-10, 22-10 UFC) will try to become the first man to tap out the durable Muhammad (18-3, 1 NC; 9-3 UFC). Enjoying this fight with the best seat in the house is referee Jason Herzog, and the two have nothing but respect for one another and touch gloves. Muhammad reaches out with several punches, and the Brazilian is right there to greet him with punches. Maia eats a few on the chin and shoots in low for a takedown, but it gets stuffed with ease. Maia comes out with a solid right hand that surprises Muhammad, and he uses this to pursue a single from afar. The grappling legend keeps the left leg elevated as he continues to pursue it, but he has to abandon it when Muhammad sprawls against the fence properly. Maia goes back after the submission, and he rips Muhammad’s knee out from beneath him to secure the takedown. Muhammad’s eyes are wide as he is surprised that this happened to him, and he walks up to his feet to stand back up. Muhammad lifts his leg all the way in the air to break the grip, and he backs away to get his feet from beneath him. Muhammad answers with a solid right hand, and he pushes away a leaping takedown attempt from Maia shortly thereafter. Muhammad has his leg grabbed again, and he hops back to the fence to keep his balance. Maia eats an elbow as he pursues the single, but Muhammad is able to put his leg down for a moment and pull it back. Maia backs away and evades the punches that come his way, but a left hand finds its home on his chin. A stiff jab from Muhammad backs Maia off, and Maia fakes a takedown to draw out a reaction. Maia puts another attempt on Muhammad with the single, and he lifts the leg up high to take Muhammad down but cannot get it. Muhammad hops to and fro with his back on the wire, and Maia sticks to him like glue as he is intent on putting Muhammad on his back. Muhammad is able to put his leg down to the ground again, and he uses the other to sling a head kick that gets blocked right before the bell.
Sherdog Scores
Jay Pettry scores the round: 10-9 Maia
Ben Duffy scores the round: 10-9 Maia
Tristen Critchfield scores the round: 10-9 Maia
Round 2
There is a quick glove touch to start off the round, and Maia follows it with a left hand. Muhammad kicks the lead leg and hops back before Maia can snatch it up. The American gets off a few jabs here and there as he tries to find his range and keep a safe distance, timing uppercut feints and marking up Maia’s nose with strikes. Maia lunges forward with a looping left hand that hits nothing but air, and there is a lengthy stalemate as they look for angles. Maia drops down for a low single, and Muhammad sticks him with punches from far out. Maia turns a punch to a takedown attempt in the center of the cage, and Muhammad sprawls and stops it from happening. Muhammad makes him pay with a right hand after breaking up the attempt, and he swats away a few half-hearted punches from the Brazilian. Maia pursues another takedown, and Muhammad jumps far away to get out of harm’s way. Muhammad stings Maia with crisp punch combinations, and he hurts Maia with a right hand as he is feeling more comfortable to let his hands go. Muhammad paws out several left hands to break up Maia’s forward movement, and he kicks the lead leg hard. Maia tries to take him down, but his attempts are more labored and Muhammad sees it coming from a mile away. “Remember the Name” makes Maia remember his fists as he introduces them to Maia’s chin a few times, until Maia charges in for a desperate single leg takedown. When the Brazilian lifts the leg up, Muhammad keeps his balance and stays upright. When Maia tries for one last takedown, Muhammad defends with elbows on the side of the head until time expires.
Sherdog Scores
Jay Pettry scores the round: 10-9 Muhammad
Ben Duffy scores the round: 10-9 Muhammad
Tristen Critchfield scores the round: 10-9 Muhammad
Round 3
There is one final touch of gloves for the last round, and Muhammad is more comfortable in the center of the cage as he jabs his way out. Maia gets one back, but Muhammad triples up on jabs. Maia dives for a takedown, and Muhammad springs out of danger without much concern. Muhammad gets off a head kick that still does damage even though it is fully blocked, and a right hand hurts the 43-year-old. Maia wings a left hand, but Muhammad’s strikes are more accurate and quicker. There is another head kick from Muhammad, and when it gets blocked, the Roufusport product sticks Maia with a jab. Maia shoots low for a single, and Muhammad does not seem concerned as he stops it once more. Muhammad jabs and continues to redden Maia’s face up, and a clubbing left hand frustrates Maia. Muhammad staves off a feeble single so that he can chain punches together, and he tees off on the fading Brazilian with combinations. Maia can do little but flirt with takedowns, and Muhammad drills him with a shovel uppercut but gets caught with an overhand left. Muhammad pulls his leg back before it gets snagged, and Maia telegraphs these shots every time and does not vary his approach. Muhammad aims a head kick at him, but it too is blocked. Maia crashes forward with a single, and “Remember the Name” posts a stellar takedown defense rate when he stops that one from succeeding. Muhammad protects his leg when Maia latches on to it, punching the Brazilian in the side of the head as Maia lumbers towards him. Muhammad is forced to defend single after single, and Maia lifts the leg but cannot ground him. The gritty fight comes to an end in this position.
Sherdog Scores
Jay Pettry scores the round: 10-9 Muhammad (29-28 Muhammad)
Ben Duffy scores the round: 10-9 Muhammad (29-28 Muhammad)
Tristen Critchfield scores the round: 10-9 Muhammad (29-28 Muhammad)
The Official Result
Belal Muhammad def. Demian Maia via Unanimous Decision (30-27, 29-28, 29-28)
Big Brady picks Belal Muhammad, citing his youth, cardio, and volume advantage. He is concerned about Muhammad's untested takedown defense against a grappler like Maia, but believes Maia's age (43) will be a factor. He expects Muhammad to win a decision, possibly 29-28 or 30-27.
Cody sees this as a dog or pass situation. He notes Maia's age and slow striking but believes if Maia gets takedowns, he can submit Muhammad. He is interested in a small sprinkle on Maia by submission at +400, as Maia has a history of taking down better wrestlers.
Daniel Levi picks Belal Muhammad, stating that no 43-year-old is beating him. He emphasizes Muhammad's pace and cardio, and that Maia's blueprint has been exposed. He expects Muhammad to outwork Maia, especially in later rounds, and predicts a dominant decision. He calls Muhammad the most sure thing among the favorites.
Maia's jiu-jitsu is a level above anyone Muhammad has faced. Muhammad is a jack-of-all-trades but lacks a finishing threat, while Maia can latch on and submit him. Muhammad's takedown defense hasn't been tested by a grappler of Maia's caliber. Maia's age and cardio are concerns, but he should find a submission in the early rounds.
Paul agrees it's a dog or pass situation. He notes Maia's age and the fact that Muhammad has never faced a wrestler, but he doesn't have a strong lean either way. He is not interested in laying the wood on Muhammad at -230.
The MMA Guru picks Belal Muhammad, believing Maia is past his prime with lowered testosterone. He notes Muhammad's cardio, takedown defense, and recent experience against Leon Edwards. He expects Muhammad to lose the first round to Maia's grappling but come back in rounds 2 and 3 with volume, winning a 29-28 decision.
Totals
| Fighter | KD | Sig. Str. | Sig. Str. % | Total Str. | TD | TD % | Sub. Att | Rev. | Ctrl |
|---|---|---|---|---|---|---|---|---|---|
| Gilbert Burns | 0 | 4 of 7 | 57% | 4 of 7 | 2 of 2 | 100% | 0 | 0 | 1:24 |
| Demian Maia | 1 | 13 of 16 | 81% | 14 of 17 | 0 of 0 | --- | 0 | 0 | 0:04 |
Per Round
| Rd | Fighter | KD | Sig. Str. | Sig. Str. % | Total Str. | TD | TD % | Sub. Att | Rev. | Ctrl |
|---|---|---|---|---|---|---|---|---|---|---|
| 1 | Gilbert Burns | 0 | 4 of 7 | 57% | 4 of 7 | 2 of 2 | 100% | 0 | 0 | 1:24 |
| Demian Maia | 1 | 13 of 16 | 81% | 14 of 17 | 0 of 0 | --- | 0 | 0 | 0:04 |
Significant Strikes
| Fighter | Sig. Str. | Sig. Str. % | Head | Body | Leg | Distance | Clinch | Ground |
|---|---|---|---|---|---|---|---|---|
| Gilbert Burns | 4 of 7 | 57% | 4 of 7 | 0 of 0 | 0 of 0 | 4 of 7 | 0 of 0 | 0 of 0 |
| Demian Maia | 13 of 16 | 81% | 10 of 13 | 1 of 1 | 2 of 2 | 5 of 7 | 0 of 0 | 8 of 9 |
Significant Strikes Per Round
| Rd | Fighter | Sig. Str. | Sig. Str. % | Head | Body | Leg | Distance | Clinch | Ground |
|---|---|---|---|---|---|---|---|---|---|
| 1 | Gilbert Burns | 4 of 7 | 57% | 4 of 7 | 0 of 0 | 0 of 0 | 4 of 7 | 0 of 0 | 0 of 0 |
| Demian Maia | 13 of 16 | 81% | 10 of 13 | 1 of 1 | 2 of 2 | 5 of 7 | 0 of 0 | 8 of 9 |
Play-by-Play
View on SherdogRound 1
In the only bout of the evening between two fighters representing Brazil, two of the most highly decorated submission artists in the welterweight division face off when Maia (28-9, 22-9 UFC) tests his skills against Burns (17-3, 10-3 UFC). Together, the two have submitted a healthy 22 opponents across their 45 victories, and referee Osiris Maia will be the third Brazilian in the cage. They race to the center of the Octagon, and Maia sticks out a jab but it is Burns that throws something of note first, in the form of a right hand that misses. Burns lands a leg kick, while Maia scores a left hook. Burns scores two more kicks, and Maia comes back with that same left. Maia is pushing the pace in Burns, with a left hand that does little more than set up a single leg takedown. Burns nearly welcomes the takedown, fishing for a heel hook before abandoning it to stand up. The former title challenger keeps on him, nearly taking Burns’ back while pushing him against the fence and threatening with another takedown. As Burns tries to roll, Maia fishes for a rear-naked choke, and gets a hook in as Burns fights off the arm that wraps around his throat.
Burns slips out the back door and stands back up before anything comes from it, and blasts Maia with a monster left hook. Maia crumples to the canvas, and Burns celebrates by throwing his arms in the air.
He looks to the referee to call the fight, but none come, so Burns chases after him and swarms him with punches until the ref stops the action. This is an enormous win for Burns, who smashes a top-five opponent with style points, and immediately stakes his claim as an elite fighter in the division.
The Official Result
Gilbert Burns def. Demian Maia R1 2:34 via TKO (Punches)
Daniel picks Burns, citing his power and youth. He thinks Maia's stand-up is a liability and that Burns can hurt him. He notes Burns has the jiu-jitsu to avoid submissions and predicts a decision win for Burns.
The host picks Gilbert Burns over Demian Maia. He notes that Maia has not been submitting opponents recently, as seen in his fight with Anthony Rocco Martin. Burns is a three-time BJJ world champion and will be able to stay out of submissions. He expects Burns to win by third-round TKO, as Maia fades in later rounds due to age and weight cut. He calls Burns an underdog but believes he has this fight in the bag.
Totals
| Fighter | KD | Sig. Str. | Sig. Str. % | Total Str. | TD | TD % | Sub. Att | Rev. | Ctrl |
|---|---|---|---|---|---|---|---|---|---|
| Demian Maia | 0 | 69 of 122 | 56% | 84 of 137 | 0 of 0 | --- | 1 | 2 | 1:29 |
| Ben Askren | 0 | 63 of 127 | 49% | 102 of 168 | 4 of 7 | 57% | 0 | 1 | 1:54 |
Per Round
| Rd | Fighter | KD | Sig. Str. | Sig. Str. % | Total Str. | TD | TD % | Sub. Att | Rev. | Ctrl |
|---|---|---|---|---|---|---|---|---|---|---|
| 1 | Demian Maia | 0 | 28 of 54 | 51% | 31 of 57 | 0 of 0 | --- | 0 | 0 | 0:00 |
| Ben Askren | 0 | 27 of 45 | 60% | 44 of 62 | 1 of 2 | 50% | 0 | 0 | 0:46 | |
| 2 | Demian Maia | 0 | 23 of 44 | 52% | 31 of 52 | 0 of 0 | --- | 0 | 1 | 0:38 |
| Ben Askren | 0 | 22 of 53 | 41% | 31 of 62 | 1 of 1 | 100% | 0 | 1 | 0:35 | |
| 3 | Demian Maia | 0 | 18 of 24 | 75% | 22 of 28 | 0 of 0 | --- | 1 | 1 | 0:51 |
| Ben Askren | 0 | 14 of 29 | 48% | 27 of 44 | 2 of 4 | 50% | 0 | 0 | 0:33 |
Significant Strikes
| Fighter | Sig. Str. | Sig. Str. % | Head | Body | Leg | Distance | Clinch | Ground |
|---|---|---|---|---|---|---|---|---|
| Demian Maia | 69 of 122 | 56% | 44 of 88 | 25 of 34 | 0 of 0 | 49 of 99 | 17 of 20 | 3 of 3 |
| Ben Askren | 63 of 127 | 49% | 54 of 116 | 4 of 6 | 5 of 5 | 46 of 108 | 11 of 13 | 6 of 6 |
Significant Strikes Per Round
| Rd | Fighter | Sig. Str. | Sig. Str. % | Head | Body | Leg | Distance | Clinch | Ground |
|---|---|---|---|---|---|---|---|---|---|
| 1 | Demian Maia | 28 of 54 | 51% | 16 of 36 | 12 of 18 | 0 of 0 | 18 of 41 | 10 of 13 | 0 of 0 |
| Ben Askren | 27 of 45 | 60% | 21 of 39 | 2 of 2 | 4 of 4 | 17 of 35 | 8 of 8 | 2 of 2 | |
| 2 | Demian Maia | 23 of 44 | 52% | 15 of 33 | 8 of 11 | 0 of 0 | 19 of 40 | 3 of 3 | 1 of 1 |
| Ben Askren | 22 of 53 | 41% | 21 of 50 | 0 of 2 | 1 of 1 | 18 of 47 | 2 of 4 | 2 of 2 | |
| 3 | Demian Maia | 18 of 24 | 75% | 13 of 19 | 5 of 5 | 0 of 0 | 12 of 18 | 4 of 4 | 2 of 2 |
| Ben Askren | 14 of 29 | 48% | 12 of 27 | 2 of 2 | 0 of 0 | 11 of 26 | 1 of 1 | 2 of 2 |
Totals
| Fighter | KD | Sig. Str. | Sig. Str. % | Total Str. | TD | TD % | Sub. Att | Rev. | Ctrl |
|---|---|---|---|---|---|---|---|---|---|
| Demian Maia | 0 | 3 of 12 | 25% | 74 of 86 | 3 of 9 | 33% | 0 | 1 | 6:02 |
| Anthony Rocco Martin | 0 | 22 of 95 | 23% | 36 of 109 | 0 of 0 | --- | 0 | 0 | 1:11 |
Per Round
| Rd | Fighter | KD | Sig. Str. | Sig. Str. % | Total Str. | TD | TD % | Sub. Att | Rev. | Ctrl |
|---|---|---|---|---|---|---|---|---|---|---|
| 1 | Demian Maia | 0 | 2 of 5 | 40% | 31 of 34 | 1 of 2 | 50% | 0 | 0 | 2:42 |
| Anthony Rocco Martin | 0 | 3 of 15 | 20% | 9 of 21 | 0 of 0 | --- | 0 | 0 | 0:30 | |
| 2 | Demian Maia | 0 | 0 of 3 | 0% | 42 of 48 | 2 of 5 | 40% | 0 | 1 | 3:20 |
| Anthony Rocco Martin | 0 | 3 of 16 | 18% | 7 of 20 | 0 of 0 | --- | 0 | 0 | 0:12 | |
| 3 | Demian Maia | 0 | 1 of 4 | 25% | 1 of 4 | 0 of 2 | 0% | 0 | 0 | 0:00 |
| Anthony Rocco Martin | 0 | 16 of 64 | 25% | 20 of 68 | 0 of 0 | --- | 0 | 0 | 0:29 |
Significant Strikes
| Fighter | Sig. Str. | Sig. Str. % | Head | Body | Leg | Distance | Clinch | Ground |
|---|---|---|---|---|---|---|---|---|
| Demian Maia | 3 of 12 | 25% | 3 of 12 | 0 of 0 | 0 of 0 | 2 of 11 | 0 of 0 | 1 of 1 |
| Anthony Rocco Martin | 22 of 95 | 23% | 13 of 81 | 7 of 12 | 2 of 2 | 16 of 86 | 1 of 1 | 5 of 8 |
Significant Strikes Per Round
| Rd | Fighter | Sig. Str. | Sig. Str. % | Head | Body | Leg | Distance | Clinch | Ground |
|---|---|---|---|---|---|---|---|---|---|
| 1 | Demian Maia | 2 of 5 | 40% | 2 of 5 | 0 of 0 | 0 of 0 | 1 of 4 | 0 of 0 | 1 of 1 |
| Anthony Rocco Martin | 3 of 15 | 20% | 2 of 12 | 0 of 2 | 1 of 1 | 2 of 14 | 1 of 1 | 0 of 0 | |
| 2 | Demian Maia | 0 of 3 | 0% | 0 of 3 | 0 of 0 | 0 of 0 | 0 of 3 | 0 of 0 | 0 of 0 |
| Anthony Rocco Martin | 3 of 16 | 18% | 3 of 16 | 0 of 0 | 0 of 0 | 3 of 16 | 0 of 0 | 0 of 0 | |
| 3 | Demian Maia | 1 of 4 | 25% | 1 of 4 | 0 of 0 | 0 of 0 | 1 of 4 | 0 of 0 | 0 of 0 |
| Anthony Rocco Martin | 16 of 64 | 25% | 8 of 53 | 7 of 10 | 1 of 1 | 11 of 56 | 0 of 0 | 5 of 8 |
Totals
| Fighter | KD | Sig. Str. | Sig. Str. % | Total Str. | TD | TD % | Sub. Att | Rev. | Ctrl |
|---|---|---|---|---|---|---|---|---|---|
| Demian Maia | 0 | 0 of 1 | 0% | 8 of 9 | 2 of 4 | 50% | 2 | 0 | 2:12 |
| Lyman Good | 0 | 0 of 2 | 0% | 0 of 2 | 0 of 0 | --- | 0 | 0 | 0:00 |
Per Round
| Rd | Fighter | KD | Sig. Str. | Sig. Str. % | Total Str. | TD | TD % | Sub. Att | Rev. | Ctrl |
|---|---|---|---|---|---|---|---|---|---|---|
| 1 | Demian Maia | 0 | 0 of 1 | 0% | 8 of 9 | 2 of 4 | 50% | 2 | 0 | 2:12 |
| Lyman Good | 0 | 0 of 2 | 0% | 0 of 2 | 0 of 0 | --- | 0 | 0 | 0:00 |
Significant Strikes
| Fighter | Sig. Str. | Sig. Str. % | Head | Body | Leg | Distance | Clinch | Ground |
|---|---|---|---|---|---|---|---|---|
| Demian Maia | 0 of 1 | 0% | 0 of 1 | 0 of 0 | 0 of 0 | 0 of 1 | 0 of 0 | 0 of 0 |
| Lyman Good | 0 of 2 | 0% | 0 of 2 | 0 of 0 | 0 of 0 | 0 of 2 | 0 of 0 | 0 of 0 |
Significant Strikes Per Round
| Rd | Fighter | Sig. Str. | Sig. Str. % | Head | Body | Leg | Distance | Clinch | Ground |
|---|---|---|---|---|---|---|---|---|---|
| 1 | Demian Maia | 0 of 1 | 0% | 0 of 1 | 0 of 0 | 0 of 0 | 0 of 1 | 0 of 0 | 0 of 0 |
| Lyman Good | 0 of 2 | 0% | 0 of 2 | 0 of 0 | 0 of 0 | 0 of 2 | 0 of 0 | 0 of 0 |
Totals
| Fighter | KD | Sig. Str. | Sig. Str. % | Total Str. | TD | TD % | Sub. Att | Rev. | Ctrl |
|---|---|---|---|---|---|---|---|---|---|
| Kamaru Usman | 0 | 27 of 87 | 31% | 33 of 94 | 0 of 15 | 0% | 0 | 0 | 2:01 |
| Demian Maia | 1 | 66 of 209 | 31% | 97 of 244 | 0 of 0 | --- | 0 | 0 | 4:18 |
Per Round
| Rd | Fighter | KD | Sig. Str. | Sig. Str. % | Total Str. | TD | TD % | Sub. Att | Rev. | Ctrl |
|---|---|---|---|---|---|---|---|---|---|---|
| 1 | Kamaru Usman | 0 | 5 of 12 | 41% | 10 of 17 | 0 of 1 | 0% | 0 | 0 | 2:01 |
| Demian Maia | 0 | 12 of 29 | 41% | 13 of 30 | 0 of 0 | --- | 0 | 0 | 0:00 | |
| 2 | Kamaru Usman | 0 | 7 of 18 | 38% | 8 of 20 | 0 of 4 | 0% | 0 | 0 | 0:00 |
| Demian Maia | 0 | 12 of 47 | 25% | 16 of 52 | 0 of 0 | --- | 0 | 0 | 0:37 | |
| 3 | Kamaru Usman | 0 | 4 of 25 | 16% | 4 of 25 | 0 of 4 | 0% | 0 | 0 | 0:00 |
| Demian Maia | 0 | 13 of 53 | 24% | 16 of 56 | 0 of 0 | --- | 0 | 0 | 0:26 | |
| 4 | Kamaru Usman | 0 | 4 of 9 | 44% | 4 of 9 | 0 of 3 | 0% | 0 | 0 | 0:00 |
| Demian Maia | 1 | 16 of 42 | 38% | 32 of 58 | 0 of 0 | --- | 0 | 0 | 1:31 | |
| 5 | Kamaru Usman | 0 | 7 of 23 | 30% | 7 of 23 | 0 of 3 | 0% | 0 | 0 | 0:00 |
| Demian Maia | 0 | 13 of 38 | 34% | 20 of 48 | 0 of 0 | --- | 0 | 0 | 1:44 |
Significant Strikes
| Fighter | Sig. Str. | Sig. Str. % | Head | Body | Leg | Distance | Clinch | Ground |
|---|---|---|---|---|---|---|---|---|
| Kamaru Usman | 27 of 87 | 31% | 26 of 85 | 1 of 2 | 0 of 0 | 25 of 85 | 1 of 1 | 1 of 1 |
| Demian Maia | 66 of 209 | 31% | 49 of 181 | 4 of 12 | 13 of 16 | 55 of 187 | 1 of 5 | 10 of 17 |
Significant Strikes Per Round
| Rd | Fighter | Sig. Str. | Sig. Str. % | Head | Body | Leg | Distance | Clinch | Ground |
|---|---|---|---|---|---|---|---|---|---|
| 1 | Kamaru Usman | 5 of 12 | 41% | 5 of 12 | 0 of 0 | 0 of 0 | 5 of 12 | 0 of 0 | 0 of 0 |
| Demian Maia | 12 of 29 | 41% | 6 of 22 | 0 of 1 | 6 of 6 | 12 of 29 | 0 of 0 | 0 of 0 | |
| 2 | Kamaru Usman | 7 of 18 | 38% | 7 of 18 | 0 of 0 | 0 of 0 | 6 of 17 | 1 of 1 | 0 of 0 |
| Demian Maia | 12 of 47 | 25% | 9 of 43 | 1 of 2 | 2 of 2 | 10 of 43 | 1 of 3 | 1 of 1 | |
| 3 | Kamaru Usman | 4 of 25 | 16% | 4 of 25 | 0 of 0 | 0 of 0 | 4 of 25 | 0 of 0 | 0 of 0 |
| Demian Maia | 13 of 53 | 24% | 9 of 44 | 2 of 5 | 2 of 4 | 13 of 51 | 0 of 0 | 0 of 2 | |
| 4 | Kamaru Usman | 4 of 9 | 44% | 4 of 9 | 0 of 0 | 0 of 0 | 4 of 9 | 0 of 0 | 0 of 0 |
| Demian Maia | 16 of 42 | 38% | 14 of 38 | 0 of 2 | 2 of 2 | 10 of 33 | 0 of 0 | 6 of 9 | |
| 5 | Kamaru Usman | 7 of 23 | 30% | 6 of 21 | 1 of 2 | 0 of 0 | 6 of 22 | 0 of 0 | 1 of 1 |
| Demian Maia | 13 of 38 | 34% | 11 of 34 | 1 of 2 | 1 of 2 | 10 of 31 | 0 of 2 | 3 of 5 |
Totals
| Fighter | KD | Sig. Str. | Sig. Str. % | Total Str. | TD | TD % | Sub. Att | Rev. | Ctrl |
|---|---|---|---|---|---|---|---|---|---|
| Colby Covington | 0 | 53 of 151 | 35% | 59 of 157 | 0 of 13 | 0% | 0 | 0 | 0:02 |
| Demian Maia | 0 | 88 of 317 | 27% | 121 of 351 | 0 of 0 | --- | 0 | 0 | 1:46 |
Per Round
| Rd | Fighter | KD | Sig. Str. | Sig. Str. % | Total Str. | TD | TD % | Sub. Att | Rev. | Ctrl |
|---|---|---|---|---|---|---|---|---|---|---|
| 1 | Colby Covington | 0 | 29 of 66 | 43% | 31 of 68 | 0 of 2 | 0% | 0 | 0 | 0:02 |
| Demian Maia | 0 | 37 of 125 | 29% | 44 of 132 | 0 of 0 | --- | 0 | 0 | 0:06 | |
| 2 | Colby Covington | 0 | 11 of 38 | 28% | 12 of 39 | 0 of 6 | 0% | 0 | 0 | 0:00 |
| Demian Maia | 0 | 22 of 83 | 26% | 25 of 86 | 0 of 0 | --- | 0 | 0 | 0:35 | |
| 3 | Colby Covington | 0 | 13 of 47 | 27% | 16 of 50 | 0 of 5 | 0% | 0 | 0 | 0:00 |
| Demian Maia | 0 | 29 of 109 | 26% | 52 of 133 | 0 of 0 | --- | 0 | 0 | 1:05 |
Significant Strikes
| Fighter | Sig. Str. | Sig. Str. % | Head | Body | Leg | Distance | Clinch | Ground |
|---|---|---|---|---|---|---|---|---|
| Colby Covington | 53 of 151 | 35% | 53 of 149 | 0 of 1 | 0 of 1 | 51 of 148 | 2 of 3 | 0 of 0 |
| Demian Maia | 88 of 317 | 27% | 65 of 286 | 1 of 4 | 22 of 27 | 81 of 304 | 4 of 8 | 3 of 5 |
Significant Strikes Per Round
| Rd | Fighter | Sig. Str. | Sig. Str. % | Head | Body | Leg | Distance | Clinch | Ground |
|---|---|---|---|---|---|---|---|---|---|
| 1 | Colby Covington | 29 of 66 | 43% | 29 of 66 | 0 of 0 | 0 of 0 | 29 of 66 | 0 of 0 | 0 of 0 |
| Demian Maia | 37 of 125 | 29% | 18 of 99 | 1 of 4 | 18 of 22 | 37 of 125 | 0 of 0 | 0 of 0 | |
| 2 | Colby Covington | 11 of 38 | 28% | 11 of 37 | 0 of 0 | 0 of 1 | 11 of 37 | 0 of 1 | 0 of 0 |
| Demian Maia | 22 of 83 | 26% | 20 of 80 | 0 of 0 | 2 of 3 | 20 of 77 | 2 of 5 | 0 of 1 | |
| 3 | Colby Covington | 13 of 47 | 27% | 13 of 46 | 0 of 1 | 0 of 0 | 11 of 45 | 2 of 2 | 0 of 0 |
| Demian Maia | 29 of 109 | 26% | 27 of 107 | 0 of 0 | 2 of 2 | 24 of 102 | 2 of 3 | 3 of 4 |
Totals
| Fighter | KD | Sig. Str. | Sig. Str. % | Total Str. | TD | TD % | Sub. Att | Rev. | Ctrl |
|---|---|---|---|---|---|---|---|---|---|
| Tyron Woodley | 1 | 57 of 153 | 37% | 57 of 153 | 0 of 0 | --- | 0 | 0 | 0:06 |
| Demian Maia | 0 | 28 of 89 | 31% | 29 of 90 | 0 of 21 | 0% | 0 | 0 | 0:53 |
Per Round
| Rd | Fighter | KD | Sig. Str. | Sig. Str. % | Total Str. | TD | TD % | Sub. Att | Rev. | Ctrl |
|---|---|---|---|---|---|---|---|---|---|---|
| 1 | Tyron Woodley | 0 | 6 of 18 | 33% | 6 of 18 | 0 of 0 | --- | 0 | 0 | 0:00 |
| Demian Maia | 0 | 3 of 6 | 50% | 3 of 6 | 0 of 6 | 0% | 0 | 0 | 0:38 | |
| 2 | Tyron Woodley | 1 | 14 of 29 | 48% | 14 of 29 | 0 of 0 | --- | 0 | 0 | 0:04 |
| Demian Maia | 0 | 4 of 14 | 28% | 4 of 14 | 0 of 3 | 0% | 0 | 0 | 0:00 | |
| 3 | Tyron Woodley | 0 | 12 of 41 | 29% | 12 of 41 | 0 of 0 | --- | 0 | 0 | 0:00 |
| Demian Maia | 0 | 8 of 24 | 33% | 8 of 24 | 0 of 2 | 0% | 0 | 0 | 0:00 | |
| 4 | Tyron Woodley | 0 | 15 of 39 | 38% | 15 of 39 | 0 of 0 | --- | 0 | 0 | 0:01 |
| Demian Maia | 0 | 5 of 25 | 20% | 5 of 25 | 0 of 3 | 0% | 0 | 0 | 0:11 | |
| 5 | Tyron Woodley | 0 | 10 of 26 | 38% | 10 of 26 | 0 of 0 | --- | 0 | 0 | 0:01 |
| Demian Maia | 0 | 8 of 20 | 40% | 9 of 21 | 0 of 7 | 0% | 0 | 0 | 0:04 |
Significant Strikes
| Fighter | Sig. Str. | Sig. Str. % | Head | Body | Leg | Distance | Clinch | Ground |
|---|---|---|---|---|---|---|---|---|
| Tyron Woodley | 57 of 153 | 37% | 40 of 131 | 13 of 18 | 4 of 4 | 56 of 152 | 1 of 1 | 0 of 0 |
| Demian Maia | 28 of 89 | 31% | 23 of 83 | 2 of 3 | 3 of 3 | 26 of 87 | 2 of 2 | 0 of 0 |
Significant Strikes Per Round
| Rd | Fighter | Sig. Str. | Sig. Str. % | Head | Body | Leg | Distance | Clinch | Ground |
|---|---|---|---|---|---|---|---|---|---|
| 1 | Tyron Woodley | 6 of 18 | 33% | 5 of 16 | 1 of 2 | 0 of 0 | 6 of 18 | 0 of 0 | 0 of 0 |
| Demian Maia | 3 of 6 | 50% | 3 of 6 | 0 of 0 | 0 of 0 | 3 of 6 | 0 of 0 | 0 of 0 | |
| 2 | Tyron Woodley | 14 of 29 | 48% | 9 of 24 | 3 of 3 | 2 of 2 | 14 of 29 | 0 of 0 | 0 of 0 |
| Demian Maia | 4 of 14 | 28% | 4 of 14 | 0 of 0 | 0 of 0 | 4 of 14 | 0 of 0 | 0 of 0 | |
| 3 | Tyron Woodley | 12 of 41 | 29% | 9 of 37 | 1 of 2 | 2 of 2 | 12 of 41 | 0 of 0 | 0 of 0 |
| Demian Maia | 8 of 24 | 33% | 6 of 22 | 0 of 0 | 2 of 2 | 8 of 24 | 0 of 0 | 0 of 0 | |
| 4 | Tyron Woodley | 15 of 39 | 38% | 11 of 32 | 4 of 7 | 0 of 0 | 15 of 39 | 0 of 0 | 0 of 0 |
| Demian Maia | 5 of 25 | 20% | 4 of 23 | 0 of 1 | 1 of 1 | 5 of 25 | 0 of 0 | 0 of 0 | |
| 5 | Tyron Woodley | 10 of 26 | 38% | 6 of 22 | 4 of 4 | 0 of 0 | 9 of 25 | 1 of 1 | 0 of 0 |
| Demian Maia | 8 of 20 | 40% | 6 of 18 | 2 of 2 | 0 of 0 | 6 of 18 | 2 of 2 | 0 of 0 |
Matt Brown - Fight History
Totals
| Fighter | KD | Sig. Str. | Sig. Str. % | Total Str. | TD | TD % | Sub. Att | Rev. | Ctrl |
|---|---|---|---|---|---|---|---|---|---|
| Matt Brown | 1 | 11 of 15 | 73% | 22 of 26 | 0 of 0 | --- | 0 | 0 | 0:02 |
| Court McGee | 0 | 8 of 31 | 25% | 17 of 48 | 1 of 1 | 100% | 0 | 0 | 1:57 |
Per Round
| Rd | Fighter | KD | Sig. Str. | Sig. Str. % | Total Str. | TD | TD % | Sub. Att | Rev. | Ctrl |
|---|---|---|---|---|---|---|---|---|---|---|
| 1 | Matt Brown | 1 | 11 of 15 | 73% | 22 of 26 | 0 of 0 | --- | 0 | 0 | 0:02 |
| Court McGee | 0 | 8 of 31 | 25% | 17 of 48 | 1 of 1 | 100% | 0 | 0 | 1:57 |
Significant Strikes
| Fighter | Sig. Str. | Sig. Str. % | Head | Body | Leg | Distance | Clinch | Ground |
|---|---|---|---|---|---|---|---|---|
| Matt Brown | 11 of 15 | 73% | 2 of 4 | 3 of 4 | 6 of 7 | 10 of 14 | 1 of 1 | 0 of 0 |
| Court McGee | 8 of 31 | 25% | 2 of 21 | 2 of 5 | 4 of 5 | 6 of 29 | 2 of 2 | 0 of 0 |
Significant Strikes Per Round
| Rd | Fighter | Sig. Str. | Sig. Str. % | Head | Body | Leg | Distance | Clinch | Ground |
|---|---|---|---|---|---|---|---|---|---|
| 1 | Matt Brown | 11 of 15 | 73% | 2 of 4 | 3 of 4 | 6 of 7 | 10 of 14 | 1 of 1 | 0 of 0 |
| Court McGee | 8 of 31 | 25% | 2 of 21 | 2 of 5 | 4 of 5 | 6 of 29 | 2 of 2 | 0 of 0 |
Angelo picks Matt Brown, saying he thinks Brown will be the more durable of the two. He notes Court McGee is coming off a bad knockout loss and his chin is a question. He acknowledges the line movement tracker shows McGee went from +140 to -180 favorite, and that trend has been 7-1, but he goes against it. He is not betting on this fight.
Big Brady picks Court McGee but expresses distrust after McGee's fight against Condit where he didn't attempt a single takedown. He believes if McGee uses the right game plan—wrestling and taking down Matt Brown—he should win easily. Brady notes Brown is 42 with poor takedown defense and cardio, and McGee has better cardio and wrestling. He predicts a third-round submission, but says he can't fully trust McGee after the Condit fight.
Cody picks McGee, citing his better gas tank and durability. He notes that Brown's chin and reflexes have declined with age, and that McGee's kickboxing is good enough to compete. He expects McGee to wrestle and control the fight, especially in later rounds. He mentions the 'died and came back' theory for cardio.
Connor leans toward Court McGee, acknowledging that Matt Brown could knock him out early but that McGee's durability and pace are likely to carry him. He notes that Brown's endurance has declined and that McGee's grinding style is antithetical to Brown's current capabilities. Connor expects McGee to win by decision, as Brown's recent fights show he fades.
Daniel Levi picks Matt Brown, admitting bias as he will attend the fight and is a fan. He believes Brown is historically the better fighter, having reached number five in the welterweight rankings, while McGee never cracked the top 15. However, he acknowledges Brown's age (42) and cardio issues, which could allow McGee to push the pace and mix in takedowns. Levi hopes Brown gets a knockout to tie the UFC record, but notes the pick is not based on a betting edge.
McGee has a cardio and pace advantage over the aging Brown. He will tie Brown up, use footwork to avoid big shots, and weaponize his cardio to take over in the later rounds. Brown has slowed down in recent fights and his wrestling may not be effective against McGee. McGee will grind out a decision victory.
Paul picks McGee, emphasizing his wrestling and cardio advantage. He notes that McGee can make the fight easy by sticking to takedowns and controlling Brown. He added McGee to a chalk parlay. He acknowledges the possibility of a 'gentleman's agreement' striking affair but believes McGee's grappling is the key.
The MMA Guru picks Matt Brown, citing his better recent performances and the fact that Court McGee is coming off a brutal KO loss. He believes Brown's toughness and aggression will be too much, predicting a KO in the second or third round.
Zane picks Court McGee because he believes McGee's pace and grinding style will overwhelm Matt Brown, who fades as fights progress. He notes that Brown is still dangerous early but lacks the endurance to keep up with McGee's constant pressure and wrestling. Zane expects McGee to win a decision, as Brown's recent losses show he slows down significantly.
Totals
| Fighter | KD | Sig. Str. | Sig. Str. % | Total Str. | TD | TD % | Sub. Att | Rev. | Ctrl |
|---|---|---|---|---|---|---|---|---|---|
| Bryan Barberena | 0 | 81 of 129 | 62% | 95 of 145 | 5 of 7 | 71% | 0 | 0 | 5:01 |
| Matt Brown | 0 | 111 of 211 | 52% | 186 of 289 | 0 of 0 | --- | 0 | 1 | 0:57 |
Per Round
| Rd | Fighter | KD | Sig. Str. | Sig. Str. % | Total Str. | TD | TD % | Sub. Att | Rev. | Ctrl |
|---|---|---|---|---|---|---|---|---|---|---|
| 1 | Bryan Barberena | 0 | 23 of 37 | 62% | 25 of 39 | 1 of 3 | 33% | 0 | 0 | 1:39 |
| Matt Brown | 0 | 23 of 51 | 45% | 62 of 91 | 0 of 0 | --- | 0 | 0 | 0:16 | |
| 2 | Bryan Barberena | 0 | 23 of 36 | 63% | 29 of 43 | 2 of 2 | 100% | 0 | 0 | 1:45 |
| Matt Brown | 0 | 35 of 60 | 58% | 59 of 85 | 0 of 0 | --- | 0 | 1 | 0:30 | |
| 3 | Bryan Barberena | 0 | 35 of 56 | 62% | 41 of 63 | 2 of 2 | 100% | 0 | 0 | 1:37 |
| Matt Brown | 0 | 53 of 100 | 53% | 65 of 113 | 0 of 0 | --- | 0 | 0 | 0:11 |
Significant Strikes
| Fighter | Sig. Str. | Sig. Str. % | Head | Body | Leg | Distance | Clinch | Ground |
|---|---|---|---|---|---|---|---|---|
| Bryan Barberena | 81 of 129 | 62% | 36 of 75 | 38 of 44 | 7 of 10 | 51 of 95 | 24 of 28 | 6 of 6 |
| Matt Brown | 111 of 211 | 52% | 82 of 170 | 12 of 18 | 17 of 23 | 78 of 164 | 28 of 42 | 5 of 5 |
Significant Strikes Per Round
| Rd | Fighter | Sig. Str. | Sig. Str. % | Head | Body | Leg | Distance | Clinch | Ground |
|---|---|---|---|---|---|---|---|---|---|
| 1 | Bryan Barberena | 23 of 37 | 62% | 8 of 21 | 12 of 12 | 3 of 4 | 9 of 22 | 11 of 12 | 3 of 3 |
| Matt Brown | 23 of 51 | 45% | 13 of 36 | 2 of 4 | 8 of 11 | 19 of 46 | 4 of 5 | 0 of 0 | |
| 2 | Bryan Barberena | 23 of 36 | 63% | 9 of 20 | 12 of 14 | 2 of 2 | 17 of 29 | 6 of 7 | 0 of 0 |
| Matt Brown | 35 of 60 | 58% | 26 of 47 | 2 of 3 | 7 of 10 | 23 of 45 | 7 of 10 | 5 of 5 | |
| 3 | Bryan Barberena | 35 of 56 | 62% | 19 of 34 | 14 of 18 | 2 of 4 | 25 of 44 | 7 of 9 | 3 of 3 |
| Matt Brown | 53 of 100 | 53% | 43 of 87 | 8 of 11 | 2 of 2 | 36 of 73 | 17 of 27 | 0 of 0 |
Angelo picks Bryan Barberena, citing his durability, impressive volume, and forward pressure. He notes Barberena landed 108 strikes in his last fight and 169 against Vicente Luque. He thinks Barberena's constant volume will be the difference and expects a decision win. He says he probably won't bet on this fight.
Big Brady picks Matt Brown to knock out Bryan Barberena in the first or second round. He believes Barberena is washed after the Luke fight, citing poor takedown defense and being dropped twice by Jason Witt. He notes that Brown still has power, as shown in his last fight against Lima, and that Barberena's chin is no longer reliable. Brady also mentions that Barberena has health issues and has been taken down frequently in recent fights.
Cody strongly favors Matt Brown, highlighting Barberena's declining durability and poor takedown defense. He notes Barberena's recent wars and losses, while Brown still has power and timing. He thinks Brown can win by KO or decision. He calls it his first bet of the week.
Daniel Levi picks Matt Brown, admitting he is biased as a fan. He believes Brown is the better fighter with more finishing ability and can mix in takedowns. He notes both fighters are on the decline but thinks Brown's power and hometown crowd will carry him. He is hesitant because of Brown's age and chin, and Barberena's durability. He also points out Barberena hasn't looked the same since the Luque fight.
The host picks Barberena, noting his youth, body punching (30% of strikes to body), and Matt Brown's known body vulnerability. He expects a striking battle and believes Barberena will get a knockout, possibly in round 3 as Brown slows down. He also likes the prop 'fight doesn't go to decision'.
Paul picks Matt Brown, citing his wrestling advantage and Barberena's inability to stop takedowns. He notes Brown's hometown crowd and experience. He thinks Brown can grind out a win or land a big shot. He expects the line to move and hopes for plus money.
The MMA Guru picks Matt Brown by second-round TKO over Bryan Barberena. He envisions Barberena slightly edging the first round before getting caught with a big overhand. The Guru trusts Brown's power and recent resurgence, noting his second-round finish of Diego Lima, while Barberena's wars may leave him vulnerable.
Totals
| Fighter | KD | Sig. Str. | Sig. Str. % | Total Str. | TD | TD % | Sub. Att | Rev. | Ctrl |
|---|---|---|---|---|---|---|---|---|---|
| Matt Brown | 1 | 27 of 49 | 55% | 30 of 52 | 0 of 0 | --- | 0 | 0 | 0:03 |
| Dhiego Lima | 0 | 23 of 54 | 42% | 23 of 54 | 0 of 4 | 0% | 0 | 0 | 0:52 |
Per Round
| Rd | Fighter | KD | Sig. Str. | Sig. Str. % | Total Str. | TD | TD % | Sub. Att | Rev. | Ctrl |
|---|---|---|---|---|---|---|---|---|---|---|
| 1 | Matt Brown | 0 | 15 of 30 | 50% | 15 of 30 | 0 of 0 | --- | 0 | 0 | 0:00 |
| Dhiego Lima | 0 | 12 of 32 | 37% | 12 of 32 | 0 of 2 | 0% | 0 | 0 | 0:00 | |
| 2 | Matt Brown | 1 | 12 of 19 | 63% | 15 of 22 | 0 of 0 | --- | 0 | 0 | 0:03 |
| Dhiego Lima | 0 | 11 of 22 | 50% | 11 of 22 | 0 of 2 | 0% | 0 | 0 | 0:52 |
Significant Strikes
| Fighter | Sig. Str. | Sig. Str. % | Head | Body | Leg | Distance | Clinch | Ground |
|---|---|---|---|---|---|---|---|---|
| Matt Brown | 27 of 49 | 55% | 12 of 27 | 11 of 17 | 4 of 5 | 22 of 44 | 5 of 5 | 0 of 0 |
| Dhiego Lima | 23 of 54 | 42% | 8 of 38 | 4 of 4 | 11 of 12 | 22 of 53 | 1 of 1 | 0 of 0 |
Significant Strikes Per Round
| Rd | Fighter | Sig. Str. | Sig. Str. % | Head | Body | Leg | Distance | Clinch | Ground |
|---|---|---|---|---|---|---|---|---|---|
| 1 | Matt Brown | 15 of 30 | 50% | 8 of 18 | 4 of 8 | 3 of 4 | 15 of 30 | 0 of 0 | 0 of 0 |
| Dhiego Lima | 12 of 32 | 37% | 2 of 21 | 2 of 2 | 8 of 9 | 11 of 31 | 1 of 1 | 0 of 0 | |
| 2 | Matt Brown | 12 of 19 | 63% | 4 of 9 | 7 of 9 | 1 of 1 | 7 of 14 | 5 of 5 | 0 of 0 |
| Dhiego Lima | 11 of 22 | 50% | 6 of 17 | 2 of 2 | 3 of 3 | 11 of 22 | 0 of 0 | 0 of 0 |
Angelo picks Matt Brown as an underdog, citing Lima's brother's recent loss as a potential emotional distraction. He thinks Brown's toughness, power, and underrated wrestling could be factors. He is not confident and has no bets on the fight, but likes the over on strikes for both.
Big Brady picks the younger Lima, citing Brown's age (40) and 13 finished losses. He thinks Lima's leg kicks and youth will lead to a finish, but acknowledges Brown could knock Lima out. He recommends staying away from betting.
Cody picks Lima but is hesitant, noting Lima's questionable chin and recent split decisions. He acknowledges Matt Brown's early power but believes Brown's cardio and speed have declined. Cody thinks Lima's calf kicks and jab will allow him to pull away in later rounds, but he is not confident enough to bet.
Daniel Levi picks Dhiego Lima, citing youth and freshness. He notes that Matt Brown is 40 years old and his durability is declining, as seen in the Miguel Baeza fight where he was knocked out by punches for the first time. He believes Lima's calf kicks and left hook will be effective, and that he can either finish or win a decision. He respects Brown but thinks the age and recent performances favor Lima.
Jacob picks Dhiego Lima, expecting him to chew up Brown's legs with kicks and out-strike him. He thinks Brown's age and lack of volume will be issues. He has Lima in his lineup at $9,000 and believes Lima will dominate without a finish.
The host picks Dhiego Lima by decision, citing his calf kicks and striking advantage. He notes Lima's cardio issues in his last fight but believes he can implement a similar game plan to the Miguel Baeza fight, where calf kicks debilitated Brown. He thinks Lima can get in and out of exchanges and slow Brown down. He is not highly confident but sees Lima as the better fighter against the 40-year-old Brown, who may be on a three-fight skid.
Paul picks Lima, citing Lima's youth and striking advantage. He notes Brown's age (40) and declining cardio, and believes Lima can win by decision or late finish. Paul also bets under 2.5 rounds, expecting a finish either way.
The MMA Guru picks Dhiego Lima to win by first-round TKO via lead hook. He believes Matt Brown has taken too much damage and will rush in with his hands down, allowing Lima to land a check hook similar to the one Miguel Baeza landed on Brown. He references Lima's previous lead hook KO of Chad Laprise and expects Lima to finish Brown at the end of the first round.
Totals
| Fighter | KD | Sig. Str. | Sig. Str. % | Total Str. | TD | TD % | Sub. Att | Rev. | Ctrl |
|---|---|---|---|---|---|---|---|---|---|
| Carlos Condit | 0 | 39 of 88 | 44% | 157 of 209 | 2 of 4 | 50% | 0 | 1 | 4:52 |
| Matt Brown | 0 | 28 of 37 | 75% | 37 of 52 | 1 of 6 | 16% | 0 | 0 | 6:06 |
Per Round
| Rd | Fighter | KD | Sig. Str. | Sig. Str. % | Total Str. | TD | TD % | Sub. Att | Rev. | Ctrl |
|---|---|---|---|---|---|---|---|---|---|---|
| 1 | Carlos Condit | 0 | 6 of 22 | 27% | 60 of 77 | 0 of 0 | --- | 0 | 1 | 0:23 |
| Matt Brown | 0 | 9 of 14 | 64% | 15 of 23 | 1 of 1 | 100% | 0 | 0 | 3:36 | |
| 2 | Carlos Condit | 0 | 21 of 44 | 47% | 58 of 83 | 2 of 3 | 66% | 0 | 0 | 2:25 |
| Matt Brown | 0 | 11 of 15 | 73% | 12 of 16 | 0 of 2 | 0% | 0 | 0 | 0:37 | |
| 3 | Carlos Condit | 0 | 12 of 22 | 54% | 39 of 49 | 0 of 1 | 0% | 0 | 0 | 2:04 |
| Matt Brown | 0 | 8 of 8 | 100% | 10 of 13 | 0 of 3 | 0% | 0 | 0 | 1:53 |
Significant Strikes
| Fighter | Sig. Str. | Sig. Str. % | Head | Body | Leg | Distance | Clinch | Ground |
|---|---|---|---|---|---|---|---|---|
| Carlos Condit | 39 of 88 | 44% | 30 of 73 | 4 of 8 | 5 of 7 | 22 of 68 | 5 of 5 | 12 of 15 |
| Matt Brown | 28 of 37 | 75% | 13 of 22 | 11 of 11 | 4 of 4 | 11 of 18 | 8 of 8 | 9 of 11 |
Significant Strikes Per Round
| Rd | Fighter | Sig. Str. | Sig. Str. % | Head | Body | Leg | Distance | Clinch | Ground |
|---|---|---|---|---|---|---|---|---|---|
| 1 | Carlos Condit | 6 of 22 | 27% | 3 of 16 | 1 of 3 | 2 of 3 | 3 of 17 | 0 of 0 | 3 of 5 |
| Matt Brown | 9 of 14 | 64% | 6 of 11 | 1 of 1 | 2 of 2 | 4 of 7 | 0 of 0 | 5 of 7 | |
| 2 | Carlos Condit | 21 of 44 | 47% | 17 of 38 | 2 of 3 | 2 of 3 | 14 of 36 | 0 of 0 | 7 of 8 |
| Matt Brown | 11 of 15 | 73% | 3 of 7 | 6 of 6 | 2 of 2 | 6 of 10 | 5 of 5 | 0 of 0 | |
| 3 | Carlos Condit | 12 of 22 | 54% | 10 of 19 | 1 of 2 | 1 of 1 | 5 of 15 | 5 of 5 | 2 of 2 |
| Matt Brown | 8 of 8 | 100% | 4 of 4 | 4 of 4 | 0 of 0 | 1 of 1 | 3 of 3 | 4 of 4 |
Big Brady picks Carlos Condit to win inside the distance, specifically by second-round knockout. He notes Condit's 90% finish rate and that he has never been knocked out, while Brown has been knocked out three times and is weak to the body. He believes Brown's durability is not what it once was and that Condit can finish him. He also mentions that Brown has been submitted 10 times, but Condit's path is via knockout.
Daniel Levi picks Matt Brown as a slight underdog, calling it a 50-55 fight. He notes Condit's last win over Court McGee was unimpressive, while Brown has knockout power and a history of finishing fights. He expects Condit to try to point-fight, but Brown's pressure and body shots could be key. He admits low confidence.
Matt Brown's pressure style is a bad matchup for Condit, who struggles when opponents stay in his face and take away his space. Brown will push forward, use dirty boxing, and grind Condit against the cage. Condit's takedown defense is poor and he often relies on his back, but Brown is not a submission threat. Condit's best chance is on the feet with kicks, but Brown's durability and pressure should earn him a decision. The line should be closer to even, so plus money on Brown is value.
The MMA Guru picks Carlos Condit over Matt Brown, citing Condit's superior chin and striking. He notes Brown is losing his chin and coming off a TKO loss, while Condit has never been knocked out. He predicts Condit will win by third-round TKO once Brown gasses. He also mentions Condit's historical robbery against Robbie Lawler.
Totals
| Fighter | KD | Sig. Str. | Sig. Str. % | Total Str. | TD | TD % | Sub. Att | Rev. | Ctrl |
|---|---|---|---|---|---|---|---|---|---|
| Miguel Baeza | 0 | 33 of 61 | 54% | 33 of 61 | 0 of 0 | --- | 0 | 0 | 0:10 |
| Matt Brown | 2 | 37 of 73 | 50% | 42 of 79 | 0 of 0 | --- | 0 | 0 | 0:57 |
Per Round
| Rd | Fighter | KD | Sig. Str. | Sig. Str. % | Total Str. | TD | TD % | Sub. Att | Rev. | Ctrl |
|---|---|---|---|---|---|---|---|---|---|---|
| 1 | Miguel Baeza | 0 | 33 of 59 | 55% | 33 of 59 | 0 of 0 | --- | 0 | 0 | 0:10 |
| Matt Brown | 1 | 32 of 65 | 49% | 37 of 71 | 0 of 0 | --- | 0 | 0 | 0:55 | |
| 2 | Miguel Baeza | 0 | 0 of 2 | 0% | 0 of 2 | 0 of 0 | --- | 0 | 0 | 0:00 |
| Matt Brown | 1 | 5 of 8 | 62% | 5 of 8 | 0 of 0 | --- | 0 | 0 | 0:02 |
Significant Strikes
| Fighter | Sig. Str. | Sig. Str. % | Head | Body | Leg | Distance | Clinch | Ground |
|---|---|---|---|---|---|---|---|---|
| Miguel Baeza | 33 of 61 | 54% | 25 of 51 | 8 of 10 | 0 of 0 | 21 of 44 | 12 of 17 | 0 of 0 |
| Matt Brown | 37 of 73 | 50% | 21 of 54 | 5 of 7 | 11 of 12 | 29 of 62 | 1 of 2 | 7 of 9 |
Significant Strikes Per Round
| Rd | Fighter | Sig. Str. | Sig. Str. % | Head | Body | Leg | Distance | Clinch | Ground |
|---|---|---|---|---|---|---|---|---|---|
| 1 | Miguel Baeza | 33 of 59 | 55% | 25 of 49 | 8 of 10 | 0 of 0 | 21 of 42 | 12 of 17 | 0 of 0 |
| Matt Brown | 32 of 65 | 49% | 17 of 48 | 5 of 6 | 10 of 11 | 25 of 56 | 1 of 2 | 6 of 7 | |
| 2 | Miguel Baeza | 0 of 2 | 0% | 0 of 2 | 0 of 0 | 0 of 0 | 0 of 2 | 0 of 0 | 0 of 0 |
| Matt Brown | 5 of 8 | 62% | 4 of 6 | 0 of 1 | 1 of 1 | 4 of 6 | 0 of 0 | 1 of 2 |
Big Brady picks Miguel Baeza by first-round knockout, but is hesitant. He notes that Baeza's leg kicks are a huge factor and that Brown is dangerous on the feet and has a path to victory via takedowns. He compares the fight to the Askarov vs. Kelleher fight where an undefeated fighter got knocked out. He does not agree with Baeza being a -175 favorite and thinks the line should be closer.
Daniel Levi slightly leans with Matt Brown. He acknowledges that Miguel Baeza is super talented and could blow Brown out with a liver kick, but he thinks Brown will drag him into deep waters and drown him. He notes that Brown has historically been weak to the body but has been fighting with his hands down lately. He sees this as a good lesson for Baeza regardless.
The host picks Matt Brown, believing his veteran experience and pressure against the cage will overwhelm the undefeated Baeza. He thinks Baeza has not faced adversity and will struggle when things don't go his way. He predicts a TKO finish in the second or third round.
Totals
| Fighter | KD | Sig. Str. | Sig. Str. % | Total Str. | TD | TD % | Sub. Att | Rev. | Ctrl |
|---|---|---|---|---|---|---|---|---|---|
| Matt Brown | 0 | 30 of 47 | 63% | 40 of 59 | 2 of 3 | 66% | 0 | 0 | 7:34 |
| Ben Saunders | 0 | 12 of 23 | 52% | 38 of 49 | 0 of 0 | --- | 4 | 0 | 0:10 |
Per Round
| Rd | Fighter | KD | Sig. Str. | Sig. Str. % | Total Str. | TD | TD % | Sub. Att | Rev. | Ctrl |
|---|---|---|---|---|---|---|---|---|---|---|
| 1 | Matt Brown | 0 | 5 of 10 | 50% | 10 of 17 | 1 of 1 | 100% | 0 | 0 | 4:08 |
| Ben Saunders | 0 | 9 of 14 | 64% | 14 of 19 | 0 of 0 | --- | 4 | 0 | 0:00 | |
| 2 | Matt Brown | 0 | 25 of 37 | 67% | 30 of 42 | 1 of 2 | 50% | 0 | 0 | 3:26 |
| Ben Saunders | 0 | 3 of 9 | 33% | 24 of 30 | 0 of 0 | --- | 0 | 0 | 0:10 |
Significant Strikes
| Fighter | Sig. Str. | Sig. Str. % | Head | Body | Leg | Distance | Clinch | Ground |
|---|---|---|---|---|---|---|---|---|
| Matt Brown | 30 of 47 | 63% | 27 of 43 | 2 of 3 | 1 of 1 | 10 of 20 | 2 of 2 | 18 of 25 |
| Ben Saunders | 12 of 23 | 52% | 10 of 17 | 2 of 6 | 0 of 0 | 5 of 15 | 0 of 0 | 7 of 8 |
Significant Strikes Per Round
| Rd | Fighter | Sig. Str. | Sig. Str. % | Head | Body | Leg | Distance | Clinch | Ground |
|---|---|---|---|---|---|---|---|---|---|
| 1 | Matt Brown | 5 of 10 | 50% | 4 of 8 | 1 of 2 | 0 of 0 | 3 of 6 | 0 of 0 | 2 of 4 |
| Ben Saunders | 9 of 14 | 64% | 9 of 12 | 0 of 2 | 0 of 0 | 2 of 6 | 0 of 0 | 7 of 8 | |
| 2 | Matt Brown | 25 of 37 | 67% | 23 of 35 | 1 of 1 | 1 of 1 | 7 of 14 | 2 of 2 | 16 of 21 |
| Ben Saunders | 3 of 9 | 33% | 1 of 5 | 2 of 4 | 0 of 0 | 3 of 9 | 0 of 0 | 0 of 0 |
Totals
| Fighter | KD | Sig. Str. | Sig. Str. % | Total Str. | TD | TD % | Sub. Att | Rev. | Ctrl |
|---|---|---|---|---|---|---|---|---|---|
| Matt Brown | 1 | 18 of 34 | 52% | 20 of 36 | 0 of 0 | --- | 0 | 0 | 0:01 |
| Diego Sanchez | 0 | 12 of 20 | 60% | 13 of 21 | 0 of 3 | 0% | 0 | 0 | 1:29 |
Per Round
| Rd | Fighter | KD | Sig. Str. | Sig. Str. % | Total Str. | TD | TD % | Sub. Att | Rev. | Ctrl |
|---|---|---|---|---|---|---|---|---|---|---|
| 1 | Matt Brown | 1 | 18 of 34 | 52% | 20 of 36 | 0 of 0 | --- | 0 | 0 | 0:01 |
| Diego Sanchez | 0 | 12 of 20 | 60% | 13 of 21 | 0 of 3 | 0% | 0 | 0 | 1:29 |
Significant Strikes
| Fighter | Sig. Str. | Sig. Str. % | Head | Body | Leg | Distance | Clinch | Ground |
|---|---|---|---|---|---|---|---|---|
| Matt Brown | 18 of 34 | 52% | 14 of 30 | 2 of 2 | 2 of 2 | 12 of 28 | 6 of 6 | 0 of 0 |
| Diego Sanchez | 12 of 20 | 60% | 7 of 12 | 2 of 5 | 3 of 3 | 10 of 18 | 2 of 2 | 0 of 0 |
Significant Strikes Per Round
| Rd | Fighter | Sig. Str. | Sig. Str. % | Head | Body | Leg | Distance | Clinch | Ground |
|---|---|---|---|---|---|---|---|---|---|
| 1 | Matt Brown | 18 of 34 | 52% | 14 of 30 | 2 of 2 | 2 of 2 | 12 of 28 | 6 of 6 | 0 of 0 |
| Diego Sanchez | 12 of 20 | 60% | 7 of 12 | 2 of 5 | 3 of 3 | 10 of 18 | 2 of 2 | 0 of 0 |
Totals
| Fighter | KD | Sig. Str. | Sig. Str. % | Total Str. | TD | TD % | Sub. Att | Rev. | Ctrl |
|---|---|---|---|---|---|---|---|---|---|
| Donald Cerrone | 2 | 63 of 147 | 42% | 64 of 148 | 0 of 3 | 0% | 0 | 0 | 0:35 |
| Matt Brown | 1 | 70 of 128 | 54% | 73 of 131 | 0 of 2 | 0% | 1 | 0 | 0:03 |
Per Round
| Rd | Fighter | KD | Sig. Str. | Sig. Str. % | Total Str. | TD | TD % | Sub. Att | Rev. | Ctrl |
|---|---|---|---|---|---|---|---|---|---|---|
| 1 | Donald Cerrone | 0 | 34 of 72 | 47% | 35 of 73 | 0 of 1 | 0% | 0 | 0 | 0:32 |
| Matt Brown | 0 | 27 of 63 | 42% | 29 of 65 | 0 of 0 | --- | 1 | 0 | 0:00 | |
| 2 | Donald Cerrone | 1 | 25 of 70 | 35% | 25 of 70 | 0 of 2 | 0% | 0 | 0 | 0:02 |
| Matt Brown | 1 | 41 of 60 | 68% | 42 of 61 | 0 of 1 | 0% | 0 | 0 | 0:01 | |
| 3 | Donald Cerrone | 1 | 4 of 5 | 80% | 4 of 5 | 0 of 0 | --- | 0 | 0 | 0:01 |
| Matt Brown | 0 | 2 of 5 | 40% | 2 of 5 | 0 of 1 | 0% | 0 | 0 | 0:02 |
Significant Strikes
| Fighter | Sig. Str. | Sig. Str. % | Head | Body | Leg | Distance | Clinch | Ground |
|---|---|---|---|---|---|---|---|---|
| Donald Cerrone | 63 of 147 | 42% | 46 of 126 | 7 of 11 | 10 of 10 | 62 of 143 | 1 of 4 | 0 of 0 |
| Matt Brown | 70 of 128 | 54% | 42 of 91 | 28 of 36 | 0 of 1 | 62 of 118 | 8 of 10 | 0 of 0 |
Significant Strikes Per Round
| Rd | Fighter | Sig. Str. | Sig. Str. % | Head | Body | Leg | Distance | Clinch | Ground |
|---|---|---|---|---|---|---|---|---|---|
| 1 | Donald Cerrone | 34 of 72 | 47% | 24 of 60 | 4 of 6 | 6 of 6 | 34 of 72 | 0 of 0 | 0 of 0 |
| Matt Brown | 27 of 63 | 42% | 15 of 45 | 12 of 18 | 0 of 0 | 25 of 60 | 2 of 3 | 0 of 0 | |
| 2 | Donald Cerrone | 25 of 70 | 35% | 19 of 62 | 3 of 5 | 3 of 3 | 24 of 66 | 1 of 4 | 0 of 0 |
| Matt Brown | 41 of 60 | 68% | 26 of 43 | 15 of 16 | 0 of 1 | 35 of 53 | 6 of 7 | 0 of 0 | |
| 3 | Donald Cerrone | 4 of 5 | 80% | 3 of 4 | 0 of 0 | 1 of 1 | 4 of 5 | 0 of 0 | 0 of 0 |
| Matt Brown | 2 of 5 | 40% | 1 of 3 | 1 of 2 | 0 of 0 | 2 of 5 | 0 of 0 | 0 of 0 |
No comments yet. Be the first to share your thoughts!