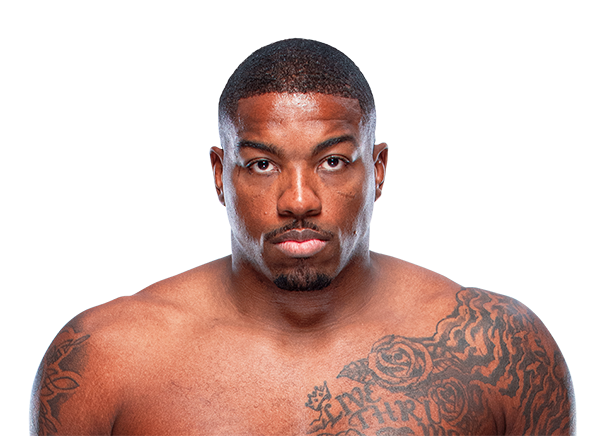
Career Averages - Walt Harris
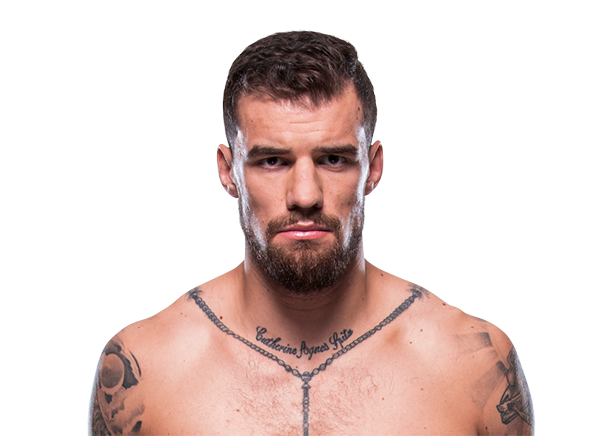
Career Averages - Daniel Spitz
Walt Harris - Fight History
Totals
| Fighter | KD | Sig. Str. | Sig. Str. % | Total Str. | TD | TD % | Sub. Att | Rev. | Ctrl |
|---|---|---|---|---|---|---|---|---|---|
| Marcin Tybura | 0 | 23 of 40 | 57% | 23 of 41 | 0 of 0 | --- | 0 | 0 | 0:06 |
| Walt Harris | 0 | 4 of 10 | 40% | 59 of 71 | 1 of 2 | 50% | 0 | 0 | 2:18 |
Per Round
| Rd | Fighter | KD | Sig. Str. | Sig. Str. % | Total Str. | TD | TD % | Sub. Att | Rev. | Ctrl |
|---|---|---|---|---|---|---|---|---|---|---|
| 1 | Marcin Tybura | 0 | 23 of 40 | 57% | 23 of 41 | 0 of 0 | --- | 0 | 0 | 0:06 |
| Walt Harris | 0 | 4 of 10 | 40% | 59 of 71 | 1 of 2 | 50% | 0 | 0 | 2:18 |
Significant Strikes
| Fighter | Sig. Str. | Sig. Str. % | Head | Body | Leg | Distance | Clinch | Ground |
|---|---|---|---|---|---|---|---|---|
| Marcin Tybura | 23 of 40 | 57% | 17 of 33 | 6 of 7 | 0 of 0 | 19 of 35 | 4 of 5 | 0 of 0 |
| Walt Harris | 4 of 10 | 40% | 2 of 6 | 2 of 4 | 0 of 0 | 4 of 10 | 0 of 0 | 0 of 0 |
Significant Strikes Per Round
| Rd | Fighter | Sig. Str. | Sig. Str. % | Head | Body | Leg | Distance | Clinch | Ground |
|---|---|---|---|---|---|---|---|---|---|
| 1 | Marcin Tybura | 23 of 40 | 57% | 17 of 33 | 6 of 7 | 0 of 0 | 19 of 35 | 4 of 5 | 0 of 0 |
| Walt Harris | 4 of 10 | 40% | 2 of 6 | 2 of 4 | 0 of 0 | 4 of 10 | 0 of 0 | 0 of 0 |
Play-by-Play
View on SherdogRound 1
It’s all heavyweights from here on out tonight, as the co-main event comes between “The Big Ticket” Harris (13-9, 1 NC; 7-8, 1 NC UFC) and surging Polish standout Tybura (21-6, 8-5 UFC). Striker versus grappler will lock horns, and referee Mark Smith will need to mind his P’s and Q’s as this big burly battle proceeds. There is a glove touch between the two, and both men are patient in the opening seconds. Harris reaches out with a front kick that is swatted away, and Tybura comes back with one of his own. Harris slings an uppercut and a head kick that gets blocked, and Tybura walks through a head kick only to get nailed with a spinning back fist on the way down. Harris unloads on a hurt Tybura, drilling him with big punches and knees. Tybura tries to clinch up, and he throws back to surprise Harris for a second. Harris wings on a few power punches, and takes his foot off the accelerator to measure himself. Harris blasts Tybura with a few massive punches, and “Tybur” crashes forward with a desperation takedown to drop Harris to a knee. Harris climbs back to his feet, and he defends by pushing Tybura’s head down and clipping him with a right hand. Tybura regains his wits about him as he marches forward to kick Harris in the torso. Harris looks to pay him back with a similar strike, and Tybura catches the kick and slams him down to the ground. Tybura jumps over to side control, and as Harris scrambles, he surrenders his back. Tybura gets a hook in and starts slamming his fists on the side of Harris’ head. A few punches may have landed on the mohawk line, and Smith chides Tybura to adjust his trajectory. Tybura gets both hooks in and looks to press Harris flat on the ground.
Tybura starts pounding on his opponent with steady diet of right hands, and Smith asks Harris to fight back. Tybura keeps slugging with right after punishing right, and Harris’ knees crumble and he falls to his stomach. The turtled-up posture is not enough for Harris to keep intelligently defending himself, and the punches continue to mount until Smith has to step in and rescue Harris.
What a comeback for “Tybur,” who waded through the fire to put Harris away with strikes late into Round 1.
The Official Result
Marcin Tybura def. Walt Harris R1 4:06 via TKO (Punches)
Big Brady thinks Tybura is the better fighter with more ways to win, including higher output on the feet and a superior ground game. He notes Harris has 100% finish rate by KO but poor cardio and a weak ground game. He believes Tybura can survive the early storm, take Harris down as he tires, and get a late finish. He predicts a third-round TKO for Tybura.
Cody picks Tybura, agreeing with Paul. He notes Tybura's momentum and that Harris is hittable and has cardio issues. Cody expects Tybura to use body kicks and takedowns to wear Harris down. He mentions Harris's power is a threat but Tybura's chin has held up recently. Cody also likes the under 2.5 rounds.
Daniel picks Tybura despite wanting to see Harris win. He notes that Tybura is in the best point of his career, has more ways to win (takedowns, clinch, grinding), and can mix in wrestling to tire Harris out. Daniel acknowledges Harris's first-round knockout power but believes if Harris doesn't finish early, Tybura will take over with his grappling and pressure. He also mentions that Tybura has been hurt in the first round before but has shown resilience. Daniel hopes he is wrong and would love to see Harris have his moment, but objectively he favors Tybura.
Harris is a one-round fighter with poor cardio. Tybura has good body work and grappling. If Tybura survives the first round, he will take over and finish Harris in the second or third.
Paul picks Tybura, noting his recent momentum and wrestling advantage. He expects Tybura to weather Harris's early power, then take over as Harris fades. Paul highlights Tybura's body work and takedowns, similar to the Greg Hardy fight. He acknowledges Harris's one-round KO power but believes Tybura can survive and win.
The Guru picks Marcin Tybura, highlighting Harris's cardio issues shown in losses to Overeem and Volkov. He believes Tybura can survive Harris's early flurries and then take over with grappling as Harris gasses. He predicts Tybura will win by TKO in the second round via ground and pound, noting Tybura has improved defensively after previous KO losses.
Totals
| Fighter | KD | Sig. Str. | Sig. Str. % | Total Str. | TD | TD % | Sub. Att | Rev. | Ctrl |
|---|---|---|---|---|---|---|---|---|---|
| Alexander Volkov | 0 | 45 of 73 | 61% | 45 of 73 | 0 of 0 | --- | 0 | 0 | 0:05 |
| Walt Harris | 0 | 16 of 58 | 27% | 16 of 58 | 0 of 1 | 0% | 0 | 0 | 0:00 |
Per Round
| Rd | Fighter | KD | Sig. Str. | Sig. Str. % | Total Str. | TD | TD % | Sub. Att | Rev. | Ctrl |
|---|---|---|---|---|---|---|---|---|---|---|
| 1 | Alexander Volkov | 0 | 39 of 64 | 60% | 39 of 64 | 0 of 0 | --- | 0 | 0 | 0:02 |
| Walt Harris | 0 | 15 of 54 | 27% | 15 of 54 | 0 of 0 | --- | 0 | 0 | 0:00 | |
| 2 | Alexander Volkov | 0 | 6 of 9 | 66% | 6 of 9 | 0 of 0 | --- | 0 | 0 | 0:03 |
| Walt Harris | 0 | 1 of 4 | 25% | 1 of 4 | 0 of 1 | 0% | 0 | 0 | 0:00 |
Significant Strikes
| Fighter | Sig. Str. | Sig. Str. % | Head | Body | Leg | Distance | Clinch | Ground |
|---|---|---|---|---|---|---|---|---|
| Alexander Volkov | 45 of 73 | 61% | 32 of 59 | 11 of 11 | 2 of 3 | 42 of 69 | 3 of 4 | 0 of 0 |
| Walt Harris | 16 of 58 | 27% | 7 of 45 | 5 of 9 | 4 of 4 | 16 of 56 | 0 of 2 | 0 of 0 |
Significant Strikes Per Round
| Rd | Fighter | Sig. Str. | Sig. Str. % | Head | Body | Leg | Distance | Clinch | Ground |
|---|---|---|---|---|---|---|---|---|---|
| 1 | Alexander Volkov | 39 of 64 | 60% | 27 of 51 | 10 of 10 | 2 of 3 | 36 of 60 | 3 of 4 | 0 of 0 |
| Walt Harris | 15 of 54 | 27% | 6 of 41 | 5 of 9 | 4 of 4 | 15 of 52 | 0 of 2 | 0 of 0 | |
| 2 | Alexander Volkov | 6 of 9 | 66% | 5 of 8 | 1 of 1 | 0 of 0 | 6 of 9 | 0 of 0 | 0 of 0 |
| Walt Harris | 1 of 4 | 25% | 1 of 4 | 0 of 0 | 0 of 0 | 1 of 4 | 0 of 0 | 0 of 0 |
Play-by-Play
View on SherdogRound 1
Up to heavyweight, former Bellator champ Volkov (31-8, 5-2 UFC) comes to blows with heavy-handed Harris (13-8, 1 NC; 6-7, 1 NC UFC). “Drago” posts 20 career knockouts on his ledger, but Harris maintains a 100 percent knockout rate in victory, so this one might not go the distance. Referee Lukasz Bosacki will take the reins on this potential slugfest, but there is a sporting glove touch before they get down to business. Volkov ducks a looping left hand as they both start throwing, and Harris flings a high kick that gets blocked. Volkov walks him down and gets jabbed to the body, and the two heavyweights trade stabbing kicks to the midsection. Harris swings and misses with lethal shots, and Volkov keeps his distance and slaps away a front kick. Harris gets clipped with a straight right as he walks in, and the two clasps hands when trying to find their range. “The Big Ticket” jabs to the body a few times and then throws up another high kick, but Volkov is the one to score with a jab and a left hand that rings Harris’ bell. Harris keeps handfighting and takes a leg kick, but loads up on a big right hand that barely misses. Volkov ducks and moves to return fire, and Harris’ chin holds up. Volkov jab at the body with a kick as he closes the distance, and Harris cracks him with a big right hand. Volkov keeps his composure and walks Harris down, landing strikes and blocking the winging hooks in time. Volkov continues to work front kicks to the body, and he slaps his shin off Harris’ calf. A right hand opens a small cut around Volkov’s right eye, and Harris lets loose a leg kick and a head kick that does not find the target. Volkov stalks him down and evades a left hand, and sees a right hook coming over the top. “Drago” blasts in the body and makes Harris double over, so the Russian charges at him and pours it on to search for a finish. Harris ducks down and tries to slam big hooks in the side of Volkov’s head, attempting to pull off what Scott Smith did to Pete “Drago” Sell with a body shot that led to a knockout. Volkov is wise to it, lets a few bounce off his shoulder, and ends the round with a few more strikes but cannot get the finish he is looking for.
Sherdog Scores
Jay Pettry scores the round: 10-9 Volkov
John Brannigan scores the round: 10-9 Volkov
Tudor Leonte scores the round: 10-9 Volkov
Round 2
The two big men clap hands to start the round, and Harris fakes a takedown to try to get off a big right hand, but the Russian sees it coming and stops it. Harris backs off and changes levels to pursue a takedown, and Volkov stuffs it without issue. Harris sticks out a few jabs, but Volkov greets him with a much cleaner right hand. Volkov pierces the midsection with a kick, and Harris doubles over in pain – the commentary team questions whether the strike was to the groin but it appeared to land square on the liver. Volkov senses that the finish is around the corner, and he rushes in to swarm him and force a stoppage. As “Drago” clubs Harris in the head and side with four or five punches, Bosacki calls a stop to the fight as Harris is no longer intelligently defending himself. This is an important win for Volkov, who bounces back from a tough loss with an impressive knockout win.
The Official Result
Alexander Volkov def. Walt Harris R2 1:15 via TKO (Body Kick and Punches)
Big Brady is confident in Alexander Volkov, citing his technical striking, range management, and high output. He notes Harris is dangerous early but has low output and suspect cardio. He predicts a third-round knockout, but acknowledges Harris could win with an early KO.
Daniel Levi picks Volkov as a pure pick, citing his disciplined point-fighting style and height/reach advantage. He notes that Volkov should keep the fight on the outside and win a decision, but he is concerned about Volkov coming in 18 pounds heavier than his last fight (265 lbs), which could affect his movement. He also mentions that as a fan he hopes Harris wins, but stylistically Volkov is the safer pick.
The host picks Alexander Volkov confidently, citing his reach, volume, and cardio advantage. He notes that Walt Harris is a one-round fighter with poor takedown defense and that Volkov will pick him apart from distance. He expects a third-round stoppage.
The MMA Guru picks Alexander Volkov to win by late second or third round TKO. He notes that Volkov is more experienced (31-8 vs 13-8), has good takedown defense (shown against Curtis Blaydes), and will use front kicks to gas out Harris. He compares Harris unfavorably to Derrick Lewis, who struggled to land on Volkov for most of their fight.
Totals
| Fighter | KD | Sig. Str. | Sig. Str. % | Total Str. | TD | TD % | Sub. Att | Rev. | Ctrl |
|---|---|---|---|---|---|---|---|---|---|
| Alistair Overeem | 1 | 68 of 85 | 80% | 97 of 115 | 1 of 1 | 100% | 0 | 0 | 4:22 |
| Walt Harris | 1 | 25 of 48 | 52% | 25 of 48 | 0 of 0 | --- | 0 | 0 | 0:47 |
Per Round
| Rd | Fighter | KD | Sig. Str. | Sig. Str. % | Total Str. | TD | TD % | Sub. Att | Rev. | Ctrl |
|---|---|---|---|---|---|---|---|---|---|---|
| 1 | Alistair Overeem | 0 | 27 of 33 | 81% | 48 of 55 | 1 of 1 | 100% | 0 | 0 | 2:56 |
| Walt Harris | 1 | 24 of 42 | 57% | 24 of 42 | 0 of 0 | --- | 0 | 0 | 0:47 | |
| 2 | Alistair Overeem | 1 | 41 of 52 | 78% | 49 of 60 | 0 of 0 | --- | 0 | 0 | 1:26 |
| Walt Harris | 0 | 1 of 6 | 16% | 1 of 6 | 0 of 0 | --- | 0 | 0 | 0:00 |
Significant Strikes
| Fighter | Sig. Str. | Sig. Str. % | Head | Body | Leg | Distance | Clinch | Ground |
|---|---|---|---|---|---|---|---|---|
| Alistair Overeem | 68 of 85 | 80% | 58 of 75 | 8 of 8 | 2 of 2 | 7 of 10 | 1 of 1 | 60 of 74 |
| Walt Harris | 25 of 48 | 52% | 19 of 41 | 6 of 7 | 0 of 0 | 6 of 19 | 1 of 3 | 18 of 26 |
Significant Strikes Per Round
| Rd | Fighter | Sig. Str. | Sig. Str. % | Head | Body | Leg | Distance | Clinch | Ground |
|---|---|---|---|---|---|---|---|---|---|
| 1 | Alistair Overeem | 27 of 33 | 81% | 21 of 27 | 5 of 5 | 1 of 1 | 3 of 4 | 1 of 1 | 23 of 28 |
| Walt Harris | 24 of 42 | 57% | 18 of 36 | 6 of 6 | 0 of 0 | 5 of 13 | 1 of 3 | 18 of 26 | |
| 2 | Alistair Overeem | 41 of 52 | 78% | 37 of 48 | 3 of 3 | 1 of 1 | 4 of 6 | 0 of 0 | 37 of 46 |
| Walt Harris | 1 of 6 | 16% | 1 of 5 | 0 of 1 | 0 of 0 | 1 of 6 | 0 of 0 | 0 of 0 |
Big Brady picks Walt Harris by first-round knockout, citing Overeem's diminished chin and Harris' power. He notes that Overeem is likely the better fighter overall but cannot be trusted due to his chin, which has been knocked out 13 times. He believes Harris will land one shot and finish the fight. He acknowledges that Overeem could win if he takes Harris down, but doubts his wrestling is good enough. He mentions the emotional motivation for Harris after his daughter's passing.
Daniel Levi picks Walt Harris via vicious knockout. He believes Harris has turned a corner, putting things together, and has the proper technique and power to put away Overeem. He notes that Overeem is the more skilled fighter but has a small margin for error and is in denial about his recent KO loss. Levi emphasizes that Harris should stay composed and not fight too emotionally.
The host is torn but ultimately picks Overeem, citing his experience and ability to adjust after the Rozenstruik fight. He believes Overeem will be elusive, avoid Harris's early power, and take the fight to the ground for a TKO. He admits he's rooting for Harris due to his personal story but thinks Overeem's skills and tools will prevail.
Totals
| Fighter | KD | Sig. Str. | Sig. Str. % | Total Str. | TD | TD % | Sub. Att | Rev. | Ctrl |
|---|---|---|---|---|---|---|---|---|---|
| Walt Harris | 0 | 1 of 3 | 33% | 1 of 3 | 0 of 0 | --- | 0 | 0 | 0:00 |
| Aleksei Oleinik | 1 | 4 of 7 | 57% | 4 of 7 | 0 of 0 | --- | 0 | 0 | 0:01 |
Per Round
| Rd | Fighter | KD | Sig. Str. | Sig. Str. % | Total Str. | TD | TD % | Sub. Att | Rev. | Ctrl |
|---|---|---|---|---|---|---|---|---|---|---|
| 1 | Walt Harris | 0 | 1 of 3 | 33% | 1 of 3 | 0 of 0 | --- | 0 | 0 | 0:00 |
| Aleksei Oleinik | 1 | 4 of 7 | 57% | 4 of 7 | 0 of 0 | --- | 0 | 0 | 0:01 |
Significant Strikes
| Fighter | Sig. Str. | Sig. Str. % | Head | Body | Leg | Distance | Clinch | Ground |
|---|---|---|---|---|---|---|---|---|
| Walt Harris | 1 of 3 | 33% | 0 of 1 | 1 of 1 | 0 of 1 | 1 of 3 | 0 of 0 | 0 of 0 |
| Aleksei Oleinik | 4 of 7 | 57% | 2 of 5 | 2 of 2 | 0 of 0 | 2 of 5 | 0 of 0 | 2 of 2 |
Significant Strikes Per Round
| Rd | Fighter | Sig. Str. | Sig. Str. % | Head | Body | Leg | Distance | Clinch | Ground |
|---|---|---|---|---|---|---|---|---|---|
| 1 | Walt Harris | 1 of 3 | 33% | 0 of 1 | 1 of 1 | 0 of 1 | 1 of 3 | 0 of 0 | 0 of 0 |
| Aleksei Oleinik | 4 of 7 | 57% | 2 of 5 | 2 of 2 | 0 of 0 | 2 of 5 | 0 of 0 | 2 of 2 |
Totals
| Fighter | KD | Sig. Str. | Sig. Str. % | Total Str. | TD | TD % | Sub. Att | Rev. | Ctrl |
|---|---|---|---|---|---|---|---|---|---|
| Walt Harris | 1 | 17 of 28 | 60% | 17 of 28 | 0 of 0 | --- | 0 | 0 | 0:05 |
| Serghei Spivac | 0 | 1 of 3 | 33% | 1 of 3 | 0 of 0 | --- | 0 | 0 | 0:00 |
Per Round
| Rd | Fighter | KD | Sig. Str. | Sig. Str. % | Total Str. | TD | TD % | Sub. Att | Rev. | Ctrl |
|---|---|---|---|---|---|---|---|---|---|---|
| 1 | Walt Harris | 1 | 17 of 28 | 60% | 17 of 28 | 0 of 0 | --- | 0 | 0 | 0:05 |
| Serghei Spivac | 0 | 1 of 3 | 33% | 1 of 3 | 0 of 0 | --- | 0 | 0 | 0:00 |
Significant Strikes
| Fighter | Sig. Str. | Sig. Str. % | Head | Body | Leg | Distance | Clinch | Ground |
|---|---|---|---|---|---|---|---|---|
| Walt Harris | 17 of 28 | 60% | 17 of 27 | 0 of 1 | 0 of 0 | 9 of 18 | 3 of 4 | 5 of 6 |
| Serghei Spivac | 1 of 3 | 33% | 0 of 2 | 0 of 0 | 1 of 1 | 1 of 3 | 0 of 0 | 0 of 0 |
Significant Strikes Per Round
| Rd | Fighter | Sig. Str. | Sig. Str. % | Head | Body | Leg | Distance | Clinch | Ground |
|---|---|---|---|---|---|---|---|---|---|
| 1 | Walt Harris | 17 of 28 | 60% | 17 of 27 | 0 of 1 | 0 of 0 | 9 of 18 | 3 of 4 | 5 of 6 |
| Serghei Spivac | 1 of 3 | 33% | 0 of 2 | 0 of 0 | 1 of 1 | 1 of 3 | 0 of 0 | 0 of 0 |
Totals
| Fighter | KD | Sig. Str. | Sig. Str. % | Total Str. | TD | TD % | Sub. Att | Rev. | Ctrl |
|---|---|---|---|---|---|---|---|---|---|
| Walt Harris | 0 | 44 of 93 | 47% | 48 of 97 | 0 of 1 | 0% | 0 | 0 | 0:09 |
| Andrei Arlovski | 0 | 24 of 93 | 25% | 26 of 95 | 1 of 3 | 33% | 0 | 0 | 0:34 |
Per Round
| Rd | Fighter | KD | Sig. Str. | Sig. Str. % | Total Str. | TD | TD % | Sub. Att | Rev. | Ctrl |
|---|---|---|---|---|---|---|---|---|---|---|
| 1 | Walt Harris | 0 | 15 of 36 | 41% | 17 of 38 | 0 of 1 | 0% | 0 | 0 | 0:09 |
| Andrei Arlovski | 0 | 13 of 40 | 32% | 14 of 41 | 0 of 1 | 0% | 0 | 0 | 0:16 | |
| 2 | Walt Harris | 0 | 17 of 28 | 60% | 17 of 28 | 0 of 0 | --- | 0 | 0 | 0:00 |
| Andrei Arlovski | 0 | 7 of 21 | 33% | 8 of 22 | 1 of 2 | 50% | 0 | 0 | 0:18 | |
| 3 | Walt Harris | 0 | 12 of 29 | 41% | 14 of 31 | 0 of 0 | --- | 0 | 0 | 0:00 |
| Andrei Arlovski | 0 | 4 of 32 | 12% | 4 of 32 | 0 of 0 | --- | 0 | 0 | 0:00 |
Significant Strikes
| Fighter | Sig. Str. | Sig. Str. % | Head | Body | Leg | Distance | Clinch | Ground |
|---|---|---|---|---|---|---|---|---|
| Walt Harris | 44 of 93 | 47% | 20 of 60 | 11 of 17 | 13 of 16 | 43 of 90 | 1 of 3 | 0 of 0 |
| Andrei Arlovski | 24 of 93 | 25% | 13 of 72 | 11 of 20 | 0 of 1 | 21 of 85 | 3 of 8 | 0 of 0 |
Significant Strikes Per Round
| Rd | Fighter | Sig. Str. | Sig. Str. % | Head | Body | Leg | Distance | Clinch | Ground |
|---|---|---|---|---|---|---|---|---|---|
| 1 | Walt Harris | 15 of 36 | 41% | 8 of 25 | 1 of 4 | 6 of 7 | 14 of 33 | 1 of 3 | 0 of 0 |
| Andrei Arlovski | 13 of 40 | 32% | 8 of 30 | 5 of 9 | 0 of 1 | 10 of 34 | 3 of 6 | 0 of 0 | |
| 2 | Walt Harris | 17 of 28 | 60% | 7 of 17 | 5 of 5 | 5 of 6 | 17 of 28 | 0 of 0 | 0 of 0 |
| Andrei Arlovski | 7 of 21 | 33% | 2 of 15 | 5 of 6 | 0 of 0 | 7 of 20 | 0 of 1 | 0 of 0 | |
| 3 | Walt Harris | 12 of 29 | 41% | 5 of 18 | 5 of 8 | 2 of 3 | 12 of 29 | 0 of 0 | 0 of 0 |
| Andrei Arlovski | 4 of 32 | 12% | 3 of 27 | 1 of 5 | 0 of 0 | 4 of 31 | 0 of 1 | 0 of 0 |
Totals
| Fighter | KD | Sig. Str. | Sig. Str. % | Total Str. | TD | TD % | Sub. Att | Rev. | Ctrl |
|---|---|---|---|---|---|---|---|---|---|
| Walt Harris | 1 | 29 of 79 | 36% | 30 of 80 | 0 of 0 | --- | 0 | 0 | 0:10 |
| Daniel Spitz | 0 | 17 of 42 | 40% | 17 of 42 | 0 of 0 | --- | 0 | 0 | 0:00 |
Per Round
| Rd | Fighter | KD | Sig. Str. | Sig. Str. % | Total Str. | TD | TD % | Sub. Att | Rev. | Ctrl |
|---|---|---|---|---|---|---|---|---|---|---|
| 1 | Walt Harris | 0 | 11 of 32 | 34% | 11 of 32 | 0 of 0 | --- | 0 | 0 | 0:00 |
| Daniel Spitz | 0 | 7 of 16 | 43% | 7 of 16 | 0 of 0 | --- | 0 | 0 | 0:00 | |
| 2 | Walt Harris | 1 | 18 of 47 | 38% | 19 of 48 | 0 of 0 | --- | 0 | 0 | 0:10 |
| Daniel Spitz | 0 | 10 of 26 | 38% | 10 of 26 | 0 of 0 | --- | 0 | 0 | 0:00 |
Significant Strikes
| Fighter | Sig. Str. | Sig. Str. % | Head | Body | Leg | Distance | Clinch | Ground |
|---|---|---|---|---|---|---|---|---|
| Walt Harris | 29 of 79 | 36% | 19 of 61 | 6 of 14 | 4 of 4 | 18 of 66 | 2 of 2 | 9 of 11 |
| Daniel Spitz | 17 of 42 | 40% | 1 of 17 | 5 of 13 | 11 of 12 | 17 of 42 | 0 of 0 | 0 of 0 |
Significant Strikes Per Round
| Rd | Fighter | Sig. Str. | Sig. Str. % | Head | Body | Leg | Distance | Clinch | Ground |
|---|---|---|---|---|---|---|---|---|---|
| 1 | Walt Harris | 11 of 32 | 34% | 5 of 21 | 3 of 8 | 3 of 3 | 10 of 31 | 1 of 1 | 0 of 0 |
| Daniel Spitz | 7 of 16 | 43% | 0 of 5 | 4 of 8 | 3 of 3 | 7 of 16 | 0 of 0 | 0 of 0 | |
| 2 | Walt Harris | 18 of 47 | 38% | 14 of 40 | 3 of 6 | 1 of 1 | 8 of 35 | 1 of 1 | 9 of 11 |
| Daniel Spitz | 10 of 26 | 38% | 1 of 12 | 1 of 5 | 8 of 9 | 10 of 26 | 0 of 0 | 0 of 0 |
Totals
| Fighter | KD | Sig. Str. | Sig. Str. % | Total Str. | TD | TD % | Sub. Att | Rev. | Ctrl |
|---|---|---|---|---|---|---|---|---|---|
| Mark Godbeer | 0 | 21 of 38 | 55% | 34 of 53 | 1 of 1 | 100% | 0 | 0 | 3:11 |
| Walt Harris | 0 | 3 of 15 | 20% | 9 of 22 | 0 of 0 | --- | 0 | 0 | 0:00 |
Per Round
| Rd | Fighter | KD | Sig. Str. | Sig. Str. % | Total Str. | TD | TD % | Sub. Att | Rev. | Ctrl |
|---|---|---|---|---|---|---|---|---|---|---|
| 1 | Mark Godbeer | 0 | 21 of 38 | 55% | 34 of 53 | 1 of 1 | 100% | 0 | 0 | 3:11 |
| Walt Harris | 0 | 3 of 15 | 20% | 9 of 22 | 0 of 0 | --- | 0 | 0 | 0:00 |
Significant Strikes
| Fighter | Sig. Str. | Sig. Str. % | Head | Body | Leg | Distance | Clinch | Ground |
|---|---|---|---|---|---|---|---|---|
| Mark Godbeer | 21 of 38 | 55% | 17 of 31 | 4 of 7 | 0 of 0 | 5 of 19 | 1 of 1 | 15 of 18 |
| Walt Harris | 3 of 15 | 20% | 2 of 13 | 1 of 1 | 0 of 1 | 2 of 14 | 1 of 1 | 0 of 0 |
Significant Strikes Per Round
| Rd | Fighter | Sig. Str. | Sig. Str. % | Head | Body | Leg | Distance | Clinch | Ground |
|---|---|---|---|---|---|---|---|---|---|
| 1 | Mark Godbeer | 21 of 38 | 55% | 17 of 31 | 4 of 7 | 0 of 0 | 5 of 19 | 1 of 1 | 15 of 18 |
| Walt Harris | 3 of 15 | 20% | 2 of 13 | 1 of 1 | 0 of 1 | 2 of 14 | 1 of 1 | 0 of 0 |
Daniel Spitz - Fight History
Totals
| Fighter | KD | Sig. Str. | Sig. Str. % | Total Str. | TD | TD % | Sub. Att | Rev. | Ctrl |
|---|---|---|---|---|---|---|---|---|---|
| Tanner Boser | 0 | 32 of 108 | 29% | 32 of 108 | 0 of 0 | --- | 0 | 0 | 0:00 |
| Daniel Spitz | 0 | 93 of 151 | 61% | 93 of 151 | 0 of 0 | --- | 0 | 0 | 0:00 |
Per Round
| Rd | Fighter | KD | Sig. Str. | Sig. Str. % | Total Str. | TD | TD % | Sub. Att | Rev. | Ctrl |
|---|---|---|---|---|---|---|---|---|---|---|
| 1 | Tanner Boser | 0 | 4 of 22 | 18% | 4 of 22 | 0 of 0 | --- | 0 | 0 | 0:00 |
| Daniel Spitz | 0 | 20 of 34 | 58% | 20 of 34 | 0 of 0 | --- | 0 | 0 | 0:00 | |
| 2 | Tanner Boser | 0 | 13 of 41 | 31% | 13 of 41 | 0 of 0 | --- | 0 | 0 | 0:00 |
| Daniel Spitz | 0 | 35 of 51 | 68% | 35 of 51 | 0 of 0 | --- | 0 | 0 | 0:00 | |
| 3 | Tanner Boser | 0 | 15 of 45 | 33% | 15 of 45 | 0 of 0 | --- | 0 | 0 | 0:00 |
| Daniel Spitz | 0 | 38 of 66 | 57% | 38 of 66 | 0 of 0 | --- | 0 | 0 | 0:00 |
Significant Strikes
| Fighter | Sig. Str. | Sig. Str. % | Head | Body | Leg | Distance | Clinch | Ground |
|---|---|---|---|---|---|---|---|---|
| Tanner Boser | 32 of 108 | 29% | 20 of 83 | 6 of 16 | 6 of 9 | 32 of 108 | 0 of 0 | 0 of 0 |
| Daniel Spitz | 93 of 151 | 61% | 33 of 86 | 25 of 27 | 35 of 38 | 93 of 151 | 0 of 0 | 0 of 0 |
Significant Strikes Per Round
| Rd | Fighter | Sig. Str. | Sig. Str. % | Head | Body | Leg | Distance | Clinch | Ground |
|---|---|---|---|---|---|---|---|---|---|
| 1 | Tanner Boser | 4 of 22 | 18% | 1 of 14 | 1 of 3 | 2 of 5 | 4 of 22 | 0 of 0 | 0 of 0 |
| Daniel Spitz | 20 of 34 | 58% | 6 of 19 | 4 of 4 | 10 of 11 | 20 of 34 | 0 of 0 | 0 of 0 | |
| 2 | Tanner Boser | 13 of 41 | 31% | 9 of 32 | 3 of 8 | 1 of 1 | 13 of 41 | 0 of 0 | 0 of 0 |
| Daniel Spitz | 35 of 51 | 68% | 11 of 25 | 15 of 15 | 9 of 11 | 35 of 51 | 0 of 0 | 0 of 0 | |
| 3 | Tanner Boser | 15 of 45 | 33% | 10 of 37 | 2 of 5 | 3 of 3 | 15 of 45 | 0 of 0 | 0 of 0 |
| Daniel Spitz | 38 of 66 | 57% | 16 of 42 | 6 of 8 | 16 of 16 | 38 of 66 | 0 of 0 | 0 of 0 |
Play-by-Play
View on SherdogRound 1
We begin the night at the heavyweight division, where Spitz (6-2, 1-2 UFC) will try to spoil Boser's (16-5-1, 0-0 UFC) second attempt at making his debut. Boser was originally set to appear at UFC 240, but his opponent Giacomo Lemos tested positive for drostanolone (an anabolic steroid) on fight week. Refereeing this sizeable matchup will be Gary Forman. We touch gloves, and the night has officially begun. The two men trade left jabs immediately, as Boser's mullet waves majestically behind him. A right from Boser comes over the top to click Spitz on the chin, and then he throws a heavy leg kick to follow it. Boser wings a left hand that falls short, as he is trying to combat the range of his far longer opponent, but he is able to reach with a few more leg kicks. As Spitz commits to a body kick, Boser sits down on a huge right hand that just comes short of the mark. The Canadian then sets up his own body kick, so Spitz comes back with a head kick that misses the mark. The two then throw leg kicks, but Boser's is more impactful, as he uses it to back away his taller adversary. Despite Spitz holding a significant reach advantage, it is largely Boser who is able to score more effectively with his punches. Another vicious body kick comes from Boser, and Spitz is unable to block it in time as it lands with an audible pop. After setting up a few kicks, Boser cracks Spitz with a left hand that sends him staggering back, but the American regains his composure and walks his man down. Spitz ends the round with a combination that mostly misses, and a head kick that also falls shy.
Sherdog Scores
Jay Pettry scores the round: 10-9 Boser
Mike Sloan scores the round: 10-9 Boser
Tyler Treese scores the round: 10-9 Boser
Round 2
Like the opening round, we again begin with twin jabs from the two heavyweights. Boser immediately backs away to start up with his kicking game again, knowing that if he can't connect with punches, his kicks will still reach his opponent. Spitz finally responds with a solid kick of his own, throw a front kick right down the middle that pushes Boser away. The Canadian wears it well, as he circles away to try to find his way in. As Boser presses forward, Spitz is finally ready with a response, throwing a slick one-two that makes Boser backpedal. "The Bulldozer" keeps his leg kick flowing, as Spitz's knee is starting to welt up and turn red quickly. A big right hand from Boser causes the crowd to gasp, but Spitz shakes it off and continues to walk forward. As Spitz presses forward, that inside leg kick is adding up quickly for Boser. The damage on that lead leg of Spitz is growing, as the swelling is start to make his knee expand and lift his leg up more often to prepare for kicks coming his way. The Canadian ducks down and slips in an overhand left, and Spitz tries to roll through it but is caught fairly flush. He is no worse for wear, and as he throws a low kick to respond to all that have come from Boser, Boser does not let him get away with it by throwing a few leg kicks back. With the 10-second clapper sounding, Spitz stalks his man down, but he is unable to do anything with it as the round concludes.
Sherdog Scores
Jay Pettry scores the round: 10-9 Boser
Mike Sloan scores the round: 10-9 Boser
Tyler Treese scores the round: 10-9 Boser
Round 3
Spitz opens the last round with a front kick, as it has been arguably his most effective weapon in the contest. When Spitz tries to sink in a leg kick, Boser checks it and throws one right back at that already damaged knee. Boser blitzes forward with a combination but does not connect significantly, although he breaks off with yet another leg kick. Despite the visible damage, Spitz seems unaffected, and is not limping or favoring the leg to any degree. The two men trade body kicks, and each block them, as Boser unleashes a spinning back fist that glances off the chin of his opponent. Boser sends a few more kicks to that knee of "Daddy Long Legs," as the Canadian has his sights set on those aforementioned long legs with kick after kick on the inside and outside. Boser chains together several one-two combinations that Spitz rolls away from, but he eats two leg kicks that finally show the kicks are getting to him with a wince. As Boser ducks down, Spitz tags him with an uppercut, but he does not follow it up as he eats a couple more constant leg kicks. Boser alternates body kicks with each of his legs that both land flush, so Spitz tries to slow down his adversary's movement with a leg kick. Keeping that leg kick flowing as seconds tick off the clock, Boser sits down on one final -- and possibly the heaviest -- leg kick to punctuate the bout. As the horn sounds to end the bout, Spitz limps away, but is quick to greet and congratulate Boser for a tough fight.
Sherdog Scores
Jay Pettry scores the round: 10-9 Boser (30-27 Boser)
Mike Sloan scores the round: 10-9 Boser (30-27 Boser)
Tyler Treese scores the round: 10-9 Boser (30-27 Boser)
The Official Result
Tanner Boser def. Daniel Spitz via Unanimous Decision (30-27, 30-27, 30-27)
Totals
| Fighter | KD | Sig. Str. | Sig. Str. % | Total Str. | TD | TD % | Sub. Att | Rev. | Ctrl |
|---|---|---|---|---|---|---|---|---|---|
| Walt Harris | 1 | 29 of 79 | 36% | 30 of 80 | 0 of 0 | --- | 0 | 0 | 0:10 |
| Daniel Spitz | 0 | 17 of 42 | 40% | 17 of 42 | 0 of 0 | --- | 0 | 0 | 0:00 |
Per Round
| Rd | Fighter | KD | Sig. Str. | Sig. Str. % | Total Str. | TD | TD % | Sub. Att | Rev. | Ctrl |
|---|---|---|---|---|---|---|---|---|---|---|
| 1 | Walt Harris | 0 | 11 of 32 | 34% | 11 of 32 | 0 of 0 | --- | 0 | 0 | 0:00 |
| Daniel Spitz | 0 | 7 of 16 | 43% | 7 of 16 | 0 of 0 | --- | 0 | 0 | 0:00 | |
| 2 | Walt Harris | 1 | 18 of 47 | 38% | 19 of 48 | 0 of 0 | --- | 0 | 0 | 0:10 |
| Daniel Spitz | 0 | 10 of 26 | 38% | 10 of 26 | 0 of 0 | --- | 0 | 0 | 0:00 |
Significant Strikes
| Fighter | Sig. Str. | Sig. Str. % | Head | Body | Leg | Distance | Clinch | Ground |
|---|---|---|---|---|---|---|---|---|
| Walt Harris | 29 of 79 | 36% | 19 of 61 | 6 of 14 | 4 of 4 | 18 of 66 | 2 of 2 | 9 of 11 |
| Daniel Spitz | 17 of 42 | 40% | 1 of 17 | 5 of 13 | 11 of 12 | 17 of 42 | 0 of 0 | 0 of 0 |
Significant Strikes Per Round
| Rd | Fighter | Sig. Str. | Sig. Str. % | Head | Body | Leg | Distance | Clinch | Ground |
|---|---|---|---|---|---|---|---|---|---|
| 1 | Walt Harris | 11 of 32 | 34% | 5 of 21 | 3 of 8 | 3 of 3 | 10 of 31 | 1 of 1 | 0 of 0 |
| Daniel Spitz | 7 of 16 | 43% | 0 of 5 | 4 of 8 | 3 of 3 | 7 of 16 | 0 of 0 | 0 of 0 | |
| 2 | Walt Harris | 18 of 47 | 38% | 14 of 40 | 3 of 6 | 1 of 1 | 8 of 35 | 1 of 1 | 9 of 11 |
| Daniel Spitz | 10 of 26 | 38% | 1 of 12 | 1 of 5 | 8 of 9 | 10 of 26 | 0 of 0 | 0 of 0 |
Totals
| Fighter | KD | Sig. Str. | Sig. Str. % | Total Str. | TD | TD % | Sub. Att | Rev. | Ctrl |
|---|---|---|---|---|---|---|---|---|---|
| Daniel Spitz | 0 | 0 of 1 | 0% | 0 of 1 | 0 of 0 | --- | 0 | 0 | 0:00 |
| Anthony Hamilton | 0 | 5 of 6 | 83% | 5 of 6 | 1 of 1 | 100% | 0 | 0 | 0:02 |
Per Round
| Rd | Fighter | KD | Sig. Str. | Sig. Str. % | Total Str. | TD | TD % | Sub. Att | Rev. | Ctrl |
|---|---|---|---|---|---|---|---|---|---|---|
| 1 | Daniel Spitz | 0 | 0 of 1 | 0% | 0 of 1 | 0 of 0 | --- | 0 | 0 | 0:00 |
| Anthony Hamilton | 0 | 5 of 6 | 83% | 5 of 6 | 1 of 1 | 100% | 0 | 0 | 0:02 |
Significant Strikes
| Fighter | Sig. Str. | Sig. Str. % | Head | Body | Leg | Distance | Clinch | Ground |
|---|---|---|---|---|---|---|---|---|
| Daniel Spitz | 0 of 1 | 0% | 0 of 1 | 0 of 0 | 0 of 0 | 0 of 1 | 0 of 0 | 0 of 0 |
| Anthony Hamilton | 5 of 6 | 83% | 5 of 5 | 0 of 1 | 0 of 0 | 1 of 2 | 0 of 0 | 4 of 4 |
Significant Strikes Per Round
| Rd | Fighter | Sig. Str. | Sig. Str. % | Head | Body | Leg | Distance | Clinch | Ground |
|---|---|---|---|---|---|---|---|---|---|
| 1 | Daniel Spitz | 0 of 1 | 0% | 0 of 1 | 0 of 0 | 0 of 0 | 0 of 1 | 0 of 0 | 0 of 0 |
| Anthony Hamilton | 5 of 6 | 83% | 5 of 5 | 0 of 1 | 0 of 0 | 1 of 2 | 0 of 0 | 4 of 4 |
Totals
| Fighter | KD | Sig. Str. | Sig. Str. % | Total Str. | TD | TD % | Sub. Att | Rev. | Ctrl |
|---|---|---|---|---|---|---|---|---|---|
| Mark Godbeer | 0 | 92 of 167 | 55% | 100 of 176 | 0 of 0 | --- | 0 | 0 | 1:13 |
| Daniel Spitz | 0 | 51 of 136 | 37% | 74 of 160 | 1 of 2 | 50% | 0 | 0 | 1:03 |
Per Round
| Rd | Fighter | KD | Sig. Str. | Sig. Str. % | Total Str. | TD | TD % | Sub. Att | Rev. | Ctrl |
|---|---|---|---|---|---|---|---|---|---|---|
| 1 | Mark Godbeer | 0 | 33 of 64 | 51% | 33 of 64 | 0 of 0 | --- | 0 | 0 | 0:01 |
| Daniel Spitz | 0 | 16 of 46 | 34% | 17 of 47 | 0 of 0 | --- | 0 | 0 | 0:00 | |
| 2 | Mark Godbeer | 0 | 32 of 56 | 57% | 37 of 62 | 0 of 0 | --- | 0 | 0 | 0:32 |
| Daniel Spitz | 0 | 20 of 39 | 51% | 28 of 48 | 1 of 2 | 50% | 0 | 0 | 0:59 | |
| 3 | Mark Godbeer | 0 | 27 of 47 | 57% | 30 of 50 | 0 of 0 | --- | 0 | 0 | 0:40 |
| Daniel Spitz | 0 | 15 of 51 | 29% | 29 of 65 | 0 of 0 | --- | 0 | 0 | 0:04 |
Significant Strikes
| Fighter | Sig. Str. | Sig. Str. % | Head | Body | Leg | Distance | Clinch | Ground |
|---|---|---|---|---|---|---|---|---|
| Mark Godbeer | 92 of 167 | 55% | 50 of 111 | 29 of 40 | 13 of 16 | 74 of 142 | 18 of 25 | 0 of 0 |
| Daniel Spitz | 51 of 136 | 37% | 33 of 113 | 13 of 16 | 5 of 7 | 43 of 123 | 8 of 13 | 0 of 0 |
Significant Strikes Per Round
| Rd | Fighter | Sig. Str. | Sig. Str. % | Head | Body | Leg | Distance | Clinch | Ground |
|---|---|---|---|---|---|---|---|---|---|
| 1 | Mark Godbeer | 33 of 64 | 51% | 12 of 35 | 11 of 16 | 10 of 13 | 30 of 58 | 3 of 6 | 0 of 0 |
| Daniel Spitz | 16 of 46 | 34% | 9 of 36 | 3 of 4 | 4 of 6 | 15 of 42 | 1 of 4 | 0 of 0 | |
| 2 | Mark Godbeer | 32 of 56 | 57% | 20 of 40 | 10 of 14 | 2 of 2 | 21 of 42 | 11 of 14 | 0 of 0 |
| Daniel Spitz | 20 of 39 | 51% | 13 of 32 | 6 of 6 | 1 of 1 | 14 of 33 | 6 of 6 | 0 of 0 | |
| 3 | Mark Godbeer | 27 of 47 | 57% | 18 of 36 | 8 of 10 | 1 of 1 | 23 of 42 | 4 of 5 | 0 of 0 |
| Daniel Spitz | 15 of 51 | 29% | 11 of 45 | 4 of 6 | 0 of 0 | 14 of 48 | 1 of 3 | 0 of 0 |
No comments yet. Be the first to share your thoughts!