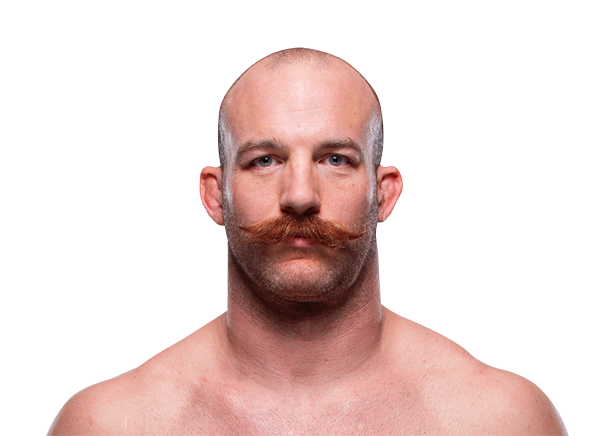
Career Averages - Patrick Cummins
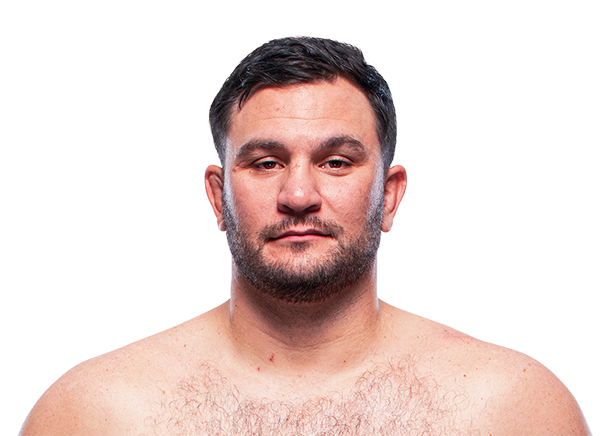
Career Averages - Gian Villante
Patrick Cummins - Fight History
Totals
| Fighter | KD | Sig. Str. | Sig. Str. % | Total Str. | TD | TD % | Sub. Att | Rev. | Ctrl |
|---|---|---|---|---|---|---|---|---|---|
| Ed Herman | 0 | 22 of 33 | 66% | 22 of 33 | 1 of 2 | 50% | 0 | 0 | 0:10 |
| Patrick Cummins | 1 | 11 of 35 | 31% | 14 of 38 | 0 of 0 | --- | 0 | 0 | 0:04 |
Per Round
| Rd | Fighter | KD | Sig. Str. | Sig. Str. % | Total Str. | TD | TD % | Sub. Att | Rev. | Ctrl |
|---|---|---|---|---|---|---|---|---|---|---|
| 1 | Ed Herman | 0 | 22 of 33 | 66% | 22 of 33 | 1 of 2 | 50% | 0 | 0 | 0:10 |
| Patrick Cummins | 1 | 11 of 35 | 31% | 14 of 38 | 0 of 0 | --- | 0 | 0 | 0:04 |
Significant Strikes
| Fighter | Sig. Str. | Sig. Str. % | Head | Body | Leg | Distance | Clinch | Ground |
|---|---|---|---|---|---|---|---|---|
| Ed Herman | 22 of 33 | 66% | 21 of 31 | 0 of 1 | 1 of 1 | 18 of 29 | 4 of 4 | 0 of 0 |
| Patrick Cummins | 11 of 35 | 31% | 11 of 34 | 0 of 0 | 0 of 1 | 8 of 28 | 1 of 4 | 2 of 3 |
Significant Strikes Per Round
| Rd | Fighter | Sig. Str. | Sig. Str. % | Head | Body | Leg | Distance | Clinch | Ground |
|---|---|---|---|---|---|---|---|---|---|
| 1 | Ed Herman | 22 of 33 | 66% | 21 of 31 | 0 of 1 | 1 of 1 | 18 of 29 | 4 of 4 | 0 of 0 |
| Patrick Cummins | 11 of 35 | 31% | 11 of 34 | 0 of 0 | 0 of 1 | 8 of 28 | 1 of 4 | 2 of 3 |
Totals
| Fighter | KD | Sig. Str. | Sig. Str. % | Total Str. | TD | TD % | Sub. Att | Rev. | Ctrl |
|---|---|---|---|---|---|---|---|---|---|
| Misha Cirkunov | 0 | 11 of 18 | 61% | 65 of 72 | 1 of 1 | 100% | 2 | 0 | 0:40 |
| Patrick Cummins | 0 | 3 of 5 | 60% | 6 of 8 | 0 of 3 | 0% | 0 | 0 | 1:26 |
Per Round
| Rd | Fighter | KD | Sig. Str. | Sig. Str. % | Total Str. | TD | TD % | Sub. Att | Rev. | Ctrl |
|---|---|---|---|---|---|---|---|---|---|---|
| 1 | Misha Cirkunov | 0 | 11 of 18 | 61% | 65 of 72 | 1 of 1 | 100% | 2 | 0 | 0:40 |
| Patrick Cummins | 0 | 3 of 5 | 60% | 6 of 8 | 0 of 3 | 0% | 0 | 0 | 1:26 |
Significant Strikes
| Fighter | Sig. Str. | Sig. Str. % | Head | Body | Leg | Distance | Clinch | Ground |
|---|---|---|---|---|---|---|---|---|
| Misha Cirkunov | 11 of 18 | 61% | 2 of 6 | 9 of 12 | 0 of 0 | 1 of 5 | 9 of 12 | 1 of 1 |
| Patrick Cummins | 3 of 5 | 60% | 0 of 1 | 3 of 4 | 0 of 0 | 0 of 1 | 3 of 4 | 0 of 0 |
Significant Strikes Per Round
| Rd | Fighter | Sig. Str. | Sig. Str. % | Head | Body | Leg | Distance | Clinch | Ground |
|---|---|---|---|---|---|---|---|---|---|
| 1 | Misha Cirkunov | 11 of 18 | 61% | 2 of 6 | 9 of 12 | 0 of 0 | 1 of 5 | 9 of 12 | 1 of 1 |
| Patrick Cummins | 3 of 5 | 60% | 0 of 1 | 3 of 4 | 0 of 0 | 0 of 1 | 3 of 4 | 0 of 0 |
Totals
| Fighter | KD | Sig. Str. | Sig. Str. % | Total Str. | TD | TD % | Sub. Att | Rev. | Ctrl |
|---|---|---|---|---|---|---|---|---|---|
| Corey Anderson | 0 | 64 of 119 | 53% | 99 of 162 | 12 of 13 | 92% | 0 | 0 | 8:02 |
| Patrick Cummins | 0 | 31 of 99 | 31% | 44 of 113 | 0 of 1 | 0% | 0 | 0 | 0:30 |
Per Round
| Rd | Fighter | KD | Sig. Str. | Sig. Str. % | Total Str. | TD | TD % | Sub. Att | Rev. | Ctrl |
|---|---|---|---|---|---|---|---|---|---|---|
| 1 | Corey Anderson | 0 | 43 of 75 | 57% | 50 of 82 | 2 of 2 | 100% | 0 | 0 | 1:33 |
| Patrick Cummins | 0 | 18 of 53 | 33% | 22 of 58 | 0 of 1 | 0% | 0 | 0 | 0:29 | |
| 2 | Corey Anderson | 0 | 16 of 33 | 48% | 24 of 41 | 5 of 5 | 100% | 0 | 0 | 2:17 |
| Patrick Cummins | 0 | 8 of 32 | 25% | 15 of 39 | 0 of 0 | --- | 0 | 0 | 0:00 | |
| 3 | Corey Anderson | 0 | 5 of 11 | 45% | 25 of 39 | 5 of 6 | 83% | 0 | 0 | 4:12 |
| Patrick Cummins | 0 | 5 of 14 | 35% | 7 of 16 | 0 of 0 | --- | 0 | 0 | 0:01 |
Significant Strikes
| Fighter | Sig. Str. | Sig. Str. % | Head | Body | Leg | Distance | Clinch | Ground |
|---|---|---|---|---|---|---|---|---|
| Corey Anderson | 64 of 119 | 53% | 56 of 107 | 6 of 10 | 2 of 2 | 38 of 85 | 16 of 22 | 10 of 12 |
| Patrick Cummins | 31 of 99 | 31% | 24 of 85 | 6 of 12 | 1 of 2 | 18 of 79 | 12 of 19 | 1 of 1 |
Significant Strikes Per Round
| Rd | Fighter | Sig. Str. | Sig. Str. % | Head | Body | Leg | Distance | Clinch | Ground |
|---|---|---|---|---|---|---|---|---|---|
| 1 | Corey Anderson | 43 of 75 | 57% | 38 of 68 | 4 of 6 | 1 of 1 | 23 of 49 | 11 of 15 | 9 of 11 |
| Patrick Cummins | 18 of 53 | 33% | 12 of 46 | 5 of 5 | 1 of 2 | 10 of 41 | 7 of 11 | 1 of 1 | |
| 2 | Corey Anderson | 16 of 33 | 48% | 13 of 29 | 2 of 3 | 1 of 1 | 13 of 28 | 3 of 5 | 0 of 0 |
| Patrick Cummins | 8 of 32 | 25% | 8 of 29 | 0 of 3 | 0 of 0 | 5 of 26 | 3 of 6 | 0 of 0 | |
| 3 | Corey Anderson | 5 of 11 | 45% | 5 of 10 | 0 of 1 | 0 of 0 | 2 of 8 | 2 of 2 | 1 of 1 |
| Patrick Cummins | 5 of 14 | 35% | 4 of 10 | 1 of 4 | 0 of 0 | 3 of 12 | 2 of 2 | 0 of 0 |
Totals
| Fighter | KD | Sig. Str. | Sig. Str. % | Total Str. | TD | TD % | Sub. Att | Rev. | Ctrl |
|---|---|---|---|---|---|---|---|---|---|
| Patrick Cummins | 0 | 86 of 182 | 47% | 92 of 188 | 1 of 11 | 9% | 0 | 0 | 3:04 |
| Gian Villante | 0 | 72 of 196 | 36% | 85 of 210 | 0 of 0 | --- | 0 | 0 | 0:00 |
Per Round
| Rd | Fighter | KD | Sig. Str. | Sig. Str. % | Total Str. | TD | TD % | Sub. Att | Rev. | Ctrl |
|---|---|---|---|---|---|---|---|---|---|---|
| 1 | Patrick Cummins | 0 | 17 of 39 | 43% | 20 of 42 | 1 of 6 | 16% | 0 | 0 | 1:39 |
| Gian Villante | 0 | 23 of 55 | 41% | 35 of 68 | 0 of 0 | --- | 0 | 0 | 0:00 | |
| 2 | Patrick Cummins | 0 | 37 of 71 | 52% | 38 of 72 | 0 of 4 | 0% | 0 | 0 | 0:19 |
| Gian Villante | 0 | 24 of 72 | 33% | 24 of 72 | 0 of 0 | --- | 0 | 0 | 0:00 | |
| 3 | Patrick Cummins | 0 | 32 of 72 | 44% | 34 of 74 | 0 of 1 | 0% | 0 | 0 | 1:06 |
| Gian Villante | 0 | 25 of 69 | 36% | 26 of 70 | 0 of 0 | --- | 0 | 0 | 0:00 |
Significant Strikes
| Fighter | Sig. Str. | Sig. Str. % | Head | Body | Leg | Distance | Clinch | Ground |
|---|---|---|---|---|---|---|---|---|
| Patrick Cummins | 86 of 182 | 47% | 70 of 163 | 7 of 9 | 9 of 10 | 74 of 164 | 12 of 18 | 0 of 0 |
| Gian Villante | 72 of 196 | 36% | 66 of 189 | 3 of 4 | 3 of 3 | 67 of 189 | 0 of 1 | 5 of 6 |
Significant Strikes Per Round
| Rd | Fighter | Sig. Str. | Sig. Str. % | Head | Body | Leg | Distance | Clinch | Ground |
|---|---|---|---|---|---|---|---|---|---|
| 1 | Patrick Cummins | 17 of 39 | 43% | 15 of 37 | 1 of 1 | 1 of 1 | 15 of 34 | 2 of 5 | 0 of 0 |
| Gian Villante | 23 of 55 | 41% | 21 of 53 | 1 of 1 | 1 of 1 | 18 of 49 | 0 of 1 | 5 of 5 | |
| 2 | Patrick Cummins | 37 of 71 | 52% | 30 of 62 | 5 of 7 | 2 of 2 | 35 of 67 | 2 of 4 | 0 of 0 |
| Gian Villante | 24 of 72 | 33% | 21 of 68 | 1 of 2 | 2 of 2 | 24 of 72 | 0 of 0 | 0 of 0 | |
| 3 | Patrick Cummins | 32 of 72 | 44% | 25 of 64 | 1 of 1 | 6 of 7 | 24 of 63 | 8 of 9 | 0 of 0 |
| Gian Villante | 25 of 69 | 36% | 24 of 68 | 1 of 1 | 0 of 0 | 25 of 68 | 0 of 0 | 0 of 1 |
Totals
| Fighter | KD | Sig. Str. | Sig. Str. % | Total Str. | TD | TD % | Sub. Att | Rev. | Ctrl |
|---|---|---|---|---|---|---|---|---|---|
| Patrick Cummins | 0 | 73 of 121 | 60% | 109 of 162 | 3 of 10 | 30% | 0 | 0 | 7:39 |
| Jan Błachowicz | 1 | 53 of 99 | 53% | 68 of 115 | 1 of 2 | 50% | 0 | 0 | 1:11 |
Per Round
| Rd | Fighter | KD | Sig. Str. | Sig. Str. % | Total Str. | TD | TD % | Sub. Att | Rev. | Ctrl |
|---|---|---|---|---|---|---|---|---|---|---|
| 1 | Patrick Cummins | 0 | 16 of 36 | 44% | 23 of 45 | 1 of 6 | 16% | 0 | 0 | 1:28 |
| Jan Błachowicz | 1 | 31 of 51 | 60% | 37 of 57 | 0 of 0 | --- | 0 | 0 | 0:40 | |
| 2 | Patrick Cummins | 0 | 21 of 38 | 55% | 27 of 44 | 1 of 2 | 50% | 0 | 0 | 2:28 |
| Jan Błachowicz | 0 | 13 of 30 | 43% | 18 of 36 | 1 of 2 | 50% | 0 | 0 | 0:28 | |
| 3 | Patrick Cummins | 0 | 36 of 47 | 76% | 59 of 73 | 1 of 2 | 50% | 0 | 0 | 3:43 |
| Jan Błachowicz | 0 | 9 of 18 | 50% | 13 of 22 | 0 of 0 | --- | 0 | 0 | 0:03 |
Significant Strikes
| Fighter | Sig. Str. | Sig. Str. % | Head | Body | Leg | Distance | Clinch | Ground |
|---|---|---|---|---|---|---|---|---|
| Patrick Cummins | 73 of 121 | 60% | 62 of 109 | 10 of 11 | 1 of 1 | 23 of 59 | 17 of 21 | 33 of 41 |
| Jan Błachowicz | 53 of 99 | 53% | 43 of 88 | 9 of 10 | 1 of 1 | 37 of 77 | 11 of 15 | 5 of 7 |
Significant Strikes Per Round
| Rd | Fighter | Sig. Str. | Sig. Str. % | Head | Body | Leg | Distance | Clinch | Ground |
|---|---|---|---|---|---|---|---|---|---|
| 1 | Patrick Cummins | 16 of 36 | 44% | 15 of 34 | 1 of 2 | 0 of 0 | 9 of 25 | 4 of 7 | 3 of 4 |
| Jan Błachowicz | 31 of 51 | 60% | 26 of 45 | 5 of 6 | 0 of 0 | 18 of 33 | 10 of 13 | 3 of 5 | |
| 2 | Patrick Cummins | 21 of 38 | 55% | 13 of 30 | 7 of 7 | 1 of 1 | 6 of 19 | 2 of 2 | 13 of 17 |
| Jan Błachowicz | 13 of 30 | 43% | 11 of 28 | 2 of 2 | 0 of 0 | 12 of 28 | 1 of 2 | 0 of 0 | |
| 3 | Patrick Cummins | 36 of 47 | 76% | 34 of 45 | 2 of 2 | 0 of 0 | 8 of 15 | 11 of 12 | 17 of 20 |
| Jan Błachowicz | 9 of 18 | 50% | 6 of 15 | 2 of 2 | 1 of 1 | 7 of 16 | 0 of 0 | 2 of 2 |
Play-by-Play
View on SherdogRound 1
Cummins tries to press forward but gets caught by Blachowicz with an uppercut. Cummins hits the deck and tries to climb back to his feet as Blachowicz tees off with punches, looking for the early finish. Cummins stands and gets pushed against the cage, but Blachowicz slips throwing a knee and falls to the ground. Cummins catches the Polish standout in a front headlock, tries to convert it to an anaconda choke but loses Blachowicz's neck as he drops to the ground. Blachowicz separates and lands a heavy body kick, then hits the American with the uppercut again. A looping left hand to the temple from Blachowicz sends Cummins shooting for a takedown. Blachowicz easily shuts down the shot and continues to pick at Cummins with jabs, then lands another uppercut as "Durkin" comes forward. Cummins is on unsteady legs as he's underhooked and pushed against the fence by Blachowicz, who delivers uppercuts to the body in the clinch. Cummins escapes the tie-up and catches Blachowicz stepping forward with a left hand, but Blachowicz walks through it to land another uppercut. Cummins is taking a lot of punishment here, and referee John McCarthy looks close to stopping the bout at one point, but Cummins earns a reprieve with a takedown. Cummins jams Blachowicz's head against the base of the fence to make things uncomfortable, but he loses top position before the end of the round when Blachowicz threatens with an armbar.
Jordan Breen scores the round 10-8 Blachowicz
Brian Knapp scores the round 10-8 Blachowicz
Chris Nelson scores the round 10-8 Blachowicz
Round 2
Blachowicz lands his lead uppercut again in the first 30 seconds of round two, stinging Cummins, who slows the assault with a takedown attempt. Blachowicz stays standing but winds up held against the fence for half a minute or so. When they separate, both 205ers connect with punches before Cummins shoots again and runs Blachowicz to the canvas, unintentionally aided by the referee, who could not get out of Blachowicz's way in time. Cummins stands over Blachowicz, kneels down in guard again and immediately has his right arm attacked by Blachowicz with a kimura. Cummins pulls the arm free and slams Blachowicz with a few heavy punches from the Polish fighter's open guard. Referee McCarthy calls for work, and soon after, Blachowicz kicks Cummins away and escapes to his feet. Now it's Blachowicz shooting for a takedown at the fence, pulling Cummins away from the wall and dumping him to the floor. Cummins is back on his feet within seconds, and suddenly Blachowicz is looking very tired, breathing heavily and letting his hands drop to his waist between punches. Blachowicz leans over with his hands on his knees with 20 seconds on the clock, then shoots for a late takedown and gets sprawled on by Cummins.
Jordan Breen scores the round 10-9 Cummins
Brian Knapp scores the round 10-9 Cummins
Chris Nelson scores the round 10-9 Cummins
Round 3
Cummins moves forward to put Blachowicz's back against the fence but can't hold him there for more than 20 seconds. When they separate, Cummins times Blachowicz's lead uppercut and ducks under to complete an effortless takedown. Blachowicz wraps up Cummins in closed guard, then swings his legs around to try an armbar; Cummins stacks up and frees the limb, then goes back to working for the guard pass. Halfway through the round, Cummins postures up to land an elbow, a few short punches. Cummins denies another armbar, but Blachowicz uses the attempt to roll to his knees and escape to his feet. Blachowicz lands a body kick and charges Cummins, who is ready to tie up Blachowicz in a front headlock. Cummins lands several knees to the leaning Blachowicz's head and receives a warning from the ref to mind the back of the head. Blachowicz drops to guard with just over one minute remaining, and Cummins jams him up against the foot of the fence again. Cummins tries to get busy with ground-and-pound in the final seconds but is tied up by Blachowicz from the bottom.
Jordan Breen scores the round 10-9 Cummins (28-28 Draw)
Brian Knapp scores the round 10-8 Cummins (28-27 Cummins)
Chris Nelson scores the round 10-9 Cummins (28-28 Draw)
The Official Result
Patrick Cummins def. Jan Blachowicz via Majority Decision (29-28, 29-28, 28-28) R3 5:00
Totals
| Fighter | KD | Sig. Str. | Sig. Str. % | Total Str. | TD | TD % | Sub. Att | Rev. | Ctrl |
|---|---|---|---|---|---|---|---|---|---|
| Antônio Rogério Nogueira | 1 | 30 of 58 | 51% | 36 of 65 | 0 of 0 | --- | 0 | 0 | 0:12 |
| Patrick Cummins | 0 | 12 of 36 | 33% | 14 of 38 | 0 of 2 | 0% | 0 | 0 | 0:11 |
Per Round
| Rd | Fighter | KD | Sig. Str. | Sig. Str. % | Total Str. | TD | TD % | Sub. Att | Rev. | Ctrl |
|---|---|---|---|---|---|---|---|---|---|---|
| 1 | Antônio Rogério Nogueira | 1 | 30 of 58 | 51% | 36 of 65 | 0 of 0 | --- | 0 | 0 | 0:12 |
| Patrick Cummins | 0 | 12 of 36 | 33% | 14 of 38 | 0 of 2 | 0% | 0 | 0 | 0:11 |
Significant Strikes
| Fighter | Sig. Str. | Sig. Str. % | Head | Body | Leg | Distance | Clinch | Ground |
|---|---|---|---|---|---|---|---|---|
| Antônio Rogério Nogueira | 30 of 58 | 51% | 30 of 55 | 0 of 3 | 0 of 0 | 23 of 50 | 2 of 3 | 5 of 5 |
| Patrick Cummins | 12 of 36 | 33% | 6 of 25 | 0 of 2 | 6 of 9 | 12 of 33 | 0 of 3 | 0 of 0 |
Significant Strikes Per Round
| Rd | Fighter | Sig. Str. | Sig. Str. % | Head | Body | Leg | Distance | Clinch | Ground |
|---|---|---|---|---|---|---|---|---|---|
| 1 | Antônio Rogério Nogueira | 30 of 58 | 51% | 30 of 55 | 0 of 3 | 0 of 0 | 23 of 50 | 2 of 3 | 5 of 5 |
| Patrick Cummins | 12 of 36 | 33% | 6 of 25 | 0 of 2 | 6 of 9 | 12 of 33 | 0 of 3 | 0 of 0 |
Totals
| Fighter | KD | Sig. Str. | Sig. Str. % | Total Str. | TD | TD % | Sub. Att | Rev. | Ctrl |
|---|---|---|---|---|---|---|---|---|---|
| Glover Teixeira | 0 | 54 of 102 | 52% | 59 of 107 | 0 of 1 | 0% | 0 | 0 | 0:14 |
| Patrick Cummins | 0 | 33 of 90 | 36% | 38 of 95 | 4 of 6 | 66% | 0 | 0 | 1:25 |
Per Round
| Rd | Fighter | KD | Sig. Str. | Sig. Str. % | Total Str. | TD | TD % | Sub. Att | Rev. | Ctrl |
|---|---|---|---|---|---|---|---|---|---|---|
| 1 | Glover Teixeira | 0 | 32 of 63 | 50% | 34 of 65 | 0 of 1 | 0% | 0 | 0 | 0:02 |
| Patrick Cummins | 0 | 30 of 75 | 40% | 35 of 80 | 4 of 5 | 80% | 0 | 0 | 1:21 | |
| 2 | Glover Teixeira | 0 | 22 of 39 | 56% | 25 of 42 | 0 of 0 | --- | 0 | 0 | 0:12 |
| Patrick Cummins | 0 | 3 of 15 | 20% | 3 of 15 | 0 of 1 | 0% | 0 | 0 | 0:04 |
Significant Strikes
| Fighter | Sig. Str. | Sig. Str. % | Head | Body | Leg | Distance | Clinch | Ground |
|---|---|---|---|---|---|---|---|---|
| Glover Teixeira | 54 of 102 | 52% | 51 of 98 | 3 of 4 | 0 of 0 | 50 of 96 | 4 of 6 | 0 of 0 |
| Patrick Cummins | 33 of 90 | 36% | 23 of 80 | 7 of 7 | 3 of 3 | 22 of 73 | 11 of 17 | 0 of 0 |
Significant Strikes Per Round
| Rd | Fighter | Sig. Str. | Sig. Str. % | Head | Body | Leg | Distance | Clinch | Ground |
|---|---|---|---|---|---|---|---|---|---|
| 1 | Glover Teixeira | 32 of 63 | 50% | 30 of 60 | 2 of 3 | 0 of 0 | 32 of 63 | 0 of 0 | 0 of 0 |
| Patrick Cummins | 30 of 75 | 40% | 20 of 65 | 7 of 7 | 3 of 3 | 19 of 62 | 11 of 13 | 0 of 0 | |
| 2 | Glover Teixeira | 22 of 39 | 56% | 21 of 38 | 1 of 1 | 0 of 0 | 18 of 33 | 4 of 6 | 0 of 0 |
| Patrick Cummins | 3 of 15 | 20% | 3 of 15 | 0 of 0 | 0 of 0 | 3 of 11 | 0 of 4 | 0 of 0 |
Totals
| Fighter | KD | Sig. Str. | Sig. Str. % | Total Str. | TD | TD % | Sub. Att | Rev. | Ctrl |
|---|---|---|---|---|---|---|---|---|---|
| Patrick Cummins | 0 | 23 of 45 | 51% | 24 of 47 | 0 of 0 | --- | 0 | 0 | 0:03 |
| Rafael Cavalcante | 0 | 49 of 92 | 53% | 102 of 162 | 8 of 14 | 57% | 0 | 0 | 7:11 |
Per Round
| Rd | Fighter | KD | Sig. Str. | Sig. Str. % | Total Str. | TD | TD % | Sub. Att | Rev. | Ctrl |
|---|---|---|---|---|---|---|---|---|---|---|
| 1 | Patrick Cummins | 0 | 11 of 26 | 42% | 11 of 26 | 0 of 0 | --- | 0 | 0 | 0:00 |
| Rafael Cavalcante | 0 | 20 of 41 | 48% | 39 of 63 | 5 of 9 | 55% | 0 | 0 | 2:54 | |
| 2 | Patrick Cummins | 0 | 11 of 17 | 64% | 12 of 19 | 0 of 0 | --- | 0 | 0 | 0:03 |
| Rafael Cavalcante | 0 | 18 of 38 | 47% | 51 of 85 | 2 of 4 | 50% | 0 | 0 | 3:44 | |
| 3 | Patrick Cummins | 0 | 1 of 2 | 50% | 1 of 2 | 0 of 0 | --- | 0 | 0 | 0:00 |
| Rafael Cavalcante | 0 | 11 of 13 | 84% | 12 of 14 | 1 of 1 | 100% | 0 | 0 | 0:33 |
Significant Strikes
| Fighter | Sig. Str. | Sig. Str. % | Head | Body | Leg | Distance | Clinch | Ground |
|---|---|---|---|---|---|---|---|---|
| Patrick Cummins | 23 of 45 | 51% | 20 of 42 | 1 of 1 | 2 of 2 | 15 of 34 | 1 of 3 | 7 of 8 |
| Rafael Cavalcante | 49 of 92 | 53% | 37 of 77 | 6 of 7 | 6 of 8 | 18 of 49 | 7 of 10 | 24 of 33 |
Significant Strikes Per Round
| Rd | Fighter | Sig. Str. | Sig. Str. % | Head | Body | Leg | Distance | Clinch | Ground |
|---|---|---|---|---|---|---|---|---|---|
| 1 | Patrick Cummins | 11 of 26 | 42% | 9 of 24 | 0 of 0 | 2 of 2 | 10 of 25 | 1 of 1 | 0 of 0 |
| Rafael Cavalcante | 20 of 41 | 48% | 12 of 31 | 2 of 2 | 6 of 8 | 14 of 32 | 4 of 7 | 2 of 2 | |
| 2 | Patrick Cummins | 11 of 17 | 64% | 10 of 16 | 1 of 1 | 0 of 0 | 4 of 7 | 0 of 2 | 7 of 8 |
| Rafael Cavalcante | 18 of 38 | 47% | 14 of 33 | 4 of 5 | 0 of 0 | 3 of 15 | 3 of 3 | 12 of 20 | |
| 3 | Patrick Cummins | 1 of 2 | 50% | 1 of 2 | 0 of 0 | 0 of 0 | 1 of 2 | 0 of 0 | 0 of 0 |
| Rafael Cavalcante | 11 of 13 | 84% | 11 of 13 | 0 of 0 | 0 of 0 | 1 of 2 | 0 of 0 | 10 of 11 |
Gian Villante - Fight History
Totals
| Fighter | KD | Sig. Str. | Sig. Str. % | Total Str. | TD | TD % | Sub. Att | Rev. | Ctrl |
|---|---|---|---|---|---|---|---|---|---|
| Chris Barnett | 0 | 30 of 51 | 58% | 30 of 51 | 0 of 0 | --- | 0 | 0 | 0:08 |
| Gian Villante | 1 | 38 of 70 | 54% | 44 of 76 | 0 of 0 | --- | 0 | 0 | 0:12 |
Per Round
| Rd | Fighter | KD | Sig. Str. | Sig. Str. % | Total Str. | TD | TD % | Sub. Att | Rev. | Ctrl |
|---|---|---|---|---|---|---|---|---|---|---|
| 1 | Chris Barnett | 0 | 22 of 40 | 55% | 22 of 40 | 0 of 0 | --- | 0 | 0 | 0:08 |
| Gian Villante | 0 | 21 of 34 | 61% | 24 of 37 | 0 of 0 | --- | 0 | 0 | 0:00 | |
| 2 | Chris Barnett | 0 | 8 of 11 | 72% | 8 of 11 | 0 of 0 | --- | 0 | 0 | 0:00 |
| Gian Villante | 1 | 17 of 36 | 47% | 20 of 39 | 0 of 0 | --- | 0 | 0 | 0:12 |
Significant Strikes
| Fighter | Sig. Str. | Sig. Str. % | Head | Body | Leg | Distance | Clinch | Ground |
|---|---|---|---|---|---|---|---|---|
| Chris Barnett | 30 of 51 | 58% | 6 of 24 | 21 of 23 | 3 of 4 | 28 of 49 | 2 of 2 | 0 of 0 |
| Gian Villante | 38 of 70 | 54% | 13 of 41 | 4 of 5 | 21 of 24 | 28 of 52 | 1 of 1 | 9 of 17 |
Significant Strikes Per Round
| Rd | Fighter | Sig. Str. | Sig. Str. % | Head | Body | Leg | Distance | Clinch | Ground |
|---|---|---|---|---|---|---|---|---|---|
| 1 | Chris Barnett | 22 of 40 | 55% | 3 of 19 | 17 of 18 | 2 of 3 | 20 of 38 | 2 of 2 | 0 of 0 |
| Gian Villante | 21 of 34 | 61% | 3 of 16 | 3 of 3 | 15 of 15 | 20 of 33 | 1 of 1 | 0 of 0 | |
| 2 | Chris Barnett | 8 of 11 | 72% | 3 of 5 | 4 of 5 | 1 of 1 | 8 of 11 | 0 of 0 | 0 of 0 |
| Gian Villante | 17 of 36 | 47% | 10 of 25 | 1 of 2 | 6 of 9 | 8 of 19 | 0 of 0 | 9 of 17 |
Angelo picks Chris Barnett, citing his personal familiarity with Barnett from his time managing fighters in XFC. He describes Barnett as incredibly athletic and dynamic despite his appearance, with real power and surprising speed. He believes Villante is a middleweight who doesn't take his career seriously, and that Barnett will win via his diverse striking and power. He has a moneyline bet on Barnett.
Big Brady picks Chris Barnett to win by decision, citing Barnett's cardio advantage over Gian Villante, who has notoriously poor stamina. He notes Villante has looked horrible at heavyweight, gassing out and even tapping to a non-existent submission. Barnett is undersized but can go 15 minutes, while Villante slows down drastically. Brady wants to stay away from this low-level fight but leans Barnett.
Cody picks Barnett, emphasizing Villante's history of losing as a favorite and his retirement announcement. He notes Barnett's size and athleticism. He expects Villante to find a way to lose, making Barnett a live dog.
Daniel Levi picks Chris Barnett, going against the grain. He criticizes Gian Villante's tendency to mess up fights, citing the Maurice Green loss and getting choked out. Levi notes that Barnett is explosive and has knockout power, but also has been knocked out by lower-level guys. He says it's a fight between two big guys swinging, and he trusts Barnett more than Villante, who he feels is unreliable.
Jacob agrees with Angelo, picking Chris Barnett. He notes that Barnett is the better athlete and that Villante's only path to victory is to make the fight boring. He believes the UFC is giving Barnett a showcase fight, and expects Barnett to throw spinning attacks and find a finish. He also mentions that Barnett can be found at plus money on BetOnline, which he took advantage of.
The host leans Villante due to a grappling edge and the retirement motivation, but he is not confident. He expects the fight to go to decision and advises against betting on it. He thinks Villante can take Barnett down and control him, but both have cardio issues.
Paul picks Barnett, citing Villante's retirement announcement and history of underperforming as a favorite. He notes Barnett's athleticism and size advantage. He expects a sloppy fight but thinks Barnett's motivation gives him the edge.
The Guru picks Chris Barnett, praising his taekwondo and stand-up skills despite his appearance. He criticizes Gian Villante's lack of conditioning and commitment, noting Villante's poor performances. The Guru believes Barnett has takedown defense and power, predicting a first-round KO, possibly via a wheel kick or spinning back kick to the body.
Totals
| Fighter | KD | Sig. Str. | Sig. Str. % | Total Str. | TD | TD % | Sub. Att | Rev. | Ctrl |
|---|---|---|---|---|---|---|---|---|---|
| Jake Collier | 0 | 80 of 197 | 40% | 81 of 198 | 0 of 0 | --- | 0 | 0 | 0:00 |
| Gian Villante | 0 | 123 of 272 | 45% | 126 of 277 | 0 of 0 | --- | 0 | 0 | 0:02 |
Per Round
| Rd | Fighter | KD | Sig. Str. | Sig. Str. % | Total Str. | TD | TD % | Sub. Att | Rev. | Ctrl |
|---|---|---|---|---|---|---|---|---|---|---|
| 1 | Jake Collier | 0 | 27 of 65 | 41% | 28 of 66 | 0 of 0 | --- | 0 | 0 | 0:00 |
| Gian Villante | 0 | 49 of 102 | 48% | 49 of 104 | 0 of 0 | --- | 0 | 0 | 0:00 | |
| 2 | Jake Collier | 0 | 30 of 71 | 42% | 30 of 71 | 0 of 0 | --- | 0 | 0 | 0:00 |
| Gian Villante | 0 | 38 of 91 | 41% | 39 of 92 | 0 of 0 | --- | 0 | 0 | 0:02 | |
| 3 | Jake Collier | 0 | 23 of 61 | 37% | 23 of 61 | 0 of 0 | --- | 0 | 0 | 0:00 |
| Gian Villante | 0 | 36 of 79 | 45% | 38 of 81 | 0 of 0 | --- | 0 | 0 | 0:00 |
Significant Strikes
| Fighter | Sig. Str. | Sig. Str. % | Head | Body | Leg | Distance | Clinch | Ground |
|---|---|---|---|---|---|---|---|---|
| Jake Collier | 80 of 197 | 40% | 58 of 168 | 14 of 19 | 8 of 10 | 79 of 196 | 1 of 1 | 0 of 0 |
| Gian Villante | 123 of 272 | 45% | 88 of 225 | 19 of 29 | 16 of 18 | 121 of 270 | 2 of 2 | 0 of 0 |
Significant Strikes Per Round
| Rd | Fighter | Sig. Str. | Sig. Str. % | Head | Body | Leg | Distance | Clinch | Ground |
|---|---|---|---|---|---|---|---|---|---|
| 1 | Jake Collier | 27 of 65 | 41% | 18 of 56 | 6 of 6 | 3 of 3 | 27 of 65 | 0 of 0 | 0 of 0 |
| Gian Villante | 49 of 102 | 48% | 34 of 83 | 7 of 10 | 8 of 9 | 48 of 101 | 1 of 1 | 0 of 0 | |
| 2 | Jake Collier | 30 of 71 | 42% | 20 of 56 | 7 of 11 | 3 of 4 | 30 of 71 | 0 of 0 | 0 of 0 |
| Gian Villante | 38 of 91 | 41% | 28 of 79 | 6 of 7 | 4 of 5 | 38 of 91 | 0 of 0 | 0 of 0 | |
| 3 | Jake Collier | 23 of 61 | 37% | 20 of 56 | 1 of 2 | 2 of 3 | 22 of 60 | 1 of 1 | 0 of 0 |
| Gian Villante | 36 of 79 | 45% | 26 of 63 | 6 of 12 | 4 of 4 | 35 of 78 | 1 of 1 | 0 of 0 |
Big Brady hesitantly picks Gian Villante, calling it an ugly fight that should be a pick'em. He notes Villante had a better showing in his last fight against Maurice Greene, while Collier was knocked out quickly by Tom Aspinall. He says his pick might change after weigh-ins, depending on which fighter looks more motivated and in shape. He strongly advises against betting on this fight.
Daniel picks Gian Villante, citing Jake Collier's massive weight gain (from 185 to 265 lbs) and lack of training. He notes that Villante at least dropped Maurice Greene in his last fight, while Collier has been inactive and likely out of shape. He says if Collier shows up lighter, he could be a live underdog, but based on current information, Villante should win via leg kicks or a finish. He also mentions that both fighters looked terrible in their last outings, but Villante is the better pick.
The host picks Jake Collier as a significant underdog, believing the line is absurdly wide. He argues that Collier has better overall game, durability, and cardio than Villante, who is uncoachable and gasses easily. He expects Collier to win by late stoppage or decision, and will bet him at plus money, especially if it reaches +200.
The MMA Guru picks Gian Villante by TKO in the second round, criticizing both fighters' conditioning but favoring Villante's experience and recent performance against Maurice Green. He notes Villante is a two-to-one favorite and sees no way he loses, predicting leg kicks will set up the finish.
Totals
| Fighter | KD | Sig. Str. | Sig. Str. % | Total Str. | TD | TD % | Sub. Att | Rev. | Ctrl |
|---|---|---|---|---|---|---|---|---|---|
| Maurice Greene | 1 | 72 of 105 | 68% | 91 of 126 | 0 of 0 | --- | 0 | 0 | 2:37 |
| Gian Villante | 0 | 63 of 137 | 45% | 64 of 139 | 0 of 0 | --- | 1 | 0 | 0:00 |
Per Round
| Rd | Fighter | KD | Sig. Str. | Sig. Str. % | Total Str. | TD | TD % | Sub. Att | Rev. | Ctrl |
|---|---|---|---|---|---|---|---|---|---|---|
| 1 | Maurice Greene | 0 | 23 of 32 | 71% | 23 of 32 | 0 of 0 | --- | 0 | 0 | 0:00 |
| Gian Villante | 0 | 30 of 58 | 51% | 30 of 58 | 0 of 0 | --- | 0 | 0 | 0:00 | |
| 2 | Maurice Greene | 0 | 23 of 39 | 58% | 23 of 39 | 0 of 0 | --- | 0 | 0 | 0:00 |
| Gian Villante | 0 | 26 of 67 | 38% | 26 of 67 | 0 of 0 | --- | 0 | 0 | 0:00 | |
| 3 | Maurice Greene | 1 | 26 of 34 | 76% | 45 of 55 | 0 of 0 | --- | 0 | 0 | 2:37 |
| Gian Villante | 0 | 7 of 12 | 58% | 8 of 14 | 0 of 0 | --- | 1 | 0 | 0:00 |
Significant Strikes
| Fighter | Sig. Str. | Sig. Str. % | Head | Body | Leg | Distance | Clinch | Ground |
|---|---|---|---|---|---|---|---|---|
| Maurice Greene | 72 of 105 | 68% | 35 of 59 | 11 of 16 | 26 of 30 | 51 of 79 | 0 of 0 | 21 of 26 |
| Gian Villante | 63 of 137 | 45% | 24 of 87 | 12 of 19 | 27 of 31 | 62 of 136 | 1 of 1 | 0 of 0 |
Significant Strikes Per Round
| Rd | Fighter | Sig. Str. | Sig. Str. % | Head | Body | Leg | Distance | Clinch | Ground |
|---|---|---|---|---|---|---|---|---|---|
| 1 | Maurice Greene | 23 of 32 | 71% | 2 of 6 | 8 of 11 | 13 of 15 | 23 of 32 | 0 of 0 | 0 of 0 |
| Gian Villante | 30 of 58 | 51% | 11 of 32 | 5 of 8 | 14 of 18 | 30 of 58 | 0 of 0 | 0 of 0 | |
| 2 | Maurice Greene | 23 of 39 | 58% | 8 of 21 | 2 of 4 | 13 of 14 | 23 of 39 | 0 of 0 | 0 of 0 |
| Gian Villante | 26 of 67 | 38% | 10 of 47 | 5 of 9 | 11 of 11 | 26 of 67 | 0 of 0 | 0 of 0 | |
| 3 | Maurice Greene | 26 of 34 | 76% | 25 of 32 | 1 of 1 | 0 of 1 | 5 of 8 | 0 of 0 | 21 of 26 |
| Gian Villante | 7 of 12 | 58% | 3 of 8 | 2 of 2 | 2 of 2 | 6 of 11 | 1 of 1 | 0 of 0 |
Big Brady picks Maurice Greene, citing the size advantage (height and reach) and better cardio. He thinks Villante's power won't translate up a weight class, and that Greene will likely knock him out in the first round. He compares it to OSP vs Ben Rothwell. He advises against parlaying Greene due to trust issues but thinks a straight bet is fine.
Daniel Levi picks Maurice Greene, noting Greene's physical advantages (6'7", long reach) and improvement in using range. He mentions Greene's move to Jackson Wink for better training partners and elevation, while Villante is training in a garage with closed gyms. Levi thinks Villante is on the decline, with poor cardio and decision-making, and expects Greene to win by knockout or lopsided decision. He cautions that Villante has power early but Greene should weather it.
The MMA Guru picks Gian Villante as a live dog, believing he will get the jump on Maurice Greene. He notes Villante's wrestling fundamentals and training with Weidman's team, predicting a takedown and rear-naked choke submission in the first or second round. He criticizes Greene's recent losses and questionable activity outside the cage, suggesting Greene might not even show up due to COVID-19 concerns.
Totals
| Fighter | KD | Sig. Str. | Sig. Str. % | Total Str. | TD | TD % | Sub. Att | Rev. | Ctrl |
|---|---|---|---|---|---|---|---|---|---|
| Michał Oleksiejczuk | 0 | 9 of 20 | 45% | 9 of 20 | 0 of 0 | --- | 0 | 0 | 0:00 |
| Gian Villante | 1 | 14 of 22 | 63% | 14 of 22 | 0 of 0 | --- | 0 | 0 | 0:02 |
Per Round
| Rd | Fighter | KD | Sig. Str. | Sig. Str. % | Total Str. | TD | TD % | Sub. Att | Rev. | Ctrl |
|---|---|---|---|---|---|---|---|---|---|---|
| 1 | Michał Oleksiejczuk | 0 | 9 of 20 | 45% | 9 of 20 | 0 of 0 | --- | 0 | 0 | 0:00 |
| Gian Villante | 1 | 14 of 22 | 63% | 14 of 22 | 0 of 0 | --- | 0 | 0 | 0:02 |
Significant Strikes
| Fighter | Sig. Str. | Sig. Str. % | Head | Body | Leg | Distance | Clinch | Ground |
|---|---|---|---|---|---|---|---|---|
| Michał Oleksiejczuk | 9 of 20 | 45% | 6 of 12 | 0 of 4 | 3 of 4 | 9 of 20 | 0 of 0 | 0 of 0 |
| Gian Villante | 14 of 22 | 63% | 10 of 18 | 4 of 4 | 0 of 0 | 13 of 19 | 0 of 0 | 1 of 3 |
Significant Strikes Per Round
| Rd | Fighter | Sig. Str. | Sig. Str. % | Head | Body | Leg | Distance | Clinch | Ground |
|---|---|---|---|---|---|---|---|---|---|
| 1 | Michał Oleksiejczuk | 9 of 20 | 45% | 6 of 12 | 0 of 4 | 3 of 4 | 9 of 20 | 0 of 0 | 0 of 0 |
| Gian Villante | 14 of 22 | 63% | 10 of 18 | 4 of 4 | 0 of 0 | 13 of 19 | 0 of 0 | 1 of 3 |
Play-by-Play
View on SherdogRound 1
Up next is a light heavyweight bout between Gian Villante and Michal Oleksiejczuk. The official in charge of the bout is Marc Goddard. Straight left lands by Oleksiejczuk. Villante returns with a low kick, and another. Overhand right by Villante lands. He follows it up with a kick to the body. Villante lands another hard low kick.
Oleksiejczuk lands a left hook to the body and Villante is hurt badly
. He falls to the mat and Oleksiejczuk follows him down, lands some punches, and the referee calls the fight off. The body shot is what ended it.
The Official Result
Michal Oleksiejczuk def. Gian Villante via TKO (Punch To The Body) R1, 1:34
Totals
| Fighter | KD | Sig. Str. | Sig. Str. % | Total Str. | TD | TD % | Sub. Att | Rev. | Ctrl |
|---|---|---|---|---|---|---|---|---|---|
| Gian Villante | 0 | 81 of 217 | 37% | 81 of 217 | 0 of 1 | 0% | 0 | 0 | 0:04 |
| Ed Herman | 0 | 84 of 223 | 37% | 85 of 224 | 0 of 1 | 0% | 0 | 0 | 0:06 |
Per Round
| Rd | Fighter | KD | Sig. Str. | Sig. Str. % | Total Str. | TD | TD % | Sub. Att | Rev. | Ctrl |
|---|---|---|---|---|---|---|---|---|---|---|
| 1 | Gian Villante | 0 | 26 of 68 | 38% | 26 of 68 | 0 of 0 | --- | 0 | 0 | 0:00 |
| Ed Herman | 0 | 24 of 78 | 30% | 24 of 78 | 0 of 0 | --- | 0 | 0 | 0:00 | |
| 2 | Gian Villante | 0 | 32 of 82 | 39% | 32 of 82 | 0 of 0 | --- | 0 | 0 | 0:00 |
| Ed Herman | 0 | 39 of 84 | 46% | 39 of 84 | 0 of 0 | --- | 0 | 0 | 0:00 | |
| 3 | Gian Villante | 0 | 23 of 67 | 34% | 23 of 67 | 0 of 1 | 0% | 0 | 0 | 0:04 |
| Ed Herman | 0 | 21 of 61 | 34% | 22 of 62 | 0 of 1 | 0% | 0 | 0 | 0:06 |
Significant Strikes
| Fighter | Sig. Str. | Sig. Str. % | Head | Body | Leg | Distance | Clinch | Ground |
|---|---|---|---|---|---|---|---|---|
| Gian Villante | 81 of 217 | 37% | 69 of 201 | 8 of 12 | 4 of 4 | 81 of 216 | 0 of 1 | 0 of 0 |
| Ed Herman | 84 of 223 | 37% | 63 of 190 | 7 of 17 | 14 of 16 | 83 of 218 | 1 of 3 | 0 of 2 |
Significant Strikes Per Round
| Rd | Fighter | Sig. Str. | Sig. Str. % | Head | Body | Leg | Distance | Clinch | Ground |
|---|---|---|---|---|---|---|---|---|---|
| 1 | Gian Villante | 26 of 68 | 38% | 21 of 62 | 4 of 5 | 1 of 1 | 26 of 68 | 0 of 0 | 0 of 0 |
| Ed Herman | 24 of 78 | 30% | 17 of 69 | 3 of 4 | 4 of 5 | 24 of 78 | 0 of 0 | 0 of 0 | |
| 2 | Gian Villante | 32 of 82 | 39% | 29 of 78 | 3 of 4 | 0 of 0 | 32 of 82 | 0 of 0 | 0 of 0 |
| Ed Herman | 39 of 84 | 46% | 30 of 72 | 1 of 4 | 8 of 8 | 38 of 83 | 1 of 1 | 0 of 0 | |
| 3 | Gian Villante | 23 of 67 | 34% | 19 of 61 | 1 of 3 | 3 of 3 | 23 of 66 | 0 of 1 | 0 of 0 |
| Ed Herman | 21 of 61 | 34% | 16 of 49 | 3 of 9 | 2 of 3 | 21 of 57 | 0 of 2 | 0 of 2 |
Totals
| Fighter | KD | Sig. Str. | Sig. Str. % | Total Str. | TD | TD % | Sub. Att | Rev. | Ctrl |
|---|---|---|---|---|---|---|---|---|---|
| Sam Alvey | 0 | 50 of 133 | 37% | 50 of 133 | 0 of 0 | --- | 0 | 0 | 0:06 |
| Gian Villante | 1 | 53 of 122 | 43% | 59 of 128 | 0 of 0 | --- | 0 | 0 | 0:00 |
Per Round
| Rd | Fighter | KD | Sig. Str. | Sig. Str. % | Total Str. | TD | TD % | Sub. Att | Rev. | Ctrl |
|---|---|---|---|---|---|---|---|---|---|---|
| 1 | Sam Alvey | 0 | 16 of 41 | 39% | 16 of 41 | 0 of 0 | --- | 0 | 0 | 0:00 |
| Gian Villante | 1 | 18 of 40 | 45% | 18 of 40 | 0 of 0 | --- | 0 | 0 | 0:00 | |
| 2 | Sam Alvey | 0 | 18 of 39 | 46% | 18 of 39 | 0 of 0 | --- | 0 | 0 | 0:00 |
| Gian Villante | 0 | 21 of 41 | 51% | 21 of 41 | 0 of 0 | --- | 0 | 0 | 0:00 | |
| 3 | Sam Alvey | 0 | 16 of 53 | 30% | 16 of 53 | 0 of 0 | --- | 0 | 0 | 0:06 |
| Gian Villante | 0 | 14 of 41 | 34% | 20 of 47 | 0 of 0 | --- | 0 | 0 | 0:00 |
Significant Strikes
| Fighter | Sig. Str. | Sig. Str. % | Head | Body | Leg | Distance | Clinch | Ground |
|---|---|---|---|---|---|---|---|---|
| Sam Alvey | 50 of 133 | 37% | 20 of 91 | 12 of 23 | 18 of 19 | 50 of 133 | 0 of 0 | 0 of 0 |
| Gian Villante | 53 of 122 | 43% | 40 of 104 | 2 of 4 | 11 of 14 | 49 of 112 | 4 of 9 | 0 of 1 |
Significant Strikes Per Round
| Rd | Fighter | Sig. Str. | Sig. Str. % | Head | Body | Leg | Distance | Clinch | Ground |
|---|---|---|---|---|---|---|---|---|---|
| 1 | Sam Alvey | 16 of 41 | 39% | 0 of 19 | 7 of 12 | 9 of 10 | 16 of 41 | 0 of 0 | 0 of 0 |
| Gian Villante | 18 of 40 | 45% | 14 of 35 | 1 of 1 | 3 of 4 | 14 of 30 | 4 of 9 | 0 of 1 | |
| 2 | Sam Alvey | 18 of 39 | 46% | 10 of 27 | 3 of 7 | 5 of 5 | 18 of 39 | 0 of 0 | 0 of 0 |
| Gian Villante | 21 of 41 | 51% | 14 of 34 | 1 of 1 | 6 of 6 | 21 of 41 | 0 of 0 | 0 of 0 | |
| 3 | Sam Alvey | 16 of 53 | 30% | 10 of 45 | 2 of 4 | 4 of 4 | 16 of 53 | 0 of 0 | 0 of 0 |
| Gian Villante | 14 of 41 | 34% | 12 of 35 | 0 of 2 | 2 of 4 | 14 of 41 | 0 of 0 | 0 of 0 |
Totals
| Fighter | KD | Sig. Str. | Sig. Str. % | Total Str. | TD | TD % | Sub. Att | Rev. | Ctrl |
|---|---|---|---|---|---|---|---|---|---|
| Gian Villante | 0 | 74 of 209 | 35% | 74 of 209 | 0 of 0 | --- | 0 | 0 | 0:00 |
| Francimar Barroso | 0 | 74 of 128 | 57% | 74 of 128 | 0 of 0 | --- | 0 | 0 | 0:00 |
Per Round
| Rd | Fighter | KD | Sig. Str. | Sig. Str. % | Total Str. | TD | TD % | Sub. Att | Rev. | Ctrl |
|---|---|---|---|---|---|---|---|---|---|---|
| 1 | Gian Villante | 0 | 15 of 50 | 30% | 15 of 50 | 0 of 0 | --- | 0 | 0 | 0:00 |
| Francimar Barroso | 0 | 21 of 26 | 80% | 21 of 26 | 0 of 0 | --- | 0 | 0 | 0:00 | |
| 2 | Gian Villante | 0 | 35 of 79 | 44% | 35 of 79 | 0 of 0 | --- | 0 | 0 | 0:00 |
| Francimar Barroso | 0 | 26 of 57 | 45% | 26 of 57 | 0 of 0 | --- | 0 | 0 | 0:00 | |
| 3 | Gian Villante | 0 | 24 of 80 | 30% | 24 of 80 | 0 of 0 | --- | 0 | 0 | 0:00 |
| Francimar Barroso | 0 | 27 of 45 | 60% | 27 of 45 | 0 of 0 | --- | 0 | 0 | 0:00 |
Significant Strikes
| Fighter | Sig. Str. | Sig. Str. % | Head | Body | Leg | Distance | Clinch | Ground |
|---|---|---|---|---|---|---|---|---|
| Gian Villante | 74 of 209 | 35% | 57 of 184 | 11 of 17 | 6 of 8 | 74 of 208 | 0 of 1 | 0 of 0 |
| Francimar Barroso | 74 of 128 | 57% | 38 of 86 | 18 of 24 | 18 of 18 | 74 of 127 | 0 of 1 | 0 of 0 |
Significant Strikes Per Round
| Rd | Fighter | Sig. Str. | Sig. Str. % | Head | Body | Leg | Distance | Clinch | Ground |
|---|---|---|---|---|---|---|---|---|---|
| 1 | Gian Villante | 15 of 50 | 30% | 12 of 45 | 1 of 1 | 2 of 4 | 15 of 50 | 0 of 0 | 0 of 0 |
| Francimar Barroso | 21 of 26 | 80% | 9 of 11 | 5 of 8 | 7 of 7 | 21 of 26 | 0 of 0 | 0 of 0 | |
| 2 | Gian Villante | 35 of 79 | 44% | 26 of 69 | 5 of 6 | 4 of 4 | 35 of 78 | 0 of 1 | 0 of 0 |
| Francimar Barroso | 26 of 57 | 45% | 13 of 41 | 7 of 10 | 6 of 6 | 26 of 56 | 0 of 1 | 0 of 0 | |
| 3 | Gian Villante | 24 of 80 | 30% | 19 of 70 | 5 of 10 | 0 of 0 | 24 of 80 | 0 of 0 | 0 of 0 |
| Francimar Barroso | 27 of 45 | 60% | 16 of 34 | 6 of 6 | 5 of 5 | 27 of 45 | 0 of 0 | 0 of 0 |
Totals
| Fighter | KD | Sig. Str. | Sig. Str. % | Total Str. | TD | TD % | Sub. Att | Rev. | Ctrl |
|---|---|---|---|---|---|---|---|---|---|
| Patrick Cummins | 0 | 86 of 182 | 47% | 92 of 188 | 1 of 11 | 9% | 0 | 0 | 3:04 |
| Gian Villante | 0 | 72 of 196 | 36% | 85 of 210 | 0 of 0 | --- | 0 | 0 | 0:00 |
Per Round
| Rd | Fighter | KD | Sig. Str. | Sig. Str. % | Total Str. | TD | TD % | Sub. Att | Rev. | Ctrl |
|---|---|---|---|---|---|---|---|---|---|---|
| 1 | Patrick Cummins | 0 | 17 of 39 | 43% | 20 of 42 | 1 of 6 | 16% | 0 | 0 | 1:39 |
| Gian Villante | 0 | 23 of 55 | 41% | 35 of 68 | 0 of 0 | --- | 0 | 0 | 0:00 | |
| 2 | Patrick Cummins | 0 | 37 of 71 | 52% | 38 of 72 | 0 of 4 | 0% | 0 | 0 | 0:19 |
| Gian Villante | 0 | 24 of 72 | 33% | 24 of 72 | 0 of 0 | --- | 0 | 0 | 0:00 | |
| 3 | Patrick Cummins | 0 | 32 of 72 | 44% | 34 of 74 | 0 of 1 | 0% | 0 | 0 | 1:06 |
| Gian Villante | 0 | 25 of 69 | 36% | 26 of 70 | 0 of 0 | --- | 0 | 0 | 0:00 |
Significant Strikes
| Fighter | Sig. Str. | Sig. Str. % | Head | Body | Leg | Distance | Clinch | Ground |
|---|---|---|---|---|---|---|---|---|
| Patrick Cummins | 86 of 182 | 47% | 70 of 163 | 7 of 9 | 9 of 10 | 74 of 164 | 12 of 18 | 0 of 0 |
| Gian Villante | 72 of 196 | 36% | 66 of 189 | 3 of 4 | 3 of 3 | 67 of 189 | 0 of 1 | 5 of 6 |
Significant Strikes Per Round
| Rd | Fighter | Sig. Str. | Sig. Str. % | Head | Body | Leg | Distance | Clinch | Ground |
|---|---|---|---|---|---|---|---|---|---|
| 1 | Patrick Cummins | 17 of 39 | 43% | 15 of 37 | 1 of 1 | 1 of 1 | 15 of 34 | 2 of 5 | 0 of 0 |
| Gian Villante | 23 of 55 | 41% | 21 of 53 | 1 of 1 | 1 of 1 | 18 of 49 | 0 of 1 | 5 of 5 | |
| 2 | Patrick Cummins | 37 of 71 | 52% | 30 of 62 | 5 of 7 | 2 of 2 | 35 of 67 | 2 of 4 | 0 of 0 |
| Gian Villante | 24 of 72 | 33% | 21 of 68 | 1 of 2 | 2 of 2 | 24 of 72 | 0 of 0 | 0 of 0 | |
| 3 | Patrick Cummins | 32 of 72 | 44% | 25 of 64 | 1 of 1 | 6 of 7 | 24 of 63 | 8 of 9 | 0 of 0 |
| Gian Villante | 25 of 69 | 36% | 24 of 68 | 1 of 1 | 0 of 0 | 25 of 68 | 0 of 0 | 0 of 1 |
No comments yet. Be the first to share your thoughts!