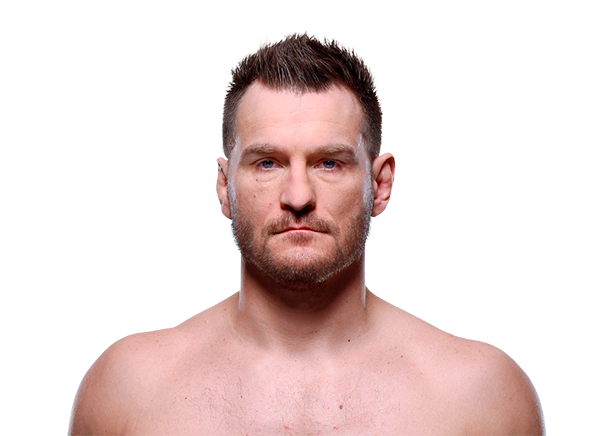
Career Averages - Stipe Miocic
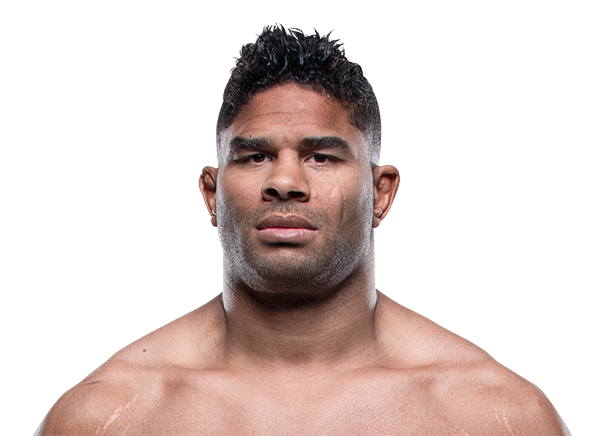
Career Averages - Alistair Overeem
Stipe Miocic - Fight History
Totals
| Fighter | KD | Sig. Str. | Sig. Str. % | Total Str. | TD | TD % | Sub. Att | Rev. | Ctrl |
|---|---|---|---|---|---|---|---|---|---|
| Jon Jones | 1 | 96 of 119 | 80% | 104 of 128 | 1 of 1 | 100% | 0 | 0 | 3:51 |
| Stipe Miocic | 0 | 37 of 89 | 41% | 42 of 94 | 0 of 0 | --- | 0 | 0 | 0:00 |
Per Round
| Rd | Fighter | KD | Sig. Str. | Sig. Str. % | Total Str. | TD | TD % | Sub. Att | Rev. | Ctrl |
|---|---|---|---|---|---|---|---|---|---|---|
| 1 | Jon Jones | 0 | 42 of 48 | 87% | 49 of 56 | 1 of 1 | 100% | 0 | 0 | 3:37 |
| Stipe Miocic | 0 | 6 of 13 | 46% | 11 of 18 | 0 of 0 | --- | 0 | 0 | 0:00 | |
| 2 | Jon Jones | 0 | 20 of 28 | 71% | 20 of 28 | 0 of 0 | --- | 0 | 0 | 0:00 |
| Stipe Miocic | 0 | 16 of 37 | 43% | 16 of 37 | 0 of 0 | --- | 0 | 0 | 0:00 | |
| 3 | Jon Jones | 1 | 34 of 43 | 79% | 35 of 44 | 0 of 0 | --- | 0 | 0 | 0:14 |
| Stipe Miocic | 0 | 15 of 39 | 38% | 15 of 39 | 0 of 0 | --- | 0 | 0 | 0:00 |
Significant Strikes
| Fighter | Sig. Str. | Sig. Str. % | Head | Body | Leg | Distance | Clinch | Ground |
|---|---|---|---|---|---|---|---|---|
| Jon Jones | 96 of 119 | 80% | 70 of 91 | 16 of 18 | 10 of 10 | 54 of 70 | 2 of 3 | 40 of 46 |
| Stipe Miocic | 37 of 89 | 41% | 24 of 75 | 7 of 8 | 6 of 6 | 32 of 83 | 4 of 5 | 1 of 1 |
Significant Strikes Per Round
| Rd | Fighter | Sig. Str. | Sig. Str. % | Head | Body | Leg | Distance | Clinch | Ground |
|---|---|---|---|---|---|---|---|---|---|
| 1 | Jon Jones | 42 of 48 | 87% | 36 of 42 | 4 of 4 | 2 of 2 | 5 of 6 | 0 of 0 | 37 of 42 |
| Stipe Miocic | 6 of 13 | 46% | 3 of 10 | 1 of 1 | 2 of 2 | 5 of 12 | 0 of 0 | 1 of 1 | |
| 2 | Jon Jones | 20 of 28 | 71% | 9 of 16 | 7 of 8 | 4 of 4 | 19 of 27 | 1 of 1 | 0 of 0 |
| Stipe Miocic | 16 of 37 | 43% | 9 of 29 | 4 of 5 | 3 of 3 | 16 of 37 | 0 of 0 | 0 of 0 | |
| 3 | Jon Jones | 34 of 43 | 79% | 25 of 33 | 5 of 6 | 4 of 4 | 30 of 37 | 1 of 2 | 3 of 4 |
| Stipe Miocic | 15 of 39 | 38% | 12 of 36 | 2 of 2 | 1 of 1 | 11 of 34 | 4 of 5 | 0 of 0 |
Angelo is very confident in Jon Jones, citing his all-around greatness, youth, and activity compared to Stipe Miocic, who is a full-time fireman on a four-year layoff. He expects Jones to take Miocic down early and dominate. He thinks Jones should be -1500 and will win easily.
Big Brady picks Jon Jones but expects a slow, disappointing fight. He notes that Stipe Miocic is old and washed, having looked slow against Francis Ngannou four years ago, but he doesn't think Jones will finish him early. He cites Jones' recent lackluster performances against Dominick Reyes and Thiago Santos. He predicts a decision win for Jones and likes the over on 40.5 significant strikes for Jones on PrizePicks.
Cody picks Jon Jones, citing Jones' legendary durability and distance management. He notes Stipe is 43, hasn't fought in 3.5 years, and looked slow against Ngannou. Cody expects Jones to win a 49-46 decision or possibly get a late submission, but sees the fight going the distance. He mentions the over 2.5 rounds as a potential prop.
Connor also picks Jones, emphasizing that Stipe is old and likely shot, and that Jones's wrestling and size will be too much. He notes that Stipe's last performance against Ngannou was poor and he looked aimless. Connor expects Jones to take Stipe down and submit him, possibly after a tentative first round.
Daniel Vreeland picks Jon Jones to win, citing Jones' superior MMA wrestling, takedown defense (95%), reach advantage, and younger age. He believes Jones will use oblique kicks to immobilize Stipe, mix in takedowns, and dictate the pace. He acknowledges Stipe's boxing and wrestling credentials but thinks Jones' overall MMA game is superior. He notes that Stipe hasn't fought since 2021 and may have declined.
Vreeland picks Jones emphatically, calling it tragic that this fight is happening. He notes Stipe hasn't fought anyone well-rounded since 2018, is 42, semi-retired, and was knocked out badly by Ngannou. Vreeland believes Jones will win by knockout, possibly with a 12-to-6 elbow, and that Stipe will look old when he gets knocked out.
Fox picks Jones, agreeing that Stipe has no chance. He notes Jones is younger, has a reach advantage, and is the better fighter everywhere. Fox expects Jones to win by knockout, possibly with a 12-to-6 elbow, and thinks Stipe's chin is compromised after the Ngannou KO.
Lucrative James picks Jon Jones to win, citing Stipe Miocic's age (42) and four-year layoff as major concerns. He believes Stipe will look stiff and has lost athleticism, while Jones has an iron chin, superior striking at all ranges, and much better MMA wrestling and grappling. He predicts Jones will win inside the distance, likely within the first two rounds, and notes that Jones can win however he wants if Stipe is a shell of his former self.
The host expects Jones to continue his dominant ways as he did against Gane, getting to his grappling and keeping Miocic on his back. He mentions Jones might use 12-to-6 elbows but ultimately finds the neck and gets a submission victory.
Paul picks Jon Jones, calling it a freak show fight. He argues Jones has fought weak competition and had close fights with lesser opponents, but Stipe is faded and hasn't fought in three years. Paul expects Jones to win by decision, possibly 49-46, and likes the over 2.5 rounds. He notes Jones' distance management and Stipe's age and inactivity.
The MMA Guru picks Jon Jones, expecting a finish in the first or second round. He describes Jones's oblique kicks and clinch work breaking down the 42-year-old Miocic. He predicts a guillotine choke after a takedown, noting Stipe's tendency to scramble into submissions.
Zane picks Jones, noting that Stipe is old and inactive, having not fought in over three years and showing no interest in fighting. He expects a slog for a round or two, then Jones will take Stipe down and finish him via submission or ground-and-pound. Zane mentions Jones's wrestling and size advantage, and that Stipe's chin and durability are questionable at this stage.
Totals
| Fighter | KD | Sig. Str. | Sig. Str. % | Total Str. | TD | TD % | Sub. Att | Rev. | Ctrl |
|---|---|---|---|---|---|---|---|---|---|
| Francis Ngannou | 0 | 12 of 13 | 92% | 12 of 13 | 0 of 1 | 0% | 0 | 0 | 0:04 |
| Stipe Miocic | 2 | 36 of 56 | 64% | 38 of 58 | 1 of 2 | 50% | 0 | 0 | 0:22 |
Per Round
| Rd | Fighter | KD | Sig. Str. | Sig. Str. % | Total Str. | TD | TD % | Sub. Att | Rev. | Ctrl |
|---|---|---|---|---|---|---|---|---|---|---|
| 1 | Francis Ngannou | 0 | 8 of 8 | 100% | 8 of 8 | 0 of 1 | 0% | 0 | 0 | 0:04 |
| Stipe Miocic | 0 | 23 of 37 | 62% | 24 of 38 | 1 of 2 | 50% | 0 | 0 | 0:19 | |
| 2 | Francis Ngannou | 0 | 4 of 5 | 80% | 4 of 5 | 0 of 0 | --- | 0 | 0 | 0:00 |
| Stipe Miocic | 2 | 13 of 19 | 68% | 14 of 20 | 0 of 0 | --- | 0 | 0 | 0:03 |
Significant Strikes
| Fighter | Sig. Str. | Sig. Str. % | Head | Body | Leg | Distance | Clinch | Ground |
|---|---|---|---|---|---|---|---|---|
| Francis Ngannou | 12 of 13 | 92% | 3 of 4 | 2 of 2 | 7 of 7 | 12 of 13 | 0 of 0 | 0 of 0 |
| Stipe Miocic | 36 of 56 | 64% | 28 of 46 | 2 of 4 | 6 of 6 | 17 of 36 | 8 of 8 | 11 of 12 |
Significant Strikes Per Round
| Rd | Fighter | Sig. Str. | Sig. Str. % | Head | Body | Leg | Distance | Clinch | Ground |
|---|---|---|---|---|---|---|---|---|---|
| 1 | Francis Ngannou | 8 of 8 | 100% | 0 of 0 | 1 of 1 | 7 of 7 | 8 of 8 | 0 of 0 | 0 of 0 |
| Stipe Miocic | 23 of 37 | 62% | 16 of 28 | 2 of 4 | 5 of 5 | 11 of 24 | 3 of 3 | 9 of 10 | |
| 2 | Francis Ngannou | 4 of 5 | 80% | 3 of 4 | 1 of 1 | 0 of 0 | 4 of 5 | 0 of 0 | 0 of 0 |
| Stipe Miocic | 13 of 19 | 68% | 12 of 18 | 0 of 0 | 1 of 1 | 6 of 12 | 5 of 5 | 2 of 2 |
Big Brady picks Stipe Miocic to win by fifth-round TKO. He believes Stipe is the more well-rounded fighter with better cardio and fight IQ. He expects Stipe to survive the early rounds by clinching and attempting takedowns to tire Ngannou, then take over as the fight progresses. He notes that Ngannou only landed two significant strikes after the second round in their first fight. However, he acknowledges Ngannou's one-shot knockout power and says he would not bet the fight at current odds.
Cody backs Ngannou, citing his generational power and the fact that he has been training wrestling defense with Kamaru Usman. He believes Ngannou's strategy is to go out and kill his opponent early, and if he lands, it's over. He acknowledges the cardio concerns but thinks Ngannou's durability held up in the first fight and that he has improved mentally since the Lewis loss.
Daniel Levi picks Francis Ngannou to win by first-round knockout. He emphasizes that Ngannou is now focused, has the right team, and has learned from his first fight with Stipe. He notes that Stipe has absorbed over 300 head strikes since their first fight, including a knockout loss, while Ngannou has taken minimal damage. Levi believes Ngannou's power and improved mental approach will lead to a violent finish.
The host believes Stipe Miocic will retain his title by third-round TKO. He notes that Stipe has improved his cardio and fight IQ since their first fight, as seen in the Cormier trilogy. He expects Stipe to use head movement, smart takedown entries to the weak side, and mix in grappling to wear down Ngannou, who he thinks will gas after a round and a half if he doesn't get the knockout. He compares the matchup to Lewis vs Blaydes and Gane vs Rozenstruik, where the more skilled fighter won. He advises that if backing Ngannou, take the KO prop because he won't win by decision.
Paul picks Stipe Miocic, emphasizing his wrestling advantage, cardio advantage, and later-round experience. He notes that Stipe has shown he can take Ngannou's punches and grind him down, as seen in the first fight. He also highlights Stipe's success in rematches, having avenged losses to JDS and Cormier. Paul is confident that if Ngannou doesn't knock him out early, Stipe will take over.
The Guru picks Stipe Miocic, emphasizing that Stipe has improved since the first fight: better footwork, cardio, wrestling, and clinch work from his camps against Daniel Cormier. He argues that Stipe's wrestling is the key difference, as he can take Ngannou down and control him, unlike other heavyweights who tried to stand and trade. He predicts Ngannou will be hesitant and gas out, leading to a TKO in the third or fourth round. He acknowledges the puncher's chance for Ngannou but relies on evidence over guesswork.
Totals
| Fighter | KD | Sig. Str. | Sig. Str. % | Total Str. | TD | TD % | Sub. Att | Rev. | Ctrl |
|---|---|---|---|---|---|---|---|---|---|
| Stipe Miocic | 1 | 115 of 187 | 61% | 171 of 244 | 0 of 6 | 0% | 0 | 0 | 5:52 |
| Daniel Cormier | 0 | 105 of 183 | 57% | 145 of 223 | 1 of 2 | 50% | 0 | 0 | 0:53 |
Per Round
| Rd | Fighter | KD | Sig. Str. | Sig. Str. % | Total Str. | TD | TD % | Sub. Att | Rev. | Ctrl |
|---|---|---|---|---|---|---|---|---|---|---|
| 1 | Stipe Miocic | 0 | 20 of 33 | 60% | 22 of 35 | 0 of 0 | --- | 0 | 0 | 0:00 |
| Daniel Cormier | 0 | 14 of 25 | 56% | 14 of 25 | 1 of 1 | 100% | 0 | 0 | 0:38 | |
| 2 | Stipe Miocic | 1 | 24 of 39 | 61% | 38 of 54 | 0 of 2 | 0% | 0 | 0 | 0:09 |
| Daniel Cormier | 0 | 26 of 53 | 49% | 26 of 53 | 0 of 0 | --- | 0 | 0 | 0:00 | |
| 3 | Stipe Miocic | 0 | 28 of 48 | 58% | 46 of 66 | 0 of 0 | --- | 0 | 0 | 1:53 |
| Daniel Cormier | 0 | 16 of 32 | 50% | 34 of 50 | 0 of 0 | --- | 0 | 0 | 0:00 | |
| 4 | Stipe Miocic | 0 | 16 of 32 | 50% | 23 of 39 | 0 of 2 | 0% | 0 | 0 | 1:23 |
| Daniel Cormier | 0 | 30 of 43 | 69% | 41 of 54 | 0 of 1 | 0% | 0 | 0 | 0:00 | |
| 5 | Stipe Miocic | 0 | 27 of 35 | 77% | 42 of 50 | 0 of 2 | 0% | 0 | 0 | 2:27 |
| Daniel Cormier | 0 | 19 of 30 | 63% | 30 of 41 | 0 of 0 | --- | 0 | 0 | 0:15 |
Significant Strikes
| Fighter | Sig. Str. | Sig. Str. % | Head | Body | Leg | Distance | Clinch | Ground |
|---|---|---|---|---|---|---|---|---|
| Stipe Miocic | 115 of 187 | 61% | 67 of 136 | 31 of 34 | 17 of 17 | 101 of 169 | 14 of 18 | 0 of 0 |
| Daniel Cormier | 105 of 183 | 57% | 70 of 132 | 11 of 24 | 24 of 27 | 95 of 171 | 10 of 12 | 0 of 0 |
Significant Strikes Per Round
| Rd | Fighter | Sig. Str. | Sig. Str. % | Head | Body | Leg | Distance | Clinch | Ground |
|---|---|---|---|---|---|---|---|---|---|
| 1 | Stipe Miocic | 20 of 33 | 60% | 7 of 19 | 7 of 8 | 6 of 6 | 20 of 33 | 0 of 0 | 0 of 0 |
| Daniel Cormier | 14 of 25 | 56% | 7 of 14 | 2 of 5 | 5 of 6 | 11 of 22 | 3 of 3 | 0 of 0 | |
| 2 | Stipe Miocic | 24 of 39 | 61% | 13 of 28 | 7 of 7 | 4 of 4 | 24 of 39 | 0 of 0 | 0 of 0 |
| Daniel Cormier | 26 of 53 | 49% | 14 of 36 | 4 of 9 | 8 of 8 | 23 of 50 | 3 of 3 | 0 of 0 | |
| 3 | Stipe Miocic | 28 of 48 | 58% | 18 of 38 | 8 of 8 | 2 of 2 | 22 of 41 | 6 of 7 | 0 of 0 |
| Daniel Cormier | 16 of 32 | 50% | 13 of 27 | 0 of 2 | 3 of 3 | 16 of 31 | 0 of 1 | 0 of 0 | |
| 4 | Stipe Miocic | 16 of 32 | 50% | 12 of 26 | 2 of 4 | 2 of 2 | 16 of 29 | 0 of 3 | 0 of 0 |
| Daniel Cormier | 30 of 43 | 69% | 21 of 31 | 2 of 3 | 7 of 9 | 29 of 41 | 1 of 2 | 0 of 0 | |
| 5 | Stipe Miocic | 27 of 35 | 77% | 17 of 25 | 7 of 7 | 3 of 3 | 19 of 27 | 8 of 8 | 0 of 0 |
| Daniel Cormier | 19 of 30 | 63% | 15 of 24 | 3 of 5 | 1 of 1 | 16 of 27 | 3 of 3 | 0 of 0 |
Big Brady picks Cormier to win by decision, expecting him to implement more wrestling and have better cardio. He thinks Cormier is the better fighter and will fight smarter. He wants to see weigh-ins before betting.
Daniel Levi picks Stipe Miocic to win the trilogy. He argues that Stipe made Cormier work hard in the first fight and that Cormier's pace is unsustainable in championship rounds, especially at age 41 with retirement looming. He notes that Stipe is willing to dig deeper and that body shots have historically troubled Cormier. He also points out that if Cormier wrestles more, it will tire him out faster, leading to a Stipe finish.
Cormier is the better wrestler with superior fight IQ and will use a grapple-heavy approach, taking Miocic down repeatedly and wearing him out. He learned from the second fight where he abandoned his wrestling and gassed out; this time he will chain-wrestle and finish via ground-and-pound in the later rounds. Miocic's gas tank has shown issues when forced to wrestle, as seen in the Ngannou fight, and Cormier's top pressure is crushing.
The MMA Guru picks Stipe Miocic by TKO in the third round. He believes Miocic will start body shots earlier than the second fight and that Cormier won't get away with eye pokes. He dismisses arguments that Cormier will wrestle more, noting Miocic stuffed takedowns in previous fights.
Totals
| Fighter | KD | Sig. Str. | Sig. Str. % | Total Str. | TD | TD % | Sub. Att | Rev. | Ctrl |
|---|---|---|---|---|---|---|---|---|---|
| Stipe Miocic | 0 | 181 of 263 | 68% | 230 of 317 | 1 of 3 | 33% | 0 | 0 | 3:02 |
| Daniel Cormier | 1 | 123 of 229 | 53% | 135 of 244 | 1 of 3 | 33% | 0 | 0 | 1:30 |
Per Round
| Rd | Fighter | KD | Sig. Str. | Sig. Str. % | Total Str. | TD | TD % | Sub. Att | Rev. | Ctrl |
|---|---|---|---|---|---|---|---|---|---|---|
| 1 | Stipe Miocic | 0 | 37 of 46 | 80% | 71 of 83 | 1 of 2 | 50% | 0 | 0 | 2:44 |
| Daniel Cormier | 0 | 7 of 13 | 53% | 9 of 18 | 0 of 0 | --- | 0 | 0 | 0:07 | |
| 2 | Stipe Miocic | 0 | 56 of 82 | 68% | 59 of 85 | 0 of 0 | --- | 0 | 0 | 0:13 |
| Daniel Cormier | 0 | 46 of 82 | 56% | 48 of 84 | 0 of 0 | --- | 0 | 0 | 0:20 | |
| 3 | Stipe Miocic | 0 | 57 of 86 | 66% | 69 of 100 | 0 of 1 | 0% | 0 | 0 | 0:05 |
| Daniel Cormier | 0 | 34 of 67 | 50% | 40 of 73 | 1 of 3 | 33% | 0 | 0 | 1:01 | |
| 4 | Stipe Miocic | 0 | 31 of 49 | 63% | 31 of 49 | 0 of 0 | --- | 0 | 0 | 0:00 |
| Daniel Cormier | 1 | 36 of 67 | 53% | 38 of 69 | 0 of 0 | --- | 0 | 0 | 0:02 |
Significant Strikes
| Fighter | Sig. Str. | Sig. Str. % | Head | Body | Leg | Distance | Clinch | Ground |
|---|---|---|---|---|---|---|---|---|
| Stipe Miocic | 181 of 263 | 68% | 162 of 243 | 9 of 9 | 10 of 11 | 139 of 209 | 21 of 27 | 21 of 27 |
| Daniel Cormier | 123 of 229 | 53% | 86 of 188 | 27 of 30 | 10 of 11 | 102 of 195 | 19 of 28 | 2 of 6 |
Significant Strikes Per Round
| Rd | Fighter | Sig. Str. | Sig. Str. % | Head | Body | Leg | Distance | Clinch | Ground |
|---|---|---|---|---|---|---|---|---|---|
| 1 | Stipe Miocic | 37 of 46 | 80% | 25 of 34 | 7 of 7 | 5 of 5 | 13 of 16 | 3 of 3 | 21 of 27 |
| Daniel Cormier | 7 of 13 | 53% | 3 of 8 | 0 of 0 | 4 of 5 | 6 of 12 | 0 of 0 | 1 of 1 | |
| 2 | Stipe Miocic | 56 of 82 | 68% | 56 of 81 | 0 of 0 | 0 of 1 | 45 of 68 | 11 of 14 | 0 of 0 |
| Daniel Cormier | 46 of 82 | 56% | 37 of 72 | 8 of 9 | 1 of 1 | 42 of 76 | 4 of 6 | 0 of 0 | |
| 3 | Stipe Miocic | 57 of 86 | 66% | 53 of 82 | 1 of 1 | 3 of 3 | 50 of 76 | 7 of 10 | 0 of 0 |
| Daniel Cormier | 34 of 67 | 50% | 28 of 61 | 5 of 5 | 1 of 1 | 24 of 50 | 10 of 17 | 0 of 0 | |
| 4 | Stipe Miocic | 31 of 49 | 63% | 28 of 46 | 1 of 1 | 2 of 2 | 31 of 49 | 0 of 0 | 0 of 0 |
| Daniel Cormier | 36 of 67 | 53% | 18 of 47 | 14 of 16 | 4 of 4 | 30 of 57 | 5 of 5 | 1 of 5 |
Totals
| Fighter | KD | Sig. Str. | Sig. Str. % | Total Str. | TD | TD % | Sub. Att | Rev. | Ctrl |
|---|---|---|---|---|---|---|---|---|---|
| Daniel Cormier | 0 | 24 of 51 | 47% | 29 of 56 | 1 of 1 | 100% | 0 | 0 | 1:21 |
| Stipe Miocic | 1 | 25 of 37 | 67% | 31 of 43 | 0 of 0 | --- | 0 | 0 | 0:06 |
Per Round
| Rd | Fighter | KD | Sig. Str. | Sig. Str. % | Total Str. | TD | TD % | Sub. Att | Rev. | Ctrl |
|---|---|---|---|---|---|---|---|---|---|---|
| 1 | Daniel Cormier | 0 | 24 of 51 | 47% | 29 of 56 | 1 of 1 | 100% | 0 | 0 | 1:21 |
| Stipe Miocic | 1 | 25 of 37 | 67% | 31 of 43 | 0 of 0 | --- | 0 | 0 | 0:06 |
Significant Strikes
| Fighter | Sig. Str. | Sig. Str. % | Head | Body | Leg | Distance | Clinch | Ground |
|---|---|---|---|---|---|---|---|---|
| Daniel Cormier | 24 of 51 | 47% | 15 of 41 | 6 of 7 | 3 of 3 | 19 of 42 | 5 of 9 | 0 of 0 |
| Stipe Miocic | 25 of 37 | 67% | 20 of 30 | 1 of 1 | 4 of 6 | 19 of 31 | 2 of 2 | 4 of 4 |
Significant Strikes Per Round
| Rd | Fighter | Sig. Str. | Sig. Str. % | Head | Body | Leg | Distance | Clinch | Ground |
|---|---|---|---|---|---|---|---|---|---|
| 1 | Daniel Cormier | 24 of 51 | 47% | 15 of 41 | 6 of 7 | 3 of 3 | 19 of 42 | 5 of 9 | 0 of 0 |
| Stipe Miocic | 25 of 37 | 67% | 20 of 30 | 1 of 1 | 4 of 6 | 19 of 31 | 2 of 2 | 4 of 4 |
Totals
| Fighter | KD | Sig. Str. | Sig. Str. % | Total Str. | TD | TD % | Sub. Att | Rev. | Ctrl |
|---|---|---|---|---|---|---|---|---|---|
| Stipe Miocic | 0 | 70 of 95 | 73% | 200 of 244 | 6 of 14 | 42% | 0 | 0 | 15:02 |
| Francis Ngannou | 0 | 21 of 113 | 18% | 33 of 126 | 0 of 1 | 0% | 1 | 0 | 0:02 |
Per Round
| Rd | Fighter | KD | Sig. Str. | Sig. Str. % | Total Str. | TD | TD % | Sub. Att | Rev. | Ctrl |
|---|---|---|---|---|---|---|---|---|---|---|
| 1 | Stipe Miocic | 0 | 16 of 25 | 64% | 24 of 33 | 2 of 5 | 40% | 0 | 0 | 1:57 |
| Francis Ngannou | 0 | 15 of 62 | 24% | 18 of 65 | 0 of 0 | --- | 0 | 0 | 0:01 | |
| 2 | Stipe Miocic | 0 | 17 of 24 | 70% | 29 of 37 | 2 of 3 | 66% | 0 | 0 | 2:17 |
| Francis Ngannou | 0 | 4 of 27 | 14% | 4 of 27 | 0 of 0 | --- | 0 | 0 | 0:00 | |
| 3 | Stipe Miocic | 0 | 12 of 16 | 75% | 47 of 58 | 1 of 3 | 33% | 0 | 0 | 3:47 |
| Francis Ngannou | 0 | 1 of 8 | 12% | 7 of 14 | 0 of 1 | 0% | 0 | 0 | 0:01 | |
| 4 | Stipe Miocic | 0 | 18 of 21 | 85% | 82 of 95 | 1 of 1 | 100% | 0 | 0 | 4:39 |
| Francis Ngannou | 0 | 0 of 3 | 0% | 0 of 3 | 0 of 0 | --- | 0 | 0 | 0:00 | |
| 5 | Stipe Miocic | 0 | 7 of 9 | 77% | 18 of 21 | 0 of 2 | 0% | 0 | 0 | 2:22 |
| Francis Ngannou | 0 | 1 of 13 | 7% | 4 of 17 | 0 of 0 | --- | 1 | 0 | 0:00 |
Significant Strikes
| Fighter | Sig. Str. | Sig. Str. % | Head | Body | Leg | Distance | Clinch | Ground |
|---|---|---|---|---|---|---|---|---|
| Stipe Miocic | 70 of 95 | 73% | 45 of 67 | 9 of 11 | 16 of 17 | 37 of 52 | 5 of 6 | 28 of 37 |
| Francis Ngannou | 21 of 113 | 18% | 17 of 106 | 4 of 7 | 0 of 0 | 19 of 105 | 2 of 8 | 0 of 0 |
Significant Strikes Per Round
| Rd | Fighter | Sig. Str. | Sig. Str. % | Head | Body | Leg | Distance | Clinch | Ground |
|---|---|---|---|---|---|---|---|---|---|
| 1 | Stipe Miocic | 16 of 25 | 64% | 13 of 22 | 2 of 2 | 1 of 1 | 12 of 19 | 2 of 2 | 2 of 4 |
| Francis Ngannou | 15 of 62 | 24% | 14 of 61 | 1 of 1 | 0 of 0 | 13 of 55 | 2 of 7 | 0 of 0 | |
| 2 | Stipe Miocic | 17 of 24 | 70% | 7 of 13 | 4 of 5 | 6 of 6 | 14 of 20 | 0 of 0 | 3 of 4 |
| Francis Ngannou | 4 of 27 | 14% | 2 of 23 | 2 of 4 | 0 of 0 | 4 of 27 | 0 of 0 | 0 of 0 | |
| 3 | Stipe Miocic | 12 of 16 | 75% | 8 of 12 | 0 of 0 | 4 of 4 | 4 of 5 | 2 of 2 | 6 of 9 |
| Francis Ngannou | 1 of 8 | 12% | 1 of 8 | 0 of 0 | 0 of 0 | 1 of 8 | 0 of 0 | 0 of 0 | |
| 4 | Stipe Miocic | 18 of 21 | 85% | 15 of 18 | 2 of 2 | 1 of 1 | 1 of 1 | 0 of 0 | 17 of 20 |
| Francis Ngannou | 0 of 3 | 0% | 0 of 3 | 0 of 0 | 0 of 0 | 0 of 3 | 0 of 0 | 0 of 0 | |
| 5 | Stipe Miocic | 7 of 9 | 77% | 2 of 2 | 1 of 2 | 4 of 5 | 6 of 7 | 1 of 2 | 0 of 0 |
| Francis Ngannou | 1 of 13 | 7% | 0 of 11 | 1 of 2 | 0 of 0 | 1 of 12 | 0 of 1 | 0 of 0 |
Totals
| Fighter | KD | Sig. Str. | Sig. Str. % | Total Str. | TD | TD % | Sub. Att | Rev. | Ctrl |
|---|---|---|---|---|---|---|---|---|---|
| Stipe Miocic | 1 | 26 of 56 | 46% | 26 of 56 | 0 of 0 | --- | 0 | 0 | 0:05 |
| Junior dos Santos | 0 | 12 of 18 | 66% | 12 of 18 | 0 of 0 | --- | 0 | 0 | 0:00 |
Per Round
| Rd | Fighter | KD | Sig. Str. | Sig. Str. % | Total Str. | TD | TD % | Sub. Att | Rev. | Ctrl |
|---|---|---|---|---|---|---|---|---|---|---|
| 1 | Stipe Miocic | 1 | 26 of 56 | 46% | 26 of 56 | 0 of 0 | --- | 0 | 0 | 0:05 |
| Junior dos Santos | 0 | 12 of 18 | 66% | 12 of 18 | 0 of 0 | --- | 0 | 0 | 0:00 |
Significant Strikes
| Fighter | Sig. Str. | Sig. Str. % | Head | Body | Leg | Distance | Clinch | Ground |
|---|---|---|---|---|---|---|---|---|
| Stipe Miocic | 26 of 56 | 46% | 23 of 50 | 0 of 2 | 3 of 4 | 15 of 39 | 3 of 4 | 8 of 13 |
| Junior dos Santos | 12 of 18 | 66% | 4 of 9 | 3 of 4 | 5 of 5 | 12 of 18 | 0 of 0 | 0 of 0 |
Significant Strikes Per Round
| Rd | Fighter | Sig. Str. | Sig. Str. % | Head | Body | Leg | Distance | Clinch | Ground |
|---|---|---|---|---|---|---|---|---|---|
| 1 | Stipe Miocic | 26 of 56 | 46% | 23 of 50 | 0 of 2 | 3 of 4 | 15 of 39 | 3 of 4 | 8 of 13 |
| Junior dos Santos | 12 of 18 | 66% | 4 of 9 | 3 of 4 | 5 of 5 | 12 of 18 | 0 of 0 | 0 of 0 |
Totals
| Fighter | KD | Sig. Str. | Sig. Str. % | Total Str. | TD | TD % | Sub. Att | Rev. | Ctrl |
|---|---|---|---|---|---|---|---|---|---|
| Stipe Miocic | 0 | 34 of 60 | 56% | 34 of 60 | 1 of 1 | 100% | 0 | 0 | 0:21 |
| Alistair Overeem | 1 | 9 of 17 | 52% | 9 of 17 | 0 of 0 | --- | 1 | 0 | 0:06 |
Per Round
| Rd | Fighter | KD | Sig. Str. | Sig. Str. % | Total Str. | TD | TD % | Sub. Att | Rev. | Ctrl |
|---|---|---|---|---|---|---|---|---|---|---|
| 1 | Stipe Miocic | 0 | 34 of 60 | 56% | 34 of 60 | 1 of 1 | 100% | 0 | 0 | 0:21 |
| Alistair Overeem | 1 | 9 of 17 | 52% | 9 of 17 | 0 of 0 | --- | 1 | 0 | 0:06 |
Significant Strikes
| Fighter | Sig. Str. | Sig. Str. % | Head | Body | Leg | Distance | Clinch | Ground |
|---|---|---|---|---|---|---|---|---|
| Stipe Miocic | 34 of 60 | 56% | 31 of 55 | 3 of 5 | 0 of 0 | 16 of 36 | 6 of 9 | 12 of 15 |
| Alistair Overeem | 9 of 17 | 52% | 5 of 10 | 3 of 6 | 1 of 1 | 7 of 14 | 2 of 3 | 0 of 0 |
Significant Strikes Per Round
| Rd | Fighter | Sig. Str. | Sig. Str. % | Head | Body | Leg | Distance | Clinch | Ground |
|---|---|---|---|---|---|---|---|---|---|
| 1 | Stipe Miocic | 34 of 60 | 56% | 31 of 55 | 3 of 5 | 0 of 0 | 16 of 36 | 6 of 9 | 12 of 15 |
| Alistair Overeem | 9 of 17 | 52% | 5 of 10 | 3 of 6 | 1 of 1 | 7 of 14 | 2 of 3 | 0 of 0 |
Alistair Overeem - Fight History
Totals
| Fighter | KD | Sig. Str. | Sig. Str. % | Total Str. | TD | TD % | Sub. Att | Rev. | Ctrl |
|---|---|---|---|---|---|---|---|---|---|
| Alexander Volkov | 0 | 10 of 20 | 50% | 10 of 20 | 0 of 1 | 0% | 0 | 0 | 0:15 |
| Alistair Overeem | 1 | 54 of 88 | 61% | 54 of 88 | 0 of 0 | --- | 0 | 0 | 0:11 |
Per Round
| Rd | Fighter | KD | Sig. Str. | Sig. Str. % | Total Str. | TD | TD % | Sub. Att | Rev. | Ctrl |
|---|---|---|---|---|---|---|---|---|---|---|
| 1 | Alexander Volkov | 0 | 8 of 14 | 57% | 8 of 14 | 0 of 0 | --- | 0 | 0 | 0:00 |
| Alistair Overeem | 0 | 33 of 53 | 62% | 33 of 53 | 0 of 0 | --- | 0 | 0 | 0:08 | |
| 2 | Alexander Volkov | 0 | 2 of 6 | 33% | 2 of 6 | 0 of 1 | 0% | 0 | 0 | 0:15 |
| Alistair Overeem | 1 | 21 of 35 | 60% | 21 of 35 | 0 of 0 | --- | 0 | 0 | 0:03 |
Significant Strikes
| Fighter | Sig. Str. | Sig. Str. % | Head | Body | Leg | Distance | Clinch | Ground |
|---|---|---|---|---|---|---|---|---|
| Alexander Volkov | 10 of 20 | 50% | 3 of 13 | 2 of 2 | 5 of 5 | 10 of 20 | 0 of 0 | 0 of 0 |
| Alistair Overeem | 54 of 88 | 61% | 47 of 81 | 3 of 3 | 4 of 4 | 40 of 65 | 11 of 18 | 3 of 5 |
Significant Strikes Per Round
| Rd | Fighter | Sig. Str. | Sig. Str. % | Head | Body | Leg | Distance | Clinch | Ground |
|---|---|---|---|---|---|---|---|---|---|
| 1 | Alexander Volkov | 8 of 14 | 57% | 3 of 9 | 2 of 2 | 3 of 3 | 8 of 14 | 0 of 0 | 0 of 0 |
| Alistair Overeem | 33 of 53 | 62% | 26 of 46 | 3 of 3 | 4 of 4 | 22 of 34 | 8 of 14 | 3 of 5 | |
| 2 | Alexander Volkov | 2 of 6 | 33% | 0 of 4 | 0 of 0 | 2 of 2 | 2 of 6 | 0 of 0 | 0 of 0 |
| Alistair Overeem | 21 of 35 | 60% | 21 of 35 | 0 of 0 | 0 of 0 | 18 of 31 | 3 of 4 | 0 of 0 |
Play-by-Play
View on SherdogRound 1
Five hundred nineteen and one-half pounds, not counting referee Jason Herzog, are in the cage now for our headliner. The two heavyweight strikers in Overeem (47-18, 1 NC; 12-7 UFC) and Volkov (32-8, 6-2 UFC) will determine who is perhaps a win away for a title shot, while the other falls to the middle of the pack with their hopes dashed. The big men respectfully touch gloves, and the cage door seals behind them as we begin. Volkov lands a huge leg kick, and Overeem backs off to shell up against the fence. Volkov lands a few strikes but does not fall into a trap of Overeem letting loose a counter strike. The Russian pulls back at the last second of a big kick to draw a reaction out of his opponent, and his strikes are already making Overeem flinch. Volkov lands a front kick down the middle, and Overeem tries to catch it and lets it go. Volkov chops at the calf with a kick, and he does not follow it and instead eats a huge right hand from “The Demolition Man.” Overeem loads up with another, and Volkov eats it like borscht and retreats against the cage wall. Volkov stalks down his opponent, but he takes a right hand and clinches up. Volkov separates, and he absorbs a left hand and fights off a takedown attempt. Volkov fires off a high kick that is blocked, and a single jab is pawed away without issue. Overeem ducks forward to land a big uppercut, and he continues along with a thudding body kick. Overeem backs off to land a kick to the thigh, and Volkov counters him with a left hand that puts Overeem down. Overeem might not be hurt and he may have slipped, but Volkov chases after him to hammer him with punches. Not sensing a finish, Volkov lets him back up and reaches out with his left jab. Volkov lands a couple punches and a knee up the middle, and he backs off to land a heavy kick to the body. Overeem lunges forward with a left hand, and Volkov picks at him with a low kick and a jab. Volkov chambers a right hand but does not throw it, and Overeem swings and misses wildly with a looping left. Volkov assaults Overeem with a barrage of punches, and Overeem covers up and takes some damage as his face is marked up. The round ends with Overeem aiming a punch to the body.
Sherdog Scores
Jay Pettry scores the round: 10-9 Volkov
Tristen Critchfield scores the round: 10-9 Volkov
Tyler Treese scores the round: 10-9 Volkov
Round 2
The heavyweights touch gloves to stat off the second round, and Overeem rushes forward shoulder first and eats a right hand. Overeem lets loose a head kick that gets blocked, and Volkov triples up on his left hand to sting Overeem. A solid one-two snaps Overeem’s head back, and Overeem ducks down to wing a left hook but it glances off the guard. Overeem crashes in to tie the Russian up, but he pushes Volkov away and gets jabbed. Volkov splits the guard with a few punches, and Overeem is stalking him down and pushes him back into the cage wall. “Drago” connects with a heavy one-two, and Overeem is in the danger zone. Overeem turns away as he takes another punch, and Volkov rips into him with punches in bunches. Volkov measures his shots and does not punch himself out, and Herzog cautions Overeem to defend himself. Overeem attacks a takedown but it is easily stuffed.
Volkov measures his strikes and lands punches that make Overeem’s legs wobble. “Drago” fires off a deadly one-two, and a bloodied Overeem stumbles to the canvas and topples over. Herzog has seen enough, and Volkov walks off knowing his work tonight is done.
We have a legitimate, new heavyweight contender on the rise, as Volkov notched a very impressive win against a devastatingly effective striker with a penchant for nasty finishes. Volkov goes down to join Overeem on his knees to thank him for the fight, showing respect for the legendary Dutchman in victory. In his post-fight interview, an eerily calm Volkov says it is his time, and that he is not done improving. With this fight card in the books, we return next week with a pay-per-view offering putting the welterweight title on the line.
The Official Result
Alexander Volkov def. Alistair Overeem R2 2:06 via TKO (Punches)
Big Brady picks Alexander Volkov, emphasizing his cardio, output, and takedown defense. He notes that Overeem's chin is completely shot and that he has been knocked out 14 times. He expects Volkov to be the 15th to knock him out, likely in the later rounds. He also suggests looking at the over 1.5 rounds prop.
Daniel Levi picks Alexander Volkov, citing his improved power at 265 pounds and his ability to sit down on punches. He notes Volkov's 40 pro fights and prime condition, and expects him to outpoint and eventually knock out Overeem. He respects Overeem but believes Volkov's size and power will be decisive.
Overeem has shown evolution in his game since joining Team Elevation, landing 7 takedowns in his last 5 fights compared to only 3 in his first 13 UFC fights. He has accrued almost 18 minutes of control time in his last 3 fights, showing he can grind out wins. Volkov's takedown defense is sketchy (66% according to UFC stats) and he was taken down 14 times by Curtis Blaydes. Overeem's chin has held up well recently, and Volkov is not a one-punch knockout artist. Overeem's clinch work, knees, and top pressure should be key. I expect Overeem to slow the fight down, take Volkov down, and control him against the cage, winning a decision.
The MMA Guru picks Alexander Volkov, praising his patience, versatility, and takedown defense shown against Curtis Blaydes. He notes Overeem's tendency to shell up and get hit, and believes Volkov's front kicks and body work will be key. He predicts a second-round TKO via body shots, similar to Volkov's win over Walt Harris.
Totals
| Fighter | KD | Sig. Str. | Sig. Str. % | Total Str. | TD | TD % | Sub. Att | Rev. | Ctrl |
|---|---|---|---|---|---|---|---|---|---|
| Alistair Overeem | 0 | 92 of 114 | 80% | 106 of 131 | 3 of 3 | 100% | 0 | 0 | 5:29 |
| Augusto Sakai | 0 | 99 of 173 | 57% | 120 of 196 | 0 of 0 | --- | 0 | 0 | 2:22 |
Per Round
| Rd | Fighter | KD | Sig. Str. | Sig. Str. % | Total Str. | TD | TD % | Sub. Att | Rev. | Ctrl |
|---|---|---|---|---|---|---|---|---|---|---|
| 1 | Alistair Overeem | 0 | 11 of 18 | 61% | 12 of 19 | 0 of 0 | --- | 0 | 0 | 0:00 |
| Augusto Sakai | 0 | 22 of 36 | 61% | 24 of 38 | 0 of 0 | --- | 0 | 0 | 0:45 | |
| 2 | Alistair Overeem | 0 | 13 of 16 | 81% | 14 of 17 | 0 of 0 | --- | 0 | 0 | 1:12 |
| Augusto Sakai | 0 | 24 of 40 | 60% | 28 of 44 | 0 of 0 | --- | 0 | 0 | 0:58 | |
| 3 | Alistair Overeem | 0 | 23 of 27 | 85% | 26 of 31 | 1 of 1 | 100% | 0 | 0 | 1:44 |
| Augusto Sakai | 0 | 34 of 54 | 62% | 48 of 69 | 0 of 0 | --- | 0 | 0 | 0:38 | |
| 4 | Alistair Overeem | 0 | 40 of 48 | 83% | 49 of 59 | 1 of 1 | 100% | 0 | 0 | 2:18 |
| Augusto Sakai | 0 | 19 of 43 | 44% | 20 of 45 | 0 of 0 | --- | 0 | 0 | 0:01 | |
| 5 | Alistair Overeem | 0 | 5 of 5 | 100% | 5 of 5 | 1 of 1 | 100% | 0 | 0 | 0:15 |
| Augusto Sakai | 0 | 0 of 0 | --- | 0 of 0 | 0 of 0 | --- | 0 | 0 | 0:00 |
Significant Strikes
| Fighter | Sig. Str. | Sig. Str. % | Head | Body | Leg | Distance | Clinch | Ground |
|---|---|---|---|---|---|---|---|---|
| Alistair Overeem | 92 of 114 | 80% | 53 of 73 | 30 of 31 | 9 of 10 | 28 of 43 | 16 of 16 | 48 of 55 |
| Augusto Sakai | 99 of 173 | 57% | 66 of 130 | 25 of 34 | 8 of 9 | 62 of 127 | 35 of 43 | 2 of 3 |
Significant Strikes Per Round
| Rd | Fighter | Sig. Str. | Sig. Str. % | Head | Body | Leg | Distance | Clinch | Ground |
|---|---|---|---|---|---|---|---|---|---|
| 1 | Alistair Overeem | 11 of 18 | 61% | 2 of 9 | 6 of 6 | 3 of 3 | 6 of 13 | 5 of 5 | 0 of 0 |
| Augusto Sakai | 22 of 36 | 61% | 13 of 23 | 8 of 12 | 1 of 1 | 14 of 27 | 8 of 9 | 0 of 0 | |
| 2 | Alistair Overeem | 13 of 16 | 81% | 5 of 7 | 7 of 7 | 1 of 2 | 4 of 7 | 9 of 9 | 0 of 0 |
| Augusto Sakai | 24 of 40 | 60% | 12 of 24 | 11 of 15 | 1 of 1 | 10 of 22 | 14 of 18 | 0 of 0 | |
| 3 | Alistair Overeem | 23 of 27 | 85% | 10 of 14 | 9 of 9 | 4 of 4 | 11 of 14 | 2 of 2 | 10 of 11 |
| Augusto Sakai | 34 of 54 | 62% | 27 of 47 | 4 of 4 | 3 of 3 | 21 of 37 | 11 of 14 | 2 of 3 | |
| 4 | Alistair Overeem | 40 of 48 | 83% | 31 of 38 | 8 of 9 | 1 of 1 | 7 of 9 | 0 of 0 | 33 of 39 |
| Augusto Sakai | 19 of 43 | 44% | 14 of 36 | 2 of 3 | 3 of 4 | 17 of 41 | 2 of 2 | 0 of 0 | |
| 5 | Alistair Overeem | 5 of 5 | 100% | 5 of 5 | 0 of 0 | 0 of 0 | 0 of 0 | 0 of 0 | 5 of 5 |
| Augusto Sakai | 0 of 0 | --- | 0 of 0 | 0 of 0 | 0 of 0 | 0 of 0 | 0 of 0 | 0 of 0 |
Big Brady picks Sakai mainly as a fade on Overeem's chin, noting Overeem has 13 knockout losses. He acknowledges Sakai is not a huge power puncher but believes he can catch Overeem. He mentions Overeem might have better cardio and could take Sakai down, but Sakai has 83% takedown defense. He suggests betting Sakai inside the distance.
Daniel Levi picks Augusto Sakai to upset Alistair Overeem. He notes Sakai's underrated chin, having taken full KO blows from Arlovski without being hurt, and his methodical Muay Thai striking. Levi is concerned about Overeem's chin and tendency to admire his work, and believes Sakai will eventually catch Overeem, predicting a third-round knockout. He also mentions Sakai's competitive running background as a plus for cardio.
The host picks Overeem to win by third or fourth round TKO. He believes Overeem is better everywhere, with improved grappling and cardio since joining Team Elevation. He expects Overeem to wear on Sakai against the cage, take him down, and pound him out. He notes Overeem's chin is a concern but thinks he can survive Sakai's early power.
The MMA Guru picks Alistair Overeem, citing Sakai's lack of impressive wins and a controversial split decision over Andrei Arlovski that he considers a robbery. He believes Overeem's experience and ability to survive early storms will be key, and predicts a second or third round TKO via ground and pound. He notes Overeem's unappealing ground and pound style but expects it to be effective.
Totals
| Fighter | KD | Sig. Str. | Sig. Str. % | Total Str. | TD | TD % | Sub. Att | Rev. | Ctrl |
|---|---|---|---|---|---|---|---|---|---|
| Alistair Overeem | 1 | 68 of 85 | 80% | 97 of 115 | 1 of 1 | 100% | 0 | 0 | 4:22 |
| Walt Harris | 1 | 25 of 48 | 52% | 25 of 48 | 0 of 0 | --- | 0 | 0 | 0:47 |
Per Round
| Rd | Fighter | KD | Sig. Str. | Sig. Str. % | Total Str. | TD | TD % | Sub. Att | Rev. | Ctrl |
|---|---|---|---|---|---|---|---|---|---|---|
| 1 | Alistair Overeem | 0 | 27 of 33 | 81% | 48 of 55 | 1 of 1 | 100% | 0 | 0 | 2:56 |
| Walt Harris | 1 | 24 of 42 | 57% | 24 of 42 | 0 of 0 | --- | 0 | 0 | 0:47 | |
| 2 | Alistair Overeem | 1 | 41 of 52 | 78% | 49 of 60 | 0 of 0 | --- | 0 | 0 | 1:26 |
| Walt Harris | 0 | 1 of 6 | 16% | 1 of 6 | 0 of 0 | --- | 0 | 0 | 0:00 |
Significant Strikes
| Fighter | Sig. Str. | Sig. Str. % | Head | Body | Leg | Distance | Clinch | Ground |
|---|---|---|---|---|---|---|---|---|
| Alistair Overeem | 68 of 85 | 80% | 58 of 75 | 8 of 8 | 2 of 2 | 7 of 10 | 1 of 1 | 60 of 74 |
| Walt Harris | 25 of 48 | 52% | 19 of 41 | 6 of 7 | 0 of 0 | 6 of 19 | 1 of 3 | 18 of 26 |
Significant Strikes Per Round
| Rd | Fighter | Sig. Str. | Sig. Str. % | Head | Body | Leg | Distance | Clinch | Ground |
|---|---|---|---|---|---|---|---|---|---|
| 1 | Alistair Overeem | 27 of 33 | 81% | 21 of 27 | 5 of 5 | 1 of 1 | 3 of 4 | 1 of 1 | 23 of 28 |
| Walt Harris | 24 of 42 | 57% | 18 of 36 | 6 of 6 | 0 of 0 | 5 of 13 | 1 of 3 | 18 of 26 | |
| 2 | Alistair Overeem | 41 of 52 | 78% | 37 of 48 | 3 of 3 | 1 of 1 | 4 of 6 | 0 of 0 | 37 of 46 |
| Walt Harris | 1 of 6 | 16% | 1 of 5 | 0 of 1 | 0 of 0 | 1 of 6 | 0 of 0 | 0 of 0 |
Big Brady picks Walt Harris by first-round knockout, citing Overeem's diminished chin and Harris' power. He notes that Overeem is likely the better fighter overall but cannot be trusted due to his chin, which has been knocked out 13 times. He believes Harris will land one shot and finish the fight. He acknowledges that Overeem could win if he takes Harris down, but doubts his wrestling is good enough. He mentions the emotional motivation for Harris after his daughter's passing.
Daniel Levi picks Walt Harris via vicious knockout. He believes Harris has turned a corner, putting things together, and has the proper technique and power to put away Overeem. He notes that Overeem is the more skilled fighter but has a small margin for error and is in denial about his recent KO loss. Levi emphasizes that Harris should stay composed and not fight too emotionally.
The host is torn but ultimately picks Overeem, citing his experience and ability to adjust after the Rozenstruik fight. He believes Overeem will be elusive, avoid Harris's early power, and take the fight to the ground for a TKO. He admits he's rooting for Harris due to his personal story but thinks Overeem's skills and tools will prevail.
Totals
| Fighter | KD | Sig. Str. | Sig. Str. % | Total Str. | TD | TD % | Sub. Att | Rev. | Ctrl |
|---|---|---|---|---|---|---|---|---|---|
| Jairzinho Rozenstruik | 0 | 74 of 105 | 70% | 101 of 135 | 2 of 10 | 20% | 0 | 0 | 8:19 |
| Alistair Overeem | 1 | 89 of 209 | 42% | 109 of 229 | 0 of 0 | --- | 0 | 0 | 0:05 |
Per Round
| Rd | Fighter | KD | Sig. Str. | Sig. Str. % | Total Str. | TD | TD % | Sub. Att | Rev. | Ctrl |
|---|---|---|---|---|---|---|---|---|---|---|
| 1 | Jairzinho Rozenstruik | 0 | 13 of 15 | 86% | 27 of 30 | 1 of 2 | 50% | 0 | 0 | 3:14 |
| Alistair Overeem | 0 | 5 of 13 | 38% | 8 of 16 | 0 of 0 | --- | 0 | 0 | 0:00 | |
| 2 | Jairzinho Rozenstruik | 0 | 14 of 20 | 70% | 17 of 24 | 0 of 1 | 0% | 0 | 0 | 2:06 |
| Alistair Overeem | 0 | 19 of 35 | 54% | 28 of 44 | 0 of 0 | --- | 0 | 0 | 0:04 | |
| 3 | Jairzinho Rozenstruik | 0 | 18 of 25 | 72% | 27 of 35 | 1 of 3 | 33% | 0 | 0 | 2:30 |
| Alistair Overeem | 0 | 14 of 33 | 42% | 22 of 41 | 0 of 0 | --- | 0 | 0 | 0:00 | |
| 4 | Jairzinho Rozenstruik | 0 | 18 of 28 | 64% | 18 of 28 | 0 of 1 | 0% | 0 | 0 | 0:00 |
| Alistair Overeem | 0 | 30 of 73 | 41% | 30 of 73 | 0 of 0 | --- | 0 | 0 | 0:00 | |
| 5 | Jairzinho Rozenstruik | 0 | 11 of 17 | 64% | 12 of 18 | 0 of 3 | 0% | 0 | 0 | 0:29 |
| Alistair Overeem | 1 | 21 of 55 | 38% | 21 of 55 | 0 of 0 | --- | 0 | 0 | 0:01 |
Significant Strikes
| Fighter | Sig. Str. | Sig. Str. % | Head | Body | Leg | Distance | Clinch | Ground |
|---|---|---|---|---|---|---|---|---|
| Jairzinho Rozenstruik | 74 of 105 | 70% | 48 of 76 | 12 of 13 | 14 of 16 | 46 of 76 | 9 of 9 | 19 of 20 |
| Alistair Overeem | 89 of 209 | 42% | 57 of 169 | 16 of 20 | 16 of 20 | 68 of 180 | 19 of 27 | 2 of 2 |
Significant Strikes Per Round
| Rd | Fighter | Sig. Str. | Sig. Str. % | Head | Body | Leg | Distance | Clinch | Ground |
|---|---|---|---|---|---|---|---|---|---|
| 1 | Jairzinho Rozenstruik | 13 of 15 | 86% | 11 of 13 | 1 of 1 | 1 of 1 | 2 of 4 | 1 of 1 | 10 of 10 |
| Alistair Overeem | 5 of 13 | 38% | 1 of 8 | 0 of 1 | 4 of 4 | 5 of 12 | 0 of 1 | 0 of 0 | |
| 2 | Jairzinho Rozenstruik | 14 of 20 | 70% | 4 of 10 | 8 of 8 | 2 of 2 | 7 of 13 | 7 of 7 | 0 of 0 |
| Alistair Overeem | 19 of 35 | 54% | 9 of 23 | 7 of 9 | 3 of 3 | 11 of 25 | 8 of 10 | 0 of 0 | |
| 3 | Jairzinho Rozenstruik | 18 of 25 | 72% | 14 of 19 | 3 of 4 | 1 of 2 | 8 of 14 | 1 of 1 | 9 of 10 |
| Alistair Overeem | 14 of 33 | 42% | 7 of 26 | 4 of 4 | 3 of 3 | 8 of 26 | 4 of 5 | 2 of 2 | |
| 4 | Jairzinho Rozenstruik | 18 of 28 | 64% | 13 of 22 | 0 of 0 | 5 of 6 | 18 of 28 | 0 of 0 | 0 of 0 |
| Alistair Overeem | 30 of 73 | 41% | 23 of 63 | 4 of 5 | 3 of 5 | 25 of 64 | 5 of 9 | 0 of 0 | |
| 5 | Jairzinho Rozenstruik | 11 of 17 | 64% | 6 of 12 | 0 of 0 | 5 of 5 | 11 of 17 | 0 of 0 | 0 of 0 |
| Alistair Overeem | 21 of 55 | 38% | 17 of 49 | 1 of 1 | 3 of 5 | 19 of 53 | 2 of 2 | 0 of 0 |
Totals
| Fighter | KD | Sig. Str. | Sig. Str. % | Total Str. | TD | TD % | Sub. Att | Rev. | Ctrl |
|---|---|---|---|---|---|---|---|---|---|
| Alistair Overeem | 1 | 29 of 33 | 87% | 31 of 35 | 0 of 1 | 0% | 0 | 0 | 1:10 |
| Aleksei Oleinik | 0 | 38 of 58 | 65% | 78 of 101 | 0 of 0 | --- | 0 | 0 | 1:22 |
Per Round
| Rd | Fighter | KD | Sig. Str. | Sig. Str. % | Total Str. | TD | TD % | Sub. Att | Rev. | Ctrl |
|---|---|---|---|---|---|---|---|---|---|---|
| 1 | Alistair Overeem | 1 | 29 of 33 | 87% | 31 of 35 | 0 of 1 | 0% | 0 | 0 | 1:10 |
| Aleksei Oleinik | 0 | 38 of 58 | 65% | 78 of 101 | 0 of 0 | --- | 0 | 0 | 1:22 |
Significant Strikes
| Fighter | Sig. Str. | Sig. Str. % | Head | Body | Leg | Distance | Clinch | Ground |
|---|---|---|---|---|---|---|---|---|
| Alistair Overeem | 29 of 33 | 87% | 23 of 27 | 6 of 6 | 0 of 0 | 5 of 8 | 12 of 13 | 12 of 12 |
| Aleksei Oleinik | 38 of 58 | 65% | 15 of 34 | 23 of 24 | 0 of 0 | 12 of 26 | 26 of 32 | 0 of 0 |
Significant Strikes Per Round
| Rd | Fighter | Sig. Str. | Sig. Str. % | Head | Body | Leg | Distance | Clinch | Ground |
|---|---|---|---|---|---|---|---|---|---|
| 1 | Alistair Overeem | 29 of 33 | 87% | 23 of 27 | 6 of 6 | 0 of 0 | 5 of 8 | 12 of 13 | 12 of 12 |
| Aleksei Oleinik | 38 of 58 | 65% | 15 of 34 | 23 of 24 | 0 of 0 | 12 of 26 | 26 of 32 | 0 of 0 |
Totals
| Fighter | KD | Sig. Str. | Sig. Str. % | Total Str. | TD | TD % | Sub. Att | Rev. | Ctrl |
|---|---|---|---|---|---|---|---|---|---|
| Alistair Overeem | 0 | 22 of 26 | 84% | 26 of 31 | 1 of 2 | 50% | 0 | 0 | 1:57 |
| Sergei Pavlovich | 0 | 13 of 32 | 40% | 18 of 37 | 0 of 2 | 0% | 0 | 0 | 0:12 |
Per Round
| Rd | Fighter | KD | Sig. Str. | Sig. Str. % | Total Str. | TD | TD % | Sub. Att | Rev. | Ctrl |
|---|---|---|---|---|---|---|---|---|---|---|
| 1 | Alistair Overeem | 0 | 22 of 26 | 84% | 26 of 31 | 1 of 2 | 50% | 0 | 0 | 1:57 |
| Sergei Pavlovich | 0 | 13 of 32 | 40% | 18 of 37 | 0 of 2 | 0% | 0 | 0 | 0:12 |
Significant Strikes
| Fighter | Sig. Str. | Sig. Str. % | Head | Body | Leg | Distance | Clinch | Ground |
|---|---|---|---|---|---|---|---|---|
| Alistair Overeem | 22 of 26 | 84% | 13 of 16 | 8 of 9 | 1 of 1 | 3 of 5 | 7 of 7 | 12 of 14 |
| Sergei Pavlovich | 13 of 32 | 40% | 9 of 25 | 3 of 6 | 1 of 1 | 8 of 22 | 5 of 10 | 0 of 0 |
Significant Strikes Per Round
| Rd | Fighter | Sig. Str. | Sig. Str. % | Head | Body | Leg | Distance | Clinch | Ground |
|---|---|---|---|---|---|---|---|---|---|
| 1 | Alistair Overeem | 22 of 26 | 84% | 13 of 16 | 8 of 9 | 1 of 1 | 3 of 5 | 7 of 7 | 12 of 14 |
| Sergei Pavlovich | 13 of 32 | 40% | 9 of 25 | 3 of 6 | 1 of 1 | 8 of 22 | 5 of 10 | 0 of 0 |
Play-by-Play
View on SherdogRound 1
Overeem crouches low with a high guard as he circles Pavlovich, feinting and testing the reactions of the Russian newcomer. Pavlovich clips “The ‘Reem” with a right hand, then shoves him away when Overeem attempts to tie up. An uppercut leaves Overeem covering up momentarily, but he recovers and drives forward to push Pavlovich against the wall. Pavlovich spins to the outside position in the clinch and walks Overeem out toward the middle, then the Dutchman reclaims control and marches him back to the fence. Pavlovich drops levels to try a double-leg, and now Overeem abandons the clinch to step back to the center. Overeem swings a big right hand at Pavlovich, tries to grab the Russian in the Thai clinch and winds up tossing him to the ground. Overeem kneels down in Pavlovich’s open guard, then stands over him with 60 seconds on the clock. Suddenly, Overeem turns up the volume on his right hands, smashing Pavlovich’s face with thunderous hammerfists. Pavlovich eats a couple punches before going fetal and turning away from Overeem. The body language is not good, and Overeem continues to pour on the right hands, prompting referee John Sharp to step in for the stoppage.
The Result
Alistair Overeem def. Sergey Pavlovich via TKO (Punches) R1 4:21
Totals
| Fighter | KD | Sig. Str. | Sig. Str. % | Total Str. | TD | TD % | Sub. Att | Rev. | Ctrl |
|---|---|---|---|---|---|---|---|---|---|
| Curtis Blaydes | 0 | 7 of 12 | 58% | 24 of 31 | 0 of 0 | --- | 2 | 0 | 0:00 |
| Alistair Overeem | 0 | 37 of 53 | 69% | 62 of 85 | 4 of 4 | 100% | 0 | 0 | 7:47 |
Per Round
| Rd | Fighter | KD | Sig. Str. | Sig. Str. % | Total Str. | TD | TD % | Sub. Att | Rev. | Ctrl |
|---|---|---|---|---|---|---|---|---|---|---|
| 1 | Curtis Blaydes | 0 | 1 of 3 | 33% | 10 of 14 | 0 of 0 | --- | 0 | 0 | 0:00 |
| Alistair Overeem | 0 | 1 of 5 | 20% | 9 of 15 | 1 of 1 | 100% | 0 | 0 | 2:19 | |
| 2 | Curtis Blaydes | 0 | 4 of 5 | 80% | 11 of 12 | 0 of 0 | --- | 2 | 0 | 0:00 |
| Alistair Overeem | 0 | 13 of 20 | 65% | 25 of 36 | 2 of 2 | 100% | 0 | 0 | 3:31 | |
| 3 | Curtis Blaydes | 0 | 2 of 4 | 50% | 3 of 5 | 0 of 0 | --- | 0 | 0 | 0:00 |
| Alistair Overeem | 0 | 23 of 28 | 82% | 28 of 34 | 1 of 1 | 100% | 0 | 0 | 1:57 |
Significant Strikes
| Fighter | Sig. Str. | Sig. Str. % | Head | Body | Leg | Distance | Clinch | Ground |
|---|---|---|---|---|---|---|---|---|
| Curtis Blaydes | 7 of 12 | 58% | 3 of 8 | 4 of 4 | 0 of 0 | 6 of 10 | 0 of 0 | 1 of 2 |
| Alistair Overeem | 37 of 53 | 69% | 32 of 48 | 5 of 5 | 0 of 0 | 3 of 16 | 12 of 14 | 22 of 23 |
Significant Strikes Per Round
| Rd | Fighter | Sig. Str. | Sig. Str. % | Head | Body | Leg | Distance | Clinch | Ground |
|---|---|---|---|---|---|---|---|---|---|
| 1 | Curtis Blaydes | 1 of 3 | 33% | 1 of 3 | 0 of 0 | 0 of 0 | 0 of 1 | 0 of 0 | 1 of 2 |
| Alistair Overeem | 1 of 5 | 20% | 1 of 5 | 0 of 0 | 0 of 0 | 0 of 4 | 0 of 0 | 1 of 1 | |
| 2 | Curtis Blaydes | 4 of 5 | 80% | 2 of 3 | 2 of 2 | 0 of 0 | 4 of 5 | 0 of 0 | 0 of 0 |
| Alistair Overeem | 13 of 20 | 65% | 10 of 17 | 3 of 3 | 0 of 0 | 0 of 6 | 2 of 3 | 11 of 11 | |
| 3 | Curtis Blaydes | 2 of 4 | 50% | 0 of 2 | 2 of 2 | 0 of 0 | 2 of 4 | 0 of 0 | 0 of 0 |
| Alistair Overeem | 23 of 28 | 82% | 21 of 26 | 2 of 2 | 0 of 0 | 3 of 6 | 10 of 11 | 10 of 11 |
Totals
| Fighter | KD | Sig. Str. | Sig. Str. % | Total Str. | TD | TD % | Sub. Att | Rev. | Ctrl |
|---|---|---|---|---|---|---|---|---|---|
| Francis Ngannou | 0 | 1 of 4 | 25% | 1 of 4 | 0 of 1 | 0% | 0 | 0 | 0:00 |
| Alistair Overeem | 1 | 6 of 14 | 42% | 11 of 20 | 0 of 0 | --- | 0 | 0 | 1:02 |
Per Round
| Rd | Fighter | KD | Sig. Str. | Sig. Str. % | Total Str. | TD | TD % | Sub. Att | Rev. | Ctrl |
|---|---|---|---|---|---|---|---|---|---|---|
| 1 | Francis Ngannou | 0 | 1 of 4 | 25% | 1 of 4 | 0 of 1 | 0% | 0 | 0 | 0:00 |
| Alistair Overeem | 1 | 6 of 14 | 42% | 11 of 20 | 0 of 0 | --- | 0 | 0 | 1:02 |
Significant Strikes
| Fighter | Sig. Str. | Sig. Str. % | Head | Body | Leg | Distance | Clinch | Ground |
|---|---|---|---|---|---|---|---|---|
| Francis Ngannou | 1 of 4 | 25% | 1 of 4 | 0 of 0 | 0 of 0 | 1 of 4 | 0 of 0 | 0 of 0 |
| Alistair Overeem | 6 of 14 | 42% | 4 of 12 | 0 of 0 | 2 of 2 | 2 of 10 | 3 of 3 | 1 of 1 |
Significant Strikes Per Round
| Rd | Fighter | Sig. Str. | Sig. Str. % | Head | Body | Leg | Distance | Clinch | Ground |
|---|---|---|---|---|---|---|---|---|---|
| 1 | Francis Ngannou | 1 of 4 | 25% | 1 of 4 | 0 of 0 | 0 of 0 | 1 of 4 | 0 of 0 | 0 of 0 |
| Alistair Overeem | 6 of 14 | 42% | 4 of 12 | 0 of 0 | 2 of 2 | 2 of 10 | 3 of 3 | 1 of 1 |
No comments yet. Be the first to share your thoughts!