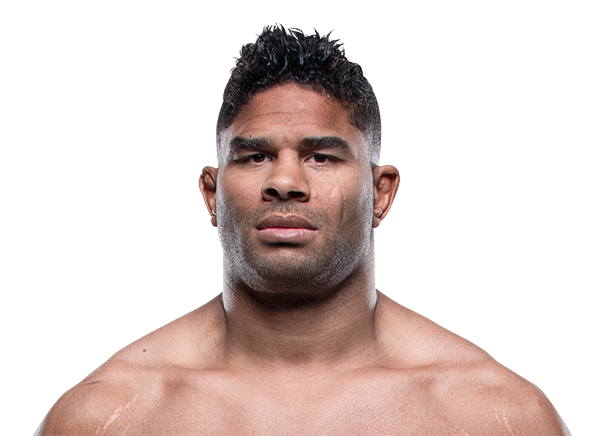
Career Averages - Alistair Overeem
Career Averages - Roy Nelson
Alistair Overeem - Fight History
Totals
| Fighter | KD | Sig. Str. | Sig. Str. % | Total Str. | TD | TD % | Sub. Att | Rev. | Ctrl |
|---|---|---|---|---|---|---|---|---|---|
| Alexander Volkov | 0 | 10 of 20 | 50% | 10 of 20 | 0 of 1 | 0% | 0 | 0 | 0:15 |
| Alistair Overeem | 1 | 54 of 88 | 61% | 54 of 88 | 0 of 0 | --- | 0 | 0 | 0:11 |
Per Round
| Rd | Fighter | KD | Sig. Str. | Sig. Str. % | Total Str. | TD | TD % | Sub. Att | Rev. | Ctrl |
|---|---|---|---|---|---|---|---|---|---|---|
| 1 | Alexander Volkov | 0 | 8 of 14 | 57% | 8 of 14 | 0 of 0 | --- | 0 | 0 | 0:00 |
| Alistair Overeem | 0 | 33 of 53 | 62% | 33 of 53 | 0 of 0 | --- | 0 | 0 | 0:08 | |
| 2 | Alexander Volkov | 0 | 2 of 6 | 33% | 2 of 6 | 0 of 1 | 0% | 0 | 0 | 0:15 |
| Alistair Overeem | 1 | 21 of 35 | 60% | 21 of 35 | 0 of 0 | --- | 0 | 0 | 0:03 |
Significant Strikes
| Fighter | Sig. Str. | Sig. Str. % | Head | Body | Leg | Distance | Clinch | Ground |
|---|---|---|---|---|---|---|---|---|
| Alexander Volkov | 10 of 20 | 50% | 3 of 13 | 2 of 2 | 5 of 5 | 10 of 20 | 0 of 0 | 0 of 0 |
| Alistair Overeem | 54 of 88 | 61% | 47 of 81 | 3 of 3 | 4 of 4 | 40 of 65 | 11 of 18 | 3 of 5 |
Significant Strikes Per Round
| Rd | Fighter | Sig. Str. | Sig. Str. % | Head | Body | Leg | Distance | Clinch | Ground |
|---|---|---|---|---|---|---|---|---|---|
| 1 | Alexander Volkov | 8 of 14 | 57% | 3 of 9 | 2 of 2 | 3 of 3 | 8 of 14 | 0 of 0 | 0 of 0 |
| Alistair Overeem | 33 of 53 | 62% | 26 of 46 | 3 of 3 | 4 of 4 | 22 of 34 | 8 of 14 | 3 of 5 | |
| 2 | Alexander Volkov | 2 of 6 | 33% | 0 of 4 | 0 of 0 | 2 of 2 | 2 of 6 | 0 of 0 | 0 of 0 |
| Alistair Overeem | 21 of 35 | 60% | 21 of 35 | 0 of 0 | 0 of 0 | 18 of 31 | 3 of 4 | 0 of 0 |
Play-by-Play
View on SherdogRound 1
Five hundred nineteen and one-half pounds, not counting referee Jason Herzog, are in the cage now for our headliner. The two heavyweight strikers in Overeem (47-18, 1 NC; 12-7 UFC) and Volkov (32-8, 6-2 UFC) will determine who is perhaps a win away for a title shot, while the other falls to the middle of the pack with their hopes dashed. The big men respectfully touch gloves, and the cage door seals behind them as we begin. Volkov lands a huge leg kick, and Overeem backs off to shell up against the fence. Volkov lands a few strikes but does not fall into a trap of Overeem letting loose a counter strike. The Russian pulls back at the last second of a big kick to draw a reaction out of his opponent, and his strikes are already making Overeem flinch. Volkov lands a front kick down the middle, and Overeem tries to catch it and lets it go. Volkov chops at the calf with a kick, and he does not follow it and instead eats a huge right hand from “The Demolition Man.” Overeem loads up with another, and Volkov eats it like borscht and retreats against the cage wall. Volkov stalks down his opponent, but he takes a right hand and clinches up. Volkov separates, and he absorbs a left hand and fights off a takedown attempt. Volkov fires off a high kick that is blocked, and a single jab is pawed away without issue. Overeem ducks forward to land a big uppercut, and he continues along with a thudding body kick. Overeem backs off to land a kick to the thigh, and Volkov counters him with a left hand that puts Overeem down. Overeem might not be hurt and he may have slipped, but Volkov chases after him to hammer him with punches. Not sensing a finish, Volkov lets him back up and reaches out with his left jab. Volkov lands a couple punches and a knee up the middle, and he backs off to land a heavy kick to the body. Overeem lunges forward with a left hand, and Volkov picks at him with a low kick and a jab. Volkov chambers a right hand but does not throw it, and Overeem swings and misses wildly with a looping left. Volkov assaults Overeem with a barrage of punches, and Overeem covers up and takes some damage as his face is marked up. The round ends with Overeem aiming a punch to the body.
Sherdog Scores
Jay Pettry scores the round: 10-9 Volkov
Tristen Critchfield scores the round: 10-9 Volkov
Tyler Treese scores the round: 10-9 Volkov
Round 2
The heavyweights touch gloves to stat off the second round, and Overeem rushes forward shoulder first and eats a right hand. Overeem lets loose a head kick that gets blocked, and Volkov triples up on his left hand to sting Overeem. A solid one-two snaps Overeem’s head back, and Overeem ducks down to wing a left hook but it glances off the guard. Overeem crashes in to tie the Russian up, but he pushes Volkov away and gets jabbed. Volkov splits the guard with a few punches, and Overeem is stalking him down and pushes him back into the cage wall. “Drago” connects with a heavy one-two, and Overeem is in the danger zone. Overeem turns away as he takes another punch, and Volkov rips into him with punches in bunches. Volkov measures his shots and does not punch himself out, and Herzog cautions Overeem to defend himself. Overeem attacks a takedown but it is easily stuffed.
Volkov measures his strikes and lands punches that make Overeem’s legs wobble. “Drago” fires off a deadly one-two, and a bloodied Overeem stumbles to the canvas and topples over. Herzog has seen enough, and Volkov walks off knowing his work tonight is done.
We have a legitimate, new heavyweight contender on the rise, as Volkov notched a very impressive win against a devastatingly effective striker with a penchant for nasty finishes. Volkov goes down to join Overeem on his knees to thank him for the fight, showing respect for the legendary Dutchman in victory. In his post-fight interview, an eerily calm Volkov says it is his time, and that he is not done improving. With this fight card in the books, we return next week with a pay-per-view offering putting the welterweight title on the line.
The Official Result
Alexander Volkov def. Alistair Overeem R2 2:06 via TKO (Punches)
Big Brady picks Alexander Volkov, emphasizing his cardio, output, and takedown defense. He notes that Overeem's chin is completely shot and that he has been knocked out 14 times. He expects Volkov to be the 15th to knock him out, likely in the later rounds. He also suggests looking at the over 1.5 rounds prop.
Daniel Levi picks Alexander Volkov, citing his improved power at 265 pounds and his ability to sit down on punches. He notes Volkov's 40 pro fights and prime condition, and expects him to outpoint and eventually knock out Overeem. He respects Overeem but believes Volkov's size and power will be decisive.
Overeem has shown evolution in his game since joining Team Elevation, landing 7 takedowns in his last 5 fights compared to only 3 in his first 13 UFC fights. He has accrued almost 18 minutes of control time in his last 3 fights, showing he can grind out wins. Volkov's takedown defense is sketchy (66% according to UFC stats) and he was taken down 14 times by Curtis Blaydes. Overeem's chin has held up well recently, and Volkov is not a one-punch knockout artist. Overeem's clinch work, knees, and top pressure should be key. I expect Overeem to slow the fight down, take Volkov down, and control him against the cage, winning a decision.
The MMA Guru picks Alexander Volkov, praising his patience, versatility, and takedown defense shown against Curtis Blaydes. He notes Overeem's tendency to shell up and get hit, and believes Volkov's front kicks and body work will be key. He predicts a second-round TKO via body shots, similar to Volkov's win over Walt Harris.
Totals
| Fighter | KD | Sig. Str. | Sig. Str. % | Total Str. | TD | TD % | Sub. Att | Rev. | Ctrl |
|---|---|---|---|---|---|---|---|---|---|
| Alistair Overeem | 0 | 92 of 114 | 80% | 106 of 131 | 3 of 3 | 100% | 0 | 0 | 5:29 |
| Augusto Sakai | 0 | 99 of 173 | 57% | 120 of 196 | 0 of 0 | --- | 0 | 0 | 2:22 |
Per Round
| Rd | Fighter | KD | Sig. Str. | Sig. Str. % | Total Str. | TD | TD % | Sub. Att | Rev. | Ctrl |
|---|---|---|---|---|---|---|---|---|---|---|
| 1 | Alistair Overeem | 0 | 11 of 18 | 61% | 12 of 19 | 0 of 0 | --- | 0 | 0 | 0:00 |
| Augusto Sakai | 0 | 22 of 36 | 61% | 24 of 38 | 0 of 0 | --- | 0 | 0 | 0:45 | |
| 2 | Alistair Overeem | 0 | 13 of 16 | 81% | 14 of 17 | 0 of 0 | --- | 0 | 0 | 1:12 |
| Augusto Sakai | 0 | 24 of 40 | 60% | 28 of 44 | 0 of 0 | --- | 0 | 0 | 0:58 | |
| 3 | Alistair Overeem | 0 | 23 of 27 | 85% | 26 of 31 | 1 of 1 | 100% | 0 | 0 | 1:44 |
| Augusto Sakai | 0 | 34 of 54 | 62% | 48 of 69 | 0 of 0 | --- | 0 | 0 | 0:38 | |
| 4 | Alistair Overeem | 0 | 40 of 48 | 83% | 49 of 59 | 1 of 1 | 100% | 0 | 0 | 2:18 |
| Augusto Sakai | 0 | 19 of 43 | 44% | 20 of 45 | 0 of 0 | --- | 0 | 0 | 0:01 | |
| 5 | Alistair Overeem | 0 | 5 of 5 | 100% | 5 of 5 | 1 of 1 | 100% | 0 | 0 | 0:15 |
| Augusto Sakai | 0 | 0 of 0 | --- | 0 of 0 | 0 of 0 | --- | 0 | 0 | 0:00 |
Significant Strikes
| Fighter | Sig. Str. | Sig. Str. % | Head | Body | Leg | Distance | Clinch | Ground |
|---|---|---|---|---|---|---|---|---|
| Alistair Overeem | 92 of 114 | 80% | 53 of 73 | 30 of 31 | 9 of 10 | 28 of 43 | 16 of 16 | 48 of 55 |
| Augusto Sakai | 99 of 173 | 57% | 66 of 130 | 25 of 34 | 8 of 9 | 62 of 127 | 35 of 43 | 2 of 3 |
Significant Strikes Per Round
| Rd | Fighter | Sig. Str. | Sig. Str. % | Head | Body | Leg | Distance | Clinch | Ground |
|---|---|---|---|---|---|---|---|---|---|
| 1 | Alistair Overeem | 11 of 18 | 61% | 2 of 9 | 6 of 6 | 3 of 3 | 6 of 13 | 5 of 5 | 0 of 0 |
| Augusto Sakai | 22 of 36 | 61% | 13 of 23 | 8 of 12 | 1 of 1 | 14 of 27 | 8 of 9 | 0 of 0 | |
| 2 | Alistair Overeem | 13 of 16 | 81% | 5 of 7 | 7 of 7 | 1 of 2 | 4 of 7 | 9 of 9 | 0 of 0 |
| Augusto Sakai | 24 of 40 | 60% | 12 of 24 | 11 of 15 | 1 of 1 | 10 of 22 | 14 of 18 | 0 of 0 | |
| 3 | Alistair Overeem | 23 of 27 | 85% | 10 of 14 | 9 of 9 | 4 of 4 | 11 of 14 | 2 of 2 | 10 of 11 |
| Augusto Sakai | 34 of 54 | 62% | 27 of 47 | 4 of 4 | 3 of 3 | 21 of 37 | 11 of 14 | 2 of 3 | |
| 4 | Alistair Overeem | 40 of 48 | 83% | 31 of 38 | 8 of 9 | 1 of 1 | 7 of 9 | 0 of 0 | 33 of 39 |
| Augusto Sakai | 19 of 43 | 44% | 14 of 36 | 2 of 3 | 3 of 4 | 17 of 41 | 2 of 2 | 0 of 0 | |
| 5 | Alistair Overeem | 5 of 5 | 100% | 5 of 5 | 0 of 0 | 0 of 0 | 0 of 0 | 0 of 0 | 5 of 5 |
| Augusto Sakai | 0 of 0 | --- | 0 of 0 | 0 of 0 | 0 of 0 | 0 of 0 | 0 of 0 | 0 of 0 |
Big Brady picks Sakai mainly as a fade on Overeem's chin, noting Overeem has 13 knockout losses. He acknowledges Sakai is not a huge power puncher but believes he can catch Overeem. He mentions Overeem might have better cardio and could take Sakai down, but Sakai has 83% takedown defense. He suggests betting Sakai inside the distance.
Daniel Levi picks Augusto Sakai to upset Alistair Overeem. He notes Sakai's underrated chin, having taken full KO blows from Arlovski without being hurt, and his methodical Muay Thai striking. Levi is concerned about Overeem's chin and tendency to admire his work, and believes Sakai will eventually catch Overeem, predicting a third-round knockout. He also mentions Sakai's competitive running background as a plus for cardio.
The host picks Overeem to win by third or fourth round TKO. He believes Overeem is better everywhere, with improved grappling and cardio since joining Team Elevation. He expects Overeem to wear on Sakai against the cage, take him down, and pound him out. He notes Overeem's chin is a concern but thinks he can survive Sakai's early power.
The MMA Guru picks Alistair Overeem, citing Sakai's lack of impressive wins and a controversial split decision over Andrei Arlovski that he considers a robbery. He believes Overeem's experience and ability to survive early storms will be key, and predicts a second or third round TKO via ground and pound. He notes Overeem's unappealing ground and pound style but expects it to be effective.
Totals
| Fighter | KD | Sig. Str. | Sig. Str. % | Total Str. | TD | TD % | Sub. Att | Rev. | Ctrl |
|---|---|---|---|---|---|---|---|---|---|
| Alistair Overeem | 1 | 68 of 85 | 80% | 97 of 115 | 1 of 1 | 100% | 0 | 0 | 4:22 |
| Walt Harris | 1 | 25 of 48 | 52% | 25 of 48 | 0 of 0 | --- | 0 | 0 | 0:47 |
Per Round
| Rd | Fighter | KD | Sig. Str. | Sig. Str. % | Total Str. | TD | TD % | Sub. Att | Rev. | Ctrl |
|---|---|---|---|---|---|---|---|---|---|---|
| 1 | Alistair Overeem | 0 | 27 of 33 | 81% | 48 of 55 | 1 of 1 | 100% | 0 | 0 | 2:56 |
| Walt Harris | 1 | 24 of 42 | 57% | 24 of 42 | 0 of 0 | --- | 0 | 0 | 0:47 | |
| 2 | Alistair Overeem | 1 | 41 of 52 | 78% | 49 of 60 | 0 of 0 | --- | 0 | 0 | 1:26 |
| Walt Harris | 0 | 1 of 6 | 16% | 1 of 6 | 0 of 0 | --- | 0 | 0 | 0:00 |
Significant Strikes
| Fighter | Sig. Str. | Sig. Str. % | Head | Body | Leg | Distance | Clinch | Ground |
|---|---|---|---|---|---|---|---|---|
| Alistair Overeem | 68 of 85 | 80% | 58 of 75 | 8 of 8 | 2 of 2 | 7 of 10 | 1 of 1 | 60 of 74 |
| Walt Harris | 25 of 48 | 52% | 19 of 41 | 6 of 7 | 0 of 0 | 6 of 19 | 1 of 3 | 18 of 26 |
Significant Strikes Per Round
| Rd | Fighter | Sig. Str. | Sig. Str. % | Head | Body | Leg | Distance | Clinch | Ground |
|---|---|---|---|---|---|---|---|---|---|
| 1 | Alistair Overeem | 27 of 33 | 81% | 21 of 27 | 5 of 5 | 1 of 1 | 3 of 4 | 1 of 1 | 23 of 28 |
| Walt Harris | 24 of 42 | 57% | 18 of 36 | 6 of 6 | 0 of 0 | 5 of 13 | 1 of 3 | 18 of 26 | |
| 2 | Alistair Overeem | 41 of 52 | 78% | 37 of 48 | 3 of 3 | 1 of 1 | 4 of 6 | 0 of 0 | 37 of 46 |
| Walt Harris | 1 of 6 | 16% | 1 of 5 | 0 of 1 | 0 of 0 | 1 of 6 | 0 of 0 | 0 of 0 |
Big Brady picks Walt Harris by first-round knockout, citing Overeem's diminished chin and Harris' power. He notes that Overeem is likely the better fighter overall but cannot be trusted due to his chin, which has been knocked out 13 times. He believes Harris will land one shot and finish the fight. He acknowledges that Overeem could win if he takes Harris down, but doubts his wrestling is good enough. He mentions the emotional motivation for Harris after his daughter's passing.
Daniel Levi picks Walt Harris via vicious knockout. He believes Harris has turned a corner, putting things together, and has the proper technique and power to put away Overeem. He notes that Overeem is the more skilled fighter but has a small margin for error and is in denial about his recent KO loss. Levi emphasizes that Harris should stay composed and not fight too emotionally.
The host is torn but ultimately picks Overeem, citing his experience and ability to adjust after the Rozenstruik fight. He believes Overeem will be elusive, avoid Harris's early power, and take the fight to the ground for a TKO. He admits he's rooting for Harris due to his personal story but thinks Overeem's skills and tools will prevail.
Totals
| Fighter | KD | Sig. Str. | Sig. Str. % | Total Str. | TD | TD % | Sub. Att | Rev. | Ctrl |
|---|---|---|---|---|---|---|---|---|---|
| Jairzinho Rozenstruik | 0 | 74 of 105 | 70% | 101 of 135 | 2 of 10 | 20% | 0 | 0 | 8:19 |
| Alistair Overeem | 1 | 89 of 209 | 42% | 109 of 229 | 0 of 0 | --- | 0 | 0 | 0:05 |
Per Round
| Rd | Fighter | KD | Sig. Str. | Sig. Str. % | Total Str. | TD | TD % | Sub. Att | Rev. | Ctrl |
|---|---|---|---|---|---|---|---|---|---|---|
| 1 | Jairzinho Rozenstruik | 0 | 13 of 15 | 86% | 27 of 30 | 1 of 2 | 50% | 0 | 0 | 3:14 |
| Alistair Overeem | 0 | 5 of 13 | 38% | 8 of 16 | 0 of 0 | --- | 0 | 0 | 0:00 | |
| 2 | Jairzinho Rozenstruik | 0 | 14 of 20 | 70% | 17 of 24 | 0 of 1 | 0% | 0 | 0 | 2:06 |
| Alistair Overeem | 0 | 19 of 35 | 54% | 28 of 44 | 0 of 0 | --- | 0 | 0 | 0:04 | |
| 3 | Jairzinho Rozenstruik | 0 | 18 of 25 | 72% | 27 of 35 | 1 of 3 | 33% | 0 | 0 | 2:30 |
| Alistair Overeem | 0 | 14 of 33 | 42% | 22 of 41 | 0 of 0 | --- | 0 | 0 | 0:00 | |
| 4 | Jairzinho Rozenstruik | 0 | 18 of 28 | 64% | 18 of 28 | 0 of 1 | 0% | 0 | 0 | 0:00 |
| Alistair Overeem | 0 | 30 of 73 | 41% | 30 of 73 | 0 of 0 | --- | 0 | 0 | 0:00 | |
| 5 | Jairzinho Rozenstruik | 0 | 11 of 17 | 64% | 12 of 18 | 0 of 3 | 0% | 0 | 0 | 0:29 |
| Alistair Overeem | 1 | 21 of 55 | 38% | 21 of 55 | 0 of 0 | --- | 0 | 0 | 0:01 |
Significant Strikes
| Fighter | Sig. Str. | Sig. Str. % | Head | Body | Leg | Distance | Clinch | Ground |
|---|---|---|---|---|---|---|---|---|
| Jairzinho Rozenstruik | 74 of 105 | 70% | 48 of 76 | 12 of 13 | 14 of 16 | 46 of 76 | 9 of 9 | 19 of 20 |
| Alistair Overeem | 89 of 209 | 42% | 57 of 169 | 16 of 20 | 16 of 20 | 68 of 180 | 19 of 27 | 2 of 2 |
Significant Strikes Per Round
| Rd | Fighter | Sig. Str. | Sig. Str. % | Head | Body | Leg | Distance | Clinch | Ground |
|---|---|---|---|---|---|---|---|---|---|
| 1 | Jairzinho Rozenstruik | 13 of 15 | 86% | 11 of 13 | 1 of 1 | 1 of 1 | 2 of 4 | 1 of 1 | 10 of 10 |
| Alistair Overeem | 5 of 13 | 38% | 1 of 8 | 0 of 1 | 4 of 4 | 5 of 12 | 0 of 1 | 0 of 0 | |
| 2 | Jairzinho Rozenstruik | 14 of 20 | 70% | 4 of 10 | 8 of 8 | 2 of 2 | 7 of 13 | 7 of 7 | 0 of 0 |
| Alistair Overeem | 19 of 35 | 54% | 9 of 23 | 7 of 9 | 3 of 3 | 11 of 25 | 8 of 10 | 0 of 0 | |
| 3 | Jairzinho Rozenstruik | 18 of 25 | 72% | 14 of 19 | 3 of 4 | 1 of 2 | 8 of 14 | 1 of 1 | 9 of 10 |
| Alistair Overeem | 14 of 33 | 42% | 7 of 26 | 4 of 4 | 3 of 3 | 8 of 26 | 4 of 5 | 2 of 2 | |
| 4 | Jairzinho Rozenstruik | 18 of 28 | 64% | 13 of 22 | 0 of 0 | 5 of 6 | 18 of 28 | 0 of 0 | 0 of 0 |
| Alistair Overeem | 30 of 73 | 41% | 23 of 63 | 4 of 5 | 3 of 5 | 25 of 64 | 5 of 9 | 0 of 0 | |
| 5 | Jairzinho Rozenstruik | 11 of 17 | 64% | 6 of 12 | 0 of 0 | 5 of 5 | 11 of 17 | 0 of 0 | 0 of 0 |
| Alistair Overeem | 21 of 55 | 38% | 17 of 49 | 1 of 1 | 3 of 5 | 19 of 53 | 2 of 2 | 0 of 0 |
Totals
| Fighter | KD | Sig. Str. | Sig. Str. % | Total Str. | TD | TD % | Sub. Att | Rev. | Ctrl |
|---|---|---|---|---|---|---|---|---|---|
| Alistair Overeem | 1 | 29 of 33 | 87% | 31 of 35 | 0 of 1 | 0% | 0 | 0 | 1:10 |
| Aleksei Oleinik | 0 | 38 of 58 | 65% | 78 of 101 | 0 of 0 | --- | 0 | 0 | 1:22 |
Per Round
| Rd | Fighter | KD | Sig. Str. | Sig. Str. % | Total Str. | TD | TD % | Sub. Att | Rev. | Ctrl |
|---|---|---|---|---|---|---|---|---|---|---|
| 1 | Alistair Overeem | 1 | 29 of 33 | 87% | 31 of 35 | 0 of 1 | 0% | 0 | 0 | 1:10 |
| Aleksei Oleinik | 0 | 38 of 58 | 65% | 78 of 101 | 0 of 0 | --- | 0 | 0 | 1:22 |
Significant Strikes
| Fighter | Sig. Str. | Sig. Str. % | Head | Body | Leg | Distance | Clinch | Ground |
|---|---|---|---|---|---|---|---|---|
| Alistair Overeem | 29 of 33 | 87% | 23 of 27 | 6 of 6 | 0 of 0 | 5 of 8 | 12 of 13 | 12 of 12 |
| Aleksei Oleinik | 38 of 58 | 65% | 15 of 34 | 23 of 24 | 0 of 0 | 12 of 26 | 26 of 32 | 0 of 0 |
Significant Strikes Per Round
| Rd | Fighter | Sig. Str. | Sig. Str. % | Head | Body | Leg | Distance | Clinch | Ground |
|---|---|---|---|---|---|---|---|---|---|
| 1 | Alistair Overeem | 29 of 33 | 87% | 23 of 27 | 6 of 6 | 0 of 0 | 5 of 8 | 12 of 13 | 12 of 12 |
| Aleksei Oleinik | 38 of 58 | 65% | 15 of 34 | 23 of 24 | 0 of 0 | 12 of 26 | 26 of 32 | 0 of 0 |
Totals
| Fighter | KD | Sig. Str. | Sig. Str. % | Total Str. | TD | TD % | Sub. Att | Rev. | Ctrl |
|---|---|---|---|---|---|---|---|---|---|
| Alistair Overeem | 0 | 22 of 26 | 84% | 26 of 31 | 1 of 2 | 50% | 0 | 0 | 1:57 |
| Sergei Pavlovich | 0 | 13 of 32 | 40% | 18 of 37 | 0 of 2 | 0% | 0 | 0 | 0:12 |
Per Round
| Rd | Fighter | KD | Sig. Str. | Sig. Str. % | Total Str. | TD | TD % | Sub. Att | Rev. | Ctrl |
|---|---|---|---|---|---|---|---|---|---|---|
| 1 | Alistair Overeem | 0 | 22 of 26 | 84% | 26 of 31 | 1 of 2 | 50% | 0 | 0 | 1:57 |
| Sergei Pavlovich | 0 | 13 of 32 | 40% | 18 of 37 | 0 of 2 | 0% | 0 | 0 | 0:12 |
Significant Strikes
| Fighter | Sig. Str. | Sig. Str. % | Head | Body | Leg | Distance | Clinch | Ground |
|---|---|---|---|---|---|---|---|---|
| Alistair Overeem | 22 of 26 | 84% | 13 of 16 | 8 of 9 | 1 of 1 | 3 of 5 | 7 of 7 | 12 of 14 |
| Sergei Pavlovich | 13 of 32 | 40% | 9 of 25 | 3 of 6 | 1 of 1 | 8 of 22 | 5 of 10 | 0 of 0 |
Significant Strikes Per Round
| Rd | Fighter | Sig. Str. | Sig. Str. % | Head | Body | Leg | Distance | Clinch | Ground |
|---|---|---|---|---|---|---|---|---|---|
| 1 | Alistair Overeem | 22 of 26 | 84% | 13 of 16 | 8 of 9 | 1 of 1 | 3 of 5 | 7 of 7 | 12 of 14 |
| Sergei Pavlovich | 13 of 32 | 40% | 9 of 25 | 3 of 6 | 1 of 1 | 8 of 22 | 5 of 10 | 0 of 0 |
Play-by-Play
View on SherdogRound 1
Overeem crouches low with a high guard as he circles Pavlovich, feinting and testing the reactions of the Russian newcomer. Pavlovich clips “The ‘Reem” with a right hand, then shoves him away when Overeem attempts to tie up. An uppercut leaves Overeem covering up momentarily, but he recovers and drives forward to push Pavlovich against the wall. Pavlovich spins to the outside position in the clinch and walks Overeem out toward the middle, then the Dutchman reclaims control and marches him back to the fence. Pavlovich drops levels to try a double-leg, and now Overeem abandons the clinch to step back to the center. Overeem swings a big right hand at Pavlovich, tries to grab the Russian in the Thai clinch and winds up tossing him to the ground. Overeem kneels down in Pavlovich’s open guard, then stands over him with 60 seconds on the clock. Suddenly, Overeem turns up the volume on his right hands, smashing Pavlovich’s face with thunderous hammerfists. Pavlovich eats a couple punches before going fetal and turning away from Overeem. The body language is not good, and Overeem continues to pour on the right hands, prompting referee John Sharp to step in for the stoppage.
The Result
Alistair Overeem def. Sergey Pavlovich via TKO (Punches) R1 4:21
Totals
| Fighter | KD | Sig. Str. | Sig. Str. % | Total Str. | TD | TD % | Sub. Att | Rev. | Ctrl |
|---|---|---|---|---|---|---|---|---|---|
| Curtis Blaydes | 0 | 7 of 12 | 58% | 24 of 31 | 0 of 0 | --- | 2 | 0 | 0:00 |
| Alistair Overeem | 0 | 37 of 53 | 69% | 62 of 85 | 4 of 4 | 100% | 0 | 0 | 7:47 |
Per Round
| Rd | Fighter | KD | Sig. Str. | Sig. Str. % | Total Str. | TD | TD % | Sub. Att | Rev. | Ctrl |
|---|---|---|---|---|---|---|---|---|---|---|
| 1 | Curtis Blaydes | 0 | 1 of 3 | 33% | 10 of 14 | 0 of 0 | --- | 0 | 0 | 0:00 |
| Alistair Overeem | 0 | 1 of 5 | 20% | 9 of 15 | 1 of 1 | 100% | 0 | 0 | 2:19 | |
| 2 | Curtis Blaydes | 0 | 4 of 5 | 80% | 11 of 12 | 0 of 0 | --- | 2 | 0 | 0:00 |
| Alistair Overeem | 0 | 13 of 20 | 65% | 25 of 36 | 2 of 2 | 100% | 0 | 0 | 3:31 | |
| 3 | Curtis Blaydes | 0 | 2 of 4 | 50% | 3 of 5 | 0 of 0 | --- | 0 | 0 | 0:00 |
| Alistair Overeem | 0 | 23 of 28 | 82% | 28 of 34 | 1 of 1 | 100% | 0 | 0 | 1:57 |
Significant Strikes
| Fighter | Sig. Str. | Sig. Str. % | Head | Body | Leg | Distance | Clinch | Ground |
|---|---|---|---|---|---|---|---|---|
| Curtis Blaydes | 7 of 12 | 58% | 3 of 8 | 4 of 4 | 0 of 0 | 6 of 10 | 0 of 0 | 1 of 2 |
| Alistair Overeem | 37 of 53 | 69% | 32 of 48 | 5 of 5 | 0 of 0 | 3 of 16 | 12 of 14 | 22 of 23 |
Significant Strikes Per Round
| Rd | Fighter | Sig. Str. | Sig. Str. % | Head | Body | Leg | Distance | Clinch | Ground |
|---|---|---|---|---|---|---|---|---|---|
| 1 | Curtis Blaydes | 1 of 3 | 33% | 1 of 3 | 0 of 0 | 0 of 0 | 0 of 1 | 0 of 0 | 1 of 2 |
| Alistair Overeem | 1 of 5 | 20% | 1 of 5 | 0 of 0 | 0 of 0 | 0 of 4 | 0 of 0 | 1 of 1 | |
| 2 | Curtis Blaydes | 4 of 5 | 80% | 2 of 3 | 2 of 2 | 0 of 0 | 4 of 5 | 0 of 0 | 0 of 0 |
| Alistair Overeem | 13 of 20 | 65% | 10 of 17 | 3 of 3 | 0 of 0 | 0 of 6 | 2 of 3 | 11 of 11 | |
| 3 | Curtis Blaydes | 2 of 4 | 50% | 0 of 2 | 2 of 2 | 0 of 0 | 2 of 4 | 0 of 0 | 0 of 0 |
| Alistair Overeem | 23 of 28 | 82% | 21 of 26 | 2 of 2 | 0 of 0 | 3 of 6 | 10 of 11 | 10 of 11 |
Totals
| Fighter | KD | Sig. Str. | Sig. Str. % | Total Str. | TD | TD % | Sub. Att | Rev. | Ctrl |
|---|---|---|---|---|---|---|---|---|---|
| Francis Ngannou | 0 | 1 of 4 | 25% | 1 of 4 | 0 of 1 | 0% | 0 | 0 | 0:00 |
| Alistair Overeem | 1 | 6 of 14 | 42% | 11 of 20 | 0 of 0 | --- | 0 | 0 | 1:02 |
Per Round
| Rd | Fighter | KD | Sig. Str. | Sig. Str. % | Total Str. | TD | TD % | Sub. Att | Rev. | Ctrl |
|---|---|---|---|---|---|---|---|---|---|---|
| 1 | Francis Ngannou | 0 | 1 of 4 | 25% | 1 of 4 | 0 of 1 | 0% | 0 | 0 | 0:00 |
| Alistair Overeem | 1 | 6 of 14 | 42% | 11 of 20 | 0 of 0 | --- | 0 | 0 | 1:02 |
Significant Strikes
| Fighter | Sig. Str. | Sig. Str. % | Head | Body | Leg | Distance | Clinch | Ground |
|---|---|---|---|---|---|---|---|---|
| Francis Ngannou | 1 of 4 | 25% | 1 of 4 | 0 of 0 | 0 of 0 | 1 of 4 | 0 of 0 | 0 of 0 |
| Alistair Overeem | 6 of 14 | 42% | 4 of 12 | 0 of 0 | 2 of 2 | 2 of 10 | 3 of 3 | 1 of 1 |
Significant Strikes Per Round
| Rd | Fighter | Sig. Str. | Sig. Str. % | Head | Body | Leg | Distance | Clinch | Ground |
|---|---|---|---|---|---|---|---|---|---|
| 1 | Francis Ngannou | 1 of 4 | 25% | 1 of 4 | 0 of 0 | 0 of 0 | 1 of 4 | 0 of 0 | 0 of 0 |
| Alistair Overeem | 6 of 14 | 42% | 4 of 12 | 0 of 0 | 2 of 2 | 2 of 10 | 3 of 3 | 1 of 1 |
Roy Nelson - Fight History
Totals
| Fighter | KD | Sig. Str. | Sig. Str. % | Total Str. | TD | TD % | Sub. Att | Rev. | Ctrl |
|---|---|---|---|---|---|---|---|---|---|
| Alexander Volkov | 0 | 122 of 182 | 67% | 125 of 185 | 0 of 0 | --- | 0 | 0 | 0:23 |
| Roy Nelson | 0 | 32 of 67 | 47% | 40 of 75 | 1 of 8 | 12% | 0 | 0 | 4:32 |
Per Round
| Rd | Fighter | KD | Sig. Str. | Sig. Str. % | Total Str. | TD | TD % | Sub. Att | Rev. | Ctrl |
|---|---|---|---|---|---|---|---|---|---|---|
| 1 | Alexander Volkov | 0 | 29 of 39 | 74% | 32 of 42 | 0 of 0 | --- | 0 | 0 | 0:23 |
| Roy Nelson | 0 | 9 of 14 | 64% | 12 of 17 | 1 of 3 | 33% | 0 | 0 | 3:12 | |
| 2 | Alexander Volkov | 0 | 45 of 71 | 63% | 45 of 71 | 0 of 0 | --- | 0 | 0 | 0:00 |
| Roy Nelson | 0 | 11 of 21 | 52% | 16 of 26 | 0 of 3 | 0% | 0 | 0 | 1:07 | |
| 3 | Alexander Volkov | 0 | 48 of 72 | 66% | 48 of 72 | 0 of 0 | --- | 0 | 0 | 0:00 |
| Roy Nelson | 0 | 12 of 32 | 37% | 12 of 32 | 0 of 2 | 0% | 0 | 0 | 0:13 |
Significant Strikes
| Fighter | Sig. Str. | Sig. Str. % | Head | Body | Leg | Distance | Clinch | Ground |
|---|---|---|---|---|---|---|---|---|
| Alexander Volkov | 122 of 182 | 67% | 77 of 132 | 29 of 34 | 16 of 16 | 105 of 157 | 17 of 25 | 0 of 0 |
| Roy Nelson | 32 of 67 | 47% | 18 of 52 | 9 of 9 | 5 of 6 | 25 of 58 | 6 of 7 | 1 of 2 |
Significant Strikes Per Round
| Rd | Fighter | Sig. Str. | Sig. Str. % | Head | Body | Leg | Distance | Clinch | Ground |
|---|---|---|---|---|---|---|---|---|---|
| 1 | Alexander Volkov | 29 of 39 | 74% | 20 of 29 | 5 of 6 | 4 of 4 | 17 of 23 | 12 of 16 | 0 of 0 |
| Roy Nelson | 9 of 14 | 64% | 7 of 12 | 2 of 2 | 0 of 0 | 2 of 6 | 6 of 6 | 1 of 2 | |
| 2 | Alexander Volkov | 45 of 71 | 63% | 35 of 58 | 7 of 10 | 3 of 3 | 45 of 69 | 0 of 2 | 0 of 0 |
| Roy Nelson | 11 of 21 | 52% | 5 of 14 | 2 of 2 | 4 of 5 | 11 of 21 | 0 of 0 | 0 of 0 | |
| 3 | Alexander Volkov | 48 of 72 | 66% | 22 of 45 | 17 of 18 | 9 of 9 | 43 of 65 | 5 of 7 | 0 of 0 |
| Roy Nelson | 12 of 32 | 37% | 6 of 26 | 5 of 5 | 1 of 1 | 12 of 31 | 0 of 1 | 0 of 0 |
Play-by-Play
View on SherdogRound 1
Volkov attacks with an early head kick which is blocked but knocks Nelson off balance, leading to a brief clinch on the fence. Nelson inches forward on the towering Russian, who fends off "Big Country" with some kicks to the body. Nelson shoots in on a single-leg, can't get it and winds up pressing Volkov against the wall with an underhook. Double underhooks for Nelson now, looking for the outside trip, but Volkov defends well and keeps his footing. Volkov reverses to the outside and gives Nelson a few knees to the gut. Nelson reaches around the back to hook Volkov's rear leg and now manages to complete the trip. Volkov sits up against the fence, nearly stands but has his right ankle picked out from under him, and Nelson maintains top position. Nelson puts the top of his head underneath Volkov's jaw and keeps his head trapped against the fence as he works to flatten out the Russian on the ground. Volkov is fishing for something from guard, perhaps a triangle or kimura, but Nelson is giving him no space to work. With little happening on the ground, referee Dan Miragliotta orders the fighters back to their feet inside the final 30 seconds. Volkov blitzes Nelson with punches and knees, forcing "Big Country" to back up to the cage. Nelson hangs in the pocket with Volkov, however, and even slugs "Drago" back with a big right hand just before the horn.
Jordan Breen scores the round 10-9 Nelson
Brian Knapp scores the round 10-9 Volkov
Chris Nelson scores the round 10-9 Nelson
Round 2
Nelson looks a bit more tentative after a frantic end to the first round, but he soon works his way back inside and pins Volkov to the fence. Volkov works an overhook and wrist control, making it tough for Nelson to work for his double-leg. Volkov breaks loose and lands a pair of punches, followed by a kick to the midsection. Nelson steps forward again, hands low, then shoots in behind a leg kick to try the double. Volkov denies the shot and pushes Nelson back to the middle of the cage to resume striking. Volkov's jabs and kicks are keeping Nelson on the outside, but the former IFL heavyweight manages to get through with a bombing overhand right. Both big men are looking tired as they hit the final minute of round two, but it's Volkov continuing to snap off jabs and stifle Nelson's attacks. Volkov blocks an overhand right and dings Nelson with a counter right hand. Nelson tries a late shot, stuffed by Volkov, and Nelson gives him a mocking wide-eyed stare as time runs out.
Jordan Breen scores the round 10-9 Volkov
Brian Knapp scores the round 10-9 Volkov
Chris Nelson scores the round 10-9 Volkov
Round 3
Volkov steps backward as Nelson comes forward, stuffing a shot from "Big Country" and roughing up the American with punches as he tries to get back to his feet. It's more measured striking and long jabs from Volkov here in the final round, never allowing the tired Nelson to get too close. Nelson is breathing heavy as he walks forward with his hands held low, Volkov continually placing front kicks in his breadbasket. Nelson charges forward and lands an uppercut, but after circling away, Volkov gets right back to his jabbing and kicking. Two minutes left as Nelson continues to try and get inside; instead, he gets more kicks to the midsection, more jabs to the face. Volkov rocks the head of Nelson with a right straight-uppercut and a kick to the body, then closes out the fight with a few more body kicks.
Jordan Breen scores the round 10-9 Volkov (29-28 Volkov)
Brian Knapp scores the round 10-9 Volkov (30-27 Volkov)
Chris Nelson scores the round 10-9 Volkov (29-28 Volkov)
The Official Result
Alexander Volkov def. Roy Nelson via Unanimous Decision (30-27, 30-27, 30-27) R3 5:00
Totals
| Fighter | KD | Sig. Str. | Sig. Str. % | Total Str. | TD | TD % | Sub. Att | Rev. | Ctrl |
|---|---|---|---|---|---|---|---|---|---|
| Roy Nelson | 1 | 36 of 66 | 54% | 38 of 68 | 0 of 1 | 0% | 0 | 0 | 1:32 |
| Antônio Silva | 0 | 27 of 61 | 44% | 46 of 81 | 0 of 2 | 0% | 0 | 0 | 0:19 |
Per Round
| Rd | Fighter | KD | Sig. Str. | Sig. Str. % | Total Str. | TD | TD % | Sub. Att | Rev. | Ctrl |
|---|---|---|---|---|---|---|---|---|---|---|
| 1 | Roy Nelson | 0 | 18 of 33 | 54% | 20 of 35 | 0 of 1 | 0% | 0 | 0 | 1:26 |
| Antônio Silva | 0 | 14 of 28 | 50% | 33 of 48 | 0 of 0 | --- | 0 | 0 | 0:00 | |
| 2 | Roy Nelson | 1 | 18 of 33 | 54% | 18 of 33 | 0 of 0 | --- | 0 | 0 | 0:06 |
| Antônio Silva | 0 | 13 of 33 | 39% | 13 of 33 | 0 of 2 | 0% | 0 | 0 | 0:19 |
Significant Strikes
| Fighter | Sig. Str. | Sig. Str. % | Head | Body | Leg | Distance | Clinch | Ground |
|---|---|---|---|---|---|---|---|---|
| Roy Nelson | 36 of 66 | 54% | 25 of 54 | 4 of 5 | 7 of 7 | 20 of 48 | 11 of 13 | 5 of 5 |
| Antônio Silva | 27 of 61 | 44% | 7 of 35 | 9 of 15 | 11 of 11 | 24 of 56 | 3 of 5 | 0 of 0 |
Significant Strikes Per Round
| Rd | Fighter | Sig. Str. | Sig. Str. % | Head | Body | Leg | Distance | Clinch | Ground |
|---|---|---|---|---|---|---|---|---|---|
| 1 | Roy Nelson | 18 of 33 | 54% | 9 of 24 | 4 of 4 | 5 of 5 | 11 of 25 | 7 of 8 | 0 of 0 |
| Antônio Silva | 14 of 28 | 50% | 6 of 19 | 3 of 4 | 5 of 5 | 13 of 25 | 1 of 3 | 0 of 0 | |
| 2 | Roy Nelson | 18 of 33 | 54% | 16 of 30 | 0 of 1 | 2 of 2 | 9 of 23 | 4 of 5 | 5 of 5 |
| Antônio Silva | 13 of 33 | 39% | 1 of 16 | 6 of 11 | 6 of 6 | 11 of 31 | 2 of 2 | 0 of 0 |
Totals
| Fighter | KD | Sig. Str. | Sig. Str. % | Total Str. | TD | TD % | Sub. Att | Rev. | Ctrl |
|---|---|---|---|---|---|---|---|---|---|
| Derrick Lewis | 0 | 4 of 19 | 21% | 66 of 89 | 7 of 10 | 70% | 0 | 0 | 9:39 |
| Roy Nelson | 0 | 37 of 73 | 50% | 39 of 75 | 0 of 0 | --- | 0 | 0 | 0:03 |
Per Round
| Rd | Fighter | KD | Sig. Str. | Sig. Str. % | Total Str. | TD | TD % | Sub. Att | Rev. | Ctrl |
|---|---|---|---|---|---|---|---|---|---|---|
| 1 | Derrick Lewis | 0 | 0 of 2 | 0% | 25 of 31 | 2 of 4 | 50% | 0 | 0 | 3:24 |
| Roy Nelson | 0 | 24 of 37 | 64% | 26 of 39 | 0 of 0 | --- | 0 | 0 | 0:03 | |
| 2 | Derrick Lewis | 0 | 2 of 8 | 25% | 19 of 26 | 3 of 3 | 100% | 0 | 0 | 2:44 |
| Roy Nelson | 0 | 3 of 13 | 23% | 3 of 13 | 0 of 0 | --- | 0 | 0 | 0:00 | |
| 3 | Derrick Lewis | 0 | 2 of 9 | 22% | 22 of 32 | 2 of 3 | 66% | 0 | 0 | 3:31 |
| Roy Nelson | 0 | 10 of 23 | 43% | 10 of 23 | 0 of 0 | --- | 0 | 0 | 0:00 |
Significant Strikes
| Fighter | Sig. Str. | Sig. Str. % | Head | Body | Leg | Distance | Clinch | Ground |
|---|---|---|---|---|---|---|---|---|
| Derrick Lewis | 4 of 19 | 21% | 3 of 18 | 0 of 0 | 1 of 1 | 2 of 15 | 2 of 3 | 0 of 1 |
| Roy Nelson | 37 of 73 | 50% | 25 of 60 | 11 of 12 | 1 of 1 | 16 of 46 | 21 of 27 | 0 of 0 |
Significant Strikes Per Round
| Rd | Fighter | Sig. Str. | Sig. Str. % | Head | Body | Leg | Distance | Clinch | Ground |
|---|---|---|---|---|---|---|---|---|---|
| 1 | Derrick Lewis | 0 of 2 | 0% | 0 of 2 | 0 of 0 | 0 of 0 | 0 of 1 | 0 of 0 | 0 of 1 |
| Roy Nelson | 24 of 37 | 64% | 17 of 30 | 7 of 7 | 0 of 0 | 8 of 18 | 16 of 19 | 0 of 0 | |
| 2 | Derrick Lewis | 2 of 8 | 25% | 1 of 7 | 0 of 0 | 1 of 1 | 2 of 8 | 0 of 0 | 0 of 0 |
| Roy Nelson | 3 of 13 | 23% | 1 of 10 | 1 of 2 | 1 of 1 | 2 of 11 | 1 of 2 | 0 of 0 | |
| 3 | Derrick Lewis | 2 of 9 | 22% | 2 of 9 | 0 of 0 | 0 of 0 | 0 of 6 | 2 of 3 | 0 of 0 |
| Roy Nelson | 10 of 23 | 43% | 7 of 20 | 3 of 3 | 0 of 0 | 6 of 17 | 4 of 6 | 0 of 0 |
Play-by-Play
View on SherdogRound 1
Lewis opens with a couple kicks to the midsection of Nelson, who stakes out the center of the cage to start the fight. Nelson runs at Lewis with a right hand, misses and winds up pressing the “Black Beast” against the fence. Lewis widens his base and stays vertical with the help of a cage post, while Nelson stays glued on and tries to wrestle the larger man to the floor. After a minute or so of inactivity, referee John McCarthy separates the big men. Lewis bursts forward with punches and a head kick, but Nelson changes levels and drives him to the mat for the first takedown of the bout. Lewis powers back to his feet and drills Nelson with a knee to the stomach, then follows up with two or three big uppercuts as Nelson tries to wheel away. Nelson gets hold of Lewis and pushes him against the fence again, slowing the pace with 90 seconds on the clock. Referee McCarthy breaks them up again with 30 seconds remaining in the round, and Lewis goes on the offensive with more big uppercuts. Nelson looks hurt, stumbling backward as Lewis attacks, but once again “Big Country” is able to wrap up his opponent for a takedown.
Sherdog Scores
Brian Knapp scores the round 10-9 Lewis
Chris Nelson scores the round 10-9 Lewis
Mike Sloan scores the round 10-9 Lewis
Round 2
Both heavyweights are looking for the homerun shot early in the second stanza, but Nelson’s right hand pulls up short and Lewis’ is deflected. Nelson steps forward slowly while Lewis backs away, leading to an uneventful couple of minutes at the top of the round. Two minutes in, Nelson digs an underhook and shoves Lewis against the wall. “Big Country” gets the takedown and passes to side control, then leans right to left across Lewis’ body to frame up a kimura. While Nelson looks for the submission, Lewis rolls free and powers back to his feet. The escape is short-lived, as Nelson pulls him right back to the canvas. Lewis gets up again, only to be taken down again, and now Nelson puts his weight on his opponent from cross-side control. Lewis is back up again with only seconds to go, and he finishes the round swinging.
Sherdog Scores
Brian Knapp scores the round 10-9 Nelson
Chris Nelson scores the round 10-9 Nelson
Mike Sloan scores the round 10-9 Nelson
Round 3
Nelson goes after an early takedown and succeeds in single-legging Lewis to the ground near the fence in the opening minute of the round. Lewis works slowly back to his feet but can’t escape the clutches of “Big Country,” who holds Lewis on the fence until he’s able to take him down again. Lewis gets up again, but Nelson stays stuck on him, throwing knees to the legs and body as they rest in a weary clinch. Referee McCarthy resets the fighters with just over a minute on the clock, and Lewis wastes no time in slugging Nelson with a right hand. Lewis follows with a kick to the body, closes in on Nelson near the fence and hits him with a pair of rights. Nelson wraps him up in a bodylock, but Lewis separates with 20 seconds left. Nelson gets caught flailing and eats a huge right hand, but it could be too little, too late for Lewis.
Sherdog Scores
Brian Knapp scores the round 10-9 Nelson (29-28 Nelson)
Chris Nelson scores the round 10-9 Lewis (29-28 Lewis)
Mike Sloan scores the round 10-9 Nelson (29-28 Nelson)
The Official Result
Derrick Lewis def. Roy Nelson via Split Decision (29-28, 29-28, 28-29) R3 5:00
Totals
| Fighter | KD | Sig. Str. | Sig. Str. % | Total Str. | TD | TD % | Sub. Att | Rev. | Ctrl |
|---|---|---|---|---|---|---|---|---|---|
| Roy Nelson | 0 | 42 of 121 | 34% | 42 of 121 | 0 of 1 | 0% | 0 | 0 | 0:00 |
| Jared Rosholt | 0 | 36 of 120 | 30% | 36 of 120 | 0 of 2 | 0% | 0 | 0 | 0:00 |
Per Round
| Rd | Fighter | KD | Sig. Str. | Sig. Str. % | Total Str. | TD | TD % | Sub. Att | Rev. | Ctrl |
|---|---|---|---|---|---|---|---|---|---|---|
| 1 | Roy Nelson | 0 | 6 of 36 | 16% | 6 of 36 | 0 of 0 | --- | 0 | 0 | 0:00 |
| Jared Rosholt | 0 | 13 of 37 | 35% | 13 of 37 | 0 of 0 | --- | 0 | 0 | 0:00 | |
| 2 | Roy Nelson | 0 | 16 of 36 | 44% | 16 of 36 | 0 of 0 | --- | 0 | 0 | 0:00 |
| Jared Rosholt | 0 | 11 of 35 | 31% | 11 of 35 | 0 of 1 | 0% | 0 | 0 | 0:00 | |
| 3 | Roy Nelson | 0 | 20 of 49 | 40% | 20 of 49 | 0 of 1 | 0% | 0 | 0 | 0:00 |
| Jared Rosholt | 0 | 12 of 48 | 25% | 12 of 48 | 0 of 1 | 0% | 0 | 0 | 0:00 |
Significant Strikes
| Fighter | Sig. Str. | Sig. Str. % | Head | Body | Leg | Distance | Clinch | Ground |
|---|---|---|---|---|---|---|---|---|
| Roy Nelson | 42 of 121 | 34% | 36 of 114 | 2 of 3 | 4 of 4 | 42 of 120 | 0 of 1 | 0 of 0 |
| Jared Rosholt | 36 of 120 | 30% | 26 of 106 | 5 of 7 | 5 of 7 | 34 of 115 | 2 of 5 | 0 of 0 |
Significant Strikes Per Round
| Rd | Fighter | Sig. Str. | Sig. Str. % | Head | Body | Leg | Distance | Clinch | Ground |
|---|---|---|---|---|---|---|---|---|---|
| 1 | Roy Nelson | 6 of 36 | 16% | 6 of 36 | 0 of 0 | 0 of 0 | 6 of 36 | 0 of 0 | 0 of 0 |
| Jared Rosholt | 13 of 37 | 35% | 10 of 33 | 2 of 3 | 1 of 1 | 11 of 33 | 2 of 4 | 0 of 0 | |
| 2 | Roy Nelson | 16 of 36 | 44% | 13 of 32 | 1 of 2 | 2 of 2 | 16 of 35 | 0 of 1 | 0 of 0 |
| Jared Rosholt | 11 of 35 | 31% | 6 of 30 | 2 of 2 | 3 of 3 | 11 of 34 | 0 of 1 | 0 of 0 | |
| 3 | Roy Nelson | 20 of 49 | 40% | 17 of 46 | 1 of 1 | 2 of 2 | 20 of 49 | 0 of 0 | 0 of 0 |
| Jared Rosholt | 12 of 48 | 25% | 10 of 43 | 1 of 2 | 1 of 3 | 12 of 48 | 0 of 0 | 0 of 0 |
Totals
| Fighter | KD | Sig. Str. | Sig. Str. % | Total Str. | TD | TD % | Sub. Att | Rev. | Ctrl |
|---|---|---|---|---|---|---|---|---|---|
| Josh Barnett | 0 | 146 of 205 | 71% | 215 of 276 | 0 of 0 | --- | 0 | 0 | 8:22 |
| Roy Nelson | 0 | 60 of 114 | 52% | 92 of 149 | 4 of 10 | 40% | 0 | 0 | 7:51 |
Per Round
| Rd | Fighter | KD | Sig. Str. | Sig. Str. % | Total Str. | TD | TD % | Sub. Att | Rev. | Ctrl |
|---|---|---|---|---|---|---|---|---|---|---|
| 1 | Josh Barnett | 0 | 17 of 26 | 65% | 27 of 36 | 0 of 0 | --- | 0 | 0 | 0:38 |
| Roy Nelson | 0 | 7 of 13 | 53% | 22 of 30 | 2 of 2 | 100% | 0 | 0 | 2:51 | |
| 2 | Josh Barnett | 0 | 44 of 65 | 67% | 65 of 87 | 0 of 0 | --- | 0 | 0 | 2:17 |
| Roy Nelson | 0 | 16 of 35 | 45% | 19 of 38 | 0 of 1 | 0% | 0 | 0 | 0:00 | |
| 3 | Josh Barnett | 0 | 21 of 31 | 67% | 33 of 43 | 0 of 0 | --- | 0 | 0 | 0:37 |
| Roy Nelson | 0 | 15 of 30 | 50% | 22 of 38 | 0 of 4 | 0% | 0 | 0 | 2:25 | |
| 4 | Josh Barnett | 0 | 39 of 50 | 78% | 57 of 68 | 0 of 0 | --- | 0 | 0 | 2:35 |
| Roy Nelson | 0 | 4 of 10 | 40% | 6 of 12 | 1 of 2 | 50% | 0 | 0 | 1:22 | |
| 5 | Josh Barnett | 0 | 25 of 33 | 75% | 33 of 42 | 0 of 0 | --- | 0 | 0 | 2:15 |
| Roy Nelson | 0 | 18 of 26 | 69% | 23 of 31 | 1 of 1 | 100% | 0 | 0 | 1:13 |
Significant Strikes
| Fighter | Sig. Str. | Sig. Str. % | Head | Body | Leg | Distance | Clinch | Ground |
|---|---|---|---|---|---|---|---|---|
| Josh Barnett | 146 of 205 | 71% | 92 of 147 | 52 of 56 | 2 of 2 | 51 of 95 | 95 of 110 | 0 of 0 |
| Roy Nelson | 60 of 114 | 52% | 38 of 85 | 15 of 19 | 7 of 10 | 28 of 62 | 29 of 49 | 3 of 3 |
Significant Strikes Per Round
| Rd | Fighter | Sig. Str. | Sig. Str. % | Head | Body | Leg | Distance | Clinch | Ground |
|---|---|---|---|---|---|---|---|---|---|
| 1 | Josh Barnett | 17 of 26 | 65% | 7 of 16 | 9 of 9 | 1 of 1 | 6 of 13 | 11 of 13 | 0 of 0 |
| Roy Nelson | 7 of 13 | 53% | 6 of 11 | 1 of 2 | 0 of 0 | 4 of 8 | 2 of 4 | 1 of 1 | |
| 2 | Josh Barnett | 44 of 65 | 67% | 31 of 50 | 12 of 14 | 1 of 1 | 17 of 30 | 27 of 35 | 0 of 0 |
| Roy Nelson | 16 of 35 | 45% | 12 of 29 | 4 of 6 | 0 of 0 | 12 of 29 | 4 of 6 | 0 of 0 | |
| 3 | Josh Barnett | 21 of 31 | 67% | 15 of 24 | 6 of 7 | 0 of 0 | 15 of 25 | 6 of 6 | 0 of 0 |
| Roy Nelson | 15 of 30 | 50% | 6 of 17 | 3 of 4 | 6 of 9 | 5 of 13 | 10 of 17 | 0 of 0 | |
| 4 | Josh Barnett | 39 of 50 | 78% | 27 of 38 | 12 of 12 | 0 of 0 | 5 of 12 | 34 of 38 | 0 of 0 |
| Roy Nelson | 4 of 10 | 40% | 3 of 9 | 0 of 0 | 1 of 1 | 1 of 3 | 3 of 7 | 0 of 0 | |
| 5 | Josh Barnett | 25 of 33 | 75% | 12 of 19 | 13 of 14 | 0 of 0 | 8 of 15 | 17 of 18 | 0 of 0 |
| Roy Nelson | 18 of 26 | 69% | 11 of 19 | 7 of 7 | 0 of 0 | 6 of 9 | 10 of 15 | 2 of 2 |
Totals
| Fighter | KD | Sig. Str. | Sig. Str. % | Total Str. | TD | TD % | Sub. Att | Rev. | Ctrl |
|---|---|---|---|---|---|---|---|---|---|
| Alistair Overeem | 1 | 23 of 77 | 29% | 23 of 77 | 0 of 4 | 0% | 0 | 0 | 0:34 |
| Roy Nelson | 0 | 62 of 84 | 73% | 62 of 84 | 0 of 2 | 0% | 0 | 0 | 0:00 |
Per Round
| Rd | Fighter | KD | Sig. Str. | Sig. Str. % | Total Str. | TD | TD % | Sub. Att | Rev. | Ctrl |
|---|---|---|---|---|---|---|---|---|---|---|
| 1 | Alistair Overeem | 0 | 11 of 25 | 44% | 11 of 25 | 0 of 1 | 0% | 0 | 0 | 0:00 |
| Roy Nelson | 0 | 25 of 28 | 89% | 25 of 28 | 0 of 0 | --- | 0 | 0 | 0:00 | |
| 2 | Alistair Overeem | 0 | 5 of 29 | 17% | 5 of 29 | 0 of 0 | --- | 0 | 0 | 0:00 |
| Roy Nelson | 0 | 18 of 29 | 62% | 18 of 29 | 0 of 1 | 0% | 0 | 0 | 0:00 | |
| 3 | Alistair Overeem | 1 | 7 of 23 | 30% | 7 of 23 | 0 of 3 | 0% | 0 | 0 | 0:34 |
| Roy Nelson | 0 | 19 of 27 | 70% | 19 of 27 | 0 of 1 | 0% | 0 | 0 | 0:00 |
Significant Strikes
| Fighter | Sig. Str. | Sig. Str. % | Head | Body | Leg | Distance | Clinch | Ground |
|---|---|---|---|---|---|---|---|---|
| Alistair Overeem | 23 of 77 | 29% | 18 of 68 | 4 of 6 | 1 of 3 | 14 of 60 | 9 of 15 | 0 of 2 |
| Roy Nelson | 62 of 84 | 73% | 18 of 29 | 24 of 33 | 20 of 22 | 59 of 80 | 2 of 3 | 1 of 1 |
Significant Strikes Per Round
| Rd | Fighter | Sig. Str. | Sig. Str. % | Head | Body | Leg | Distance | Clinch | Ground |
|---|---|---|---|---|---|---|---|---|---|
| 1 | Alistair Overeem | 11 of 25 | 44% | 9 of 22 | 2 of 3 | 0 of 0 | 5 of 16 | 6 of 9 | 0 of 0 |
| Roy Nelson | 25 of 28 | 89% | 5 of 6 | 12 of 14 | 8 of 8 | 24 of 26 | 1 of 2 | 0 of 0 | |
| 2 | Alistair Overeem | 5 of 29 | 17% | 3 of 25 | 2 of 3 | 0 of 1 | 3 of 24 | 2 of 5 | 0 of 0 |
| Roy Nelson | 18 of 29 | 62% | 6 of 10 | 5 of 10 | 7 of 9 | 17 of 28 | 1 of 1 | 0 of 0 | |
| 3 | Alistair Overeem | 7 of 23 | 30% | 6 of 21 | 0 of 0 | 1 of 2 | 6 of 20 | 1 of 1 | 0 of 2 |
| Roy Nelson | 19 of 27 | 70% | 7 of 13 | 7 of 9 | 5 of 5 | 18 of 26 | 0 of 0 | 1 of 1 |
Totals
| Fighter | KD | Sig. Str. | Sig. Str. % | Total Str. | TD | TD % | Sub. Att | Rev. | Ctrl |
|---|---|---|---|---|---|---|---|---|---|
| Mark Hunt | 1 | 32 of 91 | 35% | 32 of 91 | 0 of 0 | --- | 0 | 0 | 0:02 |
| Roy Nelson | 0 | 20 of 60 | 33% | 20 of 60 | 1 of 6 | 16% | 0 | 0 | 0:19 |
Per Round
| Rd | Fighter | KD | Sig. Str. | Sig. Str. % | Total Str. | TD | TD % | Sub. Att | Rev. | Ctrl |
|---|---|---|---|---|---|---|---|---|---|---|
| 1 | Mark Hunt | 0 | 16 of 48 | 33% | 16 of 48 | 0 of 0 | --- | 0 | 0 | 0:00 |
| Roy Nelson | 0 | 11 of 37 | 29% | 11 of 37 | 0 of 3 | 0% | 0 | 0 | 0:00 | |
| 2 | Mark Hunt | 1 | 16 of 43 | 37% | 16 of 43 | 0 of 0 | --- | 0 | 0 | 0:02 |
| Roy Nelson | 0 | 9 of 23 | 39% | 9 of 23 | 1 of 3 | 33% | 0 | 0 | 0:19 |
Significant Strikes
| Fighter | Sig. Str. | Sig. Str. % | Head | Body | Leg | Distance | Clinch | Ground |
|---|---|---|---|---|---|---|---|---|
| Mark Hunt | 32 of 91 | 35% | 28 of 85 | 3 of 5 | 1 of 1 | 28 of 85 | 4 of 6 | 0 of 0 |
| Roy Nelson | 20 of 60 | 33% | 16 of 54 | 2 of 3 | 2 of 3 | 20 of 60 | 0 of 0 | 0 of 0 |
Significant Strikes Per Round
| Rd | Fighter | Sig. Str. | Sig. Str. % | Head | Body | Leg | Distance | Clinch | Ground |
|---|---|---|---|---|---|---|---|---|---|
| 1 | Mark Hunt | 16 of 48 | 33% | 12 of 42 | 3 of 5 | 1 of 1 | 13 of 45 | 3 of 3 | 0 of 0 |
| Roy Nelson | 11 of 37 | 29% | 9 of 34 | 1 of 1 | 1 of 2 | 11 of 37 | 0 of 0 | 0 of 0 | |
| 2 | Mark Hunt | 16 of 43 | 37% | 16 of 43 | 0 of 0 | 0 of 0 | 15 of 40 | 1 of 3 | 0 of 0 |
| Roy Nelson | 9 of 23 | 39% | 7 of 20 | 1 of 2 | 1 of 1 | 9 of 23 | 0 of 0 | 0 of 0 |
Totals
| Fighter | KD | Sig. Str. | Sig. Str. % | Total Str. | TD | TD % | Sub. Att | Rev. | Ctrl |
|---|---|---|---|---|---|---|---|---|---|
| Roy Nelson | 0 | 12 of 37 | 32% | 12 of 37 | 0 of 0 | --- | 0 | 0 | 0:00 |
| Antônio Rodrigo Nogueira | 2 | 19 of 35 | 54% | 20 of 36 | 0 of 0 | --- | 0 | 0 | 0:11 |
Per Round
| Rd | Fighter | KD | Sig. Str. | Sig. Str. % | Total Str. | TD | TD % | Sub. Att | Rev. | Ctrl |
|---|---|---|---|---|---|---|---|---|---|---|
| 1 | Roy Nelson | 0 | 12 of 37 | 32% | 12 of 37 | 0 of 0 | --- | 0 | 0 | 0:00 |
| Antônio Rodrigo Nogueira | 2 | 19 of 35 | 54% | 20 of 36 | 0 of 0 | --- | 0 | 0 | 0:11 |
Significant Strikes
| Fighter | Sig. Str. | Sig. Str. % | Head | Body | Leg | Distance | Clinch | Ground |
|---|---|---|---|---|---|---|---|---|
| Roy Nelson | 12 of 37 | 32% | 12 of 36 | 0 of 1 | 0 of 0 | 12 of 37 | 0 of 0 | 0 of 0 |
| Antônio Rodrigo Nogueira | 19 of 35 | 54% | 18 of 33 | 1 of 2 | 0 of 0 | 18 of 34 | 0 of 0 | 1 of 1 |
Significant Strikes Per Round
| Rd | Fighter | Sig. Str. | Sig. Str. % | Head | Body | Leg | Distance | Clinch | Ground |
|---|---|---|---|---|---|---|---|---|---|
| 1 | Roy Nelson | 12 of 37 | 32% | 12 of 36 | 0 of 1 | 0 of 0 | 12 of 37 | 0 of 0 | 0 of 0 |
| Antônio Rodrigo Nogueira | 19 of 35 | 54% | 18 of 33 | 1 of 2 | 0 of 0 | 18 of 34 | 0 of 0 | 1 of 1 |
No comments yet. Be the first to share your thoughts!