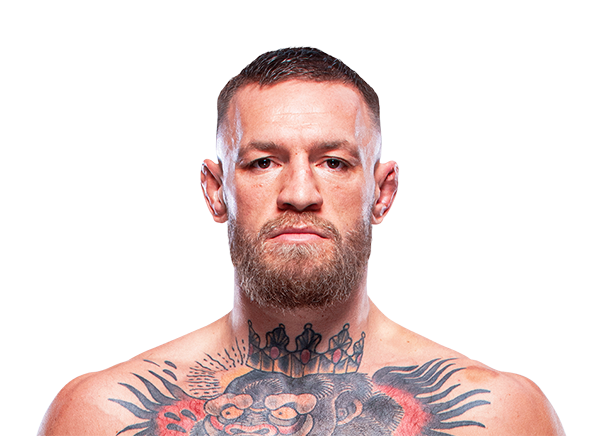
Career Averages - Conor McGregor
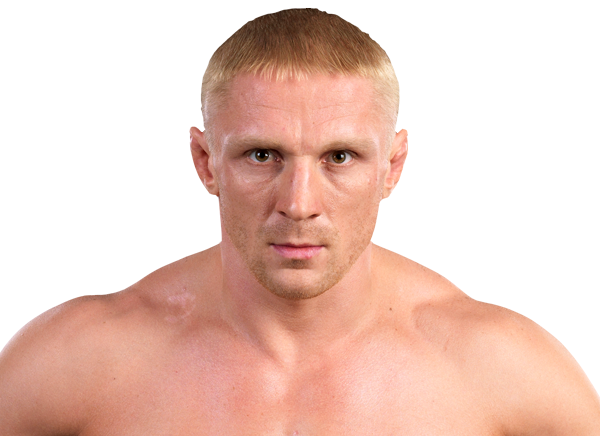
Career Averages - Dennis Siver
Conor McGregor - Fight History
AJ picks Max Holloway to win, citing McGregor's five-year layoff, age (37), and the fact that Holloway is in-season and has superior cardio and durability. He believes McGregor will fade after the first round and that Holloway's volume and body work will lead to a late stoppage. AJ also notes that McGregor's power is his only path, but Holloway's mobility and chin make that unlikely.
AJ thinks Conor McGregor's best chance is early in the first two rounds, but expects Max Holloway to be powerful at welterweight and doubts McGregor's timing after the layoff. He believes Holloway is more likely to win as the fight continues, and suggests Holloway by KO under 3.5 rounds at +125. He also notes that if McGregor wins, it would likely be a KO in round one or two.
AJ picks Max Holloway over Conor McGregor, citing McGregor's long layoff, partying, and injury history. He believes Holloway's activity, durability, and cardio will be decisive, and expects a later-stage TKO as McGregor fades. AJ notes that McGregor's best performances were at lower weights and that his 170-pound cardio has been questionable.
AJ acknowledges the temptation to pick McGregor due to his aura and recent upsets, but ultimately sides with Holloway. He notes Holloway's proven chin at 170 and that he only loses when held down all fight, while McGregor has been out for over 4 years. He believes Holloway's durability and activity give him the edge.
AJ picks Max Holloway by knockout in the second or third round. He believes Holloway's pace, cardio, and combination punching will overwhelm McGregor, who is returning after a five-year layoff and a serious leg injury. He notes Holloway's recent wins over top competition and expects McGregor to fade after the first round.
AJ picks Max Holloway to win, likely by knockout. He notes Holloway is minus 210 and thinks McGregor's long layoff makes a decision win unlikely. He suggests Holloway by KO in rounds 2 or 3 as prop bets, but doesn't love the main event betting lines overall.
Angelo believes Max Holloway is better everywhere: striking, grappling, cardio, fight IQ. He notes Conor is old, slow, rusty, and hasn't fought in 5 years, with no cardio even in his prime. He expects Holloway to finish McGregor.
Angelo picks Max Holloway confidently, stating Conor McGregor has no chance. He cites McGregor's five-year layoff, age (38), loss of speed and timing, and never having good cardio. He compares McGregor's leg break to Anderson Silva and Chris Weidman's similar injuries leading to decline. He believes Holloway will respect McGregor early but take over and finish him.
Big Brady picks Max Holloway to win by second-round knockout. He is surprised by the betting line and money coming in on McGregor, citing McGregor's one win in nine years and five-year layoff. He acknowledges McGregor's early power but believes Holloway's volume and pressure will break him. He thinks Holloway will finish McGregor in the second round.
Big Brady is leaning towards Max Holloway but is very hesitant due to the suspicious line movement and McGregor's early KO threat. He notes Holloway's elite durability and cardio, but acknowledges his chin was cracked by Topuria. He gives McGregor a 25% chance, mostly via round 1 KO, and is waiting to see if Holloway's odds drop further before betting.
Big Brady is heavily backing Max Holloway, taking the -5.5 point spread at -150 for 3 units. He believes Conor McGregor's five-year layoff, leg injury, and partying lifestyle leave him with only a couple minutes of explosiveness. He expects Holloway to drown McGregor in deep waters and finish him in rounds 2-3, as McGregor cannot win more than one round. He also has 5 units on the fight not going to decision across two parlays, calling a McGregor decision a 'rigged outcome.'
Big Brady picks Max Holloway, citing Conor McGregor's five-year layoff, injury, and one win in the last decade. He notes Holloway's durability (most significant strikes absorbed) and believes McGregor's only chance is an early KO, but Holloway will weather the storm and finish him in rounds 2-4. He doubts McGregor has 15 good minutes in him.
Cody picks Max Holloway, emphasizing McGregor's inactivity, age (38), leg injury, and lack of durability. He believes Holloway's volume, cardio, and recent elite competition give him a clear edge. He expects Holloway to win by TKO and thinks the fight doesn't go the distance.
Daniel Levi picks Max Holloway to finish Conor McGregor, citing McGregor's five-year layoff, leg break, and history of fading in fights. He notes that McGregor's best chance is an early knockout, but Holloway's durability and volume will overwhelm him as the fight progresses. Levi references Holloway's slow starts but believes he can weather the early storm and take over.
Jacob picks Conor McGregor for sentimental reasons, acknowledging it's unlikely. He believes McGregor still has power and accuracy, and that Holloway's chin has shown cracks. He thinks if McGregor lands his left hand early, he could knock Holloway out. However, he admits McGregor's cardio is a major issue and that Holloway should win. He says to pick Max but bet Max, but he's sticking with his boy.
Lucrative James picks Max Holloway to win via knockout, likely in rounds 2 or 3. He acknowledges Conor McGregor's puncher's chance early but believes Holloway's durability, cardio, and five-round experience will overwhelm McGregor, who has been inactive and suffered a severe leg injury. He notes that McGregor's power fades after round one and that Holloway has faced much tougher competition recently.
The host is confident in Holloway winning by TKO, citing McGregor's long layoff, ring rust, likely decline in speed, and the damage he has done to his body. He expects Holloway's volume and pressure to drown McGregor in the middle rounds, and recommends waiting for a better line on Holloway as McGregor money comes in.
The host recalls that McGregor used grappling to edge out the first fight in 2013, but notes Holloway has since transcended to a much higher level. He expects Holloway's high pace, volume, and pressure to drown McGregor, leading to a second, third, or fourth round TKO stoppage.
Paul picks Max Holloway citing activity, durability, and McGregor's long layoff and distractions. He notes Holloway's volume and cardio advantages, and that McGregor's best days are behind him. He mentions he already placed a small bet on Holloway and expects the line to move further.
The MMA Guru picks Max Holloway to win by TKO in the third or fourth round. He doubts McGregor's ability to return after five years off and believes Holloway's improved striking and cardio will be decisive. He predicts McGregor will start strong but fade, and Holloway will put him away with body shots and combinations against the cage.
Totals
| Fighter | KD | Sig. Str. | Sig. Str. % | Total Str. | TD | TD % | Sub. Att | Rev. | Ctrl |
|---|---|---|---|---|---|---|---|---|---|
| Dustin Poirier | 0 | 36 of 66 | 54% | 36 of 66 | 1 of 2 | 50% | 0 | 0 | 3:18 |
| Conor McGregor | 0 | 27 of 38 | 71% | 43 of 54 | 0 of 0 | --- | 1 | 0 | 0:00 |
Per Round
| Rd | Fighter | KD | Sig. Str. | Sig. Str. % | Total Str. | TD | TD % | Sub. Att | Rev. | Ctrl |
|---|---|---|---|---|---|---|---|---|---|---|
| 1 | Dustin Poirier | 0 | 36 of 66 | 54% | 36 of 66 | 1 of 2 | 50% | 0 | 0 | 3:18 |
| Conor McGregor | 0 | 27 of 38 | 71% | 43 of 54 | 0 of 0 | --- | 1 | 0 | 0:00 |
Significant Strikes
| Fighter | Sig. Str. | Sig. Str. % | Head | Body | Leg | Distance | Clinch | Ground |
|---|---|---|---|---|---|---|---|---|
| Dustin Poirier | 36 of 66 | 54% | 35 of 62 | 0 of 2 | 1 of 2 | 8 of 20 | 0 of 0 | 28 of 46 |
| Conor McGregor | 27 of 38 | 71% | 13 of 21 | 6 of 9 | 8 of 8 | 17 of 26 | 1 of 1 | 9 of 11 |
Significant Strikes Per Round
| Rd | Fighter | Sig. Str. | Sig. Str. % | Head | Body | Leg | Distance | Clinch | Ground |
|---|---|---|---|---|---|---|---|---|---|
| 1 | Dustin Poirier | 36 of 66 | 54% | 35 of 62 | 0 of 2 | 1 of 2 | 8 of 20 | 0 of 0 | 28 of 46 |
| Conor McGregor | 27 of 38 | 71% | 13 of 21 | 6 of 9 | 8 of 8 | 17 of 26 | 1 of 1 | 9 of 11 |
Angelo flips his pick from the last fight, now favoring Conor. He notes that in the first fight, Conor landed everything with power and had Dustin in trouble multiple times, but didn't capitalize due to pacing. He believes Conor will have a plan for the leg kicks this time and will get the job done. He also placed a bet on Conor by KO/TKO for plus odds.
Big Brady picks Conor McGregor to win by first-round knockout. He notes that Conor has the X-factor power, being the hardest hitter pound-for-pound, and that Poirier absorbs a lot of strikes (4.17 per minute). He expects Conor to make adjustments, stuff takedowns, check leg kicks, and keep the fight at range. He acknowledges Poirier's durability but believes Conor will land a knockout.
Cody picks Poirier based on Conor's fading cardio after the first round, Poirier's durability and leg kicks, and the American Top Team camp. He notes Conor's power early but expects Poirier to take over late. He hasn't bet yet, waiting to see how the press conferences affect Poirier's mindset.
Daniel Levi picks Dustin Poirier to win the trilogy. He emphasizes Poirier's superior cardio, output, and durability, noting that Poirier has the most knockouts in UFC lightweight history and has shown he can overcome adversity. He points out that since 2016, Poirier is 7-1 while McGregor is 1-3, and that McGregor struggles in deep waters and has diminishing durability. He predicts a submission win for Poirier, citing the check right hook, calf kicks, takedowns, and clinch work as key factors.
Jacob initially favored Dustin but switched to Conor after rewatching the first fight. He notes Conor landed everything in round one but paced himself too much. He thinks Conor will blitz early to avoid calf kicks and finish in the first round. He also mentions a possible staph infection on Conor's elbow, which could affect cardio and push Conor to an early finish.
I'm going with Poirier here, but I have no real confidence. I think Poirier's durability and cardio have improved at 155, and he can eat McGregor's shots now. McGregor might have a new game plan, but I expect Poirier to take over in the later rounds and finish him, probably in the third or fourth round. I'm not betting this fight myself, but I like Poirier inside the distance and the fight not going to decision.
Paul picks Poirier, citing Conor's durability issues and long layoffs. He notes Conor's power early but believes Poirier's durability and cardio will prevail. He mentions the distraction of Conor's trash talk and the Colby Covington sparring video, but still favors Poirier.
The Guru predicts Poirier will win by TKO in the third round. He expects McGregor to start strong, winning the first two rounds with good striking and body work, but Poirier's calf kicks and clinch work will wear McGregor down. By the third round, McGregor will fatigue, and Poirier will land a big elbow and follow-up shots to finish him against the cage. The Guru notes McGregor will have a more impressive performance than their first fight but the outcome will be the same.
Totals
| Fighter | KD | Sig. Str. | Sig. Str. % | Total Str. | TD | TD % | Sub. Att | Rev. | Ctrl |
|---|---|---|---|---|---|---|---|---|---|
| Dustin Poirier | 1 | 48 of 91 | 52% | 53 of 98 | 1 of 1 | 100% | 0 | 0 | 1:42 |
| Conor McGregor | 0 | 29 of 66 | 43% | 52 of 92 | 0 of 1 | 0% | 0 | 0 | 1:07 |
Per Round
| Rd | Fighter | KD | Sig. Str. | Sig. Str. % | Total Str. | TD | TD % | Sub. Att | Rev. | Ctrl |
|---|---|---|---|---|---|---|---|---|---|---|
| 1 | Dustin Poirier | 0 | 17 of 37 | 45% | 22 of 44 | 1 of 1 | 100% | 0 | 0 | 1:40 |
| Conor McGregor | 0 | 15 of 34 | 44% | 38 of 60 | 0 of 0 | --- | 0 | 0 | 1:07 | |
| 2 | Dustin Poirier | 1 | 31 of 54 | 57% | 31 of 54 | 0 of 0 | --- | 0 | 0 | 0:02 |
| Conor McGregor | 0 | 14 of 32 | 43% | 14 of 32 | 0 of 1 | 0% | 0 | 0 | 0:00 |
Significant Strikes
| Fighter | Sig. Str. | Sig. Str. % | Head | Body | Leg | Distance | Clinch | Ground |
|---|---|---|---|---|---|---|---|---|
| Dustin Poirier | 48 of 91 | 52% | 30 of 69 | 0 of 1 | 18 of 21 | 46 of 89 | 0 of 0 | 2 of 2 |
| Conor McGregor | 29 of 66 | 43% | 23 of 60 | 4 of 4 | 2 of 2 | 27 of 63 | 2 of 3 | 0 of 0 |
Significant Strikes Per Round
| Rd | Fighter | Sig. Str. | Sig. Str. % | Head | Body | Leg | Distance | Clinch | Ground |
|---|---|---|---|---|---|---|---|---|---|
| 1 | Dustin Poirier | 17 of 37 | 45% | 8 of 26 | 0 of 0 | 9 of 11 | 17 of 37 | 0 of 0 | 0 of 0 |
| Conor McGregor | 15 of 34 | 44% | 12 of 31 | 3 of 3 | 0 of 0 | 13 of 31 | 2 of 3 | 0 of 0 | |
| 2 | Dustin Poirier | 31 of 54 | 57% | 22 of 43 | 0 of 1 | 9 of 10 | 29 of 52 | 0 of 0 | 2 of 2 |
| Conor McGregor | 14 of 32 | 43% | 11 of 29 | 1 of 1 | 2 of 2 | 14 of 32 | 0 of 0 | 0 of 0 |
Big Brady picks Conor McGregor to win by first-round knockout, similar to their first fight. He notes McGregor's power and accuracy as key advantages, and believes Poirier's cardio won't be a factor because the fight won't go deep. He acknowledges Poirier could be a live dog but ultimately sides with McGregor's striking superiority.
Daniel Levi picks Conor McGregor to win early, citing McGregor's devastating power and ability to finish fights in the first round. He acknowledges Poirier's improved chin at lightweight and his path to victory if he survives the early storm, but believes McGregor's power is too much. Levi expresses personal rooting interest for Poirier but makes a logical pick for McGregor.
McGregor has the precision and power to replicate his first-round knockout from their first fight. Poirier is durable but has been knocked down by lesser power. McGregor's takedown defense is solid, and he should be able to keep the fight on the feet. Poirier's cardio advantage may not matter if McGregor lands early. I see McGregor winning by first-round KO.
The MMA Guru believes Conor McGregor's improved boxing, especially his left hand, will be too much for Dustin Poirier. He notes that Poirier has not thrown many kicks since his hip surgery and will rely on boxing, which plays into McGregor's strengths. He predicts McGregor will land a big left hand in the first round, knocking Poirier out cold around the four-minute mark, similar to the Michael Johnson KO. He dismisses the idea of a 60-second KO but is confident McGregor wins.
Totals
| Fighter | KD | Sig. Str. | Sig. Str. % | Total Str. | TD | TD % | Sub. Att | Rev. | Ctrl |
|---|---|---|---|---|---|---|---|---|---|
| Conor McGregor | 1 | 19 of 26 | 73% | 20 of 27 | 0 of 0 | --- | 0 | 0 | 0:13 |
| Donald Cerrone | 0 | 0 of 1 | 0% | 0 of 1 | 0 of 0 | --- | 0 | 0 | 0:00 |
Per Round
| Rd | Fighter | KD | Sig. Str. | Sig. Str. % | Total Str. | TD | TD % | Sub. Att | Rev. | Ctrl |
|---|---|---|---|---|---|---|---|---|---|---|
| 1 | Conor McGregor | 1 | 19 of 26 | 73% | 20 of 27 | 0 of 0 | --- | 0 | 0 | 0:13 |
| Donald Cerrone | 0 | 0 of 1 | 0% | 0 of 1 | 0 of 0 | --- | 0 | 0 | 0:00 |
Significant Strikes
| Fighter | Sig. Str. | Sig. Str. % | Head | Body | Leg | Distance | Clinch | Ground |
|---|---|---|---|---|---|---|---|---|
| Conor McGregor | 19 of 26 | 73% | 19 of 25 | 0 of 1 | 0 of 0 | 3 of 7 | 3 of 3 | 13 of 16 |
| Donald Cerrone | 0 of 1 | 0% | 0 of 0 | 0 of 1 | 0 of 0 | 0 of 1 | 0 of 0 | 0 of 0 |
Significant Strikes Per Round
| Rd | Fighter | Sig. Str. | Sig. Str. % | Head | Body | Leg | Distance | Clinch | Ground |
|---|---|---|---|---|---|---|---|---|---|
| 1 | Conor McGregor | 19 of 26 | 73% | 19 of 25 | 0 of 1 | 0 of 0 | 3 of 7 | 3 of 3 | 13 of 16 |
| Donald Cerrone | 0 of 1 | 0% | 0 of 0 | 0 of 1 | 0 of 0 | 0 of 1 | 0 of 0 | 0 of 0 |
Play-by-Play
View on SherdogRound 1
We have reached the welterweight headliner, as the first simultaneous two-division champ in company history in McGregor (21-4, 9-2 UFC) comes to blows with a man who holds a plethora of UFC records in "Cowboy" Cerrone (36-13, 1 NC; 23-10 UFC). These two have combined for 46 stoppages in their illustrious careers. Drawing the assignment for this marquee matchup is referee Herb Dean, the two men touch gloves, and it's on! McGregor leaps forward with a left hand immediately, and Cerrone clinches up quickly. A few shoulder strikes from McGregor bloody the nose up of Cerrone, and McGregor fires a fierce head kick that nails Cerrone; "Cowboy" is wobbled. Sensing he is hurt, McGregor charges forward and leaps in the air with a flying knee. Cerrone blocks it, but McGregor starts to swing with reckless abandon. Cerrone turtles up and falls over in pain, while "Notorious" rains down punches. Dean steps in to take a close look at the action, but Cerrone is unable to intelligently defend himself. McGregor is relentless, swarming "Cowboy" with punch after punch until Dean has to call the fight. The fight ending in under a minute, McGregor jumps on the top of the cage to celebrate. No post-fight shenanigans or antics ensue, and the two men embrace after the fight, and McGregor uses the opportunity on the microphone to celebrate his achievements and advertise his whiskey. Additionally, McGregor remarks that he would like to stay at welterweight and calls out every fighter in the division, not to mention Paul Felder in the commentary desk.
The Official Result
Conor McGregor def. Donald Cerrone R1 0:40 via TKO (Punches)
Daniel picks Conor McGregor to win by knockout, likely in the first round. He notes that McGregor's left hand is a huge factor and that Cerrone has historically folded under big lights. However, he questions McGregor's motivation and fatigue issues, but believes this is a tune-up fight for McGregor.
The host picks Conor McGregor to win by first-round KO, citing McGregor's range, speed, in-and-out movement, and left hand as key advantages. He believes Cerrone will struggle to deal with these attributes and that McGregor will set up a trap and land a clean left hand. However, he notes that if Cerrone's odds reach +300, he might place a small bet on Cerrone due to value, but his official prediction remains McGregor by first-round KO.
The host strongly favors Conor McGregor, citing his first-round focus and accuracy against Donald Cerrone's lack of head movement and slow starts. He notes Cerrone's recent KO loss to Justin Gaethje and the short turnaround (4 months), which raises chin concerns. He believes McGregor's takedown defense is underrated and that Cerrone's wrestling won't be effective. He predicts a first-round KO by McGregor.
Totals
| Fighter | KD | Sig. Str. | Sig. Str. % | Total Str. | TD | TD % | Sub. Att | Rev. | Ctrl |
|---|---|---|---|---|---|---|---|---|---|
| Khabib Nurmagomedov | 0 | 70 of 119 | 58% | 104 of 157 | 3 of 7 | 42% | 1 | 0 | 12:14 |
| Conor McGregor | 0 | 51 of 81 | 62% | 96 of 128 | 0 of 0 | --- | 0 | 0 | 0:00 |
Per Round
| Rd | Fighter | KD | Sig. Str. | Sig. Str. % | Total Str. | TD | TD % | Sub. Att | Rev. | Ctrl |
|---|---|---|---|---|---|---|---|---|---|---|
| 1 | Khabib Nurmagomedov | 0 | 7 of 9 | 77% | 18 of 21 | 1 of 2 | 50% | 0 | 0 | 4:08 |
| Conor McGregor | 0 | 6 of 7 | 85% | 39 of 40 | 0 of 0 | --- | 0 | 0 | 0:00 | |
| 2 | Khabib Nurmagomedov | 0 | 41 of 60 | 68% | 58 of 78 | 1 of 1 | 100% | 0 | 0 | 4:22 |
| Conor McGregor | 0 | 5 of 13 | 38% | 7 of 17 | 0 of 0 | --- | 0 | 0 | 0:00 | |
| 3 | Khabib Nurmagomedov | 0 | 15 of 37 | 40% | 17 of 39 | 0 of 3 | 0% | 0 | 0 | 1:47 |
| Conor McGregor | 0 | 34 of 52 | 65% | 44 of 62 | 0 of 0 | --- | 0 | 0 | 0:00 | |
| 4 | Khabib Nurmagomedov | 0 | 7 of 13 | 53% | 11 of 19 | 1 of 1 | 100% | 1 | 0 | 1:57 |
| Conor McGregor | 0 | 6 of 9 | 66% | 6 of 9 | 0 of 0 | --- | 0 | 0 | 0:00 |
Significant Strikes
| Fighter | Sig. Str. | Sig. Str. % | Head | Body | Leg | Distance | Clinch | Ground |
|---|---|---|---|---|---|---|---|---|
| Khabib Nurmagomedov | 70 of 119 | 58% | 58 of 105 | 11 of 13 | 1 of 1 | 24 of 53 | 1 of 3 | 45 of 63 |
| Conor McGregor | 51 of 81 | 62% | 34 of 60 | 16 of 19 | 1 of 2 | 35 of 65 | 10 of 10 | 6 of 6 |
Significant Strikes Per Round
| Rd | Fighter | Sig. Str. | Sig. Str. % | Head | Body | Leg | Distance | Clinch | Ground |
|---|---|---|---|---|---|---|---|---|---|
| 1 | Khabib Nurmagomedov | 7 of 9 | 77% | 7 of 8 | 0 of 1 | 0 of 0 | 0 of 1 | 0 of 0 | 7 of 8 |
| Conor McGregor | 6 of 7 | 85% | 6 of 6 | 0 of 1 | 0 of 0 | 1 of 2 | 0 of 0 | 5 of 5 | |
| 2 | Khabib Nurmagomedov | 41 of 60 | 68% | 33 of 52 | 8 of 8 | 0 of 0 | 5 of 9 | 0 of 0 | 36 of 51 |
| Conor McGregor | 5 of 13 | 38% | 3 of 10 | 2 of 3 | 0 of 0 | 3 of 11 | 1 of 1 | 1 of 1 | |
| 3 | Khabib Nurmagomedov | 15 of 37 | 40% | 12 of 33 | 2 of 3 | 1 of 1 | 14 of 34 | 1 of 3 | 0 of 0 |
| Conor McGregor | 34 of 52 | 65% | 22 of 39 | 12 of 13 | 0 of 0 | 25 of 43 | 9 of 9 | 0 of 0 | |
| 4 | Khabib Nurmagomedov | 7 of 13 | 53% | 6 of 12 | 1 of 1 | 0 of 0 | 5 of 9 | 0 of 0 | 2 of 4 |
| Conor McGregor | 6 of 9 | 66% | 3 of 5 | 2 of 2 | 1 of 2 | 6 of 9 | 0 of 0 | 0 of 0 |
Play-by-Play
View on SherdogRound 1
Referee Herb Dean will oversee tonight’s lightweight championship main event, with judges Derek Cleary, Sal D’Amato and Junichiro Kamijo scoring the bout should it complete the scheduled five rounds. The fighters are kept a few feet apart during final instructions, and they opt not to touch gloves. McGregor takes the center of the cage at the start and lobs a long left hand at Nurmagomedov, who circles to McGregor’s right around the outside. Nurmagomedov shoots a long single-leg, but McGregor sprawls, then stands and balances on one foot as “The Eagle” tries to spin him down. Nurmagomedov’s next effort yields a takedown, and plants McGregor at the base of the fence, triangling the Irishman’s legs to keep him grounded. Nurmagomedov complains that McGregor is grabbing his shorts, and referee Dean appears to swat McGregor’s hands away. Halfway through the round, Nurmagomedov remains on top, controlling McGregor’s leg and burying his head under the challenger’s chin. McGregor tries to post and stand, but Nurmagomedov still has control of his legs. McGregor frees his legs and tries butterfly guard; Nurmagomedov immediately passes to half guard and puts heavy pressure on McGregor’s torso. McGregor remains flat on his back in the final minute, trying to punch and palm strike but having little room to do so. Nurmagomedov postures up just before the horn to land a pair of punches, but McGregor saunters back to his corner with a smile on his face.
Sherdog Scores
Ben Duffy scores the round 10-9 Nurmagomedov
Brian Knapp scores the round 10-9 Nurmagomedov
Chris Nelson scores the round 10-9 Nurmagomedov
Round 2
McGregor takes the center again and fires a few kicks at Nurmagomedov, then narrowly misses with a leaping knee. Nurmagomedov comes back to the middle and floors McGregor with a missile right hand. McGregor gets back on unsteady legs and engages in a brief firefight before Nurmagomedov opts to double-leg and plow “The Notorious” to the floor. McGregor is flattened out, his right side flush to the fence as Nurmagomedov passes to side control. Nurmagomedov has an arm-triangle framed up, but he abandons it in favor of full mount. McGregor scrambles to recover full guard, but now Nurmagomedov is posturing up to land right hands to the body, a few left hands to the face. McGregor is eating some hard shots in between chatting with Nurmagomedov, who’s turning up the volume on his ground-and-pound toward the middle of the frame. Nurmagomedov stands over McGregor and bombs him with punches, both hands falling on the challenger’s face. Nurmagomedov can’t produce a finish, so he comes back to the ground, in side control on McGregor’s right side. Nurmagomedov leans across the body to try a kimura on McGregor’s left arm, but the fence gives him little room to work. McGregor sits up against the wall and leaves his neck exposed; Nurmagomedov gets a headlock but releases as McGregor stands up, now with 40 seconds on the clock. Nurmagomedov keeps him glued to the fence, with McGregor landing a few elbows to the side of the champion’s head in the closing seconds.
Sherdog Scores
Ben Duffy scores the round 10-8 Nurmagomedov
Brian Knapp scores the round 10-8 Nurmagomedov
Chris Nelson scores the round 10-8 Nurmagomedov
Round 3
McGregor comes at Nurmagomedov with uppercuts to the start the round, mixing up his punches to the body and head with middling success. Nurmagomedov snaps off a jab, deflects a hard left hand, but he’s not giving McGregor much to worry about in terms of offense. The challenger continues to press forward, now sprawls on a shot and stands Nurmagomedov back up. McGregor lands a clinch elbow, but Nurmagomedov pushes him away and socks him with a hard right. Two minutes in, Nurmagomedov initiates a clinch on the fence; this time, McGregor peels the Russian’s hands away and walks him back to the middle of the cage. Nurmagomedov doubles up on a jab; McGregor answers with a body blow. McGregor shrugs off another clinch, but Nurmagomedov comes back to drive him against the fence. McGregor climbs back up from a brief takedown as Nurmagomedov keeps him pinned to the wall with 60 seconds on the clock. With his hands being controlled, McGregor’s only option in this position is to throw knees, but he has little space to do so
Sherdog Scores
Ben Duffy scores the round 10-9 McGregor
Brian Knapp scores the round 10-9 McGregor
Chris Nelson scores the round 10-9 McGregor
Round 4
McGregor takes the center of the cage and keeps Nurmagomedov at a distance with long jabs and front kicks to the body. After a minute of this, however, Nurmagomedov bulldozes his way forward and plants McGregor on the ground at the foot of the fence. McGregor gets to his feet and puts both hands on the ground, but Nurmagomedov rips him away from the wall and tries to take the challenger’s back. McGregor rolls over, leaving Nurmagomedov in a three-quarter mount with McGregor trapping his right foot. Nurmagomedov abandons another arm-triangle choke setup but remains in full mount at the halfway point of the round. After eating a few solid left hands, McGregor rolls over, giving up his back. Within seconds, Nurmagomedov has his right arm wrapped around the Irishman’s jaw; seconds later, McGregor is tapping out.
What ensues is chaos. Nurmagomedov initially has words for McGregor, failing to stand up immediately after referee Dean stops the fight. The champion then climbs out of the cage and rushes into the crowd, apparently attacking someone from the McGregor camp who was sitting cageside. Meanwhile, inside the cage, one of Nurmagomedov’s cornermen -- Zubaira Tukhugov, according to UFC announcer Jon Anik -- reportedly attacked and landed a right hand on Conor McGregor. McGregor is escorted backstage by security and commissioners, while Nurmagomedov remains in the cage, demanding to have his hand raised.
“This is what I believe,” UFC President Dana White tells him. “If I put this belt on you, everybody’s gonna start throwing s--t into the Octagon.”
Moments later, Nurmagomedov is whisked backstage, and Bruce Buffer reads the official decision in an empty cage.
The Official Result
Khabib Nurmagomedov def. Conor McGregor via Submission (Neck Crank) R4 3:03
Totals
| Fighter | KD | Sig. Str. | Sig. Str. % | Total Str. | TD | TD % | Sub. Att | Rev. | Ctrl |
|---|---|---|---|---|---|---|---|---|---|
| Conor McGregor | 0 | 9 of 41 | 21% | 12 of 46 | 0 of 3 | 0% | 0 | 0 | 0:57 |
| Eddie Alvarez | 3 | 32 of 84 | 38% | 40 of 93 | 0 of 0 | --- | 0 | 0 | 0:54 |
Per Round
| Rd | Fighter | KD | Sig. Str. | Sig. Str. % | Total Str. | TD | TD % | Sub. Att | Rev. | Ctrl |
|---|---|---|---|---|---|---|---|---|---|---|
| 1 | Conor McGregor | 0 | 6 of 29 | 20% | 6 of 29 | 0 of 1 | 0% | 0 | 0 | 0:00 |
| Eddie Alvarez | 2 | 18 of 57 | 31% | 20 of 60 | 0 of 0 | --- | 0 | 0 | 0:52 | |
| 2 | Conor McGregor | 0 | 3 of 12 | 25% | 6 of 17 | 0 of 2 | 0% | 0 | 0 | 0:57 |
| Eddie Alvarez | 1 | 14 of 27 | 51% | 20 of 33 | 0 of 0 | --- | 0 | 0 | 0:02 |
Significant Strikes
| Fighter | Sig. Str. | Sig. Str. % | Head | Body | Leg | Distance | Clinch | Ground |
|---|---|---|---|---|---|---|---|---|
| Conor McGregor | 9 of 41 | 21% | 2 of 27 | 6 of 10 | 1 of 4 | 9 of 41 | 0 of 0 | 0 of 0 |
| Eddie Alvarez | 32 of 84 | 38% | 24 of 71 | 7 of 11 | 1 of 2 | 24 of 67 | 3 of 5 | 5 of 12 |
Significant Strikes Per Round
| Rd | Fighter | Sig. Str. | Sig. Str. % | Head | Body | Leg | Distance | Clinch | Ground |
|---|---|---|---|---|---|---|---|---|---|
| 1 | Conor McGregor | 6 of 29 | 20% | 1 of 18 | 4 of 7 | 1 of 4 | 6 of 29 | 0 of 0 | 0 of 0 |
| Eddie Alvarez | 18 of 57 | 31% | 15 of 51 | 3 of 6 | 0 of 0 | 13 of 45 | 1 of 2 | 4 of 10 | |
| 2 | Conor McGregor | 3 of 12 | 25% | 1 of 9 | 2 of 3 | 0 of 0 | 3 of 12 | 0 of 0 | 0 of 0 |
| Eddie Alvarez | 14 of 27 | 51% | 9 of 20 | 4 of 5 | 1 of 2 | 11 of 22 | 2 of 3 | 1 of 2 |
Play-by-Play
View on SherdogRound 1
Veteran official “Big” John McCarthy is the referee for tonight’s 155-pound title fight, with judges Sal D’Amato, Chris Lee and Jeff Mullen scoring the bout. Alvarez opens with a few hard chops to McGregor’s extended lead leg, while the challenger works from the center, pushing out toward Alvarez near the fence. Alvarez comes rushing inside with sloppy punches and gets clipped on the temple by McGregor’s counter left. The champion hits the deck for a second but scrambles back to his feet before McGregor can capitalize on the knockdown. Alvarez wants to tie up, gets shoved away by the Irishman. Alvarez rushes inside once more, and again he’s made to pay by McGregor’s left hand. McGregor floors Alvarez for the third time, now up against the fence, but Alvarez rolls up underneath and survives by clinging to McGregor’s legs. McGregor stacks him up but can’t finish the job before Alvarez is able to stand and dash away. McGregor is giving Alvarez no room, keeping him near to the fence and shutting down the American’s attempt at a double-leg. Alvarez digs into McGregor’s body with a punch and a front kick in the closing seconds of the round.
Sherdog Scores
Brian Knapp scores the round 10-8 McGregor
Chris Nelson scores the round 10-8 McGregor
Mike Sloan scores the round 10-9 McGregor
Round 2
McGregor finds a home for his left hand again early in round two; he’s also able to shut down another high double-leg attempt from Alvarez, who’s struggling to find a way into this fight. McGregor taunts the champion by standing in front of Alvarez with his hands behind his back. Alvarez takes some big swings but can’t find the mark, and instead he winds up pressing McGregor against the wall with an underhook. They hit the midway point of the round before they separate. When they do, McGregor steps forward and floors Alvarez with a left hand behind the ear and a follow-up right hook. Alvarez drops to his back in a daze, and referee McCarthy rushes in to rescue him from any further damage.
The Official Result
Conor McGregor def. Eddie Alvarez via TKO (Punches) R2 3:04
Totals
| Fighter | KD | Sig. Str. | Sig. Str. % | Total Str. | TD | TD % | Sub. Att | Rev. | Ctrl |
|---|---|---|---|---|---|---|---|---|---|
| Conor McGregor | 0 | 166 of 343 | 48% | 252 of 435 | 1 of 7 | 14% | 0 | 0 | 5:50 |
| Nate Diaz | 3 | 164 of 286 | 57% | 197 of 322 | 0 of 1 | 0% | 0 | 0 | 1:31 |
Per Round
| Rd | Fighter | KD | Sig. Str. | Sig. Str. % | Total Str. | TD | TD % | Sub. Att | Rev. | Ctrl |
|---|---|---|---|---|---|---|---|---|---|---|
| 1 | Conor McGregor | 0 | 25 of 73 | 34% | 25 of 73 | 0 of 0 | --- | 0 | 0 | 0:00 |
| Nate Diaz | 1 | 34 of 58 | 58% | 34 of 58 | 0 of 0 | --- | 0 | 0 | 0:05 | |
| 2 | Conor McGregor | 0 | 37 of 76 | 48% | 51 of 92 | 0 of 0 | --- | 0 | 0 | 0:30 |
| Nate Diaz | 2 | 34 of 70 | 48% | 36 of 73 | 0 of 0 | --- | 0 | 0 | 0:15 | |
| 3 | Conor McGregor | 0 | 49 of 87 | 56% | 79 of 117 | 0 of 2 | 0% | 0 | 0 | 1:31 |
| Nate Diaz | 0 | 26 of 45 | 57% | 37 of 58 | 0 of 0 | --- | 0 | 0 | 0:34 | |
| 4 | Conor McGregor | 0 | 36 of 63 | 57% | 48 of 76 | 0 of 1 | 0% | 0 | 0 | 1:07 |
| Nate Diaz | 0 | 46 of 76 | 60% | 56 of 86 | 0 of 0 | --- | 0 | 0 | 0:11 | |
| 5 | Conor McGregor | 0 | 19 of 44 | 43% | 49 of 77 | 1 of 4 | 25% | 0 | 0 | 2:42 |
| Nate Diaz | 0 | 24 of 37 | 64% | 34 of 47 | 0 of 1 | 0% | 0 | 0 | 0:26 |
Significant Strikes
| Fighter | Sig. Str. | Sig. Str. % | Head | Body | Leg | Distance | Clinch | Ground |
|---|---|---|---|---|---|---|---|---|
| Conor McGregor | 166 of 343 | 48% | 107 of 256 | 50 of 71 | 9 of 16 | 88 of 227 | 77 of 112 | 1 of 4 |
| Nate Diaz | 164 of 286 | 57% | 98 of 212 | 26 of 29 | 40 of 45 | 137 of 253 | 27 of 32 | 0 of 1 |
Significant Strikes Per Round
| Rd | Fighter | Sig. Str. | Sig. Str. % | Head | Body | Leg | Distance | Clinch | Ground |
|---|---|---|---|---|---|---|---|---|---|
| 1 | Conor McGregor | 25 of 73 | 34% | 11 of 49 | 6 of 11 | 8 of 13 | 25 of 73 | 0 of 0 | 0 of 0 |
| Nate Diaz | 34 of 58 | 58% | 14 of 35 | 3 of 4 | 17 of 19 | 34 of 58 | 0 of 0 | 0 of 0 | |
| 2 | Conor McGregor | 37 of 76 | 48% | 22 of 58 | 14 of 16 | 1 of 2 | 24 of 54 | 13 of 21 | 0 of 1 |
| Nate Diaz | 34 of 70 | 48% | 19 of 54 | 5 of 5 | 10 of 11 | 31 of 67 | 3 of 3 | 0 of 0 | |
| 3 | Conor McGregor | 49 of 87 | 56% | 40 of 72 | 9 of 15 | 0 of 0 | 18 of 42 | 31 of 45 | 0 of 0 |
| Nate Diaz | 26 of 45 | 57% | 17 of 35 | 4 of 4 | 5 of 6 | 22 of 41 | 4 of 4 | 0 of 0 | |
| 4 | Conor McGregor | 36 of 63 | 57% | 22 of 45 | 14 of 18 | 0 of 0 | 17 of 36 | 19 of 27 | 0 of 0 |
| Nate Diaz | 46 of 76 | 60% | 30 of 59 | 11 of 12 | 5 of 5 | 33 of 58 | 13 of 17 | 0 of 1 | |
| 5 | Conor McGregor | 19 of 44 | 43% | 12 of 32 | 7 of 11 | 0 of 1 | 4 of 22 | 14 of 19 | 1 of 3 |
| Nate Diaz | 24 of 37 | 64% | 18 of 29 | 3 of 4 | 3 of 4 | 17 of 29 | 7 of 8 | 0 of 0 |
Totals
| Fighter | KD | Sig. Str. | Sig. Str. % | Total Str. | TD | TD % | Sub. Att | Rev. | Ctrl |
|---|---|---|---|---|---|---|---|---|---|
| Nate Diaz | 0 | 61 of 140 | 43% | 66 of 145 | 0 of 1 | 0% | 0 | 1 | 0:39 |
| Conor McGregor | 0 | 77 of 152 | 50% | 89 of 169 | 1 of 1 | 100% | 2 | 0 | 1:12 |
Per Round
| Rd | Fighter | KD | Sig. Str. | Sig. Str. % | Total Str. | TD | TD % | Sub. Att | Rev. | Ctrl |
|---|---|---|---|---|---|---|---|---|---|---|
| 1 | Nate Diaz | 0 | 28 of 74 | 37% | 32 of 78 | 0 of 0 | --- | 0 | 1 | 0:35 |
| Conor McGregor | 0 | 23 of 62 | 37% | 26 of 68 | 1 of 1 | 100% | 0 | 0 | 0:25 | |
| 2 | Nate Diaz | 0 | 33 of 66 | 50% | 34 of 67 | 0 of 1 | 0% | 0 | 0 | 0:04 |
| Conor McGregor | 0 | 54 of 90 | 60% | 63 of 101 | 0 of 0 | --- | 2 | 0 | 0:47 |
Significant Strikes
| Fighter | Sig. Str. | Sig. Str. % | Head | Body | Leg | Distance | Clinch | Ground |
|---|---|---|---|---|---|---|---|---|
| Nate Diaz | 61 of 140 | 43% | 47 of 117 | 7 of 11 | 7 of 12 | 56 of 133 | 3 of 4 | 2 of 3 |
| Conor McGregor | 77 of 152 | 50% | 65 of 131 | 9 of 13 | 3 of 8 | 62 of 133 | 10 of 12 | 5 of 7 |
Significant Strikes Per Round
| Rd | Fighter | Sig. Str. | Sig. Str. % | Head | Body | Leg | Distance | Clinch | Ground |
|---|---|---|---|---|---|---|---|---|---|
| 1 | Nate Diaz | 28 of 74 | 37% | 18 of 58 | 4 of 6 | 6 of 10 | 26 of 71 | 0 of 0 | 2 of 3 |
| Conor McGregor | 23 of 62 | 37% | 16 of 50 | 5 of 6 | 2 of 6 | 23 of 61 | 0 of 0 | 0 of 1 | |
| 2 | Nate Diaz | 33 of 66 | 50% | 29 of 59 | 3 of 5 | 1 of 2 | 30 of 62 | 3 of 4 | 0 of 0 |
| Conor McGregor | 54 of 90 | 60% | 49 of 81 | 4 of 7 | 1 of 2 | 39 of 72 | 10 of 12 | 5 of 6 |
Play-by-Play
View on SherdogRound 1
Veteran referee John McCarthy is the third man in the cage for tonight’s welterweight headliner, with judges Derek Cleary, Jeff Mullen and Glenn Trowbridge scoring the bout. The fighters are kept feet apart during final instructions, and there is no touch of gloves before or after the opening bell. McGregor opens with a pair of outside leg kicks as he pushes out from the center, moving Diaz backward toward the fence. Two more kicks connect on Diaz’s lead right leg, then another after he tries to step toward the middle. Diaz checks the next kick and gives McGregor one of his own. McGregor steps forward and connects with a left hand over the top. Diaz seems to recover quickly, then gets sent to the floor with a straight left. McGregor allows the jiu-jitsu specialist to stand as the enter the third minute of the opening round. Another slapping leg kick connects for McGregor, who shakes his head after dodging a two-piece Diaz combo. McGregor finds his straight left again as he catches Diaz leaning. The American’s face is marked up already, and he seems increasingly concerned with checking McGregor’s low kicks. Diaz takes another leg kick and walks into a left hand. The next kick from McGregor catches Diaz planting to throw a punch, and it looks like the hardest shot so far. Diaz is starting to talk to McGregor, throwing up his hands and walking forward on the Irishman. McGregor closes the round with a straight left and right hook, and Diaz is still trying to talk to him after the horn.
Sherdog Scores
Brian Knapp scores the round 10-9 McGregor
Chris Nelson scores the round 10-9 McGregor
Mike Sloan scores the round 10-9 McGregor
Round 2
Diaz checks the first leg kick from McGregor, but the second one lands with authority. McGregor catches the American with another left hand, putting Diaz on his seat again. McGregor tells him to stand, then sends him right back to the floor with another combination. Diaz is bloodied now, leaking fluid from his nose as he staggers around the outside. Diaz grabs for McGregor’s legs, can’t get there, and now McGregor pushes forward with more leg kicks. Diaz tries to answer in kind, but there’s not much behind his kicks at this point. Three minutes remain in the second round, and McGregor is firmly in control of the bout. The leg kicks and left hands keep coming; though Diaz is trying to get back in the fight, the openings are simply not there. McGregor stands in front of Diaz but keeps his distance, diving inside to deliver more kicks and snappy punches. Suddenly, with 90 seconds left, Diaz starts to gain some steam. The Stockton native’s slapping punches are finding a home, and McGregor is being forced to his back foot. McGregor stumbles as he moves backward and eats a hard right as he finds his footing. Diaz swarms him against the fence, teeing off with both hands while McGregor tries to hold on and slow the pace. A looping right hand, now a body shot score for Diaz as the final seconds tick down.
Sherdog Scores
Brian Knapp scores the round 10-9 McGregor
Chris Nelson scores the round 10-9 McGregor
Mike Sloan scores the round 10-9 McGregor
Round 3
The welterweights have traded positions at the start of round three, with Diaz pushing out from the center and McGregor circling around the perimeter. Diaz steps out with a two-piece, pushes McGregor against the fence and looks for a trip takedown, but McGregor blocks it and reverses. Diaz spins him around again, now 80 seconds into the round. McGregor slaps with palm strikes to the sides of Diaz’s head as he fights off the clinch and trip. McGregor separates and pops Diaz with an elbow on the way out, then follows him to land a leg kick. Now it’s McGregor back in the middle and Diaz taking a breather, jawing at “The Notorious” between exchanges. McGregor throws a kick, but it’s snatched up by Diaz and used to run the Irish champ against the fence. Diaz scores with some short left hands, drops levels and tries a double-leg, but it’s blocked by McGregor. Halfway through the round, McGregor spins to take the outside position in the clinch. Diaz walks him along the fence, maybe looking for a trip, then reverses and lands body-head on the split. McGregor is jogging away as Diaz walks him down, drawing a mocking finger-point and more words from Diaz. A leg kick lands for McGregor, then a sweeping right hand for Diaz. They tie up away from the fence with 60 seconds left, then Diaz pops McGregor with a one-two on the break. Diaz shoves McGregor against the wall and begins teeing off with punches, rocking McGregor’s head from side to side. McGregor eats an uppercut, a right hook, but he’s still standing up against the fence. Final 20 seconds now, and Diaz is still at it, hurting McGregor with a body blow and a knee to the face. McGregor is purely defensive here, but he’ll survive to see the fourth round.
Sherdog Scores
Brian Knapp scores the round 10-9 Diaz
Chris Nelson scores the round 10-8 Diaz
Mike Sloan scores the round 10-9 Diaz
Round 4
Diaz opens the fourth round with a body shot; McGregor gets him back with a few hard leg kicks. Diaz is pawing at the blood running down his face, some of it into his right eye. It’s Diaz pressing forward, but McGregor is doing better work jabbing off his back foot in this frame. McGregor steps forward to land another stiff jab, now a leg kick that seems to sting Diaz, who hops away. Diaz shoots for a takedown at the fence, but McGregor stuffs it and peels away the American’s hands. Diaz switches to body shots, peppering both sides of McGregor’s ribcage with short punches. McGregor lands a short elbow in the clinch; Diaz gives him one in return and then goes back to holding McGregor against the wall. McGregor spins him around inside the final two minutes, then breaks away with a punching combo. A left hand from Diaz appears to wobble McGregor, but the featherweight ace responds with a punch of his own just seconds later. Body-head combination scores for McGregor, and Diaz looks to be fading here as rivers of blood continue to cover his face.
Sherdog Scores
Brian Knapp scores the round 10-9 McGregor
Chris Nelson scores the round 10-9 McGregor
Mike Sloan scores the round 10-9 McGregor
Round 5
Diaz walks forward and gets roughed up by a leaping knee, but he catches hold of McGregor and shoves him against the fence. McGregor reverses after 20 seconds and breaks away from the clinch, leaving Diaz with another punch to his grisly face. McGregor strolls away with his back turned, hands on his hips, and Diaz follows him to bring on another clinch. Diaz drops for yet another double-leg attempt, but McGregor blocks this one, too. Diaz switches to body shots, then slaps McGregor with a right hand. McGregor walks away with his hands on his hips again; Diaz walks after him and sticks out a middle finger. Diaz gets McGregor moving backward and leaning over, then tags him with a right hand. Now it’s a clinch from Diaz, pulling down McGregor’s head to tee him up for a knee which doesn’t materialize. Diaz scores with a knee to the body, tries another takedown and gets blocked by McGregor, who takes a look up at the clock and sees 90 seconds remaining. Diaz is doing good work in the clinch but he whiffs on a slashing elbow and allows McGregor to spin him around. McGregor hits a trip takedown, but Diaz is back on his feet seconds later. Down to the final half minute, Diaz continues to pepper with short punches in the tie-up. He finally trips McGregor to the ground with only moments to go, and Diaz closes out the fight with some ground-and-pound.
Sherdog Scores
Brian Knapp scores the round 10-9 Diaz (48-47 McGregor)
Chris Nelson scores the round 10-9 Diaz (47-47 Draw)
Mike Sloan scores the round 10-9 Diaz (48-47 McGregor)
The Official Result
Conor McGregor def. Nate Diaz via Majority Decision (48-47, 48-47, 47-47) R5 5:00
Dennis Siver - Fight History
Totals
| Fighter | KD | Sig. Str. | Sig. Str. % | Total Str. | TD | TD % | Sub. Att | Rev. | Ctrl |
|---|---|---|---|---|---|---|---|---|---|
| Dennis Siver | 1 | 57 of 107 | 53% | 65 of 116 | 0 of 0 | --- | 0 | 0 | 2:02 |
| B.J. Penn | 0 | 103 of 280 | 36% | 120 of 300 | 0 of 1 | 0% | 0 | 0 | 0:11 |
Per Round
| Rd | Fighter | KD | Sig. Str. | Sig. Str. % | Total Str. | TD | TD % | Sub. Att | Rev. | Ctrl |
|---|---|---|---|---|---|---|---|---|---|---|
| 1 | Dennis Siver | 0 | 22 of 39 | 56% | 27 of 44 | 0 of 0 | --- | 0 | 0 | 0:12 |
| B.J. Penn | 0 | 26 of 98 | 26% | 29 of 102 | 0 of 1 | 0% | 0 | 0 | 0:11 | |
| 2 | Dennis Siver | 1 | 21 of 41 | 51% | 24 of 45 | 0 of 0 | --- | 0 | 0 | 1:50 |
| B.J. Penn | 0 | 21 of 65 | 32% | 35 of 81 | 0 of 0 | --- | 0 | 0 | 0:00 | |
| 3 | Dennis Siver | 0 | 14 of 27 | 51% | 14 of 27 | 0 of 0 | --- | 0 | 0 | 0:00 |
| B.J. Penn | 0 | 56 of 117 | 47% | 56 of 117 | 0 of 0 | --- | 0 | 0 | 0:00 |
Significant Strikes
| Fighter | Sig. Str. | Sig. Str. % | Head | Body | Leg | Distance | Clinch | Ground |
|---|---|---|---|---|---|---|---|---|
| Dennis Siver | 57 of 107 | 53% | 47 of 95 | 10 of 12 | 0 of 0 | 49 of 95 | 4 of 4 | 4 of 8 |
| B.J. Penn | 103 of 280 | 36% | 59 of 199 | 9 of 29 | 35 of 52 | 103 of 275 | 0 of 5 | 0 of 0 |
Significant Strikes Per Round
| Rd | Fighter | Sig. Str. | Sig. Str. % | Head | Body | Leg | Distance | Clinch | Ground |
|---|---|---|---|---|---|---|---|---|---|
| 1 | Dennis Siver | 22 of 39 | 56% | 19 of 36 | 3 of 3 | 0 of 0 | 18 of 35 | 4 of 4 | 0 of 0 |
| B.J. Penn | 26 of 98 | 26% | 15 of 70 | 4 of 16 | 7 of 12 | 26 of 93 | 0 of 5 | 0 of 0 | |
| 2 | Dennis Siver | 21 of 41 | 51% | 15 of 34 | 6 of 7 | 0 of 0 | 17 of 33 | 0 of 0 | 4 of 8 |
| B.J. Penn | 21 of 65 | 32% | 12 of 47 | 2 of 6 | 7 of 12 | 21 of 65 | 0 of 0 | 0 of 0 | |
| 3 | Dennis Siver | 14 of 27 | 51% | 13 of 25 | 1 of 2 | 0 of 0 | 14 of 27 | 0 of 0 | 0 of 0 |
| B.J. Penn | 56 of 117 | 47% | 32 of 82 | 3 of 7 | 21 of 28 | 56 of 117 | 0 of 0 | 0 of 0 |
Totals
| Fighter | KD | Sig. Str. | Sig. Str. % | Total Str. | TD | TD % | Sub. Att | Rev. | Ctrl |
|---|---|---|---|---|---|---|---|---|---|
| Tatsuya Kawajiri | 0 | 22 of 60 | 36% | 90 of 137 | 0 of 0 | --- | 1 | 0 | 0:00 |
| Dennis Siver | 0 | 22 of 39 | 56% | 47 of 68 | 4 of 14 | 28% | 0 | 0 | 8:29 |
Per Round
| Rd | Fighter | KD | Sig. Str. | Sig. Str. % | Total Str. | TD | TD % | Sub. Att | Rev. | Ctrl |
|---|---|---|---|---|---|---|---|---|---|---|
| 1 | Tatsuya Kawajiri | 0 | 13 of 33 | 39% | 24 of 46 | 0 of 0 | --- | 0 | 0 | 0:00 |
| Dennis Siver | 0 | 7 of 15 | 46% | 12 of 22 | 1 of 6 | 16% | 0 | 0 | 1:36 | |
| 2 | Tatsuya Kawajiri | 0 | 5 of 16 | 31% | 27 of 42 | 0 of 0 | --- | 0 | 0 | 0:00 |
| Dennis Siver | 0 | 6 of 10 | 60% | 19 of 25 | 1 of 2 | 50% | 0 | 0 | 3:22 | |
| 3 | Tatsuya Kawajiri | 0 | 4 of 11 | 36% | 39 of 49 | 0 of 0 | --- | 1 | 0 | 0:00 |
| Dennis Siver | 0 | 9 of 14 | 64% | 16 of 21 | 2 of 6 | 33% | 0 | 0 | 3:31 |
Significant Strikes
| Fighter | Sig. Str. | Sig. Str. % | Head | Body | Leg | Distance | Clinch | Ground |
|---|---|---|---|---|---|---|---|---|
| Tatsuya Kawajiri | 22 of 60 | 36% | 10 of 45 | 4 of 5 | 8 of 10 | 20 of 58 | 2 of 2 | 0 of 0 |
| Dennis Siver | 22 of 39 | 56% | 15 of 31 | 6 of 7 | 1 of 1 | 17 of 34 | 0 of 0 | 5 of 5 |
Significant Strikes Per Round
| Rd | Fighter | Sig. Str. | Sig. Str. % | Head | Body | Leg | Distance | Clinch | Ground |
|---|---|---|---|---|---|---|---|---|---|
| 1 | Tatsuya Kawajiri | 13 of 33 | 39% | 7 of 27 | 3 of 3 | 3 of 3 | 11 of 31 | 2 of 2 | 0 of 0 |
| Dennis Siver | 7 of 15 | 46% | 4 of 11 | 3 of 4 | 0 of 0 | 7 of 15 | 0 of 0 | 0 of 0 | |
| 2 | Tatsuya Kawajiri | 5 of 16 | 31% | 1 of 11 | 1 of 1 | 3 of 4 | 5 of 16 | 0 of 0 | 0 of 0 |
| Dennis Siver | 6 of 10 | 60% | 3 of 7 | 2 of 2 | 1 of 1 | 5 of 9 | 0 of 0 | 1 of 1 | |
| 3 | Tatsuya Kawajiri | 4 of 11 | 36% | 2 of 7 | 0 of 1 | 2 of 3 | 4 of 11 | 0 of 0 | 0 of 0 |
| Dennis Siver | 9 of 14 | 64% | 8 of 13 | 1 of 1 | 0 of 0 | 5 of 10 | 0 of 0 | 4 of 4 |
Totals
| Fighter | KD | Sig. Str. | Sig. Str. % | Total Str. | TD | TD % | Sub. Att | Rev. | Ctrl |
|---|---|---|---|---|---|---|---|---|---|
| Conor McGregor | 1 | 64 of 119 | 53% | 65 of 120 | 0 of 0 | --- | 0 | 0 | 0:26 |
| Dennis Siver | 0 | 32 of 104 | 30% | 33 of 105 | 0 of 3 | 0% | 0 | 0 | 0:03 |
Per Round
| Rd | Fighter | KD | Sig. Str. | Sig. Str. % | Total Str. | TD | TD % | Sub. Att | Rev. | Ctrl |
|---|---|---|---|---|---|---|---|---|---|---|
| 1 | Conor McGregor | 0 | 43 of 87 | 49% | 43 of 87 | 0 of 0 | --- | 0 | 0 | 0:00 |
| Dennis Siver | 0 | 27 of 82 | 32% | 28 of 83 | 0 of 3 | 0% | 0 | 0 | 0:03 | |
| 2 | Conor McGregor | 1 | 21 of 32 | 65% | 22 of 33 | 0 of 0 | --- | 0 | 0 | 0:26 |
| Dennis Siver | 0 | 5 of 22 | 22% | 5 of 22 | 0 of 0 | --- | 0 | 0 | 0:00 |
Significant Strikes
| Fighter | Sig. Str. | Sig. Str. % | Head | Body | Leg | Distance | Clinch | Ground |
|---|---|---|---|---|---|---|---|---|
| Conor McGregor | 64 of 119 | 53% | 49 of 99 | 12 of 16 | 3 of 4 | 47 of 96 | 10 of 14 | 7 of 9 |
| Dennis Siver | 32 of 104 | 30% | 13 of 68 | 4 of 13 | 15 of 23 | 30 of 98 | 2 of 6 | 0 of 0 |
Significant Strikes Per Round
| Rd | Fighter | Sig. Str. | Sig. Str. % | Head | Body | Leg | Distance | Clinch | Ground |
|---|---|---|---|---|---|---|---|---|---|
| 1 | Conor McGregor | 43 of 87 | 49% | 29 of 68 | 11 of 15 | 3 of 4 | 33 of 73 | 10 of 14 | 0 of 0 |
| Dennis Siver | 27 of 82 | 32% | 12 of 53 | 3 of 9 | 12 of 20 | 25 of 76 | 2 of 6 | 0 of 0 | |
| 2 | Conor McGregor | 21 of 32 | 65% | 20 of 31 | 1 of 1 | 0 of 0 | 14 of 23 | 0 of 0 | 7 of 9 |
| Dennis Siver | 5 of 22 | 22% | 1 of 15 | 1 of 4 | 3 of 3 | 5 of 22 | 0 of 0 | 0 of 0 |
Play-by-Play
View on SherdogRound 1
The featherweights trade left body kicks, then McGregor sends a spinning wheel kick way over the head of Siver. McGregor already switching stances in the middle of the cage, then hits Siver with a spinning back kick. Switch-step jumping head kick by McGregor is blocked by Siver, then another spinning wheel kick goes wife. Siver shoots in and gets rejected. Siver lands a right kick to the body as McGregor steps in, but the Irishman responds with a clean left hand. Flying knee lands for McGregor, but Siver lands a hook when he lands. Another switch-step head kick from McGregor, but most of it is blocked this time. Left head kick and a right cross land for McGregor, then a left cross. The “Notorious” one is starting to land harder, cleaner shots. Siver's face is already visibly reddened. A jumping knee for McGregor lands, then a left cross knocks Siver's mouthguard out. McGregor is stalking Siver, but not active enough, as Herb Dean halts the action for a moment to put Siver's mouthguard back in. On the restart, McGregor lands another left cross, then powers out of a Siver double-leg takedown which puts him on his seat for a second. McGregor hops back to his seat and continues unloading on Siver. This is turning into a very casual beating. Siver's left eye is busted up as McGregor keeps lancing him with kicks and spearing him with long left crosses. As the round ends, McGregor has Siver trapped on the cage, unloading with both hands.
Sherdog Scores
Jordan Breen scores the round 10-8 McGregor
TJ De Santis scores the round 10-9 McGregor
Brian Knapp scores the round 10-9 McGregor
Round 2
The second round begins where the first ended, with McGregor stalking and taunting Siver. The Irishman lands another left head kick, then a left cross. McGregor's left hand seems tethered to Siver. Siver sneaks a clean hook or body kick in every so often, but he's so overwhelmed by McGregor's volume and power that it hardly seems to matter. Another streak of hard left hands from McGregor have Siver's face badly bloodied. McGregor lands yet another clean piston of a left hand, this one putting Siver on his back. Siver's still conscious, but he's beyond the point of defeated. McGregor casually sits into full mount, punching and elbowing away until referee Herb Dean rescues Siver. McGregor immediately runs out of the cage and tries to confront UFC featherweight champion Jose Aldo, but is halted by security. From several feet away, McGregor screams at Aldo, who grins in amusement from his cageside seat.
The Official Result
Conor McGregor def. Dennis Siver via TKO (Punches) R2 1:54
Totals
| Fighter | KD | Sig. Str. | Sig. Str. % | Total Str. | TD | TD % | Sub. Att | Rev. | Ctrl |
|---|---|---|---|---|---|---|---|---|---|
| Dennis Siver | 0 | 33 of 86 | 38% | 109 of 171 | 3 of 3 | 100% | 1 | 2 | 8:51 |
| Charles Rosa | 0 | 22 of 91 | 24% | 29 of 99 | 2 of 4 | 50% | 1 | 3 | 0:55 |
Per Round
| Rd | Fighter | KD | Sig. Str. | Sig. Str. % | Total Str. | TD | TD % | Sub. Att | Rev. | Ctrl |
|---|---|---|---|---|---|---|---|---|---|---|
| 1 | Dennis Siver | 0 | 12 of 40 | 30% | 23 of 52 | 1 of 1 | 100% | 1 | 0 | 2:04 |
| Charles Rosa | 0 | 9 of 49 | 18% | 9 of 49 | 0 of 1 | 0% | 0 | 0 | 0:00 | |
| 2 | Dennis Siver | 0 | 11 of 30 | 36% | 28 of 50 | 1 of 1 | 100% | 0 | 2 | 2:52 |
| Charles Rosa | 0 | 10 of 29 | 34% | 15 of 35 | 1 of 2 | 50% | 0 | 2 | 0:42 | |
| 3 | Dennis Siver | 0 | 10 of 16 | 62% | 58 of 69 | 1 of 1 | 100% | 0 | 0 | 3:55 |
| Charles Rosa | 0 | 3 of 13 | 23% | 5 of 15 | 1 of 1 | 100% | 1 | 1 | 0:13 |
Significant Strikes
| Fighter | Sig. Str. | Sig. Str. % | Head | Body | Leg | Distance | Clinch | Ground |
|---|---|---|---|---|---|---|---|---|
| Dennis Siver | 33 of 86 | 38% | 22 of 71 | 4 of 7 | 7 of 8 | 31 of 84 | 0 of 0 | 2 of 2 |
| Charles Rosa | 22 of 91 | 24% | 15 of 73 | 2 of 8 | 5 of 10 | 22 of 89 | 0 of 0 | 0 of 2 |
Significant Strikes Per Round
| Rd | Fighter | Sig. Str. | Sig. Str. % | Head | Body | Leg | Distance | Clinch | Ground |
|---|---|---|---|---|---|---|---|---|---|
| 1 | Dennis Siver | 12 of 40 | 30% | 8 of 33 | 2 of 4 | 2 of 3 | 12 of 40 | 0 of 0 | 0 of 0 |
| Charles Rosa | 9 of 49 | 18% | 6 of 38 | 0 of 5 | 3 of 6 | 9 of 49 | 0 of 0 | 0 of 0 | |
| 2 | Dennis Siver | 11 of 30 | 36% | 6 of 24 | 1 of 2 | 4 of 4 | 11 of 30 | 0 of 0 | 0 of 0 |
| Charles Rosa | 10 of 29 | 34% | 8 of 24 | 1 of 2 | 1 of 3 | 10 of 29 | 0 of 0 | 0 of 0 | |
| 3 | Dennis Siver | 10 of 16 | 62% | 8 of 14 | 1 of 1 | 1 of 1 | 8 of 14 | 0 of 0 | 2 of 2 |
| Charles Rosa | 3 of 13 | 23% | 1 of 11 | 1 of 1 | 1 of 1 | 3 of 11 | 0 of 0 | 0 of 2 |
Totals
| Fighter | KD | Sig. Str. | Sig. Str. % | Total Str. | TD | TD % | Sub. Att | Rev. | Ctrl |
|---|---|---|---|---|---|---|---|---|---|
| Dennis Siver | 0 | 54 of 130 | 41% | 191 of 311 | 2 of 2 | 100% | 0 | 0 | 5:55 |
| Manvel Gamburyan | 0 | 14 of 46 | 30% | 36 of 75 | 3 of 3 | 100% | 0 | 0 | 2:55 |
Per Round
| Rd | Fighter | KD | Sig. Str. | Sig. Str. % | Total Str. | TD | TD % | Sub. Att | Rev. | Ctrl |
|---|---|---|---|---|---|---|---|---|---|---|
| 1 | Dennis Siver | 0 | 24 of 60 | 40% | 59 of 103 | 1 of 1 | 100% | 0 | 0 | 2:00 |
| Manvel Gamburyan | 0 | 3 of 15 | 20% | 3 of 15 | 1 of 1 | 100% | 0 | 0 | 0:11 | |
| 2 | Dennis Siver | 0 | 20 of 43 | 46% | 63 of 91 | 0 of 0 | --- | 0 | 0 | 0:00 |
| Manvel Gamburyan | 0 | 7 of 19 | 36% | 22 of 40 | 2 of 2 | 100% | 0 | 0 | 2:44 | |
| 3 | Dennis Siver | 0 | 10 of 27 | 37% | 69 of 117 | 1 of 1 | 100% | 0 | 0 | 3:55 |
| Manvel Gamburyan | 0 | 4 of 12 | 33% | 11 of 20 | 0 of 0 | --- | 0 | 0 | 0:00 |
Significant Strikes
| Fighter | Sig. Str. | Sig. Str. % | Head | Body | Leg | Distance | Clinch | Ground |
|---|---|---|---|---|---|---|---|---|
| Dennis Siver | 54 of 130 | 41% | 28 of 97 | 4 of 8 | 22 of 25 | 37 of 100 | 3 of 11 | 14 of 19 |
| Manvel Gamburyan | 14 of 46 | 30% | 12 of 41 | 1 of 3 | 1 of 2 | 6 of 25 | 1 of 5 | 7 of 16 |
Significant Strikes Per Round
| Rd | Fighter | Sig. Str. | Sig. Str. % | Head | Body | Leg | Distance | Clinch | Ground |
|---|---|---|---|---|---|---|---|---|---|
| 1 | Dennis Siver | 24 of 60 | 40% | 14 of 46 | 0 of 2 | 10 of 12 | 15 of 43 | 1 of 6 | 8 of 11 |
| Manvel Gamburyan | 3 of 15 | 20% | 2 of 12 | 1 of 2 | 0 of 1 | 2 of 11 | 1 of 4 | 0 of 0 | |
| 2 | Dennis Siver | 20 of 43 | 46% | 9 of 31 | 3 of 3 | 8 of 9 | 16 of 36 | 2 of 3 | 2 of 4 |
| Manvel Gamburyan | 7 of 19 | 36% | 6 of 18 | 0 of 0 | 1 of 1 | 2 of 9 | 0 of 0 | 5 of 10 | |
| 3 | Dennis Siver | 10 of 27 | 37% | 5 of 20 | 1 of 3 | 4 of 4 | 6 of 21 | 0 of 2 | 4 of 4 |
| Manvel Gamburyan | 4 of 12 | 33% | 4 of 11 | 0 of 1 | 0 of 0 | 2 of 5 | 0 of 1 | 2 of 6 |
Totals
| Fighter | KD | Sig. Str. | Sig. Str. % | Total Str. | TD | TD % | Sub. Att | Rev. | Ctrl |
|---|---|---|---|---|---|---|---|---|---|
| Cub Swanson | 1 | 43 of 101 | 42% | 47 of 105 | 1 of 1 | 100% | 0 | 0 | 1:03 |
| Dennis Siver | 0 | 26 of 144 | 18% | 54 of 174 | 1 of 4 | 25% | 0 | 1 | 3:13 |
Per Round
| Rd | Fighter | KD | Sig. Str. | Sig. Str. % | Total Str. | TD | TD % | Sub. Att | Rev. | Ctrl |
|---|---|---|---|---|---|---|---|---|---|---|
| 1 | Cub Swanson | 0 | 3 of 13 | 23% | 6 of 16 | 0 of 0 | --- | 0 | 0 | 0:00 |
| Dennis Siver | 0 | 10 of 36 | 27% | 38 of 66 | 1 of 1 | 100% | 0 | 0 | 3:06 | |
| 2 | Cub Swanson | 0 | 17 of 49 | 34% | 18 of 50 | 1 of 1 | 100% | 0 | 0 | 0:50 |
| Dennis Siver | 0 | 12 of 75 | 16% | 12 of 75 | 0 of 2 | 0% | 0 | 1 | 0:07 | |
| 3 | Cub Swanson | 1 | 23 of 39 | 58% | 23 of 39 | 0 of 0 | --- | 0 | 0 | 0:13 |
| Dennis Siver | 0 | 4 of 33 | 12% | 4 of 33 | 0 of 1 | 0% | 0 | 0 | 0:00 |
Significant Strikes
| Fighter | Sig. Str. | Sig. Str. % | Head | Body | Leg | Distance | Clinch | Ground |
|---|---|---|---|---|---|---|---|---|
| Cub Swanson | 43 of 101 | 42% | 32 of 81 | 6 of 9 | 5 of 11 | 29 of 79 | 0 of 0 | 14 of 22 |
| Dennis Siver | 26 of 144 | 18% | 10 of 111 | 6 of 10 | 10 of 23 | 24 of 140 | 0 of 0 | 2 of 4 |
Significant Strikes Per Round
| Rd | Fighter | Sig. Str. | Sig. Str. % | Head | Body | Leg | Distance | Clinch | Ground |
|---|---|---|---|---|---|---|---|---|---|
| 1 | Cub Swanson | 3 of 13 | 23% | 0 of 9 | 0 of 1 | 3 of 3 | 3 of 13 | 0 of 0 | 0 of 0 |
| Dennis Siver | 10 of 36 | 27% | 4 of 25 | 3 of 4 | 3 of 7 | 8 of 32 | 0 of 0 | 2 of 4 | |
| 2 | Cub Swanson | 17 of 49 | 34% | 12 of 37 | 4 of 6 | 1 of 6 | 11 of 40 | 0 of 0 | 6 of 9 |
| Dennis Siver | 12 of 75 | 16% | 4 of 59 | 3 of 5 | 5 of 11 | 12 of 75 | 0 of 0 | 0 of 0 | |
| 3 | Cub Swanson | 23 of 39 | 58% | 20 of 35 | 2 of 2 | 1 of 2 | 15 of 26 | 0 of 0 | 8 of 13 |
| Dennis Siver | 4 of 33 | 12% | 2 of 27 | 0 of 1 | 2 of 5 | 4 of 33 | 0 of 0 | 0 of 0 |
Totals
| Fighter | KD | Sig. Str. | Sig. Str. % | Total Str. | TD | TD % | Sub. Att | Rev. | Ctrl |
|---|---|---|---|---|---|---|---|---|---|
| Dennis Siver | 0 | 128 of 273 | 46% | 222 of 389 | 2 of 4 | 50% | 0 | 0 | 7:02 |
| Nam Phan | 0 | 24 of 120 | 20% | 24 of 120 | 0 of 0 | --- | 0 | 0 | 0:00 |
Per Round
| Rd | Fighter | KD | Sig. Str. | Sig. Str. % | Total Str. | TD | TD % | Sub. Att | Rev. | Ctrl |
|---|---|---|---|---|---|---|---|---|---|---|
| 1 | Dennis Siver | 0 | 63 of 140 | 45% | 63 of 140 | 0 of 2 | 0% | 0 | 0 | 0:01 |
| Nam Phan | 0 | 15 of 66 | 22% | 15 of 66 | 0 of 0 | --- | 0 | 0 | 0:00 | |
| 2 | Dennis Siver | 0 | 36 of 89 | 40% | 65 of 128 | 1 of 1 | 100% | 0 | 0 | 2:36 |
| Nam Phan | 0 | 8 of 45 | 17% | 8 of 45 | 0 of 0 | --- | 0 | 0 | 0:00 | |
| 3 | Dennis Siver | 0 | 29 of 44 | 65% | 94 of 121 | 1 of 1 | 100% | 0 | 0 | 4:25 |
| Nam Phan | 0 | 1 of 9 | 11% | 1 of 9 | 0 of 0 | --- | 0 | 0 | 0:00 |
Significant Strikes
| Fighter | Sig. Str. | Sig. Str. % | Head | Body | Leg | Distance | Clinch | Ground |
|---|---|---|---|---|---|---|---|---|
| Dennis Siver | 128 of 273 | 46% | 91 of 216 | 15 of 32 | 22 of 25 | 87 of 222 | 2 of 3 | 39 of 48 |
| Nam Phan | 24 of 120 | 20% | 17 of 94 | 2 of 19 | 5 of 7 | 24 of 120 | 0 of 0 | 0 of 0 |
Significant Strikes Per Round
| Rd | Fighter | Sig. Str. | Sig. Str. % | Head | Body | Leg | Distance | Clinch | Ground |
|---|---|---|---|---|---|---|---|---|---|
| 1 | Dennis Siver | 63 of 140 | 45% | 38 of 106 | 7 of 14 | 18 of 20 | 61 of 137 | 2 of 3 | 0 of 0 |
| Nam Phan | 15 of 66 | 22% | 10 of 52 | 2 of 11 | 3 of 3 | 15 of 66 | 0 of 0 | 0 of 0 | |
| 2 | Dennis Siver | 36 of 89 | 40% | 29 of 72 | 4 of 13 | 3 of 4 | 22 of 72 | 0 of 0 | 14 of 17 |
| Nam Phan | 8 of 45 | 17% | 6 of 34 | 0 of 8 | 2 of 3 | 8 of 45 | 0 of 0 | 0 of 0 | |
| 3 | Dennis Siver | 29 of 44 | 65% | 24 of 38 | 4 of 5 | 1 of 1 | 4 of 13 | 0 of 0 | 25 of 31 |
| Nam Phan | 1 of 9 | 11% | 1 of 8 | 0 of 0 | 0 of 1 | 1 of 9 | 0 of 0 | 0 of 0 |
Totals
| Fighter | KD | Sig. Str. | Sig. Str. % | Total Str. | TD | TD % | Sub. Att | Rev. | Ctrl |
|---|---|---|---|---|---|---|---|---|---|
| Dennis Siver | 0 | 68 of 203 | 33% | 78 of 216 | 0 of 6 | 0% | 0 | 0 | 0:33 |
| Diego Nunes | 0 | 49 of 125 | 39% | 49 of 125 | 0 of 0 | --- | 0 | 0 | 0:00 |
Per Round
| Rd | Fighter | KD | Sig. Str. | Sig. Str. % | Total Str. | TD | TD % | Sub. Att | Rev. | Ctrl |
|---|---|---|---|---|---|---|---|---|---|---|
| 1 | Dennis Siver | 0 | 21 of 54 | 38% | 21 of 54 | 0 of 1 | 0% | 0 | 0 | 0:05 |
| Diego Nunes | 0 | 18 of 40 | 45% | 18 of 40 | 0 of 0 | --- | 0 | 0 | 0:00 | |
| 2 | Dennis Siver | 0 | 22 of 70 | 31% | 22 of 70 | 0 of 2 | 0% | 0 | 0 | 0:00 |
| Diego Nunes | 0 | 9 of 38 | 23% | 9 of 38 | 0 of 0 | --- | 0 | 0 | 0:00 | |
| 3 | Dennis Siver | 0 | 25 of 79 | 31% | 35 of 92 | 0 of 3 | 0% | 0 | 0 | 0:28 |
| Diego Nunes | 0 | 22 of 47 | 46% | 22 of 47 | 0 of 0 | --- | 0 | 0 | 0:00 |
Significant Strikes
| Fighter | Sig. Str. | Sig. Str. % | Head | Body | Leg | Distance | Clinch | Ground |
|---|---|---|---|---|---|---|---|---|
| Dennis Siver | 68 of 203 | 33% | 31 of 143 | 17 of 24 | 20 of 36 | 58 of 183 | 10 of 20 | 0 of 0 |
| Diego Nunes | 49 of 125 | 39% | 11 of 58 | 15 of 20 | 23 of 47 | 35 of 106 | 14 of 19 | 0 of 0 |
Significant Strikes Per Round
| Rd | Fighter | Sig. Str. | Sig. Str. % | Head | Body | Leg | Distance | Clinch | Ground |
|---|---|---|---|---|---|---|---|---|---|
| 1 | Dennis Siver | 21 of 54 | 38% | 11 of 37 | 6 of 8 | 4 of 9 | 19 of 52 | 2 of 2 | 0 of 0 |
| Diego Nunes | 18 of 40 | 45% | 3 of 16 | 6 of 9 | 9 of 15 | 14 of 34 | 4 of 6 | 0 of 0 | |
| 2 | Dennis Siver | 22 of 70 | 31% | 7 of 49 | 6 of 9 | 9 of 12 | 19 of 66 | 3 of 4 | 0 of 0 |
| Diego Nunes | 9 of 38 | 23% | 0 of 16 | 3 of 3 | 6 of 19 | 8 of 36 | 1 of 2 | 0 of 0 | |
| 3 | Dennis Siver | 25 of 79 | 31% | 13 of 57 | 5 of 7 | 7 of 15 | 20 of 65 | 5 of 14 | 0 of 0 |
| Diego Nunes | 22 of 47 | 46% | 8 of 26 | 6 of 8 | 8 of 13 | 13 of 36 | 9 of 11 | 0 of 0 |
No comments yet. Be the first to share your thoughts!