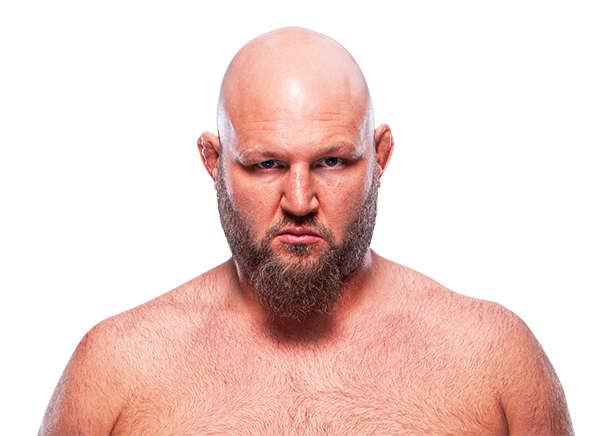
Career Averages - Gabriel Gonzaga
Career Averages - Ben Rothwell
Gabriel Gonzaga - Fight History
Totals
| Fighter | KD | Sig. Str. | Sig. Str. % | Total Str. | TD | TD % | Sub. Att | Rev. | Ctrl |
|---|---|---|---|---|---|---|---|---|---|
| Derrick Lewis | 1 | 17 of 25 | 68% | 21 of 29 | 0 of 0 | --- | 0 | 0 | 0:04 |
| Gabriel Gonzaga | 0 | 5 of 7 | 71% | 6 of 8 | 1 of 6 | 16% | 0 | 0 | 3:39 |
Per Round
| Rd | Fighter | KD | Sig. Str. | Sig. Str. % | Total Str. | TD | TD % | Sub. Att | Rev. | Ctrl |
|---|---|---|---|---|---|---|---|---|---|---|
| 1 | Derrick Lewis | 1 | 17 of 25 | 68% | 21 of 29 | 0 of 0 | --- | 0 | 0 | 0:04 |
| Gabriel Gonzaga | 0 | 5 of 7 | 71% | 6 of 8 | 1 of 6 | 16% | 0 | 0 | 3:39 |
Significant Strikes
| Fighter | Sig. Str. | Sig. Str. % | Head | Body | Leg | Distance | Clinch | Ground |
|---|---|---|---|---|---|---|---|---|
| Derrick Lewis | 17 of 25 | 68% | 15 of 20 | 2 of 5 | 0 of 0 | 7 of 12 | 9 of 11 | 1 of 2 |
| Gabriel Gonzaga | 5 of 7 | 71% | 3 of 5 | 1 of 1 | 1 of 1 | 0 of 2 | 2 of 2 | 3 of 3 |
Significant Strikes Per Round
| Rd | Fighter | Sig. Str. | Sig. Str. % | Head | Body | Leg | Distance | Clinch | Ground |
|---|---|---|---|---|---|---|---|---|---|
| 1 | Derrick Lewis | 17 of 25 | 68% | 15 of 20 | 2 of 5 | 0 of 0 | 7 of 12 | 9 of 11 | 1 of 2 |
| Gabriel Gonzaga | 5 of 7 | 71% | 3 of 5 | 1 of 1 | 1 of 1 | 0 of 2 | 2 of 2 | 3 of 3 |
Play-by-Play
View on SherdogRound 1
Gonzaga deflects a right high kick, backs up to the fence and then changes levels to try an early takedown on the “Black Beast.” Lewis stays standing for a few seconds but is soon tripped to the canvas by the Brazilian jiu-jitsu black belt. Lewis rolls to his knees and Gonzaga tries to jump on his back, but Lewis is able to scramble up and shake him off. Gonzaga tries to keep Lewis pinned against the cage; after 30 seconds of inactivity, however, referee Marc Goddard splits up the big men. Gonzaga waits for Lewis to throw, counters him with a left hand and clinches again with 80 seconds left in round one. Gonzaga is bleeding from his nose, the result of an early punch from Lewis, but it doesn’t seem to be affecting “Napao” so far. Lewis steps out to the center and then walks forward on Gonzaga with a straight right hand. The first punch only grazes the Brazilian, but a follow-up right rattles Gonzaga’s head and sends him slumping to the canvas, out cold. Lewis moves in to pounce, but this one is over and referee Goddard knows it. Derrick Lewis notches another impressive knockout inside the Octagon.
The Official Result
Derrick Lewis def. Gabriel Gonzaga via KO (Punches) R1 4:48
Totals
| Fighter | KD | Sig. Str. | Sig. Str. % | Total Str. | TD | TD % | Sub. Att | Rev. | Ctrl |
|---|---|---|---|---|---|---|---|---|---|
| Gabriel Gonzaga | 0 | 20 of 45 | 44% | 29 of 55 | 2 of 7 | 28% | 0 | 0 | 3:01 |
| Konstantin Erokhin | 0 | 15 of 51 | 29% | 28 of 65 | 0 of 0 | --- | 0 | 0 | 0:10 |
Per Round
| Rd | Fighter | KD | Sig. Str. | Sig. Str. % | Total Str. | TD | TD % | Sub. Att | Rev. | Ctrl |
|---|---|---|---|---|---|---|---|---|---|---|
| 1 | Gabriel Gonzaga | 0 | 7 of 13 | 53% | 8 of 14 | 1 of 3 | 33% | 0 | 0 | 0:00 |
| Konstantin Erokhin | 0 | 6 of 13 | 46% | 7 of 14 | 0 of 0 | --- | 0 | 0 | 0:10 | |
| 2 | Gabriel Gonzaga | 0 | 5 of 16 | 31% | 5 of 16 | 0 of 1 | 0% | 0 | 0 | 0:21 |
| Konstantin Erokhin | 0 | 6 of 26 | 23% | 6 of 26 | 0 of 0 | --- | 0 | 0 | 0:00 | |
| 3 | Gabriel Gonzaga | 0 | 8 of 16 | 50% | 16 of 25 | 1 of 3 | 33% | 0 | 0 | 2:40 |
| Konstantin Erokhin | 0 | 3 of 12 | 25% | 15 of 25 | 0 of 0 | --- | 0 | 0 | 0:00 |
Significant Strikes
| Fighter | Sig. Str. | Sig. Str. % | Head | Body | Leg | Distance | Clinch | Ground |
|---|---|---|---|---|---|---|---|---|
| Gabriel Gonzaga | 20 of 45 | 44% | 12 of 35 | 4 of 5 | 4 of 5 | 11 of 28 | 1 of 4 | 8 of 13 |
| Konstantin Erokhin | 15 of 51 | 29% | 12 of 48 | 3 of 3 | 0 of 0 | 13 of 48 | 2 of 3 | 0 of 0 |
Significant Strikes Per Round
| Rd | Fighter | Sig. Str. | Sig. Str. % | Head | Body | Leg | Distance | Clinch | Ground |
|---|---|---|---|---|---|---|---|---|---|
| 1 | Gabriel Gonzaga | 7 of 13 | 53% | 3 of 8 | 2 of 3 | 2 of 2 | 7 of 12 | 0 of 1 | 0 of 0 |
| Konstantin Erokhin | 6 of 13 | 46% | 5 of 12 | 1 of 1 | 0 of 0 | 5 of 12 | 1 of 1 | 0 of 0 | |
| 2 | Gabriel Gonzaga | 5 of 16 | 31% | 1 of 11 | 2 of 2 | 2 of 3 | 4 of 13 | 1 of 3 | 0 of 0 |
| Konstantin Erokhin | 6 of 26 | 23% | 5 of 25 | 1 of 1 | 0 of 0 | 5 of 25 | 1 of 1 | 0 of 0 | |
| 3 | Gabriel Gonzaga | 8 of 16 | 50% | 8 of 16 | 0 of 0 | 0 of 0 | 0 of 3 | 0 of 0 | 8 of 13 |
| Konstantin Erokhin | 3 of 12 | 25% | 2 of 11 | 1 of 1 | 0 of 0 | 3 of 11 | 0 of 1 | 0 of 0 |
Totals
| Fighter | KD | Sig. Str. | Sig. Str. % | Total Str. | TD | TD % | Sub. Att | Rev. | Ctrl |
|---|---|---|---|---|---|---|---|---|---|
| Mirko Filipovic | 0 | 19 of 47 | 40% | 46 of 75 | 2 of 7 | 28% | 1 | 0 | 6:36 |
| Gabriel Gonzaga | 0 | 21 of 46 | 45% | 32 of 59 | 0 of 1 | 0% | 0 | 0 | 0:59 |
Per Round
| Rd | Fighter | KD | Sig. Str. | Sig. Str. % | Total Str. | TD | TD % | Sub. Att | Rev. | Ctrl |
|---|---|---|---|---|---|---|---|---|---|---|
| 1 | Mirko Filipovic | 0 | 6 of 20 | 30% | 15 of 29 | 1 of 1 | 100% | 1 | 0 | 2:21 |
| Gabriel Gonzaga | 0 | 1 of 8 | 12% | 5 of 12 | 0 of 0 | --- | 0 | 0 | 0:00 | |
| 2 | Mirko Filipovic | 0 | 11 of 20 | 55% | 29 of 39 | 1 of 2 | 50% | 0 | 0 | 3:19 |
| Gabriel Gonzaga | 0 | 1 of 4 | 25% | 1 of 5 | 0 of 0 | --- | 0 | 0 | 0:00 | |
| 3 | Mirko Filipovic | 0 | 2 of 7 | 28% | 2 of 7 | 0 of 4 | 0% | 0 | 0 | 0:56 |
| Gabriel Gonzaga | 0 | 19 of 34 | 55% | 26 of 42 | 0 of 1 | 0% | 0 | 0 | 0:59 |
Significant Strikes
| Fighter | Sig. Str. | Sig. Str. % | Head | Body | Leg | Distance | Clinch | Ground |
|---|---|---|---|---|---|---|---|---|
| Mirko Filipovic | 19 of 47 | 40% | 16 of 42 | 2 of 3 | 1 of 2 | 4 of 20 | 3 of 5 | 12 of 22 |
| Gabriel Gonzaga | 21 of 46 | 45% | 20 of 44 | 1 of 2 | 0 of 0 | 2 of 19 | 3 of 6 | 16 of 21 |
Significant Strikes Per Round
| Rd | Fighter | Sig. Str. | Sig. Str. % | Head | Body | Leg | Distance | Clinch | Ground |
|---|---|---|---|---|---|---|---|---|---|
| 1 | Mirko Filipovic | 6 of 20 | 30% | 5 of 19 | 1 of 1 | 0 of 0 | 4 of 13 | 0 of 0 | 2 of 7 |
| Gabriel Gonzaga | 1 of 8 | 12% | 1 of 8 | 0 of 0 | 0 of 0 | 0 of 6 | 0 of 0 | 1 of 2 | |
| 2 | Mirko Filipovic | 11 of 20 | 55% | 10 of 18 | 0 of 0 | 1 of 2 | 0 of 4 | 1 of 1 | 10 of 15 |
| Gabriel Gonzaga | 1 of 4 | 25% | 1 of 4 | 0 of 0 | 0 of 0 | 1 of 4 | 0 of 0 | 0 of 0 | |
| 3 | Mirko Filipovic | 2 of 7 | 28% | 1 of 5 | 1 of 2 | 0 of 0 | 0 of 3 | 2 of 4 | 0 of 0 |
| Gabriel Gonzaga | 19 of 34 | 55% | 18 of 32 | 1 of 2 | 0 of 0 | 1 of 9 | 3 of 6 | 15 of 19 |
Totals
| Fighter | KD | Sig. Str. | Sig. Str. % | Total Str. | TD | TD % | Sub. Att | Rev. | Ctrl |
|---|---|---|---|---|---|---|---|---|---|
| Matt Mitrione | 0 | 6 of 12 | 50% | 6 of 12 | 0 of 0 | --- | 0 | 0 | 0:00 |
| Gabriel Gonzaga | 1 | 12 of 18 | 66% | 13 of 19 | 0 of 0 | --- | 0 | 0 | 0:07 |
Per Round
| Rd | Fighter | KD | Sig. Str. | Sig. Str. % | Total Str. | TD | TD % | Sub. Att | Rev. | Ctrl |
|---|---|---|---|---|---|---|---|---|---|---|
| 1 | Matt Mitrione | 0 | 6 of 12 | 50% | 6 of 12 | 0 of 0 | --- | 0 | 0 | 0:00 |
| Gabriel Gonzaga | 1 | 12 of 18 | 66% | 13 of 19 | 0 of 0 | --- | 0 | 0 | 0:07 |
Significant Strikes
| Fighter | Sig. Str. | Sig. Str. % | Head | Body | Leg | Distance | Clinch | Ground |
|---|---|---|---|---|---|---|---|---|
| Matt Mitrione | 6 of 12 | 50% | 4 of 9 | 2 of 3 | 0 of 0 | 6 of 12 | 0 of 0 | 0 of 0 |
| Gabriel Gonzaga | 12 of 18 | 66% | 12 of 18 | 0 of 0 | 0 of 0 | 7 of 13 | 0 of 0 | 5 of 5 |
Significant Strikes Per Round
| Rd | Fighter | Sig. Str. | Sig. Str. % | Head | Body | Leg | Distance | Clinch | Ground |
|---|---|---|---|---|---|---|---|---|---|
| 1 | Matt Mitrione | 6 of 12 | 50% | 4 of 9 | 2 of 3 | 0 of 0 | 6 of 12 | 0 of 0 | 0 of 0 |
| Gabriel Gonzaga | 12 of 18 | 66% | 12 of 18 | 0 of 0 | 0 of 0 | 7 of 13 | 0 of 0 | 5 of 5 |
Totals
| Fighter | KD | Sig. Str. | Sig. Str. % | Total Str. | TD | TD % | Sub. Att | Rev. | Ctrl |
|---|---|---|---|---|---|---|---|---|---|
| Stipe Miocic | 0 | 63 of 187 | 33% | 77 of 205 | 1 of 1 | 100% | 0 | 0 | 2:06 |
| Gabriel Gonzaga | 0 | 29 of 82 | 35% | 33 of 87 | 1 of 6 | 16% | 0 | 0 | 0:05 |
Per Round
| Rd | Fighter | KD | Sig. Str. | Sig. Str. % | Total Str. | TD | TD % | Sub. Att | Rev. | Ctrl |
|---|---|---|---|---|---|---|---|---|---|---|
| 1 | Stipe Miocic | 0 | 11 of 43 | 25% | 11 of 43 | 0 of 0 | --- | 0 | 0 | 0:00 |
| Gabriel Gonzaga | 0 | 17 of 36 | 47% | 17 of 36 | 1 of 1 | 100% | 0 | 0 | 0:05 | |
| 2 | Stipe Miocic | 0 | 25 of 77 | 32% | 25 of 77 | 0 of 0 | --- | 0 | 0 | 0:00 |
| Gabriel Gonzaga | 0 | 6 of 26 | 23% | 6 of 26 | 0 of 4 | 0% | 0 | 0 | 0:00 | |
| 3 | Stipe Miocic | 0 | 27 of 67 | 40% | 41 of 85 | 1 of 1 | 100% | 0 | 0 | 2:06 |
| Gabriel Gonzaga | 0 | 6 of 20 | 30% | 10 of 25 | 0 of 1 | 0% | 0 | 0 | 0:00 |
Significant Strikes
| Fighter | Sig. Str. | Sig. Str. % | Head | Body | Leg | Distance | Clinch | Ground |
|---|---|---|---|---|---|---|---|---|
| Stipe Miocic | 63 of 187 | 33% | 48 of 169 | 6 of 6 | 9 of 12 | 46 of 157 | 0 of 1 | 17 of 29 |
| Gabriel Gonzaga | 29 of 82 | 35% | 17 of 58 | 0 of 7 | 12 of 17 | 27 of 78 | 2 of 4 | 0 of 0 |
Significant Strikes Per Round
| Rd | Fighter | Sig. Str. | Sig. Str. % | Head | Body | Leg | Distance | Clinch | Ground |
|---|---|---|---|---|---|---|---|---|---|
| 1 | Stipe Miocic | 11 of 43 | 25% | 8 of 39 | 0 of 0 | 3 of 4 | 11 of 43 | 0 of 0 | 0 of 0 |
| Gabriel Gonzaga | 17 of 36 | 47% | 10 of 25 | 0 of 1 | 7 of 10 | 16 of 35 | 1 of 1 | 0 of 0 | |
| 2 | Stipe Miocic | 25 of 77 | 32% | 19 of 69 | 2 of 2 | 4 of 6 | 25 of 76 | 0 of 1 | 0 of 0 |
| Gabriel Gonzaga | 6 of 26 | 23% | 3 of 18 | 0 of 3 | 3 of 5 | 5 of 25 | 1 of 1 | 0 of 0 | |
| 3 | Stipe Miocic | 27 of 67 | 40% | 21 of 61 | 4 of 4 | 2 of 2 | 10 of 38 | 0 of 0 | 17 of 29 |
| Gabriel Gonzaga | 6 of 20 | 30% | 4 of 15 | 0 of 3 | 2 of 2 | 6 of 18 | 0 of 2 | 0 of 0 |
Totals
| Fighter | KD | Sig. Str. | Sig. Str. % | Total Str. | TD | TD % | Sub. Att | Rev. | Ctrl |
|---|---|---|---|---|---|---|---|---|---|
| Gabriel Gonzaga | 1 | 8 of 16 | 50% | 8 of 16 | 0 of 0 | --- | 0 | 0 | 0:03 |
| Shawn Jordan | 0 | 2 of 7 | 28% | 2 of 7 | 0 of 0 | --- | 0 | 0 | 0:00 |
Per Round
| Rd | Fighter | KD | Sig. Str. | Sig. Str. % | Total Str. | TD | TD % | Sub. Att | Rev. | Ctrl |
|---|---|---|---|---|---|---|---|---|---|---|
| 1 | Gabriel Gonzaga | 1 | 8 of 16 | 50% | 8 of 16 | 0 of 0 | --- | 0 | 0 | 0:03 |
| Shawn Jordan | 0 | 2 of 7 | 28% | 2 of 7 | 0 of 0 | --- | 0 | 0 | 0:00 |
Significant Strikes
| Fighter | Sig. Str. | Sig. Str. % | Head | Body | Leg | Distance | Clinch | Ground |
|---|---|---|---|---|---|---|---|---|
| Gabriel Gonzaga | 8 of 16 | 50% | 7 of 12 | 0 of 1 | 1 of 3 | 4 of 10 | 0 of 0 | 4 of 6 |
| Shawn Jordan | 2 of 7 | 28% | 2 of 7 | 0 of 0 | 0 of 0 | 2 of 7 | 0 of 0 | 0 of 0 |
Significant Strikes Per Round
| Rd | Fighter | Sig. Str. | Sig. Str. % | Head | Body | Leg | Distance | Clinch | Ground |
|---|---|---|---|---|---|---|---|---|---|
| 1 | Gabriel Gonzaga | 8 of 16 | 50% | 7 of 12 | 0 of 1 | 1 of 3 | 4 of 10 | 0 of 0 | 4 of 6 |
| Shawn Jordan | 2 of 7 | 28% | 2 of 7 | 0 of 0 | 0 of 0 | 2 of 7 | 0 of 0 | 0 of 0 |
Totals
| Fighter | KD | Sig. Str. | Sig. Str. % | Total Str. | TD | TD % | Sub. Att | Rev. | Ctrl |
|---|---|---|---|---|---|---|---|---|---|
| Gabriel Gonzaga | 1 | 3 of 3 | 100% | 5 of 5 | 0 of 0 | --- | 0 | 0 | 0:03 |
| Dave Herman | 0 | 3 of 3 | 100% | 3 of 3 | 0 of 0 | --- | 0 | 0 | 0:00 |
Per Round
| Rd | Fighter | KD | Sig. Str. | Sig. Str. % | Total Str. | TD | TD % | Sub. Att | Rev. | Ctrl |
|---|---|---|---|---|---|---|---|---|---|---|
| 1 | Gabriel Gonzaga | 1 | 3 of 3 | 100% | 5 of 5 | 0 of 0 | --- | 0 | 0 | 0:03 |
| Dave Herman | 0 | 3 of 3 | 100% | 3 of 3 | 0 of 0 | --- | 0 | 0 | 0:00 |
Significant Strikes
| Fighter | Sig. Str. | Sig. Str. % | Head | Body | Leg | Distance | Clinch | Ground |
|---|---|---|---|---|---|---|---|---|
| Gabriel Gonzaga | 3 of 3 | 100% | 3 of 3 | 0 of 0 | 0 of 0 | 1 of 1 | 0 of 0 | 2 of 2 |
| Dave Herman | 3 of 3 | 100% | 0 of 0 | 2 of 2 | 1 of 1 | 3 of 3 | 0 of 0 | 0 of 0 |
Significant Strikes Per Round
| Rd | Fighter | Sig. Str. | Sig. Str. % | Head | Body | Leg | Distance | Clinch | Ground |
|---|---|---|---|---|---|---|---|---|---|
| 1 | Gabriel Gonzaga | 3 of 3 | 100% | 3 of 3 | 0 of 0 | 0 of 0 | 1 of 1 | 0 of 0 | 2 of 2 |
| Dave Herman | 3 of 3 | 100% | 0 of 0 | 2 of 2 | 1 of 1 | 3 of 3 | 0 of 0 | 0 of 0 |
Totals
| Fighter | KD | Sig. Str. | Sig. Str. % | Total Str. | TD | TD % | Sub. Att | Rev. | Ctrl |
|---|---|---|---|---|---|---|---|---|---|
| Gabriel Gonzaga | 0 | 17 of 28 | 60% | 20 of 31 | 3 of 8 | 37% | 1 | 0 | 2:17 |
| Ben Rothwell | 0 | 12 of 27 | 44% | 15 of 32 | 0 of 0 | --- | 0 | 0 | 0:37 |
Per Round
| Rd | Fighter | KD | Sig. Str. | Sig. Str. % | Total Str. | TD | TD % | Sub. Att | Rev. | Ctrl |
|---|---|---|---|---|---|---|---|---|---|---|
| 1 | Gabriel Gonzaga | 0 | 13 of 21 | 61% | 16 of 24 | 3 of 8 | 37% | 0 | 0 | 2:17 |
| Ben Rothwell | 0 | 10 of 21 | 47% | 13 of 26 | 0 of 0 | --- | 0 | 0 | 0:22 | |
| 2 | Gabriel Gonzaga | 0 | 4 of 7 | 57% | 4 of 7 | 0 of 0 | --- | 1 | 0 | 0:00 |
| Ben Rothwell | 0 | 2 of 6 | 33% | 2 of 6 | 0 of 0 | --- | 0 | 0 | 0:15 |
Significant Strikes
| Fighter | Sig. Str. | Sig. Str. % | Head | Body | Leg | Distance | Clinch | Ground |
|---|---|---|---|---|---|---|---|---|
| Gabriel Gonzaga | 17 of 28 | 60% | 11 of 20 | 5 of 7 | 1 of 1 | 9 of 16 | 8 of 12 | 0 of 0 |
| Ben Rothwell | 12 of 27 | 44% | 10 of 25 | 2 of 2 | 0 of 0 | 9 of 22 | 3 of 5 | 0 of 0 |
Significant Strikes Per Round
| Rd | Fighter | Sig. Str. | Sig. Str. % | Head | Body | Leg | Distance | Clinch | Ground |
|---|---|---|---|---|---|---|---|---|---|
| 1 | Gabriel Gonzaga | 13 of 21 | 61% | 8 of 14 | 4 of 6 | 1 of 1 | 6 of 10 | 7 of 11 | 0 of 0 |
| Ben Rothwell | 10 of 21 | 47% | 8 of 19 | 2 of 2 | 0 of 0 | 8 of 17 | 2 of 4 | 0 of 0 | |
| 2 | Gabriel Gonzaga | 4 of 7 | 57% | 3 of 6 | 1 of 1 | 0 of 0 | 3 of 6 | 1 of 1 | 0 of 0 |
| Ben Rothwell | 2 of 6 | 33% | 2 of 6 | 0 of 0 | 0 of 0 | 1 of 5 | 1 of 1 | 0 of 0 |
Ben Rothwell - Fight History
Totals
| Fighter | KD | Sig. Str. | Sig. Str. % | Total Str. | TD | TD % | Sub. Att | Rev. | Ctrl |
|---|---|---|---|---|---|---|---|---|---|
| Marcos Rogério de Lima | 0 | 2 of 8 | 25% | 2 of 8 | 0 of 1 | 0% | 0 | 0 | 0:00 |
| Ben Rothwell | 0 | 14 of 24 | 58% | 14 of 24 | 0 of 0 | --- | 0 | 0 | 0:00 |
Per Round
| Rd | Fighter | KD | Sig. Str. | Sig. Str. % | Total Str. | TD | TD % | Sub. Att | Rev. | Ctrl |
|---|---|---|---|---|---|---|---|---|---|---|
| 1 | Marcos Rogério de Lima | 0 | 2 of 8 | 25% | 2 of 8 | 0 of 1 | 0% | 0 | 0 | 0:00 |
| Ben Rothwell | 0 | 14 of 24 | 58% | 14 of 24 | 0 of 0 | --- | 0 | 0 | 0:00 |
Significant Strikes
| Fighter | Sig. Str. | Sig. Str. % | Head | Body | Leg | Distance | Clinch | Ground |
|---|---|---|---|---|---|---|---|---|
| Marcos Rogério de Lima | 2 of 8 | 25% | 2 of 8 | 0 of 0 | 0 of 0 | 2 of 8 | 0 of 0 | 0 of 0 |
| Ben Rothwell | 14 of 24 | 58% | 11 of 20 | 0 of 1 | 3 of 3 | 14 of 24 | 0 of 0 | 0 of 0 |
Significant Strikes Per Round
| Rd | Fighter | Sig. Str. | Sig. Str. % | Head | Body | Leg | Distance | Clinch | Ground |
|---|---|---|---|---|---|---|---|---|---|
| 1 | Marcos Rogério de Lima | 2 of 8 | 25% | 2 of 8 | 0 of 0 | 0 of 0 | 2 of 8 | 0 of 0 | 0 of 0 |
| Ben Rothwell | 14 of 24 | 58% | 11 of 20 | 0 of 1 | 3 of 3 | 14 of 24 | 0 of 0 | 0 of 0 |
Angelo leans toward Ben Rothwell, reasoning that he only needs one takedown to finish, while de Lima needs 15 minutes of a clean game plan. He acknowledges de Lima's path to victory through stick-and-move but thinks Rothwell's size and durability are key.
Big Brady is confident in Ben Rothwell, citing de Lima's atrocious cardio and tendency to fade after one round. He notes Rothwell has a legendary chin (not knocked out since 2009) and superior takedown defense. Brady expects Rothwell to take over as the fight progresses and predicts a second-round submission, as de Lima has been submitted five times.
Cody emphasizes Rothwell's durability (not finished since 2009) and de Lima's tendency to fade. He points out de Lima's poor takedown defense and submission vulnerability. He expects Rothwell to pressure, take de Lima down, and eventually submit him. He also notes Rothwell's 70% takedown defense and that de Lima gasses quickly.
Daniel Levi picks Ben Rothwell by submission, predicting that de Lima will be faster and more athletic early but will eventually make a mistake and tap to a choke. He references Rothwell's history of opportunistic finishes, including the comeback against Brandon Vera and the gogoplata against Josh Barnett. Levi notes de Lima's tendency to quit when put in a choke, making Rothwell's submission threat a key factor.
Jacob picks Ben Rothwell, believing he will plod forward, make it dirty, and grind out a win. He notes that Rothwell has a granite chin and hasn't been TKO'd since 2009. Jacob thinks de Lima has no way to win except maybe a weird decision.
Paul notes that de Lima is a quitter when things go south and has a pattern of alternating wins and losses. He thinks Rothwell is durable, has better submission skills, and will wear de Lima down. He predicts Rothwell wins by submission in round 2, and mentions a prop at 13-1.
The Guru picks Ben Rothwell by unanimous decision (29-28). He expects a close first round with de Lima landing big shots, but Rothwell's pressure and physicality will take over in later rounds. Rothwell will break de Lima down with clinch work and strikes, winning the last two rounds clearly.
Totals
| Fighter | KD | Sig. Str. | Sig. Str. % | Total Str. | TD | TD % | Sub. Att | Rev. | Ctrl |
|---|---|---|---|---|---|---|---|---|---|
| Ben Rothwell | 0 | 60 of 101 | 59% | 72 of 120 | 1 of 1 | 100% | 2 | 0 | 2:03 |
| Chris Barnett | 0 | 33 of 85 | 38% | 34 of 86 | 0 of 1 | 0% | 0 | 0 | 0:02 |
Per Round
| Rd | Fighter | KD | Sig. Str. | Sig. Str. % | Total Str. | TD | TD % | Sub. Att | Rev. | Ctrl |
|---|---|---|---|---|---|---|---|---|---|---|
| 1 | Ben Rothwell | 0 | 30 of 51 | 58% | 42 of 70 | 1 of 1 | 100% | 1 | 0 | 1:48 |
| Chris Barnett | 0 | 16 of 43 | 37% | 17 of 44 | 0 of 0 | --- | 0 | 0 | 0:02 | |
| 2 | Ben Rothwell | 0 | 30 of 50 | 60% | 30 of 50 | 0 of 0 | --- | 1 | 0 | 0:15 |
| Chris Barnett | 0 | 17 of 42 | 40% | 17 of 42 | 0 of 1 | 0% | 0 | 0 | 0:00 |
Significant Strikes
| Fighter | Sig. Str. | Sig. Str. % | Head | Body | Leg | Distance | Clinch | Ground |
|---|---|---|---|---|---|---|---|---|
| Ben Rothwell | 60 of 101 | 59% | 47 of 88 | 10 of 10 | 3 of 3 | 54 of 94 | 6 of 7 | 0 of 0 |
| Chris Barnett | 33 of 85 | 38% | 20 of 69 | 4 of 5 | 9 of 11 | 31 of 81 | 2 of 4 | 0 of 0 |
Significant Strikes Per Round
| Rd | Fighter | Sig. Str. | Sig. Str. % | Head | Body | Leg | Distance | Clinch | Ground |
|---|---|---|---|---|---|---|---|---|---|
| 1 | Ben Rothwell | 30 of 51 | 58% | 20 of 41 | 8 of 8 | 2 of 2 | 24 of 44 | 6 of 7 | 0 of 0 |
| Chris Barnett | 16 of 43 | 37% | 10 of 35 | 1 of 2 | 5 of 6 | 14 of 39 | 2 of 4 | 0 of 0 | |
| 2 | Ben Rothwell | 30 of 50 | 60% | 27 of 47 | 2 of 2 | 1 of 1 | 30 of 50 | 0 of 0 | 0 of 0 |
| Chris Barnett | 17 of 42 | 40% | 10 of 34 | 3 of 3 | 4 of 5 | 17 of 42 | 0 of 0 | 0 of 0 |
Big Brady confidently picks Rothwell, expecting an early finish via knockout or submission. He notes Barnett's low level of competition and tendency to give up his back, while Rothwell's experience and power should be enough. He suggests an inside-the-distance prop.
Cody Saftic picks Ben Rothwell, noting that Barnett is a short, overweight heavyweight with poor cardio. He believes Rothwell will weather Barnett's early athleticism and then tire him out, eventually getting a TKO or submission. Saftic is intrigued by Rothwell by submission at 11-1, given Rothwell's history of submissions, but acknowledges Barnett has never been submitted. He suggests a small play on the prop.
Daniel Levi leans toward Ben Rothwell, noting that Rothwell has more UFC experience and that Chris Barnett has been knocked out by lesser competition. However, he is hesitant because Rothwell is at the worst point of his career, slow, and has not looked good in a long time. He calls it a dog or pass situation and says he cannot lay the price on Rothwell.
Matt picks Ben Rothwell to win by decision, but with low confidence. He acknowledges Chris Barnett is a live dog due to his deceptive athleticism and power, but thinks Rothwell's experience and clinch work will be enough. He is not trusting Rothwell at -310, as Rothwell doesn't always let his hands go. He expects a grinding decision rather than a finish.
Paul Shaughnessy picks Rothwell but is hesitant due to the price. He notes that Rothwell is past his prime and has looked slow, but Barnett is a short-notice replacement with a history of gassing. He believes Rothwell will eventually get the win, but at -300, he prefers to pass or look for a prop. He mentions that Rothwell by knockout is around even money, which might be a better play.
The MMA Guru predicts Ben Rothwell will win by second-round ground-and-pound TKO. He expects Chris Barnett to come out wild with spinning attacks and big bombs in the first round, but will gas out due to short notice and poor conditioning. Rothwell will then take him down and finish with ground and pound in the second round.
Totals
| Fighter | KD | Sig. Str. | Sig. Str. % | Total Str. | TD | TD % | Sub. Att | Rev. | Ctrl |
|---|---|---|---|---|---|---|---|---|---|
| Marcin Tybura | 0 | 89 of 276 | 32% | 95 of 287 | 0 of 0 | --- | 0 | 0 | 0:19 |
| Ben Rothwell | 0 | 94 of 183 | 51% | 155 of 274 | 1 of 3 | 33% | 0 | 0 | 3:08 |
Per Round
| Rd | Fighter | KD | Sig. Str. | Sig. Str. % | Total Str. | TD | TD % | Sub. Att | Rev. | Ctrl |
|---|---|---|---|---|---|---|---|---|---|---|
| 1 | Marcin Tybura | 0 | 46 of 134 | 34% | 47 of 135 | 0 of 0 | --- | 0 | 0 | 0:00 |
| Ben Rothwell | 0 | 28 of 66 | 42% | 31 of 70 | 0 of 0 | --- | 0 | 0 | 0:00 | |
| 2 | Marcin Tybura | 0 | 30 of 93 | 32% | 34 of 99 | 0 of 0 | --- | 0 | 0 | 0:19 |
| Ben Rothwell | 0 | 41 of 72 | 56% | 44 of 76 | 0 of 2 | 0% | 0 | 0 | 0:06 | |
| 3 | Marcin Tybura | 0 | 13 of 49 | 26% | 14 of 53 | 0 of 0 | --- | 0 | 0 | 0:00 |
| Ben Rothwell | 0 | 25 of 45 | 55% | 80 of 128 | 1 of 1 | 100% | 0 | 0 | 3:02 |
Significant Strikes
| Fighter | Sig. Str. | Sig. Str. % | Head | Body | Leg | Distance | Clinch | Ground |
|---|---|---|---|---|---|---|---|---|
| Marcin Tybura | 89 of 276 | 32% | 63 of 247 | 16 of 19 | 10 of 10 | 78 of 260 | 11 of 16 | 0 of 0 |
| Ben Rothwell | 94 of 183 | 51% | 69 of 154 | 15 of 19 | 10 of 10 | 89 of 165 | 3 of 12 | 2 of 6 |
Significant Strikes Per Round
| Rd | Fighter | Sig. Str. | Sig. Str. % | Head | Body | Leg | Distance | Clinch | Ground |
|---|---|---|---|---|---|---|---|---|---|
| 1 | Marcin Tybura | 46 of 134 | 34% | 38 of 124 | 6 of 8 | 2 of 2 | 39 of 124 | 7 of 10 | 0 of 0 |
| Ben Rothwell | 28 of 66 | 42% | 23 of 60 | 5 of 6 | 0 of 0 | 28 of 60 | 0 of 6 | 0 of 0 | |
| 2 | Marcin Tybura | 30 of 93 | 32% | 19 of 82 | 6 of 6 | 5 of 5 | 27 of 89 | 3 of 4 | 0 of 0 |
| Ben Rothwell | 41 of 72 | 56% | 27 of 55 | 7 of 10 | 7 of 7 | 38 of 67 | 3 of 5 | 0 of 0 | |
| 3 | Marcin Tybura | 13 of 49 | 26% | 6 of 41 | 4 of 5 | 3 of 3 | 12 of 47 | 1 of 2 | 0 of 0 |
| Ben Rothwell | 25 of 45 | 55% | 19 of 39 | 3 of 3 | 3 of 3 | 23 of 38 | 0 of 1 | 2 of 6 |
Play-by-Play
View on SherdogRound 1
Back to heavyweight, two burly brawlers square off when crafty veteran Rothwell (38-12, 8-6 UFC) comes to blows with grinding Polish grappler Tybura (19-6, 6-5 UFC). This 528-pound matchup will be officiated by referee Marc Goddard, who stands by as the two men elect to touch gloves. Rothwell leads off with a few punches, and lands a right hand and starts to blitz Tybura with a barrage of punches. Tybura turtles up and backs away, so Rothwell steps in and lands another right hand. Rothwell hits a superman punch and pours it on as Tybura retreats but keeps eating shots. Rothwell pulls off on a combination and gets clubbed in the head with a right hand. Rothwell digs to the body with a left, and Tybura connects with another stern right hand. Rothwell takes his foot off the gas but lets fly a right hand, and Tybura gets Rothwell’s attention with another sharp hook. Rothwell returns fire with a right hook that reddens up the Polish fighter’s eye, and he marches forward to return to his punch combination attack. Tybura springs forward and connect with a left hook, and Rothwell walks through them to land a few shots and ends the combination with a leg kick. They clash together at the same time, and Rothwell gathers himself faster and lands a trio of strikes before Tybura can get back at him. Rothwell rips to the body again, and Tybura is ready to engage with him with fast hands. The two go punch-for-punch across a few salvos, and Rothwell wades forward to keep throwing. Rothwell hurts him with a right hand, and then another, followed by a head kick at close range. Tybura returns fire, and these two are taking turns wailing on each other. Tybura slaps the body with a kick, and Rothwell thanks him and punches him in the midsection. They clinch up and Rothwell lands a few on the inside before breaking off the clinch. Tybura clips Rothwell with a right hand and gets off a body kick to back Rothwell off for a moment, and reaches with a right hand to force Rothwell to reset. Rothwell lunges forward and gets countered on the inside, but Rothwell grabs hold of him with a clinch and starts ripping uppercuts. Tybura responds with a few of his own to bloody the nose up, and Rothwell lands some heavy shots and a throws a head kick that makes him topple over. He hops back up and Tybura lands a left hand on the way up, but “Big Ben” eats it and throws a few more strikes until this fast-paced round ends.
Sherdog Scores
Jay Pettry scores the round: 10-9 Rothwell
Tristen Critchfield scores the round: 10-9 Rothwell
Tyler Treese scores the round: 10-9 Rothwell
Round 2
The two big men cordially re-introduce themselves to one another with a sporting touch of gloves, and when Tybura throws high, Rothwell kicks low. Tybura kicks the lead leg, and Rothwell ambles forward while throw punches in bunches. Tybura counters him and the two crash in at the same time. Tybura kicks the lead leg as Rothwell comes towards him, and Rothwell does not acknowledge it as he chases “Tybur” with a series of reaching punches. The two heavyweights clinch up and Rothwell starts to unload with uppercuts, but the clinch leads to Rothwell pressing him on the cage. Rothwell swats down low for a potential takedown, and when it does not land, they separate and throw punches at the same time. Tybura scores as Rothwell lumbers towards him, but the longtime vet targets the body a few more times for good measure. Tybura clinches up with Rothwell and lands his own uppercuts, and when they break apart, the Polish fighter re-engages and scores more. Rothwell cracks him with a right hand, and subsequently slips the punches that whiz by his head. Rothwell slings a head kick but misses by a mile, so he wanders forward and connects with a few punches. Tybura shoots for a takedown, but Rothwell stands like a brick wall and does not budge. Tybura bails on it and kicks the lead leg, and a few more punches from Tybura – the strike totals are shockingly high for a heavyweight brawl – are marking up Rothwell’s face and nose especially. Rothwell gets clipped by a right hand and he throws back at his man, and the two trade heavy leather but neither appear to show any concern for defense. Rothwell rushes in with his hands down as he lunges with punches, and Rothwell stops a takedown and slugs it out until the bell and a little after.
Sherdog Scores
Jay Pettry scores the round: 10-9 Tybura
Tristen Critchfield scores the round: 10-9 Tybura
Tyler Treese scores the round: 10-9 Tybura
Round 3
One final glove touch begins the last round, and Tybura appears the far fresher fighter as he snaps out a few jabs. Rothwell absorbs them all on the chin and kicks the lead leg, before winging a right hand. Rothwell wades forward and misses a right hand, so Tybura flicks out a few punches to touch Rothwell. Rothwell chops down the right leg of his opponent, and he strides forward to punch his way in again. Tybura meets him with punches of his own, and “Tybur” dodges and weaves as Rothwell’s punches are slowing. Rothwell takes a right hand across the bow and marches forward to start slinging bombs, and Tybura scores an uppercut before changing levels. The Polish fighter manages to ground Rothwell, and he sits heavy on top while getting off some stern ground-and-pound. Tybura busts up his opponent with elbows and punches while sitting comfortably in guard, and he continues his assault as Rothwell looks stuck in first gear and out of steam. Rothwell throws his legs up for a triangle, but “Tybur” shrugs it off and drops back down into guard. Rothwell does what he can to tie Tybura up, but instead the Polish bruiser breaks the grip and rips him with hacking elbows that spray gouts of blood from “Big Ben.” Tybura keeps punishing Rothwell but the strikes are not of the fight-ending variety, as he works Rothwell over from on top. Rothwell can do nothing but eat them as he is cut on his eye, nose and all over his face. Tybura keeps on the accelerator until the fight ends, leaving Rothwell's face a crimson mask to end the hard-fought bout.
Sherdog Scores
Jay Pettry scores the round: 10-9 Tybura (29-28 Tybura)
Tristen Critchfield scores the round: 10-9 Tybura (29-28 Tybura)
Tyler Treese scores the round: 10-9 Tybura (29-28 Tybura)
The Official Result
Marcin Tybura def. Ben Rothwell via Unanimous Decision (29-27, 29-27, 29-27)
Big Brady picks Rothwell due to his durability and power, noting Tybura has been knocked out four times and has a questionable chin. He expects Rothwell to pressure Tybura against the cage and land bombs. He acknowledges Rothwell is older (38) but believes his power and durability are key. He mentions the fight could be low output.
Daniel picks Ben Rothwell primarily because he believes Rothwell is tougher and hits harder. He acknowledges that Rothwell has looked slow since returning from suspension and takes a lot of damage, but he thinks Rothwell's pressure and durability will be enough. He also notes that Tybura has questionable toughness and may fold under pressure, but he wouldn't be surprised if Tybura wins a sloppy decision.
Rothwell's pressure and awkward striking angles will overwhelm Tybura, who lacks output and combination punching. Tybura's takedown attempts will be unsuccessful, and Rothwell's power will break him in the second round via TKO.
The Guru picks Tybura as an underdog, believing his pressure-heavy style and improved conditioning will overwhelm Rothwell. He thinks Tybura will control the clinch against the cage and win a unanimous decision, as Rothwell lacks finishing ability. He notes the odds (Rothwell -200) are off and the fight should be 50-50.
Totals
| Fighter | KD | Sig. Str. | Sig. Str. % | Total Str. | TD | TD % | Sub. Att | Rev. | Ctrl |
|---|---|---|---|---|---|---|---|---|---|
| Ben Rothwell | 0 | 56 of 110 | 50% | 86 of 142 | 1 of 3 | 33% | 0 | 0 | 5:49 |
| Ovince Saint Preux | 1 | 42 of 82 | 51% | 46 of 87 | 0 of 0 | --- | 0 | 0 | 0:22 |
Per Round
| Rd | Fighter | KD | Sig. Str. | Sig. Str. % | Total Str. | TD | TD % | Sub. Att | Rev. | Ctrl |
|---|---|---|---|---|---|---|---|---|---|---|
| 1 | Ben Rothwell | 0 | 7 of 14 | 50% | 18 of 26 | 1 of 1 | 100% | 0 | 0 | 1:35 |
| Ovince Saint Preux | 0 | 9 of 19 | 47% | 9 of 19 | 0 of 0 | --- | 0 | 0 | 0:00 | |
| 2 | Ben Rothwell | 0 | 19 of 41 | 46% | 24 of 47 | 0 of 2 | 0% | 0 | 0 | 1:30 |
| Ovince Saint Preux | 1 | 13 of 27 | 48% | 16 of 31 | 0 of 0 | --- | 0 | 0 | 0:22 | |
| 3 | Ben Rothwell | 0 | 30 of 55 | 54% | 44 of 69 | 0 of 0 | --- | 0 | 0 | 2:44 |
| Ovince Saint Preux | 0 | 20 of 36 | 55% | 21 of 37 | 0 of 0 | --- | 0 | 0 | 0:00 |
Significant Strikes
| Fighter | Sig. Str. | Sig. Str. % | Head | Body | Leg | Distance | Clinch | Ground |
|---|---|---|---|---|---|---|---|---|
| Ben Rothwell | 56 of 110 | 50% | 37 of 89 | 15 of 17 | 4 of 4 | 40 of 79 | 14 of 29 | 2 of 2 |
| Ovince Saint Preux | 42 of 82 | 51% | 27 of 62 | 13 of 15 | 2 of 5 | 33 of 70 | 9 of 12 | 0 of 0 |
Significant Strikes Per Round
| Rd | Fighter | Sig. Str. | Sig. Str. % | Head | Body | Leg | Distance | Clinch | Ground |
|---|---|---|---|---|---|---|---|---|---|
| 1 | Ben Rothwell | 7 of 14 | 50% | 3 of 10 | 4 of 4 | 0 of 0 | 5 of 12 | 0 of 0 | 2 of 2 |
| Ovince Saint Preux | 9 of 19 | 47% | 2 of 7 | 6 of 8 | 1 of 4 | 9 of 19 | 0 of 0 | 0 of 0 | |
| 2 | Ben Rothwell | 19 of 41 | 46% | 13 of 35 | 5 of 5 | 1 of 1 | 13 of 30 | 6 of 11 | 0 of 0 |
| Ovince Saint Preux | 13 of 27 | 48% | 6 of 20 | 6 of 6 | 1 of 1 | 10 of 23 | 3 of 4 | 0 of 0 | |
| 3 | Ben Rothwell | 30 of 55 | 54% | 21 of 44 | 6 of 8 | 3 of 3 | 22 of 37 | 8 of 18 | 0 of 0 |
| Ovince Saint Preux | 20 of 36 | 55% | 19 of 35 | 1 of 1 | 0 of 0 | 14 of 28 | 6 of 8 | 0 of 0 |
Big Brady leans with Ben Rothwell as an underdog, believing Rothwell's power and chin give him a good chance to knock out Ovince Saint Preux. He thinks OSP will struggle to take Rothwell down and that the fight will stay on the feet, where Rothwell has the advantage. He acknowledges OSP could win a decision if Rothwell fights poorly, but sees a knockout as more likely and considers betting on Rothwell at plus odds.
Daniel Levi picks OSP, citing his athleticism and speed advantage over Rothwell, who has looked slow since his suspension. He notes OSP's suspect chin and cardio at heavyweight, and says he won't bet him at -140 due to those concerns, but still picks him for the win.
The MMA Guru picks Ben Rothwell, noting that OSP is moving up to heavyweight and his chin won't magically improve. He highlights Rothwell's durability, having taken shots from Junior dos Santos and Blagojevich, and believes Rothwell will smother OSP and finish him in the second round. He also points out that OSP is 37 and has been rocked in recent fights.
Totals
| Fighter | KD | Sig. Str. | Sig. Str. % | Total Str. | TD | TD % | Sub. Att | Rev. | Ctrl |
|---|---|---|---|---|---|---|---|---|---|
| Ben Rothwell | 0 | 53 of 77 | 68% | 63 of 87 | 0 of 1 | 0% | 0 | 0 | 0:03 |
| Stefan Struve | 1 | 58 of 101 | 57% | 71 of 114 | 0 of 1 | 0% | 0 | 0 | 4:38 |
Per Round
| Rd | Fighter | KD | Sig. Str. | Sig. Str. % | Total Str. | TD | TD % | Sub. Att | Rev. | Ctrl |
|---|---|---|---|---|---|---|---|---|---|---|
| 1 | Ben Rothwell | 0 | 23 of 30 | 76% | 28 of 35 | 0 of 1 | 0% | 0 | 0 | 0:03 |
| Stefan Struve | 0 | 19 of 30 | 63% | 23 of 34 | 0 of 1 | 0% | 0 | 0 | 2:12 | |
| 2 | Ben Rothwell | 0 | 30 of 47 | 63% | 35 of 52 | 0 of 0 | --- | 0 | 0 | 0:00 |
| Stefan Struve | 1 | 39 of 71 | 54% | 48 of 80 | 0 of 0 | --- | 0 | 0 | 2:26 |
Significant Strikes
| Fighter | Sig. Str. | Sig. Str. % | Head | Body | Leg | Distance | Clinch | Ground |
|---|---|---|---|---|---|---|---|---|
| Ben Rothwell | 53 of 77 | 68% | 18 of 39 | 20 of 22 | 15 of 16 | 46 of 70 | 7 of 7 | 0 of 0 |
| Stefan Struve | 58 of 101 | 57% | 41 of 83 | 13 of 13 | 4 of 5 | 33 of 66 | 20 of 29 | 5 of 6 |
Significant Strikes Per Round
| Rd | Fighter | Sig. Str. | Sig. Str. % | Head | Body | Leg | Distance | Clinch | Ground |
|---|---|---|---|---|---|---|---|---|---|
| 1 | Ben Rothwell | 23 of 30 | 76% | 4 of 10 | 8 of 9 | 11 of 11 | 22 of 29 | 1 of 1 | 0 of 0 |
| Stefan Struve | 19 of 30 | 63% | 10 of 20 | 7 of 7 | 2 of 3 | 10 of 21 | 9 of 9 | 0 of 0 | |
| 2 | Ben Rothwell | 30 of 47 | 63% | 14 of 29 | 12 of 13 | 4 of 5 | 24 of 41 | 6 of 6 | 0 of 0 |
| Stefan Struve | 39 of 71 | 54% | 31 of 63 | 6 of 6 | 2 of 2 | 23 of 45 | 11 of 20 | 5 of 6 |
Totals
| Fighter | KD | Sig. Str. | Sig. Str. % | Total Str. | TD | TD % | Sub. Att | Rev. | Ctrl |
|---|---|---|---|---|---|---|---|---|---|
| Andrei Arlovski | 0 | 152 of 263 | 57% | 160 of 272 | 0 of 0 | --- | 0 | 0 | 0:50 |
| Ben Rothwell | 0 | 70 of 177 | 39% | 75 of 183 | 0 of 1 | 0% | 0 | 0 | 2:14 |
Per Round
| Rd | Fighter | KD | Sig. Str. | Sig. Str. % | Total Str. | TD | TD % | Sub. Att | Rev. | Ctrl |
|---|---|---|---|---|---|---|---|---|---|---|
| 1 | Andrei Arlovski | 0 | 54 of 103 | 52% | 54 of 103 | 0 of 0 | --- | 0 | 0 | 0:00 |
| Ben Rothwell | 0 | 29 of 73 | 39% | 29 of 73 | 0 of 0 | --- | 0 | 0 | 0:00 | |
| 2 | Andrei Arlovski | 0 | 49 of 87 | 56% | 55 of 94 | 0 of 0 | --- | 0 | 0 | 0:16 |
| Ben Rothwell | 0 | 16 of 52 | 30% | 21 of 58 | 0 of 0 | --- | 0 | 0 | 1:06 | |
| 3 | Andrei Arlovski | 0 | 49 of 73 | 67% | 51 of 75 | 0 of 0 | --- | 0 | 0 | 0:34 |
| Ben Rothwell | 0 | 25 of 52 | 48% | 25 of 52 | 0 of 1 | 0% | 0 | 0 | 1:08 |
Significant Strikes
| Fighter | Sig. Str. | Sig. Str. % | Head | Body | Leg | Distance | Clinch | Ground |
|---|---|---|---|---|---|---|---|---|
| Andrei Arlovski | 152 of 263 | 57% | 103 of 204 | 34 of 43 | 15 of 16 | 152 of 263 | 0 of 0 | 0 of 0 |
| Ben Rothwell | 70 of 177 | 39% | 55 of 155 | 9 of 16 | 6 of 6 | 70 of 176 | 0 of 1 | 0 of 0 |
Significant Strikes Per Round
| Rd | Fighter | Sig. Str. | Sig. Str. % | Head | Body | Leg | Distance | Clinch | Ground |
|---|---|---|---|---|---|---|---|---|---|
| 1 | Andrei Arlovski | 54 of 103 | 52% | 33 of 77 | 14 of 18 | 7 of 8 | 54 of 103 | 0 of 0 | 0 of 0 |
| Ben Rothwell | 29 of 73 | 39% | 20 of 62 | 5 of 7 | 4 of 4 | 29 of 73 | 0 of 0 | 0 of 0 | |
| 2 | Andrei Arlovski | 49 of 87 | 56% | 32 of 67 | 12 of 15 | 5 of 5 | 49 of 87 | 0 of 0 | 0 of 0 |
| Ben Rothwell | 16 of 52 | 30% | 12 of 46 | 3 of 5 | 1 of 1 | 16 of 52 | 0 of 0 | 0 of 0 | |
| 3 | Andrei Arlovski | 49 of 73 | 67% | 38 of 60 | 8 of 10 | 3 of 3 | 49 of 73 | 0 of 0 | 0 of 0 |
| Ben Rothwell | 25 of 52 | 48% | 23 of 47 | 1 of 4 | 1 of 1 | 25 of 51 | 0 of 1 | 0 of 0 |
Totals
| Fighter | KD | Sig. Str. | Sig. Str. % | Total Str. | TD | TD % | Sub. Att | Rev. | Ctrl |
|---|---|---|---|---|---|---|---|---|---|
| Blagoy Ivanov | 0 | 72 of 178 | 40% | 73 of 179 | 0 of 0 | --- | 0 | 0 | 0:00 |
| Ben Rothwell | 0 | 70 of 163 | 42% | 70 of 163 | 0 of 0 | --- | 0 | 0 | 0:00 |
Per Round
| Rd | Fighter | KD | Sig. Str. | Sig. Str. % | Total Str. | TD | TD % | Sub. Att | Rev. | Ctrl |
|---|---|---|---|---|---|---|---|---|---|---|
| 1 | Blagoy Ivanov | 0 | 19 of 39 | 48% | 19 of 39 | 0 of 0 | --- | 0 | 0 | 0:00 |
| Ben Rothwell | 0 | 9 of 22 | 40% | 9 of 22 | 0 of 0 | --- | 0 | 0 | 0:00 | |
| 2 | Blagoy Ivanov | 0 | 29 of 75 | 38% | 29 of 75 | 0 of 0 | --- | 0 | 0 | 0:00 |
| Ben Rothwell | 0 | 28 of 59 | 47% | 28 of 59 | 0 of 0 | --- | 0 | 0 | 0:00 | |
| 3 | Blagoy Ivanov | 0 | 24 of 64 | 37% | 25 of 65 | 0 of 0 | --- | 0 | 0 | 0:00 |
| Ben Rothwell | 0 | 33 of 82 | 40% | 33 of 82 | 0 of 0 | --- | 0 | 0 | 0:00 |
Significant Strikes
| Fighter | Sig. Str. | Sig. Str. % | Head | Body | Leg | Distance | Clinch | Ground |
|---|---|---|---|---|---|---|---|---|
| Blagoy Ivanov | 72 of 178 | 40% | 50 of 156 | 19 of 19 | 3 of 3 | 70 of 175 | 2 of 3 | 0 of 0 |
| Ben Rothwell | 70 of 163 | 42% | 47 of 135 | 6 of 10 | 17 of 18 | 69 of 162 | 1 of 1 | 0 of 0 |
Significant Strikes Per Round
| Rd | Fighter | Sig. Str. | Sig. Str. % | Head | Body | Leg | Distance | Clinch | Ground |
|---|---|---|---|---|---|---|---|---|---|
| 1 | Blagoy Ivanov | 19 of 39 | 48% | 11 of 31 | 8 of 8 | 0 of 0 | 17 of 37 | 2 of 2 | 0 of 0 |
| Ben Rothwell | 9 of 22 | 40% | 4 of 17 | 0 of 0 | 5 of 5 | 9 of 22 | 0 of 0 | 0 of 0 | |
| 2 | Blagoy Ivanov | 29 of 75 | 38% | 24 of 70 | 4 of 4 | 1 of 1 | 29 of 75 | 0 of 0 | 0 of 0 |
| Ben Rothwell | 28 of 59 | 47% | 21 of 48 | 2 of 6 | 5 of 5 | 28 of 59 | 0 of 0 | 0 of 0 | |
| 3 | Blagoy Ivanov | 24 of 64 | 37% | 15 of 55 | 7 of 7 | 2 of 2 | 24 of 63 | 0 of 1 | 0 of 0 |
| Ben Rothwell | 33 of 82 | 40% | 22 of 70 | 4 of 4 | 7 of 8 | 32 of 81 | 1 of 1 | 0 of 0 |
Totals
| Fighter | KD | Sig. Str. | Sig. Str. % | Total Str. | TD | TD % | Sub. Att | Rev. | Ctrl |
|---|---|---|---|---|---|---|---|---|---|
| Junior dos Santos | 0 | 77 of 212 | 36% | 78 of 213 | 0 of 0 | --- | 0 | 0 | 0:01 |
| Ben Rothwell | 0 | 157 of 247 | 63% | 157 of 247 | 0 of 0 | --- | 0 | 0 | 0:02 |
Per Round
| Rd | Fighter | KD | Sig. Str. | Sig. Str. % | Total Str. | TD | TD % | Sub. Att | Rev. | Ctrl |
|---|---|---|---|---|---|---|---|---|---|---|
| 1 | Junior dos Santos | 0 | 19 of 48 | 39% | 19 of 48 | 0 of 0 | --- | 0 | 0 | 0:00 |
| Ben Rothwell | 0 | 26 of 37 | 70% | 26 of 37 | 0 of 0 | --- | 0 | 0 | 0:02 | |
| 2 | Junior dos Santos | 0 | 14 of 42 | 33% | 15 of 43 | 0 of 0 | --- | 0 | 0 | 0:01 |
| Ben Rothwell | 0 | 29 of 49 | 59% | 29 of 49 | 0 of 0 | --- | 0 | 0 | 0:00 | |
| 3 | Junior dos Santos | 0 | 15 of 37 | 40% | 15 of 37 | 0 of 0 | --- | 0 | 0 | 0:00 |
| Ben Rothwell | 0 | 29 of 43 | 67% | 29 of 43 | 0 of 0 | --- | 0 | 0 | 0:00 | |
| 4 | Junior dos Santos | 0 | 18 of 48 | 37% | 18 of 48 | 0 of 0 | --- | 0 | 0 | 0:00 |
| Ben Rothwell | 0 | 40 of 57 | 70% | 40 of 57 | 0 of 0 | --- | 0 | 0 | 0:00 | |
| 5 | Junior dos Santos | 0 | 11 of 37 | 29% | 11 of 37 | 0 of 0 | --- | 0 | 0 | 0:00 |
| Ben Rothwell | 0 | 33 of 61 | 54% | 33 of 61 | 0 of 0 | --- | 0 | 0 | 0:00 |
Significant Strikes
| Fighter | Sig. Str. | Sig. Str. % | Head | Body | Leg | Distance | Clinch | Ground |
|---|---|---|---|---|---|---|---|---|
| Junior dos Santos | 77 of 212 | 36% | 51 of 179 | 7 of 12 | 19 of 21 | 75 of 210 | 2 of 2 | 0 of 0 |
| Ben Rothwell | 157 of 247 | 63% | 65 of 147 | 92 of 100 | 0 of 0 | 156 of 246 | 1 of 1 | 0 of 0 |
Significant Strikes Per Round
| Rd | Fighter | Sig. Str. | Sig. Str. % | Head | Body | Leg | Distance | Clinch | Ground |
|---|---|---|---|---|---|---|---|---|---|
| 1 | Junior dos Santos | 19 of 48 | 39% | 12 of 37 | 3 of 7 | 4 of 4 | 17 of 46 | 2 of 2 | 0 of 0 |
| Ben Rothwell | 26 of 37 | 70% | 10 of 21 | 16 of 16 | 0 of 0 | 26 of 37 | 0 of 0 | 0 of 0 | |
| 2 | Junior dos Santos | 14 of 42 | 33% | 7 of 33 | 1 of 2 | 6 of 7 | 14 of 42 | 0 of 0 | 0 of 0 |
| Ben Rothwell | 29 of 49 | 59% | 11 of 30 | 18 of 19 | 0 of 0 | 29 of 49 | 0 of 0 | 0 of 0 | |
| 3 | Junior dos Santos | 15 of 37 | 40% | 9 of 31 | 1 of 1 | 5 of 5 | 15 of 37 | 0 of 0 | 0 of 0 |
| Ben Rothwell | 29 of 43 | 67% | 8 of 21 | 21 of 22 | 0 of 0 | 28 of 42 | 1 of 1 | 0 of 0 | |
| 4 | Junior dos Santos | 18 of 48 | 37% | 14 of 44 | 1 of 1 | 3 of 3 | 18 of 48 | 0 of 0 | 0 of 0 |
| Ben Rothwell | 40 of 57 | 70% | 21 of 36 | 19 of 21 | 0 of 0 | 40 of 57 | 0 of 0 | 0 of 0 | |
| 5 | Junior dos Santos | 11 of 37 | 29% | 9 of 34 | 1 of 1 | 1 of 2 | 11 of 37 | 0 of 0 | 0 of 0 |
| Ben Rothwell | 33 of 61 | 54% | 15 of 39 | 18 of 22 | 0 of 0 | 33 of 61 | 0 of 0 | 0 of 0 |
No comments yet. Be the first to share your thoughts!