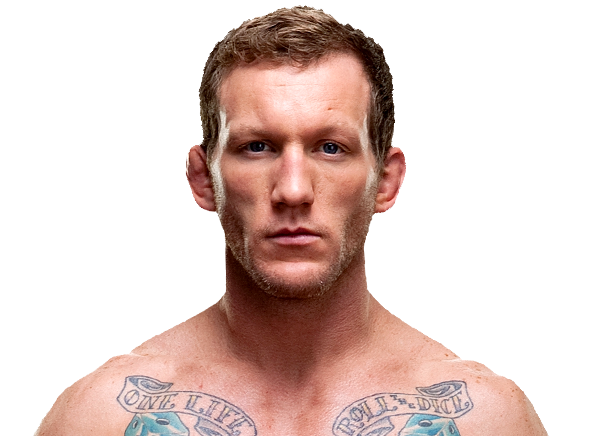
Career Averages - Gray Maynard
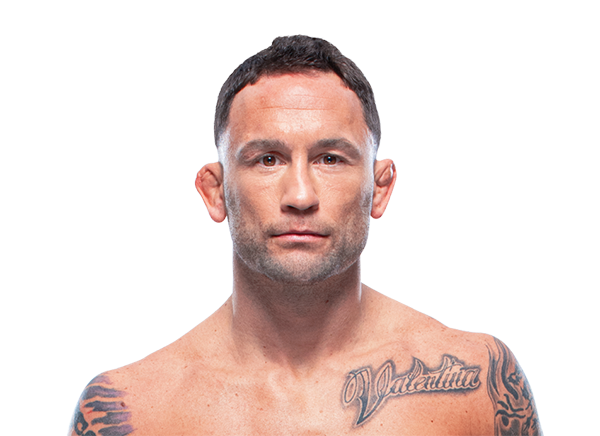
Career Averages - Frankie Edgar
Gray Maynard - Fight History
Totals
| Fighter | KD | Sig. Str. | Sig. Str. % | Total Str. | TD | TD % | Sub. Att | Rev. | Ctrl |
|---|---|---|---|---|---|---|---|---|---|
| Nik Lentz | 0 | 13 of 27 | 48% | 13 of 27 | 0 of 0 | --- | 0 | 0 | 0:08 |
| Gray Maynard | 1 | 75 of 101 | 74% | 92 of 121 | 2 of 5 | 40% | 1 | 0 | 3:34 |
Per Round
| Rd | Fighter | KD | Sig. Str. | Sig. Str. % | Total Str. | TD | TD % | Sub. Att | Rev. | Ctrl |
|---|---|---|---|---|---|---|---|---|---|---|
| 1 | Nik Lentz | 0 | 5 of 11 | 45% | 5 of 11 | 0 of 0 | --- | 0 | 0 | 0:08 |
| Gray Maynard | 0 | 64 of 80 | 80% | 81 of 100 | 2 of 5 | 40% | 1 | 0 | 3:32 | |
| 2 | Nik Lentz | 0 | 8 of 16 | 50% | 8 of 16 | 0 of 0 | --- | 0 | 0 | 0:00 |
| Gray Maynard | 1 | 11 of 21 | 52% | 11 of 21 | 0 of 0 | --- | 0 | 0 | 0:02 |
Significant Strikes
| Fighter | Sig. Str. | Sig. Str. % | Head | Body | Leg | Distance | Clinch | Ground |
|---|---|---|---|---|---|---|---|---|
| Nik Lentz | 13 of 27 | 48% | 11 of 25 | 2 of 2 | 0 of 0 | 11 of 23 | 2 of 4 | 0 of 0 |
| Gray Maynard | 75 of 101 | 74% | 67 of 93 | 5 of 5 | 3 of 3 | 23 of 34 | 12 of 16 | 40 of 51 |
Significant Strikes Per Round
| Rd | Fighter | Sig. Str. | Sig. Str. % | Head | Body | Leg | Distance | Clinch | Ground |
|---|---|---|---|---|---|---|---|---|---|
| 1 | Nik Lentz | 5 of 11 | 45% | 4 of 10 | 1 of 1 | 0 of 0 | 3 of 7 | 2 of 4 | 0 of 0 |
| Gray Maynard | 64 of 80 | 80% | 56 of 72 | 5 of 5 | 3 of 3 | 15 of 18 | 11 of 15 | 38 of 47 | |
| 2 | Nik Lentz | 8 of 16 | 50% | 7 of 15 | 1 of 1 | 0 of 0 | 8 of 16 | 0 of 0 | 0 of 0 |
| Gray Maynard | 11 of 21 | 52% | 11 of 21 | 0 of 0 | 0 of 0 | 8 of 16 | 1 of 1 | 2 of 4 |
Totals
| Fighter | KD | Sig. Str. | Sig. Str. % | Total Str. | TD | TD % | Sub. Att | Rev. | Ctrl |
|---|---|---|---|---|---|---|---|---|---|
| Gray Maynard | 0 | 16 of 24 | 66% | 37 of 46 | 11 of 11 | 100% | 2 | 0 | 12:57 |
| Teruto Ishihara | 0 | 8 of 13 | 61% | 14 of 19 | 0 of 0 | --- | 0 | 0 | 0:06 |
Per Round
| Rd | Fighter | KD | Sig. Str. | Sig. Str. % | Total Str. | TD | TD % | Sub. Att | Rev. | Ctrl |
|---|---|---|---|---|---|---|---|---|---|---|
| 1 | Gray Maynard | 0 | 7 of 12 | 58% | 16 of 21 | 5 of 5 | 100% | 0 | 0 | 3:46 |
| Teruto Ishihara | 0 | 4 of 6 | 66% | 9 of 11 | 0 of 0 | --- | 0 | 0 | 0:04 | |
| 2 | Gray Maynard | 0 | 5 of 6 | 83% | 11 of 12 | 5 of 5 | 100% | 0 | 0 | 4:32 |
| Teruto Ishihara | 0 | 3 of 5 | 60% | 4 of 6 | 0 of 0 | --- | 0 | 0 | 0:02 | |
| 3 | Gray Maynard | 0 | 4 of 6 | 66% | 10 of 13 | 1 of 1 | 100% | 2 | 0 | 4:39 |
| Teruto Ishihara | 0 | 1 of 2 | 50% | 1 of 2 | 0 of 0 | --- | 0 | 0 | 0:00 |
Significant Strikes
| Fighter | Sig. Str. | Sig. Str. % | Head | Body | Leg | Distance | Clinch | Ground |
|---|---|---|---|---|---|---|---|---|
| Gray Maynard | 16 of 24 | 66% | 8 of 15 | 8 of 9 | 0 of 0 | 1 of 3 | 3 of 4 | 12 of 17 |
| Teruto Ishihara | 8 of 13 | 61% | 3 of 7 | 5 of 6 | 0 of 0 | 4 of 8 | 3 of 4 | 1 of 1 |
Significant Strikes Per Round
| Rd | Fighter | Sig. Str. | Sig. Str. % | Head | Body | Leg | Distance | Clinch | Ground |
|---|---|---|---|---|---|---|---|---|---|
| 1 | Gray Maynard | 7 of 12 | 58% | 5 of 10 | 2 of 2 | 0 of 0 | 1 of 3 | 2 of 3 | 4 of 6 |
| Teruto Ishihara | 4 of 6 | 66% | 1 of 2 | 3 of 4 | 0 of 0 | 2 of 4 | 2 of 2 | 0 of 0 | |
| 2 | Gray Maynard | 5 of 6 | 83% | 3 of 4 | 2 of 2 | 0 of 0 | 0 of 0 | 1 of 1 | 4 of 5 |
| Teruto Ishihara | 3 of 5 | 60% | 1 of 3 | 2 of 2 | 0 of 0 | 2 of 3 | 1 of 2 | 0 of 0 | |
| 3 | Gray Maynard | 4 of 6 | 66% | 0 of 1 | 4 of 5 | 0 of 0 | 0 of 0 | 0 of 0 | 4 of 6 |
| Teruto Ishihara | 1 of 2 | 50% | 1 of 2 | 0 of 0 | 0 of 0 | 0 of 1 | 0 of 0 | 1 of 1 |
Totals
| Fighter | KD | Sig. Str. | Sig. Str. % | Total Str. | TD | TD % | Sub. Att | Rev. | Ctrl |
|---|---|---|---|---|---|---|---|---|---|
| Ryan Hall | 0 | 12 of 42 | 28% | 17 of 50 | 0 of 0 | --- | 0 | 0 | 2:57 |
| Gray Maynard | 0 | 46 of 117 | 39% | 53 of 124 | 0 of 2 | 0% | 0 | 0 | 0:00 |
Per Round
| Rd | Fighter | KD | Sig. Str. | Sig. Str. % | Total Str. | TD | TD % | Sub. Att | Rev. | Ctrl |
|---|---|---|---|---|---|---|---|---|---|---|
| 1 | Ryan Hall | 0 | 5 of 16 | 31% | 5 of 16 | 0 of 0 | --- | 0 | 0 | 0:58 |
| Gray Maynard | 0 | 12 of 36 | 33% | 13 of 37 | 0 of 1 | 0% | 0 | 0 | 0:00 | |
| 2 | Ryan Hall | 0 | 3 of 13 | 23% | 3 of 13 | 0 of 0 | --- | 0 | 0 | 0:30 |
| Gray Maynard | 0 | 17 of 48 | 35% | 18 of 49 | 0 of 1 | 0% | 0 | 0 | 0:00 | |
| 3 | Ryan Hall | 0 | 4 of 13 | 30% | 9 of 21 | 0 of 0 | --- | 0 | 0 | 1:29 |
| Gray Maynard | 0 | 17 of 33 | 51% | 22 of 38 | 0 of 0 | --- | 0 | 0 | 0:00 |
Significant Strikes
| Fighter | Sig. Str. | Sig. Str. % | Head | Body | Leg | Distance | Clinch | Ground |
|---|---|---|---|---|---|---|---|---|
| Ryan Hall | 12 of 42 | 28% | 4 of 27 | 5 of 8 | 3 of 7 | 9 of 36 | 0 of 0 | 3 of 6 |
| Gray Maynard | 46 of 117 | 39% | 14 of 44 | 19 of 53 | 13 of 20 | 43 of 113 | 2 of 3 | 1 of 1 |
Significant Strikes Per Round
| Rd | Fighter | Sig. Str. | Sig. Str. % | Head | Body | Leg | Distance | Clinch | Ground |
|---|---|---|---|---|---|---|---|---|---|
| 1 | Ryan Hall | 5 of 16 | 31% | 2 of 12 | 1 of 1 | 2 of 3 | 5 of 16 | 0 of 0 | 0 of 0 |
| Gray Maynard | 12 of 36 | 33% | 1 of 11 | 7 of 17 | 4 of 8 | 11 of 35 | 1 of 1 | 0 of 0 | |
| 2 | Ryan Hall | 3 of 13 | 23% | 2 of 10 | 1 of 3 | 0 of 0 | 2 of 12 | 0 of 0 | 1 of 1 |
| Gray Maynard | 17 of 48 | 35% | 5 of 20 | 8 of 22 | 4 of 6 | 17 of 48 | 0 of 0 | 0 of 0 | |
| 3 | Ryan Hall | 4 of 13 | 30% | 0 of 5 | 3 of 4 | 1 of 4 | 2 of 8 | 0 of 0 | 2 of 5 |
| Gray Maynard | 17 of 33 | 51% | 8 of 13 | 4 of 14 | 5 of 6 | 15 of 30 | 1 of 2 | 1 of 1 |
Totals
| Fighter | KD | Sig. Str. | Sig. Str. % | Total Str. | TD | TD % | Sub. Att | Rev. | Ctrl |
|---|---|---|---|---|---|---|---|---|---|
| Gray Maynard | 0 | 30 of 71 | 42% | 42 of 85 | 3 of 7 | 42% | 1 | 1 | 6:42 |
| Fernando Bruno | 0 | 32 of 101 | 31% | 47 of 119 | 2 of 7 | 28% | 1 | 0 | 2:28 |
Per Round
| Rd | Fighter | KD | Sig. Str. | Sig. Str. % | Total Str. | TD | TD % | Sub. Att | Rev. | Ctrl |
|---|---|---|---|---|---|---|---|---|---|---|
| 1 | Gray Maynard | 0 | 11 of 38 | 28% | 13 of 41 | 0 of 1 | 0% | 0 | 0 | 1:04 |
| Fernando Bruno | 0 | 16 of 50 | 32% | 23 of 58 | 1 of 3 | 33% | 0 | 0 | 0:54 | |
| 2 | Gray Maynard | 0 | 8 of 20 | 40% | 11 of 24 | 2 of 2 | 100% | 1 | 1 | 2:39 |
| Fernando Bruno | 0 | 8 of 33 | 24% | 14 of 41 | 1 of 2 | 50% | 0 | 0 | 0:26 | |
| 3 | Gray Maynard | 0 | 11 of 13 | 84% | 18 of 20 | 1 of 4 | 25% | 0 | 0 | 2:59 |
| Fernando Bruno | 0 | 8 of 18 | 44% | 10 of 20 | 0 of 2 | 0% | 1 | 0 | 1:08 |
Significant Strikes
| Fighter | Sig. Str. | Sig. Str. % | Head | Body | Leg | Distance | Clinch | Ground |
|---|---|---|---|---|---|---|---|---|
| Gray Maynard | 30 of 71 | 42% | 18 of 58 | 8 of 9 | 4 of 4 | 13 of 41 | 9 of 19 | 8 of 11 |
| Fernando Bruno | 32 of 101 | 31% | 26 of 85 | 6 of 16 | 0 of 0 | 27 of 83 | 5 of 18 | 0 of 0 |
Significant Strikes Per Round
| Rd | Fighter | Sig. Str. | Sig. Str. % | Head | Body | Leg | Distance | Clinch | Ground |
|---|---|---|---|---|---|---|---|---|---|
| 1 | Gray Maynard | 11 of 38 | 28% | 7 of 34 | 3 of 3 | 1 of 1 | 6 of 22 | 5 of 15 | 0 of 1 |
| Fernando Bruno | 16 of 50 | 32% | 13 of 41 | 3 of 9 | 0 of 0 | 14 of 37 | 2 of 13 | 0 of 0 | |
| 2 | Gray Maynard | 8 of 20 | 40% | 5 of 16 | 3 of 4 | 0 of 0 | 5 of 15 | 0 of 0 | 3 of 5 |
| Fernando Bruno | 8 of 33 | 24% | 5 of 26 | 3 of 7 | 0 of 0 | 6 of 29 | 2 of 4 | 0 of 0 | |
| 3 | Gray Maynard | 11 of 13 | 84% | 6 of 8 | 2 of 2 | 3 of 3 | 2 of 4 | 4 of 4 | 5 of 5 |
| Fernando Bruno | 8 of 18 | 44% | 8 of 18 | 0 of 0 | 0 of 0 | 7 of 17 | 1 of 1 | 0 of 0 |
Totals
| Fighter | KD | Sig. Str. | Sig. Str. % | Total Str. | TD | TD % | Sub. Att | Rev. | Ctrl |
|---|---|---|---|---|---|---|---|---|---|
| Alexander Yakovlev | 0 | 21 of 55 | 38% | 27 of 61 | 2 of 17 | 11% | 0 | 0 | 2:54 |
| Gray Maynard | 1 | 31 of 72 | 43% | 46 of 92 | 2 of 5 | 40% | 0 | 0 | 2:53 |
Per Round
| Rd | Fighter | KD | Sig. Str. | Sig. Str. % | Total Str. | TD | TD % | Sub. Att | Rev. | Ctrl |
|---|---|---|---|---|---|---|---|---|---|---|
| 1 | Alexander Yakovlev | 0 | 8 of 27 | 29% | 10 of 29 | 0 of 4 | 0% | 0 | 0 | 0:52 |
| Gray Maynard | 0 | 5 of 19 | 26% | 5 of 19 | 1 of 3 | 33% | 0 | 0 | 0:30 | |
| 2 | Alexander Yakovlev | 0 | 7 of 18 | 38% | 8 of 19 | 1 of 7 | 14% | 0 | 0 | 1:06 |
| Gray Maynard | 1 | 18 of 35 | 51% | 21 of 41 | 0 of 0 | --- | 0 | 0 | 1:18 | |
| 3 | Alexander Yakovlev | 0 | 6 of 10 | 60% | 9 of 13 | 1 of 6 | 16% | 0 | 0 | 0:56 |
| Gray Maynard | 0 | 8 of 18 | 44% | 20 of 32 | 1 of 2 | 50% | 0 | 0 | 1:05 |
Significant Strikes
| Fighter | Sig. Str. | Sig. Str. % | Head | Body | Leg | Distance | Clinch | Ground |
|---|---|---|---|---|---|---|---|---|
| Alexander Yakovlev | 21 of 55 | 38% | 16 of 41 | 3 of 12 | 2 of 2 | 18 of 48 | 3 of 7 | 0 of 0 |
| Gray Maynard | 31 of 72 | 43% | 21 of 59 | 9 of 11 | 1 of 2 | 15 of 49 | 8 of 12 | 8 of 11 |
Significant Strikes Per Round
| Rd | Fighter | Sig. Str. | Sig. Str. % | Head | Body | Leg | Distance | Clinch | Ground |
|---|---|---|---|---|---|---|---|---|---|
| 1 | Alexander Yakovlev | 8 of 27 | 29% | 6 of 22 | 2 of 5 | 0 of 0 | 7 of 26 | 1 of 1 | 0 of 0 |
| Gray Maynard | 5 of 19 | 26% | 0 of 12 | 5 of 6 | 0 of 1 | 2 of 15 | 3 of 4 | 0 of 0 | |
| 2 | Alexander Yakovlev | 7 of 18 | 38% | 5 of 10 | 1 of 7 | 1 of 1 | 6 of 15 | 1 of 3 | 0 of 0 |
| Gray Maynard | 18 of 35 | 51% | 13 of 29 | 4 of 5 | 1 of 1 | 5 of 16 | 5 of 8 | 8 of 11 | |
| 3 | Alexander Yakovlev | 6 of 10 | 60% | 5 of 9 | 0 of 0 | 1 of 1 | 5 of 7 | 1 of 3 | 0 of 0 |
| Gray Maynard | 8 of 18 | 44% | 8 of 18 | 0 of 0 | 0 of 0 | 8 of 18 | 0 of 0 | 0 of 0 |
Totals
| Fighter | KD | Sig. Str. | Sig. Str. % | Total Str. | TD | TD % | Sub. Att | Rev. | Ctrl |
|---|---|---|---|---|---|---|---|---|---|
| Ross Pearson | 0 | 15 of 47 | 31% | 25 of 58 | 2 of 4 | 50% | 0 | 0 | 1:12 |
| Gray Maynard | 1 | 26 of 55 | 47% | 35 of 64 | 0 of 0 | --- | 0 | 0 | 0:07 |
Per Round
| Rd | Fighter | KD | Sig. Str. | Sig. Str. % | Total Str. | TD | TD % | Sub. Att | Rev. | Ctrl |
|---|---|---|---|---|---|---|---|---|---|---|
| 1 | Ross Pearson | 0 | 13 of 38 | 34% | 23 of 49 | 2 of 3 | 66% | 0 | 0 | 0:53 |
| Gray Maynard | 0 | 11 of 37 | 29% | 19 of 45 | 0 of 0 | --- | 0 | 0 | 0:00 | |
| 2 | Ross Pearson | 0 | 2 of 9 | 22% | 2 of 9 | 0 of 1 | 0% | 0 | 0 | 0:19 |
| Gray Maynard | 1 | 15 of 18 | 83% | 16 of 19 | 0 of 0 | --- | 0 | 0 | 0:07 |
Significant Strikes
| Fighter | Sig. Str. | Sig. Str. % | Head | Body | Leg | Distance | Clinch | Ground |
|---|---|---|---|---|---|---|---|---|
| Ross Pearson | 15 of 47 | 31% | 9 of 40 | 6 of 7 | 0 of 0 | 12 of 44 | 3 of 3 | 0 of 0 |
| Gray Maynard | 26 of 55 | 47% | 20 of 45 | 4 of 8 | 2 of 2 | 16 of 44 | 6 of 7 | 4 of 4 |
Significant Strikes Per Round
| Rd | Fighter | Sig. Str. | Sig. Str. % | Head | Body | Leg | Distance | Clinch | Ground |
|---|---|---|---|---|---|---|---|---|---|
| 1 | Ross Pearson | 13 of 38 | 34% | 8 of 32 | 5 of 6 | 0 of 0 | 10 of 35 | 3 of 3 | 0 of 0 |
| Gray Maynard | 11 of 37 | 29% | 7 of 29 | 3 of 7 | 1 of 1 | 7 of 32 | 4 of 5 | 0 of 0 | |
| 2 | Ross Pearson | 2 of 9 | 22% | 1 of 8 | 1 of 1 | 0 of 0 | 2 of 9 | 0 of 0 | 0 of 0 |
| Gray Maynard | 15 of 18 | 83% | 13 of 16 | 1 of 1 | 1 of 1 | 9 of 12 | 2 of 2 | 4 of 4 |
Totals
| Fighter | KD | Sig. Str. | Sig. Str. % | Total Str. | TD | TD % | Sub. Att | Rev. | Ctrl |
|---|---|---|---|---|---|---|---|---|---|
| Nate Diaz | 0 | 5 of 15 | 33% | 6 of 16 | 1 of 2 | 50% | 0 | 0 | 0:48 |
| Gray Maynard | 0 | 33 of 55 | 60% | 34 of 56 | 0 of 1 | 0% | 0 | 0 | 0:06 |
Per Round
| Rd | Fighter | KD | Sig. Str. | Sig. Str. % | Total Str. | TD | TD % | Sub. Att | Rev. | Ctrl |
|---|---|---|---|---|---|---|---|---|---|---|
| 1 | Nate Diaz | 0 | 5 of 15 | 33% | 6 of 16 | 1 of 2 | 50% | 0 | 0 | 0:48 |
| Gray Maynard | 0 | 33 of 55 | 60% | 34 of 56 | 0 of 1 | 0% | 0 | 0 | 0:06 |
Significant Strikes
| Fighter | Sig. Str. | Sig. Str. % | Head | Body | Leg | Distance | Clinch | Ground |
|---|---|---|---|---|---|---|---|---|
| Nate Diaz | 5 of 15 | 33% | 3 of 13 | 1 of 1 | 1 of 1 | 3 of 12 | 1 of 1 | 1 of 2 |
| Gray Maynard | 33 of 55 | 60% | 28 of 49 | 5 of 6 | 0 of 0 | 15 of 33 | 18 of 22 | 0 of 0 |
Significant Strikes Per Round
| Rd | Fighter | Sig. Str. | Sig. Str. % | Head | Body | Leg | Distance | Clinch | Ground |
|---|---|---|---|---|---|---|---|---|---|
| 1 | Nate Diaz | 5 of 15 | 33% | 3 of 13 | 1 of 1 | 1 of 1 | 3 of 12 | 1 of 1 | 1 of 2 |
| Gray Maynard | 33 of 55 | 60% | 28 of 49 | 5 of 6 | 0 of 0 | 15 of 33 | 18 of 22 | 0 of 0 |
Totals
| Fighter | KD | Sig. Str. | Sig. Str. % | Total Str. | TD | TD % | Sub. Att | Rev. | Ctrl |
|---|---|---|---|---|---|---|---|---|---|
| T. J. Grant | 0 | 13 of 28 | 46% | 13 of 28 | 0 of 0 | --- | 0 | 0 | 0:00 |
| Gray Maynard | 3 | 26 of 52 | 50% | 29 of 55 | 0 of 0 | --- | 0 | 0 | 0:15 |
Per Round
| Rd | Fighter | KD | Sig. Str. | Sig. Str. % | Total Str. | TD | TD % | Sub. Att | Rev. | Ctrl |
|---|---|---|---|---|---|---|---|---|---|---|
| 1 | T. J. Grant | 0 | 13 of 28 | 46% | 13 of 28 | 0 of 0 | --- | 0 | 0 | 0:00 |
| Gray Maynard | 3 | 26 of 52 | 50% | 29 of 55 | 0 of 0 | --- | 0 | 0 | 0:15 |
Significant Strikes
| Fighter | Sig. Str. | Sig. Str. % | Head | Body | Leg | Distance | Clinch | Ground |
|---|---|---|---|---|---|---|---|---|
| T. J. Grant | 13 of 28 | 46% | 13 of 27 | 0 of 1 | 0 of 0 | 12 of 26 | 1 of 2 | 0 of 0 |
| Gray Maynard | 26 of 52 | 50% | 22 of 48 | 4 of 4 | 0 of 0 | 10 of 24 | 12 of 19 | 4 of 9 |
Significant Strikes Per Round
| Rd | Fighter | Sig. Str. | Sig. Str. % | Head | Body | Leg | Distance | Clinch | Ground |
|---|---|---|---|---|---|---|---|---|---|
| 1 | T. J. Grant | 13 of 28 | 46% | 13 of 27 | 0 of 1 | 0 of 0 | 12 of 26 | 1 of 2 | 0 of 0 |
| Gray Maynard | 26 of 52 | 50% | 22 of 48 | 4 of 4 | 0 of 0 | 10 of 24 | 12 of 19 | 4 of 9 |
Frankie Edgar - Fight History
Totals
| Fighter | KD | Sig. Str. | Sig. Str. % | Total Str. | TD | TD % | Sub. Att | Rev. | Ctrl |
|---|---|---|---|---|---|---|---|---|---|
| Marlon Vera | 0 | 94 of 155 | 60% | 138 of 202 | 3 of 9 | 33% | 0 | 0 | 4:25 |
| Frankie Edgar | 1 | 88 of 164 | 53% | 110 of 187 | 0 of 0 | --- | 1 | 0 | 0:01 |
Per Round
| Rd | Fighter | KD | Sig. Str. | Sig. Str. % | Total Str. | TD | TD % | Sub. Att | Rev. | Ctrl |
|---|---|---|---|---|---|---|---|---|---|---|
| 1 | Marlon Vera | 0 | 35 of 45 | 77% | 67 of 80 | 1 of 3 | 33% | 0 | 0 | 3:06 |
| Frankie Edgar | 0 | 18 of 35 | 51% | 36 of 54 | 0 of 0 | --- | 1 | 0 | 0:00 | |
| 2 | Marlon Vera | 0 | 27 of 47 | 57% | 39 of 59 | 1 of 4 | 25% | 0 | 0 | 1:14 |
| Frankie Edgar | 0 | 32 of 65 | 49% | 36 of 69 | 0 of 0 | --- | 0 | 0 | 0:00 | |
| 3 | Marlon Vera | 0 | 32 of 63 | 50% | 32 of 63 | 1 of 2 | 50% | 0 | 0 | 0:05 |
| Frankie Edgar | 1 | 38 of 64 | 59% | 38 of 64 | 0 of 0 | --- | 0 | 0 | 0:01 |
Significant Strikes
| Fighter | Sig. Str. | Sig. Str. % | Head | Body | Leg | Distance | Clinch | Ground |
|---|---|---|---|---|---|---|---|---|
| Marlon Vera | 94 of 155 | 60% | 59 of 113 | 25 of 32 | 10 of 10 | 69 of 125 | 0 of 1 | 25 of 29 |
| Frankie Edgar | 88 of 164 | 53% | 60 of 130 | 22 of 26 | 6 of 8 | 75 of 140 | 1 of 1 | 12 of 23 |
Significant Strikes Per Round
| Rd | Fighter | Sig. Str. | Sig. Str. % | Head | Body | Leg | Distance | Clinch | Ground |
|---|---|---|---|---|---|---|---|---|---|
| 1 | Marlon Vera | 35 of 45 | 77% | 22 of 31 | 9 of 10 | 4 of 4 | 18 of 25 | 0 of 0 | 17 of 20 |
| Frankie Edgar | 18 of 35 | 51% | 14 of 30 | 2 of 2 | 2 of 3 | 11 of 22 | 0 of 0 | 7 of 13 | |
| 2 | Marlon Vera | 27 of 47 | 57% | 19 of 35 | 5 of 9 | 3 of 3 | 19 of 38 | 0 of 0 | 8 of 9 |
| Frankie Edgar | 32 of 65 | 49% | 18 of 47 | 12 of 15 | 2 of 3 | 27 of 55 | 1 of 1 | 4 of 9 | |
| 3 | Marlon Vera | 32 of 63 | 50% | 18 of 47 | 11 of 13 | 3 of 3 | 32 of 62 | 0 of 1 | 0 of 0 |
| Frankie Edgar | 38 of 64 | 59% | 28 of 53 | 8 of 9 | 2 of 2 | 37 of 63 | 0 of 0 | 1 of 1 |
Play-by-Play
View on SherdogRound 1
The hits keep right on coming, we hope you’re not worn out from what you’ve witnessed the last several fights. Former lightweight champion and multiple-time featherweight title challenger Edgar (24-9-1, 18-9-1 UFC) will answer the call at the age of 40 against furious Ecuadorian striker Vera (17-7-1, 11-6 UFC). Although Vera will clock in 12 years his opponent’s junior, he is not taking Edgar lightly, and referee Todd Anderson will have his work cut out for him in the next 15 minutes. Vera crawls out of his corner like Jon Jones, and because of this, there is no glove touch. Instead, when Vera stands up, they start trading. Edgar walks Vera down and slugs him in the face with a right hand, and Edgar shoots in for a takedown from afar. Edgar lands a left, and then another, and he walks through a leg kick so that he can keep punching. Vera sticks his tongue out as he stalks Edgar, and Edgar greets him with punches. Vera is struggling to find his range as Edgar gets in and out of range in time, popping Vera with strikes and escaping before counters find him. Edgar catches a leg kick, and he dives in for a takedown. When Edgar hits it, Vera defends with a guillotine choke on his back, but with Vera flat on his back, there is no choke set up. Vera bucks Edgar back to his full guard, and he closes it around the former champ. Edgar breaks the posture by pumping up and down, and he slashes with vicious elbows right on the nose. Vera lets rip several elbows from his back to make Edgar honest, and chants for “Let’s go, Frankie” rain down in the arena. Vera defends successfully with hacking elbows, and Edgar sits up every so often to land some ground-and-pound. Edgar fights off a possible armbar setup to land strikes, and when he stands up, Vera starts spamming upkicks. Edgar masterfully dodges most of the strikes before dropping back down into Vera’s guard, and he begins to batter Vera with more elbows. “Chito” has his guard closed for the most part, but Edgar lands strikes from above until the horn sounds. When Edgar stands up, Vera kicks him in the face illegally, and Edgar protests.
Sherdog Scores
Jay Pettry scores the round: 10-9 Edgar
Ben Duffy scores the round: 10-9 Edgar
Tristen Critchfield scores the round: 10-9 Edgar
Round 2
Vera practically sprints out of his corner to engage, but he does not throw much in the first 20 seconds. The Ecuadorian gets off an inside leg kick, and he pops Edgar in the face to draw a little swelling around Edgar’s left eye. Vera is sharp with his hands as he gives chase, and he lands a body kick right before Edgar charges him. When the former champ rushes in, he throws a combination and gets clipped with a counter on the way out, but he is no worse for wear. Vera steps in with a knee, and Edgar’s eyes light up as he grabs his opponent’s leg and throws him down to the canvas. Edgar stacks Vera up in a high guard to keep him from defending or getting any upkicks off, all while slapping him in the face with hammerfists. Edgar comfortably sits down to land strikes, but Vera suddenly somersaults backwards to break the posture and stand back up. When back upright, Vera runs after Edgar to lay into him with strikes. “Chito” throws a kick, and Edgar grabs it but cannot punish him for this strike by taking him down. Vera pulls his leg back, and he takes an uppercut to the chops. Vera eats a few body shots so that he can knee Edgar in the face, and he is making Edgar retreat constantly as he peppers the midsection with front kicks. Vera scores a solid knee to make Edgar do a little flip on the ground to fall down and get back to his feet, and when he gets back up, Vera punches him in the face. Edgar lands a single leg kick, and Vera raises his arms in the air to taunt him, which allows Edgar to kick him two more times down low. Edgar sits down on a right hand, and he swipes with a hook to make Vera take a step back. Vera turns around and lands a back kick, and he blasts Edgar in the face with an elbow to put Edgar on rubber legs. Vera gets off a head kick, and he tries to finish the job, but he cannot because the round ends. Both bantamweights exchange words, and Vera flips him off as Anderson separates them.
Sherdog Scores
Jay Pettry scores the round: 10-9 Vera
Ben Duffy scores the round: 10-9 Vera
Tristen Critchfield scores the round: 10-9 Vera
Round 3
Vera attacks first to start of the final round, with long, rangy punches and front kicks. Vera scores a punch, and Edgar returns fire with a one-two. Edgar has a head kick clatter off the body, Vera is on him to land power shots. Vera stabs the midsection with a kick, and he turtles up when Edgar unloads on him. A leg kick from Vera makes Edgar back off, and “Chito” turns to plant a side kick on Edgar’s torso. Edgar has a takedown stuffed, and he walks into a right hand and an uppercut. Vera lets rip with a leg kick, and Edgar tags him with four punches to the body before retreating. Edgar gets marked up with a sharp uppercut, and Vera is taking it to him and making Edgar constantly backpedal. Vera’s body kick gets through, and Edgar returns fire with a short combination. The power differential is far in the favor of the Ecuadorian at this point, but Edgar is more content to land with volume while Vera is looking for the one-hitter quitter. One punch knocks Edgar’s mouthpiece out, and Anderson runs over to replace it as Vera gives a cheeky look and shrug to the camera. Edgar gets rocked by a left hand, and he catches a rampaging Vera by hitting a takedown and putting him on the ground. “Chito” powers his way back up to his feet in an instant, and he breaks the grip to line up a right hand. They both throw hands in the pocket, and Vera steps back to unleash a front kick reminiscent of Anderson Silva booting Vitor Belfort in the face. Edgar’s legs disintegrate beneath him as he falls face-first to the mat, and Vera gets off a hammerfists or two before Anderson can sprint in to halt the fight. Edgar protests the stoppage, but considering he was out on his feet when he stood up and nearly fell over walking to his corner, it appears to have been the right call. They settle their in-cage beef after the fight concludes, and show some respect to one another after a fun melee.
The Official Result
Marlon Vera def. Frankie Edgar R3 3:50 via KO (Front Kick)
Angelo picks Frankie Edgar, but hesitantly. He believes Edgar's wrestling, footwork, and cardio are superior, and that if Edgar implements a wrestling game plan, he wins. However, he worries about Edgar's chin after recent knockouts. He thinks Vera is overrated and that Edgar can win a decision if he avoids getting caught. He also likes the over on the 1.5 round line.
Big Brady picks Marlon Vera to win by third-round knockout. He notes Vera's durability and power, while Frankie Edgar is 40 years old with diminishing durability and has been knocked out three times recently. Brady thinks Edgar could win on paper with takedowns, but at this stage, Vera's youth and toughness will prevail. He expects Vera to drop the first round but build into the fight and finish Edgar late.
Cody agrees Edgar is a live underdog, citing Vera's slow starts and poor takedown defense. He worries about Edgar's age (40) and recent KO losses but thinks Edgar's wrestling and pace could win close rounds. He notes the 'Frankie effect' in New York.
Daniel Levi picks Marlon Vera to win, citing Vera's finishing ability, youth (28 vs 40), and improvement under Jason Parillo. He expects Vera to land more damage and potentially get a finish, but warns that Frankie Edgar may try to stall and clinch. Levi notes that Vera has a bad habit of starting slow but should pull away in the later rounds as Edgar's durability wanes. He also mentions that Vera has an insane chin and is still improving.
Jacob picks Marlon Vera, citing his youth (28) and upward trajectory. He believes Vera's length and jiu-jitsu will be problematic for Edgar, and that Edgar's chin is a major liability. He thinks Vera can win by knockout or decision, and that Edgar's only chance is an ugly decision via wrestling and leg kicks. He is confident in Vera.
The host bets Edgar at +148, believing his pressure, takedowns, and volume will outwork Vera. He doubts Vera's one-punch KO power and thinks Edgar's chin will hold. He expects Edgar to win a decision.
Paul leans Edgar, believing his wrestling and pace can win close rounds. He notes Vera's slow starts and poor takedown defense (69%), which Edgar can exploit. He also mentions the 'Frankie effect' in New York, where judges favor the veteran. He bet fight goes to decision at -150.
The Guru picks Marlon Vera by decision, predicting a brutal beatdown. He expects Edgar to win the first round with grappling, but Vera will take over with body shots, elbows, and range striking, eventually wearing Edgar down. The Guru notes Edgar's age and recent KO loss, and believes Vera's size and reach advantage will be key. He predicts a 29-27 unanimous decision.
Totals
| Fighter | KD | Sig. Str. | Sig. Str. % | Total Str. | TD | TD % | Sub. Att | Rev. | Ctrl |
|---|---|---|---|---|---|---|---|---|---|
| Cory Sandhagen | 1 | 2 of 5 | 40% | 2 of 5 | 0 of 0 | --- | 0 | 0 | 0:02 |
| Frankie Edgar | 0 | 2 of 3 | 66% | 2 of 3 | 0 of 0 | --- | 0 | 0 | 0:00 |
Per Round
| Rd | Fighter | KD | Sig. Str. | Sig. Str. % | Total Str. | TD | TD % | Sub. Att | Rev. | Ctrl |
|---|---|---|---|---|---|---|---|---|---|---|
| 1 | Cory Sandhagen | 1 | 2 of 5 | 40% | 2 of 5 | 0 of 0 | --- | 0 | 0 | 0:02 |
| Frankie Edgar | 0 | 2 of 3 | 66% | 2 of 3 | 0 of 0 | --- | 0 | 0 | 0:00 |
Significant Strikes
| Fighter | Sig. Str. | Sig. Str. % | Head | Body | Leg | Distance | Clinch | Ground |
|---|---|---|---|---|---|---|---|---|
| Cory Sandhagen | 2 of 5 | 40% | 1 of 3 | 0 of 0 | 1 of 2 | 2 of 5 | 0 of 0 | 0 of 0 |
| Frankie Edgar | 2 of 3 | 66% | 1 of 2 | 0 of 0 | 1 of 1 | 2 of 3 | 0 of 0 | 0 of 0 |
Significant Strikes Per Round
| Rd | Fighter | Sig. Str. | Sig. Str. % | Head | Body | Leg | Distance | Clinch | Ground |
|---|---|---|---|---|---|---|---|---|---|
| 1 | Cory Sandhagen | 2 of 5 | 40% | 1 of 3 | 0 of 0 | 1 of 2 | 2 of 5 | 0 of 0 | 0 of 0 |
| Frankie Edgar | 2 of 3 | 66% | 1 of 2 | 0 of 0 | 1 of 1 | 2 of 3 | 0 of 0 | 0 of 0 |
Play-by-Play
View on SherdogRound 1
Our co-main event comes in a flash between a pair of lightning-quick fighters as Sandhagen (13-2, 6-1 UFC) looks to find the answer against former champ “The Answer” Edgar (24-8-1, 18-8-1 UFC). Referee Keith Peterson fastens his nonsenseless seatbelt as the mayhem is about to begin, and there is no glove touch ahead of what could be a torrid affair. Edgar pushes the pace early and lands a leg kick. Sandhagen reaches out with a left hand and his own leg kick but is backing away.
As Edgar keeps advancing, Sandhagen leaps in the air with his right knee, and Edgar is completely unconscious as soon as it connects. Edgar falls lifelessly but rigidly to the ground, and Sandhagen has no interest in following up as he recognizes that there is nothing more he needs to do.
Incredible. Absolutely incredible. “Knockout of the Year” has a very early frontrunner courtesy of a knee that silenced the entire arena in one blow. Thankfully, Edgar regains consciousness and is able to not only sit up, but gets back to his feet after eating one of the cleanest flying knees you will ever see.
The Official Result
Cory Sandhagen def. Frankie Edgar R1 0:28 via KO (Flying Knee)
Big Brady picks Cory Sandhagen, calling the odds 'insane' and noting Sandhagen's striking volume and durability. He acknowledges Frankie Edgar's path to victory via takedowns, but believes Sandhagen's ability to get back up and his chin will prevail. He predicts a knockout, citing Edgar's declining chin, and suggests looking at the knockout prop for better value.
Daniel Levi leans with Cory Sandhagen, acknowledging Frankie Edgar's takedown threat and Sandhagen's poor takedown defense (30%). He notes Edgar's experience against taller fighters and his durability at 135, but believes Sandhagen's striking output and range will be key. He says it's a dog-or-pass situation and doesn't blame anyone betting on Edgar.
Sandhagen's unorthodox style, feints, and footwork will be difficult for Edgar to deal with. He uses his reach and height advantage well, and his diverse striking (kicks, spinning attacks) should keep Edgar at range. Edgar has struggled with bigger fighters who can maintain distance. Sandhagen's takedown defense is a concern, but Edgar's wrestling may not be as effective at 135. I expect Sandhagen to win a decision by landing the better shots and controlling the distance. The line is a bit wide, but Sandhagen should get the win.
The MMA Guru picks Cory Sandhagen, calling him a deserving favorite but criticizing the -440 odds as too high. He highlights Sandhagen's length, kicking game, and takedown defense. He predicts Sandhagen will use front kicks and question mark kicks to set up a head kick TKO in the second round, noting Edgar's boxing will be negated by range.
Totals
| Fighter | KD | Sig. Str. | Sig. Str. % | Total Str. | TD | TD % | Sub. Att | Rev. | Ctrl |
|---|---|---|---|---|---|---|---|---|---|
| Frankie Edgar | 0 | 166 of 350 | 47% | 166 of 350 | 0 of 0 | --- | 0 | 0 | 0:00 |
| Pedro Munhoz | 0 | 135 of 363 | 37% | 135 of 363 | 2 of 8 | 25% | 0 | 0 | 0:18 |
Per Round
| Rd | Fighter | KD | Sig. Str. | Sig. Str. % | Total Str. | TD | TD % | Sub. Att | Rev. | Ctrl |
|---|---|---|---|---|---|---|---|---|---|---|
| 1 | Frankie Edgar | 0 | 30 of 64 | 46% | 30 of 64 | 0 of 0 | --- | 0 | 0 | 0:00 |
| Pedro Munhoz | 0 | 29 of 77 | 37% | 29 of 77 | 0 of 0 | --- | 0 | 0 | 0:00 | |
| 2 | Frankie Edgar | 0 | 21 of 57 | 36% | 21 of 57 | 0 of 0 | --- | 0 | 0 | 0:00 |
| Pedro Munhoz | 0 | 25 of 61 | 40% | 25 of 61 | 1 of 5 | 20% | 0 | 0 | 0:12 | |
| 3 | Frankie Edgar | 0 | 33 of 60 | 55% | 33 of 60 | 0 of 0 | --- | 0 | 0 | 0:00 |
| Pedro Munhoz | 0 | 24 of 60 | 40% | 24 of 60 | 0 of 1 | 0% | 0 | 0 | 0:00 | |
| 4 | Frankie Edgar | 0 | 35 of 74 | 47% | 35 of 74 | 0 of 0 | --- | 0 | 0 | 0:00 |
| Pedro Munhoz | 0 | 24 of 82 | 29% | 24 of 82 | 1 of 1 | 100% | 0 | 0 | 0:06 | |
| 5 | Frankie Edgar | 0 | 47 of 95 | 49% | 47 of 95 | 0 of 0 | --- | 0 | 0 | 0:00 |
| Pedro Munhoz | 0 | 33 of 83 | 39% | 33 of 83 | 0 of 1 | 0% | 0 | 0 | 0:00 |
Significant Strikes
| Fighter | Sig. Str. | Sig. Str. % | Head | Body | Leg | Distance | Clinch | Ground |
|---|---|---|---|---|---|---|---|---|
| Frankie Edgar | 166 of 350 | 47% | 98 of 259 | 24 of 39 | 44 of 52 | 166 of 350 | 0 of 0 | 0 of 0 |
| Pedro Munhoz | 135 of 363 | 37% | 105 of 309 | 23 of 46 | 7 of 8 | 134 of 361 | 1 of 2 | 0 of 0 |
Significant Strikes Per Round
| Rd | Fighter | Sig. Str. | Sig. Str. % | Head | Body | Leg | Distance | Clinch | Ground |
|---|---|---|---|---|---|---|---|---|---|
| 1 | Frankie Edgar | 30 of 64 | 46% | 15 of 46 | 4 of 5 | 11 of 13 | 30 of 64 | 0 of 0 | 0 of 0 |
| Pedro Munhoz | 29 of 77 | 37% | 23 of 63 | 4 of 12 | 2 of 2 | 29 of 77 | 0 of 0 | 0 of 0 | |
| 2 | Frankie Edgar | 21 of 57 | 36% | 16 of 50 | 1 of 2 | 4 of 5 | 21 of 57 | 0 of 0 | 0 of 0 |
| Pedro Munhoz | 25 of 61 | 40% | 19 of 50 | 6 of 10 | 0 of 1 | 24 of 59 | 1 of 2 | 0 of 0 | |
| 3 | Frankie Edgar | 33 of 60 | 55% | 18 of 42 | 4 of 6 | 11 of 12 | 33 of 60 | 0 of 0 | 0 of 0 |
| Pedro Munhoz | 24 of 60 | 40% | 16 of 46 | 5 of 11 | 3 of 3 | 24 of 60 | 0 of 0 | 0 of 0 | |
| 4 | Frankie Edgar | 35 of 74 | 47% | 24 of 56 | 4 of 10 | 7 of 8 | 35 of 74 | 0 of 0 | 0 of 0 |
| Pedro Munhoz | 24 of 82 | 29% | 20 of 75 | 3 of 6 | 1 of 1 | 24 of 82 | 0 of 0 | 0 of 0 | |
| 5 | Frankie Edgar | 47 of 95 | 49% | 25 of 65 | 11 of 16 | 11 of 14 | 47 of 95 | 0 of 0 | 0 of 0 |
| Pedro Munhoz | 33 of 83 | 39% | 27 of 75 | 5 of 7 | 1 of 1 | 33 of 83 | 0 of 0 | 0 of 0 |
Big Brady picks Pedro Munhoz to win by third-round knockout. He believes Frankie Edgar is on his way out at 38 years old, questioning his durability and chin. Munhoz has excellent takedown defense (81%) and is dangerous on the ground with a guillotine, so Brady expects the fight to stay on the feet where Munhoz throws more volume and hits harder. He notes Munhoz has never been knocked out or submitted, while Edgar has been knocked out twice.
Daniel Levi picks Pedro Munhoz to win by first-round stoppage. He argues that Frankie Edgar has not evolved his style since 2010, relying on pitter-patter boxing, while Munhoz has devastating calf kicks, one-punch power, and a world-class guillotine. Levi notes Edgar's durability has declined with age and that dropping to bantamweight removes his speed advantage. He believes Munhoz will pressure Edgar and finish him early, similar to the Korean Zombie fight.
Pedro Munhoz is the pick because Frankie Edgar is 38, cutting to 135 for the first time, and has shown dwindling durability after the Korean Zombie loss. Munhoz's calf kicks and power punching will be too much for Edgar, who struggles to close distance without eating shots. Munhoz's guillotine threat also neutralizes Edgar's wrestling. Expect a finish inside the distance, likely by TKO in the second or third round.
The MMA Guru picks Pedro Munhoz, citing Frankie Edgar's history of KO losses and damage taken, and the disadvantage of moving down in weight. He praises Munhoz's iron chin, pressure, and body work, predicting a late first-round or early second-round TKO after Edgar shoots for a takedown.
Totals
| Fighter | KD | Sig. Str. | Sig. Str. % | Total Str. | TD | TD % | Sub. Att | Rev. | Ctrl |
|---|---|---|---|---|---|---|---|---|---|
| Chan Sung Jung | 0 | 9 of 14 | 64% | 9 of 14 | 0 of 2 | 0% | 0 | 0 | 2:12 |
| Frankie Edgar | 1 | 46 of 60 | 76% | 79 of 97 | 0 of 0 | --- | 0 | 0 | 0:00 |
Per Round
| Rd | Fighter | KD | Sig. Str. | Sig. Str. % | Total Str. | TD | TD % | Sub. Att | Rev. | Ctrl |
|---|---|---|---|---|---|---|---|---|---|---|
| 1 | Chan Sung Jung | 0 | 9 of 14 | 64% | 9 of 14 | 0 of 2 | 0% | 0 | 0 | 2:12 |
| Frankie Edgar | 1 | 46 of 60 | 76% | 79 of 97 | 0 of 0 | --- | 0 | 0 | 0:00 |
Significant Strikes
| Fighter | Sig. Str. | Sig. Str. % | Head | Body | Leg | Distance | Clinch | Ground |
|---|---|---|---|---|---|---|---|---|
| Chan Sung Jung | 9 of 14 | 64% | 6 of 11 | 1 of 1 | 2 of 2 | 9 of 14 | 0 of 0 | 0 of 0 |
| Frankie Edgar | 46 of 60 | 76% | 46 of 60 | 0 of 0 | 0 of 0 | 8 of 18 | 0 of 0 | 38 of 42 |
Significant Strikes Per Round
| Rd | Fighter | Sig. Str. | Sig. Str. % | Head | Body | Leg | Distance | Clinch | Ground |
|---|---|---|---|---|---|---|---|---|---|
| 1 | Chan Sung Jung | 9 of 14 | 64% | 6 of 11 | 1 of 1 | 2 of 2 | 9 of 14 | 0 of 0 | 0 of 0 |
| Frankie Edgar | 46 of 60 | 76% | 46 of 60 | 0 of 0 | 0 of 0 | 8 of 18 | 0 of 0 | 38 of 42 |
Totals
| Fighter | KD | Sig. Str. | Sig. Str. % | Total Str. | TD | TD % | Sub. Att | Rev. | Ctrl |
|---|---|---|---|---|---|---|---|---|---|
| Max Holloway | 0 | 129 of 328 | 39% | 131 of 330 | 0 of 0 | --- | 0 | 0 | 0:00 |
| Frankie Edgar | 0 | 96 of 264 | 36% | 96 of 264 | 1 of 15 | 6% | 0 | 0 | 1:46 |
Per Round
| Rd | Fighter | KD | Sig. Str. | Sig. Str. % | Total Str. | TD | TD % | Sub. Att | Rev. | Ctrl |
|---|---|---|---|---|---|---|---|---|---|---|
| 1 | Max Holloway | 0 | 13 of 48 | 27% | 13 of 48 | 0 of 0 | --- | 0 | 0 | 0:00 |
| Frankie Edgar | 0 | 18 of 53 | 33% | 18 of 53 | 0 of 1 | 0% | 0 | 0 | 0:00 | |
| 2 | Max Holloway | 0 | 27 of 69 | 39% | 27 of 69 | 0 of 0 | --- | 0 | 0 | 0:00 |
| Frankie Edgar | 0 | 13 of 55 | 23% | 13 of 55 | 0 of 2 | 0% | 0 | 0 | 0:05 | |
| 3 | Max Holloway | 0 | 30 of 61 | 49% | 30 of 61 | 0 of 0 | --- | 0 | 0 | 0:00 |
| Frankie Edgar | 0 | 17 of 48 | 35% | 17 of 48 | 1 of 4 | 25% | 0 | 0 | 0:59 | |
| 4 | Max Holloway | 0 | 29 of 76 | 38% | 31 of 78 | 0 of 0 | --- | 0 | 0 | 0:00 |
| Frankie Edgar | 0 | 22 of 47 | 46% | 22 of 47 | 0 of 6 | 0% | 0 | 0 | 0:28 | |
| 5 | Max Holloway | 0 | 30 of 74 | 40% | 30 of 74 | 0 of 0 | --- | 0 | 0 | 0:00 |
| Frankie Edgar | 0 | 26 of 61 | 42% | 26 of 61 | 0 of 2 | 0% | 0 | 0 | 0:14 |
Significant Strikes
| Fighter | Sig. Str. | Sig. Str. % | Head | Body | Leg | Distance | Clinch | Ground |
|---|---|---|---|---|---|---|---|---|
| Max Holloway | 129 of 328 | 39% | 109 of 295 | 20 of 33 | 0 of 0 | 120 of 319 | 8 of 8 | 1 of 1 |
| Frankie Edgar | 96 of 264 | 36% | 57 of 195 | 21 of 48 | 18 of 21 | 93 of 252 | 2 of 10 | 1 of 2 |
Significant Strikes Per Round
| Rd | Fighter | Sig. Str. | Sig. Str. % | Head | Body | Leg | Distance | Clinch | Ground |
|---|---|---|---|---|---|---|---|---|---|
| 1 | Max Holloway | 13 of 48 | 27% | 9 of 42 | 4 of 6 | 0 of 0 | 13 of 48 | 0 of 0 | 0 of 0 |
| Frankie Edgar | 18 of 53 | 33% | 10 of 40 | 3 of 8 | 5 of 5 | 18 of 51 | 0 of 2 | 0 of 0 | |
| 2 | Max Holloway | 27 of 69 | 39% | 22 of 60 | 5 of 9 | 0 of 0 | 26 of 68 | 1 of 1 | 0 of 0 |
| Frankie Edgar | 13 of 55 | 23% | 8 of 44 | 1 of 6 | 4 of 5 | 12 of 53 | 1 of 2 | 0 of 0 | |
| 3 | Max Holloway | 30 of 61 | 49% | 22 of 52 | 8 of 9 | 0 of 0 | 22 of 53 | 7 of 7 | 1 of 1 |
| Frankie Edgar | 17 of 48 | 35% | 10 of 36 | 6 of 10 | 1 of 2 | 15 of 43 | 1 of 3 | 1 of 2 | |
| 4 | Max Holloway | 29 of 76 | 38% | 27 of 72 | 2 of 4 | 0 of 0 | 29 of 76 | 0 of 0 | 0 of 0 |
| Frankie Edgar | 22 of 47 | 46% | 14 of 35 | 6 of 9 | 2 of 3 | 22 of 45 | 0 of 2 | 0 of 0 | |
| 5 | Max Holloway | 30 of 74 | 40% | 29 of 69 | 1 of 5 | 0 of 0 | 30 of 74 | 0 of 0 | 0 of 0 |
| Frankie Edgar | 26 of 61 | 42% | 15 of 40 | 5 of 15 | 6 of 6 | 26 of 60 | 0 of 1 | 0 of 0 |
Play-by-Play
View on SherdogRound 1
The UFC 240 headliner features defending featherweight champ Holloway (20-4, 16-4 UFC) finally facing off against Edgar (23-6-1, 17-6-1 UFC) after a pair of scuttled attempts to make this fight. Assigned to the main event is referee Herb Dean. Edgar tries to find his range as he throws a jab that is short and a low kick. Edgar crashes in with a blitz and does not land with anything significant. Edgar fakes for a takedown to force Holloway to retreat. Holloway lands a jab to the body, and the follows it up with two jabs up top. Edgar lands a body kick and Max misses on the counter. Holloway drops and throws an uppercut that lands flush on Edgar's chin. Edgar leaps forward and throws a combination, and clips Holloway with a left hand. Holloway throws a right hand that stings Edgar while Edgar is moving forward, and then leaps forward to land a punch on Edgar's body. Edgar chases Holloway against the fence, but Holloway circles out and eats a leg kick on the way out. Holloway lands another uppercut that tags Edgar right on the chin. Another low kick lands for Edgar, as Holloway nods at his foe. Holloway whiffs with a head kick, and Edgar returns fire with one that is blocked by Holloway. The horn sounds and the first round ends.
Sherdog Scores
Jay Pettry scores the round: 10-9 Holloway
Ant Walker scores the round: 10-9 Holloway
Ben Duffy scores the round: 10-9 Holloway
Round 2
Holloway comes out of his corner firing with a few jabs, and Edgar answers with a combination punctuated with a low kick. Holloway slips inside and lands a powerful punch to the body. Edgar is scoring leg kicks, while Holloway looks to counter with his uppercut. Edgar shoots for a takedown and almost gets Holloway to the ground before bouncing off the cage, and Holloway escapes. Holloway lands a stiff one-two that causes blood to trickle from Edgar's nose. Holloway keeps his distance and lands a strong left hand while Edgar falls short on the counter. Edgar presses forward and is again stuffed when trying for a takedown. Holloway throws a long right hand that catches Edgar cleanly. Holloway sticks his jab in the face of Edgar repeatedly, and Edgar tries to throw a head kick in response but falls short. Edgar shoots for another takedown but is stood up by Holloway, who will have nothing to do with Edgar's wrestling. Holloway blasts Edgar with a spinning back kick to the chest to end the round, and Holloway salutes Edgar as they return to their corners.
Sherdog Scores
Jay Pettry scores the round: 10-9 Holloway
Ant Walker scores the round: 10-9 Holloway
Ben Duffy scores the round: 10-9 Holloway
Round 3
Edgar starts the round off strong by going after a takedown, but Holloway shakes it off. Holloway doubles up on his left jab as Edgar backs away. Edgar is starting to show a little damage as some swelling presents itself on the side of Edgar's left eye. Edgar fakes for another takedown but nothing doing, and Max fakes for one of his own to cause Edgar to flinch. Edgar throws a lengthy combination but hits nothing but air on the way in. Edgar lands a spinning back kick to Holloway's body, and then follows up with a right hand. Holloway makes Edgar pay with his takedown attempts with a stinging right hand and knee. Holloway lands a few punches, and an uppercut sends Edgar's mouthpiece flying. Holloway chases Edgar across the cage landing strikes, but in the exchange Edgar secures his first takedown of the fight. Holloway stands up as the horn sounds and the third round ends.
Sherdog Scores
Jay Pettry scores the round: 10-9 Holloway
Ant Walker scores the round: 10-9 Holloway
Ben Duffy scores the round: 10-9 Holloway
Round 4
Holloway starts the round aggressively, putting Edgar on his back foot early. Edgar throws back and gets Holloway to back off for a moment. Holloway crowds Edgar as Edgar lands a counter right hand. Edgar leaps forward and cracks him with a right hand, and Holloway gives it back with several jabs. Edgar shoots for a takedown but Holloway spins out, and Edgar follows that attempt with one more that pushes Holloway against the cage. As they reach the fence, the crowd starts chanting "Holloway" as Holloway scores a solid combination that causes Edgar's nose to bleed more. Edgar throws two body kicks but both are blocked, and Holloway wings a head kick that passes just above Edgar's head. The two go jab-for-jab multiple times, and Edgar lands a four-punch combination. Holloway returns with a much more emphatic combination that appears to have hurt Edgar. Edgar tries for another takedown to end the round with one, but Holloway does not allow it to happen. Like the end of the second stanza, Holloway scores a spinning back kick right before the horn sounds.
Sherdog Scores
Jay Pettry scores the round: 10-9 Holloway
Ant Walker scores the round: 10-9 Holloway
Ben Duffy scores the round: 10-9 Holloway
Round 5
The final round kicks off with a few kicks from Edgar that keep Holloway at bay. Edgar commits to a takedown but Holloway defends it well and escapes. On his way in, Edgar eats a few punches from Holloway, who is using his reach advantage to full effect. Holloway lands his jab several more times to frustrate Edgar. Edgar lands a right hand but Holloway continues to stalk him down. Edgar tries to take Holloway down once more and Holloway sprawls and briefs looks for a submission attempt in the center of the cage until they break apart. Holloway times Edgar's entry with a strong right hand, and then follows that with two more to give Edgar pause. Edgar crowd Holloway and tries to unload on him, but Holloway gets back to his preferred range. Edgar throws a spinning back fist, but Holloway blocks it and then lets his hands drop low. Holloway is standing directly in front of Edgar with his chin in the air and Edgar cannot land anything of note. Holloway throws a spinning kick and Edgar tries to take advantage of the timing and secure one last takedown, but Holloway's defense holds up yet again. The fight ends and the fighters embrace, as Holloway likely records a successful defense in a tough decision over the ultra-durable Edgar.
Sherdog Scores
Jay Pettry scores the round: 10-9 Holloway (50-45 Holloway)
Ant Walker scores the round: 10-9 Holloway (50-45 Holloway)
Ben Duffy scores the round: 10-9 Holloway (50-45 Holloway)
The Official Result
Max Holloway def. Frankie Edgar via Unanimous Decision (50-45, 49-46, 48-47)
Totals
| Fighter | KD | Sig. Str. | Sig. Str. % | Total Str. | TD | TD % | Sub. Att | Rev. | Ctrl |
|---|---|---|---|---|---|---|---|---|---|
| Frankie Edgar | 0 | 58 of 136 | 42% | 60 of 139 | 0 of 8 | 0% | 0 | 0 | 0:51 |
| Cub Swanson | 0 | 48 of 130 | 36% | 50 of 132 | 0 of 0 | --- | 0 | 0 | 0:00 |
Per Round
| Rd | Fighter | KD | Sig. Str. | Sig. Str. % | Total Str. | TD | TD % | Sub. Att | Rev. | Ctrl |
|---|---|---|---|---|---|---|---|---|---|---|
| 1 | Frankie Edgar | 0 | 16 of 43 | 37% | 17 of 44 | 0 of 3 | 0% | 0 | 0 | 0:14 |
| Cub Swanson | 0 | 13 of 42 | 30% | 14 of 43 | 0 of 0 | --- | 0 | 0 | 0:00 | |
| 2 | Frankie Edgar | 0 | 21 of 53 | 39% | 21 of 53 | 0 of 3 | 0% | 0 | 0 | 0:00 |
| Cub Swanson | 0 | 18 of 50 | 36% | 18 of 50 | 0 of 0 | --- | 0 | 0 | 0:00 | |
| 3 | Frankie Edgar | 0 | 21 of 40 | 52% | 22 of 42 | 0 of 2 | 0% | 0 | 0 | 0:37 |
| Cub Swanson | 0 | 17 of 38 | 44% | 18 of 39 | 0 of 0 | --- | 0 | 0 | 0:00 |
Significant Strikes
| Fighter | Sig. Str. | Sig. Str. % | Head | Body | Leg | Distance | Clinch | Ground |
|---|---|---|---|---|---|---|---|---|
| Frankie Edgar | 58 of 136 | 42% | 33 of 106 | 6 of 10 | 19 of 20 | 52 of 126 | 6 of 10 | 0 of 0 |
| Cub Swanson | 48 of 130 | 36% | 32 of 110 | 11 of 15 | 5 of 5 | 42 of 122 | 6 of 8 | 0 of 0 |
Significant Strikes Per Round
| Rd | Fighter | Sig. Str. | Sig. Str. % | Head | Body | Leg | Distance | Clinch | Ground |
|---|---|---|---|---|---|---|---|---|---|
| 1 | Frankie Edgar | 16 of 43 | 37% | 8 of 33 | 3 of 4 | 5 of 6 | 15 of 42 | 1 of 1 | 0 of 0 |
| Cub Swanson | 13 of 42 | 30% | 8 of 35 | 4 of 6 | 1 of 1 | 12 of 40 | 1 of 2 | 0 of 0 | |
| 2 | Frankie Edgar | 21 of 53 | 39% | 12 of 43 | 1 of 2 | 8 of 8 | 18 of 49 | 3 of 4 | 0 of 0 |
| Cub Swanson | 18 of 50 | 36% | 14 of 46 | 2 of 2 | 2 of 2 | 17 of 49 | 1 of 1 | 0 of 0 | |
| 3 | Frankie Edgar | 21 of 40 | 52% | 13 of 30 | 2 of 4 | 6 of 6 | 19 of 35 | 2 of 5 | 0 of 0 |
| Cub Swanson | 17 of 38 | 44% | 10 of 29 | 5 of 7 | 2 of 2 | 13 of 33 | 4 of 5 | 0 of 0 |
Totals
| Fighter | KD | Sig. Str. | Sig. Str. % | Total Str. | TD | TD % | Sub. Att | Rev. | Ctrl |
|---|---|---|---|---|---|---|---|---|---|
| Brian Ortega | 0 | 27 of 77 | 35% | 27 of 77 | 0 of 1 | 0% | 0 | 0 | 0:00 |
| Frankie Edgar | 1 | 25 of 76 | 32% | 25 of 77 | 0 of 0 | --- | 0 | 0 | 0:02 |
Per Round
| Rd | Fighter | KD | Sig. Str. | Sig. Str. % | Total Str. | TD | TD % | Sub. Att | Rev. | Ctrl |
|---|---|---|---|---|---|---|---|---|---|---|
| 1 | Brian Ortega | 0 | 27 of 77 | 35% | 27 of 77 | 0 of 1 | 0% | 0 | 0 | 0:00 |
| Frankie Edgar | 1 | 25 of 76 | 32% | 25 of 77 | 0 of 0 | --- | 0 | 0 | 0:02 |
Significant Strikes
| Fighter | Sig. Str. | Sig. Str. % | Head | Body | Leg | Distance | Clinch | Ground |
|---|---|---|---|---|---|---|---|---|
| Brian Ortega | 27 of 77 | 35% | 12 of 59 | 10 of 13 | 5 of 5 | 27 of 76 | 0 of 1 | 0 of 0 |
| Frankie Edgar | 25 of 76 | 32% | 21 of 71 | 3 of 4 | 1 of 1 | 17 of 66 | 6 of 8 | 2 of 2 |
Significant Strikes Per Round
| Rd | Fighter | Sig. Str. | Sig. Str. % | Head | Body | Leg | Distance | Clinch | Ground |
|---|---|---|---|---|---|---|---|---|---|
| 1 | Brian Ortega | 27 of 77 | 35% | 12 of 59 | 10 of 13 | 5 of 5 | 27 of 76 | 0 of 1 | 0 of 0 |
| Frankie Edgar | 25 of 76 | 32% | 21 of 71 | 3 of 4 | 1 of 1 | 17 of 66 | 6 of 8 | 2 of 2 |
No comments yet. Be the first to share your thoughts!