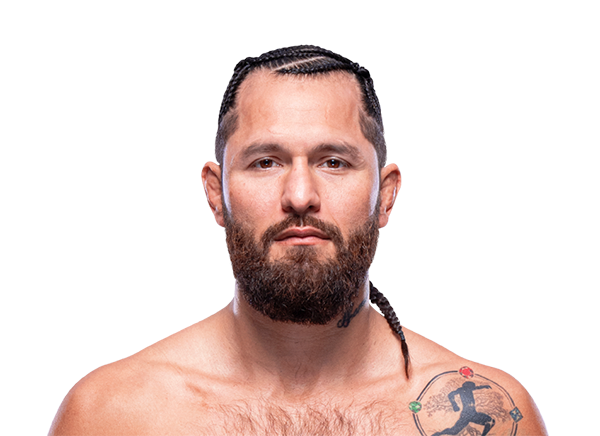

Career Averages - Jorge Masvidal
Career Averages - Darren Till
Jorge Masvidal - Fight History
Totals
| Fighter | KD | Sig. Str. | Sig. Str. % | Total Str. | TD | TD % | Sub. Att | Rev. | Ctrl |
|---|---|---|---|---|---|---|---|---|---|
| Gilbert Burns | 0 | 42 of 99 | 42% | 72 of 135 | 4 of 6 | 66% | 0 | 0 | 5:41 |
| Jorge Masvidal | 0 | 39 of 91 | 42% | 77 of 130 | 0 of 0 | --- | 0 | 0 | 0:05 |
Per Round
| Rd | Fighter | KD | Sig. Str. | Sig. Str. % | Total Str. | TD | TD % | Sub. Att | Rev. | Ctrl |
|---|---|---|---|---|---|---|---|---|---|---|
| 1 | Gilbert Burns | 0 | 13 of 39 | 33% | 15 of 42 | 1 of 1 | 100% | 0 | 0 | 0:06 |
| Jorge Masvidal | 0 | 15 of 38 | 39% | 20 of 43 | 0 of 0 | --- | 0 | 0 | 0:00 | |
| 2 | Gilbert Burns | 0 | 7 of 16 | 43% | 27 of 40 | 2 of 3 | 66% | 0 | 0 | 4:05 |
| Jorge Masvidal | 0 | 5 of 11 | 45% | 32 of 39 | 0 of 0 | --- | 0 | 0 | 0:03 | |
| 3 | Gilbert Burns | 0 | 22 of 44 | 50% | 30 of 53 | 1 of 2 | 50% | 0 | 0 | 1:30 |
| Jorge Masvidal | 0 | 19 of 42 | 45% | 25 of 48 | 0 of 0 | --- | 0 | 0 | 0:02 |
Significant Strikes
| Fighter | Sig. Str. | Sig. Str. % | Head | Body | Leg | Distance | Clinch | Ground |
|---|---|---|---|---|---|---|---|---|
| Gilbert Burns | 42 of 99 | 42% | 34 of 84 | 3 of 7 | 5 of 8 | 37 of 90 | 0 of 0 | 5 of 9 |
| Jorge Masvidal | 39 of 91 | 42% | 14 of 61 | 8 of 11 | 17 of 19 | 38 of 90 | 1 of 1 | 0 of 0 |
Significant Strikes Per Round
| Rd | Fighter | Sig. Str. | Sig. Str. % | Head | Body | Leg | Distance | Clinch | Ground |
|---|---|---|---|---|---|---|---|---|---|
| 1 | Gilbert Burns | 13 of 39 | 33% | 7 of 29 | 3 of 6 | 3 of 4 | 12 of 36 | 0 of 0 | 1 of 3 |
| Jorge Masvidal | 15 of 38 | 39% | 5 of 26 | 2 of 2 | 8 of 10 | 15 of 38 | 0 of 0 | 0 of 0 | |
| 2 | Gilbert Burns | 7 of 16 | 43% | 6 of 12 | 0 of 1 | 1 of 3 | 5 of 13 | 0 of 0 | 2 of 3 |
| Jorge Masvidal | 5 of 11 | 45% | 1 of 6 | 3 of 4 | 1 of 1 | 4 of 10 | 1 of 1 | 0 of 0 | |
| 3 | Gilbert Burns | 22 of 44 | 50% | 21 of 43 | 0 of 0 | 1 of 1 | 20 of 41 | 0 of 0 | 2 of 3 |
| Jorge Masvidal | 19 of 42 | 45% | 8 of 29 | 3 of 5 | 8 of 8 | 19 of 42 | 0 of 0 | 0 of 0 |
Play-by-Play
View on SherdogBETTING PREVIEW | SCOUTING REPORT | ODDS: Burns (-490), Masvidal (+390)
Round 1
The loudest pop of the evening almost certainly goes to Miami’s own Masvidal (35-16, 12-9 UFC), who walks out to this tough stylistic matchup as a heavy underdog on a losing streak. In his face for a maximum of three rounds will be “Durinho” Burns (21-5, 14-5 UFC), who can present problems on the feet and ground, depending on where his mood takes him. Action is virtually a guarantee here, and the watchful eye of referee Marc Goddard looks on. With ample respect, the gloves get touched when Goddard brings them together. There is no flying knee try from Masvidal, for those expecting him to come out firing this. Burns walks forward, but Masvidal takes the center of the cage. The two are hesitant to engage with little more than jabs, other than a single low kick from “Gamebred.” Burns throws one back, and they proceed to go tit-for-tat with these slapping strikes. Chants for “305” and “Let’s Go Jorge” rain down, but it does not spur the local fighter into action. Burns whiffs on a left hook, and neither man seems willing to commit to anything of note. Burns reaches out with a few jabs that miss the mark, but a right hand splits the guard and draws a smile from his opponent. Burns darts in with a straight right, and Masvidal slides out of the way and resets. Masvidal blitzes suddenly with three punches and a leg kick, and the crowd goes wild. Masvidal sinks another kick home on the lead calf, and Burns replies with a leg kick and one to the ribs. Masvidal sticks his tongue out, and Burns attacks with a pair of looping, blocked punches. Burns ducks a big punch and nearly takes the fight down, but Masvidal moves out of the way before he gets tripped. The Brazilian lands a single kick to the body, and he switches stances a few times and catches Masvidal with a right hand. Masvidal connects with another leg kick, and Burns chops down low. Masvidal surges into action, throwing a few heavy punches, but a left hand from Burns keeps him honest. Burns loops a right hand around the guard, and Masvidal shakes it off and pins three punches on the guard. Burns cracks him with a serious right hand, and Masvidal waves him on. Burns slings a right hand, changes levels and throws Masvidal to the ground. Burns postures up, flailing punches, and Masvidal goes crazy throwing offense from his back. The round ends, and the two high five.
Sherdog Scores
Jay Pettry scores the round: 10-9 Burns
Tristen Critchfield scores the round: 10-9 Burns
Tyler Treese scores the round: 10-9 Burns
Round 2
The second round opens up with Burns pushing forth a jab, and he slams his fist onto Masvidal’s jaw and knocks him off his feet. Masvidal jumps back to his feet, but Burns meets him with a double. When Masvidal defends with a guillotine, Burns simply lifts him off the ground like a sack of flour and slams him down to the ground. Burns lands in the guard and Masvidal is quickly warned for punches to the back of the head. Burns maintains heavy top pressure while getting off occasional strikes, but Goddard asks him to do more. Masvidal hangs on in hopes of forcing a standup, and Burns is unable to get off much offense from above. Goddard again tells Burns to work, and Masvidal clings to him to shut it down. Burns slashes down with a single elbow, and Masvidal works his way to put his head and neck against the wire. Burns partially stands up to step over, but Masvidal wall-walks at the same time and somersaults to break the grip. This backfires, as Burns takes his back and hangs onto it while Masvidal stands. Burns slams “Gamebred” on his face in a subsequent takedown, and Masvidal leans up against the wall and even threatens the BJJ world champion with a guillotine choke. Burns completely ignores it, and Masvidal manages to fight back to his feet. Burns presses him tightly in the clinch, and Masvidal spins him around and knees him a few times. Burns turns him back around, and he gets pushed back to split them up with 30 seconds to spare. Masvidal wings an inaccurate right hand, and he plants his shin on the body. Burns runs at him with his hands flying, and they both clash together with right hands. Burns acknowledges it, and the horn sounds.
Sherdog Scores
Jay Pettry scores the round: 10-9 Burns
Tristen Critchfield scores the round: 10-9 Burns
Tyler Treese scores the round: 10-9 Burns
Round 3
The fighters touch ‘em up to open the final frame, and Burns puts his foot upside the head. Masvidal shrugs it off and chops the calf with a single strike. The crowd puts its support behind the local competitor, and Burns punches him square in the face with his right hand. Masvidal blocks a lunging right hook but eats a pair of jabs. Masvidal gets off a strong low kick, and he comes up short on an uppercut. The leg kicks continue working for “Gamebred,” whose offense is otherwise generally muted. Masvidal suddenly spins with a back kick to the body, and Burns steps through it and snipes Masvidal with a left. Burns lands another, and Masvidal smiles at him. Burns lands a one-two on the chin, and Masvidal wobbles back to the fence and waves Burns on. A home run of a right hand skims off the chin, and Masvidal is still rocked but survives it. Masvidal gets some space and appears to have the cobwebs shaken out, as he puts a one-two on the Brazilian’s jaw. Burns lets his hands fly and smashes Masvidal in the face, and Masvidal again stumbles back to the fence. Burns jabs instead of falling into a Masvidal trap, so Masvidal kicks his foe’s lead leg and flashes out his own jab. Burns lands a left and a right, and “Gamebred” toughs it out and gets Burns’ respect with a few punches. The Brazilian changes levels in pursuit of a takedown, and Masvidal stands him up. Burns continues to go after it, and he trips Masvidal and throws him on his back, where he lands in side control. Burns slams Masvidal in the face with elbows, and he moves to half guard to keep Masvidal pinned to the mat. Burns considers an arm-triangle choke, but Masvidal uses two-on-one wrist control to stifle it. Masvidal is warned for grabbing inside the gloves, and Burns slides around to nearly take the back. Masvidal works to his knees, and the fight comes to a close. After the scores are read, Burns calls for a title shot. Masvidal, however, takes his gloves off and calls it a career after "20 long years."
Sherdog Scores
Jay Pettry scores the round: 10-9 Burns (30-27 Burns)
Tristen Critchfield scores the round: 10-9 Burns (30-27 Burns)
Tyler Treese scores the round: 10-9 Burns (30-27 Burns)
The Official Result
Gilbert Burns def. Jorge Masvidal via Unanimous Decision (30-27, 30-27, 29-28)
Angelo picks Gilbert Burns but is not betting due to the steep -450 odds. He notes that Masvidal has solid takedown defense and good hands, and if the fight stays on the feet, Masvidal is the better striker. He thinks Burns will grind out a win but is wary of Masvidal's ability to defend takedowns and potentially win a decision in his hometown.
Big Brady picks Gilbert Burns to win by decision, citing his wrestling advantage and Masvidal's age. He notes Burns should take the fight to the mat and control Masvidal, who has good takedown defense but can be controlled once taken down. He does not see a finish and warns against betting at -500 odds.
Cody picks Burns but is hesitant at -450. He notes Masvidal is very difficult to take down, as shown in five-round fights against Usman and Covington. Cody thinks Burns wins 8 out of 10 times but sees value on Masvidal due to the Florida crowd and Masvidal's power. He mentions PrizePicks under 2.5 takedowns for Burns as a potential play because Burns might not wrestle or could get a quick submission.
Connor picks Burns because Masvidal has regressed significantly: his boxing has become sloppy, he relies on trick shots that he's no longer fast enough to land, and he lets opponents dictate the fight. Burns is aggressive, assertive, and will take full advantage of Masvidal's tendency to back up and corner himself. Connor notes that Masvidal used to be a great scrambler and wrestler, but now he seems to hate grappling and makes poor decisions. He also mentions Masvidal's ego and age have eroded his game.
Jacob is extremely confident in Gilbert Burns, calling Masvidal overrated and saying he is here to collect a check. He believes Burns will take Masvidal down, slam him, and submit him. He notes that Masvidal has only defended wrestlers like Usman and Colby, but Burns is a powerful grappler who will use strength and technique to finish the fight.
Masvidal is on a three-fight losing streak but those were against the division's elite. He has slick boxing, deceptive power, and excellent takedown defense and get-up game. Burns is a BJJ specialist but his striking is decent, and he doesn't have the cardio or wrestling to replicate what Colby did to Masvidal. I think Masvidal's striking advantage and the Miami crowd will carry him to a knockout win.
Paul acknowledges the best version of Masvidal could beat Burns, but believes Masvidal at 38 has lost a step and lacks the fire. He notes Masvidal's takedown defense is good but Burns' pressure and wrestling should wear him down. Paul expects Burns to take Masvidal down, control rounds, and win a decision or late finish. He cautions that Masvidal could keep it close in Florida but ultimately picks Burns.
The MMA Guru picks Gilbert Burns to drop Masvidal in round one and submit him with an arm triangle. He expects Masvidal to lead with kicks, and Burns will time a right hand over the top, dropping Masvidal. Burns will then take mount, land big shots, and as Masvidal scrambles, he will give up an arm triangle and tap with 30 seconds left in the round.
Zane picks Burns because Masvidal's game has fallen off: he's slower, gasses now, and his boxing is worse. He used to be a well-rounded technician, but now he looks for highlight-reel shots and doesn't have the speed for them. Burns will out-grapple him and doesn't even need to do that the whole time; he can just pressure Masvidal, who backs up too easily and corners himself. Zane notes that Masvidal's ego and age have combined to make him a shadow of his former self.
Totals
| Fighter | KD | Sig. Str. | Sig. Str. % | Total Str. | TD | TD % | Sub. Att | Rev. | Ctrl |
|---|---|---|---|---|---|---|---|---|---|
| Colby Covington | 0 | 94 of 201 | 46% | 218 of 338 | 6 of 15 | 40% | 1 | 1 | 16:14 |
| Jorge Masvidal | 0 | 67 of 140 | 47% | 90 of 166 | 0 of 0 | --- | 0 | 0 | 0:21 |
Per Round
| Rd | Fighter | KD | Sig. Str. | Sig. Str. % | Total Str. | TD | TD % | Sub. Att | Rev. | Ctrl |
|---|---|---|---|---|---|---|---|---|---|---|
| 1 | Colby Covington | 0 | 7 of 18 | 38% | 29 of 45 | 3 of 5 | 60% | 0 | 0 | 3:32 |
| Jorge Masvidal | 0 | 6 of 17 | 35% | 12 of 24 | 0 of 0 | --- | 0 | 0 | 0:00 | |
| 2 | Colby Covington | 0 | 20 of 58 | 34% | 25 of 63 | 0 of 2 | 0% | 0 | 1 | 1:21 |
| Jorge Masvidal | 0 | 31 of 63 | 49% | 36 of 69 | 0 of 0 | --- | 0 | 0 | 0:21 | |
| 3 | Colby Covington | 0 | 21 of 40 | 52% | 62 of 86 | 1 of 2 | 50% | 1 | 0 | 4:34 |
| Jorge Masvidal | 0 | 8 of 12 | 66% | 19 of 24 | 0 of 0 | --- | 0 | 0 | 0:00 | |
| 4 | Colby Covington | 0 | 33 of 66 | 50% | 37 of 70 | 0 of 4 | 0% | 0 | 0 | 2:13 |
| Jorge Masvidal | 0 | 21 of 46 | 45% | 21 of 46 | 0 of 0 | --- | 0 | 0 | 0:00 | |
| 5 | Colby Covington | 0 | 13 of 19 | 68% | 65 of 74 | 2 of 2 | 100% | 0 | 0 | 4:34 |
| Jorge Masvidal | 0 | 1 of 2 | 50% | 2 of 3 | 0 of 0 | --- | 0 | 0 | 0:00 |
Significant Strikes
| Fighter | Sig. Str. | Sig. Str. % | Head | Body | Leg | Distance | Clinch | Ground |
|---|---|---|---|---|---|---|---|---|
| Colby Covington | 94 of 201 | 46% | 84 of 190 | 9 of 10 | 1 of 1 | 63 of 160 | 6 of 8 | 25 of 33 |
| Jorge Masvidal | 67 of 140 | 47% | 38 of 94 | 10 of 19 | 19 of 27 | 55 of 125 | 12 of 15 | 0 of 0 |
Significant Strikes Per Round
| Rd | Fighter | Sig. Str. | Sig. Str. % | Head | Body | Leg | Distance | Clinch | Ground |
|---|---|---|---|---|---|---|---|---|---|
| 1 | Colby Covington | 7 of 18 | 38% | 5 of 16 | 2 of 2 | 0 of 0 | 4 of 15 | 3 of 3 | 0 of 0 |
| Jorge Masvidal | 6 of 17 | 35% | 2 of 8 | 0 of 3 | 4 of 6 | 5 of 15 | 1 of 2 | 0 of 0 | |
| 2 | Colby Covington | 20 of 58 | 34% | 16 of 53 | 3 of 4 | 1 of 1 | 19 of 55 | 1 of 3 | 0 of 0 |
| Jorge Masvidal | 31 of 63 | 49% | 18 of 42 | 5 of 8 | 8 of 13 | 24 of 54 | 7 of 9 | 0 of 0 | |
| 3 | Colby Covington | 21 of 40 | 52% | 18 of 37 | 3 of 3 | 0 of 0 | 6 of 21 | 0 of 0 | 15 of 19 |
| Jorge Masvidal | 8 of 12 | 66% | 5 of 7 | 0 of 2 | 3 of 3 | 7 of 11 | 1 of 1 | 0 of 0 | |
| 4 | Colby Covington | 33 of 66 | 50% | 32 of 65 | 1 of 1 | 0 of 0 | 31 of 64 | 2 of 2 | 0 of 0 |
| Jorge Masvidal | 21 of 46 | 45% | 12 of 35 | 5 of 6 | 4 of 5 | 19 of 44 | 2 of 2 | 0 of 0 | |
| 5 | Colby Covington | 13 of 19 | 68% | 13 of 19 | 0 of 0 | 0 of 0 | 3 of 5 | 0 of 0 | 10 of 14 |
| Jorge Masvidal | 1 of 2 | 50% | 1 of 2 | 0 of 0 | 0 of 0 | 0 of 1 | 1 of 1 | 0 of 0 |
Angelo picks Colby Covington due to his relentless wrestling and high pace. He notes that Covington's non-stop takedowns and pressure will be a problem for Masvidal, similar to the first Usman fight. He mentions that Masvidal has success on the feet but Covington cuts distance quickly. He also references a source from American Top Team saying Covington dominated Masvidal in training but Masvidal would touch him up on the feet.
Big Brady picks Colby Covington to win by decision, citing Covington's relentless wrestling pace and volume striking. He notes that Covington will likely take Masvidal down repeatedly, especially early, and that Masvidal's path to victory is only by knockout. Brady believes Covington's cardio and pressure will be too much for the 37-year-old Masvidal, who has slowed down. He mentions that Covington has successfully implemented this game plan against other top welterweights like Robbie Lawler and Rafael dos Anjos.
Cody sees Colby as an elite welterweight who pushed Usman to the limit, with superior pace, wrestling, and durability. He believes Colby's chain wrestling and cardio will overwhelm Masvidal, who has poor takedown defense and fades late. Cody has already parlayed Colby with Kevin Holland and also bet Colby by round 5 at +3000, expecting a late finish or decision.
Daniel Levi picks Colby Covington to win by unanimous decision. He emphasizes Covington's relentless pace and takedown attempts, noting that even if the first few takedowns are stuffed, Covington will keep shooting and eventually grind down Masvidal. He acknowledges Masvidal's underrated takedown defense and dangerous striking, especially early, but believes Covington's pressure and cardio will be decisive in the later rounds. He also mentions that Covington's recent war with Usman might be a concern but still favors him.
Colby Covington is neck and neck with Kamaru Usman, one of the best in the world, and his wrestling threat will force Masvidal to think too much. Covington's cardio, improved striking, and volume will overwhelm Masvidal over five rounds. Masvidal is the better technical striker but lacks the wrestling and cardio to keep up. Covington via decision is the likely outcome.
Paul argues that Colby is a premier talent while Masvidal is a journeyman with 15 losses and poor takedown defense. He highlights Colby's wrestling pressure and cardio as decisive, noting Masvidal's wins are early finishes and his losses come when opponents survive the first two rounds. Paul plans to bet Colby live if Masvidal is competitive early, expecting Colby to take over in rounds 3-5.
The MMA Guru picks Colby Covington over Jorge Masvidal, despite acknowledging Masvidal's KO power and the odds being too wide. He praises Covington's chin, referencing his ability to take clean shots from Kamaru Usman. He predicts Covington will use cage pressure, takedowns, and grinding to wear Masvidal down, eventually securing a rear-naked choke in the fourth round. He notes Masvidal's age, inactivity, and potential rib injury as factors, and believes Covington's active style and improved striking will be key.
Totals
| Fighter | KD | Sig. Str. | Sig. Str. % | Total Str. | TD | TD % | Sub. Att | Rev. | Ctrl |
|---|---|---|---|---|---|---|---|---|---|
| Kamaru Usman | 1 | 21 of 40 | 52% | 32 of 54 | 2 of 2 | 100% | 0 | 0 | 1:42 |
| Jorge Masvidal | 0 | 31 of 52 | 59% | 56 of 79 | 0 of 0 | --- | 0 | 0 | 0:00 |
Per Round
| Rd | Fighter | KD | Sig. Str. | Sig. Str. % | Total Str. | TD | TD % | Sub. Att | Rev. | Ctrl |
|---|---|---|---|---|---|---|---|---|---|---|
| 1 | Kamaru Usman | 0 | 14 of 30 | 46% | 25 of 44 | 2 of 2 | 100% | 0 | 0 | 1:39 |
| Jorge Masvidal | 0 | 23 of 42 | 54% | 48 of 69 | 0 of 0 | --- | 0 | 0 | 0:00 | |
| 2 | Kamaru Usman | 1 | 7 of 10 | 70% | 7 of 10 | 0 of 0 | --- | 0 | 0 | 0:03 |
| Jorge Masvidal | 0 | 8 of 10 | 80% | 8 of 10 | 0 of 0 | --- | 0 | 0 | 0:00 |
Significant Strikes
| Fighter | Sig. Str. | Sig. Str. % | Head | Body | Leg | Distance | Clinch | Ground |
|---|---|---|---|---|---|---|---|---|
| Kamaru Usman | 21 of 40 | 52% | 15 of 32 | 5 of 7 | 1 of 1 | 12 of 30 | 0 of 0 | 9 of 10 |
| Jorge Masvidal | 31 of 52 | 59% | 13 of 33 | 3 of 4 | 15 of 15 | 27 of 47 | 0 of 0 | 4 of 5 |
Significant Strikes Per Round
| Rd | Fighter | Sig. Str. | Sig. Str. % | Head | Body | Leg | Distance | Clinch | Ground |
|---|---|---|---|---|---|---|---|---|---|
| 1 | Kamaru Usman | 14 of 30 | 46% | 8 of 22 | 5 of 7 | 1 of 1 | 10 of 25 | 0 of 0 | 4 of 5 |
| Jorge Masvidal | 23 of 42 | 54% | 12 of 30 | 2 of 3 | 9 of 9 | 19 of 37 | 0 of 0 | 4 of 5 | |
| 2 | Kamaru Usman | 7 of 10 | 70% | 7 of 10 | 0 of 0 | 0 of 0 | 2 of 5 | 0 of 0 | 5 of 5 |
| Jorge Masvidal | 8 of 10 | 80% | 1 of 3 | 1 of 1 | 6 of 6 | 8 of 10 | 0 of 0 | 0 of 0 |
Angelo relays Glover Teixeira's pick of Masvidal, noting that with a full camp Masvidal has takedown defense and striking edge. He agrees with the logic, mentioning Glover's ties to American Top Team and his training with Masvidal. Angelo seems to endorse the pick, calling it good insight.
Big Brady picks Usman to win a comfortable decision. He expects Usman to implement his game plan of takedowns, cage control, and foot stomps, grinding out Masvidal. He notes Masvidal has power but Usman has never been KO'd and has excellent takedown defense. He considers Usman a safe parlay piece.
Cody agrees with Paul, emphasizing Usman's wrestling and grinding style. He notes Masvidal's age (36) and journeyman status, and that Usman's jab and clinch work will wear him down. He sees a similar outcome to the first fight, with Usman winning by decision. He mentions the -425 price is in line with an 80% win rate and that Usman by decision is a likely prop.
Daniel picks Kamaru Usman to retain his belt, expecting him to take over in the later rounds as Masvidal fades. He acknowledges Masvidal's improved conditioning with a full camp and his one-punch KO power, but believes Usman's work rate and pressure will be too much. He notes the odds are wide and calls it a dog or pass situation from a betting perspective.
I think Usman will repeat his performance from the first fight: grinding Masvidal against the cage, using foot stomps, and controlling the pace. Masvidal is durable and hasn't been finished in 12 years, so a decision is likely. Usman's cardio and wrestling are superior. I like Usman by decision at -130, which improves the moneyline odds.
Paul believes Usman will replicate the first fight: grinding Masvidal against the cage, using his wrestling and jab to control the fight. He notes Masvidal's durability and puncher's chance but sees Usman as the superior technician. He expects a decision win, similar to the first fight, and thinks the -425 price is fair but not a value bet.
The MMA Guru picks Kamaru Usman by decision. He notes that Usman had a full camp for Masvidal this time, unlike the short-notice first fight, and that Usman's striking has improved under Trevor Whitman. He believes Usman's grappling is too good and that Masvidal hasn't made significant improvements. He predicts Usman will win with a possible 10-8 round, though Masvidal may take the first round.
Totals
| Fighter | KD | Sig. Str. | Sig. Str. % | Total Str. | TD | TD % | Sub. Att | Rev. | Ctrl |
|---|---|---|---|---|---|---|---|---|---|
| Kamaru Usman | 0 | 94 of 151 | 62% | 263 of 341 | 5 of 16 | 31% | 0 | 0 | 16:38 |
| Jorge Masvidal | 0 | 66 of 125 | 52% | 88 of 157 | 0 of 0 | --- | 0 | 0 | 0:00 |
Per Round
| Rd | Fighter | KD | Sig. Str. | Sig. Str. % | Total Str. | TD | TD % | Sub. Att | Rev. | Ctrl |
|---|---|---|---|---|---|---|---|---|---|---|
| 1 | Kamaru Usman | 0 | 18 of 40 | 45% | 25 of 50 | 1 of 3 | 33% | 0 | 0 | 2:36 |
| Jorge Masvidal | 0 | 24 of 43 | 55% | 34 of 58 | 0 of 0 | --- | 0 | 0 | 0:00 | |
| 2 | Kamaru Usman | 0 | 27 of 32 | 84% | 94 of 107 | 0 of 3 | 0% | 0 | 0 | 3:40 |
| Jorge Masvidal | 0 | 20 of 32 | 62% | 21 of 33 | 0 of 0 | --- | 0 | 0 | 0:00 | |
| 3 | Kamaru Usman | 0 | 14 of 27 | 51% | 46 of 61 | 2 of 5 | 40% | 0 | 0 | 3:14 |
| Jorge Masvidal | 0 | 12 of 19 | 63% | 17 of 24 | 0 of 0 | --- | 0 | 0 | 0:00 | |
| 4 | Kamaru Usman | 0 | 23 of 31 | 74% | 75 of 90 | 1 of 4 | 25% | 0 | 0 | 3:37 |
| Jorge Masvidal | 0 | 6 of 15 | 40% | 9 of 18 | 0 of 0 | --- | 0 | 0 | 0:00 | |
| 5 | Kamaru Usman | 0 | 12 of 21 | 57% | 23 of 33 | 1 of 1 | 100% | 0 | 0 | 3:31 |
| Jorge Masvidal | 0 | 4 of 16 | 25% | 7 of 24 | 0 of 0 | --- | 0 | 0 | 0:00 |
Significant Strikes
| Fighter | Sig. Str. | Sig. Str. % | Head | Body | Leg | Distance | Clinch | Ground |
|---|---|---|---|---|---|---|---|---|
| Kamaru Usman | 94 of 151 | 62% | 43 of 96 | 49 of 53 | 2 of 2 | 42 of 86 | 39 of 49 | 13 of 16 |
| Jorge Masvidal | 66 of 125 | 52% | 23 of 69 | 29 of 39 | 14 of 17 | 38 of 90 | 27 of 34 | 1 of 1 |
Significant Strikes Per Round
| Rd | Fighter | Sig. Str. | Sig. Str. % | Head | Body | Leg | Distance | Clinch | Ground |
|---|---|---|---|---|---|---|---|---|---|
| 1 | Kamaru Usman | 18 of 40 | 45% | 7 of 27 | 10 of 12 | 1 of 1 | 9 of 30 | 7 of 8 | 2 of 2 |
| Jorge Masvidal | 24 of 43 | 55% | 13 of 28 | 5 of 9 | 6 of 6 | 16 of 32 | 7 of 10 | 1 of 1 | |
| 2 | Kamaru Usman | 27 of 32 | 84% | 10 of 15 | 17 of 17 | 0 of 0 | 11 of 14 | 16 of 18 | 0 of 0 |
| Jorge Masvidal | 20 of 32 | 62% | 5 of 16 | 11 of 12 | 4 of 4 | 10 of 21 | 10 of 11 | 0 of 0 | |
| 3 | Kamaru Usman | 14 of 27 | 51% | 10 of 23 | 4 of 4 | 0 of 0 | 6 of 14 | 2 of 5 | 6 of 8 |
| Jorge Masvidal | 12 of 19 | 63% | 2 of 8 | 6 of 7 | 4 of 4 | 8 of 15 | 4 of 4 | 0 of 0 | |
| 4 | Kamaru Usman | 23 of 31 | 74% | 9 of 15 | 13 of 15 | 1 of 1 | 9 of 14 | 14 of 17 | 0 of 0 |
| Jorge Masvidal | 6 of 15 | 40% | 2 of 9 | 4 of 6 | 0 of 0 | 2 of 8 | 4 of 7 | 0 of 0 | |
| 5 | Kamaru Usman | 12 of 21 | 57% | 7 of 16 | 5 of 5 | 0 of 0 | 7 of 14 | 0 of 1 | 5 of 6 |
| Jorge Masvidal | 4 of 16 | 25% | 1 of 8 | 3 of 5 | 0 of 3 | 2 of 14 | 2 of 2 | 0 of 0 |
Big Brady picks Kamaru Usman by comfortable decision, citing Usman's wrestling and takedowns as the key. He notes Masvidal has been taken down often and Usman is a smart fighter who won't stand and trade. He thinks the line should be wider and Masvidal's only chance is a knockout off his back, which is unlikely.
Daniel Levi leans toward Kamaru Usman, citing his full camp, size, wrestling, and cardio. He expects Usman to use a clinch-heavy, grinding game plan to wear down Masvidal. However, he acknowledges Masvidal's momentum and power, and says he wouldn't be surprised by an upset. He picks Usman by decision, but as a fan he roots for Masvidal.
Usman is a nightmare matchup for Masvidal with his relentless pace, pressure, cardio, and wrestling. Masvidal's only chance is a Hail Mary strike, but Usman's striking is good enough to close the distance and implement his grappling. The line at -225 is great value; Usman should dominate and win by decision. This is the lock of the night.
The Guru is confident Usman wins, predicting he will maul Masvidal. He notes that Masvidal has a 25% chance of landing something big in the first round but doesn't see it happening. He emphasizes Usman's size, wrestling, and the fact that Masvidal is taking the fight on short notice.
Totals
| Fighter | KD | Sig. Str. | Sig. Str. % | Total Str. | TD | TD % | Sub. Att | Rev. | Ctrl |
|---|---|---|---|---|---|---|---|---|---|
| Jorge Masvidal | 2 | 112 of 179 | 62% | 114 of 184 | 1 of 1 | 100% | 0 | 0 | 6:56 |
| Nate Diaz | 0 | 43 of 104 | 41% | 125 of 194 | 0 of 2 | 0% | 0 | 0 | 0:44 |
Per Round
| Rd | Fighter | KD | Sig. Str. | Sig. Str. % | Total Str. | TD | TD % | Sub. Att | Rev. | Ctrl |
|---|---|---|---|---|---|---|---|---|---|---|
| 1 | Jorge Masvidal | 1 | 35 of 54 | 64% | 37 of 57 | 0 of 0 | --- | 0 | 0 | 2:58 |
| Nate Diaz | 0 | 13 of 27 | 48% | 34 of 52 | 0 of 0 | --- | 0 | 0 | 0:19 | |
| 2 | Jorge Masvidal | 1 | 39 of 58 | 67% | 39 of 60 | 1 of 1 | 100% | 0 | 0 | 2:05 |
| Nate Diaz | 0 | 11 of 31 | 35% | 34 of 56 | 0 of 0 | --- | 0 | 0 | 0:12 | |
| 3 | Jorge Masvidal | 0 | 38 of 67 | 56% | 38 of 67 | 0 of 0 | --- | 0 | 0 | 1:53 |
| Nate Diaz | 0 | 19 of 46 | 41% | 57 of 86 | 0 of 2 | 0% | 0 | 0 | 0:13 |
Significant Strikes
| Fighter | Sig. Str. | Sig. Str. % | Head | Body | Leg | Distance | Clinch | Ground |
|---|---|---|---|---|---|---|---|---|
| Jorge Masvidal | 112 of 179 | 62% | 78 of 136 | 27 of 35 | 7 of 8 | 52 of 92 | 20 of 25 | 40 of 62 |
| Nate Diaz | 43 of 104 | 41% | 23 of 74 | 12 of 21 | 8 of 9 | 33 of 91 | 10 of 13 | 0 of 0 |
Significant Strikes Per Round
| Rd | Fighter | Sig. Str. | Sig. Str. % | Head | Body | Leg | Distance | Clinch | Ground |
|---|---|---|---|---|---|---|---|---|---|
| 1 | Jorge Masvidal | 35 of 54 | 64% | 21 of 34 | 12 of 18 | 2 of 2 | 10 of 15 | 7 of 9 | 18 of 30 |
| Nate Diaz | 13 of 27 | 48% | 7 of 19 | 3 of 5 | 3 of 3 | 8 of 22 | 5 of 5 | 0 of 0 | |
| 2 | Jorge Masvidal | 39 of 58 | 67% | 29 of 47 | 7 of 8 | 3 of 3 | 18 of 32 | 11 of 13 | 10 of 13 |
| Nate Diaz | 11 of 31 | 35% | 4 of 21 | 4 of 6 | 3 of 4 | 9 of 27 | 2 of 4 | 0 of 0 | |
| 3 | Jorge Masvidal | 38 of 67 | 56% | 28 of 55 | 8 of 9 | 2 of 3 | 24 of 45 | 2 of 3 | 12 of 19 |
| Nate Diaz | 19 of 46 | 41% | 12 of 34 | 5 of 10 | 2 of 2 | 16 of 42 | 3 of 4 | 0 of 0 |
Totals
| Fighter | KD | Sig. Str. | Sig. Str. % | Total Str. | TD | TD % | Sub. Att | Rev. | Ctrl |
|---|---|---|---|---|---|---|---|---|---|
| Jorge Masvidal | 1 | 3 of 3 | 100% | 3 of 3 | 0 of 0 | --- | 0 | 0 | 0:02 |
| Ben Askren | 0 | 0 of 0 | --- | 0 of 0 | 0 of 0 | --- | 0 | 0 | 0:00 |
Per Round
| Rd | Fighter | KD | Sig. Str. | Sig. Str. % | Total Str. | TD | TD % | Sub. Att | Rev. | Ctrl |
|---|---|---|---|---|---|---|---|---|---|---|
| 1 | Jorge Masvidal | 1 | 3 of 3 | 100% | 3 of 3 | 0 of 0 | --- | 0 | 0 | 0:02 |
| Ben Askren | 0 | 0 of 0 | --- | 0 of 0 | 0 of 0 | --- | 0 | 0 | 0:00 |
Significant Strikes
| Fighter | Sig. Str. | Sig. Str. % | Head | Body | Leg | Distance | Clinch | Ground |
|---|---|---|---|---|---|---|---|---|
| Jorge Masvidal | 3 of 3 | 100% | 3 of 3 | 0 of 0 | 0 of 0 | 1 of 1 | 0 of 0 | 2 of 2 |
| Ben Askren | 0 of 0 | --- | 0 of 0 | 0 of 0 | 0 of 0 | 0 of 0 | 0 of 0 | 0 of 0 |
Significant Strikes Per Round
| Rd | Fighter | Sig. Str. | Sig. Str. % | Head | Body | Leg | Distance | Clinch | Ground |
|---|---|---|---|---|---|---|---|---|---|
| 1 | Jorge Masvidal | 3 of 3 | 100% | 3 of 3 | 0 of 0 | 0 of 0 | 1 of 1 | 0 of 0 | 2 of 2 |
| Ben Askren | 0 of 0 | --- | 0 of 0 | 0 of 0 | 0 of 0 | 0 of 0 | 0 of 0 | 0 of 0 |
Totals
| Fighter | KD | Sig. Str. | Sig. Str. % | Total Str. | TD | TD % | Sub. Att | Rev. | Ctrl |
|---|---|---|---|---|---|---|---|---|---|
| Jorge Masvidal | 1 | 21 of 43 | 48% | 22 of 44 | 1 of 1 | 100% | 0 | 0 | 0:56 |
| Darren Till | 1 | 35 of 72 | 48% | 41 of 79 | 1 of 2 | 50% | 0 | 0 | 0:47 |
Per Round
| Rd | Fighter | KD | Sig. Str. | Sig. Str. % | Total Str. | TD | TD % | Sub. Att | Rev. | Ctrl |
|---|---|---|---|---|---|---|---|---|---|---|
| 1 | Jorge Masvidal | 1 | 13 of 27 | 48% | 14 of 28 | 1 of 1 | 100% | 0 | 0 | 0:51 |
| Darren Till | 0 | 19 of 39 | 48% | 24 of 45 | 0 of 1 | 0% | 0 | 0 | 0:20 | |
| 2 | Jorge Masvidal | 0 | 8 of 16 | 50% | 8 of 16 | 0 of 0 | --- | 0 | 0 | 0:05 |
| Darren Till | 1 | 16 of 33 | 48% | 17 of 34 | 1 of 1 | 100% | 0 | 0 | 0:27 |
Significant Strikes
| Fighter | Sig. Str. | Sig. Str. % | Head | Body | Leg | Distance | Clinch | Ground |
|---|---|---|---|---|---|---|---|---|
| Jorge Masvidal | 21 of 43 | 48% | 17 of 39 | 3 of 3 | 1 of 1 | 20 of 39 | 1 of 2 | 0 of 2 |
| Darren Till | 35 of 72 | 48% | 18 of 51 | 10 of 12 | 7 of 9 | 31 of 65 | 3 of 6 | 1 of 1 |
Significant Strikes Per Round
| Rd | Fighter | Sig. Str. | Sig. Str. % | Head | Body | Leg | Distance | Clinch | Ground |
|---|---|---|---|---|---|---|---|---|---|
| 1 | Jorge Masvidal | 13 of 27 | 48% | 10 of 24 | 3 of 3 | 0 of 0 | 12 of 23 | 1 of 2 | 0 of 2 |
| Darren Till | 19 of 39 | 48% | 10 of 27 | 6 of 8 | 3 of 4 | 17 of 34 | 2 of 5 | 0 of 0 | |
| 2 | Jorge Masvidal | 8 of 16 | 50% | 7 of 15 | 0 of 0 | 1 of 1 | 8 of 16 | 0 of 0 | 0 of 0 |
| Darren Till | 16 of 33 | 48% | 8 of 24 | 4 of 4 | 4 of 5 | 14 of 31 | 1 of 1 | 1 of 1 |
Totals
| Fighter | KD | Sig. Str. | Sig. Str. % | Total Str. | TD | TD % | Sub. Att | Rev. | Ctrl |
|---|---|---|---|---|---|---|---|---|---|
| Stephen Thompson | 1 | 70 of 156 | 44% | 70 of 156 | 0 of 0 | --- | 0 | 0 | 0:03 |
| Jorge Masvidal | 0 | 42 of 142 | 29% | 42 of 142 | 0 of 2 | 0% | 0 | 0 | 0:03 |
Per Round
| Rd | Fighter | KD | Sig. Str. | Sig. Str. % | Total Str. | TD | TD % | Sub. Att | Rev. | Ctrl |
|---|---|---|---|---|---|---|---|---|---|---|
| 1 | Stephen Thompson | 0 | 13 of 27 | 48% | 13 of 27 | 0 of 0 | --- | 0 | 0 | 0:00 |
| Jorge Masvidal | 0 | 12 of 33 | 36% | 12 of 33 | 0 of 0 | --- | 0 | 0 | 0:00 | |
| 2 | Stephen Thompson | 1 | 18 of 43 | 41% | 18 of 43 | 0 of 0 | --- | 0 | 0 | 0:02 |
| Jorge Masvidal | 0 | 14 of 43 | 32% | 14 of 43 | 0 of 1 | 0% | 0 | 0 | 0:01 | |
| 3 | Stephen Thompson | 0 | 39 of 86 | 45% | 39 of 86 | 0 of 0 | --- | 0 | 0 | 0:01 |
| Jorge Masvidal | 0 | 16 of 66 | 24% | 16 of 66 | 0 of 1 | 0% | 0 | 0 | 0:02 |
Significant Strikes
| Fighter | Sig. Str. | Sig. Str. % | Head | Body | Leg | Distance | Clinch | Ground |
|---|---|---|---|---|---|---|---|---|
| Stephen Thompson | 70 of 156 | 44% | 49 of 117 | 17 of 34 | 4 of 5 | 70 of 155 | 0 of 1 | 0 of 0 |
| Jorge Masvidal | 42 of 142 | 29% | 9 of 79 | 5 of 13 | 28 of 50 | 39 of 137 | 3 of 5 | 0 of 0 |
Significant Strikes Per Round
| Rd | Fighter | Sig. Str. | Sig. Str. % | Head | Body | Leg | Distance | Clinch | Ground |
|---|---|---|---|---|---|---|---|---|---|
| 1 | Stephen Thompson | 13 of 27 | 48% | 9 of 19 | 3 of 6 | 1 of 2 | 13 of 27 | 0 of 0 | 0 of 0 |
| Jorge Masvidal | 12 of 33 | 36% | 0 of 13 | 2 of 5 | 10 of 15 | 12 of 33 | 0 of 0 | 0 of 0 | |
| 2 | Stephen Thompson | 18 of 43 | 41% | 14 of 37 | 2 of 4 | 2 of 2 | 18 of 43 | 0 of 0 | 0 of 0 |
| Jorge Masvidal | 14 of 43 | 32% | 3 of 23 | 0 of 3 | 11 of 17 | 12 of 40 | 2 of 3 | 0 of 0 | |
| 3 | Stephen Thompson | 39 of 86 | 45% | 26 of 61 | 12 of 24 | 1 of 1 | 39 of 85 | 0 of 1 | 0 of 0 |
| Jorge Masvidal | 16 of 66 | 24% | 6 of 43 | 3 of 5 | 7 of 18 | 15 of 64 | 1 of 2 | 0 of 0 |
Darren Till - Fight History
Totals
| Fighter | KD | Sig. Str. | Sig. Str. % | Total Str. | TD | TD % | Sub. Att | Rev. | Ctrl |
|---|---|---|---|---|---|---|---|---|---|
| Dricus du Plessis | 0 | 35 of 70 | 50% | 58 of 94 | 1 of 1 | 100% | 0 | 1 | 0:23 |
| Darren Till | 0 | 86 of 147 | 58% | 117 of 197 | 6 of 6 | 100% | 3 | 0 | 5:33 |
Per Round
| Rd | Fighter | KD | Sig. Str. | Sig. Str. % | Total Str. | TD | TD % | Sub. Att | Rev. | Ctrl |
|---|---|---|---|---|---|---|---|---|---|---|
| 1 | Dricus du Plessis | 0 | 6 of 12 | 50% | 9 of 15 | 1 of 1 | 100% | 0 | 1 | 0:23 |
| Darren Till | 0 | 60 of 85 | 70% | 82 of 126 | 3 of 3 | 100% | 1 | 0 | 3:56 | |
| 2 | Dricus du Plessis | 0 | 18 of 33 | 54% | 38 of 54 | 0 of 0 | --- | 0 | 0 | 0:00 |
| Darren Till | 0 | 10 of 28 | 35% | 19 of 37 | 2 of 2 | 100% | 1 | 0 | 1:27 | |
| 3 | Dricus du Plessis | 0 | 11 of 25 | 44% | 11 of 25 | 0 of 0 | --- | 0 | 0 | 0:00 |
| Darren Till | 0 | 16 of 34 | 47% | 16 of 34 | 1 of 1 | 100% | 1 | 0 | 0:10 |
Significant Strikes
| Fighter | Sig. Str. | Sig. Str. % | Head | Body | Leg | Distance | Clinch | Ground |
|---|---|---|---|---|---|---|---|---|
| Dricus du Plessis | 35 of 70 | 50% | 26 of 57 | 6 of 9 | 3 of 4 | 29 of 60 | 1 of 1 | 5 of 9 |
| Darren Till | 86 of 147 | 58% | 69 of 123 | 4 of 7 | 13 of 17 | 28 of 59 | 25 of 40 | 33 of 48 |
Significant Strikes Per Round
| Rd | Fighter | Sig. Str. | Sig. Str. % | Head | Body | Leg | Distance | Clinch | Ground |
|---|---|---|---|---|---|---|---|---|---|
| 1 | Dricus du Plessis | 6 of 12 | 50% | 5 of 11 | 1 of 1 | 0 of 0 | 1 of 3 | 0 of 0 | 5 of 9 |
| Darren Till | 60 of 85 | 70% | 54 of 77 | 2 of 3 | 4 of 5 | 4 of 6 | 25 of 38 | 31 of 41 | |
| 2 | Dricus du Plessis | 18 of 33 | 54% | 12 of 26 | 3 of 3 | 3 of 4 | 17 of 32 | 1 of 1 | 0 of 0 |
| Darren Till | 10 of 28 | 35% | 4 of 21 | 1 of 2 | 5 of 5 | 10 of 24 | 0 of 2 | 0 of 2 | |
| 3 | Dricus du Plessis | 11 of 25 | 44% | 9 of 20 | 2 of 5 | 0 of 0 | 11 of 25 | 0 of 0 | 0 of 0 |
| Darren Till | 16 of 34 | 47% | 11 of 25 | 1 of 2 | 4 of 7 | 14 of 29 | 0 of 0 | 2 of 5 |
Angelo picks Till as an underdog, believing Till's boxing and range control will be too much for du Plessis, who rushes forward with his chin up. He notes Till's recent struggles with injuries and mental health, and a DUI, making him nervous about his moneyline bet. However, he argues that Till's losses came to elite fighters who would also beat du Plessis.
Big Brady picks Dricus du Plessis, citing his volume, power, and submission game, while questioning Darren Till's mentality and recent form. He notes Till has been submitted multiple times and has low volume. He expects du Plessis to win by second round submission, but acknowledges Till has a puncher's chance.
Cody picks Darren Till as a dog, citing the stylistic matchup. He notes Till is a clean counter-striker with a nasty left hand, while du Plessis leads with his chin up and is wild. He thinks du Plessis will panic shoot takedowns, which Till can defend and counter. He acknowledges Till's low output and untrustworthiness but sees this as a good spot for him.
Connor picks du Plessis, citing his relentless pace, durability, and power. He notes Till is low output, inconsistent, and does his best work in the first round. Connor believes du Plessis will survive early trouble and overwhelm Till with constant pressure, as Till's confidence has eroded after recent losses and injuries.
Daniel Levi picks Dricus du Plessis, citing his massive output advantage over Darren Till. He notes Till has never landed 50 strikes in a UFC fight, while du Plessis landed 113 against Brad Tavares. Levi believes du Plessis's awkward but effective striking, power, and grappling (body lock, back takes) will overwhelm Till if the fight goes past the first round. He acknowledges Till's chance to land a sniper shot but thinks du Plessis will outwork and break him. Levi agrees with the line movement from -135 to -190.
Lock picks du Plessis to get his hand raised, and recommends buying stocks on him on PredictionStrike at $1.54, as he is half the price of Till and will see a solid bump with a win. He is not interested in du Plessis on the moneyline at -180 due to the question mark that Till brings, but sees PredictionStrike as a way to exploit value. For Till, he suggests the moneyline as a dog rather than investing on PredictionStrike at $3.00.
Paul leans towards Darren Till as a dog, noting the matchup is good for Till because du Plessis is not an elite wrestler and leaves his chin up. He thinks Till can hang back and pick him off. However, he is hesitant because Till throws low volume and is hard to trust with money. He decides slightly on Till due to the plus money.
The MMA Guru picks Dricus du Plessis over Darren Till, citing Till's lack of recent form and physical decline. He believes du Plessis is a real athlete with power and grappling ability, and will mix in takedowns after making Till cautious with his striking. He predicts du Plessis will finish Till via mounted guillotine or ground and pound in the later rounds.
Zane picks du Plessis, agreeing that Till's low output and inconsistency are major issues. He notes du Plessis is a messy but relentless fighter who will keep coming, and Till's confidence is shaken. Zane acknowledges du Plessis could get knocked out but trusts his durability and pace.
Totals
| Fighter | KD | Sig. Str. | Sig. Str. % | Total Str. | TD | TD % | Sub. Att | Rev. | Ctrl |
|---|---|---|---|---|---|---|---|---|---|
| Derek Brunson | 0 | 41 of 84 | 48% | 101 of 145 | 3 of 6 | 50% | 1 | 0 | 7:23 |
| Darren Till | 0 | 26 of 50 | 52% | 28 of 53 | 0 of 0 | --- | 0 | 0 | 0:04 |
Per Round
| Rd | Fighter | KD | Sig. Str. | Sig. Str. % | Total Str. | TD | TD % | Sub. Att | Rev. | Ctrl |
|---|---|---|---|---|---|---|---|---|---|---|
| 1 | Derek Brunson | 0 | 26 of 51 | 50% | 51 of 76 | 1 of 1 | 100% | 0 | 0 | 2:57 |
| Darren Till | 0 | 7 of 16 | 43% | 8 of 17 | 0 of 0 | --- | 0 | 0 | 0:00 | |
| 2 | Derek Brunson | 0 | 6 of 13 | 46% | 37 of 45 | 1 of 3 | 33% | 0 | 0 | 3:56 |
| Darren Till | 0 | 5 of 10 | 50% | 5 of 10 | 0 of 0 | --- | 0 | 0 | 0:04 | |
| 3 | Derek Brunson | 0 | 9 of 20 | 45% | 13 of 24 | 1 of 2 | 50% | 1 | 0 | 0:30 |
| Darren Till | 0 | 14 of 24 | 58% | 15 of 26 | 0 of 0 | --- | 0 | 0 | 0:00 |
Significant Strikes
| Fighter | Sig. Str. | Sig. Str. % | Head | Body | Leg | Distance | Clinch | Ground |
|---|---|---|---|---|---|---|---|---|
| Derek Brunson | 41 of 84 | 48% | 37 of 76 | 2 of 2 | 2 of 6 | 9 of 36 | 3 of 3 | 29 of 45 |
| Darren Till | 26 of 50 | 52% | 14 of 38 | 8 of 8 | 4 of 4 | 19 of 42 | 7 of 8 | 0 of 0 |
Significant Strikes Per Round
| Rd | Fighter | Sig. Str. | Sig. Str. % | Head | Body | Leg | Distance | Clinch | Ground |
|---|---|---|---|---|---|---|---|---|---|
| 1 | Derek Brunson | 26 of 51 | 50% | 26 of 48 | 0 of 0 | 0 of 3 | 3 of 16 | 1 of 1 | 22 of 34 |
| Darren Till | 7 of 16 | 43% | 6 of 15 | 1 of 1 | 0 of 0 | 6 of 15 | 1 of 1 | 0 of 0 | |
| 2 | Derek Brunson | 6 of 13 | 46% | 6 of 13 | 0 of 0 | 0 of 0 | 2 of 6 | 0 of 0 | 4 of 7 |
| Darren Till | 5 of 10 | 50% | 2 of 7 | 3 of 3 | 0 of 0 | 2 of 7 | 3 of 3 | 0 of 0 | |
| 3 | Derek Brunson | 9 of 20 | 45% | 5 of 15 | 2 of 2 | 2 of 3 | 4 of 14 | 2 of 2 | 3 of 4 |
| Darren Till | 14 of 24 | 58% | 6 of 16 | 4 of 4 | 4 of 4 | 11 of 20 | 3 of 4 | 0 of 0 |
Big Brady picks Darren Till to win by knockout, citing Till's power and Brunson's questionable chin and cardio. He notes that Till has faced much tougher competition recently (Whittaker, Gastelum, Masvidal, Woodley) compared to Brunson's lower-level opponents. However, he is hesitant because Till is very low volume (max 49 sig strikes in a fight) and Brunson is a strong wrestler who could out-grapple Till. Brady thinks the line is off (Till -180) and would not bet the moneyline, preferring the knockout prop.
Cody thinks Till should win but is hesitant at -180, noting Till's low volume and tendency to be reserved. He suggests waiting for a live line after the first round to get a better price. He acknowledges Brunson's wrestling and chain takedowns could cause problems, but believes Till's power and durability will allow him to get a late finish in a five-round fight.
I believe Till is an elite striker and Brunson's takedowns will be harder to secure against Till's 82% takedown defense. Brunson's striking is not on the same level, and Till's power is real—he's dropped five of nine opponents. Even if Brunson gets early takedowns, Till's get-up game is good enough to work back up. The longer the fight goes, the more it favors Till as Brunson's desperation takedowns fail. I'm confident Till wins, likely by decision or late KO.
Paul is taking Brunson as a plus money underdog, citing Till's low volume and Brunson's improved fight IQ and wrestling. He notes Brunson has been cashing as a dog recently and that Till's kryptonite is what Brunson does—wrestling and pressure. He believes Brunson can get takedowns and grind out a win, especially if the fight goes into later rounds where Till's hesitancy costs him.
The MMA Guru picks Darren Till to win by first-round TKO. He believes Till's striking and takedown defense will be too much for Brunson, who is hesitant on the feet and has been KO'd multiple times. He notes that if Till cannot beat Brunson, he will never be a champion. He expects a slow first round with Brunson attempting a takedown and Till countering with a left hook to finish.
Totals
| Fighter | KD | Sig. Str. | Sig. Str. % | Total Str. | TD | TD % | Sub. Att | Rev. | Ctrl |
|---|---|---|---|---|---|---|---|---|---|
| Robert Whittaker | 1 | 69 of 157 | 43% | 100 of 188 | 2 of 13 | 15% | 0 | 0 | 2:29 |
| Darren Till | 0 | 41 of 99 | 41% | 50 of 108 | 0 of 0 | --- | 0 | 0 | 0:35 |
Per Round
| Rd | Fighter | KD | Sig. Str. | Sig. Str. % | Total Str. | TD | TD % | Sub. Att | Rev. | Ctrl |
|---|---|---|---|---|---|---|---|---|---|---|
| 1 | Robert Whittaker | 0 | 11 of 30 | 36% | 13 of 32 | 0 of 2 | 0% | 0 | 0 | 0:00 |
| Darren Till | 0 | 12 of 24 | 50% | 16 of 28 | 0 of 0 | --- | 0 | 0 | 0:35 | |
| 2 | Robert Whittaker | 1 | 15 of 30 | 50% | 42 of 57 | 0 of 0 | --- | 0 | 0 | 1:48 |
| Darren Till | 0 | 3 of 12 | 25% | 3 of 12 | 0 of 0 | --- | 0 | 0 | 0:00 | |
| 3 | Robert Whittaker | 0 | 13 of 32 | 40% | 13 of 32 | 0 of 2 | 0% | 0 | 0 | 0:06 |
| Darren Till | 0 | 6 of 21 | 28% | 6 of 21 | 0 of 0 | --- | 0 | 0 | 0:00 | |
| 4 | Robert Whittaker | 0 | 13 of 34 | 38% | 14 of 35 | 0 of 2 | 0% | 0 | 0 | 0:02 |
| Darren Till | 0 | 8 of 19 | 42% | 9 of 20 | 0 of 0 | --- | 0 | 0 | 0:00 | |
| 5 | Robert Whittaker | 0 | 17 of 31 | 54% | 18 of 32 | 2 of 7 | 28% | 0 | 0 | 0:33 |
| Darren Till | 0 | 12 of 23 | 52% | 16 of 27 | 0 of 0 | --- | 0 | 0 | 0:00 |
Significant Strikes
| Fighter | Sig. Str. | Sig. Str. % | Head | Body | Leg | Distance | Clinch | Ground |
|---|---|---|---|---|---|---|---|---|
| Robert Whittaker | 69 of 157 | 43% | 32 of 116 | 7 of 10 | 30 of 31 | 57 of 139 | 7 of 11 | 5 of 7 |
| Darren Till | 41 of 99 | 41% | 29 of 86 | 7 of 8 | 5 of 5 | 31 of 87 | 7 of 9 | 3 of 3 |
Significant Strikes Per Round
| Rd | Fighter | Sig. Str. | Sig. Str. % | Head | Body | Leg | Distance | Clinch | Ground |
|---|---|---|---|---|---|---|---|---|---|
| 1 | Robert Whittaker | 11 of 30 | 36% | 4 of 22 | 1 of 2 | 6 of 6 | 10 of 29 | 1 of 1 | 0 of 0 |
| Darren Till | 12 of 24 | 50% | 8 of 20 | 3 of 3 | 1 of 1 | 6 of 18 | 3 of 3 | 3 of 3 | |
| 2 | Robert Whittaker | 15 of 30 | 50% | 7 of 22 | 1 of 1 | 7 of 7 | 10 of 23 | 0 of 0 | 5 of 7 |
| Darren Till | 3 of 12 | 25% | 0 of 9 | 0 of 0 | 3 of 3 | 3 of 12 | 0 of 0 | 0 of 0 | |
| 3 | Robert Whittaker | 13 of 32 | 40% | 8 of 26 | 0 of 1 | 5 of 5 | 11 of 30 | 2 of 2 | 0 of 0 |
| Darren Till | 6 of 21 | 28% | 5 of 20 | 1 of 1 | 0 of 0 | 5 of 20 | 1 of 1 | 0 of 0 | |
| 4 | Robert Whittaker | 13 of 34 | 38% | 7 of 26 | 1 of 2 | 5 of 6 | 12 of 31 | 1 of 3 | 0 of 0 |
| Darren Till | 8 of 19 | 42% | 6 of 16 | 1 of 2 | 1 of 1 | 6 of 16 | 2 of 3 | 0 of 0 | |
| 5 | Robert Whittaker | 17 of 31 | 54% | 6 of 20 | 4 of 4 | 7 of 7 | 14 of 26 | 3 of 5 | 0 of 0 |
| Darren Till | 12 of 23 | 52% | 10 of 21 | 2 of 2 | 0 of 0 | 11 of 21 | 1 of 2 | 0 of 0 |
Play-by-Play
View on SherdogRound 1
At long last, we have reached the main event, in the form of a middleweight contender matchup between ex-champ Whittaker (20-5, 11-3 UFC) and former welterweight title challenger Till (18-2-1, 6-2-1 UFC). To keep things clean, referee Herb Dean keeps tabs on the headliner, and even though they talked about “going to war,” there is a touch of gloves. Till leaps forward, and Whittaker stops him in his tracks with a power jab. Till walks it off and wades forward, only to get jabbed again. Whittaker times Till’s advancing movement with an overhand left, and Till stops his movement and takes a leg kick. Whittaker throws out a lazy front kick that Till catches with one hand, and “The Gorilla” tosses it aside. They crash together and Till nails him with a short elbow. Whittaker could be hurt, and he falls to his back in a shock. Till pounces to land some punches, and the former champ fights his way back to his feet without taking much damage. Till crowds him, and Whittaker backs away and absorbs a few long left hands while blocking a head kick. Till crashes in to squeeze “The Reaper” against the cage, and Whittaker tries to circle out and sneak in a knee. Whittaker tries to toss him, and Till stays upright, backs away and stings the former champ with a left. Whittaker comes back at him with a head kick that gets blocked, so he goes low with a kick and checks one that comes back towards him. Whittaker sticks him with a long right jab and wings a head kick that Till dodges, and follows this with another left. Till races forward, and Whittaker blocks and lands a left hand counter to make Till retreat. Whittaker aims a low kick at the calf, and Till stands still to wipe some sweat off his brow. Whittaker loads up with a bomb of a right hand, and Till backs away but does not get far enough back to avoid the straight right that comes after. Whittaker slaps the lead leg with one kick before we hear the horn to end the round.
Sherdog Scores
Jay Pettry scores the round: 10-9 Till
Ben Duffy scores the round: 10-9 Till
Tristen Critchfield scores the round: 10-9 Till
Round 2
They clap hands to start the round, and Till appears to loudly cough. They start engaging, and Till walks forward a little too recklessly and gets clipped with a left hand that almost makes him topple over. Till tries to land a right hand, but Whittaker counters with a left over the top. Till puts on him a pair of leg kicks, and Whittaker charges in with a right hand that drops Till to the ground hard. “Bobby Knuckles” chases him down into guard, where he starts to grind his elbow on Till’s face. Whittaker softens up the body and elbows the thigh to break the guard, but his most emphatic strike on top comes in the form of a big elbow. Whittaker steps over to half guard with one more that makes Till’s head bounce off the canvas. Whittaker sneaks a right hand around the guard, and wings a trio of short elbows that make Till check to see if he has been cut – there is blood dripping from his nose. Till rolls over and gives up his back, and Whittaker takes it but cannot secure it, so Till pushes off. Whittaker lands a low kick that does not slap as much as it thuds, and he circles away to evade Till’s strikes while sinking in another leg kick. Till cannot get in on him, and takes another leg kick as he starts to show signs of frustration. Till rushes forward but does not land, and Whittaker comes at him with a blitz only to pull back at the last second. A left hand from Till meets the guard, and Whittaker crashes in with a swarm of punches. They both try to connect with booming head kicks, but neither succeed as the second round draws to an end.
Sherdog Scores
Jay Pettry scores the round: 10-9 Whittaker
Ben Duffy scores the round: 10-9 Whittaker
Tristen Critchfield scores the round: 10-9 Whittaker
Round 3
Whittaker begins the round by chopping down the lead leg, and Till may have disclosed to his corner between rounds that there is some significant damage to it. Till wings a left hook, and Whittaker tries to fire back but comes up shy of the mark. A single left from Till gets blocked, and a head kick right after is avoided. When Whittaker tries to advance, Till looks to time the elbow that dropped Whittaker in the first, but the former champ sees it coming. Whittaker swings and misses with another charge, but he does manage to get another leg kick in. They both whiff on big head kicks, with the other bending over backwards to avoid it. When Till steps in to engage, Whittaker pops him with a jab and makes stops “The Gorilla” in his tracks. On an exchange, Till’s eye might have been injured, and he blinks it out and tells Whittaker to come at him. Whittaker obliges in the form of a head kick and a spinning back fist, and Till is able to avoid both. Out of nowhere, Whittaker shoots in for a single, and bails on it to catch Till with a crisp left hook. Whittaker works the lead leg again, and hunkers down with a right hand bomb but cannot connect with it. Whittaker crashes in for a takedown, and Till defends it with an elbow that Whittaker is able to push through. The pace has waned to a great degree as both men try to set up traps and land monster shots, as Whittaker winds up with one last bomb of a right that Till sees coming and ducks. The horn ends the third.
Sherdog Scores
Jay Pettry scores the round: 10-9 Whittaker
Ben Duffy scores the round: 10-9 Whittaker
Tristen Critchfield scores the round: 10-9 Whittaker
Round 4
Like the previous break, Till confides to his corner that he can barely put weight on his lead leg. He does not seem too concerned when the round begins, and he comes out with a left hook and a head kick. Whittaker slaps a kick on the lead leg, and he lands one on the opposite side for good measure. He digs in another as Till shakes his head at him, and the two fake and feint at one another. Whittaker swats at him, and Till is well away before he takes it or a head kick. Till cracks him with an elbow, and Whittaker wears it well as Till races in to do more damage. Whittaker is able to gather his thoughts and throw back, forcing Till to backpedal. They both swing and land right hands at the same time, and Whittaker looks to set up a jab but cannot find the chin. Whittaker changes levels for a single, and then cancels it with a right hand over the top, but Till rolls with it. The strike landing totals are not likely high for this high-stakes, tense showdown. Till lands a single straight left, and Whittaker rushes in with his own as he uppercuts Till on the chin. Till gets a crisp left off, forcing Whittaker to storm forward and try to pursue a takedown. Till stands him up, and Whittaker swings and misses with a combination. The round ends with both men staring at one another.
Sherdog Scores
Jay Pettry scores the round: 10-10
Ben Duffy scores the round: 10-9 Whittaker
Tristen Critchfield scores the round: 10-9 Till
Round 5
The two men embrace when Dean checks in the final round. Whittaker cracks him with a big right hand right out of the gate, and Till shakes his head at it. He loads up another, and Till is just able to dodge it. The former champ shoots in low for a takedown, and Till stuffs it and jabs at him. Till fires up a head kick that gets blocked, and a long left hand partially connects. Till swings and misses on another head kick, and after a pause, Whittaker fires off a right hand. Till skates out of the way without much effort, so Whittaker kicks the leg and then puts a front kick on Till’s torso. Till gets Whittaker’s attention with a one-two, so Whittaker returns with a hard leg kick. They kick at the same time, and when Whittaker gets his off to the leg, Till lands to the body. Whittaker rushes in for a takedown, and like before, he abandons it to ring a right hand home. Till scores a straight left, and Whittaker gathers himself and jumps forward to swing wildly. Till chases after him and hits him on the chops with a pair of left hands, and Whittaker kicks the lead leg with a ferocity that makes Till lift it off the ground. Whittaker sees the reaction, so he targets it once more. When Till does not fire back, Whittaker swings his leg at it one more time, and he looks to his foot after it connects. The former champ charges in with his short takedown to land a left hand, and Till pushes him away. Whittaker comes right back at him, and Till unloads a furious elbow that slices the side of Whittaker’s head open. Dean checks to see if there was a foul, and when action resumes, Whittaker runs at him for a takedown. He mashes Till against the fence to grind out the rest of the round, and this slow-paced fight is now over. We have made it to the end of the evening, after a record 15 fights went down tonight. Thanks for joining us, and we will see you next week. Don't worry, fight fans, there is a UFC card every weekend until October!
Sherdog Scores
Jay Pettry scores the round: 10-9 Whittaker (49-47 Whittaker)
Ben Duffy scores the round: 10-9 Whittaker (49-46 Whittaker)
Tristen Critchfield scores the round: 10-9 Till (48-47 Till)
The Official Result
Robert Whittaker def. Darren Till via Unanimous Decision (48-47, 48-47, 48-47)
Big Brady picks Whittaker because he believes Whittaker is the more talented fighter and will throw more volume. He notes Whittaker's chin is a concern after the Adesanya KO, but thinks if it holds up, Whittaker runs away with it. He is not impressed with Till's recent win over Gastelum and sees Till as basic. He predicts a decision win for Whittaker.
Daniel leans Whittaker, citing his power and strength, but acknowledges Till's late-round success and hunger. He notes Whittaker's defensive flaws and Till's limited but effective striking. He sees a possible second-round knockout for Whittaker but is not confident, calling it a dog-or-pass fight from a betting perspective.
Whittaker is the better overall striker with superior movement and combination punching. He will be able to cover range effectively and land blitzes, while Till may struggle with Whittaker's speed and variety. Whittaker's chin is not completely shot despite the Adesanya KO, and he should shake off rust and finish Till in the third or fourth round.
The MMA Guru picks Darren Till, arguing that elite strikers beat Robert Whittaker, citing Whittaker's losses to Israel Adesanya and Stephen Thompson. He notes Whittaker's chin is a concern after wars with Romero and the Adesanya KO, while Till has had time to recover and adjust to middleweight. He predicts Till will catch Whittaker lunging in with a left hand and finish him by TKO in the second round.
Totals
| Fighter | KD | Sig. Str. | Sig. Str. % | Total Str. | TD | TD % | Sub. Att | Rev. | Ctrl |
|---|---|---|---|---|---|---|---|---|---|
| Darren Till | 0 | 40 of 81 | 49% | 50 of 96 | 1 of 4 | 25% | 0 | 0 | 2:43 |
| Kelvin Gastelum | 0 | 36 of 67 | 53% | 37 of 69 | 1 of 2 | 50% | 0 | 0 | 0:39 |
Per Round
| Rd | Fighter | KD | Sig. Str. | Sig. Str. % | Total Str. | TD | TD % | Sub. Att | Rev. | Ctrl |
|---|---|---|---|---|---|---|---|---|---|---|
| 1 | Darren Till | 0 | 11 of 23 | 47% | 15 of 31 | 0 of 0 | --- | 0 | 0 | 1:35 |
| Kelvin Gastelum | 0 | 7 of 16 | 43% | 7 of 17 | 0 of 0 | --- | 0 | 0 | 0:31 | |
| 2 | Darren Till | 0 | 14 of 25 | 56% | 18 of 30 | 0 of 1 | 0% | 0 | 0 | 0:41 |
| Kelvin Gastelum | 0 | 12 of 23 | 52% | 13 of 24 | 0 of 0 | --- | 0 | 0 | 0:04 | |
| 3 | Darren Till | 0 | 15 of 33 | 45% | 17 of 35 | 1 of 3 | 33% | 0 | 0 | 0:27 |
| Kelvin Gastelum | 0 | 17 of 28 | 60% | 17 of 28 | 1 of 2 | 50% | 0 | 0 | 0:04 |
Significant Strikes
| Fighter | Sig. Str. | Sig. Str. % | Head | Body | Leg | Distance | Clinch | Ground |
|---|---|---|---|---|---|---|---|---|
| Darren Till | 40 of 81 | 49% | 8 of 41 | 11 of 14 | 21 of 26 | 26 of 63 | 14 of 18 | 0 of 0 |
| Kelvin Gastelum | 36 of 67 | 53% | 19 of 48 | 2 of 2 | 15 of 17 | 34 of 61 | 2 of 6 | 0 of 0 |
Significant Strikes Per Round
| Rd | Fighter | Sig. Str. | Sig. Str. % | Head | Body | Leg | Distance | Clinch | Ground |
|---|---|---|---|---|---|---|---|---|---|
| 1 | Darren Till | 11 of 23 | 47% | 1 of 8 | 2 of 4 | 8 of 11 | 2 of 11 | 9 of 12 | 0 of 0 |
| Kelvin Gastelum | 7 of 16 | 43% | 2 of 10 | 0 of 0 | 5 of 6 | 6 of 13 | 1 of 3 | 0 of 0 | |
| 2 | Darren Till | 14 of 25 | 56% | 2 of 11 | 4 of 5 | 8 of 9 | 12 of 23 | 2 of 2 | 0 of 0 |
| Kelvin Gastelum | 12 of 23 | 52% | 5 of 15 | 1 of 1 | 6 of 7 | 11 of 21 | 1 of 2 | 0 of 0 | |
| 3 | Darren Till | 15 of 33 | 45% | 5 of 22 | 5 of 5 | 5 of 6 | 12 of 29 | 3 of 4 | 0 of 0 |
| Kelvin Gastelum | 17 of 28 | 60% | 12 of 23 | 1 of 1 | 4 of 4 | 17 of 27 | 0 of 1 | 0 of 0 |
Totals
| Fighter | KD | Sig. Str. | Sig. Str. % | Total Str. | TD | TD % | Sub. Att | Rev. | Ctrl |
|---|---|---|---|---|---|---|---|---|---|
| Jorge Masvidal | 1 | 21 of 43 | 48% | 22 of 44 | 1 of 1 | 100% | 0 | 0 | 0:56 |
| Darren Till | 1 | 35 of 72 | 48% | 41 of 79 | 1 of 2 | 50% | 0 | 0 | 0:47 |
Per Round
| Rd | Fighter | KD | Sig. Str. | Sig. Str. % | Total Str. | TD | TD % | Sub. Att | Rev. | Ctrl |
|---|---|---|---|---|---|---|---|---|---|---|
| 1 | Jorge Masvidal | 1 | 13 of 27 | 48% | 14 of 28 | 1 of 1 | 100% | 0 | 0 | 0:51 |
| Darren Till | 0 | 19 of 39 | 48% | 24 of 45 | 0 of 1 | 0% | 0 | 0 | 0:20 | |
| 2 | Jorge Masvidal | 0 | 8 of 16 | 50% | 8 of 16 | 0 of 0 | --- | 0 | 0 | 0:05 |
| Darren Till | 1 | 16 of 33 | 48% | 17 of 34 | 1 of 1 | 100% | 0 | 0 | 0:27 |
Significant Strikes
| Fighter | Sig. Str. | Sig. Str. % | Head | Body | Leg | Distance | Clinch | Ground |
|---|---|---|---|---|---|---|---|---|
| Jorge Masvidal | 21 of 43 | 48% | 17 of 39 | 3 of 3 | 1 of 1 | 20 of 39 | 1 of 2 | 0 of 2 |
| Darren Till | 35 of 72 | 48% | 18 of 51 | 10 of 12 | 7 of 9 | 31 of 65 | 3 of 6 | 1 of 1 |
Significant Strikes Per Round
| Rd | Fighter | Sig. Str. | Sig. Str. % | Head | Body | Leg | Distance | Clinch | Ground |
|---|---|---|---|---|---|---|---|---|---|
| 1 | Jorge Masvidal | 13 of 27 | 48% | 10 of 24 | 3 of 3 | 0 of 0 | 12 of 23 | 1 of 2 | 0 of 2 |
| Darren Till | 19 of 39 | 48% | 10 of 27 | 6 of 8 | 3 of 4 | 17 of 34 | 2 of 5 | 0 of 0 | |
| 2 | Jorge Masvidal | 8 of 16 | 50% | 7 of 15 | 0 of 0 | 1 of 1 | 8 of 16 | 0 of 0 | 0 of 0 |
| Darren Till | 16 of 33 | 48% | 8 of 24 | 4 of 4 | 4 of 5 | 14 of 31 | 1 of 1 | 1 of 1 |
Totals
| Fighter | KD | Sig. Str. | Sig. Str. % | Total Str. | TD | TD % | Sub. Att | Rev. | Ctrl |
|---|---|---|---|---|---|---|---|---|---|
| Tyron Woodley | 1 | 57 of 79 | 72% | 74 of 97 | 0 of 4 | 0% | 1 | 0 | 5:29 |
| Darren Till | 0 | 0 of 6 | 0% | 1 of 7 | 0 of 0 | --- | 0 | 0 | 0:12 |
Per Round
| Rd | Fighter | KD | Sig. Str. | Sig. Str. % | Total Str. | TD | TD % | Sub. Att | Rev. | Ctrl |
|---|---|---|---|---|---|---|---|---|---|---|
| 1 | Tyron Woodley | 0 | 11 of 23 | 47% | 16 of 28 | 0 of 4 | 0% | 0 | 0 | 1:23 |
| Darren Till | 0 | 0 of 3 | 0% | 1 of 4 | 0 of 0 | --- | 0 | 0 | 0:12 | |
| 2 | Tyron Woodley | 1 | 46 of 56 | 82% | 58 of 69 | 0 of 0 | --- | 1 | 0 | 4:06 |
| Darren Till | 0 | 0 of 3 | 0% | 0 of 3 | 0 of 0 | --- | 0 | 0 | 0:00 |
Significant Strikes
| Fighter | Sig. Str. | Sig. Str. % | Head | Body | Leg | Distance | Clinch | Ground |
|---|---|---|---|---|---|---|---|---|
| Tyron Woodley | 57 of 79 | 72% | 47 of 67 | 7 of 9 | 3 of 3 | 7 of 19 | 5 of 6 | 45 of 54 |
| Darren Till | 0 of 6 | 0% | 0 of 6 | 0 of 0 | 0 of 0 | 0 of 6 | 0 of 0 | 0 of 0 |
Significant Strikes Per Round
| Rd | Fighter | Sig. Str. | Sig. Str. % | Head | Body | Leg | Distance | Clinch | Ground |
|---|---|---|---|---|---|---|---|---|---|
| 1 | Tyron Woodley | 11 of 23 | 47% | 3 of 13 | 5 of 7 | 3 of 3 | 6 of 17 | 5 of 6 | 0 of 0 |
| Darren Till | 0 of 3 | 0% | 0 of 3 | 0 of 0 | 0 of 0 | 0 of 3 | 0 of 0 | 0 of 0 | |
| 2 | Tyron Woodley | 46 of 56 | 82% | 44 of 54 | 2 of 2 | 0 of 0 | 1 of 2 | 0 of 0 | 45 of 54 |
| Darren Till | 0 of 3 | 0% | 0 of 3 | 0 of 0 | 0 of 0 | 0 of 3 | 0 of 0 | 0 of 0 |
Totals
| Fighter | KD | Sig. Str. | Sig. Str. % | Total Str. | TD | TD % | Sub. Att | Rev. | Ctrl |
|---|---|---|---|---|---|---|---|---|---|
| Darren Till | 0 | 30 of 126 | 23% | 31 of 127 | 0 of 1 | 0% | 0 | 0 | 0:00 |
| Stephen Thompson | 1 | 38 of 126 | 30% | 40 of 129 | 0 of 0 | --- | 0 | 0 | 0:14 |
Per Round
| Rd | Fighter | KD | Sig. Str. | Sig. Str. % | Total Str. | TD | TD % | Sub. Att | Rev. | Ctrl |
|---|---|---|---|---|---|---|---|---|---|---|
| 1 | Darren Till | 0 | 5 of 18 | 27% | 5 of 18 | 0 of 0 | --- | 0 | 0 | 0:00 |
| Stephen Thompson | 0 | 4 of 12 | 33% | 4 of 12 | 0 of 0 | --- | 0 | 0 | 0:00 | |
| 2 | Darren Till | 0 | 6 of 28 | 21% | 6 of 28 | 0 of 0 | --- | 0 | 0 | 0:00 |
| Stephen Thompson | 0 | 9 of 25 | 36% | 9 of 25 | 0 of 0 | --- | 0 | 0 | 0:00 | |
| 3 | Darren Till | 0 | 8 of 31 | 25% | 8 of 31 | 0 of 0 | --- | 0 | 0 | 0:00 |
| Stephen Thompson | 0 | 9 of 32 | 28% | 9 of 32 | 0 of 0 | --- | 0 | 0 | 0:00 | |
| 4 | Darren Till | 0 | 8 of 26 | 30% | 8 of 26 | 0 of 0 | --- | 0 | 0 | 0:00 |
| Stephen Thompson | 0 | 7 of 33 | 21% | 7 of 33 | 0 of 0 | --- | 0 | 0 | 0:08 | |
| 5 | Darren Till | 0 | 3 of 23 | 13% | 4 of 24 | 0 of 1 | 0% | 0 | 0 | 0:00 |
| Stephen Thompson | 1 | 9 of 24 | 37% | 11 of 27 | 0 of 0 | --- | 0 | 0 | 0:06 |
Significant Strikes
| Fighter | Sig. Str. | Sig. Str. % | Head | Body | Leg | Distance | Clinch | Ground |
|---|---|---|---|---|---|---|---|---|
| Darren Till | 30 of 126 | 23% | 8 of 92 | 13 of 19 | 9 of 15 | 29 of 125 | 1 of 1 | 0 of 0 |
| Stephen Thompson | 38 of 126 | 30% | 18 of 87 | 5 of 12 | 15 of 27 | 34 of 121 | 4 of 5 | 0 of 0 |
Significant Strikes Per Round
| Rd | Fighter | Sig. Str. | Sig. Str. % | Head | Body | Leg | Distance | Clinch | Ground |
|---|---|---|---|---|---|---|---|---|---|
| 1 | Darren Till | 5 of 18 | 27% | 0 of 9 | 2 of 2 | 3 of 7 | 5 of 18 | 0 of 0 | 0 of 0 |
| Stephen Thompson | 4 of 12 | 33% | 0 of 6 | 1 of 2 | 3 of 4 | 4 of 12 | 0 of 0 | 0 of 0 | |
| 2 | Darren Till | 6 of 28 | 21% | 1 of 22 | 4 of 5 | 1 of 1 | 5 of 27 | 1 of 1 | 0 of 0 |
| Stephen Thompson | 9 of 25 | 36% | 2 of 13 | 2 of 3 | 5 of 9 | 7 of 23 | 2 of 2 | 0 of 0 | |
| 3 | Darren Till | 8 of 31 | 25% | 3 of 24 | 3 of 5 | 2 of 2 | 8 of 31 | 0 of 0 | 0 of 0 |
| Stephen Thompson | 9 of 32 | 28% | 7 of 25 | 0 of 2 | 2 of 5 | 9 of 32 | 0 of 0 | 0 of 0 | |
| 4 | Darren Till | 8 of 26 | 30% | 3 of 20 | 3 of 3 | 2 of 3 | 8 of 26 | 0 of 0 | 0 of 0 |
| Stephen Thompson | 7 of 33 | 21% | 4 of 26 | 0 of 1 | 3 of 6 | 6 of 31 | 1 of 2 | 0 of 0 | |
| 5 | Darren Till | 3 of 23 | 13% | 1 of 17 | 1 of 4 | 1 of 2 | 3 of 23 | 0 of 0 | 0 of 0 |
| Stephen Thompson | 9 of 24 | 37% | 5 of 17 | 2 of 4 | 2 of 3 | 8 of 23 | 1 of 1 | 0 of 0 |
Totals
| Fighter | KD | Sig. Str. | Sig. Str. % | Total Str. | TD | TD % | Sub. Att | Rev. | Ctrl |
|---|---|---|---|---|---|---|---|---|---|
| Darren Till | 0 | 14 of 24 | 58% | 14 of 24 | 1 of 2 | 50% | 0 | 0 | 0:29 |
| Donald Cerrone | 1 | 24 of 55 | 43% | 24 of 55 | 0 of 0 | --- | 0 | 0 | 0:05 |
Per Round
| Rd | Fighter | KD | Sig. Str. | Sig. Str. % | Total Str. | TD | TD % | Sub. Att | Rev. | Ctrl |
|---|---|---|---|---|---|---|---|---|---|---|
| 1 | Darren Till | 0 | 14 of 24 | 58% | 14 of 24 | 1 of 2 | 50% | 0 | 0 | 0:29 |
| Donald Cerrone | 1 | 24 of 55 | 43% | 24 of 55 | 0 of 0 | --- | 0 | 0 | 0:05 |
Significant Strikes
| Fighter | Sig. Str. | Sig. Str. % | Head | Body | Leg | Distance | Clinch | Ground |
|---|---|---|---|---|---|---|---|---|
| Darren Till | 14 of 24 | 58% | 2 of 8 | 5 of 8 | 7 of 8 | 13 of 23 | 1 of 1 | 0 of 0 |
| Donald Cerrone | 24 of 55 | 43% | 23 of 54 | 0 of 0 | 1 of 1 | 18 of 40 | 4 of 11 | 2 of 4 |
Significant Strikes Per Round
| Rd | Fighter | Sig. Str. | Sig. Str. % | Head | Body | Leg | Distance | Clinch | Ground |
|---|---|---|---|---|---|---|---|---|---|
| 1 | Darren Till | 14 of 24 | 58% | 2 of 8 | 5 of 8 | 7 of 8 | 13 of 23 | 1 of 1 | 0 of 0 |
| Donald Cerrone | 24 of 55 | 43% | 23 of 54 | 0 of 0 | 1 of 1 | 18 of 40 | 4 of 11 | 2 of 4 |
No comments yet. Be the first to share your thoughts!