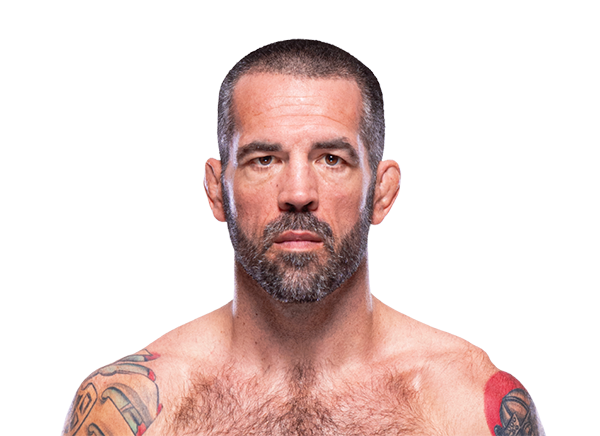
Career Averages - Matt Brown
Career Averages - Diego Sanchez
Matt Brown - Fight History
Totals
| Fighter | KD | Sig. Str. | Sig. Str. % | Total Str. | TD | TD % | Sub. Att | Rev. | Ctrl |
|---|---|---|---|---|---|---|---|---|---|
| Matt Brown | 1 | 11 of 15 | 73% | 22 of 26 | 0 of 0 | --- | 0 | 0 | 0:02 |
| Court McGee | 0 | 8 of 31 | 25% | 17 of 48 | 1 of 1 | 100% | 0 | 0 | 1:57 |
Per Round
| Rd | Fighter | KD | Sig. Str. | Sig. Str. % | Total Str. | TD | TD % | Sub. Att | Rev. | Ctrl |
|---|---|---|---|---|---|---|---|---|---|---|
| 1 | Matt Brown | 1 | 11 of 15 | 73% | 22 of 26 | 0 of 0 | --- | 0 | 0 | 0:02 |
| Court McGee | 0 | 8 of 31 | 25% | 17 of 48 | 1 of 1 | 100% | 0 | 0 | 1:57 |
Significant Strikes
| Fighter | Sig. Str. | Sig. Str. % | Head | Body | Leg | Distance | Clinch | Ground |
|---|---|---|---|---|---|---|---|---|
| Matt Brown | 11 of 15 | 73% | 2 of 4 | 3 of 4 | 6 of 7 | 10 of 14 | 1 of 1 | 0 of 0 |
| Court McGee | 8 of 31 | 25% | 2 of 21 | 2 of 5 | 4 of 5 | 6 of 29 | 2 of 2 | 0 of 0 |
Significant Strikes Per Round
| Rd | Fighter | Sig. Str. | Sig. Str. % | Head | Body | Leg | Distance | Clinch | Ground |
|---|---|---|---|---|---|---|---|---|---|
| 1 | Matt Brown | 11 of 15 | 73% | 2 of 4 | 3 of 4 | 6 of 7 | 10 of 14 | 1 of 1 | 0 of 0 |
| Court McGee | 8 of 31 | 25% | 2 of 21 | 2 of 5 | 4 of 5 | 6 of 29 | 2 of 2 | 0 of 0 |
Angelo picks Matt Brown, saying he thinks Brown will be the more durable of the two. He notes Court McGee is coming off a bad knockout loss and his chin is a question. He acknowledges the line movement tracker shows McGee went from +140 to -180 favorite, and that trend has been 7-1, but he goes against it. He is not betting on this fight.
Big Brady picks Court McGee but expresses distrust after McGee's fight against Condit where he didn't attempt a single takedown. He believes if McGee uses the right game plan—wrestling and taking down Matt Brown—he should win easily. Brady notes Brown is 42 with poor takedown defense and cardio, and McGee has better cardio and wrestling. He predicts a third-round submission, but says he can't fully trust McGee after the Condit fight.
Cody picks McGee, citing his better gas tank and durability. He notes that Brown's chin and reflexes have declined with age, and that McGee's kickboxing is good enough to compete. He expects McGee to wrestle and control the fight, especially in later rounds. He mentions the 'died and came back' theory for cardio.
Connor leans toward Court McGee, acknowledging that Matt Brown could knock him out early but that McGee's durability and pace are likely to carry him. He notes that Brown's endurance has declined and that McGee's grinding style is antithetical to Brown's current capabilities. Connor expects McGee to win by decision, as Brown's recent fights show he fades.
Daniel Levi picks Matt Brown, admitting bias as he will attend the fight and is a fan. He believes Brown is historically the better fighter, having reached number five in the welterweight rankings, while McGee never cracked the top 15. However, he acknowledges Brown's age (42) and cardio issues, which could allow McGee to push the pace and mix in takedowns. Levi hopes Brown gets a knockout to tie the UFC record, but notes the pick is not based on a betting edge.
McGee has a cardio and pace advantage over the aging Brown. He will tie Brown up, use footwork to avoid big shots, and weaponize his cardio to take over in the later rounds. Brown has slowed down in recent fights and his wrestling may not be effective against McGee. McGee will grind out a decision victory.
Paul picks McGee, emphasizing his wrestling and cardio advantage. He notes that McGee can make the fight easy by sticking to takedowns and controlling Brown. He added McGee to a chalk parlay. He acknowledges the possibility of a 'gentleman's agreement' striking affair but believes McGee's grappling is the key.
The MMA Guru picks Matt Brown, citing his better recent performances and the fact that Court McGee is coming off a brutal KO loss. He believes Brown's toughness and aggression will be too much, predicting a KO in the second or third round.
Zane picks Court McGee because he believes McGee's pace and grinding style will overwhelm Matt Brown, who fades as fights progress. He notes that Brown is still dangerous early but lacks the endurance to keep up with McGee's constant pressure and wrestling. Zane expects McGee to win a decision, as Brown's recent losses show he slows down significantly.
Totals
| Fighter | KD | Sig. Str. | Sig. Str. % | Total Str. | TD | TD % | Sub. Att | Rev. | Ctrl |
|---|---|---|---|---|---|---|---|---|---|
| Bryan Barberena | 0 | 81 of 129 | 62% | 95 of 145 | 5 of 7 | 71% | 0 | 0 | 5:01 |
| Matt Brown | 0 | 111 of 211 | 52% | 186 of 289 | 0 of 0 | --- | 0 | 1 | 0:57 |
Per Round
| Rd | Fighter | KD | Sig. Str. | Sig. Str. % | Total Str. | TD | TD % | Sub. Att | Rev. | Ctrl |
|---|---|---|---|---|---|---|---|---|---|---|
| 1 | Bryan Barberena | 0 | 23 of 37 | 62% | 25 of 39 | 1 of 3 | 33% | 0 | 0 | 1:39 |
| Matt Brown | 0 | 23 of 51 | 45% | 62 of 91 | 0 of 0 | --- | 0 | 0 | 0:16 | |
| 2 | Bryan Barberena | 0 | 23 of 36 | 63% | 29 of 43 | 2 of 2 | 100% | 0 | 0 | 1:45 |
| Matt Brown | 0 | 35 of 60 | 58% | 59 of 85 | 0 of 0 | --- | 0 | 1 | 0:30 | |
| 3 | Bryan Barberena | 0 | 35 of 56 | 62% | 41 of 63 | 2 of 2 | 100% | 0 | 0 | 1:37 |
| Matt Brown | 0 | 53 of 100 | 53% | 65 of 113 | 0 of 0 | --- | 0 | 0 | 0:11 |
Significant Strikes
| Fighter | Sig. Str. | Sig. Str. % | Head | Body | Leg | Distance | Clinch | Ground |
|---|---|---|---|---|---|---|---|---|
| Bryan Barberena | 81 of 129 | 62% | 36 of 75 | 38 of 44 | 7 of 10 | 51 of 95 | 24 of 28 | 6 of 6 |
| Matt Brown | 111 of 211 | 52% | 82 of 170 | 12 of 18 | 17 of 23 | 78 of 164 | 28 of 42 | 5 of 5 |
Significant Strikes Per Round
| Rd | Fighter | Sig. Str. | Sig. Str. % | Head | Body | Leg | Distance | Clinch | Ground |
|---|---|---|---|---|---|---|---|---|---|
| 1 | Bryan Barberena | 23 of 37 | 62% | 8 of 21 | 12 of 12 | 3 of 4 | 9 of 22 | 11 of 12 | 3 of 3 |
| Matt Brown | 23 of 51 | 45% | 13 of 36 | 2 of 4 | 8 of 11 | 19 of 46 | 4 of 5 | 0 of 0 | |
| 2 | Bryan Barberena | 23 of 36 | 63% | 9 of 20 | 12 of 14 | 2 of 2 | 17 of 29 | 6 of 7 | 0 of 0 |
| Matt Brown | 35 of 60 | 58% | 26 of 47 | 2 of 3 | 7 of 10 | 23 of 45 | 7 of 10 | 5 of 5 | |
| 3 | Bryan Barberena | 35 of 56 | 62% | 19 of 34 | 14 of 18 | 2 of 4 | 25 of 44 | 7 of 9 | 3 of 3 |
| Matt Brown | 53 of 100 | 53% | 43 of 87 | 8 of 11 | 2 of 2 | 36 of 73 | 17 of 27 | 0 of 0 |
Angelo picks Bryan Barberena, citing his durability, impressive volume, and forward pressure. He notes Barberena landed 108 strikes in his last fight and 169 against Vicente Luque. He thinks Barberena's constant volume will be the difference and expects a decision win. He says he probably won't bet on this fight.
Big Brady picks Matt Brown to knock out Bryan Barberena in the first or second round. He believes Barberena is washed after the Luke fight, citing poor takedown defense and being dropped twice by Jason Witt. He notes that Brown still has power, as shown in his last fight against Lima, and that Barberena's chin is no longer reliable. Brady also mentions that Barberena has health issues and has been taken down frequently in recent fights.
Cody strongly favors Matt Brown, highlighting Barberena's declining durability and poor takedown defense. He notes Barberena's recent wars and losses, while Brown still has power and timing. He thinks Brown can win by KO or decision. He calls it his first bet of the week.
Daniel Levi picks Matt Brown, admitting he is biased as a fan. He believes Brown is the better fighter with more finishing ability and can mix in takedowns. He notes both fighters are on the decline but thinks Brown's power and hometown crowd will carry him. He is hesitant because of Brown's age and chin, and Barberena's durability. He also points out Barberena hasn't looked the same since the Luque fight.
The host picks Barberena, noting his youth, body punching (30% of strikes to body), and Matt Brown's known body vulnerability. He expects a striking battle and believes Barberena will get a knockout, possibly in round 3 as Brown slows down. He also likes the prop 'fight doesn't go to decision'.
Paul picks Matt Brown, citing his wrestling advantage and Barberena's inability to stop takedowns. He notes Brown's hometown crowd and experience. He thinks Brown can grind out a win or land a big shot. He expects the line to move and hopes for plus money.
The MMA Guru picks Matt Brown by second-round TKO over Bryan Barberena. He envisions Barberena slightly edging the first round before getting caught with a big overhand. The Guru trusts Brown's power and recent resurgence, noting his second-round finish of Diego Lima, while Barberena's wars may leave him vulnerable.
Totals
| Fighter | KD | Sig. Str. | Sig. Str. % | Total Str. | TD | TD % | Sub. Att | Rev. | Ctrl |
|---|---|---|---|---|---|---|---|---|---|
| Matt Brown | 1 | 27 of 49 | 55% | 30 of 52 | 0 of 0 | --- | 0 | 0 | 0:03 |
| Dhiego Lima | 0 | 23 of 54 | 42% | 23 of 54 | 0 of 4 | 0% | 0 | 0 | 0:52 |
Per Round
| Rd | Fighter | KD | Sig. Str. | Sig. Str. % | Total Str. | TD | TD % | Sub. Att | Rev. | Ctrl |
|---|---|---|---|---|---|---|---|---|---|---|
| 1 | Matt Brown | 0 | 15 of 30 | 50% | 15 of 30 | 0 of 0 | --- | 0 | 0 | 0:00 |
| Dhiego Lima | 0 | 12 of 32 | 37% | 12 of 32 | 0 of 2 | 0% | 0 | 0 | 0:00 | |
| 2 | Matt Brown | 1 | 12 of 19 | 63% | 15 of 22 | 0 of 0 | --- | 0 | 0 | 0:03 |
| Dhiego Lima | 0 | 11 of 22 | 50% | 11 of 22 | 0 of 2 | 0% | 0 | 0 | 0:52 |
Significant Strikes
| Fighter | Sig. Str. | Sig. Str. % | Head | Body | Leg | Distance | Clinch | Ground |
|---|---|---|---|---|---|---|---|---|
| Matt Brown | 27 of 49 | 55% | 12 of 27 | 11 of 17 | 4 of 5 | 22 of 44 | 5 of 5 | 0 of 0 |
| Dhiego Lima | 23 of 54 | 42% | 8 of 38 | 4 of 4 | 11 of 12 | 22 of 53 | 1 of 1 | 0 of 0 |
Significant Strikes Per Round
| Rd | Fighter | Sig. Str. | Sig. Str. % | Head | Body | Leg | Distance | Clinch | Ground |
|---|---|---|---|---|---|---|---|---|---|
| 1 | Matt Brown | 15 of 30 | 50% | 8 of 18 | 4 of 8 | 3 of 4 | 15 of 30 | 0 of 0 | 0 of 0 |
| Dhiego Lima | 12 of 32 | 37% | 2 of 21 | 2 of 2 | 8 of 9 | 11 of 31 | 1 of 1 | 0 of 0 | |
| 2 | Matt Brown | 12 of 19 | 63% | 4 of 9 | 7 of 9 | 1 of 1 | 7 of 14 | 5 of 5 | 0 of 0 |
| Dhiego Lima | 11 of 22 | 50% | 6 of 17 | 2 of 2 | 3 of 3 | 11 of 22 | 0 of 0 | 0 of 0 |
Angelo picks Matt Brown as an underdog, citing Lima's brother's recent loss as a potential emotional distraction. He thinks Brown's toughness, power, and underrated wrestling could be factors. He is not confident and has no bets on the fight, but likes the over on strikes for both.
Big Brady picks the younger Lima, citing Brown's age (40) and 13 finished losses. He thinks Lima's leg kicks and youth will lead to a finish, but acknowledges Brown could knock Lima out. He recommends staying away from betting.
Cody picks Lima but is hesitant, noting Lima's questionable chin and recent split decisions. He acknowledges Matt Brown's early power but believes Brown's cardio and speed have declined. Cody thinks Lima's calf kicks and jab will allow him to pull away in later rounds, but he is not confident enough to bet.
Daniel Levi picks Dhiego Lima, citing youth and freshness. He notes that Matt Brown is 40 years old and his durability is declining, as seen in the Miguel Baeza fight where he was knocked out by punches for the first time. He believes Lima's calf kicks and left hook will be effective, and that he can either finish or win a decision. He respects Brown but thinks the age and recent performances favor Lima.
Jacob picks Dhiego Lima, expecting him to chew up Brown's legs with kicks and out-strike him. He thinks Brown's age and lack of volume will be issues. He has Lima in his lineup at $9,000 and believes Lima will dominate without a finish.
The host picks Dhiego Lima by decision, citing his calf kicks and striking advantage. He notes Lima's cardio issues in his last fight but believes he can implement a similar game plan to the Miguel Baeza fight, where calf kicks debilitated Brown. He thinks Lima can get in and out of exchanges and slow Brown down. He is not highly confident but sees Lima as the better fighter against the 40-year-old Brown, who may be on a three-fight skid.
Paul picks Lima, citing Lima's youth and striking advantage. He notes Brown's age (40) and declining cardio, and believes Lima can win by decision or late finish. Paul also bets under 2.5 rounds, expecting a finish either way.
The MMA Guru picks Dhiego Lima to win by first-round TKO via lead hook. He believes Matt Brown has taken too much damage and will rush in with his hands down, allowing Lima to land a check hook similar to the one Miguel Baeza landed on Brown. He references Lima's previous lead hook KO of Chad Laprise and expects Lima to finish Brown at the end of the first round.
Totals
| Fighter | KD | Sig. Str. | Sig. Str. % | Total Str. | TD | TD % | Sub. Att | Rev. | Ctrl |
|---|---|---|---|---|---|---|---|---|---|
| Carlos Condit | 0 | 39 of 88 | 44% | 157 of 209 | 2 of 4 | 50% | 0 | 1 | 4:52 |
| Matt Brown | 0 | 28 of 37 | 75% | 37 of 52 | 1 of 6 | 16% | 0 | 0 | 6:06 |
Per Round
| Rd | Fighter | KD | Sig. Str. | Sig. Str. % | Total Str. | TD | TD % | Sub. Att | Rev. | Ctrl |
|---|---|---|---|---|---|---|---|---|---|---|
| 1 | Carlos Condit | 0 | 6 of 22 | 27% | 60 of 77 | 0 of 0 | --- | 0 | 1 | 0:23 |
| Matt Brown | 0 | 9 of 14 | 64% | 15 of 23 | 1 of 1 | 100% | 0 | 0 | 3:36 | |
| 2 | Carlos Condit | 0 | 21 of 44 | 47% | 58 of 83 | 2 of 3 | 66% | 0 | 0 | 2:25 |
| Matt Brown | 0 | 11 of 15 | 73% | 12 of 16 | 0 of 2 | 0% | 0 | 0 | 0:37 | |
| 3 | Carlos Condit | 0 | 12 of 22 | 54% | 39 of 49 | 0 of 1 | 0% | 0 | 0 | 2:04 |
| Matt Brown | 0 | 8 of 8 | 100% | 10 of 13 | 0 of 3 | 0% | 0 | 0 | 1:53 |
Significant Strikes
| Fighter | Sig. Str. | Sig. Str. % | Head | Body | Leg | Distance | Clinch | Ground |
|---|---|---|---|---|---|---|---|---|
| Carlos Condit | 39 of 88 | 44% | 30 of 73 | 4 of 8 | 5 of 7 | 22 of 68 | 5 of 5 | 12 of 15 |
| Matt Brown | 28 of 37 | 75% | 13 of 22 | 11 of 11 | 4 of 4 | 11 of 18 | 8 of 8 | 9 of 11 |
Significant Strikes Per Round
| Rd | Fighter | Sig. Str. | Sig. Str. % | Head | Body | Leg | Distance | Clinch | Ground |
|---|---|---|---|---|---|---|---|---|---|
| 1 | Carlos Condit | 6 of 22 | 27% | 3 of 16 | 1 of 3 | 2 of 3 | 3 of 17 | 0 of 0 | 3 of 5 |
| Matt Brown | 9 of 14 | 64% | 6 of 11 | 1 of 1 | 2 of 2 | 4 of 7 | 0 of 0 | 5 of 7 | |
| 2 | Carlos Condit | 21 of 44 | 47% | 17 of 38 | 2 of 3 | 2 of 3 | 14 of 36 | 0 of 0 | 7 of 8 |
| Matt Brown | 11 of 15 | 73% | 3 of 7 | 6 of 6 | 2 of 2 | 6 of 10 | 5 of 5 | 0 of 0 | |
| 3 | Carlos Condit | 12 of 22 | 54% | 10 of 19 | 1 of 2 | 1 of 1 | 5 of 15 | 5 of 5 | 2 of 2 |
| Matt Brown | 8 of 8 | 100% | 4 of 4 | 4 of 4 | 0 of 0 | 1 of 1 | 3 of 3 | 4 of 4 |
Big Brady picks Carlos Condit to win inside the distance, specifically by second-round knockout. He notes Condit's 90% finish rate and that he has never been knocked out, while Brown has been knocked out three times and is weak to the body. He believes Brown's durability is not what it once was and that Condit can finish him. He also mentions that Brown has been submitted 10 times, but Condit's path is via knockout.
Daniel Levi picks Matt Brown as a slight underdog, calling it a 50-55 fight. He notes Condit's last win over Court McGee was unimpressive, while Brown has knockout power and a history of finishing fights. He expects Condit to try to point-fight, but Brown's pressure and body shots could be key. He admits low confidence.
Matt Brown's pressure style is a bad matchup for Condit, who struggles when opponents stay in his face and take away his space. Brown will push forward, use dirty boxing, and grind Condit against the cage. Condit's takedown defense is poor and he often relies on his back, but Brown is not a submission threat. Condit's best chance is on the feet with kicks, but Brown's durability and pressure should earn him a decision. The line should be closer to even, so plus money on Brown is value.
The MMA Guru picks Carlos Condit over Matt Brown, citing Condit's superior chin and striking. He notes Brown is losing his chin and coming off a TKO loss, while Condit has never been knocked out. He predicts Condit will win by third-round TKO once Brown gasses. He also mentions Condit's historical robbery against Robbie Lawler.
Totals
| Fighter | KD | Sig. Str. | Sig. Str. % | Total Str. | TD | TD % | Sub. Att | Rev. | Ctrl |
|---|---|---|---|---|---|---|---|---|---|
| Miguel Baeza | 0 | 33 of 61 | 54% | 33 of 61 | 0 of 0 | --- | 0 | 0 | 0:10 |
| Matt Brown | 2 | 37 of 73 | 50% | 42 of 79 | 0 of 0 | --- | 0 | 0 | 0:57 |
Per Round
| Rd | Fighter | KD | Sig. Str. | Sig. Str. % | Total Str. | TD | TD % | Sub. Att | Rev. | Ctrl |
|---|---|---|---|---|---|---|---|---|---|---|
| 1 | Miguel Baeza | 0 | 33 of 59 | 55% | 33 of 59 | 0 of 0 | --- | 0 | 0 | 0:10 |
| Matt Brown | 1 | 32 of 65 | 49% | 37 of 71 | 0 of 0 | --- | 0 | 0 | 0:55 | |
| 2 | Miguel Baeza | 0 | 0 of 2 | 0% | 0 of 2 | 0 of 0 | --- | 0 | 0 | 0:00 |
| Matt Brown | 1 | 5 of 8 | 62% | 5 of 8 | 0 of 0 | --- | 0 | 0 | 0:02 |
Significant Strikes
| Fighter | Sig. Str. | Sig. Str. % | Head | Body | Leg | Distance | Clinch | Ground |
|---|---|---|---|---|---|---|---|---|
| Miguel Baeza | 33 of 61 | 54% | 25 of 51 | 8 of 10 | 0 of 0 | 21 of 44 | 12 of 17 | 0 of 0 |
| Matt Brown | 37 of 73 | 50% | 21 of 54 | 5 of 7 | 11 of 12 | 29 of 62 | 1 of 2 | 7 of 9 |
Significant Strikes Per Round
| Rd | Fighter | Sig. Str. | Sig. Str. % | Head | Body | Leg | Distance | Clinch | Ground |
|---|---|---|---|---|---|---|---|---|---|
| 1 | Miguel Baeza | 33 of 59 | 55% | 25 of 49 | 8 of 10 | 0 of 0 | 21 of 42 | 12 of 17 | 0 of 0 |
| Matt Brown | 32 of 65 | 49% | 17 of 48 | 5 of 6 | 10 of 11 | 25 of 56 | 1 of 2 | 6 of 7 | |
| 2 | Miguel Baeza | 0 of 2 | 0% | 0 of 2 | 0 of 0 | 0 of 0 | 0 of 2 | 0 of 0 | 0 of 0 |
| Matt Brown | 5 of 8 | 62% | 4 of 6 | 0 of 1 | 1 of 1 | 4 of 6 | 0 of 0 | 1 of 2 |
Big Brady picks Miguel Baeza by first-round knockout, but is hesitant. He notes that Baeza's leg kicks are a huge factor and that Brown is dangerous on the feet and has a path to victory via takedowns. He compares the fight to the Askarov vs. Kelleher fight where an undefeated fighter got knocked out. He does not agree with Baeza being a -175 favorite and thinks the line should be closer.
Daniel Levi slightly leans with Matt Brown. He acknowledges that Miguel Baeza is super talented and could blow Brown out with a liver kick, but he thinks Brown will drag him into deep waters and drown him. He notes that Brown has historically been weak to the body but has been fighting with his hands down lately. He sees this as a good lesson for Baeza regardless.
The host picks Matt Brown, believing his veteran experience and pressure against the cage will overwhelm the undefeated Baeza. He thinks Baeza has not faced adversity and will struggle when things don't go his way. He predicts a TKO finish in the second or third round.
Totals
| Fighter | KD | Sig. Str. | Sig. Str. % | Total Str. | TD | TD % | Sub. Att | Rev. | Ctrl |
|---|---|---|---|---|---|---|---|---|---|
| Matt Brown | 0 | 30 of 47 | 63% | 40 of 59 | 2 of 3 | 66% | 0 | 0 | 7:34 |
| Ben Saunders | 0 | 12 of 23 | 52% | 38 of 49 | 0 of 0 | --- | 4 | 0 | 0:10 |
Per Round
| Rd | Fighter | KD | Sig. Str. | Sig. Str. % | Total Str. | TD | TD % | Sub. Att | Rev. | Ctrl |
|---|---|---|---|---|---|---|---|---|---|---|
| 1 | Matt Brown | 0 | 5 of 10 | 50% | 10 of 17 | 1 of 1 | 100% | 0 | 0 | 4:08 |
| Ben Saunders | 0 | 9 of 14 | 64% | 14 of 19 | 0 of 0 | --- | 4 | 0 | 0:00 | |
| 2 | Matt Brown | 0 | 25 of 37 | 67% | 30 of 42 | 1 of 2 | 50% | 0 | 0 | 3:26 |
| Ben Saunders | 0 | 3 of 9 | 33% | 24 of 30 | 0 of 0 | --- | 0 | 0 | 0:10 |
Significant Strikes
| Fighter | Sig. Str. | Sig. Str. % | Head | Body | Leg | Distance | Clinch | Ground |
|---|---|---|---|---|---|---|---|---|
| Matt Brown | 30 of 47 | 63% | 27 of 43 | 2 of 3 | 1 of 1 | 10 of 20 | 2 of 2 | 18 of 25 |
| Ben Saunders | 12 of 23 | 52% | 10 of 17 | 2 of 6 | 0 of 0 | 5 of 15 | 0 of 0 | 7 of 8 |
Significant Strikes Per Round
| Rd | Fighter | Sig. Str. | Sig. Str. % | Head | Body | Leg | Distance | Clinch | Ground |
|---|---|---|---|---|---|---|---|---|---|
| 1 | Matt Brown | 5 of 10 | 50% | 4 of 8 | 1 of 2 | 0 of 0 | 3 of 6 | 0 of 0 | 2 of 4 |
| Ben Saunders | 9 of 14 | 64% | 9 of 12 | 0 of 2 | 0 of 0 | 2 of 6 | 0 of 0 | 7 of 8 | |
| 2 | Matt Brown | 25 of 37 | 67% | 23 of 35 | 1 of 1 | 1 of 1 | 7 of 14 | 2 of 2 | 16 of 21 |
| Ben Saunders | 3 of 9 | 33% | 1 of 5 | 2 of 4 | 0 of 0 | 3 of 9 | 0 of 0 | 0 of 0 |
Totals
| Fighter | KD | Sig. Str. | Sig. Str. % | Total Str. | TD | TD % | Sub. Att | Rev. | Ctrl |
|---|---|---|---|---|---|---|---|---|---|
| Matt Brown | 1 | 18 of 34 | 52% | 20 of 36 | 0 of 0 | --- | 0 | 0 | 0:01 |
| Diego Sanchez | 0 | 12 of 20 | 60% | 13 of 21 | 0 of 3 | 0% | 0 | 0 | 1:29 |
Per Round
| Rd | Fighter | KD | Sig. Str. | Sig. Str. % | Total Str. | TD | TD % | Sub. Att | Rev. | Ctrl |
|---|---|---|---|---|---|---|---|---|---|---|
| 1 | Matt Brown | 1 | 18 of 34 | 52% | 20 of 36 | 0 of 0 | --- | 0 | 0 | 0:01 |
| Diego Sanchez | 0 | 12 of 20 | 60% | 13 of 21 | 0 of 3 | 0% | 0 | 0 | 1:29 |
Significant Strikes
| Fighter | Sig. Str. | Sig. Str. % | Head | Body | Leg | Distance | Clinch | Ground |
|---|---|---|---|---|---|---|---|---|
| Matt Brown | 18 of 34 | 52% | 14 of 30 | 2 of 2 | 2 of 2 | 12 of 28 | 6 of 6 | 0 of 0 |
| Diego Sanchez | 12 of 20 | 60% | 7 of 12 | 2 of 5 | 3 of 3 | 10 of 18 | 2 of 2 | 0 of 0 |
Significant Strikes Per Round
| Rd | Fighter | Sig. Str. | Sig. Str. % | Head | Body | Leg | Distance | Clinch | Ground |
|---|---|---|---|---|---|---|---|---|---|
| 1 | Matt Brown | 18 of 34 | 52% | 14 of 30 | 2 of 2 | 2 of 2 | 12 of 28 | 6 of 6 | 0 of 0 |
| Diego Sanchez | 12 of 20 | 60% | 7 of 12 | 2 of 5 | 3 of 3 | 10 of 18 | 2 of 2 | 0 of 0 |
Totals
| Fighter | KD | Sig. Str. | Sig. Str. % | Total Str. | TD | TD % | Sub. Att | Rev. | Ctrl |
|---|---|---|---|---|---|---|---|---|---|
| Donald Cerrone | 2 | 63 of 147 | 42% | 64 of 148 | 0 of 3 | 0% | 0 | 0 | 0:35 |
| Matt Brown | 1 | 70 of 128 | 54% | 73 of 131 | 0 of 2 | 0% | 1 | 0 | 0:03 |
Per Round
| Rd | Fighter | KD | Sig. Str. | Sig. Str. % | Total Str. | TD | TD % | Sub. Att | Rev. | Ctrl |
|---|---|---|---|---|---|---|---|---|---|---|
| 1 | Donald Cerrone | 0 | 34 of 72 | 47% | 35 of 73 | 0 of 1 | 0% | 0 | 0 | 0:32 |
| Matt Brown | 0 | 27 of 63 | 42% | 29 of 65 | 0 of 0 | --- | 1 | 0 | 0:00 | |
| 2 | Donald Cerrone | 1 | 25 of 70 | 35% | 25 of 70 | 0 of 2 | 0% | 0 | 0 | 0:02 |
| Matt Brown | 1 | 41 of 60 | 68% | 42 of 61 | 0 of 1 | 0% | 0 | 0 | 0:01 | |
| 3 | Donald Cerrone | 1 | 4 of 5 | 80% | 4 of 5 | 0 of 0 | --- | 0 | 0 | 0:01 |
| Matt Brown | 0 | 2 of 5 | 40% | 2 of 5 | 0 of 1 | 0% | 0 | 0 | 0:02 |
Significant Strikes
| Fighter | Sig. Str. | Sig. Str. % | Head | Body | Leg | Distance | Clinch | Ground |
|---|---|---|---|---|---|---|---|---|
| Donald Cerrone | 63 of 147 | 42% | 46 of 126 | 7 of 11 | 10 of 10 | 62 of 143 | 1 of 4 | 0 of 0 |
| Matt Brown | 70 of 128 | 54% | 42 of 91 | 28 of 36 | 0 of 1 | 62 of 118 | 8 of 10 | 0 of 0 |
Significant Strikes Per Round
| Rd | Fighter | Sig. Str. | Sig. Str. % | Head | Body | Leg | Distance | Clinch | Ground |
|---|---|---|---|---|---|---|---|---|---|
| 1 | Donald Cerrone | 34 of 72 | 47% | 24 of 60 | 4 of 6 | 6 of 6 | 34 of 72 | 0 of 0 | 0 of 0 |
| Matt Brown | 27 of 63 | 42% | 15 of 45 | 12 of 18 | 0 of 0 | 25 of 60 | 2 of 3 | 0 of 0 | |
| 2 | Donald Cerrone | 25 of 70 | 35% | 19 of 62 | 3 of 5 | 3 of 3 | 24 of 66 | 1 of 4 | 0 of 0 |
| Matt Brown | 41 of 60 | 68% | 26 of 43 | 15 of 16 | 0 of 1 | 35 of 53 | 6 of 7 | 0 of 0 | |
| 3 | Donald Cerrone | 4 of 5 | 80% | 3 of 4 | 0 of 0 | 1 of 1 | 4 of 5 | 0 of 0 | 0 of 0 |
| Matt Brown | 2 of 5 | 40% | 1 of 3 | 1 of 2 | 0 of 0 | 2 of 5 | 0 of 0 | 0 of 0 |
Diego Sanchez - Fight History
Totals
| Fighter | KD | Sig. Str. | Sig. Str. % | Total Str. | TD | TD % | Sub. Att | Rev. | Ctrl |
|---|---|---|---|---|---|---|---|---|---|
| Jake Matthews | 0 | 25 of 81 | 30% | 38 of 95 | 0 of 1 | 0% | 0 | 0 | 0:00 |
| Diego Sanchez | 1 | 72 of 148 | 48% | 93 of 174 | 1 of 2 | 50% | 0 | 0 | 4:52 |
Per Round
| Rd | Fighter | KD | Sig. Str. | Sig. Str. % | Total Str. | TD | TD % | Sub. Att | Rev. | Ctrl |
|---|---|---|---|---|---|---|---|---|---|---|
| 1 | Jake Matthews | 0 | 11 of 35 | 31% | 11 of 35 | 0 of 1 | 0% | 0 | 0 | 0:00 |
| Diego Sanchez | 0 | 22 of 46 | 47% | 24 of 51 | 1 of 2 | 50% | 0 | 0 | 0:29 | |
| 2 | Jake Matthews | 0 | 12 of 40 | 30% | 12 of 40 | 0 of 0 | --- | 0 | 0 | 0:00 |
| Diego Sanchez | 0 | 23 of 53 | 43% | 23 of 53 | 0 of 0 | --- | 0 | 0 | 0:00 | |
| 3 | Jake Matthews | 0 | 2 of 6 | 33% | 15 of 20 | 0 of 0 | --- | 0 | 0 | 0:00 |
| Diego Sanchez | 1 | 27 of 49 | 55% | 46 of 70 | 0 of 0 | --- | 0 | 0 | 4:23 |
Significant Strikes
| Fighter | Sig. Str. | Sig. Str. % | Head | Body | Leg | Distance | Clinch | Ground |
|---|---|---|---|---|---|---|---|---|
| Jake Matthews | 25 of 81 | 30% | 12 of 57 | 4 of 12 | 9 of 12 | 23 of 77 | 0 of 0 | 2 of 4 |
| Diego Sanchez | 72 of 148 | 48% | 69 of 145 | 3 of 3 | 0 of 0 | 42 of 97 | 1 of 1 | 29 of 50 |
Significant Strikes Per Round
| Rd | Fighter | Sig. Str. | Sig. Str. % | Head | Body | Leg | Distance | Clinch | Ground |
|---|---|---|---|---|---|---|---|---|---|
| 1 | Jake Matthews | 11 of 35 | 31% | 4 of 20 | 4 of 10 | 3 of 5 | 11 of 35 | 0 of 0 | 0 of 0 |
| Diego Sanchez | 22 of 46 | 47% | 19 of 43 | 3 of 3 | 0 of 0 | 16 of 38 | 1 of 1 | 5 of 7 | |
| 2 | Jake Matthews | 12 of 40 | 30% | 6 of 32 | 0 of 1 | 6 of 7 | 12 of 40 | 0 of 0 | 0 of 0 |
| Diego Sanchez | 23 of 53 | 43% | 23 of 53 | 0 of 0 | 0 of 0 | 23 of 53 | 0 of 0 | 0 of 0 | |
| 3 | Jake Matthews | 2 of 6 | 33% | 2 of 5 | 0 of 1 | 0 of 0 | 0 of 2 | 0 of 0 | 2 of 4 |
| Diego Sanchez | 27 of 49 | 55% | 27 of 49 | 0 of 0 | 0 of 0 | 3 of 6 | 0 of 0 | 24 of 43 |
Play-by-Play
View on SherdogRound 1
Sanchez (30-12, 19-12 UFC) is back and this time with an additional cornerman (Stephan Bonnar) beyond self-awareness coach Josh Fabia, and he will be facing a tough test in the form of “The Celtic Kid” Matthews (16-4, 9-4 UFC) at welterweight. The third man inside the octagon is referee Jason Herzog, and the two 170-pounders have absolutely no interest in touching gloves before the action begins. Sanchez races forward with a body kick, and he eats a right hand and rolls around to try to get out of harm’s way. Sanchez gets back to his feet after Matthews grabbed hold of it, and he just barely ducks an overhand right that zips past his head. Sanchez evades another heavy shot and whiffs with a return fire leg kick. Matthews sneaks in a right hand when Sanchez closes the distance, and nearly turns Sanchez into a Pez dispenser with an uppercut. Sanchez goes to the body and swats at the head, but Matthews rolls with it. Sanchez starts waving his hands around in a stance more likely seen in “Cobra Kai” than the UFC, and Matthews fires a kick at his head. The Aussie walks forward to land a body shot and avoids the Sanchez counterattack. Matthews snaps Sanchez’ head back with a right hand, and ducks out of the way when Sanchez swings at him with open hands. “Nightmare” leaps forward with a right hand, and Matthews avoids it while landing one of his own to sting the TUF 1 winner. Sanchez comes up short with a counter, although he does land a leg kick. Sanchez surprises the Aussie with a right hand, and Matthews backs away to reset. Sanchez stalks him down and rushes forward hands down with a barrage of punches, but Matthews is able to jog out of the way. Matthews scores a one-two and evades the swarming attack of Sanchez, but “Nightmare” keeps at it with looping punches. Sanchez lands a slapping body kick and changes levels for a takedown. Matthews defends it and decides to take Sanchez down, where he hops on top to get off some ground-and-pound. When Matthews sits up, Sanchez hunts for a heel hook. Matthews punches his way out with a few fierce right hands that hurt Sanchez, and the round ends.
Sherdog Scores
Jay Pettry scores the round: 10-9 Matthews
Brian Knapp scores the round: 10-9 Matthews
Tristen Critchfield scores the round: 10-9 Matthews
Round 2
Sanchez comes out with his nose already bleeding, and Matthews plants a right hand on that nose. Sanchez swarms in with several wild punches, and Matthews is able to avoid them in time. Sanchez tries this flurry once more, and Matthews snaps out a jab to keep him at bay. Sanchez lets fly a heavy leg kick, but “The Celtic Kid” walks through it. Sanchez explodes forward with winging, slopping punches that do not reach his opponent, and Matthews walks him down to the cage before scoring a quick uppercut. Sanchez circles around and switches stances a few times to shake it out, but Matthews stays composed and scores a right hand followed by a one-two. Sanchez takes a right hand so he can land a body kick, but Matthews redoubles his effort with another right hand that makes Sanchez back off. When the original TUF winner comes forward, again Matthews is ready for him with that right hand. Sanchez races forward and just misses with an overhand right, and Matthews accurately targets the nose again. Matthews gets up another uppercut, and clips Sanchez at the end of a left hand. Sanchez grins and starts throwing bombs like the days of old, but Matthews is able to avoid the brunt of the damage. An open-handed slap skims over Matthews’ head, and Matthews returns fire with a closed fist that makes Sanchez retreat. “Nightmare” shakes off the cobwebs only to get tagged again a few times, and Matthews is able to dart out of the way after landing to avoid the Sanchez blitz. Sanchez lands a calf kick and blocks an uppercut that is aimed at his face, and he ducks down to attack but gets cracked on the way in. The horn concludes this second frame.
Sherdog Scores
Jay Pettry scores the round: 10-9 Matthews
Brian Knapp scores the round: 10-9 Matthews
Tristen Critchfield scores the round: 10-9 Matthews
Round 3
Sanchez starts the third round with his hands behind his waist leaning against the cage, and after a few seconds of standing there, he runs forward with an attack similar to Jorge Masvidal against Ben Askren. The Aussie is wise to it and the knee misses by a wide margin, but he is unable to make Sanchez pay for it. Matthews cracks Sanchez with a one-two and sets him down hard, where he hammers down several punches to slash Sanchez’ right eyebrow open. The blood has positively erupted from Sanchez’ eyebrow, and a growing pool of blood is forming beneath his head fast. Matthews pays it no mind and lands some more ground-and-pound. Sanchez locks him down in guard, and he tries to kick his hips to hunt for submissions and stave off any further strikes. Sanchez grabs hold of the neck for a guillotine choke off his back, but it is nothing doing as Matthews stays patient and pops his head out. Sanchez kicks Matthews off of him and Matthews lords over him while trying to find a way back in to do some more damage. “The Celtic Kid” finds his angle and crashes down into the guard, while Sanchez twists and turns for any sort of Hail Mary submission, but none is to be had. Matthews gets off a few more heavy right hands as the blood continues to flow for Sanchez, and Sanchez throws his legs up for a triangle choke. Matthews stops it by smashing him in the face with several punches, but the crafty vet hunts for an armbar. Sanchez has it tight briefly, but the slipperiness allows Matthews to pull his arm and then head free from the submission danger. Sanchez looks away for several seconds to his corner as he decides to lock Matthews down. Matthews does not accept that, and postures up to get off several more punches. He lets loose one final salvo to wrap up this fight with style points, although Matthews was unable to get the finish he so desired.
Sherdog Scores
Jay Pettry scores the round: 10-8 Matthews (30-26 Matthews)
Brian Knapp scores the round: 10-8 Matthews (30-26 Matthews)
Tristen Critchfield scores the round: 10-8 Matthews (30-26 Matthews)
The Official Result
Jake Matthews def. Diego Sanchez via Unanimous Decision (30-26, 30-26, 30-26)
Big Brady confidently picks Matthews, citing Sanchez's decline and poor recent performances. He believes Matthews is better everywhere at this point and expects a finish, as Sanchez's durability is fading. He notes the line is wide and likely to get wider.
Daniel Levi picks Jake Matthews, citing his power and youth compared to a diminished Diego Sanchez. He worries about Matthews gassing in the third round as he has in past fights, but believes the firepower difference is too great. He expects a knockout or unanimous decision.
The host confidently picks Jake Matthews, citing his youth, athleticism, and grinding style. He believes Diego Sanchez's body is declining and that Matthews will dominate with grappling. He predicts a second or third-round TKO after wearing Sanchez down.
The MMA Guru picks Jake Matthews, calling him a guaranteed win. He notes Matthews has a great chin, recovery, and grappling, and has fought tough opponents. He expects Matthews to hurt Sanchez badly and predicts a first-round KO. He mentions the odds are high but justified because Matthews is a lock.
Totals
| Fighter | KD | Sig. Str. | Sig. Str. % | Total Str. | TD | TD % | Sub. Att | Rev. | Ctrl |
|---|---|---|---|---|---|---|---|---|---|
| Diego Sanchez | 0 | 25 of 64 | 39% | 29 of 68 | 0 of 6 | 0% | 0 | 0 | 0:10 |
| Michel Pereira | 1 | 53 of 91 | 58% | 56 of 94 | 2 of 2 | 100% | 0 | 0 | 0:50 |
Per Round
| Rd | Fighter | KD | Sig. Str. | Sig. Str. % | Total Str. | TD | TD % | Sub. Att | Rev. | Ctrl |
|---|---|---|---|---|---|---|---|---|---|---|
| 1 | Diego Sanchez | 0 | 10 of 22 | 45% | 11 of 23 | 0 of 3 | 0% | 0 | 0 | 0:00 |
| Michel Pereira | 0 | 16 of 27 | 59% | 16 of 27 | 0 of 0 | --- | 0 | 0 | 0:09 | |
| 2 | Diego Sanchez | 0 | 13 of 27 | 48% | 14 of 28 | 0 of 2 | 0% | 0 | 0 | 0:10 |
| Michel Pereira | 0 | 19 of 37 | 51% | 19 of 37 | 1 of 1 | 100% | 0 | 0 | 0:13 | |
| 3 | Diego Sanchez | 0 | 2 of 15 | 13% | 4 of 17 | 0 of 1 | 0% | 0 | 0 | 0:00 |
| Michel Pereira | 1 | 18 of 27 | 66% | 21 of 30 | 1 of 1 | 100% | 0 | 0 | 0:28 |
Significant Strikes
| Fighter | Sig. Str. | Sig. Str. % | Head | Body | Leg | Distance | Clinch | Ground |
|---|---|---|---|---|---|---|---|---|
| Diego Sanchez | 25 of 64 | 39% | 6 of 34 | 10 of 17 | 9 of 13 | 23 of 61 | 1 of 2 | 1 of 1 |
| Michel Pereira | 53 of 91 | 58% | 20 of 52 | 28 of 33 | 5 of 6 | 39 of 75 | 10 of 11 | 4 of 5 |
Significant Strikes Per Round
| Rd | Fighter | Sig. Str. | Sig. Str. % | Head | Body | Leg | Distance | Clinch | Ground |
|---|---|---|---|---|---|---|---|---|---|
| 1 | Diego Sanchez | 10 of 22 | 45% | 2 of 11 | 3 of 5 | 5 of 6 | 10 of 21 | 0 of 1 | 0 of 0 |
| Michel Pereira | 16 of 27 | 59% | 3 of 11 | 11 of 14 | 2 of 2 | 12 of 22 | 4 of 5 | 0 of 0 | |
| 2 | Diego Sanchez | 13 of 27 | 48% | 3 of 9 | 7 of 12 | 3 of 6 | 12 of 26 | 1 of 1 | 0 of 0 |
| Michel Pereira | 19 of 37 | 51% | 8 of 24 | 8 of 10 | 3 of 3 | 18 of 36 | 1 of 1 | 0 of 0 | |
| 3 | Diego Sanchez | 2 of 15 | 13% | 1 of 14 | 0 of 0 | 1 of 1 | 1 of 14 | 0 of 0 | 1 of 1 |
| Michel Pereira | 18 of 27 | 66% | 9 of 17 | 9 of 9 | 0 of 1 | 9 of 17 | 5 of 5 | 4 of 5 |
Play-by-Play
View on SherdogRound 1
Our co-main event virtually guarantees action as the original winner of “The Ultimate Fighter” Sanchez (29-12, 18-12 UFC) comes to blows with the high-flying, wild and crazy Pereira (23-10, 2 NC; 1-1 UFC). As Pereira’s song comes on the speakers, he stops and dances for a minute or two. The crowd is not into it, and they start booing him. Not to be outdone, Sanchez calmly walks out to the cage, and struts around like a peacock when he reaches the Octagon. Hold on tight, just like referee Jason Herzog, as the fight is about to pop off. Sanchez starts off the fight as one would expect in this kind of contest, with a somersault kick. It partially lands, and Pereira laughs it off. They end up against the fence, and Sanchez escapes. Sanchez holds his hands out straight in front of him, and Pereira throws a few front kicks before faking that he will run off the walls. Sanchez wings two punches that are well short of the mark, and takes a punch to the body. Pereira throws another powerful front kick, and Sanchez is running back and forth as he narrowly avoids a Showtime kick. Pereira leaps in with a knee, and Sanchez drops down to take his ankle out from beneath him. Sanchez backs off, and throws a low kick. Pereira again snaps the front kick up the middle, so Sanchez tries to fire back with a body kick but he misses. Sanchez has his back against the fence the entire time, and takes a punch and then a kick to the midsection. Sanchez lands a left hand but misses with the right hook that follows, as Pereira darts out of the way. The Brazilian sneaks up a front kick through the guard of “The Nightmare,” and ducks a spinning back fist from Sanchez. The two come together and swing, but neither land as Sanchez stumbles against the cage wall. Sanchez shoots in low for a takedown to get Pereira to bite on a defending, and he lands a low kick. Pereira misses with a spinning wheel kick, and Sanchez runs forward to engage but backs off before he reaches his opponent. Pereira lands a few punches and a stern knee up the middle. As Sanchez circles away he nearly absorbs a head kick, and then misses wide with another somersault kick. Sanchez sprints at his opponent with punches, but does not connect as the round concludes.
Sherdog Scores
Jay Pettry scores the round: 10-9 Pereira
Mike Sloan scores the round: 10-9 Pereira
Tyler Treese scores the round: 10-9 Pereira
Round 2
Pereira opens the round with a body kick and then another front kick, while Sanchez ducks low to pursue a takedown. The Brazilian shoves him away and evades the strikes that come from Sanchez. Sanchez aims to the body with a few punches, and then a leg kick, before taking a right hand on the jaw. Pereira lands two punches, and hops out of the way when Sanchez fires a head kick at him. Pereira narrowly misses with a knee and then a spinning kick, and Sanchez goes back to holding his palm outstretched. Pereira times a flying knee as Sanchez wades forward, and Sanchez eats it without issue. Pereira attempts a capoeira kick, leading to Sanchez sprinting forward to land strikes. Sanchez lunges forward with several more punches, and the Brazilian is easily able to back away. Pereira lands a heavy body kick, causing “The Nightmare” to bend over and grimace for a moment. Sanchez clinches up and goes after a takedown, but he cannot hit it as Pereira circles away and lands a flying knee on the chest. Pereira blocks a body kick after he throws a kick behind his other leg, and blasts Sanchez in the face with a right hand that forces Sanchez to stumble backwards. Sanchez bites down on his mouthpiece and throws back at him, landing a left hand as Pereira drops his hands down to his waist. Pereira circles around and backs off before landing a superman punch by jumping off the cage. Pereira scores another front kick to the body, and dings Sanchez with a flying knee before backing off. Pereira rips the body with a hard right hand, and evades the body kick soaring at him. The 10-second clapper spurs Sanchez to throw a spinning back kick, but Pereira dodges it and suplex Sanchez to end the round.
Sherdog Scores
Jay Pettry scores the round: 10-9 Pereira
Mike Sloan scores the round: 10-9 Pereira
Tyler Treese scores the round: 10-9 Pereira
Round 3
Pereira stands before his opponent to start the round, as he looks down at the cage floor instead of his opponent. He taunts Sanchez, as he avoids his charging adversary. Another front kick from Pereira scores, and Sanchez has no counter to them. Two punches land successfully for the Brazilian, and Sanchez whiffs with a spinning back fist as he gets taken down. Pereira flips in the air to land some kind of a stomp, and the legality of that technique is questionable. Sanchez gets up, takes a knee to the chest and falls over, and Pereira chases after him with some ferocious ground-and-pound. Sanchez springs free, and gets up to charge at his opponent like a bull. Playing the matador, Pereira shoves him away against the fence, and does so a second time to make Sanchez look like Ronda Rousey against Holly Holm. Sanchez wings shots but they are not landing, while overextending himself as Pereira works him to the body. Sanchez is stalking “Demolidor” down, but Pereira throws several crushing knees that make Sanchez fall over.
As Sanchez falls to his knees, Pereira cracks him in the head with an illegal knee. Herzog rushes in to stop the action for a moment, and the knee busted Sanchez’ head wide open. Blood is pouring out of Sanchez’ forehead, and the doctor is trying to figure out what to do. Herzog allows Sanchez to recover, and deducts one point from Pereira, but Sanchez claims that he cannot see. Sanchez asks Herzog what the result would be given on the stoppage, and upon learning it would be a disqualification, Sanchez says he cannot continue.
Unbelievable. As it was an illegal knee that caused the stoppage, Pereira will indeed be disqualified. This is the first event in UFC history where multiple fights have ended by DQ. Truly a bizarre end to a totally bizarre fight.
The Official Result
Diego Sanchez def. Michel Pereira R3 3:09 via Disqualification (Illegal Knee)
Daniel Levi picks Michel Pereira to win by first-round knockout. He believes Diego Sanchez is a deranged man with a deteriorating chin and questionable training situation, while Pereira is more focused after his first UFC loss. He thinks Pereira's power and striking will be too much for Sanchez, who ducks his head and hasn't evolved.
Totals
| Fighter | KD | Sig. Str. | Sig. Str. % | Total Str. | TD | TD % | Sub. Att | Rev. | Ctrl |
|---|---|---|---|---|---|---|---|---|---|
| Michael Chiesa | 0 | 7 of 11 | 63% | 23 of 31 | 1 of 2 | 50% | 0 | 0 | 2:24 |
| Diego Sanchez | 0 | 47 of 67 | 70% | 98 of 132 | 5 of 6 | 83% | 0 | 1 | 11:45 |
Per Round
| Rd | Fighter | KD | Sig. Str. | Sig. Str. % | Total Str. | TD | TD % | Sub. Att | Rev. | Ctrl |
|---|---|---|---|---|---|---|---|---|---|---|
| 1 | Michael Chiesa | 0 | 4 of 5 | 80% | 7 of 11 | 1 of 1 | 100% | 0 | 0 | 1:28 |
| Diego Sanchez | 0 | 11 of 17 | 64% | 24 of 39 | 1 of 2 | 50% | 0 | 1 | 3:16 | |
| 2 | Michael Chiesa | 0 | 2 of 5 | 40% | 3 of 6 | 0 of 1 | 0% | 0 | 0 | 0:35 |
| Diego Sanchez | 0 | 31 of 44 | 70% | 59 of 75 | 2 of 2 | 100% | 0 | 0 | 4:13 | |
| 3 | Michael Chiesa | 0 | 1 of 1 | 100% | 13 of 14 | 0 of 0 | --- | 0 | 0 | 0:21 |
| Diego Sanchez | 0 | 5 of 6 | 83% | 15 of 18 | 2 of 2 | 100% | 0 | 0 | 4:16 |
Significant Strikes
| Fighter | Sig. Str. | Sig. Str. % | Head | Body | Leg | Distance | Clinch | Ground |
|---|---|---|---|---|---|---|---|---|
| Michael Chiesa | 7 of 11 | 63% | 1 of 4 | 0 of 1 | 6 of 6 | 1 of 3 | 2 of 4 | 4 of 4 |
| Diego Sanchez | 47 of 67 | 70% | 46 of 66 | 1 of 1 | 0 of 0 | 4 of 7 | 5 of 8 | 38 of 52 |
Significant Strikes Per Round
| Rd | Fighter | Sig. Str. | Sig. Str. % | Head | Body | Leg | Distance | Clinch | Ground |
|---|---|---|---|---|---|---|---|---|---|
| 1 | Michael Chiesa | 4 of 5 | 80% | 0 of 0 | 0 of 1 | 4 of 4 | 0 of 0 | 0 of 1 | 4 of 4 |
| Diego Sanchez | 11 of 17 | 64% | 10 of 16 | 1 of 1 | 0 of 0 | 0 of 0 | 3 of 6 | 8 of 11 | |
| 2 | Michael Chiesa | 2 of 5 | 40% | 0 of 3 | 0 of 0 | 2 of 2 | 0 of 2 | 2 of 3 | 0 of 0 |
| Diego Sanchez | 31 of 44 | 70% | 31 of 44 | 0 of 0 | 0 of 0 | 2 of 5 | 2 of 2 | 27 of 37 | |
| 3 | Michael Chiesa | 1 of 1 | 100% | 1 of 1 | 0 of 0 | 0 of 0 | 1 of 1 | 0 of 0 | 0 of 0 |
| Diego Sanchez | 5 of 6 | 83% | 5 of 6 | 0 of 0 | 0 of 0 | 2 of 2 | 0 of 0 | 3 of 4 |
Totals
| Fighter | KD | Sig. Str. | Sig. Str. % | Total Str. | TD | TD % | Sub. Att | Rev. | Ctrl |
|---|---|---|---|---|---|---|---|---|---|
| Diego Sanchez | 0 | 56 of 87 | 64% | 61 of 92 | 4 of 4 | 100% | 0 | 0 | 6:00 |
| Mickey Gall | 0 | 23 of 65 | 35% | 35 of 80 | 0 of 0 | --- | 0 | 0 | 0:19 |
Per Round
| Rd | Fighter | KD | Sig. Str. | Sig. Str. % | Total Str. | TD | TD % | Sub. Att | Rev. | Ctrl |
|---|---|---|---|---|---|---|---|---|---|---|
| 1 | Diego Sanchez | 0 | 15 of 31 | 48% | 19 of 35 | 3 of 3 | 100% | 0 | 0 | 3:08 |
| Mickey Gall | 0 | 16 of 43 | 37% | 28 of 58 | 0 of 0 | --- | 0 | 0 | 0:16 | |
| 2 | Diego Sanchez | 0 | 41 of 56 | 73% | 42 of 57 | 1 of 1 | 100% | 0 | 0 | 2:52 |
| Mickey Gall | 0 | 7 of 22 | 31% | 7 of 22 | 0 of 0 | --- | 0 | 0 | 0:03 |
Significant Strikes
| Fighter | Sig. Str. | Sig. Str. % | Head | Body | Leg | Distance | Clinch | Ground |
|---|---|---|---|---|---|---|---|---|
| Diego Sanchez | 56 of 87 | 64% | 37 of 63 | 13 of 18 | 6 of 6 | 7 of 28 | 10 of 11 | 39 of 48 |
| Mickey Gall | 23 of 65 | 35% | 19 of 59 | 2 of 3 | 2 of 3 | 8 of 44 | 9 of 14 | 6 of 7 |
Significant Strikes Per Round
| Rd | Fighter | Sig. Str. | Sig. Str. % | Head | Body | Leg | Distance | Clinch | Ground |
|---|---|---|---|---|---|---|---|---|---|
| 1 | Diego Sanchez | 15 of 31 | 48% | 5 of 18 | 5 of 8 | 5 of 5 | 3 of 18 | 8 of 9 | 4 of 4 |
| Mickey Gall | 16 of 43 | 37% | 12 of 37 | 2 of 3 | 2 of 3 | 4 of 25 | 9 of 14 | 3 of 4 | |
| 2 | Diego Sanchez | 41 of 56 | 73% | 32 of 45 | 8 of 10 | 1 of 1 | 4 of 10 | 2 of 2 | 35 of 44 |
| Mickey Gall | 7 of 22 | 31% | 7 of 22 | 0 of 0 | 0 of 0 | 4 of 19 | 0 of 0 | 3 of 3 |
Totals
| Fighter | KD | Sig. Str. | Sig. Str. % | Total Str. | TD | TD % | Sub. Att | Rev. | Ctrl |
|---|---|---|---|---|---|---|---|---|---|
| Diego Sanchez | 0 | 46 of 77 | 59% | 82 of 124 | 3 of 4 | 75% | 0 | 0 | 14:22 |
| Craig White | 1 | 18 of 42 | 42% | 64 of 94 | 0 of 0 | --- | 1 | 0 | 0:08 |
Per Round
| Rd | Fighter | KD | Sig. Str. | Sig. Str. % | Total Str. | TD | TD % | Sub. Att | Rev. | Ctrl |
|---|---|---|---|---|---|---|---|---|---|---|
| 1 | Diego Sanchez | 0 | 13 of 26 | 50% | 29 of 48 | 1 of 1 | 100% | 0 | 0 | 4:54 |
| Craig White | 0 | 8 of 9 | 88% | 15 of 18 | 0 of 0 | --- | 1 | 0 | 0:00 | |
| 2 | Diego Sanchez | 0 | 12 of 19 | 63% | 18 of 28 | 1 of 2 | 50% | 0 | 0 | 4:43 |
| Craig White | 0 | 7 of 14 | 50% | 30 of 40 | 0 of 0 | --- | 0 | 0 | 0:05 | |
| 3 | Diego Sanchez | 0 | 21 of 32 | 65% | 35 of 48 | 1 of 1 | 100% | 0 | 0 | 4:45 |
| Craig White | 1 | 3 of 19 | 15% | 19 of 36 | 0 of 0 | --- | 0 | 0 | 0:03 |
Significant Strikes
| Fighter | Sig. Str. | Sig. Str. % | Head | Body | Leg | Distance | Clinch | Ground |
|---|---|---|---|---|---|---|---|---|
| Diego Sanchez | 46 of 77 | 59% | 34 of 65 | 12 of 12 | 0 of 0 | 3 of 8 | 1 of 1 | 42 of 68 |
| Craig White | 18 of 42 | 42% | 16 of 39 | 2 of 3 | 0 of 0 | 8 of 17 | 1 of 1 | 9 of 24 |
Significant Strikes Per Round
| Rd | Fighter | Sig. Str. | Sig. Str. % | Head | Body | Leg | Distance | Clinch | Ground |
|---|---|---|---|---|---|---|---|---|---|
| 1 | Diego Sanchez | 13 of 26 | 50% | 9 of 22 | 4 of 4 | 0 of 0 | 1 of 4 | 0 of 0 | 12 of 22 |
| Craig White | 8 of 9 | 88% | 6 of 7 | 2 of 2 | 0 of 0 | 4 of 4 | 0 of 0 | 4 of 5 | |
| 2 | Diego Sanchez | 12 of 19 | 63% | 9 of 16 | 3 of 3 | 0 of 0 | 0 of 0 | 0 of 0 | 12 of 19 |
| Craig White | 7 of 14 | 50% | 7 of 14 | 0 of 0 | 0 of 0 | 2 of 7 | 1 of 1 | 4 of 6 | |
| 3 | Diego Sanchez | 21 of 32 | 65% | 16 of 27 | 5 of 5 | 0 of 0 | 2 of 4 | 1 of 1 | 18 of 27 |
| Craig White | 3 of 19 | 15% | 3 of 18 | 0 of 1 | 0 of 0 | 2 of 6 | 0 of 0 | 1 of 13 |
Totals
| Fighter | KD | Sig. Str. | Sig. Str. % | Total Str. | TD | TD % | Sub. Att | Rev. | Ctrl |
|---|---|---|---|---|---|---|---|---|---|
| Matt Brown | 1 | 18 of 34 | 52% | 20 of 36 | 0 of 0 | --- | 0 | 0 | 0:01 |
| Diego Sanchez | 0 | 12 of 20 | 60% | 13 of 21 | 0 of 3 | 0% | 0 | 0 | 1:29 |
Per Round
| Rd | Fighter | KD | Sig. Str. | Sig. Str. % | Total Str. | TD | TD % | Sub. Att | Rev. | Ctrl |
|---|---|---|---|---|---|---|---|---|---|---|
| 1 | Matt Brown | 1 | 18 of 34 | 52% | 20 of 36 | 0 of 0 | --- | 0 | 0 | 0:01 |
| Diego Sanchez | 0 | 12 of 20 | 60% | 13 of 21 | 0 of 3 | 0% | 0 | 0 | 1:29 |
Significant Strikes
| Fighter | Sig. Str. | Sig. Str. % | Head | Body | Leg | Distance | Clinch | Ground |
|---|---|---|---|---|---|---|---|---|
| Matt Brown | 18 of 34 | 52% | 14 of 30 | 2 of 2 | 2 of 2 | 12 of 28 | 6 of 6 | 0 of 0 |
| Diego Sanchez | 12 of 20 | 60% | 7 of 12 | 2 of 5 | 3 of 3 | 10 of 18 | 2 of 2 | 0 of 0 |
Significant Strikes Per Round
| Rd | Fighter | Sig. Str. | Sig. Str. % | Head | Body | Leg | Distance | Clinch | Ground |
|---|---|---|---|---|---|---|---|---|---|
| 1 | Matt Brown | 18 of 34 | 52% | 14 of 30 | 2 of 2 | 2 of 2 | 12 of 28 | 6 of 6 | 0 of 0 |
| Diego Sanchez | 12 of 20 | 60% | 7 of 12 | 2 of 5 | 3 of 3 | 10 of 18 | 2 of 2 | 0 of 0 |
Totals
| Fighter | KD | Sig. Str. | Sig. Str. % | Total Str. | TD | TD % | Sub. Att | Rev. | Ctrl |
|---|---|---|---|---|---|---|---|---|---|
| Al Iaquinta | 2 | 12 of 19 | 63% | 12 of 19 | 0 of 0 | --- | 0 | 0 | 0:05 |
| Diego Sanchez | 0 | 4 of 15 | 26% | 4 of 15 | 0 of 0 | --- | 0 | 0 | 0:00 |
Per Round
| Rd | Fighter | KD | Sig. Str. | Sig. Str. % | Total Str. | TD | TD % | Sub. Att | Rev. | Ctrl |
|---|---|---|---|---|---|---|---|---|---|---|
| 1 | Al Iaquinta | 2 | 12 of 19 | 63% | 12 of 19 | 0 of 0 | --- | 0 | 0 | 0:05 |
| Diego Sanchez | 0 | 4 of 15 | 26% | 4 of 15 | 0 of 0 | --- | 0 | 0 | 0:00 |
Significant Strikes
| Fighter | Sig. Str. | Sig. Str. % | Head | Body | Leg | Distance | Clinch | Ground |
|---|---|---|---|---|---|---|---|---|
| Al Iaquinta | 12 of 19 | 63% | 9 of 15 | 1 of 2 | 2 of 2 | 8 of 15 | 2 of 2 | 2 of 2 |
| Diego Sanchez | 4 of 15 | 26% | 2 of 13 | 2 of 2 | 0 of 0 | 4 of 14 | 0 of 1 | 0 of 0 |
Significant Strikes Per Round
| Rd | Fighter | Sig. Str. | Sig. Str. % | Head | Body | Leg | Distance | Clinch | Ground |
|---|---|---|---|---|---|---|---|---|---|
| 1 | Al Iaquinta | 12 of 19 | 63% | 9 of 15 | 1 of 2 | 2 of 2 | 8 of 15 | 2 of 2 | 2 of 2 |
| Diego Sanchez | 4 of 15 | 26% | 2 of 13 | 2 of 2 | 0 of 0 | 4 of 14 | 0 of 1 | 0 of 0 |
Totals
| Fighter | KD | Sig. Str. | Sig. Str. % | Total Str. | TD | TD % | Sub. Att | Rev. | Ctrl |
|---|---|---|---|---|---|---|---|---|---|
| Diego Sanchez | 0 | 46 of 81 | 56% | 69 of 108 | 0 of 1 | 0% | 0 | 0 | 9:17 |
| Marcin Held | 0 | 30 of 82 | 36% | 57 of 112 | 0 of 2 | 0% | 1 | 0 | 0:17 |
Per Round
| Rd | Fighter | KD | Sig. Str. | Sig. Str. % | Total Str. | TD | TD % | Sub. Att | Rev. | Ctrl |
|---|---|---|---|---|---|---|---|---|---|---|
| 1 | Diego Sanchez | 0 | 17 of 44 | 38% | 19 of 46 | 0 of 1 | 0% | 0 | 0 | 0:31 |
| Marcin Held | 0 | 23 of 64 | 35% | 32 of 73 | 0 of 0 | --- | 1 | 0 | 0:17 | |
| 2 | Diego Sanchez | 0 | 8 of 10 | 80% | 20 of 23 | 0 of 0 | --- | 0 | 0 | 4:36 |
| Marcin Held | 0 | 2 of 4 | 50% | 11 of 13 | 0 of 0 | --- | 0 | 0 | 0:00 | |
| 3 | Diego Sanchez | 0 | 21 of 27 | 77% | 30 of 39 | 0 of 0 | --- | 0 | 0 | 4:10 |
| Marcin Held | 0 | 5 of 14 | 35% | 14 of 26 | 0 of 2 | 0% | 0 | 0 | 0:00 |
Significant Strikes
| Fighter | Sig. Str. | Sig. Str. % | Head | Body | Leg | Distance | Clinch | Ground |
|---|---|---|---|---|---|---|---|---|
| Diego Sanchez | 46 of 81 | 56% | 31 of 62 | 12 of 16 | 3 of 3 | 21 of 52 | 0 of 0 | 25 of 29 |
| Marcin Held | 30 of 82 | 36% | 30 of 80 | 0 of 2 | 0 of 0 | 23 of 70 | 3 of 4 | 4 of 8 |
Significant Strikes Per Round
| Rd | Fighter | Sig. Str. | Sig. Str. % | Head | Body | Leg | Distance | Clinch | Ground |
|---|---|---|---|---|---|---|---|---|---|
| 1 | Diego Sanchez | 17 of 44 | 38% | 11 of 34 | 5 of 9 | 1 of 1 | 17 of 44 | 0 of 0 | 0 of 0 |
| Marcin Held | 23 of 64 | 35% | 23 of 63 | 0 of 1 | 0 of 0 | 20 of 61 | 3 of 3 | 0 of 0 | |
| 2 | Diego Sanchez | 8 of 10 | 80% | 5 of 7 | 2 of 2 | 1 of 1 | 1 of 2 | 0 of 0 | 7 of 8 |
| Marcin Held | 2 of 4 | 50% | 2 of 4 | 0 of 0 | 0 of 0 | 1 of 2 | 0 of 0 | 1 of 2 | |
| 3 | Diego Sanchez | 21 of 27 | 77% | 15 of 21 | 5 of 5 | 1 of 1 | 3 of 6 | 0 of 0 | 18 of 21 |
| Marcin Held | 5 of 14 | 35% | 5 of 13 | 0 of 1 | 0 of 0 | 2 of 7 | 0 of 1 | 3 of 6 |
No comments yet. Be the first to share your thoughts!