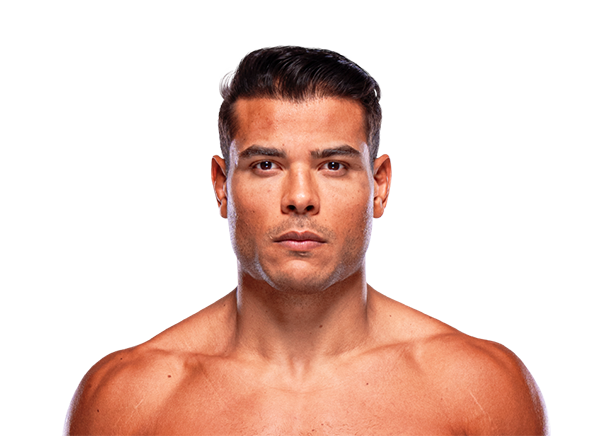
Career Averages - Paulo Costa
Career Averages - Yoel Romero
Paulo Costa - Fight History
Totals
| Fighter | KD | Sig. Str. | Sig. Str. % | Total Str. | TD | TD % | Sub. Att | Rev. | Ctrl |
|---|---|---|---|---|---|---|---|---|---|
| Azamat Murzakanov | 0 | 34 of 70 | 48% | 34 of 70 | 1 of 2 | 50% | 1 | 0 | 0:20 |
| Paulo Costa | 1 | 55 of 80 | 68% | 61 of 86 | 0 of 1 | 0% | 0 | 1 | 1:20 |
Per Round
| Rd | Fighter | KD | Sig. Str. | Sig. Str. % | Total Str. | TD | TD % | Sub. Att | Rev. | Ctrl |
|---|---|---|---|---|---|---|---|---|---|---|
| 1 | Azamat Murzakanov | 0 | 7 of 26 | 26% | 7 of 26 | 0 of 0 | --- | 0 | 0 | 0:00 |
| Paulo Costa | 0 | 21 of 31 | 67% | 23 of 33 | 0 of 0 | --- | 0 | 0 | 0:31 | |
| 2 | Azamat Murzakanov | 0 | 23 of 38 | 60% | 23 of 38 | 1 of 2 | 50% | 1 | 0 | 0:20 |
| Paulo Costa | 0 | 19 of 31 | 61% | 23 of 35 | 0 of 1 | 0% | 0 | 1 | 0:49 | |
| 3 | Azamat Murzakanov | 0 | 4 of 6 | 66% | 4 of 6 | 0 of 0 | --- | 0 | 0 | 0:00 |
| Paulo Costa | 1 | 15 of 18 | 83% | 15 of 18 | 0 of 0 | --- | 0 | 0 | 0:00 |
Significant Strikes
| Fighter | Sig. Str. | Sig. Str. % | Head | Body | Leg | Distance | Clinch | Ground |
|---|---|---|---|---|---|---|---|---|
| Azamat Murzakanov | 34 of 70 | 48% | 26 of 59 | 8 of 11 | 0 of 0 | 30 of 65 | 4 of 5 | 0 of 0 |
| Paulo Costa | 55 of 80 | 68% | 27 of 44 | 16 of 23 | 12 of 13 | 44 of 66 | 6 of 7 | 5 of 7 |
Significant Strikes Per Round
| Rd | Fighter | Sig. Str. | Sig. Str. % | Head | Body | Leg | Distance | Clinch | Ground |
|---|---|---|---|---|---|---|---|---|---|
| 1 | Azamat Murzakanov | 7 of 26 | 26% | 6 of 23 | 1 of 3 | 0 of 0 | 6 of 25 | 1 of 1 | 0 of 0 |
| Paulo Costa | 21 of 31 | 67% | 8 of 14 | 5 of 9 | 8 of 8 | 14 of 22 | 2 of 2 | 5 of 7 | |
| 2 | Azamat Murzakanov | 23 of 38 | 60% | 16 of 30 | 7 of 8 | 0 of 0 | 20 of 34 | 3 of 4 | 0 of 0 |
| Paulo Costa | 19 of 31 | 61% | 9 of 17 | 7 of 10 | 3 of 4 | 15 of 26 | 4 of 5 | 0 of 0 | |
| 3 | Azamat Murzakanov | 4 of 6 | 66% | 4 of 6 | 0 of 0 | 0 of 0 | 4 of 6 | 0 of 0 | 0 of 0 |
| Paulo Costa | 15 of 18 | 83% | 10 of 13 | 4 of 4 | 1 of 1 | 15 of 18 | 0 of 0 | 0 of 0 |
Angelo picks Azamat Murzakanov, citing his power, wrestling, and knockdowns in every UFC fight. He acknowledges Paulo Costa's recent good performance but is skeptical of Costa moving up in weight and his history of canceled fights. He expects Azamat to bring pressure and suggests a possible over 1.5 rounds bet.
Big Brady is impressed with Murzakanov's speed, power, takedown defense, and defensive striking. He notes that Murzakanov's cardio has improved and he carries power late. He doubts Paulo Costa's recent performances, citing losses to Vettori, Strickland, and Adesanya. He predicts Murzakanov wins by decision, possibly hurting Costa but not finishing him.
Cody picks Costa as an underdog, believing he can weather Murzakanov's early storm and outwork him in later rounds. He notes Murzakanov's low volume and Costa's durability, expecting a decision win for Costa.
Connor picks Murzakanov, citing Costa's inconsistency and lack of defensive awareness. He notes that Murzakanov is a one-shot knockout artist with excellent timing and defensive awareness, and that Costa's high-volume, low-defense style leaves him vulnerable. Connor also questions Costa's motivation and his move up to light heavyweight, suggesting that Murzakanov's calm, patient approach will allow him to land a clean shot. He compares Murzakanov to Fedor Emelianenko in terms of timing and cage craft.
Daniel believes Murzakanov is being disrespected and sees him as a heavy hitter with good takedown defense. He thinks Costa gets discouraged in fights and that Murzakanov will box him up.
Daniel Vreeland picks Azamat Murzakanov because he believes Murzakanov is criminally underrated and has been disrespected by oddsmakers. He notes that Murzakanov has heavy hands and good wrestling, and that Costa's cardio and discipline are questionable. He also points out that Costa's move up to light heavyweight may not help his psyche or performance.
The host thinks the odds are too aggressive favoring Murzakanov (implied probability 67%) and would cap the fight closer to 50/50. He believes Costa has better cardio and is the more complete striker, while Murzakanov is a better boxer with more power but fades after the first round. He prefers the underdog value on Costa but is not confident in a win.
James picks Murzakanov, citing his power, speed, and accuracy advantage over Costa, who he believes is on a downtrend and not suited for light heavyweight. He expects Murzakanov to hurt Costa early and possibly finish him.
Costa's durability and volume should be too much for Murzakanov, who relies heavily on knockout power. Murzakanov has been close to losing in several fights and his power may not phase Costa. Costa's athleticism and counter-striking can neutralize Murzakanov's blitzes. Costa looked sharp against Kopylov and can outpoint or even knock out Murzakanov. This is a winnable fight for Costa at plus money.
Paul favors Murzakanov due to Costa's questionable commitment and Murzakanov's knockout power. He thinks Costa may be one foot in, one foot out, while Murzakanov's sole purpose is knocking dudes out.
The MMA Guru picks Paulo Costa over Azamat Murzakanov. He is very confident, calling it a 'masterclass'. He believes Costa's speed, body kicks, and technical striking will be too much for Murzakanov, who he thinks is overrated and whose best days are behind him. He predicts a TKO in round two via body kick or similar.
Zane picks Murzakanov, emphasizing Costa's psychological fragility and tendency to fade when pressured. He notes that Murzakanov does a lot of maintenance work—cutting off the cage, feinting, and being defensively aware—which will set up his knockout power. Zane also points out that Costa's only recent good performance was against Roman Kopylov, and that moving up to light heavyweight again raises questions about his commitment. He believes Murzakanov's timing and power will be too much for Costa, who is prone to getting hit and may not want to engage.
Totals
| Fighter | KD | Sig. Str. | Sig. Str. % | Total Str. | TD | TD % | Sub. Att | Rev. | Ctrl |
|---|---|---|---|---|---|---|---|---|---|
| Paulo Costa | 1 | 99 of 159 | 62% | 102 of 162 | 0 of 2 | 0% | 0 | 0 | 0:13 |
| Roman Kopylov | 0 | 48 of 104 | 46% | 48 of 104 | 0 of 0 | --- | 0 | 0 | 0:00 |
Per Round
| Rd | Fighter | KD | Sig. Str. | Sig. Str. % | Total Str. | TD | TD % | Sub. Att | Rev. | Ctrl |
|---|---|---|---|---|---|---|---|---|---|---|
| 1 | Paulo Costa | 1 | 34 of 54 | 62% | 37 of 57 | 0 of 0 | --- | 0 | 0 | 0:13 |
| Roman Kopylov | 0 | 11 of 27 | 40% | 11 of 27 | 0 of 0 | --- | 0 | 0 | 0:00 | |
| 2 | Paulo Costa | 0 | 32 of 57 | 56% | 32 of 57 | 0 of 0 | --- | 0 | 0 | 0:00 |
| Roman Kopylov | 0 | 16 of 32 | 50% | 16 of 32 | 0 of 0 | --- | 0 | 0 | 0:00 | |
| 3 | Paulo Costa | 0 | 33 of 48 | 68% | 33 of 48 | 0 of 2 | 0% | 0 | 0 | 0:00 |
| Roman Kopylov | 0 | 21 of 45 | 46% | 21 of 45 | 0 of 0 | --- | 0 | 0 | 0:00 |
Significant Strikes
| Fighter | Sig. Str. | Sig. Str. % | Head | Body | Leg | Distance | Clinch | Ground |
|---|---|---|---|---|---|---|---|---|
| Paulo Costa | 99 of 159 | 62% | 34 of 89 | 41 of 46 | 24 of 24 | 87 of 141 | 3 of 3 | 9 of 15 |
| Roman Kopylov | 48 of 104 | 46% | 29 of 79 | 14 of 20 | 5 of 5 | 48 of 104 | 0 of 0 | 0 of 0 |
Significant Strikes Per Round
| Rd | Fighter | Sig. Str. | Sig. Str. % | Head | Body | Leg | Distance | Clinch | Ground |
|---|---|---|---|---|---|---|---|---|---|
| 1 | Paulo Costa | 34 of 54 | 62% | 13 of 33 | 7 of 7 | 14 of 14 | 25 of 39 | 0 of 0 | 9 of 15 |
| Roman Kopylov | 11 of 27 | 40% | 5 of 18 | 3 of 6 | 3 of 3 | 11 of 27 | 0 of 0 | 0 of 0 | |
| 2 | Paulo Costa | 32 of 57 | 56% | 10 of 31 | 18 of 22 | 4 of 4 | 31 of 56 | 1 of 1 | 0 of 0 |
| Roman Kopylov | 16 of 32 | 50% | 9 of 22 | 5 of 8 | 2 of 2 | 16 of 32 | 0 of 0 | 0 of 0 | |
| 3 | Paulo Costa | 33 of 48 | 68% | 11 of 25 | 16 of 17 | 6 of 6 | 31 of 46 | 2 of 2 | 0 of 0 |
| Roman Kopylov | 21 of 45 | 46% | 15 of 39 | 6 of 6 | 0 of 0 | 21 of 45 | 0 of 0 | 0 of 0 |
Play-by-Play
View on SherdogBETTING PREVIEW | SCOUTING REPORT | ODDS: Kopylov (-245), Costa (+200)
Round 1
Without a win since 2022, and no knockout victories in over seven years, Costa (14-4, 6-4 UFC) is back in the Octagon after a while away planning on getting a little more green on his ledger. Standing in his way will be fellow knockout artist Kopylov (14-3, 6-3 UFC), with the heavy-hitting middleweights combining for 23 strike stoppages in their 28 pro wins. Referee Herb Dean will don his proverbial hard hat and try to avoid any errant swings. The fighters do not touch gloves.
Costa wants to party immediately, surging into action with punches and kicks to put the Russian on his back foot. Kopylov responds with a left hand that reddens the face of his opponent, and he gets caught with a right hand to sustain a little damage on his mug as well. Costa scores a kick to the inner thigh, bouncing in and out and just brushing the ear with a right hand. “Borrachinha” whips a kick to the ribs after it, and the two men catch one another with single punches. Kopylov recovers first, bouncing in to kick Costa in the stomach. He then kicks the calf, checking one coming back his direction. Costa jabs and opens up with a left hook, with his right hand chambered back ready to go.
Costa works the inside and outside of his foe’s front leg, and Kopylov times one kick to go upstairs with a left hand. Costa drives a right hand to the sternum, and his head kick shakes the hair of the Russian without causing much damage otherwise. He does hammer Kopylov’s front leg with another calf kick, and he goes on the other side to keep Kopylov guessing. Kopylov drills the midsection with a fierce kick, parrying a high kick aimed at his dome and pushing Costa back with a pair of punches. Costa goes to the body multiple times, chaining a right hand behind it that dislodges Kopylov’s mouthpiece and dropping him to his knees. Costa hammers the hurt Russian with short but powerful punches, and Kopylov stands up and circles away while Dean collects his mouthpiece. Dean finds the right moment to give Kopylov his gumshield back, and Kopylov thanks him by landing once more on the Brazilian before the horn sounds.
Sherdog Scores
Jay Pettry scores the round: 10-9 Costa
Ben Duffy scores the round: 10-9 Costa
Tyler Treese scores the round: 10-9 Costa
Round 2
As the second round begins, coach and commentator Din Thomas issues pungent criticisms towards Kopylov’s corner for their questionable advice about how Kopylov was succeeding. When the fighters get going in Round 2, Costa is quick to get in his groove, making Kopylov react every time he throws. This frees Costa up to pick his shots, measuring targets to the body and head when finding openings. The power of Costa makes Kopylov think twice about swinging more than once in a row, as he digs two kicks to the body. Costa rifles a right hand down the middle, walking the Russian down to club him a few more times.
Costa dips and rips an uppercut that catches Kopylov off-guard, but it is his straight right hand that damages Kopylov. Costa blasts the body with a kick, not selling out to force a finish as his power strikes are breaking Kopylov down. Costa goes from body shots to big right hands, and Kopylov is stuck not knowing what to do. He briefly presents in a traditional martial arts stance with his elbow high, but Costa pushes that out of the way. Kopylov thanks him for this with a snappy jab, but it is a single shot as Costa evades anything else. Costa picks and pokes with the most painful seeming jabs and front kicks one can imagine, as his teep kick actually lifts Kopylov off the ground once. He chops down the leg a bit more like a lumberjack, and his body work opens up big rights. Kopylov takes body shots on his way in, breaking up what he wants to do other than a reverse crescent kick. Costa marches through the kicks and punches the Russian square in the face. The round concludes.
Sherdog Scores
Jay Pettry scores the round: 10-9 Costa
Ben Duffy scores the round: 10-9 Costa
Tyler Treese scores the round: 10-9 Costa
Round 3
Costa marches out to the center of the Octagon to further establish dominance, hammering his Russian adversary’s front with a few kicks. Kopylov splits the guard when leaping in, but Costa is able to back off and wail on him with kicks to any target. Kopylov catches Costa off-balance with another blitz, only for Costa to rebound off the wire and jump forward to clip Kopylov again. The two hand-fight while in opposing stances, with Kopylov kicking the ribs and punching high as Costa appears to be slowing. “Borrachinha” attacks the body and counters a rushing Kopylov with a right hand, and he points at the Russian after tagging him. Costa loads up with a right to the body and then a right to the head. Kopylov steels himself and winds up with a massive right hand that stings Costa, but Costa wags his finger at him.
The mere wag of his finger dissuades Kopylov from diving in to keep attacking, allowing Costa to shake off any cobwebs and launch additional right hands to the busted nose and swollen midsection. Kopylov rifles a left hand up top, standing straight up and eating a low kick. He goes after the Brazilian, lobbing short combos in punches as Costa sticks his tongue out at him. This encourages Kopylov to throw more, only to get caught and backed off by body shots from Costa. The former title challenger shoots for a single, bailing on it and trying a second time so he can knee Kopylov in the liver. Kopylov springs forward behind a crisp right hand, only to slow down right in front of Costa and take right hands on the eye socket. Kopylov swings hard, and Costa rushes towards him to get a clinch. When he lets it go, he strikes the body and staggers Kopylov with a massive overhand right. The Russian is tough as old beef jerky, who bounces back and goes for broke as the fight concludes.
Sherdog Scores
Jay Pettry scores the round: 10-9 Costa (30-27 Costa)
Ben Duffy scores the round: 10-9 Kopylov (29-28 Costa)
Tyler Treese scores the round: 10-9 Costa (30-27 Costa)
The Official Result
Paulo Costa def. Roman Kopylov via Unanimous Decision (30-27, 30-27, 29-28)
Angelo picks Roman Kopylov, reasoning that in a striking match, Kopylov is the better striker. He doubts Paulo Costa will use his grappling, as he has been a brawler recently. He notes Costa's durability and output but believes Kopylov's technical striking will win.
Big Brady picks Roman Kopylov, criticizing Paulo Costa's lack of effort and decline since 2019. He notes Kopylov has improved his striking and wrestling, while Costa has regressed. He predicts Kopylov wins by late finish or decision.
Connor picks Kopylov because he believes Costa's current style is vulnerable to a dynamic kicking game. He notes that Costa has not been the same pressure fighter since the Adesanya fight and struggles against opponents who use long-range weapons. Kopylov's ability to pressure and chain combinations on the front foot is seen as a nightmare for Costa's hesitant approach.
The host acknowledges Costa is a wild card, making it difficult to determine whether to bet on Kopylov. He expects Kopylov to win, utilizing grappling and striking to win on the scorecards, but the hesitation is due to Costa's unpredictability.
The MMA Guru picks Roman Kopylov over Paulo Costa, predicting a decision win. He criticizes Costa's inactivity and lack of finishing ability, noting that he rarely punches opponents in the face anymore. Kopylov is described as busier and more active, with a reach advantage. The Guru believes Kopylov will pepper Costa with strikes and possibly land head kicks, while Costa's full-force but ineffective style will not be enough. He also mentions a prop bet that Costa will land less than 63.5 significant strikes.
Zane agrees with Connor, stating that Kopylov's dynamic all-levels kicking game at range and pace is the dagger for Costa's current style. He notes that Costa can still fight in bursts but doesn't trust him to show up the right way. He also mentions that Kopylov's pressure will force Costa to fight, which could lead to a fun but dangerous fight for Costa.
Totals
| Fighter | KD | Sig. Str. | Sig. Str. % | Total Str. | TD | TD % | Sub. Att | Rev. | Ctrl |
|---|---|---|---|---|---|---|---|---|---|
| Sean Strickland | 0 | 182 of 402 | 45% | 182 of 402 | 0 of 0 | --- | 0 | 0 | 0:01 |
| Paulo Costa | 0 | 158 of 266 | 59% | 158 of 266 | 0 of 0 | --- | 0 | 0 | 0:00 |
Per Round
| Rd | Fighter | KD | Sig. Str. | Sig. Str. % | Total Str. | TD | TD % | Sub. Att | Rev. | Ctrl |
|---|---|---|---|---|---|---|---|---|---|---|
| 1 | Sean Strickland | 0 | 24 of 56 | 42% | 24 of 56 | 0 of 0 | --- | 0 | 0 | 0:01 |
| Paulo Costa | 0 | 31 of 43 | 72% | 31 of 43 | 0 of 0 | --- | 0 | 0 | 0:00 | |
| 2 | Sean Strickland | 0 | 25 of 70 | 35% | 25 of 70 | 0 of 0 | --- | 0 | 0 | 0:00 |
| Paulo Costa | 0 | 32 of 49 | 65% | 32 of 49 | 0 of 0 | --- | 0 | 0 | 0:00 | |
| 3 | Sean Strickland | 0 | 45 of 83 | 54% | 45 of 83 | 0 of 0 | --- | 0 | 0 | 0:00 |
| Paulo Costa | 0 | 34 of 54 | 62% | 34 of 54 | 0 of 0 | --- | 0 | 0 | 0:00 | |
| 4 | Sean Strickland | 0 | 39 of 88 | 44% | 39 of 88 | 0 of 0 | --- | 0 | 0 | 0:00 |
| Paulo Costa | 0 | 29 of 53 | 54% | 29 of 53 | 0 of 0 | --- | 0 | 0 | 0:00 | |
| 5 | Sean Strickland | 0 | 49 of 105 | 46% | 49 of 105 | 0 of 0 | --- | 0 | 0 | 0:00 |
| Paulo Costa | 0 | 32 of 67 | 47% | 32 of 67 | 0 of 0 | --- | 0 | 0 | 0:00 |
Significant Strikes
| Fighter | Sig. Str. | Sig. Str. % | Head | Body | Leg | Distance | Clinch | Ground |
|---|---|---|---|---|---|---|---|---|
| Sean Strickland | 182 of 402 | 45% | 104 of 258 | 67 of 127 | 11 of 17 | 179 of 397 | 3 of 5 | 0 of 0 |
| Paulo Costa | 158 of 266 | 59% | 28 of 100 | 84 of 111 | 46 of 55 | 157 of 265 | 1 of 1 | 0 of 0 |
Significant Strikes Per Round
| Rd | Fighter | Sig. Str. | Sig. Str. % | Head | Body | Leg | Distance | Clinch | Ground |
|---|---|---|---|---|---|---|---|---|---|
| 1 | Sean Strickland | 24 of 56 | 42% | 5 of 18 | 16 of 35 | 3 of 3 | 24 of 54 | 0 of 2 | 0 of 0 |
| Paulo Costa | 31 of 43 | 72% | 4 of 10 | 17 of 21 | 10 of 12 | 30 of 42 | 1 of 1 | 0 of 0 | |
| 2 | Sean Strickland | 25 of 70 | 35% | 12 of 40 | 11 of 24 | 2 of 6 | 25 of 70 | 0 of 0 | 0 of 0 |
| Paulo Costa | 32 of 49 | 65% | 2 of 17 | 16 of 17 | 14 of 15 | 32 of 49 | 0 of 0 | 0 of 0 | |
| 3 | Sean Strickland | 45 of 83 | 54% | 28 of 56 | 15 of 25 | 2 of 2 | 45 of 83 | 0 of 0 | 0 of 0 |
| Paulo Costa | 34 of 54 | 62% | 7 of 19 | 17 of 23 | 10 of 12 | 34 of 54 | 0 of 0 | 0 of 0 | |
| 4 | Sean Strickland | 39 of 88 | 44% | 22 of 61 | 14 of 22 | 3 of 5 | 38 of 87 | 1 of 1 | 0 of 0 |
| Paulo Costa | 29 of 53 | 54% | 9 of 26 | 13 of 19 | 7 of 8 | 29 of 53 | 0 of 0 | 0 of 0 | |
| 5 | Sean Strickland | 49 of 105 | 46% | 37 of 83 | 11 of 21 | 1 of 1 | 47 of 103 | 2 of 2 | 0 of 0 |
| Paulo Costa | 32 of 67 | 47% | 6 of 28 | 21 of 31 | 5 of 8 | 32 of 67 | 0 of 0 | 0 of 0 |
Play-by-Play
View on SherdogBETTING PREVIEW | SCOUTING REPORT | ODDS: Strickland (-245), Costa (+205)
Round 1
Fresh off a close decision loss to surrender his title, Strickland (28-6, 15-6 UFC) is back in for another five-round contest. With no belt or main event between them, the UFC still decided to schedule this matchup for 25 minutes. He stands across the cage from Brazilian marauder Costa (14-3, 6-3 UFC), who celebrates about 80% of his wins via knockout even as he has not landed one since 2018. Referee Jason Herzog will take control of the cage for this co-main attraction, and possibly due to their back-and-forth on fight week, they do not touch gloves. Costa rushes out of his corner to strike first, where he lands two hearty leg kicks early. Strickland jabs him back, and Costa chops at him with another kick. Strickland raises his leg preemptively to protect against a few others, with damage showing on it less than one minute in. Strickland walks forward despite the kicks, and he prods out a front kick of his own a few times. Costa catches Strickland walking in with a check left hook, and he swats away subsequent front kicks so he can jab the midsection of his foe. Costa pushes off the chest with a much heavier push kick, and Strickland relies on his own front kick again and again. Even if it does not land, he is making Costa think about it. Costa comes up short on an overhand right, but he does connect with a calf kick that is partially checked. They trade jabs, and the Brazilian aims a one-two to the body. Costa clacks a kick off the calf, and Strickland raises his leg up and keeps walking forward tossing out constant front kicks. Costa circles away and fakes a high kick to draw a reaction, and he kicks low to follow. A jab from “The Eraser” reddens the former champ’s nose, and he kicks Strickland in the side and jabs him in the chest. Practically every other step, Strickland is pushing out with the ball of his foot at Costa’s chest and body. Strickland catches a kick and knocks Costa down with a right hand, but Costa hops back upright without batting an eye. Costa spins with a back kick, and Strickland continues pressuring him with these continuous front kicks. The round ends.
Sherdog Scores
Jay Pettry scores the round: 10-9 Strickland
Ben Duffy scores the round: 10-9 Strickland
Devin Tejada scores the round: 10-9 Strickland
Round 2
Strickland does not sit between rounds, instead standing up and watching Costa while receiving advance. He wants to keep fighting, even if he has to take a break. As soon as they resume, Strickland goes right back to his kick spam, as if he were a young child playing a fighting game hitting the same button for one specific strike a hundred times. Costa loads up on power shots to back him off momentarily, and he sits down on a loud low kick that makes Strickland pause. A second kick hurts Strickland’s front leg further, and Strickland’s kick-heavy approach wanes momentarily. Costa attacks that lead leg once more, and he lands a left hand but starts to back off from Strickland’s pressure. Strickland starts prodding his front kicks once more, and Costa stands firm and takes a one-two across the forward bow. Strickland closes distance with this front kick when he is not throwing it directly, and it keeps Costa busy thinking about it enough to stifle most of his own offense. Strickland’s nullifying approach makes the crowd restless, and Costa skips away and hacks down with a low kick that is checked hard. Strickland pokes with kicks to the body, and he snaps the head back with a jab while checking a calf kick. A front kick leads to two punches from the ex-champ, and Costa explodes at him pursuing a takedown, but Strickland tosses him aside. Costa delivers two solid low kicks, and Strickland lifts his leg to shake it out and keeps a poker face. Costa spins with a wheel kick that bounces off the guard, and he backs away as Strickland jabs him again and again. Strickland connects with a stiff jab, and he drops Costa to a knee as the pressure appears to be wilting the Brazilian. Costa stands and sticks his tongue out, and Strickland does not falter in his gameplan of front kicks, jabs and the occasional right hand. This plays out to the bell.
Sherdog Scores
Jay Pettry scores the round: 10-9 Strickland
Ben Duffy scores the round: 10-9 Strickland
Devin Tejada scores the round: 10-9 Strickland
Round 3
It takes all of a few seconds for Strickland to turn the game plan back on of front kick after stifling front kick. Even if every other kick actually lands, they add up, and Costa’s midsection is marking up fast. Costa digs a pair of left hands to the body, and he pounds his own kick to the ribs and then goes low. Strickland checks the latter, and he leans back to avoid a left hook. Strickland powers forward, loading up on a combination until Costa bounces off the cage wall and sticks his tongue out. Costa whips a high kick up and it is blocked, and he strikes low and has his kick checked hard. Costa limps away, and Strickland walks him down while touching up him with jabs. Strickland jabs and jabs again, and he pushes Costa away when Costa rushes at him for a level change. Costa thinks about spinning with a strike, but he just twirls around without throwing anything. Strickland chips away at him with jabs and front kicks, and he evades a spinning wheel kick that zips past his nose. Costa lands a pair of low kicks, and the second makes him hobble away. Costa jabs to the body, and he gets his guts kicked a few more times. Strickland comes up short on two hooks, but the straight strikes land regularly. Two jabs, a front kick and two more come from the former champ, who is cruising while Costa is fading. Costa puts all his power into an overhand right, and Strickland dodges as it glances past him. Strickland strings three heavier punches together, and Costa skirts away and tosses a half-hearted right hand that surprises Strickland. The former champion rips an uppercut as Costa ducks, and the horn sounds.
Sherdog Scores
Jay Pettry scores the round: 10-9 Strickland
Ben Duffy scores the round: 10-9 Strickland
Devin Tejada scores the round: 10-9 Strickland
Round 4
The middleweights tap gloves as they enter the championship rounds, and Strickland does not need much time before revving up his engines to steadily work Costa over. Costa flails with heavy strikes, and he gets a right hand in, but Strickland lands three of his own, a body kick and a few more jabs. The Brazilian gets off a low kick, and he reaches Strickland with a number of jabs. Costa swipes out with a left hook, and when he has a leg kick checked, he almost falls over from the impact. Costa sells out for a head kick on the other side, and Strickland keeps walking him down and protecting himself from the telegraphed heavy blows. Strickland presses ever forward, jabbing the body and head with punches and front kicks. The approach has been steady and effective, if not overly entertaining. The crowd expresses its restlessness as Costa swings for the fences but hits air, and Strickland does not load up on much while simply outworking his opponent. Costa’s head kicks are blocked, his hooks go wide and his leg kicks are largely checked. Costa gets off a front kick to the body that has much more impact than Strickland’s, and he scores a calf kick that is not checked. He turns and fakes one type of kick so that he can set up a side kick that lands flush on the midsection. Strickland pushes him back with jabs and twos, and Costa slams his left hand on the liver and dings the front leg with another powerful kick. Costa’s kicks are not being checked like before, and Strickland frowns when absorbing them. Costa lands a punch to the body, and he absorbs four punches from up close before backing away. Strickland wings a right hand that bounces into the ear, and Costa stumbles away as the horn blares.
Sherdog Scores
Jay Pettry scores the round: 10-9 Costa
Ben Duffy scores the round: 10-9 Costa
Devin Tejada scores the round: 10-9 Strickland
Round 5
The fifth round has been reached by the middleweights, and they touch gloves presumably one last time. Costa tosses out two punches and a low kick, and Strickland lifts his leg up to defend it. Costa kicks it again, and Strickland meanders forward with a front kick from either leg. Costa plants his shin on the front leg of his opponent again as Strickland is coming at him, and Strickland rolls to avoid a right hand and checks a low kick to follow. Costa winds up on power punches, and one more leg kick gets checked. Strickland catches a body kick and makes Costa pay for it with a pair of straight left hands before releasing the leg, and the two throw hands at the same time. A body kick from “The Eraser” backs Strickland off for a moment, but Strickland gets back into his rhythm of jab to front kick territory. Strickland has his own body struck from kicks and punches, and Costa doubles down on body shots. Costa kicks the body on the other side, and Strickland jabs him and pushes him away with a teep kick. Strickland’s jab is on point, disrupting Costa’s sweeping strikes. Costa goes to the body with a stern left hand, and Strickland no-sells it and works the body with front kick after front kick. Costa just misses on a one-two, and he barrels forward and pushes Strickland back but does not change levels. Strickland misses the mark on a pair of punches, and Costa snaps his head back with a power jab and sits down on a low kick. Costa reaches his man with a left hook, and he is driven away with a handful of jabs. Costa thinks about pursuing a single, but he gives it up and spins with a back fist as he eats a jab. Costa sits down on a few punches, and Strickland pours it on with a barrage of punches. As Costa bounces off the fence, Strickland boots him in the raised guard with a head kick with enough impact to still put Costa on his seat. Costa springs back up, and Strickland runs at him with a jumping front kick as the long engagement comes to a close.
Sherdog Scores
Jay Pettry scores the round: 10-9 Strickland (49-46 Strickland)
Ben Duffy scores the round: 10-9 Strickland (49-46 Strickland)
Devin Tejada scores the round: 10-9 Strickland (50-45 Strickland)
The Official Result
Sean Strickland def. Paulo Costa via Split Decision (46-49, 50-45, 49-46)
Angelo picks Sean Strickland because of his dependability and the Philly shell defense. He acknowledges Paulo Costa's power and cardio but believes Strickland's volume and durability will win a decision, especially in a five-round fight. He notes that Costa might try wrestling after seeing Dricus du Plessis take Strickland down, but still favors Strickland.
Big Brady likes Sean Strickland at 8,800 because it's a five-round fight, giving Strickland 25 minutes to rack up volume (6 significant strikes per minute). He thinks Strickland's pace will add up and he could even get a late finish. He also likes Paulo Costa in cash games for the same five-round volume, noting Costa's durability and potential takedowns. He sees Costa as a live dog but expects Strickland to win a decision or late finish.
Cody picks Strickland, highlighting his jab and reach advantage. He notes Strickland's durability and volume, and believes Costa's power is overrated (last KO of note was Uriah Hall in 2018). Cody expects Strickland to drown Costa with pressure and volume, possibly getting a late stoppage. He mentions Strickland's experience in five-round fights and Costa's lack thereof.
Daniel notes that Costa can compete at this level but questions if he can win. He highlights Strickland's insane output and Philly shell, and expects Strickland to edge a decision with higher volume. He acknowledges either could get knocked out but leans Strickland.
Daniel Vreeland also picks Costa, agreeing with Fox. He was initially concerned about the 25-minute fight but was reassured by Costa's performance against Whittaker. Vreeland notes Strickland won't grapple and Costa is a decent grappler anyway. He sees risk standing with Costa for 25 minutes but believes Costa's power and durability give him the edge.
Jeff Fox picks Paulo Costa at +200, citing that Strickland's five-round losses (to Jared Cannonier and Dricus du Plessis) came because opponents landed harder shots that judges value more. He believes Costa will land the bigger shots and notes Costa's strong performance against Robert Whittaker. Fox thinks Costa can take three rounds and possibly win a split decision, and he's not worried about Strickland wrestling.
The host believes Costa's power punching is the key to beating Strickland, who has struggled against power punchers. Costa's ability to land big shots over five rounds could lead to a knockout or sway judges with damage. The host notes Costa's recent activity and motivation, and sees value at +205, picking Costa by knockout.
Paul picks Strickland, emphasizing volume advantage. He notes Costa can land big shots but lacks volume; Strickland will put up 200+ significant strikes while Costa struggles to reach 100. He expects Strickland by decision or late stoppage, and mentions Strickland's reach advantage (76-inch reach vs Costa's 72-inch). He also notes Costa's poor body language and cardio in past fights.
The MMA Guru picks Sean Strickland, noting that Costa is inconsistent and has been effectively jabbed before. He believes Strickland can survive Costa's early pressure and take over in later rounds. He predicts Strickland by TKO in rounds 4 or 5. He acknowledges Costa's dangerous right hand and head kick but trusts Strickland's durability.
Totals
| Fighter | KD | Sig. Str. | Sig. Str. % | Total Str. | TD | TD % | Sub. Att | Rev. | Ctrl |
|---|---|---|---|---|---|---|---|---|---|
| Robert Whittaker | 0 | 95 of 175 | 54% | 95 of 175 | 0 of 1 | 0% | 0 | 0 | 0:00 |
| Paulo Costa | 0 | 67 of 151 | 44% | 67 of 151 | 0 of 0 | --- | 0 | 0 | 0:00 |
Per Round
| Rd | Fighter | KD | Sig. Str. | Sig. Str. % | Total Str. | TD | TD % | Sub. Att | Rev. | Ctrl |
|---|---|---|---|---|---|---|---|---|---|---|
| 1 | Robert Whittaker | 0 | 38 of 62 | 61% | 38 of 62 | 0 of 0 | --- | 0 | 0 | 0:00 |
| Paulo Costa | 0 | 27 of 49 | 55% | 27 of 49 | 0 of 0 | --- | 0 | 0 | 0:00 | |
| 2 | Robert Whittaker | 0 | 32 of 55 | 58% | 32 of 55 | 0 of 0 | --- | 0 | 0 | 0:00 |
| Paulo Costa | 0 | 26 of 54 | 48% | 26 of 54 | 0 of 0 | --- | 0 | 0 | 0:00 | |
| 3 | Robert Whittaker | 0 | 25 of 58 | 43% | 25 of 58 | 0 of 1 | 0% | 0 | 0 | 0:00 |
| Paulo Costa | 0 | 14 of 48 | 29% | 14 of 48 | 0 of 0 | --- | 0 | 0 | 0:00 |
Significant Strikes
| Fighter | Sig. Str. | Sig. Str. % | Head | Body | Leg | Distance | Clinch | Ground |
|---|---|---|---|---|---|---|---|---|
| Robert Whittaker | 95 of 175 | 54% | 63 of 143 | 4 of 4 | 28 of 28 | 95 of 172 | 0 of 3 | 0 of 0 |
| Paulo Costa | 67 of 151 | 44% | 39 of 117 | 8 of 12 | 20 of 22 | 67 of 151 | 0 of 0 | 0 of 0 |
Significant Strikes Per Round
| Rd | Fighter | Sig. Str. | Sig. Str. % | Head | Body | Leg | Distance | Clinch | Ground |
|---|---|---|---|---|---|---|---|---|---|
| 1 | Robert Whittaker | 38 of 62 | 61% | 26 of 50 | 1 of 1 | 11 of 11 | 38 of 61 | 0 of 1 | 0 of 0 |
| Paulo Costa | 27 of 49 | 55% | 16 of 38 | 4 of 4 | 7 of 7 | 27 of 49 | 0 of 0 | 0 of 0 | |
| 2 | Robert Whittaker | 32 of 55 | 58% | 20 of 43 | 3 of 3 | 9 of 9 | 32 of 55 | 0 of 0 | 0 of 0 |
| Paulo Costa | 26 of 54 | 48% | 16 of 43 | 2 of 3 | 8 of 8 | 26 of 54 | 0 of 0 | 0 of 0 | |
| 3 | Robert Whittaker | 25 of 58 | 43% | 17 of 50 | 0 of 0 | 8 of 8 | 25 of 56 | 0 of 2 | 0 of 0 |
| Paulo Costa | 14 of 48 | 29% | 7 of 36 | 2 of 5 | 5 of 7 | 14 of 48 | 0 of 0 | 0 of 0 |
Play-by-Play
View on SherdogBETTING PREVIEW | SCOUTING REPORT | ODDS: Whittaker (-225), Costa (+185)
Round 1
For the co-main event, the particulars of this middleweight matchup are extremely close. Separated by four months in age, one inch in both height and reach—but not both for one man—and very similar takedown defense rates, Whittaker (24-7, 15-5 UFC) vs. Costa (14-2, 6-2 UFC) appears to be a quite well-matched fight. Both men do prefer to end fights via knockout, but it has been since 2017 for the former and 2018 for the latter to procure a stoppage via strikes. Knowing this could go the long haul but be quite a fun one, referee Mike Beltran dons his hard hat. Both men are incredibly intense and do not touch gloves, and instead they go right after it. Perhaps having studied the strategy of Israel Adesanya against Costa, Whittaker goes right to low kick after low kick. Costa throws back with a left hand that reddens up Whittaker’s cheek, and he blocks a big high kick in the nick of time. Costa checks a leg kick, but Whittaker continues to target the lead wheel. Costa attacks another head kick, and Whittaker sees it coming and defends it, but the sheer impact knocks him to the side. Costa’s power punches redden up Whittaker’s face, and Whittaker goes after another kick down low. Costa partially checks it, and his leg begins to swell. Whittaker dips back to counter a lunging Costa with a big right, and when Costa strikes back, Whittaker beans him with a left hook. Costa stuns Whittaker with a straight left hand, but Whittaker rushes at him and tags him with a few punches. Costa smiles and laughs, and Whittaker punches him in the face again a few times. Whittaker blitzes with a right hand and a harsh calf kick, and Costa is struggling to plant on the lead leg after about three minutes as his shin swells. Costa prepares to check another kick, and he leans to the proper direction as a blazing fast right hand from the Aussie soars past him. Costa eats a sharp jab and walks into a second, and he flicks out a power jab in response. Whittaker charges with a right down hand down the middle, and Costa smiles. “Bobby Knuckles” scores a low kick on one leg, and when Costa switches stances, Whittaker lands one on the other side. Costa allows Whittaker to crowd him with offense so he can dig some body shots, but he does not escape unscathed as Whittaker targets him up top. Whittaker kicks him in the chest with a side kick, and Costa spins suddenly with a wheel kick that rings the former champ’s bell. Whittaker, hurt and wobbled like a baby deer, bites down on his mouthguard and swings for the fences. The round ends with the two middleweights brawling, and that single power strike might have stolen the Brazilian the round.
Sherdog Scores
Jay Pettry scores the round: 10-9 Costa
Ben Duffy scores the round: 10-9 Costa
Tristen Critchfield scores the round: 10-9 Costa
Round 2
Whittaker comes out of his corner no worse the wear, and his sea legs appear to be beneath him. Whittaker goes after low kicks and connects with a few punches up top. Costa responds with his own calf kick and a right hand, and he zooms up a head kick from his lead leg that slams into Whittaker’s guard. Costa snaps the head back with a jab, and Whittaker gives him two back to think about. Whittaker kicks Costa upside the head, and Costa eats it and sticks his tongue out. Costa connects with a vicious leg kick, and Whittaker’s lead leg is welting up as well. Whittaker responds immediately with his own calf kick, and a responding jab from Costa busts up the former champ’s nose. Costa keeps pushing out the jab, intercepting Whittaker until his thumb slides out and jabs into Whittaker’s eye. Costa smiles sheepishly, and Whittaker gets a pause. Whittaker wants to get right back to it, and he drives kicks into Costa’s lead leg on the restart and swings hard up high. Costa continues to jab up his foe’s bloody mug, but Whittaker is outlanding him and doing so with power. Whittaker rolls his shoulder to move with a punch, and he staggers Costa with a right hand and a thudding calf kick. Whittaker winds up with a power right hand, and a left that follows gives Costa further pause. Whittaker delivers a vicious kick to the same spot, and he unloads with a combination that knock Costa’s head around like a heavy bag. Costa waves him on, but Whittaker does not bite and instead settles back down to chipping and working on the lead leg. Costa goes up high twice with two kicks that are blocked, and he hops back to avoid the brunt of a leg kick and a right hand. Whittaker gets off a side kick to the torso, and Costa prods out a jab to back Whittaker off. Costa whips a kick right by Whittaker’s beard, and he absorbs a flush low kick that makes his leg wobble. Whittaker hits Costa with everything he has, but the Brazilian just absorbs it and smiles. Costa wanders forward, but the round ends before he can reach out with anything.
Sherdog Scores
Jay Pettry scores the round: 10-9 Whittaker
Ben Duffy scores the round: 10-9 Whittaker
Tristen Critchfield scores the round: 10-9 Whittaker
Round 3
The last round opens with Costa running out to the center of the cage, and he lets go with a one-two. Whittaker shrugs it off and powers out a pair of jabs. Costa jabs the body back, and he swipes out with a calf kick that breezes past the front leg. Whittaker darts out with a left hook that lands on the temple, and the two clash with kicks at the same time. Whittaker’s jab is finding its home, and his leg kick does as well. Costa connects with a stern low kick, and Whittaker crowds him and cracks him with a huge right hand. Costa goes back to the leg kick, and Whittaker bounces back away from the looping shots that come at him. Costa drives a knee to the chest to get Whittaker’s attention, and they crash together and disengage. Whittaker checks a kick and stumbles Costa with a left hook, but Costa recovers himself and eats another left hand. Whittaker races forward with a fierce right hand, and Costa’s chin is granite as he takes these shots that would fell heavyweights. Costa takes a hard leg kick and points at the groin to draw a brawl, and Whittaker does not throw his game plan in the trash and swing recklessly. They trade leg kicks, and Costa pushes out a front kick. Whittaker reaches out with two left hands, and he blocks a head kick that flies at him. Whittaker gets off another swiping left, and he pokes a jab out to follow before nearly kicking out Costa’s lead leg. Costa strikes with a jab, and Whittaker does the same and dips a hook. Whittaker snaps the head back with a jab, and Costa is right there in his face to jab him back. Costa attempts another spinning wheel kick, but he misses, and Whittaker makes him pay with a short combination. Whittaker lashes out with another brief combo, and they both unleash fiery kicks that land at the same time. These two are going strike for strike as time ticks off the clock in this absolute blood and guts affair, and the damage from Whittaker’s blows have finally drawn some blood. Whittaker wings a left hand, and his leaping strikes find the mark as he backs off to avoid counters. Costa walks through a few left hands, and he fires off a high kick. Whittaker shoots for a takedown, bails on it, and comes up top with two mighty hooks. Both middleweights raise their arms after a terrific hard-fought battle, and time expires. This was worth the wait.
Sherdog Scores
Jay Pettry scores the round: 10-9 Whittaker (29-28 Whittaker)
Ben Duffy scores the round: 10-9 Whittaker (29-28 Whittaker)
Tristen Critchfield scores the round: 10-9 Whittaker (29-28 Whittaker)
The Official Result
Robert Whittaker def. Paulo Costa via Unanimous Decision (29-28, 29-28, 30-27)
Angelo picks Robert Whittaker, citing his well-roundedness, diverse striking, and takedowns. He notes Costa's power and durability but questions his activity. He is slightly worried about Whittaker's chin after the Dricus loss but believes Whittaker's resume and skills outweigh Costa's. He will leave Whittaker out of the safety parlay.
Big Brady picks Robert Whittaker to win by decision. He questions Costa's motivation and activity, noting he's fought only twice in five years and didn't look impressive against Luke Rockhold. He believes Whittaker is the better fighter and more hungry, though he acknowledges Costa's durability and power. He says if Costa doesn't pull out, Whittaker should win a decision.
Cody picks Whittaker, citing his higher volume and tactical approach. He notes that Costa's knockout of Luke Rockhold is less impressive given Rockhold's chin issues. He mentions the over 1.5 rounds total has been steamed, suggesting a decision win for Whittaker. He acknowledges the risk of Costa landing a bomb but trusts Whittaker's jab and fight IQ.
Daniel Vreeland picks Robert Whittaker, arguing that Paulo Costa was never that great and has only one win since the pandemic (over an aged Luke Rockhold). He notes Whittaker's losses are only to champions (Adesanya and du Plessis) and that he has a cleaner striking game and better counter-striking. He expects Whittaker to get reads on Costa and outpoint him, possibly finishing late.
Whittaker uses a cagey style, blitzing in and out with hands and kicks. He has underrated wrestling to implement. If he avoids Costa's power, he should win on the scorecards.
Paul acknowledges Whittaker's superior technique, speed, and experience but worries about his durability due to past knockouts and damage from Romero, Adesanya, and DDP. He notes Costa's power and the threat of a one-punch KO, but points out Costa's wins are over shopworn or lower-level opponents. He ultimately picks Whittaker by decision, trusting his jab and footwork to outpoint Costa.
The MMA Guru picks Robert Whittaker, citing his speed and movement, and the bigger cage favoring him. He criticizes Paulo Costa's recent performance against Luke Rockhold and his inability to close distance effectively. He notes Whittaker's reach advantage and believes Costa's orthodox stance will be easier to read than Dricus du Plessis's unorthodox style. He predicts a sting-and-move masterclass.
Totals
| Fighter | KD | Sig. Str. | Sig. Str. % | Total Str. | TD | TD % | Sub. Att | Rev. | Ctrl |
|---|---|---|---|---|---|---|---|---|---|
| Paulo Costa | 0 | 73 of 103 | 70% | 106 of 137 | 2 of 2 | 100% | 0 | 0 | 5:28 |
| Luke Rockhold | 0 | 51 of 70 | 72% | 57 of 78 | 1 of 4 | 25% | 0 | 1 | 0:47 |
Per Round
| Rd | Fighter | KD | Sig. Str. | Sig. Str. % | Total Str. | TD | TD % | Sub. Att | Rev. | Ctrl |
|---|---|---|---|---|---|---|---|---|---|---|
| 1 | Paulo Costa | 0 | 27 of 34 | 79% | 56 of 64 | 1 of 1 | 100% | 0 | 0 | 2:48 |
| Luke Rockhold | 0 | 19 of 23 | 82% | 19 of 23 | 0 of 2 | 0% | 0 | 0 | 0:03 | |
| 2 | Paulo Costa | 0 | 30 of 42 | 71% | 31 of 43 | 1 of 1 | 100% | 0 | 0 | 0:17 |
| Luke Rockhold | 0 | 23 of 35 | 65% | 23 of 35 | 1 of 1 | 100% | 0 | 0 | 0:12 | |
| 3 | Paulo Costa | 0 | 16 of 27 | 59% | 19 of 30 | 0 of 0 | --- | 0 | 0 | 2:23 |
| Luke Rockhold | 0 | 9 of 12 | 75% | 15 of 20 | 0 of 1 | 0% | 0 | 1 | 0:32 |
Significant Strikes
| Fighter | Sig. Str. | Sig. Str. % | Head | Body | Leg | Distance | Clinch | Ground |
|---|---|---|---|---|---|---|---|---|
| Paulo Costa | 73 of 103 | 70% | 37 of 61 | 33 of 39 | 3 of 3 | 53 of 80 | 3 of 4 | 17 of 19 |
| Luke Rockhold | 51 of 70 | 72% | 23 of 40 | 23 of 25 | 5 of 5 | 48 of 67 | 2 of 2 | 1 of 1 |
Significant Strikes Per Round
| Rd | Fighter | Sig. Str. | Sig. Str. % | Head | Body | Leg | Distance | Clinch | Ground |
|---|---|---|---|---|---|---|---|---|---|
| 1 | Paulo Costa | 27 of 34 | 79% | 13 of 19 | 13 of 14 | 1 of 1 | 11 of 15 | 2 of 3 | 14 of 16 |
| Luke Rockhold | 19 of 23 | 82% | 6 of 8 | 11 of 13 | 2 of 2 | 17 of 21 | 2 of 2 | 0 of 0 | |
| 2 | Paulo Costa | 30 of 42 | 71% | 14 of 22 | 14 of 18 | 2 of 2 | 29 of 41 | 1 of 1 | 0 of 0 |
| Luke Rockhold | 23 of 35 | 65% | 11 of 23 | 9 of 9 | 3 of 3 | 23 of 35 | 0 of 0 | 0 of 0 | |
| 3 | Paulo Costa | 16 of 27 | 59% | 10 of 20 | 6 of 7 | 0 of 0 | 13 of 24 | 0 of 0 | 3 of 3 |
| Luke Rockhold | 9 of 12 | 75% | 6 of 9 | 3 of 3 | 0 of 0 | 8 of 11 | 0 of 0 | 1 of 1 |
Angelo picks Paulo Costa over Luke Rockhold. He describes Costa as a massive middleweight with power, output, and surprising cardio, noting his relentless pace even when exhausted. Angelo acknowledges Rockhold's credentials as a former champion and talented wrestler, but believes the three-year layoff and age (38) are too much to overcome against a top-ranked opponent. He mentions that Costa has good takedown defense (80%) and that he already placed a moneyline bet on Costa at better odds earlier.
Big Brady is confident in Paulo Costa. He notes that Luke Rockhold hasn't fought in three years, hasn't won in nearly five years, and was knocked out in his last fight. Rockhold's chin is gone, and he looked slow and washed against Jan Błachowicz. Costa is younger, more active, hits hard, and has solid cardio. Brady expects Costa to knock Rockhold out in the first or second round. He mentions Costa's takedown defense is good, so Rockhold's wrestling won't work.
Cody picks Costa but expresses concerns about Costa's weight cut and his poor grappling off his back. He notes Rockhold's durability issues but acknowledges Rockhold's BJJ could be a threat if Costa gets taken down. Ultimately, he trusts Costa's power and finishing ability.
Daniel Levi picks Paulo Costa to knock out Luke Rockhold in the first round. He notes that Rockhold's chin has been suspect for a long time, citing knockouts by Vitor Belfort, Michael Bisping, Yoel Romero, and Jan Błachowicz. He believes Rockhold hasn't fought since 2019 and is coming back for a paycheck, which is a bad sign. Levi praises Costa's takedown defense (stuffing Yoel Romero's takedowns) and his power, and thinks Costa is catching Rockhold at the right time. He also mentions that Costa looked back to form in his last fight against Marvin Vettori.
Costa should knock out Rockhold, who has a weak chin and has been inactive for three years. However, the -350 price is too high for a finish-reliant fighter. The host prefers Costa by KO at -120 (now -170) but is passing on the moneyline. He warns that if Costa doesn't finish early, Rockhold could make it a tough fight.
Paul picks Costa to knock out Rockhold inside the first two rounds. He notes Rockhold's chin issues and long layoff, and likes the under 10 minutes on Prize Picks. He mentions Costa's wild card nature but thinks he's in great shape for this fight.
The Guru predicts Paulo Costa wins by first-round KO. He describes Costa rushing across the cage, landing a big kick, and then clipping Rockhold with a shot. He sees Costa slipping Rockhold's jab, landing a right hand and body shot, then a switch kick to the body. He envisions Costa blocking Rockhold's kicks and landing an inside leg kick, then a body kick, and finally a left hook that drops Rockhold about two and a half minutes into the first round.
Totals
| Fighter | KD | Sig. Str. | Sig. Str. % | Total Str. | TD | TD % | Sub. Att | Rev. | Ctrl |
|---|---|---|---|---|---|---|---|---|---|
| Marvin Vettori | 0 | 163 of 260 | 62% | 172 of 269 | 1 of 1 | 100% | 0 | 0 | 0:47 |
| Paulo Costa | 0 | 190 of 346 | 54% | 214 of 373 | 1 of 5 | 20% | 0 | 0 | 3:27 |
Per Round
| Rd | Fighter | KD | Sig. Str. | Sig. Str. % | Total Str. | TD | TD % | Sub. Att | Rev. | Ctrl |
|---|---|---|---|---|---|---|---|---|---|---|
| 1 | Marvin Vettori | 0 | 35 of 53 | 66% | 35 of 53 | 0 of 0 | --- | 0 | 0 | 0:00 |
| Paulo Costa | 0 | 39 of 68 | 57% | 42 of 71 | 0 of 0 | --- | 0 | 0 | 0:09 | |
| 2 | Marvin Vettori | 0 | 36 of 65 | 55% | 36 of 65 | 0 of 0 | --- | 0 | 0 | 0:00 |
| Paulo Costa | 0 | 40 of 80 | 50% | 40 of 80 | 1 of 1 | 100% | 0 | 0 | 0:22 | |
| 3 | Marvin Vettori | 0 | 17 of 29 | 58% | 19 of 31 | 1 of 1 | 100% | 0 | 0 | 0:24 |
| Paulo Costa | 0 | 31 of 55 | 56% | 47 of 74 | 0 of 0 | --- | 0 | 0 | 1:27 | |
| 4 | Marvin Vettori | 0 | 30 of 47 | 63% | 32 of 49 | 0 of 0 | --- | 0 | 0 | 0:00 |
| Paulo Costa | 0 | 49 of 81 | 60% | 53 of 85 | 0 of 1 | 0% | 0 | 0 | 0:30 | |
| 5 | Marvin Vettori | 0 | 45 of 66 | 68% | 50 of 71 | 0 of 0 | --- | 0 | 0 | 0:23 |
| Paulo Costa | 0 | 31 of 62 | 50% | 32 of 63 | 0 of 3 | 0% | 0 | 0 | 0:59 |
Significant Strikes
| Fighter | Sig. Str. | Sig. Str. % | Head | Body | Leg | Distance | Clinch | Ground |
|---|---|---|---|---|---|---|---|---|
| Marvin Vettori | 163 of 260 | 62% | 82 of 174 | 67 of 72 | 14 of 14 | 154 of 249 | 5 of 5 | 4 of 6 |
| Paulo Costa | 190 of 346 | 54% | 154 of 307 | 33 of 36 | 3 of 3 | 168 of 316 | 21 of 29 | 1 of 1 |
Significant Strikes Per Round
| Rd | Fighter | Sig. Str. | Sig. Str. % | Head | Body | Leg | Distance | Clinch | Ground |
|---|---|---|---|---|---|---|---|---|---|
| 1 | Marvin Vettori | 35 of 53 | 66% | 13 of 29 | 18 of 20 | 4 of 4 | 34 of 52 | 1 of 1 | 0 of 0 |
| Paulo Costa | 39 of 68 | 57% | 34 of 62 | 5 of 6 | 0 of 0 | 37 of 66 | 2 of 2 | 0 of 0 | |
| 2 | Marvin Vettori | 36 of 65 | 55% | 14 of 42 | 18 of 19 | 4 of 4 | 35 of 64 | 1 of 1 | 0 of 0 |
| Paulo Costa | 40 of 80 | 50% | 29 of 69 | 10 of 10 | 1 of 1 | 36 of 72 | 4 of 8 | 0 of 0 | |
| 3 | Marvin Vettori | 17 of 29 | 58% | 13 of 24 | 3 of 4 | 1 of 1 | 14 of 24 | 0 of 0 | 3 of 5 |
| Paulo Costa | 31 of 55 | 56% | 23 of 46 | 7 of 8 | 1 of 1 | 27 of 51 | 3 of 3 | 1 of 1 | |
| 4 | Marvin Vettori | 30 of 47 | 63% | 16 of 32 | 11 of 12 | 3 of 3 | 28 of 45 | 2 of 2 | 0 of 0 |
| Paulo Costa | 49 of 81 | 60% | 41 of 73 | 7 of 7 | 1 of 1 | 38 of 66 | 11 of 15 | 0 of 0 | |
| 5 | Marvin Vettori | 45 of 66 | 68% | 26 of 47 | 17 of 17 | 2 of 2 | 43 of 64 | 1 of 1 | 1 of 1 |
| Paulo Costa | 31 of 62 | 50% | 27 of 57 | 4 of 5 | 0 of 0 | 30 of 61 | 1 of 1 | 0 of 0 |
Play-by-Play
View on SherdogRound 1
What can be said about this mess of a fight formerly scheduled at middleweight? On just a few days’ notice, this 185-pound tilt between Costa (13-1, 5-1 UFC) and Vettori (17-5-1, 7-3-1 UFC) transformed into a 195-pound catchweight affair before shifting to light heavyweight the night before weigh-ins. There is more bad blood in this fight than all of the rest of the 13 matches tonight combined, and they would like more than anything to smash the other. They nearly get into a fracas as Costa enters the cage. Referee Jason Herzog will be holding on tight for this flamethrowing main event, and it comes to the surprise of no one that there is no glove touch. Costa takes the center of the cage, and he misses with a high kick but pounds Vettori’s inside thigh with his shin. Vettori launches his own head kick, and Costa sees it coming a mile away and batters Vettori’s lead leg with a kick. Costa has a high kick blocked, and one to the body knocks him off-balance. Vettori charges after him, having landed the counter that may have actually dropped Costa, but Costa backs him off with a thudding body kick. Costa catches Vettori on the way in with a short right hand, and they push one another into the wall as Vettori is in the driver’s seat. Costa again fights his way out, and he eats a left hand and may be stung from one that comes after. Costa scores a right and a body kick, and the two trade vicious right hands. Costa sits down on a body kick again, and Vettori’s left arm is down to block it. Costa lands to the body with a punch, and Vettori counters him with five punches. At the midpoint of the round, Costa appears to be breathing heavy already, and Vettori walks through a leg kick to pressure his opponent. The Brazilian swats away punches, but Vettori is on him working him over with a combination. Costa shrugs it off and fires a body kick off, and Vettori pushes through another that does not have nearly the impact as previous ones. Vettori jabs a few times to back Costa away, and he blocks an overhand right as Costa is trying to load up on single shots. Costa has a head kick get through, but Vettori is not fazed as he pops Costa with a jab and then a one-two. Vettori lands a few punches as Costa shells up, and a left hand pierces the guard as Costa waves him on for more. Vettori sticks and moves, ignores a kick and punch to the midsection, and lands a straight right hand. Right before the round ends, Costa has a head kick zoom by the Italian’s face.
Sherdog Scores
Jay Pettry scores the round: 10-9 Vettori
Ben Duffy scores the round: 10-9 Vettori
Brian Knapp scores the round: 10-9 Vettori
Round 2
They meet in the middle and stick out straight punches, and Vettori triples up on a jab before scoring a body kick. Costa’s is much heavier in response, but Vettori shrugs it off to land a quartet of significant punches. Costa gets backed up to the fence, but he lands a right hand that Vettori is able to partially block. Vettori lands a body shot, and Costa suddenly surprises him with a head kick. Vettori is rocked and falls back towards the fence, and “Borrachinha” chases him down with a body kick and a swarm of punches. As Vettori clears his head, he lands a few knees, but Costa is right in his face with another shin to the chin. Vettori’s beard is quite something, as he seems to have his footing beneath him again as he throws right back at his Brazilian foe. They trade kicks, and Vettori has a pair of punches collide with the guard. Costa’s body shots continue to land, but the looping punches are not as accurate as Vettori is able to slip them. The momentum keeps shifting between the two, as Costa gets Vettori’s attention with a punch salvo. Vettori just ducks when a head kick is aimed at his head, but he steps face-first into a left hook. Vettori uses Costa’s forward momentum against him, hitting a well-timed trip to put the Brazilian on the canvas. Costa fights back to his feet and walks up the wall, and he gains separation. Costa reaches out with a body kick and an opened right hand, and his fingers jab the Italian in the eye. Herzog is aware of this as he allows Vettori all the time he needs to recover, bringing in the doctor just in case. As he had already been warned for something from Herzog, Herzog deducts one point for the eye poke. Costa is incensed but there is nothing he can do, so the two get back to business with kicks from both sides. Costa sits down on a pair of head kicks, and Vettori defends himself but the sheer impact moves him. Vettori lances the guard with a pair of punches, and he goes low with a kick as he punches his way into a clinch. Vettori pressures Costa against the wire with a steady diet of punches, and Costa looses a huge right hand that Vettori sees coming. A glancing left hand gets Vettori’s attention, and Vettori blasts him back with a left hook. Both men wobble briefly but they keep it together, to end the round with a flurry.
Sherdog Scores
Jay Pettry scores the round: 10-8 Vettori
Ben Duffy scores the round: 9-9
Brian Knapp scores the round: 10-8 Vettori
Round 3
Vettori is amped up to start off Round 3, putting a jab in Costa’s face a few times. Costa comes up a millimeter short with a head kick, and Vettori is right there to work the body as Costa puts his foot down. Costa slips a punch to land a right, and he takes a step back and absorbs a body kick. Vettori puts a pace on Costa as he pressures him, and when he lands a few punches, Costa slaps his belly to entice him to throw more. Costa wings a spinning wheel kick, and it skims off Vettori’s hair. As he lands, he catches Vettori with a right hand, but the Italian is able to run out of the way and recover. “The Italian Dream” goes right back to his aggressive ways, landing right hands and busting Costa’s nose open. As they clinch up, Vettori has a single elbow pound into Costa’s face, and Costa grins widely. Costa backs his foe off with a straight right hand to the body, but Vettori is undaunted, as he walks the Brazilian down to throw hands. Three punches split the guard of Costa, who circles off the fence to not take more damage. Vettori lands a single kick, and Costa crashes forward to hit his own unexpected takedown and put the Italian on his back. Costa gets kicked off, and he jumps back down to fight it. When Vettori gives his neck up, Costa jumps guard for a guillotine choke. Vettori does not appear concerned, as he wriggles his neck out and puts Costa flat on his back. Vettori begins to get his ground-and-pound going while Costa closes his guard, with punches and elbows to keep Costa guessing. As Vettori lands a few more strikes from on top, the round ends.
Sherdog Scores
Jay Pettry scores the round: 10-9 Vettori
Ben Duffy scores the round: 10-9 Vettori
Brian Knapp scores the round: 10-9 Vettori
Round 4
As he has done for the previous rounds, Vettori charges ahead to start off the round. A huge body kick from Costa resounds around the arena, and Vettori is able to tank it and keep pressing forward. The Italian pushes Costa against the fence, where he unloads with a combination of punches. Vettori changes things up every so often with a sharp jab, and he sits down on one with a crisp left hand that makes Costa shake his head. Make no mistake, that punch hurt. Vettori jabs a few more times to keep Costa back, and because of this, he is able to dodge a high kick. Vettori rolls with a head kick, but it might have opened a cut on the side of his eye. Vettori advances and pours it on with a barrage of brutal blows, and Costa winds up with a hook to the body to prove he is very much still in the fight. Costa tags Vettori with a few punches, and Vettori is right there to throw back at him. Another big body kick from Costa connects cleanly on the midsection, and he lands one to the side of Vettori’s knee for good measure. A solid combination from Vettori gets Costa’s attention, one punctuated with a left hand that draws a huge smile out of Costa. Vettori tries to push on the accelerator, only to take a flush kick to the body. Vettori steps in with a knee, and Costa takes the knee to the cup and tells Herzog to back off so they can keep fighting. Costa has his hands down, and Vettori times a swift left hand that backs Costa up to the fence. Costa lets go with a combo of power punches when he is in this position, and Vettori takes a deep breath as he avoids most of them. Vettori blitzes forward, pursues a takedown, and is stuffed. Costa slams his shin into Vettori’s waist, and Vettori will be wearing it tomorrow but he does not flinch here. Instead, he introduces his own shin to Costa’s body, and Costa simply sticks his tongue out at him. The horn sounds, and the fight has reached the fifth frame.
Sherdog Scores
Jay Pettry scores the round: 10-9 Vettori
Ben Duffy scores the round: 10-9 Vettori
Brian Knapp scores the round: 10-9 Vettori
Round 5
The first strike landed in the last round is a huge right hand from Costa, one that Vettori eats like an entire plate of pasta. He follows this with a booming head kick, and Vettori’s chin can never be questioned again after the punishment he has endured the last two fights. They stand right in front of one another and trade, not afraid of the other in any way. Costa smashes his leg into Vettori’s torso like he was hitting a side of beef, and Costa may have finally gotten through to Vettori. Seeing Vettori may be hurt, he peppers him with more punches and a few more kicks, until Vettori shoots in for a desperation takedown. The Brazilian is strong enough to endure and stop it, and he keeps himself upright after the subsequent try. When Vettori cannot get it, he backs off, and Costa follows him with punches. Costa tags his foe with a monstrous right hand, and Vettori wears it and takes a knee and a kick to the body right after. “Borrachinha” continues to batter the body with blistering blows, and Vettori has had enough of them, so he ducks down and telegraphs a double from halfway across the fence. Costa notices it, stops it, and lets Vettori take a step back so he can kick Vettori in the midsection again. Vettori aims a kick to the body to pay him back, but Costa’s are far more emphatic and still landing hard and loud this late into the fight. They start trading, and Costa gets a head kick over the top of the guard. Costa grabs hold of a clinch to try to set up a Thai Plum, but he releases it when Vettori pulls back. Back to his preferred range, Vettori jabs out a few times, but Costa pounds him in the chops with a right hand. Vettori is now the one shaking his head to signal that it does not hurt. The Italian ties him up and hunts for a takedown, and Costa stuffs it and shakes his head. He slaps Vettori in the side and backside as time expires, clearly not thrilled with his performance. The Brazilian might be disappointed, but most fans watching around the world clearly will not be after that wild, hard-fought battle. It is a relief to those same fans that the event ended with a bang and not a dud, like recent weeks, and there will be little time to take a breath as the next big show is right around the corner. UFC 267 will take place next Saturday early in the morning, and it will be a pay-per-view caliber card for free for those that have ESPN+. Although we might not have been here live today due to technical difficulties, we will be here for it next week with bells on. We hope you are too.
Sherdog Scores
Jay Pettry scores the round: 10-9 Costa (49-45 Vettori)
Ben Duffy scores the round: 10-9 Costa (48-47 Vettori)
Brian Knapp scores the round: 10-9 Costa (49-45 Vettori)
The Official Result
Marvin Vettori def. Paulo Costa via Unanimous Decision (48-46, 48-46, 48-46)
Angelo finds this a very tough pick. He initially had Costa but flipped to Vettori because Vettori has more ways to win (grappling, durability). He notes Vettori's takedown accuracy is under 50% and he struggles to keep people down, while Costa has 80% takedown defense. He's worried Vettori will get sucked into a striking match. He ultimately picks Vettori but is not confident. He loves a prop bet on Costa: 'wins inside the distance, decision no action' at -110, meaning if Costa wins by KO he gets paid, if he loses a decision he gets a refund.
Big Brady picks Vettori to survive Costa's early storm and win late, citing Vettori's durability, five-round experience, and never-been-KO'd record. He notes Costa's takedown defense (80%) and strength make him hard to take down, but believes Vettori's wrestling and cardio will prevail in later rounds. He predicts a fifth-round TKO or submission.
Cody picks Marvin Vettori, expecting to get a better live price after Vettori likely drops the first round. He highlights Vettori's durability, cardio, and experience in five-round fights, contrasting with Costa's questionable cardio and history of gassing. Cody notes Costa's impressive pressure against Yoel Romero but points out his poor performance against Adesanya and his tendency to fade after two rounds. He believes Vettori can take over in rounds 3-5 and recommends betting live after the first round.
Lock picks Vettori based on durability and cardio advantage. He notes Costa's cardio drops after 8 minutes and Vettori's pace will take over late. He expects Vettori to survive early onslaught and finish in rounds 3-5. He also likes Vettori inside the distance and round props.
Paul initially leans towards Costa but is swayed by Cody's reasoning. He acknowledges Vettori's durability and chin, but also notes Costa's power and the possibility of a knockout. Paul suggests that if betting Costa, the knockout prop at +225 is the way to go. He ultimately agrees that waiting for live markets is the best approach, but does not commit to a clear pick.
The MMA Guru picks Marvin Vettori, citing Costa's questionable cardio and mindset after his first KO loss. He believes Vettori's durability, pressure, and activity will allow him to take over in the later rounds. He predicts a rear-naked choke finish in round 4, drawing parallels to Vettori's fight with Omari Akhmedov.
Totals
| Fighter | KD | Sig. Str. | Sig. Str. % | Total Str. | TD | TD % | Sub. Att | Rev. | Ctrl |
|---|---|---|---|---|---|---|---|---|---|
| Israel Adesanya | 1 | 55 of 84 | 65% | 55 of 84 | 0 of 0 | --- | 0 | 0 | 0:09 |
| Paulo Costa | 0 | 12 of 26 | 46% | 12 of 26 | 0 of 0 | --- | 0 | 0 | 0:01 |
Per Round
| Rd | Fighter | KD | Sig. Str. | Sig. Str. % | Total Str. | TD | TD % | Sub. Att | Rev. | Ctrl |
|---|---|---|---|---|---|---|---|---|---|---|
| 1 | Israel Adesanya | 0 | 22 of 37 | 59% | 22 of 37 | 0 of 0 | --- | 0 | 0 | 0:00 |
| Paulo Costa | 0 | 7 of 11 | 63% | 7 of 11 | 0 of 0 | --- | 0 | 0 | 0:01 | |
| 2 | Israel Adesanya | 1 | 33 of 47 | 70% | 33 of 47 | 0 of 0 | --- | 0 | 0 | 0:09 |
| Paulo Costa | 0 | 5 of 15 | 33% | 5 of 15 | 0 of 0 | --- | 0 | 0 | 0:00 |
Significant Strikes
| Fighter | Sig. Str. | Sig. Str. % | Head | Body | Leg | Distance | Clinch | Ground |
|---|---|---|---|---|---|---|---|---|
| Israel Adesanya | 55 of 84 | 65% | 24 of 51 | 5 of 6 | 26 of 27 | 45 of 71 | 2 of 3 | 8 of 10 |
| Paulo Costa | 12 of 26 | 46% | 2 of 13 | 7 of 8 | 3 of 5 | 12 of 26 | 0 of 0 | 0 of 0 |
Significant Strikes Per Round
| Rd | Fighter | Sig. Str. | Sig. Str. % | Head | Body | Leg | Distance | Clinch | Ground |
|---|---|---|---|---|---|---|---|---|---|
| 1 | Israel Adesanya | 22 of 37 | 59% | 4 of 17 | 3 of 4 | 15 of 16 | 22 of 37 | 0 of 0 | 0 of 0 |
| Paulo Costa | 7 of 11 | 63% | 1 of 4 | 5 of 6 | 1 of 1 | 7 of 11 | 0 of 0 | 0 of 0 | |
| 2 | Israel Adesanya | 33 of 47 | 70% | 20 of 34 | 2 of 2 | 11 of 11 | 23 of 34 | 2 of 3 | 8 of 10 |
| Paulo Costa | 5 of 15 | 33% | 1 of 9 | 2 of 2 | 2 of 4 | 5 of 15 | 0 of 0 | 0 of 0 |
Big Brady picks Adesanya after initially leaning Costa. He cites Adesanya's eight-inch reach advantage, superior striking defense, and ability to stick and move in the bigger cage. He thinks Costa is hittable and may fade in later rounds, leading to a fourth-round knockout for Adesanya.
Daniel Levi picks Paulo Costa to become the new champion, citing Costa's pressure, body work, and ability to close distance. He dismisses concerns about Costa's cardio and notes Costa dropped Yoel Romero with a left hook. He believes Izzy's jab will be answered by Costa's combinations, and that Costa can win by decision or knockout. He calls it a dog-or-pass situation at plus 160.
The host picks Israel Adesanya, expecting him to use his movement and counter-striking to frustrate Paulo Costa. He believes Costa will swing at air and slow down after two rounds, allowing Adesanya to take over and finish in the fourth round. He notes that Costa's power is a threat early, but Adesanya's elusiveness and technical striking will prevail.
The MMA Guru picks Paulo Costa, emphasizing Costa's overlooked technical skill, power, and size. He thinks Costa will hurt Adesanya to the body first and then finish upstairs, predicting a second-round TKO. He notes Costa won the trash talk and remains calm, while Adesanya's tentativeness against Romero could be exploited.
Totals
| Fighter | KD | Sig. Str. | Sig. Str. % | Total Str. | TD | TD % | Sub. Att | Rev. | Ctrl |
|---|---|---|---|---|---|---|---|---|---|
| Paulo Costa | 1 | 125 of 284 | 44% | 125 of 284 | 1 of 4 | 25% | 0 | 0 | 0:12 |
| Yoel Romero | 1 | 118 of 213 | 55% | 118 of 213 | 0 of 0 | --- | 0 | 0 | 0:06 |
Per Round
| Rd | Fighter | KD | Sig. Str. | Sig. Str. % | Total Str. | TD | TD % | Sub. Att | Rev. | Ctrl |
|---|---|---|---|---|---|---|---|---|---|---|
| 1 | Paulo Costa | 1 | 32 of 69 | 46% | 32 of 69 | 0 of 2 | 0% | 0 | 0 | 0:06 |
| Yoel Romero | 1 | 37 of 69 | 53% | 37 of 69 | 0 of 0 | --- | 0 | 0 | 0:04 | |
| 2 | Paulo Costa | 0 | 40 of 91 | 43% | 40 of 91 | 1 of 1 | 100% | 0 | 0 | 0:01 |
| Yoel Romero | 0 | 37 of 71 | 52% | 37 of 71 | 0 of 0 | --- | 0 | 0 | 0:00 | |
| 3 | Paulo Costa | 0 | 53 of 124 | 42% | 53 of 124 | 0 of 1 | 0% | 0 | 0 | 0:05 |
| Yoel Romero | 0 | 44 of 73 | 60% | 44 of 73 | 0 of 0 | --- | 0 | 0 | 0:02 |
Significant Strikes
| Fighter | Sig. Str. | Sig. Str. % | Head | Body | Leg | Distance | Clinch | Ground |
|---|---|---|---|---|---|---|---|---|
| Paulo Costa | 125 of 284 | 44% | 96 of 244 | 11 of 20 | 18 of 20 | 118 of 276 | 7 of 8 | 0 of 0 |
| Yoel Romero | 118 of 213 | 55% | 67 of 148 | 46 of 58 | 5 of 7 | 110 of 202 | 5 of 5 | 3 of 6 |
Significant Strikes Per Round
| Rd | Fighter | Sig. Str. | Sig. Str. % | Head | Body | Leg | Distance | Clinch | Ground |
|---|---|---|---|---|---|---|---|---|---|
| 1 | Paulo Costa | 32 of 69 | 46% | 23 of 54 | 2 of 7 | 7 of 8 | 31 of 68 | 1 of 1 | 0 of 0 |
| Yoel Romero | 37 of 69 | 53% | 19 of 46 | 16 of 20 | 2 of 3 | 32 of 61 | 2 of 2 | 3 of 6 | |
| 2 | Paulo Costa | 40 of 91 | 43% | 28 of 77 | 6 of 7 | 6 of 7 | 39 of 90 | 1 of 1 | 0 of 0 |
| Yoel Romero | 37 of 71 | 52% | 24 of 53 | 12 of 17 | 1 of 1 | 36 of 70 | 1 of 1 | 0 of 0 | |
| 3 | Paulo Costa | 53 of 124 | 42% | 45 of 113 | 3 of 6 | 5 of 5 | 48 of 118 | 5 of 6 | 0 of 0 |
| Yoel Romero | 44 of 73 | 60% | 24 of 49 | 18 of 21 | 2 of 3 | 42 of 71 | 2 of 2 | 0 of 0 |
Yoel Romero - Fight History
Totals
| Fighter | KD | Sig. Str. | Sig. Str. % | Total Str. | TD | TD % | Sub. Att | Rev. | Ctrl |
|---|---|---|---|---|---|---|---|---|---|
| Israel Adesanya | 0 | 48 of 132 | 36% | 48 of 132 | 0 of 0 | --- | 0 | 0 | 0:00 |
| Yoel Romero | 0 | 40 of 89 | 44% | 40 of 89 | 0 of 3 | 0% | 0 | 0 | 0:00 |
Per Round
| Rd | Fighter | KD | Sig. Str. | Sig. Str. % | Total Str. | TD | TD % | Sub. Att | Rev. | Ctrl |
|---|---|---|---|---|---|---|---|---|---|---|
| 1 | Israel Adesanya | 0 | 2 of 11 | 18% | 2 of 11 | 0 of 0 | --- | 0 | 0 | 0:00 |
| Yoel Romero | 0 | 4 of 6 | 66% | 4 of 6 | 0 of 0 | --- | 0 | 0 | 0:00 | |
| 2 | Israel Adesanya | 0 | 11 of 29 | 37% | 11 of 29 | 0 of 0 | --- | 0 | 0 | 0:00 |
| Yoel Romero | 0 | 7 of 14 | 50% | 7 of 14 | 0 of 0 | --- | 0 | 0 | 0:00 | |
| 3 | Israel Adesanya | 0 | 12 of 30 | 40% | 12 of 30 | 0 of 0 | --- | 0 | 0 | 0:00 |
| Yoel Romero | 0 | 9 of 14 | 64% | 9 of 14 | 0 of 0 | --- | 0 | 0 | 0:00 | |
| 4 | Israel Adesanya | 0 | 11 of 33 | 33% | 11 of 33 | 0 of 0 | --- | 0 | 0 | 0:00 |
| Yoel Romero | 0 | 6 of 22 | 27% | 6 of 22 | 0 of 2 | 0% | 0 | 0 | 0:00 | |
| 5 | Israel Adesanya | 0 | 12 of 29 | 41% | 12 of 29 | 0 of 0 | --- | 0 | 0 | 0:00 |
| Yoel Romero | 0 | 14 of 33 | 42% | 14 of 33 | 0 of 1 | 0% | 0 | 0 | 0:00 |
Significant Strikes
| Fighter | Sig. Str. | Sig. Str. % | Head | Body | Leg | Distance | Clinch | Ground |
|---|---|---|---|---|---|---|---|---|
| Israel Adesanya | 48 of 132 | 36% | 14 of 81 | 9 of 22 | 25 of 29 | 48 of 132 | 0 of 0 | 0 of 0 |
| Yoel Romero | 40 of 89 | 44% | 20 of 58 | 7 of 13 | 13 of 18 | 35 of 82 | 5 of 7 | 0 of 0 |
Significant Strikes Per Round
| Rd | Fighter | Sig. Str. | Sig. Str. % | Head | Body | Leg | Distance | Clinch | Ground |
|---|---|---|---|---|---|---|---|---|---|
| 1 | Israel Adesanya | 2 of 11 | 18% | 0 of 7 | 0 of 0 | 2 of 4 | 2 of 11 | 0 of 0 | 0 of 0 |
| Yoel Romero | 4 of 6 | 66% | 1 of 2 | 1 of 1 | 2 of 3 | 4 of 6 | 0 of 0 | 0 of 0 | |
| 2 | Israel Adesanya | 11 of 29 | 37% | 3 of 18 | 3 of 5 | 5 of 6 | 11 of 29 | 0 of 0 | 0 of 0 |
| Yoel Romero | 7 of 14 | 50% | 5 of 11 | 0 of 0 | 2 of 3 | 3 of 10 | 4 of 4 | 0 of 0 | |
| 3 | Israel Adesanya | 12 of 30 | 40% | 3 of 18 | 4 of 7 | 5 of 5 | 12 of 30 | 0 of 0 | 0 of 0 |
| Yoel Romero | 9 of 14 | 64% | 2 of 5 | 2 of 3 | 5 of 6 | 9 of 14 | 0 of 0 | 0 of 0 | |
| 4 | Israel Adesanya | 11 of 33 | 33% | 4 of 22 | 1 of 4 | 6 of 7 | 11 of 33 | 0 of 0 | 0 of 0 |
| Yoel Romero | 6 of 22 | 27% | 4 of 15 | 1 of 5 | 1 of 2 | 5 of 20 | 1 of 2 | 0 of 0 | |
| 5 | Israel Adesanya | 12 of 29 | 41% | 4 of 16 | 1 of 6 | 7 of 7 | 12 of 29 | 0 of 0 | 0 of 0 |
| Yoel Romero | 14 of 33 | 42% | 8 of 25 | 3 of 4 | 3 of 4 | 14 of 32 | 0 of 1 | 0 of 0 |
Daniel believes Adesanya's volume and distance management will be too much for Romero. He thinks Adesanya will pick Romero apart with kicks and win a lopsided decision, though he acknowledges Romero is always live for a knockout. He notes that Romero doesn't do well in fights that go the distance and that Adesanya's takedown defense and get-up game are underrated.
Adesanya's distance management, kicking, and ability to read opponents are key. He will target Romero's body to drain his cardio, then mix in head strikes. Adesanya's takedown defense is excellent; he gets back up quickly. A fourth-round TKO is likely, but a decision is also possible. The host considered a parlay with Jamall Emmers.
The MMA Guru picks Israel Adesanya, citing his striking level, reach advantage (7 inches), and ability to get up from takedowns. He notes Romero's recent close losses and age (42), and believes Adesanya will pick him apart with front kicks and knees, eventually finishing him in the third or fourth round by TKO. He also mentions Romero's tendency to leave himself open to uppercuts.
Totals
| Fighter | KD | Sig. Str. | Sig. Str. % | Total Str. | TD | TD % | Sub. Att | Rev. | Ctrl |
|---|---|---|---|---|---|---|---|---|---|
| Paulo Costa | 1 | 125 of 284 | 44% | 125 of 284 | 1 of 4 | 25% | 0 | 0 | 0:12 |
| Yoel Romero | 1 | 118 of 213 | 55% | 118 of 213 | 0 of 0 | --- | 0 | 0 | 0:06 |
Per Round
| Rd | Fighter | KD | Sig. Str. | Sig. Str. % | Total Str. | TD | TD % | Sub. Att | Rev. | Ctrl |
|---|---|---|---|---|---|---|---|---|---|---|
| 1 | Paulo Costa | 1 | 32 of 69 | 46% | 32 of 69 | 0 of 2 | 0% | 0 | 0 | 0:06 |
| Yoel Romero | 1 | 37 of 69 | 53% | 37 of 69 | 0 of 0 | --- | 0 | 0 | 0:04 | |
| 2 | Paulo Costa | 0 | 40 of 91 | 43% | 40 of 91 | 1 of 1 | 100% | 0 | 0 | 0:01 |
| Yoel Romero | 0 | 37 of 71 | 52% | 37 of 71 | 0 of 0 | --- | 0 | 0 | 0:00 | |
| 3 | Paulo Costa | 0 | 53 of 124 | 42% | 53 of 124 | 0 of 1 | 0% | 0 | 0 | 0:05 |
| Yoel Romero | 0 | 44 of 73 | 60% | 44 of 73 | 0 of 0 | --- | 0 | 0 | 0:02 |
Significant Strikes
| Fighter | Sig. Str. | Sig. Str. % | Head | Body | Leg | Distance | Clinch | Ground |
|---|---|---|---|---|---|---|---|---|
| Paulo Costa | 125 of 284 | 44% | 96 of 244 | 11 of 20 | 18 of 20 | 118 of 276 | 7 of 8 | 0 of 0 |
| Yoel Romero | 118 of 213 | 55% | 67 of 148 | 46 of 58 | 5 of 7 | 110 of 202 | 5 of 5 | 3 of 6 |
Significant Strikes Per Round
| Rd | Fighter | Sig. Str. | Sig. Str. % | Head | Body | Leg | Distance | Clinch | Ground |
|---|---|---|---|---|---|---|---|---|---|
| 1 | Paulo Costa | 32 of 69 | 46% | 23 of 54 | 2 of 7 | 7 of 8 | 31 of 68 | 1 of 1 | 0 of 0 |
| Yoel Romero | 37 of 69 | 53% | 19 of 46 | 16 of 20 | 2 of 3 | 32 of 61 | 2 of 2 | 3 of 6 | |
| 2 | Paulo Costa | 40 of 91 | 43% | 28 of 77 | 6 of 7 | 6 of 7 | 39 of 90 | 1 of 1 | 0 of 0 |
| Yoel Romero | 37 of 71 | 52% | 24 of 53 | 12 of 17 | 1 of 1 | 36 of 70 | 1 of 1 | 0 of 0 | |
| 3 | Paulo Costa | 53 of 124 | 42% | 45 of 113 | 3 of 6 | 5 of 5 | 48 of 118 | 5 of 6 | 0 of 0 |
| Yoel Romero | 44 of 73 | 60% | 24 of 49 | 18 of 21 | 2 of 3 | 42 of 71 | 2 of 2 | 0 of 0 |
Totals
| Fighter | KD | Sig. Str. | Sig. Str. % | Total Str. | TD | TD % | Sub. Att | Rev. | Ctrl |
|---|---|---|---|---|---|---|---|---|---|
| Robert Whittaker | 0 | 128 of 326 | 39% | 129 of 328 | 0 of 1 | 0% | 0 | 0 | 0:37 |
| Yoel Romero | 2 | 111 of 240 | 46% | 149 of 287 | 3 of 10 | 30% | 0 | 0 | 4:21 |
Per Round
| Rd | Fighter | KD | Sig. Str. | Sig. Str. % | Total Str. | TD | TD % | Sub. Att | Rev. | Ctrl |
|---|---|---|---|---|---|---|---|---|---|---|
| 1 | Robert Whittaker | 0 | 33 of 85 | 38% | 33 of 85 | 0 of 0 | --- | 0 | 0 | 0:00 |
| Yoel Romero | 0 | 9 of 24 | 37% | 9 of 24 | 0 of 0 | --- | 0 | 0 | 0:00 | |
| 2 | Robert Whittaker | 0 | 29 of 77 | 37% | 29 of 77 | 0 of 0 | --- | 0 | 0 | 0:00 |
| Yoel Romero | 0 | 20 of 48 | 41% | 20 of 48 | 0 of 1 | 0% | 0 | 0 | 0:00 | |
| 3 | Robert Whittaker | 0 | 18 of 42 | 42% | 19 of 43 | 0 of 0 | --- | 0 | 0 | 0:37 |
| Yoel Romero | 1 | 36 of 77 | 46% | 54 of 97 | 2 of 6 | 33% | 0 | 0 | 2:11 | |
| 4 | Robert Whittaker | 0 | 34 of 93 | 36% | 34 of 94 | 0 of 0 | --- | 0 | 0 | 0:00 |
| Yoel Romero | 0 | 20 of 44 | 45% | 20 of 44 | 0 of 0 | --- | 0 | 0 | 0:00 | |
| 5 | Robert Whittaker | 0 | 14 of 29 | 48% | 14 of 29 | 0 of 1 | 0% | 0 | 0 | 0:00 |
| Yoel Romero | 1 | 26 of 47 | 55% | 46 of 74 | 1 of 3 | 33% | 0 | 0 | 2:10 |
Significant Strikes
| Fighter | Sig. Str. | Sig. Str. % | Head | Body | Leg | Distance | Clinch | Ground |
|---|---|---|---|---|---|---|---|---|
| Robert Whittaker | 128 of 326 | 39% | 57 of 225 | 23 of 39 | 48 of 62 | 119 of 308 | 9 of 17 | 0 of 1 |
| Yoel Romero | 111 of 240 | 46% | 76 of 194 | 19 of 27 | 16 of 19 | 66 of 177 | 25 of 40 | 20 of 23 |
Significant Strikes Per Round
| Rd | Fighter | Sig. Str. | Sig. Str. % | Head | Body | Leg | Distance | Clinch | Ground |
|---|---|---|---|---|---|---|---|---|---|
| 1 | Robert Whittaker | 33 of 85 | 38% | 12 of 58 | 2 of 4 | 19 of 23 | 33 of 85 | 0 of 0 | 0 of 0 |
| Yoel Romero | 9 of 24 | 37% | 3 of 15 | 2 of 4 | 4 of 5 | 9 of 24 | 0 of 0 | 0 of 0 | |
| 2 | Robert Whittaker | 29 of 77 | 37% | 14 of 57 | 6 of 8 | 9 of 12 | 28 of 73 | 1 of 4 | 0 of 0 |
| Yoel Romero | 20 of 48 | 41% | 8 of 33 | 4 of 5 | 8 of 10 | 19 of 47 | 1 of 1 | 0 of 0 | |
| 3 | Robert Whittaker | 18 of 42 | 42% | 10 of 28 | 5 of 9 | 3 of 5 | 10 of 29 | 8 of 13 | 0 of 0 |
| Yoel Romero | 36 of 77 | 46% | 33 of 73 | 3 of 4 | 0 of 0 | 8 of 34 | 22 of 36 | 6 of 7 | |
| 4 | Robert Whittaker | 34 of 93 | 36% | 16 of 65 | 7 of 14 | 11 of 14 | 34 of 93 | 0 of 0 | 0 of 0 |
| Yoel Romero | 20 of 44 | 45% | 14 of 37 | 4 of 5 | 2 of 2 | 20 of 44 | 0 of 0 | 0 of 0 | |
| 5 | Robert Whittaker | 14 of 29 | 48% | 5 of 17 | 3 of 4 | 6 of 8 | 14 of 28 | 0 of 0 | 0 of 1 |
| Yoel Romero | 26 of 47 | 55% | 18 of 36 | 6 of 9 | 2 of 2 | 10 of 28 | 2 of 3 | 14 of 16 |
Totals
| Fighter | KD | Sig. Str. | Sig. Str. % | Total Str. | TD | TD % | Sub. Att | Rev. | Ctrl |
|---|---|---|---|---|---|---|---|---|---|
| Yoel Romero | 1 | 45 of 92 | 48% | 52 of 99 | 0 of 0 | --- | 0 | 0 | 0:08 |
| Luke Rockhold | 0 | 45 of 119 | 37% | 45 of 119 | 0 of 0 | --- | 0 | 0 | 0:00 |
Per Round
| Rd | Fighter | KD | Sig. Str. | Sig. Str. % | Total Str. | TD | TD % | Sub. Att | Rev. | Ctrl |
|---|---|---|---|---|---|---|---|---|---|---|
| 1 | Yoel Romero | 0 | 10 of 27 | 37% | 10 of 27 | 0 of 0 | --- | 0 | 0 | 0:00 |
| Luke Rockhold | 0 | 18 of 41 | 43% | 18 of 41 | 0 of 0 | --- | 0 | 0 | 0:00 | |
| 2 | Yoel Romero | 0 | 24 of 46 | 52% | 31 of 53 | 0 of 0 | --- | 0 | 0 | 0:06 |
| Luke Rockhold | 0 | 17 of 51 | 33% | 17 of 51 | 0 of 0 | --- | 0 | 0 | 0:00 | |
| 3 | Yoel Romero | 1 | 11 of 19 | 57% | 11 of 19 | 0 of 0 | --- | 0 | 0 | 0:02 |
| Luke Rockhold | 0 | 10 of 27 | 37% | 10 of 27 | 0 of 0 | --- | 0 | 0 | 0:00 |
Significant Strikes
| Fighter | Sig. Str. | Sig. Str. % | Head | Body | Leg | Distance | Clinch | Ground |
|---|---|---|---|---|---|---|---|---|
| Yoel Romero | 45 of 92 | 48% | 23 of 60 | 10 of 17 | 12 of 15 | 31 of 73 | 13 of 18 | 1 of 1 |
| Luke Rockhold | 45 of 119 | 37% | 22 of 87 | 10 of 15 | 13 of 17 | 44 of 118 | 1 of 1 | 0 of 0 |
Significant Strikes Per Round
| Rd | Fighter | Sig. Str. | Sig. Str. % | Head | Body | Leg | Distance | Clinch | Ground |
|---|---|---|---|---|---|---|---|---|---|
| 1 | Yoel Romero | 10 of 27 | 37% | 3 of 15 | 1 of 4 | 6 of 8 | 10 of 27 | 0 of 0 | 0 of 0 |
| Luke Rockhold | 18 of 41 | 43% | 3 of 21 | 4 of 7 | 11 of 13 | 18 of 41 | 0 of 0 | 0 of 0 | |
| 2 | Yoel Romero | 24 of 46 | 52% | 13 of 30 | 7 of 11 | 4 of 5 | 11 of 28 | 13 of 18 | 0 of 0 |
| Luke Rockhold | 17 of 51 | 33% | 10 of 40 | 6 of 8 | 1 of 3 | 16 of 50 | 1 of 1 | 0 of 0 | |
| 3 | Yoel Romero | 11 of 19 | 57% | 7 of 15 | 2 of 2 | 2 of 2 | 10 of 18 | 0 of 0 | 1 of 1 |
| Luke Rockhold | 10 of 27 | 37% | 9 of 26 | 0 of 0 | 1 of 1 | 10 of 27 | 0 of 0 | 0 of 0 |
Totals
| Fighter | KD | Sig. Str. | Sig. Str. % | Total Str. | TD | TD % | Sub. Att | Rev. | Ctrl |
|---|---|---|---|---|---|---|---|---|---|
| Robert Whittaker | 0 | 48 of 107 | 44% | 114 of 175 | 4 of 18 | 22% | 0 | 0 | 5:15 |
| Yoel Romero | 0 | 74 of 221 | 33% | 94 of 244 | 0 of 0 | --- | 0 | 0 | 1:33 |
Per Round
| Rd | Fighter | KD | Sig. Str. | Sig. Str. % | Total Str. | TD | TD % | Sub. Att | Rev. | Ctrl |
|---|---|---|---|---|---|---|---|---|---|---|
| 1 | Robert Whittaker | 0 | 12 of 18 | 66% | 14 of 20 | 1 of 4 | 25% | 0 | 0 | 0:53 |
| Yoel Romero | 0 | 7 of 25 | 28% | 7 of 25 | 0 of 0 | --- | 0 | 0 | 0:00 | |
| 2 | Robert Whittaker | 0 | 6 of 12 | 50% | 49 of 55 | 2 of 6 | 33% | 0 | 0 | 3:20 |
| Yoel Romero | 0 | 6 of 22 | 27% | 10 of 27 | 0 of 0 | --- | 0 | 0 | 0:00 | |
| 3 | Robert Whittaker | 0 | 5 of 16 | 31% | 5 of 16 | 0 of 3 | 0% | 0 | 0 | 0:00 |
| Yoel Romero | 0 | 11 of 53 | 20% | 13 of 55 | 0 of 0 | --- | 0 | 0 | 0:00 | |
| 4 | Robert Whittaker | 0 | 7 of 18 | 38% | 8 of 19 | 1 of 4 | 25% | 0 | 0 | 1:02 |
| Yoel Romero | 0 | 19 of 42 | 45% | 19 of 42 | 0 of 0 | --- | 0 | 0 | 0:05 | |
| 5 | Robert Whittaker | 0 | 18 of 43 | 41% | 38 of 65 | 0 of 1 | 0% | 0 | 0 | 0:00 |
| Yoel Romero | 0 | 31 of 79 | 39% | 45 of 95 | 0 of 0 | --- | 0 | 0 | 1:28 |
Significant Strikes
| Fighter | Sig. Str. | Sig. Str. % | Head | Body | Leg | Distance | Clinch | Ground |
|---|---|---|---|---|---|---|---|---|
| Robert Whittaker | 48 of 107 | 44% | 20 of 68 | 12 of 18 | 16 of 21 | 41 of 100 | 3 of 3 | 4 of 4 |
| Yoel Romero | 74 of 221 | 33% | 46 of 163 | 23 of 52 | 5 of 6 | 59 of 195 | 7 of 12 | 8 of 14 |
Significant Strikes Per Round
| Rd | Fighter | Sig. Str. | Sig. Str. % | Head | Body | Leg | Distance | Clinch | Ground |
|---|---|---|---|---|---|---|---|---|---|
| 1 | Robert Whittaker | 12 of 18 | 66% | 2 of 8 | 3 of 3 | 7 of 7 | 10 of 16 | 2 of 2 | 0 of 0 |
| Yoel Romero | 7 of 25 | 28% | 4 of 19 | 2 of 5 | 1 of 1 | 6 of 21 | 1 of 4 | 0 of 0 | |
| 2 | Robert Whittaker | 6 of 12 | 50% | 4 of 8 | 2 of 3 | 0 of 1 | 3 of 9 | 1 of 1 | 2 of 2 |
| Yoel Romero | 6 of 22 | 27% | 2 of 14 | 3 of 6 | 1 of 2 | 3 of 18 | 3 of 4 | 0 of 0 | |
| 3 | Robert Whittaker | 5 of 16 | 31% | 2 of 11 | 1 of 3 | 2 of 2 | 5 of 16 | 0 of 0 | 0 of 0 |
| Yoel Romero | 11 of 53 | 20% | 8 of 36 | 2 of 16 | 1 of 1 | 10 of 51 | 1 of 2 | 0 of 0 | |
| 4 | Robert Whittaker | 7 of 18 | 38% | 2 of 10 | 1 of 1 | 4 of 7 | 5 of 16 | 0 of 0 | 2 of 2 |
| Yoel Romero | 19 of 42 | 45% | 11 of 31 | 7 of 10 | 1 of 1 | 16 of 38 | 2 of 2 | 1 of 2 | |
| 5 | Robert Whittaker | 18 of 43 | 41% | 10 of 31 | 5 of 8 | 3 of 4 | 18 of 43 | 0 of 0 | 0 of 0 |
| Yoel Romero | 31 of 79 | 39% | 21 of 63 | 9 of 15 | 1 of 1 | 24 of 67 | 0 of 0 | 7 of 12 |
Play-by-Play
View on SherdogRound 1
Dan Miragliotta is the referee for tonight's 185-pound main event, which remains a five-rounder but is no longer a title fight due to Yoel Romero missing weight on Friday. Whittaker comes out attacking the lead leg of Romero with side kicks and oblique stomps, then switches to traditional leg kicks in between pumping his jab. Romero hasn't offered up anything through the first two minutes, seemingly content to stay on his back foot and figure out Whittaker's puzzle. When Romero does start striking, he's throwing big, single power punches. Whittaker maintains a more measured approach, dipping in and out of range, attacking Romero's legs while keeping his jab in the Cuban's face. Romero keeps his guard high, shelling up when Whittaker comes forward to jab. Whittaker crouches low, goes body-head and then ducks under a spinning backfist from Romero right at the horn.
Sherdog Scores
Tristen Critchfield scores the round 10-9 Whittaker
Ben Duffy scores the round 10-9 Whittaker
Chris Nelson scores the round 10-9 Whittaker
Round 2
Whittaker starts the second round in the same manner as the first, going after the left leg of Romero with stomps and kicks. Romero continues to fight at a sluggish pace, seemingly waiting for an opportunity to counterstrike, but rarely offering up any counters. Whittaker is staying busy, keeping his distance and picking at the "Soldier of God" with jabs and body kicks. Even when Romero comes forward, he's not throwing much, though he does manage to put a kick or knee on Whittaker's midsection. Romero whiffs on a slow-motion spinning backfist. Whittaker catches him turning and pops him with a jab, and Romero's right eye begins swelling up instantly. Romero blocks a head kick, clinches up with Whittaker, but releases the champion before attempting a takedown. In the final 30 seconds, Romero is standing stock-still in front of Whittaker, who is happy to feed his stationary target some more jabs and leg kicks.
Sherdog Scores
Tristen Critchfield scores the round 10-9 Whittaker
Ben Duffy scores the round 10-9 Whittaker
Chris Nelson scores the round 10-9 Whittaker
Round 3
Romero comes out aggressive and stings Whittaker with a huge right hand in the first 30 seconds. The champion hits the deck momentarily, then scrambles away on roller skates, trying to avoid Romero's follow-up fire. Romero can't keep Whittaker on the ground, but back on the feet, he's able to rock the young Aussie with punches and elbows up against the fence. Nearly two minutes in, Whittaker still hasn't recovered from the early knockdown, though he's started to tag Romero back as they fight in the clinch. Romero backs up to land another power punch, then hugs Whittaker against the cage. Whittaker reverses to the outside position and puts a knee in the breadbasket of Romero, who's looking tired after expending a lot of energy going for the finish. Whittaker eats another flurry of punches on the fence and is forced to go on the retreat. Romero tries to walk him down, but the "Soldier of God" marches straight into a head kick. With under a minute to go in the third, both men are starting to look spent. Whittaker takes the outside position in the clinch, and both fighters look content to take a 20-second breather at round's end.
Sherdog Scores
Tristen Critchfield scores the round 10-9 Romero
Ben Duffy scores the round 10-9 Romero
Chris Nelson scores the round 10-9 Romero
Round 4
The championship rounds begin with the fighters toe-to-toe in the center of the cage. Whittaker looks to be the fresher fighter, slightly bouncing on his toes as he sizes up the virtually motionless Romero. Backing up Romero to the fence, Whittaker keeps his distance while attacking with jabs and low kicks. Romero blocks a right high kick, so Whittaker fires a few at his knees and midsection. A front kick clips Romero on the cup, and referee Miragliotta pauses the fight to give Romero time to recover from the accidental foul. Action resumes with 3:30 on the clock, and Whittaker looks refreshed from the rest as he attacks Romero's midsection with hard front kicks. Romero nods his head in acknowledgement as he inches forward on the champion, ripping a left hand to the champion's body. The middleweights are trading shots in the final minute when a right hand from Romero puts Whittaker on rubber legs. The champion recovers before the horn, but not before taking another Cuban right hand on the chin.
Sherdog Scores
Tristen Critchfield scores the round 10-9 Romero
Ben Duffy scores the round 10-9 Romero
Chris Nelson scores the round 10-9 Romero
Round 5
Whittaker gets caught off-balance with a Romero one-two, circles away and comes back to hit the challenger with a body kick. Romero is still attempting spinning strikes, albeit very slow ones at this late stage of the bout. Meanwhile, Whittaker continues to stomp on Romero's left knee, just as he was in the opening round. Romero explodes forward and floors Whittaker with a hellacious left hand, then tries to pound out the wounded champion. Whittaker tries to drive forward on a single-leg, but the Olympic wrestler defends the takedown with ease and continues to bash Whittaker from the sprawl. Whittaker climbs back to his feet but doesn't let go of the leg, and he soon finds himself back on his knees. Whittaker stands up, eats a knee, now has his legs kicked out by Romero, who's in control from the rear waistlock position. Whittaker still hasn't recovered from the knockdown, isn't doing much of anything as the final two minutes tick away and Romero holds him in place. Referee Miragliotta separates the fighters with under a minute remaining. Whittaker catches Romero throwing a spinning kick and trips him to the ground, but Romero springs back up to finish the fight on his feet.
Sherdog Scores
Tristen Critchfield scores the round 10-9 Romero (48-47 Romero)
Ben Duffy scores the round 10-8 Romero (48-46 Romero)
Chris Nelson scores the round 10-8 Romero (48-46 Romero)
The Official Result
Robert Whittaker def. Yoel Romero via Split Decision (48-47, 48-47, 47-48) R5 5:00
Totals
| Fighter | KD | Sig. Str. | Sig. Str. % | Total Str. | TD | TD % | Sub. Att | Rev. | Ctrl |
|---|---|---|---|---|---|---|---|---|---|
| Yoel Romero | 0 | 12 of 47 | 25% | 16 of 54 | 1 of 8 | 12% | 0 | 0 | 0:25 |
| Chris Weidman | 1 | 18 of 40 | 45% | 27 of 51 | 2 of 3 | 66% | 0 | 0 | 1:52 |
Per Round
| Rd | Fighter | KD | Sig. Str. | Sig. Str. % | Total Str. | TD | TD % | Sub. Att | Rev. | Ctrl |
|---|---|---|---|---|---|---|---|---|---|---|
| 1 | Yoel Romero | 0 | 7 of 24 | 29% | 9 of 27 | 1 of 4 | 25% | 0 | 0 | 0:25 |
| Chris Weidman | 0 | 3 of 10 | 30% | 5 of 12 | 0 of 0 | --- | 0 | 0 | 0:00 | |
| 2 | Yoel Romero | 0 | 4 of 21 | 19% | 6 of 25 | 0 of 4 | 0% | 0 | 0 | 0:00 |
| Chris Weidman | 0 | 8 of 21 | 38% | 15 of 30 | 2 of 3 | 66% | 0 | 0 | 1:48 | |
| 3 | Yoel Romero | 0 | 1 of 2 | 50% | 1 of 2 | 0 of 0 | --- | 0 | 0 | 0:00 |
| Chris Weidman | 1 | 7 of 9 | 77% | 7 of 9 | 0 of 0 | --- | 0 | 0 | 0:04 |
Significant Strikes
| Fighter | Sig. Str. | Sig. Str. % | Head | Body | Leg | Distance | Clinch | Ground |
|---|---|---|---|---|---|---|---|---|
| Yoel Romero | 12 of 47 | 25% | 2 of 22 | 6 of 15 | 4 of 10 | 12 of 46 | 0 of 1 | 0 of 0 |
| Chris Weidman | 18 of 40 | 45% | 13 of 32 | 2 of 3 | 3 of 5 | 9 of 24 | 1 of 2 | 8 of 14 |
Significant Strikes Per Round
| Rd | Fighter | Sig. Str. | Sig. Str. % | Head | Body | Leg | Distance | Clinch | Ground |
|---|---|---|---|---|---|---|---|---|---|
| 1 | Yoel Romero | 7 of 24 | 29% | 1 of 11 | 4 of 8 | 2 of 5 | 7 of 23 | 0 of 1 | 0 of 0 |
| Chris Weidman | 3 of 10 | 30% | 2 of 6 | 1 of 2 | 0 of 2 | 3 of 9 | 0 of 1 | 0 of 0 | |
| 2 | Yoel Romero | 4 of 21 | 19% | 1 of 11 | 1 of 6 | 2 of 4 | 4 of 21 | 0 of 0 | 0 of 0 |
| Chris Weidman | 8 of 21 | 38% | 5 of 18 | 1 of 1 | 2 of 2 | 4 of 13 | 1 of 1 | 3 of 7 | |
| 3 | Yoel Romero | 1 of 2 | 50% | 0 of 0 | 1 of 1 | 0 of 1 | 1 of 2 | 0 of 0 | 0 of 0 |
| Chris Weidman | 7 of 9 | 77% | 6 of 8 | 0 of 0 | 1 of 1 | 2 of 2 | 0 of 0 | 5 of 7 |
Totals
| Fighter | KD | Sig. Str. | Sig. Str. % | Total Str. | TD | TD % | Sub. Att | Rev. | Ctrl |
|---|---|---|---|---|---|---|---|---|---|
| Yoel Romero | 0 | 30 of 52 | 57% | 42 of 67 | 1 of 7 | 14% | 0 | 0 | 2:33 |
| Jacare Souza | 1 | 46 of 92 | 50% | 56 of 104 | 0 of 1 | 0% | 0 | 0 | 1:58 |
Per Round
| Rd | Fighter | KD | Sig. Str. | Sig. Str. % | Total Str. | TD | TD % | Sub. Att | Rev. | Ctrl |
|---|---|---|---|---|---|---|---|---|---|---|
| 1 | Yoel Romero | 0 | 5 of 16 | 31% | 5 of 16 | 0 of 0 | --- | 0 | 0 | 0:00 |
| Jacare Souza | 1 | 27 of 57 | 47% | 30 of 61 | 0 of 0 | --- | 0 | 0 | 1:45 | |
| 2 | Yoel Romero | 0 | 7 of 13 | 53% | 7 of 13 | 0 of 4 | 0% | 0 | 0 | 0:08 |
| Jacare Souza | 0 | 6 of 14 | 42% | 6 of 14 | 0 of 1 | 0% | 0 | 0 | 0:05 | |
| 3 | Yoel Romero | 0 | 18 of 23 | 78% | 30 of 38 | 1 of 3 | 33% | 0 | 0 | 2:25 |
| Jacare Souza | 0 | 13 of 21 | 61% | 20 of 29 | 0 of 0 | --- | 0 | 0 | 0:08 |
Significant Strikes
| Fighter | Sig. Str. | Sig. Str. % | Head | Body | Leg | Distance | Clinch | Ground |
|---|---|---|---|---|---|---|---|---|
| Yoel Romero | 30 of 52 | 57% | 16 of 35 | 11 of 14 | 3 of 3 | 22 of 44 | 0 of 0 | 8 of 8 |
| Jacare Souza | 46 of 92 | 50% | 37 of 80 | 5 of 6 | 4 of 6 | 24 of 50 | 0 of 1 | 22 of 41 |
Significant Strikes Per Round
| Rd | Fighter | Sig. Str. | Sig. Str. % | Head | Body | Leg | Distance | Clinch | Ground |
|---|---|---|---|---|---|---|---|---|---|
| 1 | Yoel Romero | 5 of 16 | 31% | 1 of 10 | 3 of 5 | 1 of 1 | 5 of 16 | 0 of 0 | 0 of 0 |
| Jacare Souza | 27 of 57 | 47% | 26 of 55 | 1 of 2 | 0 of 0 | 5 of 16 | 0 of 0 | 22 of 41 | |
| 2 | Yoel Romero | 7 of 13 | 53% | 3 of 8 | 3 of 4 | 1 of 1 | 7 of 13 | 0 of 0 | 0 of 0 |
| Jacare Souza | 6 of 14 | 42% | 2 of 8 | 2 of 2 | 2 of 4 | 6 of 14 | 0 of 0 | 0 of 0 | |
| 3 | Yoel Romero | 18 of 23 | 78% | 12 of 17 | 5 of 5 | 1 of 1 | 10 of 15 | 0 of 0 | 8 of 8 |
| Jacare Souza | 13 of 21 | 61% | 9 of 17 | 2 of 2 | 2 of 2 | 13 of 20 | 0 of 1 | 0 of 0 |
Totals
| Fighter | KD | Sig. Str. | Sig. Str. % | Total Str. | TD | TD % | Sub. Att | Rev. | Ctrl |
|---|---|---|---|---|---|---|---|---|---|
| Yoel Romero | 0 | 31 of 64 | 48% | 31 of 64 | 0 of 0 | --- | 0 | 0 | 0:00 |
| Lyoto Machida | 0 | 42 of 70 | 60% | 44 of 72 | 1 of 2 | 50% | 0 | 0 | 0:05 |
Per Round
| Rd | Fighter | KD | Sig. Str. | Sig. Str. % | Total Str. | TD | TD % | Sub. Att | Rev. | Ctrl |
|---|---|---|---|---|---|---|---|---|---|---|
| 1 | Yoel Romero | 0 | 12 of 28 | 42% | 12 of 28 | 0 of 0 | --- | 0 | 0 | 0:00 |
| Lyoto Machida | 0 | 15 of 30 | 50% | 15 of 30 | 0 of 0 | --- | 0 | 0 | 0:00 | |
| 2 | Yoel Romero | 0 | 16 of 26 | 61% | 16 of 26 | 0 of 0 | --- | 0 | 0 | 0:00 |
| Lyoto Machida | 0 | 17 of 27 | 62% | 17 of 27 | 0 of 1 | 0% | 0 | 0 | 0:00 | |
| 3 | Yoel Romero | 0 | 3 of 10 | 30% | 3 of 10 | 0 of 0 | --- | 0 | 0 | 0:00 |
| Lyoto Machida | 0 | 10 of 13 | 76% | 12 of 15 | 1 of 1 | 100% | 0 | 0 | 0:05 |
Significant Strikes
| Fighter | Sig. Str. | Sig. Str. % | Head | Body | Leg | Distance | Clinch | Ground |
|---|---|---|---|---|---|---|---|---|
| Yoel Romero | 31 of 64 | 48% | 6 of 27 | 11 of 20 | 14 of 17 | 31 of 63 | 0 of 1 | 0 of 0 |
| Lyoto Machida | 42 of 70 | 60% | 16 of 31 | 9 of 18 | 17 of 21 | 35 of 63 | 1 of 1 | 6 of 6 |
Significant Strikes Per Round
| Rd | Fighter | Sig. Str. | Sig. Str. % | Head | Body | Leg | Distance | Clinch | Ground |
|---|---|---|---|---|---|---|---|---|---|
| 1 | Yoel Romero | 12 of 28 | 42% | 2 of 12 | 5 of 9 | 5 of 7 | 12 of 28 | 0 of 0 | 0 of 0 |
| Lyoto Machida | 15 of 30 | 50% | 1 of 7 | 5 of 11 | 9 of 12 | 15 of 30 | 0 of 0 | 0 of 0 | |
| 2 | Yoel Romero | 16 of 26 | 61% | 4 of 9 | 5 of 9 | 7 of 8 | 16 of 25 | 0 of 1 | 0 of 0 |
| Lyoto Machida | 17 of 27 | 62% | 8 of 15 | 3 of 5 | 6 of 7 | 16 of 26 | 1 of 1 | 0 of 0 | |
| 3 | Yoel Romero | 3 of 10 | 30% | 0 of 6 | 1 of 2 | 2 of 2 | 3 of 10 | 0 of 0 | 0 of 0 |
| Lyoto Machida | 10 of 13 | 76% | 7 of 9 | 1 of 2 | 2 of 2 | 4 of 7 | 0 of 0 | 6 of 6 |
No comments yet. Be the first to share your thoughts!