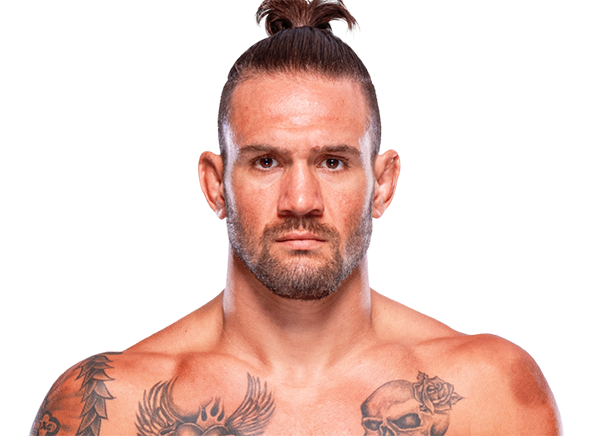
Career Averages - Christos Giagos
Career Averages - Mizuto Hirota
Christos Giagos - Fight History
Totals
| Fighter | KD | Sig. Str. | Sig. Str. % | Total Str. | TD | TD % | Sub. Att | Rev. | Ctrl |
|---|---|---|---|---|---|---|---|---|---|
| Ignacio Bahamondes | 1 | 40 of 68 | 58% | 40 of 69 | 0 of 0 | --- | 0 | 0 | 0:15 |
| Christos Giagos | 0 | 17 of 45 | 37% | 18 of 46 | 0 of 1 | 0% | 0 | 0 | 0:10 |
Per Round
| Rd | Fighter | KD | Sig. Str. | Sig. Str. % | Total Str. | TD | TD % | Sub. Att | Rev. | Ctrl |
|---|---|---|---|---|---|---|---|---|---|---|
| 1 | Ignacio Bahamondes | 1 | 40 of 68 | 58% | 40 of 69 | 0 of 0 | --- | 0 | 0 | 0:15 |
| Christos Giagos | 0 | 17 of 45 | 37% | 18 of 46 | 0 of 1 | 0% | 0 | 0 | 0:10 |
Significant Strikes
| Fighter | Sig. Str. | Sig. Str. % | Head | Body | Leg | Distance | Clinch | Ground |
|---|---|---|---|---|---|---|---|---|
| Ignacio Bahamondes | 40 of 68 | 58% | 26 of 53 | 8 of 9 | 6 of 6 | 33 of 56 | 7 of 12 | 0 of 0 |
| Christos Giagos | 17 of 45 | 37% | 7 of 31 | 3 of 7 | 7 of 7 | 16 of 44 | 1 of 1 | 0 of 0 |
Significant Strikes Per Round
| Rd | Fighter | Sig. Str. | Sig. Str. % | Head | Body | Leg | Distance | Clinch | Ground |
|---|---|---|---|---|---|---|---|---|---|
| 1 | Ignacio Bahamondes | 40 of 68 | 58% | 26 of 53 | 8 of 9 | 6 of 6 | 33 of 56 | 7 of 12 | 0 of 0 |
| Christos Giagos | 17 of 45 | 37% | 7 of 31 | 3 of 7 | 7 of 7 | 16 of 44 | 1 of 1 | 0 of 0 |
Angelo leans Ignacio Bahamondes because he believes Bahamondes' last loss was more about how good Ludovit Klein is rather than Bahamondes being bad. He acknowledges that Bahamondes has good takedown defense (85%) but that it failed in his last fight. He thinks Christos Giagos could win if he gets takedowns, but Angelo is on the Bahamondes side, though he admits he will be biting his nails over takedowns.
Big Brady picks Ignacio Bahamondes to win by second-round submission. He notes that Giagos will likely have early success with takedowns and wrestling, but will fade as the fight goes on due to poor cardio. Bahamondes will grow into the fight and finish Giagos in the second round.
Cody agrees, pointing to Giagos's pattern of fading after round 1, as seen in the Zellhuber fight. He notes Bahamondes's length and reach may make it hard for Giagos to land early, and that Bahamondes has never been knocked out. Cody thinks Bahamondes will take control as the fight goes on, and that Giagos's takedown threat diminishes as he tires.
Daniel Vreeland confidently picks Ignacio Bahamondes, praising his stance switching, range, and opportunistic submissions. He dismisses Bahamondes' losses to Melsik Baghdasaryan and Ludovit Klein as forgivable, noting Klein's suspicious transformation. Vreeland sees Christos Giagos as an athletic journeyman who fades after the first round, lacking depth beyond spamming hooks. He expects Bahamondes to frustrate Giagos with range and dominate past round one, possibly by finish.
Bahamondes is a talented striker with nasty Muay Thai and improving grappling. Giagos has early finishing power but fades if he doesn't get the finish. Bahamondes can weather the early storm, then take over in later rounds with his striking and cardio. Expect a TKO in the second or third round.
Paul is confident in Bahamondes, citing his length, chin, cardio, and striking. He notes Giagos is explosive but fades after 6-7 minutes, and that Bahamondes's takedown defense and ability to get up will neutralize Giagos's early wrestling. Paul expects Bahamondes to take over in rounds 2 and 3, possibly by TKO. He also suggests live betting Bahamondes if he loses the first round.
The host dismisses Giagos as a 'pensioner killer' with wins over older fighters like Ricky Glenn, Soroano, and Carlton Minus. He notes Bahamondes' lanky frame (6'2" at lightweight) and recent wins over Roosevelt Roberts, Ronu, and Trey Ogden. He predicts Bahamondes will sleep Giagos, ignoring technique and focusing on size advantage.
Totals
| Fighter | KD | Sig. Str. | Sig. Str. % | Total Str. | TD | TD % | Sub. Att | Rev. | Ctrl |
|---|---|---|---|---|---|---|---|---|---|
| Daniel Zellhuber | 0 | 36 of 101 | 35% | 36 of 101 | 0 of 0 | --- | 1 | 0 | 0:17 |
| Christos Giagos | 0 | 38 of 82 | 46% | 38 of 82 | 0 of 6 | 0% | 0 | 0 | 0:11 |
Per Round
| Rd | Fighter | KD | Sig. Str. | Sig. Str. % | Total Str. | TD | TD % | Sub. Att | Rev. | Ctrl |
|---|---|---|---|---|---|---|---|---|---|---|
| 1 | Daniel Zellhuber | 0 | 12 of 50 | 24% | 12 of 50 | 0 of 0 | --- | 0 | 0 | 0:00 |
| Christos Giagos | 0 | 26 of 52 | 50% | 26 of 52 | 0 of 2 | 0% | 0 | 0 | 0:00 | |
| 2 | Daniel Zellhuber | 0 | 24 of 51 | 47% | 24 of 51 | 0 of 0 | --- | 1 | 0 | 0:17 |
| Christos Giagos | 0 | 12 of 30 | 40% | 12 of 30 | 0 of 4 | 0% | 0 | 0 | 0:11 |
Significant Strikes
| Fighter | Sig. Str. | Sig. Str. % | Head | Body | Leg | Distance | Clinch | Ground |
|---|---|---|---|---|---|---|---|---|
| Daniel Zellhuber | 36 of 101 | 35% | 18 of 75 | 11 of 19 | 7 of 7 | 35 of 100 | 1 of 1 | 0 of 0 |
| Christos Giagos | 38 of 82 | 46% | 25 of 63 | 3 of 7 | 10 of 12 | 36 of 79 | 2 of 3 | 0 of 0 |
Significant Strikes Per Round
| Rd | Fighter | Sig. Str. | Sig. Str. % | Head | Body | Leg | Distance | Clinch | Ground |
|---|---|---|---|---|---|---|---|---|---|
| 1 | Daniel Zellhuber | 12 of 50 | 24% | 7 of 40 | 2 of 7 | 3 of 3 | 12 of 50 | 0 of 0 | 0 of 0 |
| Christos Giagos | 26 of 52 | 50% | 16 of 37 | 2 of 6 | 8 of 9 | 26 of 51 | 0 of 1 | 0 of 0 | |
| 2 | Daniel Zellhuber | 24 of 51 | 47% | 11 of 35 | 9 of 12 | 4 of 4 | 23 of 50 | 1 of 1 | 0 of 0 |
| Christos Giagos | 12 of 30 | 40% | 9 of 26 | 1 of 1 | 2 of 3 | 10 of 28 | 2 of 2 | 0 of 0 |
Angelo picks Daniel Zellhuber as the more technical striker with good takedown defense. He acknowledges Christos Giagos has a path if he pressures and wrestles, but doubts Giagos will stick to a game plan. He is not betting this fight yet.
Big Brady picks Zellhuber, noting his improved performance after a poor debut. He expects Giagos to have early success but fade due to cardio issues, and Zellhuber to take over as the fight progresses. He predicts a submission in the second round, possibly via guillotine when Giagos shoots.
Cody leans toward Giagos but is hesitant due to cardio concerns. He notes Giagos is a front-runner with big power early but fades. He thinks Zellhuber may work his way back into the fight in later rounds. Cody prefers to get a better live price but ultimately picks Giagos for the pregame show.
Daniel Levi has bet Zellhuber in all three UFC fights and is confident here. He attributes Zellhuber's debut loss to a 'debut stun' and believes he has recovered, as shown in his win over Lando Vannata. Levi sees Giagos as an athletic but limited fighter who fades down the stretch, while Zellhuber's length, creativity, and pressure should allow him to take over late and potentially get a finish.
Zellhuber has excellent footwork, range management, and volume striking, as shown in his win over Lando Vannata. Giagos is a wrestler who may have early success but will likely gas out. Zellhuber should pick him apart in the later rounds and get a finish, possibly by submission or TKO. I expect Giagos to revert to wrestling, but Zellhuber's conditioning and striking will be too much.
Paul picks Giagos as a live underdog, citing his physicality, wrestling, and power. He notes that Zellhuber looked green in his UFC debut against Trey Ogden, getting outworked and taken down. Paul believes Giagos can land early shots and get takedowns, though cardio is a concern. He has circled this bet and plans to add it to his card.
The MMA Guru picks Daniel Zellhuber over Christos Giagos, despite considering the underdog. He notes Zellhuber's reach advantage (77 inches) and dangerous striking. He criticizes Giagos's recent performance against Ricky Glenn, where Glenn looked old and slow, and notes Giagos has been dominated by others. He predicts Zellhuber may catch Giagos on the chin.
Totals
| Fighter | KD | Sig. Str. | Sig. Str. % | Total Str. | TD | TD % | Sub. Att | Rev. | Ctrl |
|---|---|---|---|---|---|---|---|---|---|
| Christos Giagos | 0 | 2 of 11 | 18% | 2 of 11 | 0 of 0 | --- | 0 | 0 | 0:00 |
| Ricky Glenn | 1 | 9 of 16 | 56% | 9 of 16 | 0 of 0 | --- | 0 | 0 | 0:02 |
Per Round
| Rd | Fighter | KD | Sig. Str. | Sig. Str. % | Total Str. | TD | TD % | Sub. Att | Rev. | Ctrl |
|---|---|---|---|---|---|---|---|---|---|---|
| 1 | Christos Giagos | 0 | 2 of 11 | 18% | 2 of 11 | 0 of 0 | --- | 0 | 0 | 0:00 |
| Ricky Glenn | 1 | 9 of 16 | 56% | 9 of 16 | 0 of 0 | --- | 0 | 0 | 0:02 |
Significant Strikes
| Fighter | Sig. Str. | Sig. Str. % | Head | Body | Leg | Distance | Clinch | Ground |
|---|---|---|---|---|---|---|---|---|
| Christos Giagos | 2 of 11 | 18% | 1 of 7 | 0 of 1 | 1 of 3 | 2 of 11 | 0 of 0 | 0 of 0 |
| Ricky Glenn | 9 of 16 | 56% | 4 of 11 | 3 of 3 | 2 of 2 | 8 of 15 | 0 of 0 | 1 of 1 |
Significant Strikes Per Round
| Rd | Fighter | Sig. Str. | Sig. Str. % | Head | Body | Leg | Distance | Clinch | Ground |
|---|---|---|---|---|---|---|---|---|---|
| 1 | Christos Giagos | 2 of 11 | 18% | 1 of 7 | 0 of 1 | 1 of 3 | 2 of 11 | 0 of 0 | 0 of 0 |
| Ricky Glenn | 9 of 16 | 56% | 4 of 11 | 3 of 3 | 2 of 2 | 8 of 15 | 0 of 0 | 1 of 1 |
Angelo picks Ricky Glenn because of his superior striking. He thinks Glenn's striking will be so much better that Giagos will struggle to get takedowns. He also notes Glenn has solid submission defense if taken down. He is not betting due to both fighters being inactive and not having won in a couple of years.
Big Brady picks Ricky Glenn to win by decision. He notes that Glenn has solid takedown defense and a very good get-up game, which will be a problem for Giagos, who tends to slow down as fights go on. Brady expects Giagos to have early success taking Glenn down, but Glenn will pop back up, and as Giagos fades, Glenn will take over in the second and third rounds. He trusts Glenn's cardio over Giagos's.
Cody picks Ricky Glenn, praising his cardio, durability, and striking volume. He notes Giagos is explosive but gasses quickly, often winning the first round but fading. Glenn has excellent takedown defense and submission defense, and he can get back to his feet. Cody believes Glenn will weather the early storm and take over in later rounds, possibly getting a late stoppage. He mentions a third-round TKO prop as a live play.
Connor picks Ricky Glenn, noting that Glenn is a slow-starting fighter who builds into fights and has a history of comebacks. He highlights Glenn's ability to stuff takedowns and win scrambles, turning them into top position where he is fearsome. Connor contrasts this with Giagos, who is a physical bully but has a rudimentary wrestle-boxing style and tends to crumble when pushed back.
Ricky Glenn is a solid all-around fighter with good cardio and defensive grappling. He should be able to stuff Giagos' early takedowns and take over in later rounds. Giagos has poor cardio and a limited striking game. However, Glenn has a history of hip injuries and layoffs, so his conditioning is a concern. If Glenn is anywhere near 80%, he should win by late finish or decision. Prediction: Glenn by third-round TKO.
Paul agrees with Cody, saying he is in complete agreement and has nothing to add. He implicitly picks Ricky Glenn.
The MMA Guru picks Ricky Glenn over Christos Giagos. He criticizes Giagos for losing to top-level competition and notes his wins are against low-level opponents. He praises Glenn's performances against good opponents like Dennis Bermudez and Gavin Tucker, and his short-notice majority draw with Grant Dawson. He thinks Glenn can out-grapple or out-strike Giagos and predicts a decision win, 29-28.
Zane agrees with Connor, picking Ricky Glenn. He emphasizes that Glenn is never the faster or harder hitter, but he is undeterred by Giagos's early success. Zane notes that Giagos has never lost the ability to be shocked when someone he bullied early works back into the fight, and he tends to crumble. Zane feels relatively confident in Glenn getting the win.
Totals
| Fighter | KD | Sig. Str. | Sig. Str. % | Total Str. | TD | TD % | Sub. Att | Rev. | Ctrl |
|---|---|---|---|---|---|---|---|---|---|
| Arman Tsarukyan | 1 | 22 of 31 | 70% | 27 of 37 | 0 of 1 | 0% | 0 | 0 | 0:11 |
| Christos Giagos | 0 | 1 of 6 | 16% | 4 of 11 | 0 of 0 | --- | 0 | 0 | 0:49 |
Per Round
| Rd | Fighter | KD | Sig. Str. | Sig. Str. % | Total Str. | TD | TD % | Sub. Att | Rev. | Ctrl |
|---|---|---|---|---|---|---|---|---|---|---|
| 1 | Arman Tsarukyan | 1 | 22 of 31 | 70% | 27 of 37 | 0 of 1 | 0% | 0 | 0 | 0:11 |
| Christos Giagos | 0 | 1 of 6 | 16% | 4 of 11 | 0 of 0 | --- | 0 | 0 | 0:49 |
Significant Strikes
| Fighter | Sig. Str. | Sig. Str. % | Head | Body | Leg | Distance | Clinch | Ground |
|---|---|---|---|---|---|---|---|---|
| Arman Tsarukyan | 22 of 31 | 70% | 21 of 29 | 1 of 1 | 0 of 1 | 4 of 10 | 0 of 0 | 18 of 21 |
| Christos Giagos | 1 of 6 | 16% | 0 of 5 | 1 of 1 | 0 of 0 | 1 of 5 | 0 of 1 | 0 of 0 |
Significant Strikes Per Round
| Rd | Fighter | Sig. Str. | Sig. Str. % | Head | Body | Leg | Distance | Clinch | Ground |
|---|---|---|---|---|---|---|---|---|---|
| 1 | Arman Tsarukyan | 22 of 31 | 70% | 21 of 29 | 1 of 1 | 0 of 1 | 4 of 10 | 0 of 0 | 18 of 21 |
| Christos Giagos | 1 of 6 | 16% | 0 of 5 | 1 of 1 | 0 of 0 | 1 of 5 | 0 of 1 | 0 of 0 |
Angelo is very confident in Arman Tsarukyan, calling him the biggest favorite on the card. He praises Arman's wrestling, striking, and athleticism, noting he improves between fights. He thinks Christos Giagos is tough but will be outmatched everywhere. He expects a one-sided beating and suggests the under on rounds might be worth a bet for plus money.
Big Brady is very confident in Arman Tsarukyan, citing his relentless wrestling and high pace. He notes Giagos has poor takedown defense and cardio, and has been finished five times. He predicts Tsarukyan will get a late finish, specifically a third-round submission, as Giagos slows down.
Cody is very confident in Tsarukyan, highlighting his youth, wrestling, and experience against tough competition. He believes Giagos' only path is wrestling, but Tsarukyan is a superior wrestler and will not be taken down. Cody predicts a late finish as Giagos gasses.
Daniel Levi picks Arman Tsarukyan to win. He says Giagos might make it competitive for five minutes before gassing, then Tsarukyan will take over with takedowns. He questions whether -800 is worth it for a decision win but is sure Tsarukyan wins. He mentions Tsarukyan's only scored over 100 fantasy points once (against Matt Frevola) but sees potential for a breakthrough.
Preet is very confident Tsarukyan will win and finish Giagos. He notes Tsarukyan's striking is improving and he owns Giagos everywhere. Giagos has poor cardio and will slow down, allowing Tsarukyan to get his first UFC finish. He likes Tsarukyan inside the distance at +170 and round 2-3 props.
Paul picks Tsarukyan as a parlay piece, noting that Giagos has suspect cardio and was outstruck by Sean Soriano before getting a submission. He believes Tsarukyan's wrestling and durability will be too much. Paul mentions he has Tsarukyan in a three-leg parlay.
The MMA Guru picks Arman Tsarukyan by submission in the second round, calling it a mismatch. He highlights Tsarukyan's well-rounded skills, great grappling, and cardio. He notes Giagos is not a prolific finisher and predicts Tsarukyan will easily get takedowns and finish with a rear-naked choke.
Totals
| Fighter | KD | Sig. Str. | Sig. Str. % | Total Str. | TD | TD % | Sub. Att | Rev. | Ctrl |
|---|---|---|---|---|---|---|---|---|---|
| Christos Giagos | 0 | 22 of 54 | 40% | 23 of 55 | 3 of 5 | 60% | 1 | 0 | 0:59 |
| Sean Soriano | 0 | 33 of 53 | 62% | 37 of 57 | 0 of 0 | --- | 0 | 0 | 0:00 |
Per Round
| Rd | Fighter | KD | Sig. Str. | Sig. Str. % | Total Str. | TD | TD % | Sub. Att | Rev. | Ctrl |
|---|---|---|---|---|---|---|---|---|---|---|
| 1 | Christos Giagos | 0 | 21 of 48 | 43% | 21 of 48 | 2 of 4 | 50% | 0 | 0 | 0:32 |
| Sean Soriano | 0 | 29 of 45 | 64% | 33 of 49 | 0 of 0 | --- | 0 | 0 | 0:00 | |
| 2 | Christos Giagos | 0 | 1 of 6 | 16% | 2 of 7 | 1 of 1 | 100% | 1 | 0 | 0:27 |
| Sean Soriano | 0 | 4 of 8 | 50% | 4 of 8 | 0 of 0 | --- | 0 | 0 | 0:00 |
Significant Strikes
| Fighter | Sig. Str. | Sig. Str. % | Head | Body | Leg | Distance | Clinch | Ground |
|---|---|---|---|---|---|---|---|---|
| Christos Giagos | 22 of 54 | 40% | 15 of 43 | 5 of 9 | 2 of 2 | 19 of 50 | 2 of 3 | 1 of 1 |
| Sean Soriano | 33 of 53 | 62% | 16 of 35 | 8 of 9 | 9 of 9 | 30 of 50 | 3 of 3 | 0 of 0 |
Significant Strikes Per Round
| Rd | Fighter | Sig. Str. | Sig. Str. % | Head | Body | Leg | Distance | Clinch | Ground |
|---|---|---|---|---|---|---|---|---|---|
| 1 | Christos Giagos | 21 of 48 | 43% | 14 of 37 | 5 of 9 | 2 of 2 | 18 of 44 | 2 of 3 | 1 of 1 |
| Sean Soriano | 29 of 45 | 64% | 13 of 28 | 8 of 9 | 8 of 8 | 26 of 42 | 3 of 3 | 0 of 0 | |
| 2 | Christos Giagos | 1 of 6 | 16% | 1 of 6 | 0 of 0 | 0 of 0 | 1 of 6 | 0 of 0 | 0 of 0 |
| Sean Soriano | 4 of 8 | 50% | 3 of 7 | 0 of 0 | 1 of 1 | 4 of 8 | 0 of 0 | 0 of 0 |
Giagos has a clear path to victory via takedowns and top control. Soriano is on short notice and has historically poor takedown defense, giving up his back. Giagos averages about three takedowns per 15 minutes, though his cardio fades in round three. He should ride out at least two rounds for a decision win.
Cody picks Giagos, emphasizing that Soriano's takedown defense is non-existent and he gives up submissions easily. Cody believes Giagos will take him down and control the fight. He notes that Soriano's only path to victory is a first-round KO, but Giagos is durable.
Daniel Levi picks Sean Soriano as a dog, citing his technical kickboxing and the possibility that Giagos gasses. He notes that both fighters have cardio issues, but Soriano's striking could give him an edge if he doesn't get taken down. Levi is concerned about Soriano's history of gassing and getting choked out, but thinks at the dog price it's worth a shot.
The host picks Giagos but expresses significant hesitation. He notes Giagos has decent striking but his bread and butter is grinding opponents on the ground, though his cardio looks suspect. He worries that if Soriano can stop takedowns and get his hands going, it could cause Giagos problems later in the fight. He ultimately thinks Giagos grinds out a decision but says he just can't trust him and thinks the line is too wide.
Paul picks Giagos, noting that Soriano has a clear weakness: he cannot stop takedowns and gives up his back. Paul believes Giagos will spam takedowns and either win by submission or decision. He mentions that Giagos is a decision machine but Soriano leaves his neck out, making a submission possible.
The MMA Guru picks Christos Giagos over Sean Soriano, citing Giagos's impressive performance on short notice against Carlton Minus and a competitive fight with Drakkar Klose. He questions Soriano's recent win over an older Noah Lahat and notes Soriano is stepping in on short notice. He predicts Giagos will win the grappling exchanges and land more on the feet, winning a unanimous decision 30-27.
Totals
| Fighter | KD | Sig. Str. | Sig. Str. % | Total Str. | TD | TD % | Sub. Att | Rev. | Ctrl |
|---|---|---|---|---|---|---|---|---|---|
| Christos Giagos | 0 | 31 of 67 | 46% | 76 of 124 | 5 of 15 | 33% | 0 | 0 | 8:57 |
| Carlton Minus | 0 | 28 of 80 | 35% | 29 of 81 | 0 of 0 | --- | 0 | 0 | 0:00 |
Per Round
| Rd | Fighter | KD | Sig. Str. | Sig. Str. % | Total Str. | TD | TD % | Sub. Att | Rev. | Ctrl |
|---|---|---|---|---|---|---|---|---|---|---|
| 1 | Christos Giagos | 0 | 13 of 19 | 68% | 26 of 37 | 3 of 3 | 100% | 0 | 0 | 3:40 |
| Carlton Minus | 0 | 2 of 7 | 28% | 2 of 7 | 0 of 0 | --- | 0 | 0 | 0:00 | |
| 2 | Christos Giagos | 0 | 6 of 15 | 40% | 34 of 47 | 1 of 2 | 50% | 0 | 0 | 3:34 |
| Carlton Minus | 0 | 7 of 18 | 38% | 7 of 18 | 0 of 0 | --- | 0 | 0 | 0:00 | |
| 3 | Christos Giagos | 0 | 12 of 33 | 36% | 16 of 40 | 1 of 10 | 10% | 0 | 0 | 1:43 |
| Carlton Minus | 0 | 19 of 55 | 34% | 20 of 56 | 0 of 0 | --- | 0 | 0 | 0:00 |
Significant Strikes
| Fighter | Sig. Str. | Sig. Str. % | Head | Body | Leg | Distance | Clinch | Ground |
|---|---|---|---|---|---|---|---|---|
| Christos Giagos | 31 of 67 | 46% | 23 of 57 | 3 of 5 | 5 of 5 | 17 of 50 | 1 of 1 | 13 of 16 |
| Carlton Minus | 28 of 80 | 35% | 18 of 64 | 4 of 9 | 6 of 7 | 28 of 79 | 0 of 1 | 0 of 0 |
Significant Strikes Per Round
| Rd | Fighter | Sig. Str. | Sig. Str. % | Head | Body | Leg | Distance | Clinch | Ground |
|---|---|---|---|---|---|---|---|---|---|
| 1 | Christos Giagos | 13 of 19 | 68% | 11 of 17 | 0 of 0 | 2 of 2 | 3 of 6 | 0 of 0 | 10 of 13 |
| Carlton Minus | 2 of 7 | 28% | 0 of 5 | 0 of 0 | 2 of 2 | 2 of 7 | 0 of 0 | 0 of 0 | |
| 2 | Christos Giagos | 6 of 15 | 40% | 4 of 12 | 2 of 3 | 0 of 0 | 3 of 12 | 0 of 0 | 3 of 3 |
| Carlton Minus | 7 of 18 | 38% | 3 of 13 | 1 of 2 | 3 of 3 | 7 of 18 | 0 of 0 | 0 of 0 | |
| 3 | Christos Giagos | 12 of 33 | 36% | 8 of 28 | 1 of 2 | 3 of 3 | 11 of 32 | 1 of 1 | 0 of 0 |
| Carlton Minus | 19 of 55 | 34% | 15 of 46 | 3 of 7 | 1 of 2 | 19 of 54 | 0 of 1 | 0 of 0 |
Big Brady picks Christos Giagos over Carlton Minus, noting Giagos' pressure and the small cage favoring him. He is underwhelmed by Minus' tape (no power, poor takedown defense) and believes Giagos can win by decision or possibly finish. However, he acknowledges Giagos is coming off an injury and layoff, which explains the shorter odds.
The host picks Giagos but is hesitant due to his long layoff and the close nature of the fight. He believes Giagos' grappling and wrestling will be the difference, but notes Minus could make it close on the feet. He recommends Giagos by decision and advises against parlaying him.
The Guru picks Christos Giagos, noting he is the bigger fighter and has good wins including a dominant performance over Gavin Tucker. He criticizes Carlton Minus for a poor UFC debut and lack of quality wins. He predicts a submission win for Giagos in the second or third round.
Totals
| Fighter | KD | Sig. Str. | Sig. Str. % | Total Str. | TD | TD % | Sub. Att | Rev. | Ctrl |
|---|---|---|---|---|---|---|---|---|---|
| Drakkar Klose | 0 | 87 of 155 | 56% | 113 of 186 | 2 of 5 | 40% | 1 | 0 | 3:19 |
| Christos Giagos | 0 | 99 of 160 | 61% | 159 of 223 | 2 of 7 | 28% | 0 | 0 | 3:42 |
Per Round
| Rd | Fighter | KD | Sig. Str. | Sig. Str. % | Total Str. | TD | TD % | Sub. Att | Rev. | Ctrl |
|---|---|---|---|---|---|---|---|---|---|---|
| 1 | Drakkar Klose | 0 | 24 of 47 | 51% | 39 of 64 | 0 of 0 | --- | 0 | 0 | 0:18 |
| Christos Giagos | 0 | 21 of 41 | 51% | 53 of 73 | 0 of 1 | 0% | 0 | 0 | 1:22 | |
| 2 | Drakkar Klose | 0 | 22 of 32 | 68% | 29 of 42 | 2 of 4 | 50% | 1 | 0 | 1:43 |
| Christos Giagos | 0 | 37 of 48 | 77% | 50 of 63 | 1 of 1 | 100% | 0 | 0 | 2:05 | |
| 3 | Drakkar Klose | 0 | 41 of 76 | 53% | 45 of 80 | 0 of 1 | 0% | 0 | 0 | 1:18 |
| Christos Giagos | 0 | 41 of 71 | 57% | 56 of 87 | 1 of 5 | 20% | 0 | 0 | 0:15 |
Significant Strikes
| Fighter | Sig. Str. | Sig. Str. % | Head | Body | Leg | Distance | Clinch | Ground |
|---|---|---|---|---|---|---|---|---|
| Drakkar Klose | 87 of 155 | 56% | 55 of 117 | 29 of 33 | 3 of 5 | 69 of 127 | 16 of 23 | 2 of 5 |
| Christos Giagos | 99 of 160 | 61% | 56 of 114 | 29 of 30 | 14 of 16 | 39 of 93 | 38 of 40 | 22 of 27 |
Significant Strikes Per Round
| Rd | Fighter | Sig. Str. | Sig. Str. % | Head | Body | Leg | Distance | Clinch | Ground |
|---|---|---|---|---|---|---|---|---|---|
| 1 | Drakkar Klose | 24 of 47 | 51% | 7 of 28 | 15 of 16 | 2 of 3 | 17 of 38 | 7 of 9 | 0 of 0 |
| Christos Giagos | 21 of 41 | 51% | 4 of 23 | 13 of 13 | 4 of 5 | 9 of 28 | 12 of 13 | 0 of 0 | |
| 2 | Drakkar Klose | 22 of 32 | 68% | 18 of 26 | 4 of 5 | 0 of 1 | 18 of 23 | 2 of 4 | 2 of 5 |
| Christos Giagos | 37 of 48 | 77% | 27 of 37 | 8 of 9 | 2 of 2 | 7 of 12 | 9 of 10 | 21 of 26 | |
| 3 | Drakkar Klose | 41 of 76 | 53% | 30 of 63 | 10 of 12 | 1 of 1 | 34 of 66 | 7 of 10 | 0 of 0 |
| Christos Giagos | 41 of 71 | 57% | 25 of 54 | 8 of 8 | 8 of 9 | 23 of 53 | 17 of 17 | 1 of 1 |
Mizuto Hirota - Fight History
Totals
| Fighter | KD | Sig. Str. | Sig. Str. % | Total Str. | TD | TD % | Sub. Att | Rev. | Ctrl |
|---|---|---|---|---|---|---|---|---|---|
| Christos Giagos | 0 | 19 of 55 | 34% | 47 of 86 | 0 of 0 | --- | 1 | 0 | 1:05 |
| Mizuto Hirota | 0 | 31 of 90 | 34% | 63 of 131 | 5 of 10 | 50% | 0 | 1 | 9:21 |
Per Round
| Rd | Fighter | KD | Sig. Str. | Sig. Str. % | Total Str. | TD | TD % | Sub. Att | Rev. | Ctrl |
|---|---|---|---|---|---|---|---|---|---|---|
| 1 | Christos Giagos | 0 | 8 of 19 | 42% | 12 of 23 | 0 of 0 | --- | 1 | 0 | 0:00 |
| Mizuto Hirota | 0 | 21 of 51 | 41% | 33 of 64 | 2 of 2 | 100% | 0 | 0 | 2:41 | |
| 2 | Christos Giagos | 0 | 4 of 15 | 26% | 8 of 21 | 0 of 0 | --- | 0 | 0 | 0:00 |
| Mizuto Hirota | 0 | 9 of 31 | 29% | 25 of 55 | 2 of 2 | 100% | 0 | 0 | 3:58 | |
| 3 | Christos Giagos | 0 | 7 of 21 | 33% | 27 of 42 | 0 of 0 | --- | 0 | 0 | 1:05 |
| Mizuto Hirota | 0 | 1 of 8 | 12% | 5 of 12 | 1 of 6 | 16% | 0 | 1 | 2:42 |
Significant Strikes
| Fighter | Sig. Str. | Sig. Str. % | Head | Body | Leg | Distance | Clinch | Ground |
|---|---|---|---|---|---|---|---|---|
| Christos Giagos | 19 of 55 | 34% | 15 of 50 | 4 of 4 | 0 of 1 | 12 of 41 | 4 of 10 | 3 of 4 |
| Mizuto Hirota | 31 of 90 | 34% | 22 of 80 | 8 of 9 | 1 of 1 | 14 of 53 | 3 of 4 | 14 of 33 |
Significant Strikes Per Round
| Rd | Fighter | Sig. Str. | Sig. Str. % | Head | Body | Leg | Distance | Clinch | Ground |
|---|---|---|---|---|---|---|---|---|---|
| 1 | Christos Giagos | 8 of 19 | 42% | 7 of 17 | 1 of 1 | 0 of 1 | 7 of 18 | 1 of 1 | 0 of 0 |
| Mizuto Hirota | 21 of 51 | 41% | 14 of 44 | 7 of 7 | 0 of 0 | 10 of 32 | 2 of 2 | 9 of 17 | |
| 2 | Christos Giagos | 4 of 15 | 26% | 4 of 15 | 0 of 0 | 0 of 0 | 4 of 12 | 0 of 3 | 0 of 0 |
| Mizuto Hirota | 9 of 31 | 29% | 7 of 28 | 1 of 2 | 1 of 1 | 3 of 13 | 1 of 2 | 5 of 16 | |
| 3 | Christos Giagos | 7 of 21 | 33% | 4 of 18 | 3 of 3 | 0 of 0 | 1 of 11 | 3 of 6 | 3 of 4 |
| Mizuto Hirota | 1 of 8 | 12% | 1 of 8 | 0 of 0 | 0 of 0 | 1 of 8 | 0 of 0 | 0 of 0 |
Totals
| Fighter | KD | Sig. Str. | Sig. Str. % | Total Str. | TD | TD % | Sub. Att | Rev. | Ctrl |
|---|---|---|---|---|---|---|---|---|---|
| Ross Pearson | 0 | 58 of 176 | 32% | 59 of 177 | 0 of 0 | --- | 0 | 0 | 0:00 |
| Mizuto Hirota | 0 | 77 of 213 | 36% | 77 of 213 | 0 of 1 | 0% | 0 | 0 | 0:06 |
Per Round
| Rd | Fighter | KD | Sig. Str. | Sig. Str. % | Total Str. | TD | TD % | Sub. Att | Rev. | Ctrl |
|---|---|---|---|---|---|---|---|---|---|---|
| 1 | Ross Pearson | 0 | 16 of 52 | 30% | 17 of 53 | 0 of 0 | --- | 0 | 0 | 0:00 |
| Mizuto Hirota | 0 | 17 of 47 | 36% | 17 of 47 | 0 of 1 | 0% | 0 | 0 | 0:00 | |
| 2 | Ross Pearson | 0 | 19 of 54 | 35% | 19 of 54 | 0 of 0 | --- | 0 | 0 | 0:00 |
| Mizuto Hirota | 0 | 34 of 91 | 37% | 34 of 91 | 0 of 0 | --- | 0 | 0 | 0:06 | |
| 3 | Ross Pearson | 0 | 23 of 70 | 32% | 23 of 70 | 0 of 0 | --- | 0 | 0 | 0:00 |
| Mizuto Hirota | 0 | 26 of 75 | 34% | 26 of 75 | 0 of 0 | --- | 0 | 0 | 0:00 |
Significant Strikes
| Fighter | Sig. Str. | Sig. Str. % | Head | Body | Leg | Distance | Clinch | Ground |
|---|---|---|---|---|---|---|---|---|
| Ross Pearson | 58 of 176 | 32% | 31 of 134 | 16 of 30 | 11 of 12 | 57 of 174 | 1 of 2 | 0 of 0 |
| Mizuto Hirota | 77 of 213 | 36% | 49 of 176 | 3 of 10 | 25 of 27 | 73 of 208 | 4 of 5 | 0 of 0 |
Significant Strikes Per Round
| Rd | Fighter | Sig. Str. | Sig. Str. % | Head | Body | Leg | Distance | Clinch | Ground |
|---|---|---|---|---|---|---|---|---|---|
| 1 | Ross Pearson | 16 of 52 | 30% | 6 of 38 | 4 of 8 | 6 of 6 | 15 of 51 | 1 of 1 | 0 of 0 |
| Mizuto Hirota | 17 of 47 | 36% | 9 of 36 | 0 of 3 | 8 of 8 | 17 of 47 | 0 of 0 | 0 of 0 | |
| 2 | Ross Pearson | 19 of 54 | 35% | 13 of 45 | 5 of 7 | 1 of 2 | 19 of 53 | 0 of 1 | 0 of 0 |
| Mizuto Hirota | 34 of 91 | 37% | 22 of 75 | 2 of 5 | 10 of 11 | 30 of 86 | 4 of 5 | 0 of 0 | |
| 3 | Ross Pearson | 23 of 70 | 32% | 12 of 51 | 7 of 15 | 4 of 4 | 23 of 70 | 0 of 0 | 0 of 0 |
| Mizuto Hirota | 26 of 75 | 34% | 18 of 65 | 1 of 2 | 7 of 8 | 26 of 75 | 0 of 0 | 0 of 0 |
Totals
| Fighter | KD | Sig. Str. | Sig. Str. % | Total Str. | TD | TD % | Sub. Att | Rev. | Ctrl |
|---|---|---|---|---|---|---|---|---|---|
| Alexander Volkanovski | 1 | 87 of 139 | 62% | 93 of 145 | 4 of 7 | 57% | 0 | 0 | 5:18 |
| Mizuto Hirota | 0 | 46 of 149 | 30% | 51 of 155 | 0 of 5 | 0% | 0 | 0 | 0:23 |
Per Round
| Rd | Fighter | KD | Sig. Str. | Sig. Str. % | Total Str. | TD | TD % | Sub. Att | Rev. | Ctrl |
|---|---|---|---|---|---|---|---|---|---|---|
| 1 | Alexander Volkanovski | 1 | 33 of 56 | 58% | 35 of 58 | 3 of 4 | 75% | 0 | 0 | 2:23 |
| Mizuto Hirota | 0 | 16 of 41 | 39% | 19 of 44 | 0 of 0 | --- | 0 | 0 | 0:00 | |
| 2 | Alexander Volkanovski | 0 | 28 of 45 | 62% | 32 of 49 | 1 of 2 | 50% | 0 | 0 | 1:39 |
| Mizuto Hirota | 0 | 14 of 50 | 28% | 15 of 52 | 0 of 1 | 0% | 0 | 0 | 0:02 | |
| 3 | Alexander Volkanovski | 0 | 26 of 38 | 68% | 26 of 38 | 0 of 1 | 0% | 0 | 0 | 1:16 |
| Mizuto Hirota | 0 | 16 of 58 | 27% | 17 of 59 | 0 of 4 | 0% | 0 | 0 | 0:21 |
Significant Strikes
| Fighter | Sig. Str. | Sig. Str. % | Head | Body | Leg | Distance | Clinch | Ground |
|---|---|---|---|---|---|---|---|---|
| Alexander Volkanovski | 87 of 139 | 62% | 55 of 97 | 9 of 13 | 23 of 29 | 46 of 93 | 18 of 20 | 23 of 26 |
| Mizuto Hirota | 46 of 149 | 30% | 39 of 139 | 2 of 5 | 5 of 5 | 42 of 142 | 2 of 5 | 2 of 2 |
Significant Strikes Per Round
| Rd | Fighter | Sig. Str. | Sig. Str. % | Head | Body | Leg | Distance | Clinch | Ground |
|---|---|---|---|---|---|---|---|---|---|
| 1 | Alexander Volkanovski | 33 of 56 | 58% | 23 of 42 | 2 of 4 | 8 of 10 | 10 of 29 | 5 of 6 | 18 of 21 |
| Mizuto Hirota | 16 of 41 | 39% | 12 of 37 | 1 of 1 | 3 of 3 | 13 of 35 | 1 of 4 | 2 of 2 | |
| 2 | Alexander Volkanovski | 28 of 45 | 62% | 18 of 30 | 3 of 4 | 7 of 11 | 18 of 35 | 5 of 5 | 5 of 5 |
| Mizuto Hirota | 14 of 50 | 28% | 12 of 46 | 1 of 3 | 1 of 1 | 14 of 50 | 0 of 0 | 0 of 0 | |
| 3 | Alexander Volkanovski | 26 of 38 | 68% | 14 of 25 | 4 of 5 | 8 of 8 | 18 of 29 | 8 of 9 | 0 of 0 |
| Mizuto Hirota | 16 of 58 | 27% | 15 of 56 | 0 of 1 | 1 of 1 | 15 of 57 | 1 of 1 | 0 of 0 |
Totals
| Fighter | KD | Sig. Str. | Sig. Str. % | Total Str. | TD | TD % | Sub. Att | Rev. | Ctrl |
|---|---|---|---|---|---|---|---|---|---|
| Mizuto Hirota | 0 | 21 of 60 | 35% | 22 of 61 | 0 of 0 | --- | 0 | 1 | 1:03 |
| Cole Miller | 0 | 57 of 114 | 50% | 165 of 242 | 6 of 7 | 85% | 0 | 0 | 9:49 |
Per Round
| Rd | Fighter | KD | Sig. Str. | Sig. Str. % | Total Str. | TD | TD % | Sub. Att | Rev. | Ctrl |
|---|---|---|---|---|---|---|---|---|---|---|
| 1 | Mizuto Hirota | 0 | 11 of 31 | 35% | 11 of 31 | 0 of 0 | --- | 0 | 0 | 0:00 |
| Cole Miller | 0 | 23 of 48 | 47% | 47 of 74 | 4 of 4 | 100% | 0 | 0 | 2:27 | |
| 2 | Mizuto Hirota | 0 | 3 of 13 | 23% | 3 of 13 | 0 of 0 | --- | 0 | 1 | 1:03 |
| Cole Miller | 0 | 16 of 32 | 50% | 58 of 79 | 1 of 1 | 100% | 0 | 0 | 3:12 | |
| 3 | Mizuto Hirota | 0 | 7 of 16 | 43% | 8 of 17 | 0 of 0 | --- | 0 | 0 | 0:00 |
| Cole Miller | 0 | 18 of 34 | 52% | 60 of 89 | 1 of 2 | 50% | 0 | 0 | 4:10 |
Significant Strikes
| Fighter | Sig. Str. | Sig. Str. % | Head | Body | Leg | Distance | Clinch | Ground |
|---|---|---|---|---|---|---|---|---|
| Mizuto Hirota | 21 of 60 | 35% | 11 of 44 | 5 of 9 | 5 of 7 | 20 of 59 | 0 of 0 | 1 of 1 |
| Cole Miller | 57 of 114 | 50% | 43 of 95 | 7 of 11 | 7 of 8 | 26 of 60 | 1 of 1 | 30 of 53 |
Significant Strikes Per Round
| Rd | Fighter | Sig. Str. | Sig. Str. % | Head | Body | Leg | Distance | Clinch | Ground |
|---|---|---|---|---|---|---|---|---|---|
| 1 | Mizuto Hirota | 11 of 31 | 35% | 4 of 21 | 4 of 6 | 3 of 4 | 10 of 30 | 0 of 0 | 1 of 1 |
| Cole Miller | 23 of 48 | 47% | 15 of 38 | 3 of 5 | 5 of 5 | 16 of 30 | 1 of 1 | 6 of 17 | |
| 2 | Mizuto Hirota | 3 of 13 | 23% | 3 of 11 | 0 of 1 | 0 of 1 | 3 of 13 | 0 of 0 | 0 of 0 |
| Cole Miller | 16 of 32 | 50% | 14 of 28 | 1 of 2 | 1 of 2 | 3 of 12 | 0 of 0 | 13 of 20 | |
| 3 | Mizuto Hirota | 7 of 16 | 43% | 4 of 12 | 1 of 2 | 2 of 2 | 7 of 16 | 0 of 0 | 0 of 0 |
| Cole Miller | 18 of 34 | 52% | 14 of 29 | 3 of 4 | 1 of 1 | 7 of 18 | 0 of 0 | 11 of 16 |
Totals
| Fighter | KD | Sig. Str. | Sig. Str. % | Total Str. | TD | TD % | Sub. Att | Rev. | Ctrl |
|---|---|---|---|---|---|---|---|---|---|
| Mizuto Hirota | 0 | 62 of 183 | 33% | 100 of 225 | 2 of 5 | 40% | 0 | 0 | 3:26 |
| Teruto Ishihara | 2 | 88 of 168 | 52% | 89 of 169 | 0 of 1 | 0% | 0 | 0 | 0:10 |
Per Round
| Rd | Fighter | KD | Sig. Str. | Sig. Str. % | Total Str. | TD | TD % | Sub. Att | Rev. | Ctrl |
|---|---|---|---|---|---|---|---|---|---|---|
| 1 | Mizuto Hirota | 0 | 13 of 56 | 23% | 13 of 56 | 0 of 0 | --- | 0 | 0 | 0:09 |
| Teruto Ishihara | 1 | 37 of 67 | 55% | 37 of 67 | 0 of 1 | 0% | 0 | 0 | 0:03 | |
| 2 | Mizuto Hirota | 0 | 23 of 69 | 33% | 31 of 78 | 1 of 2 | 50% | 0 | 0 | 0:48 |
| Teruto Ishihara | 0 | 36 of 65 | 55% | 36 of 65 | 0 of 0 | --- | 0 | 0 | 0:00 | |
| 3 | Mizuto Hirota | 0 | 26 of 58 | 44% | 56 of 91 | 1 of 3 | 33% | 0 | 0 | 2:29 |
| Teruto Ishihara | 1 | 15 of 36 | 41% | 16 of 37 | 0 of 0 | --- | 0 | 0 | 0:07 |
Significant Strikes
| Fighter | Sig. Str. | Sig. Str. % | Head | Body | Leg | Distance | Clinch | Ground |
|---|---|---|---|---|---|---|---|---|
| Mizuto Hirota | 62 of 183 | 33% | 55 of 165 | 4 of 13 | 3 of 5 | 49 of 163 | 13 of 20 | 0 of 0 |
| Teruto Ishihara | 88 of 168 | 52% | 62 of 134 | 14 of 22 | 12 of 12 | 82 of 154 | 5 of 13 | 1 of 1 |
Significant Strikes Per Round
| Rd | Fighter | Sig. Str. | Sig. Str. % | Head | Body | Leg | Distance | Clinch | Ground |
|---|---|---|---|---|---|---|---|---|---|
| 1 | Mizuto Hirota | 13 of 56 | 23% | 9 of 47 | 1 of 4 | 3 of 5 | 13 of 56 | 0 of 0 | 0 of 0 |
| Teruto Ishihara | 37 of 67 | 55% | 24 of 52 | 6 of 8 | 7 of 7 | 35 of 65 | 1 of 1 | 1 of 1 | |
| 2 | Mizuto Hirota | 23 of 69 | 33% | 23 of 64 | 0 of 5 | 0 of 0 | 22 of 66 | 1 of 3 | 0 of 0 |
| Teruto Ishihara | 36 of 65 | 55% | 25 of 49 | 7 of 12 | 4 of 4 | 36 of 63 | 0 of 2 | 0 of 0 | |
| 3 | Mizuto Hirota | 26 of 58 | 44% | 23 of 54 | 3 of 4 | 0 of 0 | 14 of 41 | 12 of 17 | 0 of 0 |
| Teruto Ishihara | 15 of 36 | 41% | 13 of 33 | 1 of 2 | 1 of 1 | 11 of 26 | 4 of 10 | 0 of 0 |
Totals
| Fighter | KD | Sig. Str. | Sig. Str. % | Total Str. | TD | TD % | Sub. Att | Rev. | Ctrl |
|---|---|---|---|---|---|---|---|---|---|
| Rodrigo Damm | 0 | 76 of 162 | 46% | 77 of 163 | 2 of 7 | 28% | 0 | 0 | 1:43 |
| Mizuto Hirota | 0 | 102 of 199 | 51% | 113 of 212 | 0 of 1 | 0% | 0 | 0 | 0:00 |
Per Round
| Rd | Fighter | KD | Sig. Str. | Sig. Str. % | Total Str. | TD | TD % | Sub. Att | Rev. | Ctrl |
|---|---|---|---|---|---|---|---|---|---|---|
| 1 | Rodrigo Damm | 0 | 19 of 41 | 46% | 20 of 42 | 1 of 3 | 33% | 0 | 0 | 1:30 |
| Mizuto Hirota | 0 | 26 of 43 | 60% | 37 of 56 | 0 of 0 | --- | 0 | 0 | 0:00 | |
| 2 | Rodrigo Damm | 0 | 27 of 65 | 41% | 27 of 65 | 0 of 1 | 0% | 0 | 0 | 0:00 |
| Mizuto Hirota | 0 | 40 of 77 | 51% | 40 of 77 | 0 of 0 | --- | 0 | 0 | 0:00 | |
| 3 | Rodrigo Damm | 0 | 30 of 56 | 53% | 30 of 56 | 1 of 3 | 33% | 0 | 0 | 0:13 |
| Mizuto Hirota | 0 | 36 of 79 | 45% | 36 of 79 | 0 of 1 | 0% | 0 | 0 | 0:00 |
Significant Strikes
| Fighter | Sig. Str. | Sig. Str. % | Head | Body | Leg | Distance | Clinch | Ground |
|---|---|---|---|---|---|---|---|---|
| Rodrigo Damm | 76 of 162 | 46% | 51 of 128 | 12 of 17 | 13 of 17 | 75 of 161 | 1 of 1 | 0 of 0 |
| Mizuto Hirota | 102 of 199 | 51% | 60 of 153 | 32 of 35 | 10 of 11 | 100 of 197 | 2 of 2 | 0 of 0 |
Significant Strikes Per Round
| Rd | Fighter | Sig. Str. | Sig. Str. % | Head | Body | Leg | Distance | Clinch | Ground |
|---|---|---|---|---|---|---|---|---|---|
| 1 | Rodrigo Damm | 19 of 41 | 46% | 11 of 30 | 4 of 6 | 4 of 5 | 18 of 40 | 1 of 1 | 0 of 0 |
| Mizuto Hirota | 26 of 43 | 60% | 15 of 30 | 9 of 11 | 2 of 2 | 24 of 41 | 2 of 2 | 0 of 0 | |
| 2 | Rodrigo Damm | 27 of 65 | 41% | 20 of 54 | 3 of 4 | 4 of 7 | 27 of 65 | 0 of 0 | 0 of 0 |
| Mizuto Hirota | 40 of 77 | 51% | 24 of 60 | 9 of 9 | 7 of 8 | 40 of 77 | 0 of 0 | 0 of 0 | |
| 3 | Rodrigo Damm | 30 of 56 | 53% | 20 of 44 | 5 of 7 | 5 of 5 | 30 of 56 | 0 of 0 | 0 of 0 |
| Mizuto Hirota | 36 of 79 | 45% | 21 of 63 | 14 of 15 | 1 of 1 | 36 of 79 | 0 of 0 | 0 of 0 |
Totals
| Fighter | KD | Sig. Str. | Sig. Str. % | Total Str. | TD | TD % | Sub. Att | Rev. | Ctrl |
|---|---|---|---|---|---|---|---|---|---|
| Rani Yahya | 0 | 4 of 14 | 28% | 39 of 56 | 1 of 1 | 100% | 0 | 0 | 3:10 |
| Mizuto Hirota | 0 | 13 of 29 | 44% | 105 of 122 | 5 of 12 | 41% | 1 | 0 | 8:59 |
Per Round
| Rd | Fighter | KD | Sig. Str. | Sig. Str. % | Total Str. | TD | TD % | Sub. Att | Rev. | Ctrl |
|---|---|---|---|---|---|---|---|---|---|---|
| 1 | Rani Yahya | 0 | 0 of 1 | 0% | 3 of 5 | 0 of 0 | --- | 0 | 0 | 0:49 |
| Mizuto Hirota | 0 | 3 of 8 | 37% | 55 of 61 | 3 of 4 | 75% | 0 | 0 | 3:21 | |
| 2 | Rani Yahya | 0 | 0 of 3 | 0% | 5 of 8 | 0 of 0 | --- | 0 | 0 | 0:15 |
| Mizuto Hirota | 0 | 8 of 13 | 61% | 46 of 51 | 1 of 1 | 100% | 1 | 0 | 4:20 | |
| 3 | Rani Yahya | 0 | 4 of 10 | 40% | 31 of 43 | 1 of 1 | 100% | 0 | 0 | 2:06 |
| Mizuto Hirota | 0 | 2 of 8 | 25% | 4 of 10 | 1 of 7 | 14% | 0 | 0 | 1:18 |
Significant Strikes
| Fighter | Sig. Str. | Sig. Str. % | Head | Body | Leg | Distance | Clinch | Ground |
|---|---|---|---|---|---|---|---|---|
| Rani Yahya | 4 of 14 | 28% | 3 of 13 | 1 of 1 | 0 of 0 | 4 of 12 | 0 of 1 | 0 of 1 |
| Mizuto Hirota | 13 of 29 | 44% | 11 of 26 | 2 of 3 | 0 of 0 | 3 of 13 | 1 of 1 | 9 of 15 |
Significant Strikes Per Round
| Rd | Fighter | Sig. Str. | Sig. Str. % | Head | Body | Leg | Distance | Clinch | Ground |
|---|---|---|---|---|---|---|---|---|---|
| 1 | Rani Yahya | 0 of 1 | 0% | 0 of 1 | 0 of 0 | 0 of 0 | 0 of 1 | 0 of 0 | 0 of 0 |
| Mizuto Hirota | 3 of 8 | 37% | 3 of 7 | 0 of 1 | 0 of 0 | 1 of 3 | 0 of 0 | 2 of 5 | |
| 2 | Rani Yahya | 0 of 3 | 0% | 0 of 3 | 0 of 0 | 0 of 0 | 0 of 1 | 0 of 1 | 0 of 1 |
| Mizuto Hirota | 8 of 13 | 61% | 6 of 11 | 2 of 2 | 0 of 0 | 0 of 2 | 1 of 1 | 7 of 10 | |
| 3 | Rani Yahya | 4 of 10 | 40% | 3 of 9 | 1 of 1 | 0 of 0 | 4 of 10 | 0 of 0 | 0 of 0 |
| Mizuto Hirota | 2 of 8 | 25% | 2 of 8 | 0 of 0 | 0 of 0 | 2 of 8 | 0 of 0 | 0 of 0 |
No comments yet. Be the first to share your thoughts!