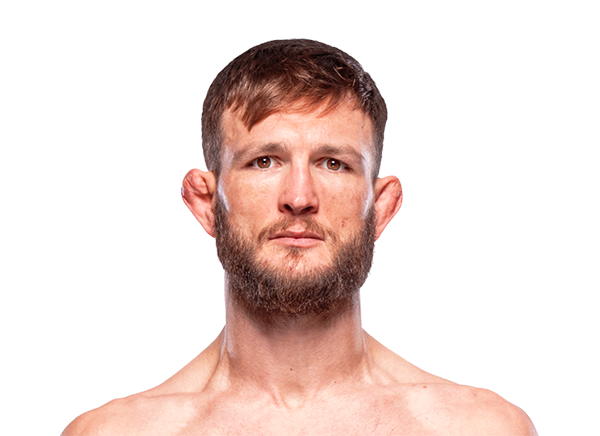
Career Averages - Jonathan Pearce
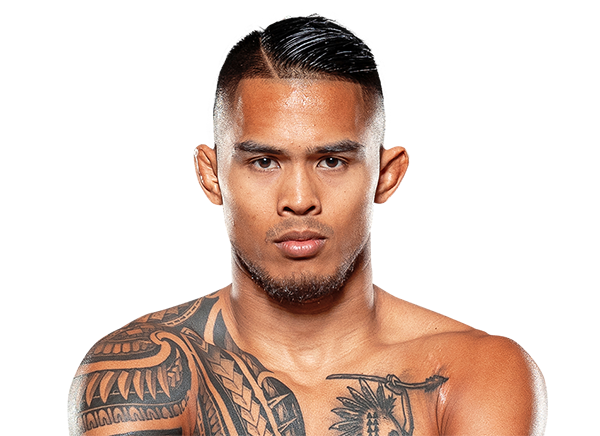
Career Averages - Kai Kamaka III
Jonathan Pearce - Fight History
Totals
| Fighter | KD | Sig. Str. | Sig. Str. % | Total Str. | TD | TD % | Sub. Att | Rev. | Ctrl |
|---|---|---|---|---|---|---|---|---|---|
| Pat Sabatini | 0 | 2 of 2 | 100% | 32 of 32 | 0 of 0 | --- | 0 | 0 | 0:00 |
| Jonathan Pearce | 0 | 3 of 5 | 60% | 19 of 25 | 2 of 3 | 66% | 1 | 0 | 3:56 |
Per Round
| Rd | Fighter | KD | Sig. Str. | Sig. Str. % | Total Str. | TD | TD % | Sub. Att | Rev. | Ctrl |
|---|---|---|---|---|---|---|---|---|---|---|
| 1 | Pat Sabatini | 0 | 2 of 2 | 100% | 32 of 32 | 0 of 0 | --- | 0 | 0 | 0:00 |
| Jonathan Pearce | 0 | 3 of 5 | 60% | 19 of 25 | 2 of 3 | 66% | 1 | 0 | 3:56 |
Significant Strikes
| Fighter | Sig. Str. | Sig. Str. % | Head | Body | Leg | Distance | Clinch | Ground |
|---|---|---|---|---|---|---|---|---|
| Pat Sabatini | 2 of 2 | 100% | 0 of 0 | 1 of 1 | 1 of 1 | 2 of 2 | 0 of 0 | 0 of 0 |
| Jonathan Pearce | 3 of 5 | 60% | 2 of 4 | 1 of 1 | 0 of 0 | 1 of 2 | 1 of 1 | 1 of 2 |
Significant Strikes Per Round
| Rd | Fighter | Sig. Str. | Sig. Str. % | Head | Body | Leg | Distance | Clinch | Ground |
|---|---|---|---|---|---|---|---|---|---|
| 1 | Pat Sabatini | 2 of 2 | 100% | 0 of 0 | 1 of 1 | 1 of 1 | 2 of 2 | 0 of 0 | 0 of 0 |
| Jonathan Pearce | 3 of 5 | 60% | 2 of 4 | 1 of 1 | 0 of 0 | 1 of 2 | 1 of 1 | 1 of 2 |
Play-by-Play
View on SherdogBETTING PREVIEW | SCOUTING REPORT | ODDS: Pearce (-130), Sabatini (+110)
Round 1
Grapplers enter the Octagon in what should be a fun stylistic clash. On a rare losing streak, Pearce (14-6, 5-3 UFC) has his back against the wall, but the same might be said for Sabatini (18-5, 5-2 UFC), who has dropped two of three. Someone will turn things around in the next 15 minutes or less, and referee Chris Tognoni will follow them every step of the way. Before throwing hands, “JSP” walks over to the other corner to deliver a friendly fist bump. Pearce takes to the center of the cage, and they clash body kicks at the same time. As they tangle up, Sabatini manages to sneak around and grab Pearce from behind, where he hops on his back to take the form of a mean-spirited backpack. Sabatini locks a body triangle around the waist, slugging his left hand around the raised guard of his foe. Pearce leans against the wall to relieve himself of some of the extra weight, and he turns his shoulder to sling Sabatini off of him. The Pennsylvanian turns the corner to get his arms around Pearce once more, and “JSP” is warned for fence grabs to keep himself on his feet. Rules are mere suggestions in the sport of MMA. Sabatini scoops up Pearce’s legs and steps over him to ground him, and Pearce is warned for elbowing the spine and attempting 12-6 elbows—these will be allowed next month. Pearce uses a butterfly guard to keep Sabatini from establishing a more traditional top position, only for Sabatini to smother him and move to half guard. Sabatini steps over to three-quarter mount, hunting for a choke when Pearce turns the wrong direction. Sabatini looks for another submission as Pearce gets to his knees, and Sabatini’s body triangle is wrapped firmly around the ribs. Pearce stands up and elbows Sabatini’s thigh to try to break up the body lock.
Sabatini leans to add his weight to different places on the back, and he slithers his forearm beneath the chin and fastens a nasty rear-naked choke. Pearce’s head turns a brilliant shade of red, and he thinks about going out on his shield but elects to fight another day and taps out.
Sabatini releases the lock and walks to the center of the cage, letting out one triumphant shout before calming himself. Sabatini tries his best to stay cool, but cannot help but flip around the cage, bellowing and fist-pumping in celebration.
The Official Result
Pat Sabatini def. Jonathan Pearce R1 4:06 via Submission (Rear-Naked Choke)
Angelo picks Jonathan Pearce, citing his relentless wrestling pressure and awareness of Sabatini's jiu-jitsu. He notes that Sabatini hasn't improved his skills since entering the UFC and that Pearce's non-stop takedown attempts will be key. Angelo also thinks Pearce can have success on the feet, as Sabatini's striking is technical but lacks head movement. He mentions he placed a half-unit bet on Pearce at -131.
Big Brady picks Jonathan Pearce to win by TKO in the second round. He considers this one of his favorite fights on the card, noting both have paths: Sabatini via submission (Pearce has been submitted three times), but Pearce via knockout (Sabatini has been knocked out by Diego Lopes, Damon Jackson, and dropped by Jamall Emmers). He worries about Sabatini's durability and cardio, and believes Pearce's pace will break him down. Despite Pearce potentially getting into bad spots, Brady trusts his ability to fight out of them.
Connor agrees with Zane, noting that Pearce's striking is all fencing and he cannot keep opponents down. He points out that Pearce lost to David Onama despite having control time, and that Sabatini is a better grappler who can win if he gets top position. Connor is surprised Sabatini is the underdog.
This fight was not discussed in the transcript. No picks were made.
Daniel thinks Pearce is more well-rounded and has better volume on the feet, but he acknowledges Sabatini's grinding wrestling and durability. He is not confident because Sabatini could easily grind out a win. Daniel leans toward Pearce to outwork him but admits he wouldn't be surprised by a Sabatini decision.
Pearce is on a two-fight losing streak but looked good in his last fight against David Onama even in defeat. He should use defensive grappling to keep the fight standing and put a pace on Sabatini, who is uncomfortable in the striking realm. Pearce will keep it upright, push the pace, and finish Sabatini in the second or third round.
The MMA Guru picks Pat Sabatini, highlighting his technical grappling edge over Jonathan Pearce. He notes that Pearce is tough with good cardio but makes mistakes in grappling, often losing position. Sabatini has good submissions and control, and the Guru believes he can submit Pearce. He acknowledges Pearce could TKO Sabatini due to a suspect chin, but favors Sabatini's grappling.
This fight was not discussed in the transcript. No picks were made.
Zane thinks Sabatini will win because he is a more willing and confident striker, though both are stiff. He notes Sabatini has paid for trying to do other things and will just go for takedowns. Zane points out that Pearce has poor control time (23%) and cannot keep opponents down, while Sabatini has 52% control time. He believes Sabatini can get takedowns and win on the ground.
Totals
| Fighter | KD | Sig. Str. | Sig. Str. % | Total Str. | TD | TD % | Sub. Att | Rev. | Ctrl |
|---|---|---|---|---|---|---|---|---|---|
| David Onama | 0 | 57 of 129 | 44% | 87 of 165 | 5 of 14 | 35% | 1 | 1 | 4:49 |
| Jonathan Pearce | 0 | 58 of 104 | 55% | 66 of 115 | 0 of 1 | 0% | 1 | 5 | 2:15 |
Per Round
| Rd | Fighter | KD | Sig. Str. | Sig. Str. % | Total Str. | TD | TD % | Sub. Att | Rev. | Ctrl |
|---|---|---|---|---|---|---|---|---|---|---|
| 1 | David Onama | 0 | 15 of 41 | 36% | 15 of 41 | 1 of 5 | 20% | 0 | 0 | 0:50 |
| Jonathan Pearce | 0 | 14 of 23 | 60% | 18 of 29 | 0 of 0 | --- | 0 | 1 | 0:49 | |
| 2 | David Onama | 0 | 14 of 18 | 77% | 29 of 37 | 3 of 3 | 100% | 1 | 1 | 3:16 |
| Jonathan Pearce | 0 | 5 of 10 | 50% | 6 of 11 | 0 of 0 | --- | 1 | 3 | 0:36 | |
| 3 | David Onama | 0 | 28 of 70 | 40% | 43 of 87 | 1 of 6 | 16% | 0 | 0 | 0:43 |
| Jonathan Pearce | 0 | 39 of 71 | 54% | 42 of 75 | 0 of 1 | 0% | 0 | 1 | 0:50 |
Significant Strikes
| Fighter | Sig. Str. | Sig. Str. % | Head | Body | Leg | Distance | Clinch | Ground |
|---|---|---|---|---|---|---|---|---|
| David Onama | 57 of 129 | 44% | 37 of 102 | 13 of 19 | 7 of 8 | 44 of 114 | 1 of 1 | 12 of 14 |
| Jonathan Pearce | 58 of 104 | 55% | 50 of 94 | 6 of 8 | 2 of 2 | 54 of 99 | 4 of 5 | 0 of 0 |
Significant Strikes Per Round
| Rd | Fighter | Sig. Str. | Sig. Str. % | Head | Body | Leg | Distance | Clinch | Ground |
|---|---|---|---|---|---|---|---|---|---|
| 1 | David Onama | 15 of 41 | 36% | 6 of 28 | 6 of 9 | 3 of 4 | 12 of 37 | 0 of 0 | 3 of 4 |
| Jonathan Pearce | 14 of 23 | 60% | 11 of 20 | 1 of 1 | 2 of 2 | 12 of 21 | 2 of 2 | 0 of 0 | |
| 2 | David Onama | 14 of 18 | 77% | 10 of 13 | 2 of 3 | 2 of 2 | 5 of 8 | 0 of 0 | 9 of 10 |
| Jonathan Pearce | 5 of 10 | 50% | 4 of 8 | 1 of 2 | 0 of 0 | 5 of 10 | 0 of 0 | 0 of 0 | |
| 3 | David Onama | 28 of 70 | 40% | 21 of 61 | 5 of 7 | 2 of 2 | 27 of 69 | 1 of 1 | 0 of 0 |
| Jonathan Pearce | 39 of 71 | 54% | 35 of 66 | 4 of 5 | 0 of 0 | 37 of 68 | 2 of 3 | 0 of 0 |
Angelo has a half-unit bet on Jonathan Pearce at -140, beating the line. He attributes the pick solely to wrestling: Pearce is a relentless wrestler who averages almost six takedowns per fight. He believes David Onama, a good kickboxer, will struggle to stop the takedowns, as Nate Landwehr was able to take him down. He notes Pearce dominated his last fight before a submission loss due to showboating, but expects him to dominate here.
Cody picks Onama as an underdog, citing his reach and striking advantage. He notes that judges score damage over control time, and if Onama can get back to his feet after takedowns, he can win rounds with strikes. He sees this as close to a 50/50 fight.
Daniel likes Pearce's high pace, cardio, and improved striking, but notes he's inconsistent and sticks his neck into guillotines. He thinks Pearce can grind out a win via takedowns and top control, but acknowledges Onama's power and heart make him dangerous. He leans Pearce but calls it a dog-or-pass situation.
Pearce has a dominant grappling style and should be able to nullify Onama's power punching by taking him down and keeping him in uncomfortable positions. Onama has shown defensive grappling improvements but may still struggle with Pearce's smothering style. I lean Pearce by decision, but Onama could find a finish late if Pearce slows down.
Paul picks Pearce, arguing his wrestling and top control will be decisive. He notes Pearce's chain wrestling and ability to improve position, and believes Onama's takedown defense is questionable. He expects a grinding decision win for Pearce.
The MMA Guru picks David Onama as an underdog. He criticizes Jonathan Pearce's striking as atrocious and lacking hand-eye coordination. He praises Onama's speed, grappling defense, and cardio, noting his KO of Gabriel Santos and competitive fight with Mason Jones. He predicts Onama will catch Pearce with a straight right in the second or third round for a TKO.
Totals
| Fighter | KD | Sig. Str. | Sig. Str. % | Total Str. | TD | TD % | Sub. Att | Rev. | Ctrl |
|---|---|---|---|---|---|---|---|---|---|
| Joanderson Brito | 0 | 14 of 16 | 87% | 81 of 96 | 1 of 4 | 25% | 0 | 1 | 6:15 |
| Jonathan Pearce | 0 | 8 of 20 | 40% | 33 of 47 | 1 of 1 | 100% | 1 | 0 | 1:58 |
Per Round
| Rd | Fighter | KD | Sig. Str. | Sig. Str. % | Total Str. | TD | TD % | Sub. Att | Rev. | Ctrl |
|---|---|---|---|---|---|---|---|---|---|---|
| 1 | Joanderson Brito | 0 | 12 of 14 | 85% | 43 of 48 | 0 of 3 | 0% | 0 | 1 | 2:28 |
| Jonathan Pearce | 0 | 8 of 19 | 42% | 21 of 33 | 1 of 1 | 100% | 0 | 0 | 1:58 | |
| 2 | Joanderson Brito | 0 | 2 of 2 | 100% | 38 of 48 | 1 of 1 | 100% | 0 | 0 | 3:47 |
| Jonathan Pearce | 0 | 0 of 1 | 0% | 12 of 14 | 0 of 0 | --- | 1 | 0 | 0:00 |
Significant Strikes
| Fighter | Sig. Str. | Sig. Str. % | Head | Body | Leg | Distance | Clinch | Ground |
|---|---|---|---|---|---|---|---|---|
| Joanderson Brito | 14 of 16 | 87% | 6 of 6 | 2 of 4 | 6 of 6 | 3 of 4 | 7 of 8 | 4 of 4 |
| Jonathan Pearce | 8 of 20 | 40% | 4 of 15 | 3 of 4 | 1 of 1 | 4 of 12 | 2 of 3 | 2 of 5 |
Significant Strikes Per Round
| Rd | Fighter | Sig. Str. | Sig. Str. % | Head | Body | Leg | Distance | Clinch | Ground |
|---|---|---|---|---|---|---|---|---|---|
| 1 | Joanderson Brito | 12 of 14 | 85% | 4 of 4 | 2 of 4 | 6 of 6 | 3 of 4 | 7 of 8 | 2 of 2 |
| Jonathan Pearce | 8 of 19 | 42% | 4 of 14 | 3 of 4 | 1 of 1 | 4 of 12 | 2 of 3 | 2 of 4 | |
| 2 | Joanderson Brito | 2 of 2 | 100% | 2 of 2 | 0 of 0 | 0 of 0 | 0 of 0 | 0 of 0 | 2 of 2 |
| Jonathan Pearce | 0 of 1 | 0% | 0 of 1 | 0 of 0 | 0 of 0 | 0 of 0 | 0 of 0 | 0 of 1 |
Play-by-Play
View on SherdogBETTING PREVIEW | SCOUTING REPORT | ODDS: Pearce (-130), Brito (+110)
Round 1
A potentially violent featherweight encounter rounds out this long preliminary slate. Winner of five straight, “JSP” Pearce (14-4, 5-1 UFC) will be in for a fight against the hard-charging Brito (15-3-1, 3-1 UFC). Referee Herb Dean may have his hands full for this one, although there is a sporting glove touch before it begins. Pearce lets loose with a kick to start things off, and Brito slings a right hand in response. Pearce shoots for a takedown, and Brito defends the double with a guillotine choke. Brito turns his foe around and keeps tightly pressed against him, and he starts digging right hands to the body as Pearce shakes his head. Brito lifts Pearce clean off the ground and slams him down, and he instantly lands in side control and starts slugging Pearce in the face with left hands. A bit too excited, Brito jumps over and looks to take a scrambling Pearce’s back, but he falls off the back and lands on his own back. Pearce lines him up for a solid right hand, and he attempts to set up a guillotine choke when Brito fights his way up. Brito clubs Pearce in the temple on the break, and he chases after Pearce throwing haymakers. Pearce responds with a body kick and a double, and Brito stops it and backs himself against the wall. Pearce redoubles his effort to take the fight down, and he is stonewalled but pressing the Brazilian against the wall. Brito slugs Pearce in the belly a few times as they turn one another around while clinched. Pearce claims that Brito grabbed his cup, as Brito tried to defend from a takedown. Pearce falls to his back in search of an armbar, and Brito stacks Pearce up to break out of the submission setup. “JSP” hunts for a triangle, and Brito lifts him up and slams him down to stop that as well. Pearce jumps back to his feet and looks for a takedown, and he sneaks in two uppercuts and dodges a windmilling right hand before the round ends.
Sherdog Scores
Jay Pettry scores the round: 10-9 Pearce
Brian Knapp scores the round: 10-9 Pearce
Tyler Treese scores the round: 10-9 Pearce
Round 2
The fists are bumped, and Pearce dives forward to hit a single in the opening seconds. Pearce lands on half guard and starts slamming down elbows. Pearce steps over into mount for a moment, and Brito bucks and fights off an arm-triangle set up to drag Pearce back to guard. Brito twists and bucks, but Pearce gladly grinds on his opponent to wear him down. “JSP” continues holding Brito down, landing sporadic shots, and the two start talking to one another. Pearce tells him to get up and do something, and Brito tries to explode out but his power is not what it was in the previous round. Pearce rides and lands right hands, and Brito laughs at him for his feeble strikes while irritated he is being held down. Brito scoots his way to the wall on one knee, and he works his way up.
Out of nowhere, “Tubarao” snatches up a ninja choke with his back still against the wall, and it is shockingly tight. Pearce falls to his side to wriggle out, and Brito cranks down hard on it with his chest pressed tightly. Pearce starts tapping as Brito completes the submission
, and the stunning comeback has been completed by the powerhouse Brazilian.
The Official Result
Joanderson Brito def. Jonathan Pearce R2 3:54 via Submission (Ninja Choke)
Angelo picks Jonathan Pearce, citing his insane wrestling pressure and ability to take down Joanderson Brito. He notes Brito is a dangerous striker but expects Pearce to dive at legs immediately. He expresses some hesitation due to the Grant Dawson knockout, but still picks Pearce.
Big Brady calls this his favorite fight on the card. He thinks Brito is very live for a first-round knockout or submission because Pearce is very hitable and leaves himself in bad spots on the mat. He notes Pearce has great pressure and cardio but Brito has power and submission skills. He predicts Brito wins by first-round knockout, but acknowledges if it goes to the second round, Pearce takes over.
Cody picks Joanderson Brito as a slight underdog, calling it a 50/50 fight. He notes Brito's power and physicality, and believes he can catch Pearce with something. He acknowledges Pearce's wrestling and cardio but thinks Brito's power and submission threat early make him the value play.
Brito is a relentless pressure fighter who doesn't give opponents room to breathe. He has good takedown defense and gets back to his feet quickly. Pearce is a wrestler who may get takedowns early, but Brito's ability to scramble and return to striking will break Pearce. Brito will land big punches and eventually find a knockout in the third round.
Paul also picks Brito, citing his power and the danger he poses early. He notes that Pearce has been hurt before and Brito hits hard. Paul thinks Brito's submission threat, especially a guillotine, is real early. He sees this as a dog or pass and takes the plus money.
The MMA Guru picks Joanderson Brito to finish Jonathan Pearce in round one. He criticizes Pearce's competition and notes that Pearce struggled against Darren Elkins, Makwan Amirkhani, and Christian Rodriguez. He highlights Brito's finishing potential with first-round wins over Lucas Alexander, Andre Fili, and Weston Wilson, and believes Brito's run will continue.
Totals
| Fighter | KD | Sig. Str. | Sig. Str. % | Total Str. | TD | TD % | Sub. Att | Rev. | Ctrl |
|---|---|---|---|---|---|---|---|---|---|
| Jonathan Pearce | 0 | 57 of 193 | 29% | 67 of 203 | 2 of 5 | 40% | 0 | 0 | 0:48 |
| Darren Elkins | 0 | 110 of 222 | 49% | 154 of 276 | 2 of 7 | 28% | 0 | 1 | 3:33 |
Per Round
| Rd | Fighter | KD | Sig. Str. | Sig. Str. % | Total Str. | TD | TD % | Sub. Att | Rev. | Ctrl |
|---|---|---|---|---|---|---|---|---|---|---|
| 1 | Jonathan Pearce | 0 | 11 of 57 | 19% | 14 of 60 | 1 of 2 | 50% | 0 | 0 | 0:28 |
| Darren Elkins | 0 | 30 of 64 | 46% | 35 of 70 | 1 of 1 | 100% | 0 | 0 | 0:42 | |
| 2 | Jonathan Pearce | 0 | 15 of 47 | 31% | 22 of 54 | 1 of 2 | 50% | 0 | 0 | 0:18 |
| Darren Elkins | 0 | 44 of 68 | 64% | 74 of 106 | 0 of 3 | 0% | 0 | 1 | 2:29 | |
| 3 | Jonathan Pearce | 0 | 31 of 89 | 34% | 31 of 89 | 0 of 1 | 0% | 0 | 0 | 0:02 |
| Darren Elkins | 0 | 36 of 90 | 40% | 45 of 100 | 1 of 3 | 33% | 0 | 0 | 0:22 |
Significant Strikes
| Fighter | Sig. Str. | Sig. Str. % | Head | Body | Leg | Distance | Clinch | Ground |
|---|---|---|---|---|---|---|---|---|
| Jonathan Pearce | 57 of 193 | 29% | 47 of 176 | 9 of 15 | 1 of 2 | 49 of 177 | 8 of 16 | 0 of 0 |
| Darren Elkins | 110 of 222 | 49% | 80 of 188 | 18 of 22 | 12 of 12 | 66 of 159 | 14 of 20 | 30 of 43 |
Significant Strikes Per Round
| Rd | Fighter | Sig. Str. | Sig. Str. % | Head | Body | Leg | Distance | Clinch | Ground |
|---|---|---|---|---|---|---|---|---|---|
| 1 | Jonathan Pearce | 11 of 57 | 19% | 9 of 51 | 2 of 6 | 0 of 0 | 10 of 55 | 1 of 2 | 0 of 0 |
| Darren Elkins | 30 of 64 | 46% | 16 of 47 | 11 of 14 | 3 of 3 | 21 of 51 | 4 of 5 | 5 of 8 | |
| 2 | Jonathan Pearce | 15 of 47 | 31% | 14 of 43 | 1 of 3 | 0 of 1 | 10 of 37 | 5 of 10 | 0 of 0 |
| Darren Elkins | 44 of 68 | 64% | 37 of 61 | 3 of 3 | 4 of 4 | 13 of 27 | 8 of 10 | 23 of 31 | |
| 3 | Jonathan Pearce | 31 of 89 | 34% | 24 of 82 | 6 of 6 | 1 of 1 | 29 of 85 | 2 of 4 | 0 of 0 |
| Darren Elkins | 36 of 90 | 40% | 27 of 80 | 4 of 5 | 5 of 5 | 32 of 81 | 2 of 5 | 2 of 4 |
Angelo picks Jonathan Pearce, trusting him to wrestle early and use his power and grappling. He notes Pearce is a good size favorite and should be, but expresses concern that Pearce was taken down three times in his last fight, and Darren Elkins will be looking for takedowns. He believes Pearce needs to grapple first and not wait for Elkins, otherwise Elkins could control the fight and win a decision.
Big Brady picks Pearce, citing his youth (eight years younger) and less wear and tear. He notes both fighters have similar styles but Pearce has better cardio and takedown ability. He expects Pearce to win a decision, though he acknowledges Elkins is tough and could have moments.
Cody picks Pearce, seeing it as a passing of the torch. He notes Pearce's wrestling and pace, and Elkins' age and damage. He thinks Pearce will win by decision or late finish.
Connor picks Jonathan Pearce, agreeing that Elkins is declining and that Pearce is too young and athletic. He notes that Pearce won't be afraid to grapple and is a giant at featherweight, making it a bad matchup for Elkins.
Daniel Levi picks Jonathan Pearce, calling it a passing of the torch. He notes Pearce's wrestling, cardio, and output, and believes Elkins' damage over the years is a factor. He is not betting at the heavy price but is confident in the pick.
The host is confident in Pearce, calling it a horrible matchup for Elkins. He thinks Pearce's speed, power, and youth will overwhelm Elkins early. He expects a first-round finish and likes the under 2.5 rounds at minus 135 as a steal. He notes that Pearce has all the advantages except heart, which won't be enough for Elkins.
Paul picks Elkins hesitantly, thinking the price is too wide. He notes Elkins' durability and pace, and Pierce's questionable cardio. He likes Elkins by decision at +800 as a sprinkle.
The MMA Guru picks Jonathan Pearce as a lock of the card, citing Darren Elkins' decline in speed and performance. He notes Elkins has looked slower in recent fights and that Pearce is a tough, momentum-driven fighter who has been melting opponents. He predicts a dominant decision or late TKO for Pearce.
Zane picks Jonathan Pearce, stating that Elkins is in decline and has been toughing out wins against lesser competition. He notes that Pearce is younger, bigger, and won't crumble; he will play his own game rather than being drawn into Elkins' strengths.
Totals
| Fighter | KD | Sig. Str. | Sig. Str. % | Total Str. | TD | TD % | Sub. Att | Rev. | Ctrl |
|---|---|---|---|---|---|---|---|---|---|
| Jonathan Pearce | 0 | 11 of 22 | 50% | 12 of 23 | 3 of 7 | 42% | 0 | 0 | 1:25 |
| Makwan Amirkhani | 0 | 90 of 112 | 80% | 144 of 178 | 4 of 5 | 80% | 0 | 0 | 4:46 |
Per Round
| Rd | Fighter | KD | Sig. Str. | Sig. Str. % | Total Str. | TD | TD % | Sub. Att | Rev. | Ctrl |
|---|---|---|---|---|---|---|---|---|---|---|
| 1 | Jonathan Pearce | 0 | 6 of 11 | 54% | 7 of 12 | 3 of 7 | 42% | 0 | 0 | 1:25 |
| Makwan Amirkhani | 0 | 46 of 51 | 90% | 61 of 67 | 2 of 3 | 66% | 0 | 0 | 1:39 | |
| 2 | Jonathan Pearce | 0 | 5 of 11 | 45% | 5 of 11 | 0 of 0 | --- | 0 | 0 | 0:00 |
| Makwan Amirkhani | 0 | 44 of 61 | 72% | 83 of 111 | 2 of 2 | 100% | 0 | 0 | 3:07 |
Significant Strikes
| Fighter | Sig. Str. | Sig. Str. % | Head | Body | Leg | Distance | Clinch | Ground |
|---|---|---|---|---|---|---|---|---|
| Jonathan Pearce | 11 of 22 | 50% | 9 of 19 | 0 of 1 | 2 of 2 | 11 of 22 | 0 of 0 | 0 of 0 |
| Makwan Amirkhani | 90 of 112 | 80% | 75 of 94 | 11 of 14 | 4 of 4 | 16 of 28 | 37 of 37 | 37 of 47 |
Significant Strikes Per Round
| Rd | Fighter | Sig. Str. | Sig. Str. % | Head | Body | Leg | Distance | Clinch | Ground |
|---|---|---|---|---|---|---|---|---|---|
| 1 | Jonathan Pearce | 6 of 11 | 54% | 4 of 8 | 0 of 1 | 2 of 2 | 6 of 11 | 0 of 0 | 0 of 0 |
| Makwan Amirkhani | 46 of 51 | 90% | 43 of 47 | 2 of 3 | 1 of 1 | 3 of 7 | 37 of 37 | 6 of 7 | |
| 2 | Jonathan Pearce | 5 of 11 | 45% | 5 of 11 | 0 of 0 | 0 of 0 | 5 of 11 | 0 of 0 | 0 of 0 |
| Makwan Amirkhani | 44 of 61 | 72% | 32 of 47 | 9 of 11 | 3 of 3 | 13 of 21 | 0 of 0 | 31 of 40 |
Angelo picks Jonathan Pearce, noting it's a grappler vs grappler matchup and it will come down to who shoots first. He believes Pearce will initiate the takedowns and has a high pace. He mentions Amirkhani just submitted a better wrestler in Mike Grundy, and all of Pearce's losses are grappling-based, so he suggests a live bet on Amirkhani if he gets early takedowns.
Big Brady picks Makwan Amirkhani for the upset by early submission. He likes Jonathan Pearce's style but notes Pearce often gets in bad spots on the mat. Amirkhani has dangerous submissions and good wrestling. However, Amirkhani's cardio is a concern; if he doesn't finish in round one, Pearce takes over. He suggests a live bet on Pearce if Amirkhani doesn't finish round one.
Cody picks Makwan Amirkhani, agreeing the line is fraudulent. He notes Pearce's striking defense is poor and he almost got submitted in his last fight. Cody thinks Amirkhani is dangerous early and can submit Pearce if he shoots. He also notes Amirkhani has good wrestling and could take Pearce down. Cody likes the moneyline at +170.
Daniel Levi picks Jonathan Pearce, emphasizing his high pace and ability to put up large strike and takedown numbers. He acknowledges that Amirkhani is dangerous in the first round with his wrestling and submissions, but notes that Amirkhani gasses out due to health issues. Levi believes if Pearce can survive the first round, his pace will be too much in the later rounds.
Pearce has the striking advantage, overall MMA advantage, and cardio advantage. Amirkhani's only threat is the anaconda choke. Pearce's team will have him prepared. Pearce can finish later or win a decision. I might pull the trigger at -200.
Paul picks Makwan Amirkhani at +170, calling it a dogger pass. He thinks the line is off and the fight is closer to 50-50. Paul notes Pearce's cardio looked poor in his last fight and that Amirkhani is dangerous on the ground. He believes if Pearce takes Amirkhani down, he'll be in trouble. Paul also likes Amirkhani by submission at +350.
The MMA Guru picks Makwan Amirkhani as an underdog, noting he always likes him but often loses when picking him. He believes Amirkhani is dangerous in the first round with submissions, and Jonathan Pearce leaves himself in bad positions during scrambles. Pearce's pressure and cardio are good, but his technical scrambles are not. The Guru expects an anaconda choke finish early.
Totals
| Fighter | KD | Sig. Str. | Sig. Str. % | Total Str. | TD | TD % | Sub. Att | Rev. | Ctrl |
|---|---|---|---|---|---|---|---|---|---|
| Jonathan Pearce | 0 | 18 of 44 | 40% | 59 of 102 | 6 of 10 | 60% | 2 | 0 | 11:17 |
| Christian Rodriguez | 0 | 26 of 60 | 43% | 38 of 77 | 2 of 2 | 100% | 3 | 1 | 1:05 |
Per Round
| Rd | Fighter | KD | Sig. Str. | Sig. Str. % | Total Str. | TD | TD % | Sub. Att | Rev. | Ctrl |
|---|---|---|---|---|---|---|---|---|---|---|
| 1 | Jonathan Pearce | 0 | 5 of 12 | 41% | 17 of 36 | 2 of 4 | 50% | 0 | 0 | 4:23 |
| Christian Rodriguez | 0 | 3 of 10 | 30% | 11 of 18 | 0 of 0 | --- | 1 | 0 | 0:06 | |
| 2 | Jonathan Pearce | 0 | 8 of 20 | 40% | 34 of 50 | 3 of 4 | 75% | 0 | 0 | 3:15 |
| Christian Rodriguez | 0 | 14 of 32 | 43% | 14 of 33 | 1 of 1 | 100% | 1 | 1 | 0:14 | |
| 3 | Jonathan Pearce | 0 | 5 of 12 | 41% | 8 of 16 | 1 of 2 | 50% | 2 | 0 | 3:39 |
| Christian Rodriguez | 0 | 9 of 18 | 50% | 13 of 26 | 1 of 1 | 100% | 1 | 0 | 0:45 |
Significant Strikes
| Fighter | Sig. Str. | Sig. Str. % | Head | Body | Leg | Distance | Clinch | Ground |
|---|---|---|---|---|---|---|---|---|
| Jonathan Pearce | 18 of 44 | 40% | 9 of 31 | 5 of 9 | 4 of 4 | 10 of 33 | 5 of 6 | 3 of 5 |
| Christian Rodriguez | 26 of 60 | 43% | 21 of 54 | 5 of 6 | 0 of 0 | 23 of 55 | 2 of 4 | 1 of 1 |
Significant Strikes Per Round
| Rd | Fighter | Sig. Str. | Sig. Str. % | Head | Body | Leg | Distance | Clinch | Ground |
|---|---|---|---|---|---|---|---|---|---|
| 1 | Jonathan Pearce | 5 of 12 | 41% | 1 of 7 | 4 of 5 | 0 of 0 | 1 of 7 | 3 of 4 | 1 of 1 |
| Christian Rodriguez | 3 of 10 | 30% | 0 of 6 | 3 of 4 | 0 of 0 | 2 of 7 | 1 of 3 | 0 of 0 | |
| 2 | Jonathan Pearce | 8 of 20 | 40% | 3 of 13 | 1 of 3 | 4 of 4 | 6 of 18 | 1 of 1 | 1 of 1 |
| Christian Rodriguez | 14 of 32 | 43% | 12 of 30 | 2 of 2 | 0 of 0 | 13 of 31 | 0 of 0 | 1 of 1 | |
| 3 | Jonathan Pearce | 5 of 12 | 41% | 5 of 11 | 0 of 1 | 0 of 0 | 3 of 8 | 1 of 1 | 1 of 3 |
| Christian Rodriguez | 9 of 18 | 50% | 9 of 18 | 0 of 0 | 0 of 0 | 8 of 17 | 1 of 1 | 0 of 0 |
Play-by-Play
View on SherdogRound 1
In another fight featuring a more established fighter against a UFC newcomer, Pearce (11-4, 2-1 UFC) will welcome “CeeRod” Rodriguez (7-0, 0-0 UFC) to the organization. On the one hand, “JSP” has not gone the distance in any of his eight fights, and on the other, Rodriguez celebrates a finish rate of 86%. It’s not likely this will make it into the hands of the judges, and referee Jason Herzog is ready for where the fight takes them. The featherweights do not bothering to touch gloves, and want to get after it right away. Both men land strikes from a distance to test one another, and Pearce sits down with a left hand before shooting in to put Rodriguez on the defensive early. Rodriguez keeps himself upright on the first attempt, and he sneaks in a knee when Pearce presses him to the wall heavily. Pearce gives him several knees back, and he looks to throw the newcomer to the ground but cannot quite get Rodriguez to the mat – possibly thanks to Rodriguez grabbing the cage with his toes. Pearce redoubles his effort for a takedown, and as soon as they hit the ground, “CeeRod” locks him down with a nasty guillotine choke. Rodriguez wraps his legs around Pearce’s waist, and Pearce slowly, methodically works his neck out of this dangerous choke. Rodriguez scrambles, but in the process, he gives up his back, and Pearce is quick to snatch on to it. Rodriguez twists through to not surrender dominant position, but “JSP” rolls through it to get a hook around the side of Rodriguez’ legs. The scrambles are wild and frantic, and even when Pearce holds a body lock, he cannot quite assume full back control. Pearce begins to soften his foe up with punches and elbows, and he holds on to an arm-triangle choke when Rodriguez tries to turn into top position. Rodriguez falls to his back after the ground exchange, with Pearce holding on tight, and the round concludes in this posture.
Sherdog Scores
Jay Pettry scores the round: 10-9 Pearce
Ben Duffy scores the round: 10-9 Rodriguez
Tyler Treese scores the round: 10-9 Pearce
Round 2
The round begins with Pearce coming out aggressively, but Rodriguez is there to greet him with powerful punches. Pearce jumps in the air with a knee, and Rodriguez intercepts him and tags him with a few shots. The strikes force “JSP” to shoot for a takedown, and it get stuffed in his first try. Rodriguez backs Pearce off with his hands, checking a leg kick and stalking him down. His forward momentum gets used against him, as Pearce manages to hit a takedown when Rodriguez is off-balance. Pearce resumes the strange quasi-back control position he held in the end of the round, and he looks to turn it to a twister. “CeeRod” bucks and twists to get out of this precarious position, and he fights his way back to his feet. Pearce threatens with a standing rear-naked choke, and he bails on it so that he can turn about and slam Rodriguez in the face with a jump knee. In the ensuing scramble, Rodriguez attacks with an armbar, and they fall to the mat. “JSP” slides his elbow out of the bad spot and wrenches his arm free, and as soon as they get to their knees, Pearce is on him with a takedown. Pearce manages to climb on top in search of an arm-triangle choke, and he abandons it when Rodriguez turns so that he can slug him in the face. Rodriguez sits up, but Pearce will not give him any space, as he takes Rodriguez’ back and assumes back control. Pearce fishes for a rear-naked choke but he cannot get his hooks in, and this allows Rodriguez to pop back up to his knees. Pearce follows him until he slides out the back door, and he lets Pearce up so that he can drill him with a heavy salvo of punches. Pearce winces but backs away against the fence to make it to Round 3.
Sherdog Scores
Jay Pettry scores the round: 10-9 Pearce
Ben Duffy scores the round: 10-9 Pearce
Tyler Treese scores the round: 10-9 Pearce
Round 3
To start off the final round, Rodriguez comes out firing, possibly aware that he is down on the scorecards. He tees off on Pearce with a few right hands, and he catches Pearce with a right hand when “JSP” attacks with a flying knee. Pearce falls forward into a takedown, and Rodriguez reverses him and goes after a rear-naked choke. The scramble is furious and fast-pace, and Rodriguez manages to take Pearce’s back as Pearce may be fading from two rounds of heavy grappling. Rodriguez clings to him with a body triangle, and Pearce still stands up. Rodriguez drills him in the face with a blistering elbow, and Pearce is wobbled badly and staggers back to the cage wall. “CeeRod” will not let him off the hook, giving chase and tagging Pearce with a few more punches. Hurt but not out, Pearce ducks down for a double-leg takedown, and he grounds Rodriguez to save his own chin. Rodriguez tries and ultimately fails to scramble, but he fights out of a submission attempt or two that Pearce sets up as he looks to secure Rodriguez’ back. Pearce successfully gets a hook around the waist with his leg, disallowing Rodriguez to turn towards him. Pearce uses this position to hunt for an arm-triangle choke from the back, and Rodriguez turns to his knees to break the grip but cannot get Pearce off of him. “JSP” locks on to a rear-naked choke, and Rodriguez successfully holds it off with wrist control and turns to try to stand up. Pearce wrangles him back down to the ground, making Rodriguez’ life miserable with ground control and back takes. Pearce nearly slides off the top, but he rejiggers himself to claim full mount briefly and hang on tight to the back when Rodriguez turns. Pearce rides out the position to the end of the fight.
Sherdog Scores
Jay Pettry scores the round: 10-9 Pearce (30-27 Pearce)
Ben Duffy scores the round: 10-9 Pearce (29-28 Pearce)
Tyler Treese scores the round: 10-9 Pearce (30-27 Pearce)
The Official Result
Jonathan Pearce def. Christian Rodriguez via Unanimous Decision (30-27, 29-28, 29-28)
Big Brady picks Jonathan Pearce despite being high on Rodriguez. He notes Rodriguez is coming up a weight class on short notice, which is a huge disadvantage against a pressure wrestler like Pearce. He predicts Pearce will break Rodriguez with his pace and get a second or third round finish.
Cody is very confident in Pearce, calling him a potential parlay piece. He notes that Rodriguez is taking the fight on short notice, is young and inexperienced, and comes from a kickboxing gym with poor grappling. Cody highlights Pearce's dominant performances at 145, where he ragdolls opponents with takedowns and ground-and-pound. He believes Pearce will press Rodriguez against the cage, take him down, and finish him.
Levi picks Pearce, citing his size (6' at featherweight), relentless pace, and takedown volume. He notes that Rodriguez is talented but too small for featherweight and that Pearce's style of constant pressure and grappling will break him. Levi acknowledges Rodriguez's bright future but believes this is a tough matchup for him.
Pearce has a significant size and strength advantage, with a 5-inch height edge. He will likely implement a takedown-heavy game plan, and Rodriguez is making a short-notice debut at a weight class not his own. Pearce's blueprint from training partners and his own grappling should lead to a finish inside the distance. Pearce inside distance is the pick.
Paul picks Pearce, agreeing that he deserves to be the biggest favorite on the card. He notes that Pearce's pace and strength at 145 are overwhelming, and that Rodriguez is a short-notice replacement with no notable wins. Paul thinks Pearce will use his size and wrestling to dominate.
The MMA Guru picks Jonathan Pearce to win by third-round rear-naked choke. He questions Christian Rodriguez's level of competition, noting his last opponent was 19-36 and that his record looks padded. He believes Pearce's grappling will be too much for Rodriguez, as Pearce has proven himself against better competition and will take Rodriguez into deep waters.
Totals
| Fighter | KD | Sig. Str. | Sig. Str. % | Total Str. | TD | TD % | Sub. Att | Rev. | Ctrl |
|---|---|---|---|---|---|---|---|---|---|
| Jonathan Pearce | 0 | 12 of 35 | 34% | 55 of 83 | 6 of 11 | 54% | 1 | 0 | 5:33 |
| Omar Morales | 0 | 12 of 25 | 48% | 27 of 42 | 0 of 0 | --- | 0 | 2 | 0:19 |
Per Round
| Rd | Fighter | KD | Sig. Str. | Sig. Str. % | Total Str. | TD | TD % | Sub. Att | Rev. | Ctrl |
|---|---|---|---|---|---|---|---|---|---|---|
| 1 | Jonathan Pearce | 0 | 10 of 29 | 34% | 28 of 48 | 4 of 7 | 57% | 0 | 0 | 2:22 |
| Omar Morales | 0 | 11 of 21 | 52% | 21 of 31 | 0 of 0 | --- | 0 | 1 | 0:08 | |
| 2 | Jonathan Pearce | 0 | 2 of 6 | 33% | 27 of 35 | 2 of 4 | 50% | 1 | 0 | 3:11 |
| Omar Morales | 0 | 1 of 4 | 25% | 6 of 11 | 0 of 0 | --- | 0 | 1 | 0:11 |
Significant Strikes
| Fighter | Sig. Str. | Sig. Str. % | Head | Body | Leg | Distance | Clinch | Ground |
|---|---|---|---|---|---|---|---|---|
| Jonathan Pearce | 12 of 35 | 34% | 9 of 28 | 3 of 4 | 0 of 3 | 11 of 33 | 1 of 2 | 0 of 0 |
| Omar Morales | 12 of 25 | 48% | 9 of 22 | 0 of 0 | 3 of 3 | 8 of 18 | 4 of 7 | 0 of 0 |
Significant Strikes Per Round
| Rd | Fighter | Sig. Str. | Sig. Str. % | Head | Body | Leg | Distance | Clinch | Ground |
|---|---|---|---|---|---|---|---|---|---|
| 1 | Jonathan Pearce | 10 of 29 | 34% | 7 of 22 | 3 of 4 | 0 of 3 | 10 of 29 | 0 of 0 | 0 of 0 |
| Omar Morales | 11 of 21 | 52% | 8 of 18 | 0 of 0 | 3 of 3 | 8 of 15 | 3 of 6 | 0 of 0 | |
| 2 | Jonathan Pearce | 2 of 6 | 33% | 2 of 6 | 0 of 0 | 0 of 0 | 1 of 4 | 1 of 2 | 0 of 0 |
| Omar Morales | 1 of 4 | 25% | 1 of 4 | 0 of 0 | 0 of 0 | 0 of 3 | 1 of 1 | 0 of 0 |
Angelo picks Omar Morales, citing his strong kickboxing, solid takedown defense, and forward pressure. He notes that Morales' only loss is to Giga Chikadze, which looks better after Giga's recent win. Angelo believes Morales' striking and ability to control the cage will be key, and he expects a stoppage win.
Big Brady picks Omar Morales to win by first-round knockout. He notes that Jonathan Pierce is very hittable and relies on his chin, while Morales has good takedown defense and is a black belt in BJJ. He believes Morales can take advantage of Pierce's sloppy striking and potentially finish him early, though he acknowledges Pierce's cardio could be a factor if the fight goes longer.
Cody picks Pearce as an underdog, citing his volume, pace, cardio, and wrestling. He notes Morales' low output and questions his power at UFC level. He worries about Morales' calf kicks but believes Pearce's pressure will overwhelm Morales over three rounds.
Daniel Levi picks Omar Morales because he believes Morales can slow the pace and fight at his own methodical rhythm. He notes that Jonathan Pearce absorbs too many strikes (upwards of seven per minute) and that Morales has a solid wrestling base and is in his prime at 35. Levi also mentions that Morales addressed medical issues that held him back previously, and expects a finish or decision win.
Jacob picks Jonathan Pearce, citing his wrestling, pace, and a quote from Pearce: 'I've never seen a striker out wrestle a wrestler.' Jacob believes Pearce will get takedowns and wear down Omar Morales. He also notes that Pearce has already beaten Morales once before.
The host believes Omar Morales will win via decision. He thinks Morales has a much more hard-nosed striking style that will march down Jonathan Pierce. He expects Pierce to struggle to close the distance and land takedowns due to the heavy onslaught from Morales. He notes that Pierce's grappling success is necessary for him to win, but he doubts Pierce can break Morales.
Paul does not have a clear pick. He is staying away from this fight, noting he has been burned by Pearce before (the Joe Lauzon loss). He respects others who like Morales but has no edge.
The MMA Guru picks Omar Morales over Jonathan Pearce, citing Morales' composed striking and takedown defense. He notes that Morales' only loss is to Giga Chikadze, which has aged well, and that Pearce, while looking good against Kaikamaka, is not at Morales' level. He expects Morales to win a unanimous decision, as he doesn't see the fight hitting the ground and believes Morales is a more versatile and dangerous striker.
Totals
| Fighter | KD | Sig. Str. | Sig. Str. % | Total Str. | TD | TD % | Sub. Att | Rev. | Ctrl |
|---|---|---|---|---|---|---|---|---|---|
| Jonathan Pearce | 0 | 51 of 100 | 51% | 113 of 172 | 5 of 7 | 71% | 1 | 0 | 3:26 |
| Kai Kamaka III | 0 | 47 of 83 | 56% | 48 of 84 | 1 of 3 | 33% | 1 | 1 | 0:33 |
Per Round
| Rd | Fighter | KD | Sig. Str. | Sig. Str. % | Total Str. | TD | TD % | Sub. Att | Rev. | Ctrl |
|---|---|---|---|---|---|---|---|---|---|---|
| 1 | Jonathan Pearce | 0 | 22 of 55 | 40% | 23 of 56 | 1 of 3 | 33% | 0 | 0 | 0:35 |
| Kai Kamaka III | 0 | 35 of 64 | 54% | 36 of 65 | 1 of 2 | 50% | 0 | 0 | 0:11 | |
| 2 | Jonathan Pearce | 0 | 29 of 45 | 64% | 90 of 116 | 4 of 4 | 100% | 1 | 0 | 2:51 |
| Kai Kamaka III | 0 | 12 of 19 | 63% | 12 of 19 | 0 of 1 | 0% | 1 | 1 | 0:22 |
Significant Strikes
| Fighter | Sig. Str. | Sig. Str. % | Head | Body | Leg | Distance | Clinch | Ground |
|---|---|---|---|---|---|---|---|---|
| Jonathan Pearce | 51 of 100 | 51% | 34 of 76 | 12 of 19 | 5 of 5 | 27 of 71 | 6 of 9 | 18 of 20 |
| Kai Kamaka III | 47 of 83 | 56% | 20 of 51 | 20 of 25 | 7 of 7 | 44 of 79 | 2 of 3 | 1 of 1 |
Significant Strikes Per Round
| Rd | Fighter | Sig. Str. | Sig. Str. % | Head | Body | Leg | Distance | Clinch | Ground |
|---|---|---|---|---|---|---|---|---|---|
| 1 | Jonathan Pearce | 22 of 55 | 40% | 10 of 37 | 9 of 15 | 3 of 3 | 19 of 51 | 3 of 4 | 0 of 0 |
| Kai Kamaka III | 35 of 64 | 54% | 13 of 37 | 15 of 20 | 7 of 7 | 35 of 64 | 0 of 0 | 0 of 0 | |
| 2 | Jonathan Pearce | 29 of 45 | 64% | 24 of 39 | 3 of 4 | 2 of 2 | 8 of 20 | 3 of 5 | 18 of 20 |
| Kai Kamaka III | 12 of 19 | 63% | 7 of 14 | 5 of 5 | 0 of 0 | 9 of 15 | 2 of 3 | 1 of 1 |
Play-by-Play
View on SherdogRound 1
Opening up this six-fight main card is a potential featherweight brawl and third consecutive match with a Hawaiian involved as “The Fighting Hawaiian” Kamaka III (8-2, 1-0 UFC) takes on “JSP” Pearce (9-4, 0-1 UFC). Referee Dan Miragliotta is in charge of the cage for the main card opener, the touch of gloves comes just a second before Pearce kicks his man to the body. Pearce throws another front kick to the midsection, and Kamaka decides it’s his turn and he cracks Pearce in the ribs with his shin. Both men are almost exclusively targeting the body, perhaps because they saw the Mazany stoppage backstage, and both are landing strikes from the outside. Kamaka keeps punching the torso, and he pushes back a leaping “JSP” with one strike. Kamaka lands two heavy leg kicks that make Pearce react, and Kamaka continues kicking and lands a body kick to the liver. Kamaka scores a body kick that clips off the cup, and Pearce shrugs it off and has the two continue. Pearce throws up a kick, and when Kamaka grabs hold of him, Pearce falls to his back and considers a submission off his back. Kamaka is not interested in this grappling exchange, and steps out of guard to allow them to strike again. Kamaka gets off a solid jab and a leg kick, and “JSP” returns fire with a short salvo of punches over the top. The Hawaiian kicks the leg and gets shoved back with his foe’s foot, and the two clash together and swing heavily, but are too close to land flush. Kamaka sits down on a leg kick, and he barely blocks the counter right hand coming at him. “JSP” tries to grab on to the leg to go after a takedown, and Kamaka shoves it away and lands a few heavy punches. “The Fighting Hawaiian” flirts with his own takedown attempt, but when it does not succeed, Pearce replies in kind and is also stuffed. Kamaka scores a stiff jab, and he over-extends himself with a follow-up punch to allow Pearce to take the fight down. Kamaka flips over and gets to his knees, where he stands up while allowing Pearce to take his back. The Hawaiian gets kneed in the face when “JSP” slides off his back, and the two separate. Pearce jumps at him with a flying knee, but Kamaka sees it coming and waits for his opponent to land to score a quick left hand at the horn.
Sherdog Scores
Jay Pettry scores the round: 10-9 Kamaka
Tristen Critchfield scores the round: 10-9 Kamaka
Tyler Treese scores the round: 10-9 Kamaka
Round 2
“JSP” starts the round with another flying knee, and a pair of looping hooks get Kamaka’s attention early on. Pearce crashes forward to implement his grappling, and he hits a takedown. Like the previous round, Kamaka bursts up and gives up his back, walking up the fence while wearing Pearce like a backpack. Kamaka riskily falls forward to escape the position, but it proves to his benefit as Pearce falls off. The two both scramble back to their feet, and they start trading huge punches. Pearce lands a few, and Kamaka gives them back to him. When Pearce lines up a knee in a clinch, the Hawaiian works the body and draws a reaction. Pearce decides to take the fight back down again, and this time Kamaka is not able to pop back up. Instead, Pearce climbs over his guard and nails him with a big shot, but Kamaka is scrambling wildly to get back to his knees. Pearce takes back control and gets his hooks in, and he flattens Kamaka out to start landing heavy punches. “JSP” hunts for a rear-naked choke, and when Kamaka breaks the grip, Pearce smashes him with an elbow. Pearce alternates strikes with submission attempts, and Kamaka rolls to his back and allows Pearce to stay on his back. Kamaka spins around and gets back on top, but he slams down a right hand. Pearce bucks him off and gets up, where he takes Kamaka back down instantly. On his opponent’s back and sitting up like he is riding him like a horse, Pearce sits up and smacks his foe with hammerfists both sides of his head.
Pearce keeps pounding on Kamaka, and Miragliotta leans in to chide Kamaka to defend himself. “JSP” knows this is his time to shine, and he pours it on with punch after punch until Miragliotta has seen enough.
This is a huge win for Pearce, who earns his first win inside the Octagon while also becoming the first man to finish “The Fighting Hawaiian” with strikes. With that, Hawaiian fighters end their night at 0-3.
The Official Result
Jonathan Pearce def. Kai Kamaka III R2 4:28 via TKO (Punches)
Kai Kamaka III - Fight History
AJ picks Luke Riley by decision, praising his precise straight punches and speed. He believes Riley's technical striking will outwork Kai Kamaka's pressure boxing, and that Kamaka's takedown threats won't be enough. He notes the odds are too wide but still favors Riley.
AJ picks Luke Riley but emphasizes it will be a hard-fought win. He notes Kamaka is well-rounded, very experienced, and has fought in UFC, PFL, and Bellator. He warns that Riley's price tag is incredibly high and that betting on him is risky.
AJ picks Luke Riley to beat Kai Kamaka, citing Riley's striking and Kamaka's lack of power. He believes Riley's clean boxing and leg kicks will overwhelm Kamaka, who is a journeyman. He sees a potential knockout or decision win for Riley.
AJ feels Luke Riley is a confident pick, noting that Kamaka doesn't offer much damage threat. He thinks Riley will touch Kamaka's chin and possibly get a KO in the second or third round, or win by decision. He mentions Riley by KO round 2 at +850 and Riley by decision at +120.
AJ picks Luke Riley, noting he is a big favorite and should win. He acknowledges Kamaka is a tough journeyman but believes Riley will pull it off.
AJ picks Luke Riley to win a decision, emphasizing his sharp kickboxing, speed, and power advantage. He believes Kamaka is durable but lacks finishing power, and that Riley's cleaner striking will outpoint him. AJ notes that Riley is a prospect on the rise and that Kamaka's recent loss to Diego Brandao is a concern.
Angelo picks Luke Riley, citing his cleaner striking, speed, and range management. He is slightly nervous due to past English prospects failing in the UFC. He expects a decision win, not a finish, due to Kai's toughness and Luke's outside fighting style.
Angelo picks Luke Riley because he is faster, cleaner, and more technical. He notes that Riley's takedown defense is okay and he stays busy. He worries about Cage Warriors signings when they face gritty opponents, but believes Riley should win straightforwardly. He thinks the matchup is favorable and Riley is the better striker.
Big Brady is confident Riley wins by decision. He thinks Riley will have the bigger moments and land bigger shots, but Kamaka is stupid tough and the fight likely goes the distance. He notes the -400 opener was wild, but still thinks Riley wins. He might look at a decision prop or fight goes the distance.
Big Brady picks Luke Riley to win by decision. He highlights Riley's power and better defense, expecting him to land harder shots than Kamaka. He notes Kamaka's toughness and solid skills but believes Riley's power will be the difference. He acknowledges Kamaka might mix in takedowns but thinks Riley will get back up and out-strike him.
Big Brady passes on this fight, calling it a 'close but clear winner' for Luke Riley based on power and big moments, but expects a decision. He notes Kamaka is tough and his fights are often close, so he does not bet.
Cody picks Luke Riley, citing his superior striking and power. He notes Kamaka's tendency to go to decision and be in close fights. However, he is cautious about the price and expects a competitive fight, possibly a split decision.
Daniel Levi picks Luke Riley to defeat Kai Kamaka, citing Riley's speed, athleticism, and power advantage. He acknowledges Kamaka's experience and well-rounded skills but believes Riley can do enough to win at least two rounds. Levi does not predict a knockout but expects a clear decision win.
Jacob picks Luke Riley but is not confident, having been anti-Riley in the past. He notes that Kai Kamaka is a tough veteran who doesn't get pushed around, and that Riley has been taken down and controlled before. However, he believes Riley is the better striker in a mostly striking matchup and should win, but warns that if Kamaka gets in his face early, it could get interesting.
Lucrative James picks Luke Riley via decision, expecting a competitive striking fight. He believes Riley is the better boxer with more power and will defend takedowns after round one. He notes Kamaka's toughness but thinks Riley's offensive boxing will pull away in the later rounds.
The host acknowledges the fight will be closer than odds indicate and that an underdog shot on Kamaka could be warranted. However, he believes Riley will land more significant and eye-catching shots, leading to a decision win.
The host picks Riley to win by decision, believing his striking will land the more eye-catching shots. However, he considers Kamaka a live underdog due to his experience and well-roundedness, and notes the -305 line is too steep.
Paul picks Luke Riley by decision, noting Kamaka's durability and tendency to go to split decisions. He likes the split decision prop at +550. He acknowledges Riley's grappling deficiencies but believes his boxing will be enough.
The MMA Guru picks Luke Riley to win by KO in the first or second round. He likes Riley's boxing advantage and believes Riley will catch a kick and counter. He notes that Kamaka is no joke but thinks Riley's power and timing will be the difference. He also mentions that Riley should not be a -290 favorite, more like -190 or -200.
Totals
| Fighter | KD | Sig. Str. | Sig. Str. % | Total Str. | TD | TD % | Sub. Att | Rev. | Ctrl |
|---|---|---|---|---|---|---|---|---|---|
| Kai Kamaka III | 0 | 105 of 159 | 66% | 144 of 199 | 0 of 1 | 0% | 0 | 0 | 0:23 |
| Dakota Hope | 1 | 106 of 258 | 41% | 155 of 312 | 1 of 3 | 33% | 0 | 0 | 1:18 |
Per Round
| Rd | Fighter | KD | Sig. Str. | Sig. Str. % | Total Str. | TD | TD % | Sub. Att | Rev. | Ctrl |
|---|---|---|---|---|---|---|---|---|---|---|
| 1 | Kai Kamaka III | 0 | 21 of 36 | 58% | 31 of 46 | 0 of 0 | --- | 0 | 0 | 0:05 |
| Dakota Hope | 1 | 42 of 89 | 47% | 66 of 117 | 0 of 0 | --- | 0 | 0 | 0:35 | |
| 2 | Kai Kamaka III | 0 | 41 of 54 | 75% | 59 of 72 | 0 of 1 | 0% | 0 | 0 | 0:10 |
| Dakota Hope | 0 | 32 of 83 | 38% | 44 of 95 | 0 of 0 | --- | 0 | 0 | 0:19 | |
| 3 | Kai Kamaka III | 0 | 43 of 69 | 62% | 54 of 81 | 0 of 0 | --- | 0 | 0 | 0:08 |
| Dakota Hope | 0 | 32 of 86 | 37% | 45 of 100 | 1 of 3 | 33% | 0 | 0 | 0:24 |
Significant Strikes
| Fighter | Sig. Str. | Sig. Str. % | Head | Body | Leg | Distance | Clinch | Ground |
|---|---|---|---|---|---|---|---|---|
| Kai Kamaka III | 105 of 159 | 66% | 44 of 94 | 47 of 51 | 14 of 14 | 83 of 131 | 22 of 28 | 0 of 0 |
| Dakota Hope | 106 of 258 | 41% | 62 of 201 | 43 of 54 | 1 of 3 | 61 of 197 | 44 of 57 | 1 of 4 |
Significant Strikes Per Round
| Rd | Fighter | Sig. Str. | Sig. Str. % | Head | Body | Leg | Distance | Clinch | Ground |
|---|---|---|---|---|---|---|---|---|---|
| 1 | Kai Kamaka III | 21 of 36 | 58% | 4 of 17 | 10 of 12 | 7 of 7 | 18 of 31 | 3 of 5 | 0 of 0 |
| Dakota Hope | 42 of 89 | 47% | 23 of 68 | 19 of 21 | 0 of 0 | 19 of 56 | 22 of 29 | 1 of 4 | |
| 2 | Kai Kamaka III | 41 of 54 | 75% | 18 of 30 | 19 of 20 | 4 of 4 | 32 of 45 | 9 of 9 | 0 of 0 |
| Dakota Hope | 32 of 83 | 38% | 19 of 64 | 13 of 18 | 0 of 1 | 20 of 71 | 12 of 12 | 0 of 0 | |
| 3 | Kai Kamaka III | 43 of 69 | 62% | 22 of 47 | 18 of 19 | 3 of 3 | 33 of 55 | 10 of 14 | 0 of 0 |
| Dakota Hope | 32 of 86 | 37% | 20 of 69 | 11 of 15 | 1 of 2 | 22 of 70 | 10 of 16 | 0 of 0 |
Play-by-Play
View on SherdogBETTING PREVIEW | SCOUTING REPORT | ODDS: Kamaka (-155); Hope (+130)
Round 1
We are here together on Saturday to bear witness to an Apex event that has a couple ranked fighters and three bouts with a betting favorite sporting odds above -600. A baker’s dozen series of tilts will play out in the world-famous Octagon, and the action kicks off at the lightweight division. Fresh off a crushing two-minute knockout in Fury FC while the UFC was in town last month, Hope (11-1, 0-0 UFC) gets the shot he called for that Friday night. He takes the short-notice pairing against the returning Kamaka (17-7-1, 1-2-1 UFC). The lightweights take center stage while referee Keith Peterson watches on, and the two rush towards one another with no nonsense and no glove touch.
Advertisement
Hope races out of his corner throwing caution to the wind, scoring punches and mashing his way into a clinch. He nails Kamaka with an elbow to break off, and measures himself to double up on a jab and hurl a right hand over the top. Hope scores another hard punch and starts driving knees to the liver. Kamaka bends over from the quick strikes, opening up Hope to knee him in the face once or twice. The Hawaiian remains in the clinch to get his bearings, and Hope knocks him back with a right hand to separate. Kamaka fires back and nails the front leg with a kick after tossing a few punches, and he finds that at 75 seconds in, Hope takes his foot off the gas for a moment. Kamaka delivers a front kick to the body after swaying back to avoid the looping punches from the Texan, and he chews up the front leg with a few kicks. Hope swings his way into a grappling exchange, resulting in a clinch so that Hope can work the body with knees and a clean left hand. Kamaka targets the body and front leg when he gets a second at his preferred range, pecking and probing when Hope decides not to explode at him. Hope gathers a head of steam and crashes forward swinging his fists, landing one or two before Kamaka shells up.
Kamaka decides it is time to throw back, and he starts swinging for the bleachers. Hope fires back as their heads bash together and knocks him off his feet, charging to hammer the downed Hawaiian and hope to put him away. Kamaka tanks the strikes, absorbs a few to the back of the head, and he wall-walks to stand back up. While they remain tied up in the center of the cage, Hope keeps working his foe over with knees to the midsection and an elbow on the break. Kamaka chips at the lead leg and leans back from a counter overhand right. Hope takes a heavy low kick and blitzes, and Kamaka is ready for it and defends the worst of them before kneeing Hope to break away. Hope successfully counters a low kick with right upstairs, and he knees the stomach and pops Kamaka with his shoulder when they are in close proximity. Hope shoulder strikes his opponent in the jaw and is kicked away with a front kick. The horn sounds.
Sherdog Scores
Jay Pettry scores the round: 10-9 Hope
Tristen Critchfield scores the round: 10-9 Hope
Tyler Treese scores the round: 10-9 Hope
Round 2
Hope starts out the round again attacking with everything he has, swinging wildly and ringing Kamaka’s bell early. Kamaka grabs hold of him to keep himself afloat, resulting in his absorption of a stern shoulder to his jaw. Kamaka frees himself and starts to beat on the front leg of his adversary, forcing Hope to change stances. Hope offers a feeble front kick back from his other leg and keeps his front leg high to prevent it being kicked back. Kamaka boxes on the inside while Hope is still putting power on everything, and this leaves Hope open to straight, quick strikes like a push kick down the middle. Kamaka grabs hold of “Huracan” and holds him for as long as he can, but Hope breaks free and swings recklessly. Kamaka stays composed, works the lead leg again and dances away from the following fire.
Kamaka’s low kick is starting to pay off, as Hope is slightly compromised when he rushes in. Hope still has plenty of power, as Kamaka gets cracked and looks around for a second before regaining his composure in the clinch. When tied up, Hope knees the torso and rips a pair of punches before Kamaka decides to find another approach. Kamaka backs away and works his way forward with a huge right hand, drawing out fire from Hope. Hope unleashes a fury of punches and knees, and Kamaka is tough as can be and does not wilt in the oncoming fire. Kamaka slashes out with an elbow when they split up, and Hope strikes the body back. Kamaka’s leg kick scores again, and his head movement keeps him out of danger when Hope swings back. Kamaka lets a high kick go, and he intercepts Hope with a knee to the body when Hope charges again. Hope scores twice, and Kamaka is right there in the pocket to trade with him. There is no fear of the power as the two duke it out to the bell.
Sherdog Scores
Jay Pettry scores the round: 10-9 Hope
Tristen Critchfield scores the round: 10-9 Hope
Tyler Treese scores the round: 10-9 Hope
Round 3
Hope says hello in the final frame with a body kick, and Kamaka stands in the pocket to give him back more to think about. Kamaka tees off on Hope’s front leg and abdomen with both shins, backing Hope to the wall and ignoring a right hand to dig a left to the body. Kamaka appears the fresher of the two, while Hope’s volume is diminishing to a degree. Kamaka measures an advancing Hope with a step-in knee, and he stays in place too long to get popped with a few punches. Kamaka forces the Texan to back off courtesy of an elbow on the bridge of the nose, and he stabs his toes to Hope’s body to deter him from recklessly advancing. They come together and clinch, with Kamaka getting the upper hand with an elbow that makes Hope take a funny step back. Hope tries to brawl, and Kamaka sees the telegraphed hurled hands coming and avoids the worst of it.
They crash together, and Hope lands an elbow while Kamaka gets off a knee. Hope goes body-head-body, and he follows with a knee to the liver. Kamaka stays right in his face and jacks him in the jaw, forcing Hope to stumble with a low kick. Hope knees the body and elbows up top, and Kamaka does not flinch. Kamaka goes to the body, and he is knocked back from a counter right hand. Hope rifles off a left to the body and dips back before the counters, and he crashes the pocket once more attacking with everything he has. Kamaka rolls with the punches and fires back with a vengeance, and the two bang their heads together once more. No blood is drawn from what is at least the third time the two bulls have conked heads, and they proceed to keep dueling as if they were just getting started. Hope takes a hard punch to the body and has to suck wind to recover, and he uses his momentum to tackle Kamaka to the floor. Kamaka quickly wall-walks without absorbing much, and he leans on the fencing until the intense match concludes. It may all come down to the scoring of the second round.
Sherdog Scores
Jay Pettry scores the round: 10-9 Kamaka (29-28 Hope)
Tristen Critchfield scores the round: 10-9 Kamaka (29-28 Hope)
Tyler Treese scores the round: 10-9 Kamaka (29-28 Hope)
The Official Result
Kai Kamaka III def. Dakota Hope via Split Decision (28-29, 29-28, 29-28)
Cody picks Kamaka, citing his experience and ability to win close decisions. He expects Kamaka's striking and takedown defense to edge out Hope, who may gas due to his explosive style.
Connor picks Kamaka, noting that Hope is aimless and doesn't build attacks. He expects Kamaka to make the fight harder than necessary but still win. Kamaka's experience and short-notice readiness are advantages, though he acknowledges Kamaka can get trapped into weird fights.
Paul leans towards Hope, noting his physicality and wrestling. He expects Hope to take Kamaka down and control him, though he acknowledges Kamaka's experience.
The MMA Guru picks Kai Kamaka III, citing his experience as a crafty veteran who has fought tough competition like Brendan Loughnane and Bubba Jenkins. He dismisses Dakota Hope's record as padded against lesser opponents and notes that Hope lost to a 9-7 fighter. He believes Kamaka's veteran savvy will be the difference.
Zane picks Kamaka confidently, noting that Kamaka is a more experienced professional who is likely to be ready on short notice. He sees Hope as a good athlete but without much MMA game, aimless and one-and-done as a striker. Kamaka's front-foot pressure and wrestling should overwhelm Hope.
Totals
| Fighter | KD | Sig. Str. | Sig. Str. % | Total Str. | TD | TD % | Sub. Att | Rev. | Ctrl |
|---|---|---|---|---|---|---|---|---|---|
| Kai Kamaka III | 0 | 41 of 110 | 37% | 53 of 122 | 1 of 5 | 20% | 0 | 0 | 0:35 |
| Danny Chavez | 0 | 48 of 77 | 62% | 80 of 114 | 0 of 3 | 0% | 0 | 0 | 3:33 |
Per Round
| Rd | Fighter | KD | Sig. Str. | Sig. Str. % | Total Str. | TD | TD % | Sub. Att | Rev. | Ctrl |
|---|---|---|---|---|---|---|---|---|---|---|
| 1 | Kai Kamaka III | 0 | 9 of 31 | 29% | 9 of 31 | 1 of 1 | 100% | 0 | 0 | 0:06 |
| Danny Chavez | 0 | 14 of 19 | 73% | 14 of 19 | 0 of 1 | 0% | 0 | 0 | 0:00 | |
| 2 | Kai Kamaka III | 0 | 15 of 47 | 31% | 15 of 47 | 0 of 1 | 0% | 0 | 0 | 0:00 |
| Danny Chavez | 0 | 22 of 39 | 56% | 22 of 39 | 0 of 0 | --- | 0 | 0 | 0:06 | |
| 3 | Kai Kamaka III | 0 | 17 of 32 | 53% | 29 of 44 | 0 of 3 | 0% | 0 | 0 | 0:29 |
| Danny Chavez | 0 | 12 of 19 | 63% | 44 of 56 | 0 of 2 | 0% | 0 | 0 | 3:27 |
Significant Strikes
| Fighter | Sig. Str. | Sig. Str. % | Head | Body | Leg | Distance | Clinch | Ground |
|---|---|---|---|---|---|---|---|---|
| Kai Kamaka III | 41 of 110 | 37% | 25 of 81 | 7 of 14 | 9 of 15 | 28 of 91 | 10 of 16 | 3 of 3 |
| Danny Chavez | 48 of 77 | 62% | 9 of 28 | 15 of 20 | 24 of 29 | 42 of 68 | 6 of 9 | 0 of 0 |
Significant Strikes Per Round
| Rd | Fighter | Sig. Str. | Sig. Str. % | Head | Body | Leg | Distance | Clinch | Ground |
|---|---|---|---|---|---|---|---|---|---|
| 1 | Kai Kamaka III | 9 of 31 | 29% | 2 of 18 | 3 of 6 | 4 of 7 | 9 of 31 | 0 of 0 | 0 of 0 |
| Danny Chavez | 14 of 19 | 73% | 3 of 7 | 3 of 3 | 8 of 9 | 14 of 19 | 0 of 0 | 0 of 0 | |
| 2 | Kai Kamaka III | 15 of 47 | 31% | 9 of 35 | 2 of 5 | 4 of 7 | 14 of 45 | 1 of 2 | 0 of 0 |
| Danny Chavez | 22 of 39 | 56% | 3 of 13 | 6 of 9 | 13 of 17 | 21 of 36 | 1 of 3 | 0 of 0 | |
| 3 | Kai Kamaka III | 17 of 32 | 53% | 14 of 28 | 2 of 3 | 1 of 1 | 5 of 15 | 9 of 14 | 3 of 3 |
| Danny Chavez | 12 of 19 | 63% | 3 of 8 | 6 of 8 | 3 of 3 | 7 of 13 | 5 of 6 | 0 of 0 |
Play-by-Play
View on SherdogRound 1
The long-historied battle between Florida and Hawaii continues here at featherweight, as “The Colombian Warrior” Chavez (11-4, 1-1 UFC) locks horns with “The Fighting Hawaiian” Kamaka III (8-4, 1-2 UFC). The horn-locking official overseeing the match is referee Herb Dean, who locks the cage behind them when the starting horn sounds and the fighters touch gloves. Kamaka reaches out with jabs but Chavez is there with a front kick to back him away. As both stare at one another, they tensely kick the other’s lead leg one after the other. Chavez slings up a head kick that is easily blocked, and Kamaka ducks a looping right hand. Chavez explodes into a takedown attempt, putting Kamaka on his back for a moment, but only keeping him there briefly. Kamaka springs back up and makes Chavez pay with a right hand, and he tries to follow it but it comes up short. Chavez throws several inaccurate strikes and Kamaka fires back at him with a deliberate barrage of calf kicks. The kicks land on the same spot again and again, until Chavez uncomfortably picks up his leg after one smacks him. Chavez’ offense slows after these kicks do some damage, and Kamaka stands in front of him peppering him with kicks. He throws these kicks until Chavez reacts visibly, and the round ends.
Sherdog Scores
Jay Pettry scores the round: 10-9 Kamaka
Brian Knapp scores the round: 10-9 Kamaka
Tyler Treese scores the round: 10-9 Kamaka
Round 2
Chavez steps forward when the round begins to clock Kamaka with a fiery right hand, and Kamaka reels and throws back at him. Chavez is quick to string together several one-twos, surprising the Hawaiian as he stings him with these combinations. Kamaka gathers himself and chops down Chavez’ lead leg until Chavez runs at him to take him down. The takedown fails, and Kamaka is able to catch him on the way out with a hacking kick. Kamaka keeps drilling the same minute spot again and again, forcing Chavez to lift his lead leg up in pain. Chavez tries to plant his shin on Kamaka’s side, but the Hawaiian closes the distance to break it up. Kamaka methodically breaks down Chavez’ leg with kicks, and Kamaka reaches out to swat down a combination with outstretched fingers to jab Chavez deep in the eye. Chavez falls to the ground in major pain, screaming as the finger went deep into his right eye. Dean quickly calls in the doctor, and Chavez cannot even open his eye to show him its condition. He tells the doctor not to stop the fight, asking for as much time as he can get, and he requests some water to rinse his eye out. After a lengthy recovery time, Chavez pops up and says he is ready to go. Dean gives Kamaka a hard warning from his pokes – Kamaka was poked in the previous round -- and Chavez is incensed and ready to rock. He throws caution to the wind, swinging huge punches at his opponent. Kamaka recovers, frames off and blasts Chavez in the cup with his knee. Chavez crumbles to the ground in trouble again, and once more the fouled fighter in on his knees in a bad way. Kamaka is deducted one point before they get back to it, and Chavez once more recovers. The two engage in a torrid flurry at one another, stinging one another and walking through damaging blows. Kamaka kicks the leg, and Chavez picks it up and swings a hook kick at him. Kamaka targets the calf a few more times, he steps forward and scores a knee. The two kick at one another until this tough round comes to a close.
Sherdog Scores
Jay Pettry scores the round: 9-9
Brian Knapp scores the round: 9-9
Tyler Treese scores the round: 9-9
Round 3
Chavez tries his luck early on with a leg kick, and both men swing for the fences recklessly. Kamaka gives him one kick back and charges ahead to pursue a takedown. Chavez defends with his back against the fence by slamming his elbow on to the side of Kamaka’s head to embrace his inner Travis Browne. The Hawaiian’s knees wobble a little, but he is ok as he squeezes to take the fight down. Kamaka eats several knees on the chin as Chavez keeps his balance, and the stalemate of this position continues as Kamaka grinds on his foe. Kamaka turns a double into a single, and Chavez defends with a kimura to sweep his opponent but cannot pull it off. Instead, Kamaka briefly pulls Chavez’ legs out beneath him, but “The Colombian Warrior” stands back up. After a few warnings from Dean, the fighters push free and separate. Chavez sticks out a left hook that surprises Kamaka, and he pursues his own takedown to Kamaka’s surprise. Chavez goes low for a single, and he changes levels but it fails. Kamaka lands a body kick as Chavez chases after him, and Chavez throws everything he has into one string of punches until the fight mercifully ends.
Sherdog Scores
Jay Pettry scores the round: 10-9 Chavez (28-28)
Brian Knapp scores the round: 10-9 Kamaka (29-27 Kamaka)
Tyler Treese scores the round: 10-9 Kamaka (29-27 Kamaka)
The Official Result
Kai Kamaka III vs. Danny Chavez is ruled a Majority Draw (29-27, 28-28, 28-28)
Big Brady picks Kai Kamaka III in what he calls the toughest fight to call on the card. He favors Kamaka's youth and higher volume, noting that Chavez is low-volume and was exposed by Jared Gordon. However, he acknowledges both fighters have flaws and can be taken down. He predicts a decision win for Kamaka.
Cody leans towards Danny Chavez, citing Kamaka's poor cardio and Chavez's leg kicks and smart game plan. He notes that Kamaka starts strong but fades, and Chavez has shown he can exploit that. Cody believes Chavez can win a decision or even get a finish if Kamaka gasses. He sees value in Chavez at near pick'em odds.
Levi thinks Kamaka has a couple of physical advantages and believes he will edge out a close fight. He references Kamaka's controversial loss to TJ Brown as a robbery, suggesting Kamaka deserved the win. Levi acknowledges Chavez's durability and calf kicks but leans with Kamaka to get it done, though he admits the fight could be close and competitive.
Chavez trains at MMA Masters and uses calf kicks effectively. Kamaka struggles when opponents push the pace and get their own game going. Chavez should target the calf kick early to slow Kamaka, then mix in striking and takedowns. Kamaka is on short notice, which favors Chavez. Even money is a slight advantage for Chavez.
Paul also picks Danny Chavez, agreeing with Cody's reasoning. He notes that Chavez has a clear path to victory with leg kicks and takedowns, and that Kamaka's cardio is a major liability. Paul is not extremely confident but sees Chavez as the slight favorite in a close fight.
The MMA Guru picks Danny Chavez over Kai Kamaka III, noting that Chavez's main weakness is grappling, but Kamaka is not a grappler. He expects Chavez to chop at Kamaka's lead leg with calf kicks, as Kamaka sits heavy on his lead leg. He predicts Chavez will win by unanimous decision 29-28, with Kamaka possibly winning the first round but fading as the fight goes on.
Totals
| Fighter | KD | Sig. Str. | Sig. Str. % | Total Str. | TD | TD % | Sub. Att | Rev. | Ctrl |
|---|---|---|---|---|---|---|---|---|---|
| T.J. Brown | 1 | 61 of 128 | 47% | 85 of 155 | 1 of 1 | 100% | 0 | 0 | 5:38 |
| Kai Kamaka III | 0 | 82 of 211 | 38% | 110 of 243 | 2 of 4 | 50% | 1 | 0 | 0:36 |
Per Round
| Rd | Fighter | KD | Sig. Str. | Sig. Str. % | Total Str. | TD | TD % | Sub. Att | Rev. | Ctrl |
|---|---|---|---|---|---|---|---|---|---|---|
| 1 | T.J. Brown | 0 | 22 of 47 | 46% | 23 of 48 | 0 of 0 | --- | 0 | 0 | 0:45 |
| Kai Kamaka III | 0 | 34 of 88 | 38% | 35 of 91 | 0 of 1 | 0% | 0 | 0 | 0:00 | |
| 2 | T.J. Brown | 1 | 26 of 49 | 53% | 40 of 65 | 0 of 0 | --- | 0 | 0 | 1:44 |
| Kai Kamaka III | 0 | 24 of 69 | 34% | 40 of 87 | 1 of 1 | 100% | 1 | 0 | 0:25 | |
| 3 | T.J. Brown | 0 | 13 of 32 | 40% | 22 of 42 | 1 of 1 | 100% | 0 | 0 | 3:09 |
| Kai Kamaka III | 0 | 24 of 54 | 44% | 35 of 65 | 1 of 2 | 50% | 0 | 0 | 0:11 |
Significant Strikes
| Fighter | Sig. Str. | Sig. Str. % | Head | Body | Leg | Distance | Clinch | Ground |
|---|---|---|---|---|---|---|---|---|
| T.J. Brown | 61 of 128 | 47% | 38 of 100 | 14 of 17 | 9 of 11 | 51 of 115 | 1 of 1 | 9 of 12 |
| Kai Kamaka III | 82 of 211 | 38% | 54 of 174 | 19 of 26 | 9 of 11 | 77 of 204 | 3 of 5 | 2 of 2 |
Significant Strikes Per Round
| Rd | Fighter | Sig. Str. | Sig. Str. % | Head | Body | Leg | Distance | Clinch | Ground |
|---|---|---|---|---|---|---|---|---|---|
| 1 | T.J. Brown | 22 of 47 | 46% | 11 of 34 | 4 of 4 | 7 of 9 | 18 of 43 | 1 of 1 | 3 of 3 |
| Kai Kamaka III | 34 of 88 | 38% | 17 of 63 | 9 of 15 | 8 of 10 | 33 of 85 | 1 of 3 | 0 of 0 | |
| 2 | T.J. Brown | 26 of 49 | 53% | 18 of 40 | 7 of 8 | 1 of 1 | 20 of 40 | 0 of 0 | 6 of 9 |
| Kai Kamaka III | 24 of 69 | 34% | 19 of 63 | 5 of 6 | 0 of 0 | 24 of 69 | 0 of 0 | 0 of 0 | |
| 3 | T.J. Brown | 13 of 32 | 40% | 9 of 26 | 3 of 5 | 1 of 1 | 13 of 32 | 0 of 0 | 0 of 0 |
| Kai Kamaka III | 24 of 54 | 44% | 18 of 48 | 5 of 5 | 1 of 1 | 20 of 50 | 2 of 2 | 2 of 2 |
Play-by-Play
View on SherdogRound 1
Featherweights throw down next as Hawaii’s Kamaka (8-3, 1-1 UFC) comes to blows with Arkansas native Brown (14-8, 0-2 UFC). It’s a battle between one man in Kamaka who only holds one finish against a man in Brown who only holds one win by decision, and referee Jason Herzog will be looking on. There is a glove touch, and Brown starts off with several jabs. Kamaka responds with a leg kick, but Brown does not pay an attention to it as he keeps jabbing. The Hawaiian loads up on a big right hand, and he stings his man with several leg kicks. Brown continues jabbing and kicking back at him, with a front kick and a left hand that split the guard. Kamaka ducks down and rushes to attack, and the two throw leather and both partially land. Neither is worse for wear, and Kamaka gets back into his groove of low leg kicks. Brown paws out with his jabs and follows one with a right hand, circling around and stepping into a body kick that is barely blocked in time. Kamaka counters a right hand with a head kick, and there are multiple narrow misses that could have put the other in danger. Brown lands a one-two and slips a punch to land another, with his left hand sneaking through the guard. A head kick from Brown makes him fall to his back off-balance, as Kamaka pushes him over. Brown allows him to climb down into his guard so that he can attack a leg, and the Hawaiian scrambles but lets Brown back up. The two trade big shots, with Brown landing a right hand and getting countered. Brown gets back to his jab and gets tagged with a left hand, and the pace has waned compared to the beginning of the round. Kamaka invests in his leg kick, and he ducks down and gets nailed to the liver with a left hand. The Hawaiian leaps in the air with a knee, and both throw hands to end the round.
Sherdog Scores
Jay Pettry scores the round: 10-9 Kamaka
Lev Pisarsky scores the round: 10-9 Kamaka
Tristen Critchfield scores the round: 10-9 Kamaka
Round 2
Kamaka begins the round with a leg kick that immediately draws a reaction out of his man, and Brown replies with a bouquet of jabs. Kamaka ducks down and fires off a head kick that clatters off the chin, and Brown eats it like a sandwich and throws right back. Kamaka throws another big kick, and this time it is blocked and he falls to the ground. Brown aims to time a right hand, and Kamaka weathers the strike. Brown smashes him in the chin with a right hand, wobbling the Hawaiian’s legs. “Downtown” scores one more right hand from downtown and Kamaka is hurt. Kamaka rolls through and gets tagged a few more times, but he survives to gather his thoughts. As “The Fighting Hawaiian” resumes the melee, he cracks Brown with a short right hand at close range, hurting Brown and sending him down to the ground! In the span of about 30 seconds, both men have been hurt badly, and Kamaka crashes in for a takedown as his coaches cry for him to instead keep swinging. Kamaka from on top lands some ground-and-pound that opens up a cut on Brown’s face, and Brown defends with a two-on-one wrist lock to sweep. Brown wrenches the kimura all the way around the back, and the only thing keeping Kamaka from tapping or landing on his back is the cage at his side. The Hawaiian grits it out and frees his arm, and the two stand back up to start swinging again. It is one after the other, with Kamaka landing, Brown responding, and Kamaka answering back. Kamaka blocks a head kick to rush in with a combination, and he rips the body with a left hand after ducking a right hand. The two both target the body with strikes, and Brown lands a kick as he circles around the outside. Brown sticks and moves, landing a few punches and backing away. “Downtown” goes down for a takedown, and he plants the Hawaiian on his backside. Kamaka defends with a guillotine choke on the way down, but he does not have anything as Brown rides out the remainder of the round on top.
Sherdog Scores
Jay Pettry scores the round: 10-9 Kamaka
Lev Pisarsky scores the round: 10-9 Kamaka
Tristen Critchfield scores the round: 10-9 Kamaka
Round 3
The two meet in the middle to begin the last round, and Brown leads off with a leg kick and one to the body. Kamaka goes up top, landing a right hand that snaps the head back and stunning Brown. Brown wears it well, and he shoots in for takedown only to get reversed. Kamaka climbs into his foe’s guard, and he fights off a potential submission setup without issue. The Hawaiian tries to maintain his position as Brown scoots his way to the fence, and Kamaka is unable to get off much offense as Brown is staying busy on his back. Brown scrambles and ties up the arm in an omoplata, but Kamaka wrests it free. In the process, “Downtown” manages to get up, and he starts working the body and head with quick strikes. Brown ducks the counters, chaining strikes from the body to the head. The Hawaiian crashes forward, and he may have gotten away with a headbutt as Brown tumbles to the ground. “The Fighting Hawaiian” continues in his pursuit for a takedown, and he attempts to secure mount but cannot take it for long. Brown grabs the fence multiple times to try to get up, forcing Herzog to slap his hand away. Brown redoubles his effort to stand up, and he nails Kamaka with a fierce elbow and a few body shots. Kamaka is right there to fire back at him, and the two begin to brawl. Kamaka looses a body kick, and a right hand knocks him off his feet – this may not necessarily be a knockdown, but rather a strike that pushed him over. Brown hunts for a leglock as he attacks from the ground, and he abandons it to go after a kimura sweep. Kamaka toughs it out and ends this exciting fight in top position.
Sherdog Scores
Jay Pettry scores the round: 10-9 Kamaka (30-27 Kamaka)
Lev Pisarsky scores the round: 10-9 Brown (29-28 Kamaka)
Tristen Critchfield scores the round: 10-9 Kamaka (30-27 Kamaka)
The Official Result
T.J. Brown def. Kai Kamaka III via Split Decision (27-30, 29-28, 29-28)
Big Brady picks T.J. Brown to win by decision, taking a shot on the underdog. He believes Brown's wrestling and grappling are superior, and that Brown can take Kamaka down and wear him out. Brady notes that Kamaka slows down as fights progress and has poor grappling off his back. He also mentions Brown's full training camp at Glory MMA with James Krause, which he sees as a positive. Brady thinks the line should be closer to a pick'em.
Cody sees T.J. Brown as a live underdog now that he is training with James Krause at Glory MMA. He notes that Brown has a submission game and grappling prowess, but his cardio is a major concern. He thinks if Brown uses a proper game plan and doesn't gas out, he can take down Kamaka and submit him. He points out that Kamaka has looked unimpressive, with losses to low-level opponents and a close win over Tony Kelley. He believes Krause's coaching can help Brown manage his energy and fight smart.
Daniel Levi picks Kai Kamaka III to win, citing his potential as a prospect and the fact that T.J. Brown has a weak chin and poor fight IQ. He notes that Kamaka's last loss was on short notice with a bad weight cut, and that he has since moved to a better training camp. Levi believes Kamaka can outwork Brown if he stays off his back.
The host picks T.J. Brown by submission, expecting him to take down Kai Kamaka and wear him out. He notes Kamaka's poor cardio and lack of power, while Brown is a grappler who can chain wrestle. He believes Brown will eventually find a submission in the second or third round.
Paul does not make a clear pick for this fight. He discusses both fighters' cardio issues and the difficulty in capping the fight. He mentions that Brown's game falls apart if he doesn't finish early, and that Kamaka has looked poor. He does not commit to a side.
The MMA Guru picks Kai Kamaka III over T.J. Brown, noting that Kamaka is younger and more committed to his career, while Brown has been beaten eight times and seems to be Bryce Mitchell's sparring partner. He expects Brown to get takedowns in the first round but fade in the later rounds, allowing Kamaka to win the last two rounds and take a 29-28 decision.
Totals
| Fighter | KD | Sig. Str. | Sig. Str. % | Total Str. | TD | TD % | Sub. Att | Rev. | Ctrl |
|---|---|---|---|---|---|---|---|---|---|
| Jonathan Pearce | 0 | 51 of 100 | 51% | 113 of 172 | 5 of 7 | 71% | 1 | 0 | 3:26 |
| Kai Kamaka III | 0 | 47 of 83 | 56% | 48 of 84 | 1 of 3 | 33% | 1 | 1 | 0:33 |
Per Round
| Rd | Fighter | KD | Sig. Str. | Sig. Str. % | Total Str. | TD | TD % | Sub. Att | Rev. | Ctrl |
|---|---|---|---|---|---|---|---|---|---|---|
| 1 | Jonathan Pearce | 0 | 22 of 55 | 40% | 23 of 56 | 1 of 3 | 33% | 0 | 0 | 0:35 |
| Kai Kamaka III | 0 | 35 of 64 | 54% | 36 of 65 | 1 of 2 | 50% | 0 | 0 | 0:11 | |
| 2 | Jonathan Pearce | 0 | 29 of 45 | 64% | 90 of 116 | 4 of 4 | 100% | 1 | 0 | 2:51 |
| Kai Kamaka III | 0 | 12 of 19 | 63% | 12 of 19 | 0 of 1 | 0% | 1 | 1 | 0:22 |
Significant Strikes
| Fighter | Sig. Str. | Sig. Str. % | Head | Body | Leg | Distance | Clinch | Ground |
|---|---|---|---|---|---|---|---|---|
| Jonathan Pearce | 51 of 100 | 51% | 34 of 76 | 12 of 19 | 5 of 5 | 27 of 71 | 6 of 9 | 18 of 20 |
| Kai Kamaka III | 47 of 83 | 56% | 20 of 51 | 20 of 25 | 7 of 7 | 44 of 79 | 2 of 3 | 1 of 1 |
Significant Strikes Per Round
| Rd | Fighter | Sig. Str. | Sig. Str. % | Head | Body | Leg | Distance | Clinch | Ground |
|---|---|---|---|---|---|---|---|---|---|
| 1 | Jonathan Pearce | 22 of 55 | 40% | 10 of 37 | 9 of 15 | 3 of 3 | 19 of 51 | 3 of 4 | 0 of 0 |
| Kai Kamaka III | 35 of 64 | 54% | 13 of 37 | 15 of 20 | 7 of 7 | 35 of 64 | 0 of 0 | 0 of 0 | |
| 2 | Jonathan Pearce | 29 of 45 | 64% | 24 of 39 | 3 of 4 | 2 of 2 | 8 of 20 | 3 of 5 | 18 of 20 |
| Kai Kamaka III | 12 of 19 | 63% | 7 of 14 | 5 of 5 | 0 of 0 | 9 of 15 | 2 of 3 | 1 of 1 |
Play-by-Play
View on SherdogRound 1
Opening up this six-fight main card is a potential featherweight brawl and third consecutive match with a Hawaiian involved as “The Fighting Hawaiian” Kamaka III (8-2, 1-0 UFC) takes on “JSP” Pearce (9-4, 0-1 UFC). Referee Dan Miragliotta is in charge of the cage for the main card opener, the touch of gloves comes just a second before Pearce kicks his man to the body. Pearce throws another front kick to the midsection, and Kamaka decides it’s his turn and he cracks Pearce in the ribs with his shin. Both men are almost exclusively targeting the body, perhaps because they saw the Mazany stoppage backstage, and both are landing strikes from the outside. Kamaka keeps punching the torso, and he pushes back a leaping “JSP” with one strike. Kamaka lands two heavy leg kicks that make Pearce react, and Kamaka continues kicking and lands a body kick to the liver. Kamaka scores a body kick that clips off the cup, and Pearce shrugs it off and has the two continue. Pearce throws up a kick, and when Kamaka grabs hold of him, Pearce falls to his back and considers a submission off his back. Kamaka is not interested in this grappling exchange, and steps out of guard to allow them to strike again. Kamaka gets off a solid jab and a leg kick, and “JSP” returns fire with a short salvo of punches over the top. The Hawaiian kicks the leg and gets shoved back with his foe’s foot, and the two clash together and swing heavily, but are too close to land flush. Kamaka sits down on a leg kick, and he barely blocks the counter right hand coming at him. “JSP” tries to grab on to the leg to go after a takedown, and Kamaka shoves it away and lands a few heavy punches. “The Fighting Hawaiian” flirts with his own takedown attempt, but when it does not succeed, Pearce replies in kind and is also stuffed. Kamaka scores a stiff jab, and he over-extends himself with a follow-up punch to allow Pearce to take the fight down. Kamaka flips over and gets to his knees, where he stands up while allowing Pearce to take his back. The Hawaiian gets kneed in the face when “JSP” slides off his back, and the two separate. Pearce jumps at him with a flying knee, but Kamaka sees it coming and waits for his opponent to land to score a quick left hand at the horn.
Sherdog Scores
Jay Pettry scores the round: 10-9 Kamaka
Tristen Critchfield scores the round: 10-9 Kamaka
Tyler Treese scores the round: 10-9 Kamaka
Round 2
“JSP” starts the round with another flying knee, and a pair of looping hooks get Kamaka’s attention early on. Pearce crashes forward to implement his grappling, and he hits a takedown. Like the previous round, Kamaka bursts up and gives up his back, walking up the fence while wearing Pearce like a backpack. Kamaka riskily falls forward to escape the position, but it proves to his benefit as Pearce falls off. The two both scramble back to their feet, and they start trading huge punches. Pearce lands a few, and Kamaka gives them back to him. When Pearce lines up a knee in a clinch, the Hawaiian works the body and draws a reaction. Pearce decides to take the fight back down again, and this time Kamaka is not able to pop back up. Instead, Pearce climbs over his guard and nails him with a big shot, but Kamaka is scrambling wildly to get back to his knees. Pearce takes back control and gets his hooks in, and he flattens Kamaka out to start landing heavy punches. “JSP” hunts for a rear-naked choke, and when Kamaka breaks the grip, Pearce smashes him with an elbow. Pearce alternates strikes with submission attempts, and Kamaka rolls to his back and allows Pearce to stay on his back. Kamaka spins around and gets back on top, but he slams down a right hand. Pearce bucks him off and gets up, where he takes Kamaka back down instantly. On his opponent’s back and sitting up like he is riding him like a horse, Pearce sits up and smacks his foe with hammerfists both sides of his head.
Pearce keeps pounding on Kamaka, and Miragliotta leans in to chide Kamaka to defend himself. “JSP” knows this is his time to shine, and he pours it on with punch after punch until Miragliotta has seen enough.
This is a huge win for Pearce, who earns his first win inside the Octagon while also becoming the first man to finish “The Fighting Hawaiian” with strikes. With that, Hawaiian fighters end their night at 0-3.
The Official Result
Jonathan Pearce def. Kai Kamaka III R2 4:28 via TKO (Punches)
Totals
| Fighter | KD | Sig. Str. | Sig. Str. % | Total Str. | TD | TD % | Sub. Att | Rev. | Ctrl |
|---|---|---|---|---|---|---|---|---|---|
| Kai Kamaka III | 0 | 114 of 185 | 61% | 138 of 216 | 5 of 5 | 100% | 0 | 0 | 5:09 |
| Tony Kelley | 0 | 114 of 226 | 50% | 185 of 298 | 0 of 1 | 0% | 0 | 0 | 0:00 |
Per Round
| Rd | Fighter | KD | Sig. Str. | Sig. Str. % | Total Str. | TD | TD % | Sub. Att | Rev. | Ctrl |
|---|---|---|---|---|---|---|---|---|---|---|
| 1 | Kai Kamaka III | 0 | 43 of 72 | 59% | 49 of 79 | 3 of 3 | 100% | 0 | 0 | 1:13 |
| Tony Kelley | 0 | 24 of 59 | 40% | 37 of 72 | 0 of 0 | --- | 0 | 0 | 0:00 | |
| 2 | Kai Kamaka III | 0 | 32 of 56 | 57% | 34 of 58 | 2 of 2 | 100% | 0 | 0 | 1:37 |
| Tony Kelley | 0 | 43 of 81 | 53% | 63 of 102 | 0 of 1 | 0% | 0 | 0 | 0:00 | |
| 3 | Kai Kamaka III | 0 | 39 of 57 | 68% | 55 of 79 | 0 of 0 | --- | 0 | 0 | 2:19 |
| Tony Kelley | 0 | 47 of 86 | 54% | 85 of 124 | 0 of 0 | --- | 0 | 0 | 0:00 |
Significant Strikes
| Fighter | Sig. Str. | Sig. Str. % | Head | Body | Leg | Distance | Clinch | Ground |
|---|---|---|---|---|---|---|---|---|
| Kai Kamaka III | 114 of 185 | 61% | 49 of 113 | 64 of 71 | 1 of 1 | 90 of 160 | 22 of 22 | 2 of 3 |
| Tony Kelley | 114 of 226 | 50% | 63 of 152 | 35 of 54 | 16 of 20 | 76 of 182 | 38 of 44 | 0 of 0 |
Significant Strikes Per Round
| Rd | Fighter | Sig. Str. | Sig. Str. % | Head | Body | Leg | Distance | Clinch | Ground |
|---|---|---|---|---|---|---|---|---|---|
| 1 | Kai Kamaka III | 43 of 72 | 59% | 22 of 49 | 21 of 23 | 0 of 0 | 34 of 62 | 8 of 8 | 1 of 2 |
| Tony Kelley | 24 of 59 | 40% | 5 of 35 | 9 of 14 | 10 of 10 | 22 of 57 | 2 of 2 | 0 of 0 | |
| 2 | Kai Kamaka III | 32 of 56 | 57% | 12 of 32 | 19 of 23 | 1 of 1 | 30 of 54 | 1 of 1 | 1 of 1 |
| Tony Kelley | 43 of 81 | 53% | 29 of 56 | 11 of 20 | 3 of 5 | 24 of 60 | 19 of 21 | 0 of 0 | |
| 3 | Kai Kamaka III | 39 of 57 | 68% | 15 of 32 | 24 of 25 | 0 of 0 | 26 of 44 | 13 of 13 | 0 of 0 |
| Tony Kelley | 47 of 86 | 54% | 29 of 61 | 15 of 20 | 3 of 5 | 30 of 65 | 17 of 21 | 0 of 0 |
Play-by-Play
View on SherdogRound 1
It’s fight night once again for the UFC, in the form of a pay-per-view card with a heavyweight championship rubber match on tap for the marquee billing. We kick things off in the featherweight division between two UFC newcomers, as Kamaka III (7-2, 0-0 UFC) tries to become another victorious Hawaiian on the roster against Team Alpha Male product Kelley (5-1, 0-0 UFC). Referee Chris Tognoni will oversee the card-opening matchup, and with a touch of gloves, away we go! Kelley throws out a few jabs and a low kick right out of the gate. He flings a front kick, and then tries to step in with a one-two but gets countered. A quick jab from the Louisiana native halts the offense of his opponent for a moment, but Kamaka gathers himself and swings back hard. Kelley blocks it and dances out of the way, and tries to blitz forward, only to get countered with a short left hook. Kamaka lands another left hook, and Kelley responds with a pair of thudding leg kicks that make Kamaka turn his lead leg. The Hawaiian returns fire with a few punches that get Kelley’s attention, and they start trading heavy leather. Kelley targets the leg on the inside and out, while Kamaka is more interested in headhunting with solid success. He lands a right hand that makes Kelley crash in to score a knee up the middle, and backs off to stick him with a jab. Kelley connects with a left, but Kamaka pops him with that same effective left hook to back Kelley against the fence. Kamaka unloads on him with a few punches and a pounding body kick that gives Kelley some serious pause. Kelley resets on the outside, and lands a few shots when he comes in, but Kamaka gives it right back to him. An inside left kick from Kelley is followed by a left and a body kick, but Kamaka winds up and cracks him with a few punches to make Kelley retreat. Kamaka rushes him and presses him to the fence, where scoops up the leg and sets him down. Kelley gets back up, but Kamaka is not done yet as he keeps targeting the midsection with powerful punches and kicks. Kamaka does some damage with his punches, sending Kelley reeling. Kamaka keeps advancing and bulldozes his opponent over, only for Kelley to try to return to his feet by grabbing the fence. He is unable to return to a standing position, and Kamaka steps into his guard and lands some short ground-and-pound. Kelley walks up the fence, and he rips a few knees as Kamaka lumps up the body to end the round.
Sherdog Scores
Jay Pettry scores the round: 10-9 Kamaka
Brian Knapp scores the round: 10-9 Kamaka
Tristen Critchfield scores the round: 10-9 Kamaka
Round 2
Kelley keeps his distance in the early going, attempting to stick his man with jabs while staying on the outside to avoid counters. Kelley lazily paws out a jab, and Kamaka sits down on a leg kick and nearly sets Kelley down. Kelley keeps his footing and tries to go for a sweep, but he cannot get it as Kamaka dodges it only to bear down on him. Kamaka lands a few punches that back Kelley away, and every body shot Kamaka connects with seems to make Kelley drops his hands a fraction of an inch. When the hands are lowered, Kamaka takes a low kick but goes over the top with a right hand. Kamaka mixes it up and lands a punch to the torso that nearly forces Kelley to double over. “Primetime” gathers himself and tries to get some kicks off to gain separation, but Kamaka ignores them and scores a left to the body. Kamaka blocks a punch and lands two punches down the middle, and his body work is drawing visible reactions out of his opponent. Kelley, who may be hurt, bites down his mouthpiece and starts to slug it out with “The Fighting Hawaiian.” They keep trading heavy shots, with Kelley taking advantage of his surprising burst of offense, so Kamaka changes levels and hits a quick double leg takedown to halt it. Kelley again grabs the fence to try to get back up, and Tognoni warns Kelley but he still is able to walk up the cage wall. One exchange or possibly a clash of heads has opened up a cut high on Kelley’s forehead, but he pays it no mind as he is more concerned with stuffing the subsequent takedown attempt and break free in the clinch. Kamaka scoops him back up and drops him down, planting the Team Alpha Male fighter on the ground for a moment. Kelley springs back up and in close proximity to his opponent, he hacks at him with several elbows. Kamaka shoots low for a double, and Kelley defends with elbows to the side of the head until the horn sounds.
Sherdog Scores
Jay Pettry scores the round: 10-9 Kelley
Brian Knapp scores the round: 10-9 Kelley
Tristen Critchfield scores the round: 10-9 Kamaka
Round 3
They greet one another in the center of the cage with a glove touch, and Kelley quickly fires off a low kick. Kelley is a man possessed, and he starts unloading a series of damaging elbows to wobble Kamaka for a moment. As he pours it on, Kamaka closes in, so Kelley pulls guard for a guillotine choke but slides out. Kamaka winds up in top position in his opponent’s guard in the center of the cage, and rains down shots. Kelley is able to scoot his way to the fence, but Kelley drags him back down and takes his opponent’s back on the way up. Kelley is able to burst free, and the two get right back to it by going punch-for-punch. They stand in front of one another in a proverbial phone booth and start nailing each other, with Kelley stinging him with some knees and elbows while Kamaka punches to the body and the head. Kamaka, who is not getting the better of these brief slugfests, shoots in low for a double, but Kelley stuffs it and punches him repeatedly. Kelley stands him up and slashes at him with a pair of elbows, which forces Kamaka to back off. Once more, the action is furious as they blast each other in close quarters, and a knee from Kelley clanks off the cup to force a brief stoppage. Kamaka takes advantage of all the time necessary to get his wind back, which is something more fighters have done in a crowdless environment. Kamaka signals that he can continue, and with 90 seconds left, it still may be anybody’s fight. Kelley tries to get some jabs off, but a crisp one-two comes back at him from Kamaka. When Kamaka over-extends himself, Kelley sets up a Thai clinch and knees him to the body several times. Kelley ducks down for a body shot, as Kamaka fires back over the top at him. Kamaka dings him with a check left hook twice as Kelley is trying to come in, and Kelley nearly falls over in his final assault. Kamaka digs to the body with a stern left hand in the midst of a combination, and Kelley walks through it like a zombie. One second before the final buzzer, both land a punch at the same time, and this close thriller is now over.
Sherdog Scores
Jay Pettry scores the round: 10-9 Kelley (29-28 Kelley)
Brian Knapp scores the round: 10-9 Kelley (29-28 Kelley)
Tristen Critchfield scores the round: 10-9 Kamaka (30-27 Kamaka)
The Official Result
Kai Kamaka III def. Tony Kelley via Unanimous Decision (29-28, 29-28, 29-28)
Big Brady was impressed by Tony Kelley's performance against Kevin Aguilar, noting his crisp striking and takedowns. He thinks Kelley is the better defensive striker and has a size advantage. However, he admits the pick might change after more research and is not confident due to limited tape on Kamaka.
Daniel Levi picks Kai Kamaka III to win his UFC debut. He believes Kamaka is the superior athlete and more well-rounded fighter. He notes Kamaka's aggressive style, body work, and cardio from his LFA fight. He criticizes Tony Kelley's takedown defense and tendency to play off his back. He expects Kamaka to push the pace and win a decision or late finish.
A slight failed single leg takedown to swift back take. Rode the shack off standing up. Punches. Shook off kept the grip. On him like glue. Got the feet tucked in like Khabib against. Hands behind the head rear naked choke!