Career Averages - Gunnar Nelson
Career Averages - Takashi Sato
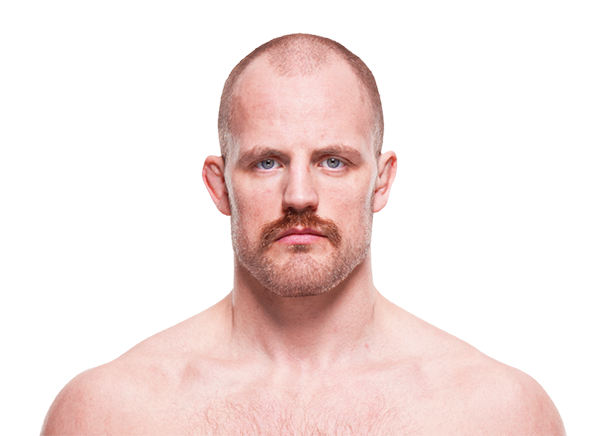
Gunnar Nelson
Takashi Sato
Gunnar Nelson - Fight History
Totals
| Fighter | KD | Sig. Str. | Sig. Str. % | Total Str. | TD | TD % | Sub. Att | Rev. | Ctrl |
|---|---|---|---|---|---|---|---|---|---|
| Gunnar Nelson | 0 | 15 of 24 | 62% | 30 of 44 | 3 of 10 | 30% | 1 | 0 | 9:29 |
| Kevin Holland | 1 | 55 of 89 | 61% | 138 of 178 | 0 of 1 | 0% | 0 | 0 | 1:04 |
Per Round
| Rd | Fighter | KD | Sig. Str. | Sig. Str. % | Total Str. | TD | TD % | Sub. Att | Rev. | Ctrl |
|---|---|---|---|---|---|---|---|---|---|---|
| 1 | Gunnar Nelson | 0 | 5 of 9 | 55% | 13 of 20 | 1 of 1 | 100% | 0 | 0 | 2:55 |
| Kevin Holland | 1 | 19 of 37 | 51% | 31 of 51 | 0 of 1 | 0% | 0 | 0 | 0:08 | |
| 2 | Gunnar Nelson | 0 | 3 of 6 | 50% | 7 of 11 | 1 of 5 | 20% | 0 | 0 | 3:22 |
| Kevin Holland | 0 | 17 of 23 | 73% | 73 of 82 | 0 of 0 | --- | 0 | 0 | 0:29 | |
| 3 | Gunnar Nelson | 0 | 7 of 9 | 77% | 10 of 13 | 1 of 4 | 25% | 1 | 0 | 3:12 |
| Kevin Holland | 0 | 19 of 29 | 65% | 34 of 45 | 0 of 0 | --- | 0 | 0 | 0:27 |
Significant Strikes
| Fighter | Sig. Str. | Sig. Str. % | Head | Body | Leg | Distance | Clinch | Ground |
|---|---|---|---|---|---|---|---|---|
| Gunnar Nelson | 15 of 24 | 62% | 10 of 19 | 4 of 4 | 1 of 1 | 2 of 7 | 7 of 8 | 6 of 9 |
| Kevin Holland | 55 of 89 | 61% | 30 of 57 | 15 of 20 | 10 of 12 | 15 of 34 | 22 of 27 | 18 of 28 |
Significant Strikes Per Round
| Rd | Fighter | Sig. Str. | Sig. Str. % | Head | Body | Leg | Distance | Clinch | Ground |
|---|---|---|---|---|---|---|---|---|---|
| 1 | Gunnar Nelson | 5 of 9 | 55% | 3 of 7 | 1 of 1 | 1 of 1 | 1 of 4 | 1 of 1 | 3 of 4 |
| Kevin Holland | 19 of 37 | 51% | 10 of 24 | 3 of 5 | 6 of 8 | 9 of 20 | 4 of 4 | 6 of 13 | |
| 2 | Gunnar Nelson | 3 of 6 | 50% | 1 of 4 | 2 of 2 | 0 of 0 | 1 of 3 | 2 of 2 | 0 of 1 |
| Kevin Holland | 17 of 23 | 73% | 9 of 15 | 6 of 6 | 2 of 2 | 3 of 7 | 6 of 7 | 8 of 9 | |
| 3 | Gunnar Nelson | 7 of 9 | 77% | 6 of 8 | 1 of 1 | 0 of 0 | 0 of 0 | 4 of 5 | 3 of 4 |
| Kevin Holland | 19 of 29 | 65% | 11 of 18 | 6 of 9 | 2 of 2 | 3 of 7 | 12 of 16 | 4 of 6 |
Play-by-Play
View on SherdogBETTING PREVIEW | SCOUTING REPORT | ODDS: Nelson (-130), Holland (+110)
Round 1
Dan Movahedi will referee Nelson’s first fight since March 2023. Holland opens with a pair of inside leg kicks. Nelson is operating from his usual karate stance. Another leg kick for Holland, who has a significant reach edge. Nelson tries to charge in, but he’s rebuffed by Holland. Holland with a long jab and right hand. Nelson shoots and gets Holland down. Holland is active from his back, threatening with submissions, but Nelson is a savvy grappler. Nelson stands and picks Holland up with one arm and both fighters share a laugh. Nelson goes back to work from above, but he’ll have to navigate his foe’s long limbs. Holland is landing hammerfists from his bck on occasion. Nelson with a solid right from top position. Holland lands an elbow from his back. Nelson is struggling to find openings for offense from above. The Iceland native drops a short elbow. Nelson stands and has to worry about Holland’s upkicks before moving back on top. They stand late in the round, and Holland drops Nelson with a one-two. He hovers over Nelson and drops heavy standing to ground shots. Nelson is saved by the horn, but Holland might've landed one after the buzzer.
Sherdog Scores
Tristen Critchfield scores the round: 10-9 Holland
Ben Duffy scores the round: 10-9 Holland
Tyler Treese scores the round: 10-9 Holland
Round 2
Holland is aggressive, and he punches his way into the clinch behind an uppercut. Holland with a knee and a foot stomp. They separate and size each other up from range. Holland with a solid inside low kick. Holland is measuring the right hand that dropped Nelson in Round 1. Nelson is working hard for a takedown, but Holland is able to stay upright. Nelson adjusts against the fence, but Holland maintains his footing. Nelson is clinging to the leg, and Holland stays busy with short strikes. Nelson pulls Holland off the fence and drags him to the canvas with about 2:00 to go. Nelson is in top position, but Holland is active again, both with his guard and strikes from his back. Nelson is simply holding position as Holland continues to work from his back. Holland with an upkick as Nelson stands. Nelson works his way back into full guard as the round draws to a close.
Sherdog Scores
Tristen Critchfield scores the round: 10-9 Holland
Ben Duffy scores the round: 10-9 Holland
Tyler Treese scores the round: 10-9 Holland
Round 3
Holland chips away at the legs of Nelson before they collide in the clinch. Holland lands a knee in close. Nelson counters with uppercuts, but another Holland knee gets through. Nelson decides against continuing to trade offense in the clinch, and he changes levels for a takedown. Nelson moves into full mount with ease. Holland kicks off the fence to remove Nelson from mount, but the grappling ace is still in top position. Holland is warned to remove his toes from the cage. Nelson absorbs a series of heel strikes to to the head. He responds by dropping a right from above. Nelson transitions to an arm triangle during a scramble. He’s close to the cage, but it looks pretty deep. Holland looks comfortable for now, and he’s able to eventually escape to his feet. Holland pushes Nelson into the fence. Nelson is looking at the clock now. Holland with a knee to the midsection. Back at range, Holland connects with a front kick. Nelson closes the distance but eats another knee for his efforts. Holland denies a takedown and the welterweights battle in the clinch. Holland breaks free and falls to his back after missing on a knee before the horn sounds.
Sherdog Scores
Tristen Critchfield scores the round: 10-9 Nelson (29-28 Holland)
Ben Duffy scores the round: 10-9 Nelson (29-28 Holland)
Tyler Treese scores the round: 10-9 Nelson (29-28 Holland)
The Official Result
Kevin Holland def. Gunnar Nelson via Unanimous Decision (29-28, 29-28, 29-28) R3 5:00
Angelo picks Kevin Holland despite his poor takedown defense, arguing that skill-wise Holland is the better fighter. He notes that Holland is likely fighting for his job at welterweight and will be motivated. He criticizes Gunnar Nelson's inactivity (2 years), poor striking differential, and lack of wins over active UFC fighters. He has a small bet on Holland.
Brady is very hesitant but picks Holland, calling it 'One Last Ride'. He notes Nelson is 36, inactive (2 fights in 5 years), has no striking, and is coming off a 2-year layoff. Holland has an astronomical striking advantage and is fighting at welterweight where he belongs. Brady predicts a second-round knockout.
Connor agrees with Zane, picking Nelson. He highlights Holland's inability to wrestle seriously and his tendency to fall apart when pressured. Nelson's striking, though limited, will force Holland to close distance, leading to takedowns and submissions. Connor is confident Nelson will look the same despite the layoff.
The host notes Nelson doesn't fight often but still showcases superb jiu-jitsu. He expects Nelson to get a body lock, drag the fight to the ground, find the back, and secure a submission win over Holland.
The Guru confidently picks Gunnar Nelson, citing his superior jiu-jitsu and takedown entries. He expects Nelson to get a takedown, take Holland's back, and secure a rear-naked choke in the first round. He notes that Holland is susceptible to grapplers and has not finished anyone early in a long time. He acknowledges a small chance Holland lands a 45-70 kick but dismisses it.
Zane confidently picks Nelson, arguing that Holland's poor wrestling and tendency to crash forward will play directly into Nelson's strengths. Nelson's karate-style striking and elite ground game will exploit Holland's lack of takedown defense and submission awareness. He expects Holland to either get taken down and submitted or run into Nelson's clinch.
Totals
| Fighter | KD | Sig. Str. | Sig. Str. % | Total Str. | TD | TD % | Sub. Att | Rev. | Ctrl |
|---|---|---|---|---|---|---|---|---|---|
| Gunnar Nelson | 0 | 10 of 11 | 90% | 20 of 21 | 1 of 2 | 50% | 1 | 0 | 3:13 |
| Bryan Barberena | 0 | 7 of 12 | 58% | 18 of 23 | 0 of 0 | --- | 0 | 0 | 0:00 |
Per Round
| Rd | Fighter | KD | Sig. Str. | Sig. Str. % | Total Str. | TD | TD % | Sub. Att | Rev. | Ctrl |
|---|---|---|---|---|---|---|---|---|---|---|
| 1 | Gunnar Nelson | 0 | 10 of 11 | 90% | 20 of 21 | 1 of 2 | 50% | 1 | 0 | 3:13 |
| Bryan Barberena | 0 | 7 of 12 | 58% | 18 of 23 | 0 of 0 | --- | 0 | 0 | 0:00 |
Significant Strikes
| Fighter | Sig. Str. | Sig. Str. % | Head | Body | Leg | Distance | Clinch | Ground |
|---|---|---|---|---|---|---|---|---|
| Gunnar Nelson | 10 of 11 | 90% | 8 of 9 | 2 of 2 | 0 of 0 | 1 of 2 | 2 of 2 | 7 of 7 |
| Bryan Barberena | 7 of 12 | 58% | 3 of 7 | 0 of 0 | 4 of 5 | 6 of 11 | 0 of 0 | 1 of 1 |
Significant Strikes Per Round
| Rd | Fighter | Sig. Str. | Sig. Str. % | Head | Body | Leg | Distance | Clinch | Ground |
|---|---|---|---|---|---|---|---|---|---|
| 1 | Gunnar Nelson | 10 of 11 | 90% | 8 of 9 | 2 of 2 | 0 of 0 | 1 of 2 | 2 of 2 | 7 of 7 |
| Bryan Barberena | 7 of 12 | 58% | 3 of 7 | 0 of 0 | 4 of 5 | 6 of 11 | 0 of 0 | 1 of 1 |
Angelo picks Nelson but is not betting. He thinks Nelson's ground game is far superior and Barberena is tough but not technical. He notes Nelson's takedowns are telegraphed but Barberena will close distance and get clinched. He worries Nelson might not be motivated and could be a parlay buster.
Big Brady picks Nelson confidently, citing Barberena's atrocious takedown defense (taken down multiple times by lower-level fighters). He believes Nelson will take him down and submit him early. He predicts a first-round submission, noting Barberena was just submitted by RDA.
Cody picks Nelson, emphasizing Barberena's poor takedown defense and tendency to give up his back. He notes Nelson's elite back-taking and body triangle control. He thinks Nelson wins by decision or submission, but after Nelson's last fight where he didn't chase submissions, he's less sure about a finish. He says the line is reflective of what should happen but feels trappy due to Nelson's inactivity and age.
Connor picks Nelson based on his wrestling and grappling advantage. He notes that Barberena is slow-footed and vulnerable to takedowns, as shown by RDA easily taking him down. Nelson has a quick shot and good clinch trips. Connor acknowledges that Nelson's striking defense is poor and he can be shocked standing, but believes Nelson's path to victory is clear via takedowns and control. He also mentions that Barberena's scrambling is solid but Nelson's control grappling is superior.
Jacob calls Nelson his most confident play on the card. He thinks Barberena is not a powerful puncher and will struggle with Nelson's range. He expects Barberena to close distance and get taken down via body clinch. He notes everyone takes Barberena down and Nelson should dominate on the ground.
Nelson is a high-level grappler with a karate-style striking base, but has struggled against top competition. Barberena is a durable brawler who has been finished by technically better fighters. Nelson should be able to take the fight to the ground and submit Barberena, though the submission prop may not offer value at the expected line.
Paul does not make a clear pick. He discusses the trap potential: Nelson has had one fight in four years, is a small welterweight, and may not be the same fighter. He notes Barberena's ability to get back to his feet and that Nelson could get outstruck if he doesn't get a submission. He says he doesn't have the cojones to pick Barberena but has zero confidence in Nelson at the price.
The MMA Guru picks Gunnar Nelson to win by rear-naked choke, citing Barberena's short notice and defensive flaws exposed by Rafael dos Anjos. He notes Barberena repeatedly made the same mistake of lowering his stance, allowing inside trips. Nelson is a technical grappler who will exploit that and find a finish. He does not see Barberena having success on the feet either.
Zane agrees with Connor, emphasizing that Barberena's takedown defense is poor and Nelson's wrestling is a major threat. He notes that Barberena has been taken down multiple times by lesser wrestlers. Zane also points out that Nelson's striking is vulnerable but his grappling is elite. He thinks Nelson will likely get the fight to the ground and control it. Zane adds that Barberena's best chance is to keep it standing and land a big shot, but Nelson's speed and shot selection should prevail.
Totals
| Fighter | KD | Sig. Str. | Sig. Str. % | Total Str. | TD | TD % | Sub. Att | Rev. | Ctrl |
|---|---|---|---|---|---|---|---|---|---|
| Gunnar Nelson | 0 | 44 of 55 | 80% | 140 of 166 | 3 of 3 | 100% | 1 | 0 | 8:09 |
| Takashi Sato | 0 | 9 of 23 | 39% | 16 of 34 | 0 of 0 | --- | 0 | 0 | 0:00 |
Per Round
| Rd | Fighter | KD | Sig. Str. | Sig. Str. % | Total Str. | TD | TD % | Sub. Att | Rev. | Ctrl |
|---|---|---|---|---|---|---|---|---|---|---|
| 1 | Gunnar Nelson | 0 | 24 of 29 | 82% | 46 of 52 | 1 of 1 | 100% | 0 | 0 | 2:05 |
| Takashi Sato | 0 | 4 of 12 | 33% | 4 of 12 | 0 of 0 | --- | 0 | 0 | 0:00 | |
| 2 | Gunnar Nelson | 0 | 12 of 16 | 75% | 25 of 32 | 1 of 1 | 100% | 0 | 0 | 2:36 |
| Takashi Sato | 0 | 3 of 4 | 75% | 3 of 4 | 0 of 0 | --- | 0 | 0 | 0:00 | |
| 3 | Gunnar Nelson | 0 | 8 of 10 | 80% | 69 of 82 | 1 of 1 | 100% | 1 | 0 | 3:28 |
| Takashi Sato | 0 | 2 of 7 | 28% | 9 of 18 | 0 of 0 | --- | 0 | 0 | 0:00 |
Significant Strikes
| Fighter | Sig. Str. | Sig. Str. % | Head | Body | Leg | Distance | Clinch | Ground |
|---|---|---|---|---|---|---|---|---|
| Gunnar Nelson | 44 of 55 | 80% | 36 of 47 | 7 of 7 | 1 of 1 | 10 of 20 | 1 of 2 | 33 of 33 |
| Takashi Sato | 9 of 23 | 39% | 4 of 16 | 2 of 4 | 3 of 3 | 9 of 23 | 0 of 0 | 0 of 0 |
Significant Strikes Per Round
| Rd | Fighter | Sig. Str. | Sig. Str. % | Head | Body | Leg | Distance | Clinch | Ground |
|---|---|---|---|---|---|---|---|---|---|
| 1 | Gunnar Nelson | 24 of 29 | 82% | 21 of 26 | 2 of 2 | 1 of 1 | 4 of 8 | 0 of 1 | 20 of 20 |
| Takashi Sato | 4 of 12 | 33% | 2 of 8 | 0 of 2 | 2 of 2 | 4 of 12 | 0 of 0 | 0 of 0 | |
| 2 | Gunnar Nelson | 12 of 16 | 75% | 9 of 13 | 3 of 3 | 0 of 0 | 5 of 9 | 0 of 0 | 7 of 7 |
| Takashi Sato | 3 of 4 | 75% | 1 of 2 | 1 of 1 | 1 of 1 | 3 of 4 | 0 of 0 | 0 of 0 | |
| 3 | Gunnar Nelson | 8 of 10 | 80% | 6 of 8 | 2 of 2 | 0 of 0 | 1 of 3 | 1 of 1 | 6 of 6 |
| Takashi Sato | 2 of 7 | 28% | 1 of 6 | 1 of 1 | 0 of 0 | 2 of 7 | 0 of 0 | 0 of 0 |
Angelo picks Gunnar Nelson, predicting a submission win. He notes that Nelson has been away for two years due to rib injuries but has a short-notice opponent with grappling holes. He worries about Nelson's takedown entries leaving him hittable but thinks the UFC set him up for a win. He says Nelson probably wins by submission but acknowledges the layoff makes it uncertain.
Big Brady picks Gunnar Nelson to win by first-round submission, but expresses concern about Nelson's two-year layoff. He believes if Nelson is anywhere near his best, he should submit Sato early, as Sato has been submitted three times and has poor ground game. Brady notes Nelson has fought elite competition like Gilbert Burns and Leon Edwards, while Sato's level is lower.
Cody picks Nelson by submission, noting Nelson's superior grappling and Sato's submission liability. He thinks Nelson will get the fight to the mat and find a submission. He mentions the prop is minus 110 and he took it.
Daniel Levi picks Gunnar Nelson by submission, noting that Sato has lost 75% of his fights by submission and that Nelson has 12 submission wins. He acknowledges Nelson's low striking volume and questions his motivation, but believes Nelson only needs one takedown to finish. Levi also mentions the hometown advantage for British fighters at the O2, suggesting a decision win is possible if it goes the distance. He calls it a 'dog or pass' situation due to the high price on Nelson.
Nelson is a jiu-jitsu wizard who should get the fight to the ground and find a submission. Sato has been finished by submission in three of his last four losses, a huge red flag. However, ring rust and past injuries are concerns for Nelson. Sato has power and a karate style, but Nelson's grappling should be too much. I'd rather play Nelson inside the distance than the -450 line. I'm picking Nelson via second-round submission.
Paul picks Nelson, emphasizing his world-class skills and Sato's tendency to fade. He believes Nelson's cardio and grappling will be too much, and that Sato's power is only a threat early. He thinks Nelson will win handily, possibly by submission.
The Guru picks Gunnar Nelson but expects a first-round scare where Sato drops him. He believes Nelson will recover, get a takedown, and eventually secure a rear-naked choke in round two or three. He notes Nelson's close losses to Leon Edwards and Gilbert Burns, and argues that if Burns couldn't finish him, Sato won't either. He predicts a late submission.
Totals
| Fighter | KD | Sig. Str. | Sig. Str. % | Total Str. | TD | TD % | Sub. Att | Rev. | Ctrl |
|---|---|---|---|---|---|---|---|---|---|
| Gilbert Burns | 0 | 20 of 36 | 55% | 26 of 45 | 0 of 2 | 0% | 0 | 0 | 4:49 |
| Gunnar Nelson | 0 | 30 of 76 | 39% | 46 of 99 | 1 of 3 | 33% | 1 | 0 | 1:55 |
Per Round
| Rd | Fighter | KD | Sig. Str. | Sig. Str. % | Total Str. | TD | TD % | Sub. Att | Rev. | Ctrl |
|---|---|---|---|---|---|---|---|---|---|---|
| 1 | Gilbert Burns | 0 | 7 of 13 | 53% | 7 of 14 | 0 of 0 | --- | 0 | 0 | 0:28 |
| Gunnar Nelson | 0 | 11 of 28 | 39% | 11 of 30 | 0 of 1 | 0% | 0 | 0 | 0:15 | |
| 2 | Gilbert Burns | 0 | 6 of 14 | 42% | 7 of 17 | 0 of 2 | 0% | 0 | 0 | 1:58 |
| Gunnar Nelson | 0 | 11 of 27 | 40% | 18 of 34 | 0 of 1 | 0% | 1 | 0 | 0:57 | |
| 3 | Gilbert Burns | 0 | 7 of 9 | 77% | 12 of 14 | 0 of 0 | --- | 0 | 0 | 2:23 |
| Gunnar Nelson | 0 | 8 of 21 | 38% | 17 of 35 | 1 of 1 | 100% | 0 | 0 | 0:43 |
Significant Strikes
| Fighter | Sig. Str. | Sig. Str. % | Head | Body | Leg | Distance | Clinch | Ground |
|---|---|---|---|---|---|---|---|---|
| Gilbert Burns | 20 of 36 | 55% | 9 of 23 | 4 of 5 | 7 of 8 | 18 of 32 | 2 of 3 | 0 of 1 |
| Gunnar Nelson | 30 of 76 | 39% | 8 of 47 | 8 of 11 | 14 of 18 | 19 of 55 | 10 of 18 | 1 of 3 |
Significant Strikes Per Round
| Rd | Fighter | Sig. Str. | Sig. Str. % | Head | Body | Leg | Distance | Clinch | Ground |
|---|---|---|---|---|---|---|---|---|---|
| 1 | Gilbert Burns | 7 of 13 | 53% | 4 of 9 | 1 of 2 | 2 of 2 | 7 of 12 | 0 of 0 | 0 of 1 |
| Gunnar Nelson | 11 of 28 | 39% | 1 of 15 | 3 of 5 | 7 of 8 | 8 of 23 | 3 of 5 | 0 of 0 | |
| 2 | Gilbert Burns | 6 of 14 | 42% | 3 of 10 | 1 of 1 | 2 of 3 | 5 of 12 | 1 of 2 | 0 of 0 |
| Gunnar Nelson | 11 of 27 | 40% | 4 of 18 | 4 of 5 | 3 of 4 | 6 of 15 | 4 of 9 | 1 of 3 | |
| 3 | Gilbert Burns | 7 of 9 | 77% | 2 of 4 | 2 of 2 | 3 of 3 | 6 of 8 | 1 of 1 | 0 of 0 |
| Gunnar Nelson | 8 of 21 | 38% | 3 of 14 | 1 of 1 | 4 of 6 | 5 of 17 | 3 of 4 | 0 of 0 |
Play-by-Play
View on SherdogRound 1
A pair of welterweight submission specialists meet next, with Nelson (17-4-1, 8-4 UFC) looking to beat short-notice replacement Burns (16-3, 9-3 UFC). Referee Neil Hall is the third man inside the Octagon. The fight begins at range, with neither man ready to commit on any serious strikes. As Nelson tries to close the distance, Burns hits him with a leg kick and then a slapping left hand to separate them. Nelson sinks in a loud leg kick, but does not follow it with anything, allowing Burns to reply with one to Nelson's calf. "Gunni" tries to close the distance, but Burns defends before scoring another leg kick that bends the knee of Nelson. Nelson holds his hand outstretched, using it to find his range, and follows it with a right straight and a left hook that partially land. Burns commits to another leg kick, and then crashes forward but Nelson backs away. As Nelson comes in, he catches a knee, so he backs away and catches another leg kick for his troubles. The Icelandic fighter sneaks in a jab, and evades a low kick, as the two men seem content on engaging in a tentative kickboxing match. As Nelson comes in again, Burns sits down on an uppercut, forcing Nelson to retreat. The Brazilian charges in, winging shots that do not land before clinching up. Nelson scoops Burns' legs out from underneath him, and Burns tries for a leg lock but is nowhere near securing it as the round ends.
Sherdog Scores
Jay Pettry scores the round: 10-9 Burns
Ben Duffy scores the round: 10-9 Nelson
Mike Sloan scores the round: 10-9 Burns
Round 2
The second round opens with the two walking towards one another, and casually touch gloves before walking away. Burns starts out with a jab, and catches a side kick from Nelson. The action is few and far between as we get going, but Burns does score another low calf kick, and we can see Nelson's leg is changing color rapidly. "Gunni" whips a low kick that forces Burns to spin in a circle, and Nelson uses this moment to crash in and land a few strikes while Burns attempts to sit on the counter. Nelson tries to set up a takedown, and Burns is holding tight this time, but in the process Nelson scores a few short strikes in the clinch. Burns, with his back against the cage, looks confused as Nelson shoots in for a double leg that is easily stuffed. The Brazilian separates, and then crash together as Burns clubs Nelson with a right hand. With Nelson leaning on him, Burns tries to bring up a knee, causing Nelson to shrug his shoulders. The two break apart, and Nelson whiffs with a low kick. Nelson rushes in and tries to take the fight down again, but as they scuffle Burns judo throws him and lands Nelson on his head. "Gunni" immediately springs back up, so Burns leaps forward with a flying knee. As Nelson tries to take Burns down again, Burns defends it by trying to set up a brabo choke, but Nelson escapes. With 10 seconds left, Burns ends up on top and drops down a few hard punches, and the second stanza comes to a close.
Sherdog Scores
Jay Pettry scores the round: 10-9 Burns
Ben Duffy scores the round: 10-9 Burns
Mike Sloan scores the round: 10-9 Burns
Round 3
Burns opens up with a spinning kick that falls well short of the target, and then they trade leg kicks. They come together again, and Nelson looks for a body lock before switching to a single, and Burns defends the attempts one by one. "Gunni" tries to set up a Thai clinch, but Nelson uses that moment to drop in a few short strikes and a right over the top. As they break, Burns wings a right hand that partially lands, causing Nelson to shoot in for a double again. Burns is strong against the fence, and stands up his Icelandic opponent. Burns slashes Nelson with an elbow, forcing Nelson to once again try for a takedown. There is nothing to be had for that attempt either, although he is racking up control time until Burns is tired of leaning against the fence. As they separate, Nelson loads up with a punch to the body, and Burns swings with all his might with a right hand that nearly causes him to fall over. Burns scores a few more effective leg kicks before launching a head kick that Nelson ducks. Another leg kick from Burns causes Nelson's leg to briefly buckle, so "Gunni" shoots in for yet another takedown. Burns shrugs it off, and uses the opportunity to lift up Nelson and slam him down emphatically. With 30 seconds left, Burns takes his opponent's back momentarily, but Nelson scrambles and stands back up quickly. This close fight wraps with Burns pressing Nelson against the cage, and the judges undoubtedly have their hands full with this one.
Sherdog Scores
Jay Pettry scores the round: 10-9 Burns (30-27 Burns)
Ben Duffy scores the round: 10-9 Burns (29-28 Burns)
Mike Sloan scores the round: 10-9 Burns (30-27 Burns)
The Official Result
Gilbert Burns def. Gunnar Nelson via Unanimous Decision (29-28, 29-28, 29-28)
Totals
| Fighter | KD | Sig. Str. | Sig. Str. % | Total Str. | TD | TD % | Sub. Att | Rev. | Ctrl |
|---|---|---|---|---|---|---|---|---|---|
| Leon Edwards | 1 | 31 of 49 | 63% | 47 of 69 | 2 of 3 | 66% | 0 | 0 | 3:29 |
| Gunnar Nelson | 0 | 9 of 18 | 50% | 27 of 38 | 3 of 4 | 75% | 0 | 0 | 4:22 |
Per Round
| Rd | Fighter | KD | Sig. Str. | Sig. Str. % | Total Str. | TD | TD % | Sub. Att | Rev. | Ctrl |
|---|---|---|---|---|---|---|---|---|---|---|
| 1 | Leon Edwards | 0 | 5 of 9 | 55% | 18 of 26 | 2 of 2 | 100% | 0 | 0 | 2:18 |
| Gunnar Nelson | 0 | 3 of 3 | 100% | 6 of 7 | 2 of 3 | 66% | 0 | 0 | 1:26 | |
| 2 | Leon Edwards | 1 | 23 of 36 | 63% | 25 of 38 | 0 of 0 | --- | 0 | 0 | 0:30 |
| Gunnar Nelson | 0 | 3 of 11 | 27% | 3 of 11 | 0 of 0 | --- | 0 | 0 | 0:38 | |
| 3 | Leon Edwards | 0 | 3 of 4 | 75% | 4 of 5 | 0 of 1 | 0% | 0 | 0 | 0:41 |
| Gunnar Nelson | 0 | 3 of 4 | 75% | 18 of 20 | 1 of 1 | 100% | 0 | 0 | 2:18 |
Significant Strikes
| Fighter | Sig. Str. | Sig. Str. % | Head | Body | Leg | Distance | Clinch | Ground |
|---|---|---|---|---|---|---|---|---|
| Leon Edwards | 31 of 49 | 63% | 17 of 30 | 13 of 17 | 1 of 2 | 4 of 16 | 16 of 19 | 11 of 14 |
| Gunnar Nelson | 9 of 18 | 50% | 3 of 10 | 4 of 5 | 2 of 3 | 4 of 12 | 5 of 6 | 0 of 0 |
Significant Strikes Per Round
| Rd | Fighter | Sig. Str. | Sig. Str. % | Head | Body | Leg | Distance | Clinch | Ground |
|---|---|---|---|---|---|---|---|---|---|
| 1 | Leon Edwards | 5 of 9 | 55% | 0 of 1 | 4 of 7 | 1 of 1 | 1 of 5 | 4 of 4 | 0 of 0 |
| Gunnar Nelson | 3 of 3 | 100% | 0 of 0 | 2 of 2 | 1 of 1 | 1 of 1 | 2 of 2 | 0 of 0 | |
| 2 | Leon Edwards | 23 of 36 | 63% | 16 of 27 | 7 of 8 | 0 of 1 | 3 of 11 | 9 of 11 | 11 of 14 |
| Gunnar Nelson | 3 of 11 | 27% | 1 of 8 | 1 of 2 | 1 of 1 | 1 of 9 | 2 of 2 | 0 of 0 | |
| 3 | Leon Edwards | 3 of 4 | 75% | 1 of 2 | 2 of 2 | 0 of 0 | 0 of 0 | 3 of 4 | 0 of 0 |
| Gunnar Nelson | 3 of 4 | 75% | 2 of 2 | 1 of 1 | 0 of 1 | 2 of 2 | 1 of 2 | 0 of 0 |
Totals
| Fighter | KD | Sig. Str. | Sig. Str. % | Total Str. | TD | TD % | Sub. Att | Rev. | Ctrl |
|---|---|---|---|---|---|---|---|---|---|
| Gunnar Nelson | 0 | 36 of 49 | 73% | 52 of 69 | 0 of 2 | 0% | 0 | 1 | 3:06 |
| Alex Oliveira | 0 | 11 of 11 | 100% | 20 of 20 | 2 of 5 | 40% | 1 | 0 | 4:43 |
Per Round
| Rd | Fighter | KD | Sig. Str. | Sig. Str. % | Total Str. | TD | TD % | Sub. Att | Rev. | Ctrl |
|---|---|---|---|---|---|---|---|---|---|---|
| 1 | Gunnar Nelson | 0 | 30 of 40 | 75% | 39 of 53 | 0 of 0 | --- | 0 | 1 | 1:44 |
| Alex Oliveira | 0 | 2 of 2 | 100% | 3 of 3 | 1 of 4 | 25% | 0 | 0 | 2:14 | |
| 2 | Gunnar Nelson | 0 | 6 of 9 | 66% | 13 of 16 | 0 of 2 | 0% | 0 | 0 | 1:22 |
| Alex Oliveira | 0 | 9 of 9 | 100% | 17 of 17 | 1 of 1 | 100% | 1 | 0 | 2:29 |
Significant Strikes
| Fighter | Sig. Str. | Sig. Str. % | Head | Body | Leg | Distance | Clinch | Ground |
|---|---|---|---|---|---|---|---|---|
| Gunnar Nelson | 36 of 49 | 73% | 27 of 40 | 6 of 6 | 3 of 3 | 3 of 4 | 9 of 9 | 24 of 36 |
| Alex Oliveira | 11 of 11 | 100% | 10 of 10 | 1 of 1 | 0 of 0 | 1 of 1 | 1 of 1 | 9 of 9 |
Significant Strikes Per Round
| Rd | Fighter | Sig. Str. | Sig. Str. % | Head | Body | Leg | Distance | Clinch | Ground |
|---|---|---|---|---|---|---|---|---|---|
| 1 | Gunnar Nelson | 30 of 40 | 75% | 25 of 35 | 4 of 4 | 1 of 1 | 1 of 1 | 5 of 5 | 24 of 34 |
| Alex Oliveira | 2 of 2 | 100% | 2 of 2 | 0 of 0 | 0 of 0 | 1 of 1 | 0 of 0 | 1 of 1 | |
| 2 | Gunnar Nelson | 6 of 9 | 66% | 2 of 5 | 2 of 2 | 2 of 2 | 2 of 3 | 4 of 4 | 0 of 2 |
| Alex Oliveira | 9 of 9 | 100% | 8 of 8 | 1 of 1 | 0 of 0 | 0 of 0 | 1 of 1 | 8 of 8 |
Totals
| Fighter | KD | Sig. Str. | Sig. Str. % | Total Str. | TD | TD % | Sub. Att | Rev. | Ctrl |
|---|---|---|---|---|---|---|---|---|---|
| Santiago Ponzinibbio | 0 | 5 of 7 | 71% | 5 of 7 | 0 of 0 | --- | 0 | 0 | 0:00 |
| Gunnar Nelson | 1 | 7 of 12 | 58% | 7 of 12 | 0 of 0 | --- | 0 | 0 | 0:03 |
Per Round
| Rd | Fighter | KD | Sig. Str. | Sig. Str. % | Total Str. | TD | TD % | Sub. Att | Rev. | Ctrl |
|---|---|---|---|---|---|---|---|---|---|---|
| 1 | Santiago Ponzinibbio | 0 | 5 of 7 | 71% | 5 of 7 | 0 of 0 | --- | 0 | 0 | 0:00 |
| Gunnar Nelson | 1 | 7 of 12 | 58% | 7 of 12 | 0 of 0 | --- | 0 | 0 | 0:03 |
Significant Strikes
| Fighter | Sig. Str. | Sig. Str. % | Head | Body | Leg | Distance | Clinch | Ground |
|---|---|---|---|---|---|---|---|---|
| Santiago Ponzinibbio | 5 of 7 | 71% | 4 of 6 | 0 of 0 | 1 of 1 | 5 of 7 | 0 of 0 | 0 of 0 |
| Gunnar Nelson | 7 of 12 | 58% | 7 of 12 | 0 of 0 | 0 of 0 | 4 of 9 | 0 of 0 | 3 of 3 |
Significant Strikes Per Round
| Rd | Fighter | Sig. Str. | Sig. Str. % | Head | Body | Leg | Distance | Clinch | Ground |
|---|---|---|---|---|---|---|---|---|---|
| 1 | Santiago Ponzinibbio | 5 of 7 | 71% | 4 of 6 | 0 of 0 | 1 of 1 | 5 of 7 | 0 of 0 | 0 of 0 |
| Gunnar Nelson | 7 of 12 | 58% | 7 of 12 | 0 of 0 | 0 of 0 | 4 of 9 | 0 of 0 | 3 of 3 |
Takashi Sato - Fight History
Totals
| Fighter | KD | Sig. Str. | Sig. Str. % | Total Str. | TD | TD % | Sub. Att | Rev. | Ctrl |
|---|---|---|---|---|---|---|---|---|---|
| Themba Gorimbo | 0 | 30 of 47 | 63% | 56 of 76 | 2 of 6 | 33% | 0 | 1 | 2:21 |
| Takashi Sato | 1 | 33 of 56 | 58% | 110 of 158 | 3 of 8 | 37% | 0 | 2 | 11:15 |
Per Round
| Rd | Fighter | KD | Sig. Str. | Sig. Str. % | Total Str. | TD | TD % | Sub. Att | Rev. | Ctrl |
|---|---|---|---|---|---|---|---|---|---|---|
| 1 | Themba Gorimbo | 0 | 3 of 8 | 37% | 15 of 21 | 1 of 2 | 50% | 0 | 0 | 0:32 |
| Takashi Sato | 0 | 7 of 16 | 43% | 39 of 57 | 1 of 3 | 33% | 0 | 1 | 3:58 | |
| 2 | Themba Gorimbo | 0 | 14 of 17 | 82% | 21 of 25 | 1 of 4 | 25% | 0 | 0 | 1:14 |
| Takashi Sato | 1 | 18 of 30 | 60% | 40 of 57 | 1 of 2 | 50% | 0 | 1 | 3:20 | |
| 3 | Themba Gorimbo | 0 | 13 of 22 | 59% | 20 of 30 | 0 of 0 | --- | 0 | 1 | 0:35 |
| Takashi Sato | 0 | 8 of 10 | 80% | 31 of 44 | 1 of 3 | 33% | 0 | 0 | 3:57 |
Significant Strikes
| Fighter | Sig. Str. | Sig. Str. % | Head | Body | Leg | Distance | Clinch | Ground |
|---|---|---|---|---|---|---|---|---|
| Themba Gorimbo | 30 of 47 | 63% | 21 of 37 | 9 of 10 | 0 of 0 | 5 of 16 | 15 of 16 | 10 of 15 |
| Takashi Sato | 33 of 56 | 58% | 21 of 41 | 12 of 15 | 0 of 0 | 12 of 25 | 9 of 12 | 12 of 19 |
Significant Strikes Per Round
| Rd | Fighter | Sig. Str. | Sig. Str. % | Head | Body | Leg | Distance | Clinch | Ground |
|---|---|---|---|---|---|---|---|---|---|
| 1 | Themba Gorimbo | 3 of 8 | 37% | 2 of 7 | 1 of 1 | 0 of 0 | 0 of 4 | 3 of 4 | 0 of 0 |
| Takashi Sato | 7 of 16 | 43% | 1 of 9 | 6 of 7 | 0 of 0 | 1 of 9 | 6 of 7 | 0 of 0 | |
| 2 | Themba Gorimbo | 14 of 17 | 82% | 9 of 12 | 5 of 5 | 0 of 0 | 1 of 4 | 11 of 11 | 2 of 2 |
| Takashi Sato | 18 of 30 | 60% | 15 of 25 | 3 of 5 | 0 of 0 | 5 of 8 | 2 of 4 | 11 of 18 | |
| 3 | Themba Gorimbo | 13 of 22 | 59% | 10 of 18 | 3 of 4 | 0 of 0 | 4 of 8 | 1 of 1 | 8 of 13 |
| Takashi Sato | 8 of 10 | 80% | 5 of 7 | 3 of 3 | 0 of 0 | 6 of 8 | 1 of 1 | 1 of 1 |
Play-by-Play
View on SherdogBETTING PREVIEW | SCOUTING REPORT | ODDS: Sato (-110), Gorimbo (-110)
Round 1
The last UFC card before a much-needed weekend off is upon us, and it will be in the form of a dozen-fight showcase at the UFC Apex. There are two ranked fighters on the entire billing, both coming in the main attraction, but with any luck, those numbers will not matter when the cage doors close and the competitors all get after it. The first match of the evening comes in the welterweight division between two men who would very much like a win. With three losses in his last three appearances, Sato (15-6, 2-4 UFC) may need to get his hand raised to stay on the roster. Meanwhile, South Africa’s Gorimbo (10-4, 0-1 UFC) is hoping to have a second chance to make a first impression. This classic Japan vs. South Africa (or Zimbabwe, if you prefer birth nation) battle will be overseen by referee Chris Tognoni and his sweet mustache, and the combatants do not touch gloves before getting started. Gorimbo leads the dance with a head kick early, and follows it with a few punches while Sato bears down on him. Sato blocks another high kick before it can reach his head, and Gorimbo mashes forward to attempt a takedown. Sato stonewalls him and nearly shoves Gorimbo to his back, but he decides instead to stand back up and Gorimbo follows him to the clinch. Gorimbo looks to muscle his man down, and Sato turns the corner and dumps him to his back for a moment. Gorimbo explodes right back up, and he manages to suck Sato’s legs out beneath him and drag him to his seat. Sato moves to his knees while Gorimbo hooks his foe’s legs between one of his own, and he wall-walks to stand back up as Gorimbo continues to jam him up. Gorimbo looks for a trip that does not succeed, and he lifts up a knee to the chest to get a strike off in this position. This allows Sato to turn him around for a second, but Gorimbo powers him back around. “The Answer” answers a potential ref request for more action with another solid knee, and Sato replies with a half-hearted throw that he abandons when he realizes he will need to use much more energy than he is willing to succeed. Gorimbo drills another knee to the solar plexus, and Sato uses a sweep and a body lock to toss his foe to the floor. Gorimbo scrambles wildly, doing enough to get Sato down and circling around to take the back. The South African fighter hooks up a body triangle and starts fishing for a rear-naked choke, and Sato is wise to the attempt and tries to turn to a side to escape. Gorimbo softens him up with short strikes to the side of the head, and he hands on with back control until the horn blares.
Advertisement
Sherdog Scores
Jay Pettry scores the round: 10-9 Gorimbo
Edwin Ayala scores the round: 10-9 Gorimbo
Tristen Critchfield scores the round: 10-9 Gorimbo
Round 2
Sato initiates the second round aggressively, pressuring forward and hoping to turn the tables on Gorimbo after giving up the last round. Gorimbo cocks back a right hand and releases it, blasting the charging Sato in the face and knocking him down to the floor. Sato hits his back and tries to clear out the cobwebs, and Gorimbo leaps down on top of him and tries to jack him up with hammerfists. Sato gathers his thoughts enough to consider a takedown, perhaps in a desperation effort, and the two end up standing up in the clinch. Sato starts driving several knees to the body, and Gorimbo works for another takedown as he turns the Japanese fighter around. Gorimbo looks to hook up a single-leg takedown, and Sato reverses him brilliantly with a head-and-arm throw that deposits Gorimbo to the floor. “Ten” starts fishing for a scarf hold in the advantageous position, and when there is no submission to be found, he sits up. Gorimbo threatens off his back with a leglock, but it does not come anywhere near close before Sato starts smacking him in the face with ground strikes. Gorimbo tugs his toes on the fence to get enough leverage to work his way to his knees and then upright, where he stays bent over to go for a takedown. Sato defends with a series of elbows to the side of the head, and even when he is pulled down to his knees, he continues doing some work with elbows. Gorimbo keeps grinding on him and defends a throw from Sato to stay in this grueling position. Sato breaks away from the clinch and gains some space, but Gorimbo gives chase and wings punches at him until changing levels. The round ends with Gorimbo trying to take the fight down again.
Sherdog Scores
Jay Pettry scores the round: 10-9 Gorimbo
Edwin Ayala scores the round: 10-9 Gorimbo
Tristen Critchfield scores the round: 10-9 Gorimbo
Round 3
With Sato advancing as per usual to start off the round, Gorimbo is prepared and goes after another huge right hand. This time, Sato does not walk face-first into it, and he ducks it to tie the African fighter up. Gorimbo is glad to get back into the close range, where he turns Sato around and drags him down to a knee for a moment. When Sato springs back up, Gorimbo redoubles his effort and hits the takedown he is seeking. Sato falls to his back, with a cut around his right eye starting to bleed. Sato does not remain on his back for long before shifting enough to get to a knee, and Gorimbo again works his way around to take the back. “The Answer” locks his legs around the waist, and Sato grimaces in pain as the position must be causing him no small amount of discomfort. Sato attempts to turn and spin around, but Gorimbo has him locked down. Gorimbo lands occasional punches to both sides of the head to keep Sato guessing, with the strikes more frustrating than damaging. Gorimbo uses one moment to snake his right forearm around the chin, but he cannot sink it under it to lock down the rear-naked choke before Sato defends it. Sato cannot get out of this miserable position, and Gorimbo turns to the side and looks for a side choke. Sato takes advantage of this momentary lapse of judgment and flips Gorimbo to his back, and he starts shelling the African fighter with punches and elbows. Sato unloads a final barrage of blows, with few actually getting through the guard, and time expires before a stoppage is even close. It may have been too little, too late for the Japanese fighter, as the fight is over.
Sherdog Scores
Jay Pettry scores the round: 10-9 Gorimbo (30-27 Gorimbo)
Edwin Ayala scores the round: 10-9 Gorimbo (30-27 Gorimbo)
Tristen Critchfield scores the round: 10-9 Gorimbo (30-27 Gorimbo)
The Official Result
Themba Gorimbo def. Takashi Sato via Unanimous Decision (30-27, 30-27, 30-27)
Angelo picks Themba Gorimbo based on his solid grappling and takedown defense shown in the loss to AJ Fletcher. He notes that Gorimbo never looked panicked and can make adjustments on the fly. While Sato is better than his recent record, Angelo believes his best years are behind him.
Big Brady picks Themba Gorimbo to submit Takashi Sato in the second round. He notes that Sato has a massive hole in his takedown defense and ground game, and Gorimbo is the grappler who will exploit that. However, he has concerns about Gorimbo's cardio after his debut against AJ Fletcher, but gives him a pass for short notice. He expects Gorimbo to get takedowns early and submit Sato, though he advises against going all-in on this fight.
Cody gives Sato a slight edge due to his power and experience. He notes Gorimbo's durability issues and thinks Sato's kickboxing could be decisive. He is not confident and calls it a 50-50 fight.
Connor also picks Gorimbo, agreeing that his pace and aggression will be key. He notes that Sato is a solid defensive wrestler but will be tested immediately and repeatedly because he doesn't do anything. Connor expects an ugly fight but sees Gorimbo's pace winning out.
Daniel Levi picks Themba Gorimbo, citing confidence and mental state. He questions Takashi Sato's ability to rebound from a brutal knockout loss (head kick, back of head to canvas) and thinks Sato may be hesitant. He notes Sato has low volume but heavy hands, while Gorimbo is not the most athletic but may be hungrier. He admits Gorimbo could be faded but thinks Sato's demons will be a factor.
The host picks Themba Gorimbo despite feeling slightly sketchy about him. He believes Gorimbo's grappling advantage will be the key, as he should be able to drag the fight to the ground and control Sato for the majority. He notes Gorimbo's striking is wild and erratic, but his kicks can keep Sato at range. He expects a decision win for Gorimbo.
Paul does not make a clear pick, stating he has no strong opinion and that the fight is a toss-up. He does not commit to either fighter.
The MMA Guru expects a striking matchup, noting that neither fighter is strong on the ground. He believes Takashi Sato has become gun-shy on the feet since his KO over Jason Witt, while Themba Gorimbo is a big athlete with a reach advantage and trains at MMA Masters. He predicts Gorimbo will hurt Sato on the feet and then secure a submission, likely a rear-naked choke or armbar, finishing in the first round.
Zane picks Gorimbo, citing his pace and aggressive wrestling as the modern way to win. He notes that Sato is a low-output counter puncher who will be overwhelmed by Gorimbo's constant pressure and awkward tie-ups. Zane acknowledges Gorimbo is not a good fighter but believes his pace will be too much for Sato.
Totals
| Fighter | KD | Sig. Str. | Sig. Str. % | Total Str. | TD | TD % | Sub. Att | Rev. | Ctrl |
|---|---|---|---|---|---|---|---|---|---|
| Bryan Battle | 1 | 7 of 10 | 70% | 7 of 10 | 0 of 0 | --- | 0 | 0 | 0:02 |
| Takashi Sato | 0 | 2 of 8 | 25% | 2 of 8 | 0 of 0 | --- | 0 | 0 | 0:00 |
Per Round
| Rd | Fighter | KD | Sig. Str. | Sig. Str. % | Total Str. | TD | TD % | Sub. Att | Rev. | Ctrl |
|---|---|---|---|---|---|---|---|---|---|---|
| 1 | Bryan Battle | 1 | 7 of 10 | 70% | 7 of 10 | 0 of 0 | --- | 0 | 0 | 0:02 |
| Takashi Sato | 0 | 2 of 8 | 25% | 2 of 8 | 0 of 0 | --- | 0 | 0 | 0:00 |
Significant Strikes
| Fighter | Sig. Str. | Sig. Str. % | Head | Body | Leg | Distance | Clinch | Ground |
|---|---|---|---|---|---|---|---|---|
| Bryan Battle | 7 of 10 | 70% | 4 of 6 | 2 of 3 | 1 of 1 | 6 of 8 | 0 of 0 | 1 of 2 |
| Takashi Sato | 2 of 8 | 25% | 0 of 5 | 2 of 2 | 0 of 1 | 2 of 8 | 0 of 0 | 0 of 0 |
Significant Strikes Per Round
| Rd | Fighter | Sig. Str. | Sig. Str. % | Head | Body | Leg | Distance | Clinch | Ground |
|---|---|---|---|---|---|---|---|---|---|
| 1 | Bryan Battle | 7 of 10 | 70% | 4 of 6 | 2 of 3 | 1 of 1 | 6 of 8 | 0 of 0 | 1 of 2 |
| Takashi Sato | 2 of 8 | 25% | 0 of 5 | 2 of 2 | 0 of 1 | 2 of 8 | 0 of 0 | 0 of 0 |
Angelo picks Bryan Battle, describing him as a very busy striker with solid volume and head kicks. He notes Battle's grinding style and takedown attempts should earn him a decision win over Sato, who is hittable and lacks head movement. He references his own notes from Battle's previous fight, calling him 'very tough not amazing anywhere but very busy striker.'
Cody also picks Battle, highlighting his long-range kickboxing and ability to avoid takedowns. He notes that Sato's losses come against grapplers, and Battle is not an offensive wrestler. Cody believes Battle will stay at range and outpoint Sato, possibly by decision. He agrees that Battle's takedown total is likely under 2.
Daniel Levi leans Battle but calls it a 'dog or pass' situation, noting Battle's cardio and durability should allow him to break Sato down over time. He warns that Sato has power and could catch Battle, and that laying -270 on an unproven fighter like Battle is not advisable. He prefers Sato as a dog if forced to pick.
Paul picks Battle, noting that Battle is a striker with good range and output. He mentions that Sato is a power puncher who has been taken down by grapplers. Paul thinks Battle will use the threat of takedowns to open up his striking and win a decision. He is concerned about Battle's weight cut to 170.
Totals
| Fighter | KD | Sig. Str. | Sig. Str. % | Total Str. | TD | TD % | Sub. Att | Rev. | Ctrl |
|---|---|---|---|---|---|---|---|---|---|
| Gunnar Nelson | 0 | 44 of 55 | 80% | 140 of 166 | 3 of 3 | 100% | 1 | 0 | 8:09 |
| Takashi Sato | 0 | 9 of 23 | 39% | 16 of 34 | 0 of 0 | --- | 0 | 0 | 0:00 |
Per Round
| Rd | Fighter | KD | Sig. Str. | Sig. Str. % | Total Str. | TD | TD % | Sub. Att | Rev. | Ctrl |
|---|---|---|---|---|---|---|---|---|---|---|
| 1 | Gunnar Nelson | 0 | 24 of 29 | 82% | 46 of 52 | 1 of 1 | 100% | 0 | 0 | 2:05 |
| Takashi Sato | 0 | 4 of 12 | 33% | 4 of 12 | 0 of 0 | --- | 0 | 0 | 0:00 | |
| 2 | Gunnar Nelson | 0 | 12 of 16 | 75% | 25 of 32 | 1 of 1 | 100% | 0 | 0 | 2:36 |
| Takashi Sato | 0 | 3 of 4 | 75% | 3 of 4 | 0 of 0 | --- | 0 | 0 | 0:00 | |
| 3 | Gunnar Nelson | 0 | 8 of 10 | 80% | 69 of 82 | 1 of 1 | 100% | 1 | 0 | 3:28 |
| Takashi Sato | 0 | 2 of 7 | 28% | 9 of 18 | 0 of 0 | --- | 0 | 0 | 0:00 |
Significant Strikes
| Fighter | Sig. Str. | Sig. Str. % | Head | Body | Leg | Distance | Clinch | Ground |
|---|---|---|---|---|---|---|---|---|
| Gunnar Nelson | 44 of 55 | 80% | 36 of 47 | 7 of 7 | 1 of 1 | 10 of 20 | 1 of 2 | 33 of 33 |
| Takashi Sato | 9 of 23 | 39% | 4 of 16 | 2 of 4 | 3 of 3 | 9 of 23 | 0 of 0 | 0 of 0 |
Significant Strikes Per Round
| Rd | Fighter | Sig. Str. | Sig. Str. % | Head | Body | Leg | Distance | Clinch | Ground |
|---|---|---|---|---|---|---|---|---|---|
| 1 | Gunnar Nelson | 24 of 29 | 82% | 21 of 26 | 2 of 2 | 1 of 1 | 4 of 8 | 0 of 1 | 20 of 20 |
| Takashi Sato | 4 of 12 | 33% | 2 of 8 | 0 of 2 | 2 of 2 | 4 of 12 | 0 of 0 | 0 of 0 | |
| 2 | Gunnar Nelson | 12 of 16 | 75% | 9 of 13 | 3 of 3 | 0 of 0 | 5 of 9 | 0 of 0 | 7 of 7 |
| Takashi Sato | 3 of 4 | 75% | 1 of 2 | 1 of 1 | 1 of 1 | 3 of 4 | 0 of 0 | 0 of 0 | |
| 3 | Gunnar Nelson | 8 of 10 | 80% | 6 of 8 | 2 of 2 | 0 of 0 | 1 of 3 | 1 of 1 | 6 of 6 |
| Takashi Sato | 2 of 7 | 28% | 1 of 6 | 1 of 1 | 0 of 0 | 2 of 7 | 0 of 0 | 0 of 0 |
Angelo picks Gunnar Nelson, predicting a submission win. He notes that Nelson has been away for two years due to rib injuries but has a short-notice opponent with grappling holes. He worries about Nelson's takedown entries leaving him hittable but thinks the UFC set him up for a win. He says Nelson probably wins by submission but acknowledges the layoff makes it uncertain.
Big Brady picks Gunnar Nelson to win by first-round submission, but expresses concern about Nelson's two-year layoff. He believes if Nelson is anywhere near his best, he should submit Sato early, as Sato has been submitted three times and has poor ground game. Brady notes Nelson has fought elite competition like Gilbert Burns and Leon Edwards, while Sato's level is lower.
Cody picks Nelson by submission, noting Nelson's superior grappling and Sato's submission liability. He thinks Nelson will get the fight to the mat and find a submission. He mentions the prop is minus 110 and he took it.
Daniel Levi picks Gunnar Nelson by submission, noting that Sato has lost 75% of his fights by submission and that Nelson has 12 submission wins. He acknowledges Nelson's low striking volume and questions his motivation, but believes Nelson only needs one takedown to finish. Levi also mentions the hometown advantage for British fighters at the O2, suggesting a decision win is possible if it goes the distance. He calls it a 'dog or pass' situation due to the high price on Nelson.
Nelson is a jiu-jitsu wizard who should get the fight to the ground and find a submission. Sato has been finished by submission in three of his last four losses, a huge red flag. However, ring rust and past injuries are concerns for Nelson. Sato has power and a karate style, but Nelson's grappling should be too much. I'd rather play Nelson inside the distance than the -450 line. I'm picking Nelson via second-round submission.
Paul picks Nelson, emphasizing his world-class skills and Sato's tendency to fade. He believes Nelson's cardio and grappling will be too much, and that Sato's power is only a threat early. He thinks Nelson will win handily, possibly by submission.
The Guru picks Gunnar Nelson but expects a first-round scare where Sato drops him. He believes Nelson will recover, get a takedown, and eventually secure a rear-naked choke in round two or three. He notes Nelson's close losses to Leon Edwards and Gilbert Burns, and argues that if Burns couldn't finish him, Sato won't either. He predicts a late submission.
Totals
| Fighter | KD | Sig. Str. | Sig. Str. % | Total Str. | TD | TD % | Sub. Att | Rev. | Ctrl |
|---|---|---|---|---|---|---|---|---|---|
| Miguel Baeza | 0 | 40 of 73 | 54% | 43 of 82 | 1 of 2 | 50% | 1 | 0 | 1:09 |
| Takashi Sato | 0 | 15 of 58 | 25% | 15 of 58 | 0 of 0 | --- | 0 | 0 | 0:02 |
Per Round
| Rd | Fighter | KD | Sig. Str. | Sig. Str. % | Total Str. | TD | TD % | Sub. Att | Rev. | Ctrl |
|---|---|---|---|---|---|---|---|---|---|---|
| 1 | Miguel Baeza | 0 | 18 of 37 | 48% | 19 of 38 | 0 of 0 | --- | 0 | 0 | 0:07 |
| Takashi Sato | 0 | 8 of 29 | 27% | 8 of 29 | 0 of 0 | --- | 0 | 0 | 0:02 | |
| 2 | Miguel Baeza | 0 | 22 of 36 | 61% | 24 of 44 | 1 of 2 | 50% | 1 | 0 | 1:02 |
| Takashi Sato | 0 | 7 of 29 | 24% | 7 of 29 | 0 of 0 | --- | 0 | 0 | 0:00 |
Significant Strikes
| Fighter | Sig. Str. | Sig. Str. % | Head | Body | Leg | Distance | Clinch | Ground |
|---|---|---|---|---|---|---|---|---|
| Miguel Baeza | 40 of 73 | 54% | 16 of 40 | 20 of 28 | 4 of 5 | 32 of 65 | 3 of 3 | 5 of 5 |
| Takashi Sato | 15 of 58 | 25% | 10 of 49 | 4 of 8 | 1 of 1 | 15 of 56 | 0 of 1 | 0 of 1 |
Significant Strikes Per Round
| Rd | Fighter | Sig. Str. | Sig. Str. % | Head | Body | Leg | Distance | Clinch | Ground |
|---|---|---|---|---|---|---|---|---|---|
| 1 | Miguel Baeza | 18 of 37 | 48% | 5 of 17 | 10 of 16 | 3 of 4 | 15 of 34 | 3 of 3 | 0 of 0 |
| Takashi Sato | 8 of 29 | 27% | 5 of 24 | 2 of 4 | 1 of 1 | 8 of 27 | 0 of 1 | 0 of 1 | |
| 2 | Miguel Baeza | 22 of 36 | 61% | 11 of 23 | 10 of 12 | 1 of 1 | 17 of 31 | 0 of 0 | 5 of 5 |
| Takashi Sato | 7 of 29 | 24% | 5 of 25 | 2 of 4 | 0 of 0 | 7 of 29 | 0 of 0 | 0 of 0 |
Totals
| Fighter | KD | Sig. Str. | Sig. Str. % | Total Str. | TD | TD % | Sub. Att | Rev. | Ctrl |
|---|---|---|---|---|---|---|---|---|---|
| Takashi Sato | 1 | 18 of 21 | 85% | 18 of 21 | 0 of 0 | --- | 0 | 0 | 0:11 |
| Jason Witt | 0 | 2 of 5 | 40% | 2 of 5 | 0 of 1 | 0% | 0 | 0 | 0:00 |
Per Round
| Rd | Fighter | KD | Sig. Str. | Sig. Str. % | Total Str. | TD | TD % | Sub. Att | Rev. | Ctrl |
|---|---|---|---|---|---|---|---|---|---|---|
| 1 | Takashi Sato | 1 | 18 of 21 | 85% | 18 of 21 | 0 of 0 | --- | 0 | 0 | 0:11 |
| Jason Witt | 0 | 2 of 5 | 40% | 2 of 5 | 0 of 1 | 0% | 0 | 0 | 0:00 |
Significant Strikes
| Fighter | Sig. Str. | Sig. Str. % | Head | Body | Leg | Distance | Clinch | Ground |
|---|---|---|---|---|---|---|---|---|
| Takashi Sato | 18 of 21 | 85% | 18 of 21 | 0 of 0 | 0 of 0 | 3 of 5 | 0 of 0 | 15 of 16 |
| Jason Witt | 2 of 5 | 40% | 0 of 2 | 1 of 2 | 1 of 1 | 2 of 5 | 0 of 0 | 0 of 0 |
Significant Strikes Per Round
| Rd | Fighter | Sig. Str. | Sig. Str. % | Head | Body | Leg | Distance | Clinch | Ground |
|---|---|---|---|---|---|---|---|---|---|
| 1 | Takashi Sato | 18 of 21 | 85% | 18 of 21 | 0 of 0 | 0 of 0 | 3 of 5 | 0 of 0 | 15 of 16 |
| Jason Witt | 2 of 5 | 40% | 0 of 2 | 1 of 2 | 1 of 1 | 2 of 5 | 0 of 0 | 0 of 0 |
Big Brady picks Takashi Sato, despite the narrative that Witt (Brahimaj) has a submission-heavy record. He thinks Sato's takedown defense and cardio will be key, and that Witt will gas after the first round. He predicts Sato will weather the early storm and get a knockout in the second round. He notes that Witt's UFC debut and poor cardio are concerns.
Daniel Levi leans with Takashi Sato, citing his full camp preparation and UFC experience. He notes Sato's karate style, judo base for takedown defense, and counter-striking power. However, he acknowledges Sato's questionable chin and that Witt is taking the fight on short notice but has a wrestling background. Levi thinks Sato's discipline and preparation give him the edge, but warns that short-notice fighters have pulled off upsets before.
The MMA Guru picks Takashi Sato, citing his experience and recent UFC wins, while dismissing Jason Witt's resume as not UFC-level. He predicts Sato will dominate and win by submission in the second or third round, as Witt may come out aggressive but fade. He initially considered a decision but changed to submission, noting Sato is not a finisher but expects the experience gap to show.
Totals
| Fighter | KD | Sig. Str. | Sig. Str. % | Total Str. | TD | TD % | Sub. Att | Rev. | Ctrl |
|---|---|---|---|---|---|---|---|---|---|
| Belal Muhammad | 0 | 49 of 106 | 46% | 78 of 148 | 2 of 9 | 22% | 1 | 0 | 2:30 |
| Takashi Sato | 0 | 29 of 89 | 32% | 34 of 95 | 1 of 2 | 50% | 0 | 0 | 0:38 |
Per Round
| Rd | Fighter | KD | Sig. Str. | Sig. Str. % | Total Str. | TD | TD % | Sub. Att | Rev. | Ctrl |
|---|---|---|---|---|---|---|---|---|---|---|
| 1 | Belal Muhammad | 0 | 20 of 40 | 50% | 43 of 75 | 1 of 4 | 25% | 0 | 0 | 1:41 |
| Takashi Sato | 0 | 9 of 30 | 30% | 9 of 30 | 0 of 0 | --- | 0 | 0 | 0:00 | |
| 2 | Belal Muhammad | 0 | 20 of 44 | 45% | 25 of 50 | 0 of 3 | 0% | 0 | 0 | 0:20 |
| Takashi Sato | 0 | 12 of 40 | 30% | 17 of 46 | 1 of 2 | 50% | 0 | 0 | 0:38 | |
| 3 | Belal Muhammad | 0 | 9 of 22 | 40% | 10 of 23 | 1 of 2 | 50% | 1 | 0 | 0:29 |
| Takashi Sato | 0 | 8 of 19 | 42% | 8 of 19 | 0 of 0 | --- | 0 | 0 | 0:00 |
Significant Strikes
| Fighter | Sig. Str. | Sig. Str. % | Head | Body | Leg | Distance | Clinch | Ground |
|---|---|---|---|---|---|---|---|---|
| Belal Muhammad | 49 of 106 | 46% | 40 of 85 | 7 of 19 | 2 of 2 | 42 of 98 | 3 of 4 | 4 of 4 |
| Takashi Sato | 29 of 89 | 32% | 23 of 79 | 4 of 8 | 2 of 2 | 29 of 89 | 0 of 0 | 0 of 0 |
Significant Strikes Per Round
| Rd | Fighter | Sig. Str. | Sig. Str. % | Head | Body | Leg | Distance | Clinch | Ground |
|---|---|---|---|---|---|---|---|---|---|
| 1 | Belal Muhammad | 20 of 40 | 50% | 16 of 30 | 3 of 9 | 1 of 1 | 15 of 35 | 1 of 1 | 4 of 4 |
| Takashi Sato | 9 of 30 | 30% | 7 of 27 | 1 of 2 | 1 of 1 | 9 of 30 | 0 of 0 | 0 of 0 | |
| 2 | Belal Muhammad | 20 of 44 | 45% | 17 of 37 | 2 of 6 | 1 of 1 | 18 of 41 | 2 of 3 | 0 of 0 |
| Takashi Sato | 12 of 40 | 30% | 9 of 35 | 2 of 4 | 1 of 1 | 12 of 40 | 0 of 0 | 0 of 0 | |
| 3 | Belal Muhammad | 9 of 22 | 40% | 7 of 18 | 2 of 4 | 0 of 0 | 9 of 22 | 0 of 0 | 0 of 0 |
| Takashi Sato | 8 of 19 | 42% | 7 of 17 | 1 of 2 | 0 of 0 | 8 of 19 | 0 of 0 | 0 of 0 |
Play-by-Play
View on SherdogRound 1
Headlining the early prelims by staying at welterweight, Muhammad (15-3, 6-3 UFC) looks to spoil Sato's (15-2, 1-0 UFC) sophomore Octagon appearance. Drawing the assignment for this one is referee Viacheslav Kiselev. As the fight begins, the two try to find their distance and jab at one another. Muhammad fires a right to the body and a left to the head, and then tries for a looping right hand that is barely blocked. He does this two-punch combination two more times, working the body and head indiscriminately and effectively. A big left hand cracks Sato, who backs away against the fence, and Muhammad charges in to try for a takedown and takes the back of his Japanese opponent. Muhammad lifts up Sato and drops him down, but Sato bounces back up and keeps the jab flowing. "Remember the Name" goes after a right high kick that does not quite find its mark, but a right hand following up does. Sato scores over the top with a right, and Muhammad uses this brief lull in the action to again wrap his hands around his adversary's waist. Sato circles away, and Muhammad shoots for a double leg takedown and emphatically puts Sato down. In the ensuing scramble, Muhammad takes Sato's back and secures the body lock. Cracking Sato with elbows, the horn sounds and this exciting round is over.
Sherdog Scores
Jay Pettry scores the round: 10-9 Muhammad
Ben Duffy scores the round: 10-9 Muhammad
Brian Knapp scores the round: 10-9 Muhammad
Round 2
As the second round begins, Sato scores with a left hand up top and then one more to the body. He ducks away from the combinations of the American, and avoids a high kick as well. Muhammad briefly considers a takedown and Sato defends it well. Muhammad goes back to the combination that served him well in the opening stanza, with a right to the body and left to the head. Muhammad then leans on a few more left hands, scoring on each of them until he shoots at a distance for a takedown and somehow lands it -- albeit briefly. Sato escapes by trying to throw Muhammad, who returns to that right-left combo that scores almost every time he tries it. Sato sticks out a strong left jab, as Muhammad shoots in for another takedown attempt, but Sato is prepared for it. The two separate again, and Muhammad jumps in the air with a knee that is nowhere near his opponent. Sato tags Muhammad with a straight left hand, and Muhammad returns fire with a powerful right hook that backs off Sato. The two clinch, and Sato scores a trip and lands in side control with about 30 seconds left. Sato may not land a great deal while in control, but he does end the round on top.
Sherdog Scores
Jay Pettry scores the round: 10-9 Muhammad
Ben Duffy scores the round: 10-9 Muhammad
Brian Knapp scores the round: 10-9 Muhammad
Round 3
As the third and final round commences, the two men stand in the center of the cage and trade. They appear to clash heads, causing a cut to appear on the side of Sato's right eye, but this could have also come from one of Muhammad's left hands. Sato fires off a head kick and Muhammad blocks it, with the American closing the distance to try to drag the fight down. Muhammad fails on one attempt, but does not relent and eventually gets his man to the canvas.
"Remember the Name" takes Sato's back, and quickly tries for a rear-naked choke. Unable to secure it with one arm, he switches to the other and locks it up, forcing Sato to tap.
With the victory, Muhammad picks up the first submission win of his career.
The Official Result
Belal Muhammad def. Takashi Sato R3 1:55 via Submission (Rear-Naked Choke)
Totals
| Fighter | KD | Sig. Str. | Sig. Str. % | Total Str. | TD | TD % | Sub. Att | Rev. | Ctrl |
|---|---|---|---|---|---|---|---|---|---|
| Takashi Sato | 0 | 46 of 90 | 51% | 47 of 91 | 0 of 0 | --- | 0 | 0 | 0:25 |
| Ben Saunders | 1 | 28 of 69 | 40% | 33 of 74 | 0 of 0 | --- | 0 | 0 | 0:17 |
Per Round
| Rd | Fighter | KD | Sig. Str. | Sig. Str. % | Total Str. | TD | TD % | Sub. Att | Rev. | Ctrl |
|---|---|---|---|---|---|---|---|---|---|---|
| 1 | Takashi Sato | 0 | 39 of 74 | 52% | 39 of 74 | 0 of 0 | --- | 0 | 0 | 0:25 |
| Ben Saunders | 0 | 12 of 41 | 29% | 16 of 45 | 0 of 0 | --- | 0 | 0 | 0:00 | |
| 2 | Takashi Sato | 0 | 7 of 16 | 43% | 8 of 17 | 0 of 0 | --- | 0 | 0 | 0:00 |
| Ben Saunders | 1 | 16 of 28 | 57% | 17 of 29 | 0 of 0 | --- | 0 | 0 | 0:17 |
Significant Strikes
| Fighter | Sig. Str. | Sig. Str. % | Head | Body | Leg | Distance | Clinch | Ground |
|---|---|---|---|---|---|---|---|---|
| Takashi Sato | 46 of 90 | 51% | 9 of 46 | 22 of 28 | 15 of 16 | 29 of 70 | 17 of 20 | 0 of 0 |
| Ben Saunders | 28 of 69 | 40% | 25 of 64 | 2 of 3 | 1 of 2 | 13 of 44 | 2 of 6 | 13 of 19 |
Significant Strikes Per Round
| Rd | Fighter | Sig. Str. | Sig. Str. % | Head | Body | Leg | Distance | Clinch | Ground |
|---|---|---|---|---|---|---|---|---|---|
| 1 | Takashi Sato | 39 of 74 | 52% | 8 of 38 | 21 of 25 | 10 of 11 | 22 of 54 | 17 of 20 | 0 of 0 |
| Ben Saunders | 12 of 41 | 29% | 10 of 37 | 1 of 2 | 1 of 2 | 10 of 35 | 2 of 6 | 0 of 0 | |
| 2 | Takashi Sato | 7 of 16 | 43% | 1 of 8 | 1 of 3 | 5 of 5 | 7 of 16 | 0 of 0 | 0 of 0 |
| Ben Saunders | 16 of 28 | 57% | 15 of 27 | 1 of 1 | 0 of 0 | 3 of 9 | 0 of 0 | 13 of 19 |
Expert Picks (7)
Angelo picks Gunnar Nelson, predicting a submission win. He notes that Nelson has been away for two years due to rib injuries but has a short-notice opponent with grappling holes. He worries about Nelson's takedown entries leaving him hittable but thinks the UFC set him up for a win. He says Nelson probably wins by submission but acknowledges the layoff makes it uncertain.
Big Brady picks Gunnar Nelson to win by first-round submission, but expresses concern about Nelson's two-year layoff. He believes if Nelson is anywhere near his best, he should submit Sato early, as Sato has been submitted three times and has poor ground game. Brady notes Nelson has fought elite competition like Gilbert Burns and Leon Edwards, while Sato's level is lower.
Cody picks Nelson by submission, noting Nelson's superior grappling and Sato's submission liability. He thinks Nelson will get the fight to the mat and find a submission. He mentions the prop is minus 110 and he took it.
Daniel Levi picks Gunnar Nelson by submission, noting that Sato has lost 75% of his fights by submission and that Nelson has 12 submission wins. He acknowledges Nelson's low striking volume and questions his motivation, but believes Nelson only needs one takedown to finish. Levi also mentions the hometown advantage for British fighters at the O2, suggesting a decision win is possible if it goes the distance. He calls it a 'dog or pass' situation due to the high price on Nelson.
Nelson is a jiu-jitsu wizard who should get the fight to the ground and find a submission. Sato has been finished by submission in three of his last four losses, a huge red flag. However, ring rust and past injuries are concerns for Nelson. Sato has power and a karate style, but Nelson's grappling should be too much. I'd rather play Nelson inside the distance than the -450 line. I'm picking Nelson via second-round submission.
Paul picks Nelson, emphasizing his world-class skills and Sato's tendency to fade. He believes Nelson's cardio and grappling will be too much, and that Sato's power is only a threat early. He thinks Nelson will win handily, possibly by submission.
The Guru picks Gunnar Nelson but expects a first-round scare where Sato drops him. He believes Nelson will recover, get a takedown, and eventually secure a rear-naked choke in round two or three. He notes Nelson's close losses to Leon Edwards and Gilbert Burns, and argues that if Burns couldn't finish him, Sato won't either. He predicts a late submission.
No comments yet. Be the first to share your thoughts!